Thursday 30 June 2022

How to Create a WordPress Plugin (Beginner’s Guide)

One of the main reasons that WordPress is so popular is its open-source nature. There are over 50,000 plugins that have been developed for this widely used Content Management System (CMS). However, you might be wondering how to create your own WordPress plugin. 

Fortunately, WordPress makes the process easy. Some coding knowledge will be needed, but it’s not terribly hard to learn how to create a basic plugin for your website. This will, among other things, enable you to add more functionality to your content. 

In this article, we’ll take a closer look at WordPress plugins and why you might want to create one. Then, we’ll show you how to develop your first plugin. Let’s get started!

An Introduction to WordPress Plugins

WordPress powers well over one third of all websites on the internet. This equates to around half a billion different sites!

A major factor in the success of WordPress is its open-source nature. This means the source code of the core software, its plugins, and themes is available for anyone to work with and modify as they see fit.

WordPress plugins are packages of code that extend the functionality of your site. These are created by different developers all around the world, and are designed for a variety of purposes. 

For instance, you’ll find plugins for adding social media share buttons, newsletter signup forms, popups, turning WordPress into a full blown ecommerce site, and more:

The WordPress Plugin Directory

The WordPress plugin ecosystem empowers those without coding knowledge to create and customize powerful websites. Additionally, it offers almost limitless opportunities for developers and webmasters alike.

Why Develop a WordPress Plugin

WordPress is one of the largest markets for developers. This means you’ll find plenty of resources to help you develop plugins for the CMS.

Moreover, the earning potential for WordPress plugins is also very high. While there is no shortage of competition, if you have a new or better solution to a common problem, you could quickly find your plugin used on thousands of sites. In fact, most plugins that are available for download were originally developed to help solve a problem.

The magic of WordPress is that you can develop a solution for your own site — you don’t have to share it on the plugin market. However, many developers choose to make their plugins available to other users to help them work around similar issues that may be bothering them.

Lastly, WordPress is a great platform for learning how to code. Because it has been around for 19 years, it provides plenty of resources and documentation to help you get started. On top of that, it has a massive user base, which can help you gain exposure as a developer if your plugin gets widely adopted.

Get Content Delivered Straight to Your Inbox

Subscribe to our blog and receive great content just like this delivered straight to your inbox.

How to Create a WordPress Plugin (In 6 Steps)

While different plugins will require different amounts of coding and know-how, they all tend to follow the same development process. Let’s look at how to create a WordPress plugin in six steps.

Step 1: Do Some Research and Planning

There are thousands of tools in the WordPress Plugin Directory. Therefore, the first thing you’ll want to do is carry out some research to see if your idea already exists.

However, even if it does, you could still go ahead with your plan. You may want to explore similar plugins and find out how you might be able to improve upon them. Alternatively, you could complement what is already available with something like your own custom post type and additional features. 

You might also want to check the status of existing plugins. For instance, if a plugin hasn’t been updated in some time, or is not compatible with the latest version of WordPress, there might be an opportunity to either adopt it or provide a better solution:

Abandoned plugin example

You can also look at the number of active installations to see if there’s a big market for the type of plugin that you have in mind. It’s also a good idea to test the plugin on your own site to see what it does well, and what could be done better. 

You’ll also want to give some consideration to how you will market your plugin. For instance, some developers create a dedicated website for their products. If you’re planning to monetize your plugin, you’ll need to think about both the pricing and subscription options. 

Finally, you’ll want to read up on the WordPress Coding Standards. This is particularly important if you’re planning to share your plugin with others. These coding standards are a set of guidelines and best practices that developers should try to adhere to when creating themes and plugins for WordPress. 

Step 2: Set Up a Testing Environment

The next step is to set up a testing environment. As a beginner, you are likely to learn a lot along the way and you wouldn’t want to experiment on an active site. A local environment or staging site will enable you to test your plugin privately as you work on it. 

You can use Local to create a WordPress site on your computer:

Local homepage

You can also create an online staging environment. With DreamHost, you can make a copy of your existing site. This way, you can test your plugin without breaking your site or interrupting your visitors.

Step 3: Create the Plugin File

Once you have your staging environment set up, it’s time to create your plugin. The first step is to create a folder for it in your site’s directory.

You can use a Secure File Transfer Protocol (SFTP) client like FileZilla to access your site’s files and folders:

FileZilla homepage

If this is your first time using FileZilla, you’ll need to enter your credentials, including your username and password. You can get this information from your hosting account. 

Once you’ve connected to your site’s directory, navigate to wp-content/plugins and create a new folder for your plugin:

New plugin directory example

Next, you’ll need to create a PHP file to add to this folder. To do this, open your preferred text editor and enter the following information:

<?php
/**
* Plugin Name: test-plugin
* Plugin URI: https://www.your-site.com/
* Description: Test.
* Version: 0.1
* Author: your-name
* Author URI: https://www.your-site.com/
**/

Of course, you’ll need to change the above information to match your details. When you’re ready, you can save your file. Remember to use the file extension php (e.g., my-first-plugin.php). 

Then, you’ll need to upload this file to the plugin folder that you created earlier. Once you’ve done this, navigate to your test site’s WordPress dashboard and go to the Plugins page. Here, you should be able to see your new plugin.

Test plugin example

This plugin won’t do anything yet if you were to activate it. However, WordPress will recognize it as a functional add-on from this point forward.

Step 4: Add Code to Your Plugin

Every plugin is different. However, they all share common components. For instance, all plugins use hooks to interact with WordPress. 

A hook is how a plugin connects to the pre-existing code of WordPress core’s programming. In other words, the hook is the anchor point where a plugin inserts itself in order to add or change the functionality of the site. 

Hooks are an important part of WordPress development. There are hundreds of hooks that can be used as triggers for a plugin, and you can even create new ones if needed.

There are two types of hooks that you will need to consider when creating your plugin:

  1. Actions: These add or change WordPress functionality and make up the majority of hooks. 
  2. Filters: These are used to modify the functionality of actions.

To code your plugin, you’ll need to familiarize yourself with hooks and how they work. Fortunately, the Plugin Developer Handbook can help you get started. 

For this tutorial, we’ll use the following code as an example.

function modify_read_more_link() {
    return '<a class="more-link" href="' . get_permalink() . '">Click to Read!</a>';
}
add_filter( 'the_content_more_link', 'modify_read_more_link' );

As you might be able to see, this code uses a filter to modify the standard “read more” link by replacing it with a different value: “Click to Read!” If you add this snippet to your PHP file and activate the plugin on your site, you’ll end up seeing the following anchor text below your post excerpts:
Click to Read! Plugin example

Feel free to experiment with the code and try using a different function. Please note that you can also add this code to your theme’s functions.php file. This file contains code that adds functionality to your site, and works in a way that is very similarl to how a plugin does. However, if you switch to a different theme in the future — or your theme is upgraded to a new version — you will lose these changes. 

Step 5: Test Your Plugin

As you continue developing your plugin, it’s important that you save your work often and test your changes on your staging site. You’ll also want to keep an eye out for any security issues, so you can resolve them before publishing your plugin. 

Once you’re satisfied with your plugin, you should try it on a live site. Again, you’ll want to make sure that you have thoroughly tested your plugin for any bugs and vulnerabilities.

It’s also a good idea to create a backup of your live site before testing your plugin on it. This way, if anything does go wrong, you can restore your content. 

If you’re happy with the performance of your plugin, you could offer it to other developers for them to use and test. This can earn you valuable feedback. You could also ask them to put your plugin through its paces and try to break it to prove its stability. 

To do this, you’ll want to export your plugin to a zip file for easy distribution and installation. Locate your plugin’s folder in the site’s directory, then right-click on it and select Send to > Compressed (zipped) folder:

Send to compressed folder

Choose a destination and the files within your folder will be compiled into a zip folder that you can easily share. If you are developing on a live site, you may need to first download the plugin folder from your SFTP client before compressing it. 

To install your plugin on a WordPress site, simply navigate to the Plugins page on your dashboard and select Add New. Next, click on Upload Plugin and you’ll be prompted to choose a .zip file to upload to your site:

Uploading plugin zip file in WordPress

Simply select the compressed file and select Install Now. WordPress will then unpack and install the plugin on your site:

Unpack and install plugin

Once that is complete, just click on Activate Plugin. That’s it — your plugin is now live! 🎉

Step 6: Distribute Your Plugin

Once you’ve created and tested your plugin, you can start distributing it. Let’s look at the best ways to do this.

1. Publish Your Work on the WordPress Plugin Directory

By submitting your plugin to the WordPress Plugin Directory, you can share your work with the community and gain exposure. You can take advantage of the massive WordPress user base and attract new clients:

WordPress Add Your Plugin screen

However, you’ll need to make sure that your plugin complies with best practices and the Detailed Plugin Guidelines before uploading it for review. It might take a while for your plugin to be reviewed and accepted.

Once your plugin is approved, you’ll need to add your files to the SVN directory. Then, WordPress users will be able to install your plugin on their sites. 

2. Share the Plugin on Your Own Website

Besides uploading your plugin to the WordPress directory, you could also create a website for it.  

You can use this site to provide more details about your plugin. You could also include documentation, tutorials, and marketing information: 

Yoast plugin website homepage

A developer will often use websites to promote their premium plugin, while providing a free or lite version in the WordPress directory. That way, users are able to download and try the product before upgrading. 

You can lock certain advanced features behind a paywall. Additionally, you can offer a multi-tiered membership model. For example, you might create several premium versions of the plugin to give users more options. 

The Power of Open-Source

As an open-source platform, WordPress enables you to develop your own plugin and share it with other users. While some coding knowledge will certainly be helpful, you can easily create a simple plugin to improve your site’s functionality. Once you’ve gained more experience, you can start selling premium versions of any plugins that you might create. 

To recap, here’s how to create your own WordPress plugin:

  1. Research your idea.
  2. Set up a testing environment. 
  3. Create the main plugin file and folder. 
  4. Add code to the plugin file.
  5. Test your plugin.
  6. Distribute your plugin on WordPress.org. 

Our DreamPress plans enable you to create a staging site so you can develop and test plugins with confidence. A staging site is the closest thing to the real deal, making it the perfect place to test how a new plugin might work when installed.

Do More with DreamPress

DreamPress Plus and Pro users get access to Jetpack Professional (and 200+ premium themes) at no added cost!

managed WordPress hosting provider

The post How to Create a WordPress Plugin (Beginner’s Guide) appeared first on Website Guides, Tips & Knowledge.


source https://www.dreamhost.com/blog/how-to-create-your-first-wordpress-plugin/

Tuesday 28 June 2022

How to Optimize Your Website for Mobile Devices

Chances are that you’re reading this using a mobile device. If you don’t like the way that the page is structured or the content is hard to read, you’ll probably look elsewhere for the information that you want. Now put yourself on the other side of the equation and consider just how many users you can lose if your website is not optimized for mobile.

By ‘optimized’, we mean that your website should look amazing on smaller screens. It should also load fast and be easy to navigate and interact with. If you can pull that off for a mobile device, then your site should look fantastic on a full desktop screen too.

In this article, we’re going to talk about what mobile-first design is and why it’s essential. First, we’ll break down how to approach mobile design. Then, we’ll show you some practical ways you can optimize your site for smartphones and tablets. Let’s get to it!

Why Mobile-First Design Is Essential

Nearly 84% of the global population owns a smartphone and often multiple types of mobile devices. That’s far more than the number of people with access to PCs and laptops

In fact, many people use smartphones as their sole computer, making it the only way they interact with the web. It’s often the only computer at their disposal. Either way, most people carry their smartphones everywhere.

Unsurprisingly, mobile traffic has increased dramatically over the past years. It has surpassed desktop usage, with over 54% of all traffic on the web coming from mobile devices. That’s versus about 43% from desktop computers.

In practical terms, those numbers mean that if your website isn’t optimized for mobile devices, you may be missing out on a significant number of users. With so much content out there, your potential audience (and customers) aren’t likely to put up with a poor user experience. They’re bound to look elsewhere for what they want.

What Does Responsive Web Design Mean?

Responsive design means that no matter how big a screen is, a site will fill it properly and present information in a clear way. This can be on a phone, tablet, desktop, or even a smartwatch.

When you browse a website, you should notice that it adapts to the size of your screen. For large screens, elements will scale up to a point, so they don’t look oversized, but they remain easy to engage with.

The same happens with mobile devices. When you’re using a smaller screen, you want the content of your site to scale down, but not so much that it becomes unreadable or impossible to interact with:

The DreamHost homepage on mobile.

Websites that can pull off that delicate balance are considered responsive. Web design and development go hand in hand here, as the site’s graphical assets need to scale. In the background, there’s CSS and stylesheets that govern how the website will display across different size screens.

Until recently, responsive design was an afterthought. We used to design websites all around the desktop experience. Now that mobile traffic comes first, so does mobile design. That’s why you’ll often hear the term ‘mobile-first’ in web design circles.

It’s important to understand there’s a difference between responsive and adaptive design. Adaptive design involves creating multiple versions of a single page and serving them depending on what type of devices visitors use. That approach to web design is considered outdated nowadays, as responsiveness is the more efficient option.

Get Content Delivered Straight to Your Inbox

Subscribe to our blog and receive great content just like this delivered straight to your inbox.

How to Think Mobile-First When it Comes to Web Design

Bryan Clayton, CEO of GreenPal, spent nine months building his company’s site from scratch. “Right out of the gate, there were major problems,” he says. “We assumed that the majority of our users would shop for a lawn care service from their desktop or laptop computer. But it became very clear, very quickly that more people were accessing the website from their mobile phones and tablets than from a desktop or laptop computer — 4-to-1.”

The original full-featured desktop experience included all kinds of bells and whistles such as animations. “We had all kinds of other features that make a desktop experience delightful,” he recalls. “The problem with this approach was that the desktop experience would not translate to a mobile web browser.”

As a result, the website was bloated and didn’t work well on mobile. Users found that they had to pinch and zoom to get through the sign-up process.

“Before our website was rebuilt for a mobile-first experience, conversion on a mobile browser was less than 4%,” he says. “That means that people who attempted to sign up abandoned in the process 96% of the time.”

After rebuilding the site to be mobile-first, Clayton found that 82% of people who initiated the sign-up process to get a free price estimate completed the entire process from their mobile device and tablet. “Our mobile-first product is the only reason why we are even in the game today,” he says.

When it comes to mobile-first design, there are a lot of things that we can learn from GreenPal’s experience. Let’s start by talking about honing in on your audience.

Hone in on Your Audience and Ask for Customer Feedback

When it comes to redesigning a website, you’ll likely need to figure out how customers are currently interacting with it. That means looking at analytics and seeing if the engagement numbers look different for mobile and desktop users.

Analytics might reveal a higher bounce rate among mobile visitors or less time spent on site. Those are dead giveaways of a poor mobile user experience. If the data points in that direction, your best option is to ask customers what they like and what they don’t like about your site.

Zondra Wilson, the owner of Blu Skincare in Los Angeles, only found out that her site wasn’t mobile-friendly when she started asking for feedback from customers.

“I would ask my customers to write a review and they would say they couldn’t find where to write it,” she recalls. “I would ask them about my blog or articles that I posted and they had a hard time finding them. They had trouble viewing my site on their cell phones. They had to scroll down a lot before my first picture or any information about my company popped up. They didn’t know how to navigate through my site. Many were frustrated and didn’t go past the first page.”

When Wilson upgraded her site to a more mobile-friendly version, she noticed right away that users started viewing more pages on the site than usual.

There are a lot of tried and true techniques for optimizing a website for mobile devices. However, customer feedback will often reveal parts of the user experience that you would otherwise miss.

Think Small (In Terms of Screen Size)

Modern smartphones are powerful, and a big part of your audience will have access to a decent internet connection. However, you’ll want to make sure that your site loads as fast as possible. This makes taking away excess clutter one of the best design strategies. 

Vitaliy Vinogradov, CEO of Modern Place Lighting, found that switching to a mobile-first design led to 30% more conversions compared to desktop. “One important thing to do is to remove excess plugins, pop-ups, or any other screen inhibitors on the mobile version of the site,” he says.

The DreamHost homepage on mobile.

His team combed through the site and eliminated a few social sharing plugins that took up valuable real estate on the screen. When you design with large screens in mind, you might find that you end up including a lot of elements that don’t provide much value to users. 

“You need to design for small,” explains Matt Felten, a Los Angeles-based product designer. “You have to be a little more focused. You have to cut down on information and content.” After your mobile site is in place, you may find that you don’t need to add more to the desktop version of the site, after all.

Removing all of that visual clutter won’t only make your website easier to use on mobile. It can also help visitors focus on the elements that are actually important. That means Calls-to-Action, forms, posts, and other key elements in the user journey.

Refine Your Design Aesthetic

“Consumers today expect more sophisticated design”, says Felten. “There’s a big push to see the business cases of a beautiful and well-performing website,” he says. “If I’m a small-business owner and all of the competition has a really nice, responsive website and I don’t, in less than a second, people make a negative judgment about my product.”

A professional-looking website isn’t just a reflection of your good eye for design – it shows that you put an effort into providing a better user experience. Unless you work in an incredibly niche field, customers always have other alternatives online. Therefore, it’s essential that you put your best foot forward with your site’s design.

8 Ways to Optimize Your Website for Mobile Devices

Now that we’ve made it clear why it’s necessary to prime your site for mobile usage, let’s get a little more practical. In the next few sections, we’ll walk you through some of the most critical aspects of creating a mobile-optimized website, ranging from the simple to the more technically complex.

We recommend that you take the time to implement as many of these methods as possible, to improve the odds that your website performs well on all devices (and is favored by Google’s mobile-first index). Let’s get to work!

1. Test Your Site Using Google’s Mobile-Friendly Tool

Before you take any further action, it’s a smart move to see how your site is already faring when it comes to mobile-friendliness. This will help you hone in on the specific areas of your site that need work, and give you useful information on how you can make improvements.

One way to do this is by simply using your website on several different devices. Access the site using your own smartphone or tablet, and see how it looks and feels to use. Doing this lets you get a feel for the loading times, how well the design works on a smaller screen, whether the content is still readable, and if the navigation is easy to use.

Once you’ve done that, you can go even deeper by using a dedicated testing tool. Fortunately, Google has created one you can use for free, which will show you if your site is up to its standards for mobile pages. Appropriately, this is called the Mobile-Friendly Test tool:

Google’s Mobile-Friendly Test tool

If the page that you test is mobile-friendly, the tool will return a positive result. However, if Google detects there are possible improvements, it’ll point out what changes you can make to improve the mobile experience:

Mobile optimization suggestions from the Mobile-Friendly Test tool.

Even if your site gets an overall positive result, it might still have difficulty loading certain assets. In that case, you’ll see a Page loading issues notification. Clicking on that notification will show you a list of what assets the testing tool couldn’t load on mobile:

A list of assets that failed to load on mobile.

At this point, you can deal with each listed issue in turn. For example, you could edit your robots.txt file to allow Google to access blocked files, or fix any redirection errors.

2. Use Custom CSS to Make Your Website Responsive

A big part of implementing responsive web design involves using CSS. You’d be surprised at just how far a little CSS knowledge can take you when it comes to making your site mobile-friendly. 

To give you an example, you can use CSS to implement what we call ‘media query’ ranges. With media queries (or responsive breakpoints), you can tell browsers when to load different layouts for a page depending on the size of the screen they’re using. Media queries are an essential component of HTML, CSS, and JS libraries such as Bootstrap:

The Bootstrap framework’s website.

Other ways that you can use CSS to make your website more responsive include:

  • Creating a CSS grid layout. CSS grid layouts, such as the one that Bootstrap provides, offer a simple way to help you adjust designs to various screen sizes. Having a layout with well-defined elements can enable you to configure how they appear and how much space they take with each size of screen.
  • Using size percentages for layout elements. As you might know, CSS enables you to set the height and width of elements using pixels and other units of measurement. To make your website more responsive, we recommend that you use percentages. That way, elements such as buttons should adapt seamlessly as screens get smaller. 
  • Adjusting font sizes using media queries. Images and other visual elements on a page shouldn’t be the only things that scale for smaller screens. Text also needs to be responsive or you can end up with a mobile site where users can only see a word or two on their screen before needing to scroll down.
  • Controlling the spacing between elements. CSS enables you to determine the spacing between elements so there’s enough whitespace even when pages scale down. 

If you feel comfortable using HTML and CSS, designing a fully responsive website can be easier than you think. However, if you use a Content Management System (CMS) such as WordPress the whole process becomes much simpler since you seldom need to deal with code, even when working on a responsive design.

3. Choose Responsive Themes and Plugins

One of the biggest advantages of using WordPress is that it’s fairly easy to create a responsive website using the CMS. In fact, these days, it’s harder to create a website that’s not responsive. As long as you pick your plugins and themes well, your site should be in good shape.

Fortunately, most popular themes are developed with mobile-friendliness in mind. That means simply choosing the right theme can save you a lot of time. This way, you can avoid configuring media breakpoints and creating CSS grids manually.

opular WordPress themes.

If you want to check if a theme is responsive before installing (or buying) it, we recommend that you check out its demo. A lot of theme demos will include previews of how their designs look on smaller screens. You can also use a staging website to test new themes and see how mobile-friendly they are.

When creating pages using the Block Editor or page builders such as Elementor, you also get to preview how the design looks across multiple types of devices at any time. If you’re proactive about previewing designs, there’s very little reason why any of your pages should come out of the oven not being perfectly mobile-friendly:

Mobile preview in the Block Editor.

The Classic Editor makes it a bit harder to create responsive pages, since it’s not as visual as the Block Editor. However, you still get to preview how pages look at any time. 

If you’re finding it difficult to create responsive pages, we recommend trying out a different page builder and perhaps switching themes. Those can be big shifts for any page, so you’ll want to take your time and familiarize yourself with how the new plugins and themes work.

4. Test Your Website’s Core Web Vitals

Core Web Vitals are part of a recent update to Google’s search algorithms. These ‘vitals’ are a set of metrics that provide insights into the overall user experience. There are three Core Web Vitals, which are:

  • Largest Contentful Paint (LCP). This metric measures how long it takes for the largest element on a page to load. A low LCP score means that the page loads quickly overall.
  • First Input Delay (FID). The goal of this metric is to measure interactivity. The FID score tells you how long it takes before a user can interact with a page as it loads.
  • Cumulative Layout Shift (CLS). This tells you how much the layout of a page ‘shifts’ or moves around as it loads. You want to aim for a CLS score of near zero to minimize that movement.

Putting a score on a website’s user experience is tough. Therefore, Core Web Vitals don’t paint an entire picture of the overall user experience of a site. However, they enable you to measure key technical aspects of any page that have a direct impact on how enjoyable they are for users.

Furthermore, Core Web Vitals aren’t just a theoretical exercise. They have a direct impact on Search Engine Optimization (SEO) and page rankings. Google enables you to test Core Web Vitals using its free PageSpeed Insights tool. Once you enter a URL, PageSpeed Insights will return an overview of its Core Web Vitals:

Using PageSpeed Insights to test your site’s Core Web Vitals.

Just as with the Mobile-Friendly Test tool, Google provides specific suggestions on what improvements you can make to optimize the website. Since Core Web Vitals focus more on performance, most of the suggestions that you’ll see here have to do with speed optimization:

Performance optimization suggestions from PageSpeed Insights.

Keep in mind that PageSpeed Insights returns separate results for the mobile and desktop ‘versions’ of your site. That means you might get a different set of suggestions for each version. Focusing on the mobile optimization suggestions will drastically improve both sets of scores.

5. Improve Your Site’s Loading Times

As we hinted at in the previous section, website speeds are particularly significant in a mobile-first world. Optimizing your site for speed will not only help you keep your bounce rate down, but it can also improve your users’ experience, which is good news for your bottom line.

Testing your website’s Core Web Vitals will give you an accurate idea of how long it takes to load. Armed with that information and the performance optimization suggestions the tool provides, you can get to work on improving your site’s loading times. Here are some of the most impactful optimization methods that you can utilize on your website:

  • Implement caching. When you use caching, some of your website’s files will be saved in a more convenient location (such as on each visitor’s local device), so they don’t need to be downloaded every time a new page is accessed. There are many free caching plugins available, although some hosting plans such as DreamPress include this feature by default.
  • Use a Content Delivery Network (CDN). Instead of delivering your files from one central server, a CDN lets you store copies of them in a series of servers that are spread out geographically. This makes loading times more balanced regardless of a given user’s location, while also reducing your bandwidth usage.
  • Compress your images. Large image files are often the culprits behind slow loading times. By compressing them, you can reduce their size without affecting their quality. There are a number of free and premium solutions to help you do this, including the ShortPixel plugin and the TinyPNG tool.
  • Minify your code. By optimizing your site’s CSS, HTML, and JavaScript code, you can make it more efficient and shave precious seconds off your load times.
  • Keep all aspects of your site up to date. Using outdated software to run your website not only leaves you vulnerable to security issues, but also prevents it from performing at peak efficiency. By keeping your plugins, themes, and CMS updated at all times, you can avoid those problems.

While this can seem like a lot of work, most of these techniques can actually be implemented using simple, free solutions that require little-to-no configuration on your part. As a result, your site should perform considerably better on mobile devices and have an advantage in search engine rankings.

6. Redesign Your Pop-ups for Mobile Devices

While pop-ups get a lot of criticism, they remain one of the most effective methods of grabbing a visitor’s attention. As such, we wouldn’t be surprised if your site contains at least one or two strategically positioned pop-ups, designed to capture leads or pass vital information on to users.

An example of an email marketing pop-up.

Although pop-ups can be highly effective, they can negatively impact the mobile experience. On a smaller device, screen space becomes more important, and even medium-sized pop-ups can become far more disruptive than they appear on the desktop version of your website.

A while back, Google began to crack down on pop-ups by implementing a set of rules these elements need to follow so they don’t overly affect the user experience. Those rules include the following:

  • Pop-ups must be as non-obstructive as possible: On mobile devices, pop-ups should only cover a small fraction of the screen.
  • They should be easy to close: It should be clear how mobile users can dismiss the pop-up, usually via a clearly visible, decently-sized button.
  • Pop-ups containing necessary information are exempt: The above guidelines do not apply to login dialogs, age verification forms, cookie notices, GDPR consent notices, and more.

As long as you bear these considerations in mind when designing your pop-ups, your site shouldn’t be at risk of any negative impacts. However, websites that don’t follow pop-up guidelines might get penalized in the rankings.

7. Choose a Reliable Web Host

We’ve said it before, and we’ll happily say it again — picking the right web host for your site is one of the most crucial decisions you’ll make. The simple fact is that if you choose a host or plan that doesn’t offer the speed and resources you need, no amount of work on your part can stop your website from performing poorly.

Your web host will do a lot to determine how well your site performs, and when it comes to mobile-first optimization, speed is even more important than usual. With that in mind, you’ll want to choose a plan (or upgrade to one) that can guarantee consistently high performance and absolutely minimal downtime. 

The best option in most cases is going with a Virtual Private Server (VPS) hosting plan, as they tend to be affordable while still offering terrific performance. At DreamHost, we offer a broad range of VPS plans for all kinds of WordPress projects: 

DreamHost’s VPS hosting plans.

If you need even more out of your web hosting, you might want to go with a managed dedicated server — which means you’ll be able to use a server that’s reserved specifically for your site. Not only does this let you customize the server to your exact requirements, but it also means increased security and speed – both of which are key elements on a mobile-friendly site.

8. Create a Mobile Application

Finally, we come to a solution that might seem drastic at first glance. After all, it wasn’t long ago that mobile app were exclusive to large websites and services. However, the market has changed significantly, and it’s now commonplace for almost any type of business or organization to offer a mobile app in addition to its standard, responsive site.

Creating a dedicated app comes with many unique benefits that a simple website can’t provide. For example, it enables you to offer subscriptions and deal with them directly through your own interface. You can also use push notifications to grab users’ attention when you post content or want to share news.

While it’s possible to code a mobile app from scratch (or hire a developer to do so), a far easier solution is to use a tool that helps you turn your site into an app. One solution that’s optimized for WordPress users is AppPresser:

AppPresser software.

This is a premium tool with plans that start at $59 per month. For that, you get an intuitive app builder interface that should be easy to use if you’re already familiar with WordPress.

With this tool, you can quickly put together a mobile app based on a specific site for both Android and iOS, which you can then share with your users. For example, you could submit it to an app store, or provide it directly to your site’s visitors or subscribers.

Mobile Optimization Can’t Wait

We now live in a mobile-first world. The majority of internet users rely more on mobile devices than their desktop counterparts, which means that you need to carefully consider how your website works and looks on smaller screens. Optimizing your site so that it performs well and is still easily usable on mobile devices is key, especially if you don’t want to get penalized by search engines.

If you use WordPress, optimizing your website for mobile devices becomes much easier. Using the right plugins and themes will get you a long way, as will previewing how your designs look on mobile. Combine that with tools such as the Google Mobile-Friendly Test, and it’s relatively simple to create a site that looks fantastic on smaller screens.

Are you ready to go mobile-first? Our DreamPress plans include managed WordPress services and a custom WP Website Builder. Both make it easy to create pages that look fantastic on mobile devices!

Optimize Your Business with DreamPress

Our automatic updates and strong security defenses take server management off your hands so you can focus on your customers.

Managed WordPress Hosting - DreamPress

The post How to Optimize Your Website for Mobile Devices appeared first on Website Guides, Tips & Knowledge.


source https://www.dreamhost.com/blog/how-to-optimize-your-site-for-mobile/

Friday 24 June 2022

How to Start a Blog in 7 Easy Steps

It’s no secret that blogs have become a ubiquitous part of the online landscape. Just about everyone — from your next door neighbor to the majority of Fortune 500 companies — have one.

And for good reason. Blogs are a great way to build an audience, add value, create loyalty, and even earn money.

However, while starting a blog is easier than it’s ever been, creating content that draws traffic and can make you money requires both planning and effort.

In most cases, this investment is well worth it. A blog can be an extension of an existing marketing strategy. It can also be a lucrative method for making money online. Even if you don’t monetize your blog, it can be creatively and professionally useful for both individuals and businesses.

In this comprehensive, seven-step guide, we’re going to take you through all the steps required to create a successful blog using WordPress.

We’ll cover everything from installing your site to writing your first post and sharing it with others. There’s a lot of ground to cover, so let’s get started!

The Benefits of Blogging

Have something to say? Perhaps you have a cause you want to discuss with other people or a particular subject matter that you’re passionate about, such as health and fitness

You might even just want an outlet to vent about your worries, which can help you clear your mind and promote progress in your everyday life.

A blog can also be an excellent opportunity to express yourself creatively. You could use it to publish your writing, including reviews, short stories, or even poems. This can motivate you to improve your writing and grow your audience. Some bloggers have even managed to turn their blogging into careers as published writers.

However, as we mentioned earlier, blogging is not only for personal or creative use. You probably won’t be surprised to hear that many businesses have their own company blogs. This includes big international corporations like Google, Facebook, and Starbucks. However, smaller businesses also use blogs to grow their audiences, post updates about their services, and provide value to their readers.

Of course, while we’re clearly fans of blogging, that doesn’t mean it’s free from potential problems and difficulties. For one, your blog requires a considerable investment of time and effort to be successful. There are also plenty of common blogging mistakes you’ll want to avoid, such as having an irregular posting schedule, using a site with long loading times, and most importantly, writing sub-par content.

Even so, these are almost all issues you can avoid. If you take the time to plan your content, create a well-performing site, and work on improving your writing, you’ll be well-equipped to run a blog that people will genuinely enjoy reading.

Get Content Delivered Straight to Your Inbox

Subscribe to our blog and receive great content just like this delivered straight to your inbox.

Before Getting Started

Before you create your own blog, there are a few things you’ll want to do. Careful research and planning can lead to a smoother process. Let’s take a look at some of the factors to consider before getting started.

Your Blog Niche

First and foremost, you’ll need to decide what your blog should be about. Chances are you already have a good idea of what the subject matter will be. However, it’s important to determine not only what general topics you’ll tackle, but also how and for whom. This will help define your blog’s identity and make it easier for you to tailor its content to your intended audience.

A perfect starting point is to consider your own interests. What kind of topics are you passionate about and feel you could write about insightfully? Perhaps you’re an artist looking to start a photography blog. However, there are already plenty of blogs on this subject, so you’ll need to think about how yours might differ. This includes deciding what your blog’s focus will be (such as portrait photography) and defining your target audience (professional photographers or beginners).

Doing some market research at this stage will be useful, as it can help you find a niche that may be underserved. For example, you might notice there are only a handful of blogs devoted to astrophotography or using a particular camera. These are both niches you could set out to fill. As a result, your blog will have a tighter focus and a stronger audience appeal.

A Blog Name

Naming your blog isn’t a task that should be taken lightly. After all, a name can help to brand your blog and make it more memorable.

Most blog names can be separated into two categories:

  • Keyword-based. These are names that contain relevant keywords in order to describe the purpose or theme of the blog. Some examples include British Beauty Blogger and Car and Driver.
  • Brand-based. These blog names focus on a brand and tend to be shorter and more memorable. A few examples are Kotaku and BMWBLOG.

If you feel stuck and need a bit of inspiration, you can use an online name generator. These provide potential names based on a word or phrase. One of our favorite tools is called Blog Name Generator:

The Blog Name Generator tool

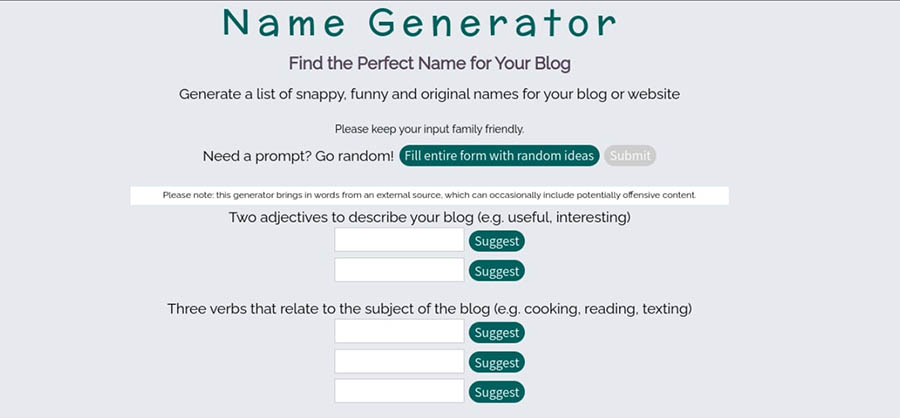
This site asks you to enter some information related to your blog, including its tone and subject matter. It then creates a series of names that you can use for inspiration.

For example, here are some of the results we got for a “funny” and “informative” blog about “texting, traveling, and painting” (we set the author as Elsa Cox from New York):
Name Generator results.
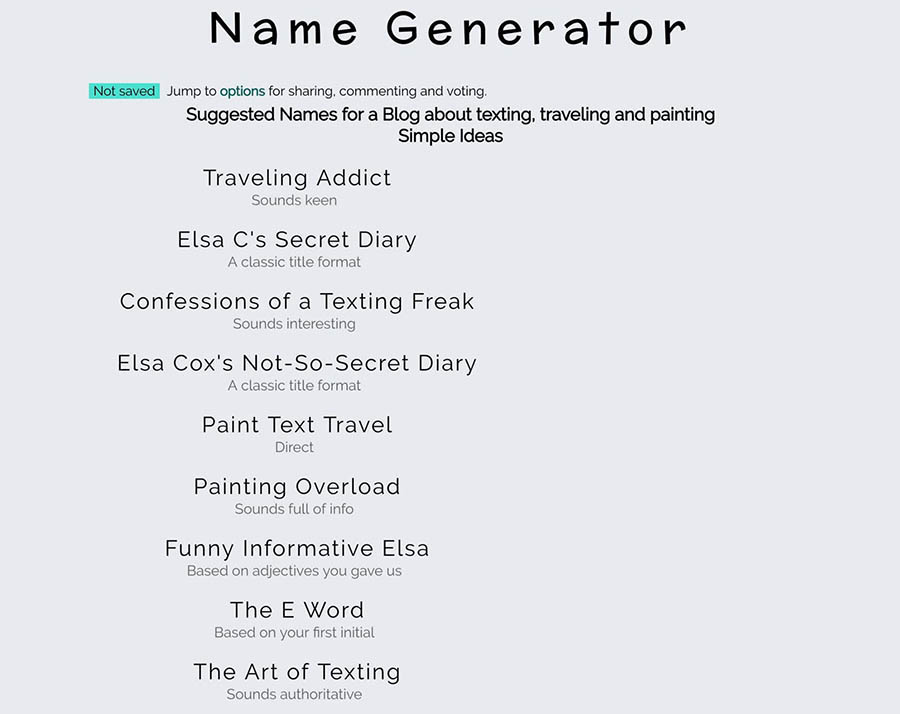
You can either select one of these options or use them as inspiration to come up with something unique. Either way, it’s essential that you search for your chosen blog name using Google to make sure that you don’t accidentally infringe on someone else’s brand.

Once you have these basic details ironed out, you’re ready to get to the fun part: creating your blog.

How to Start a Blog in 7 Easy Steps

In this tutorial, we’re going to take you through the entire process of setting up a blog with a step-by-step guide. Let’s get this blog on the road!

Step 1: Choose a Blogging Platform, Web Hosting, and Domain Name

First, you’ll need to choose a platform to build your blog on. You’ll also need to purchase a hosting plan and register a domain name. These tasks are all somewhat related and can usually be executed on one platform, such as DreamHost. 

Pick a Blogging Platform

At this point, you’ll need to consider which platform you’ll use to build your blog. As we’ve previously discussed, there are numerous platforms available. For example, you can choose a dedicated blogging platform, such as Tumblr or Blogger, both of which are free.

However, we only recommend using these free blog solutions if you’re starting a personal blog, due to their limited functionality and customization options. Using a free blogging platform can also come across as cheap or unprofessional, especially if the blog is tied to a business.

Instead, we recommend that you use WordPress to create your blog:

The WordPress.org website.

Not only is this open-source platform easy to use, but it offers more functionality. WordPress also lets you style your blog using themes and add new features via plugins. It also helps to make your blog more secure and perform better with minimal work required on your end.

As such, we’ll be using WordPress throughout the remainder of this article. If you’re unfamiliar with this Content Management System (CMS), we’ve written extensively about it over the years! 

Here are a few articles to help you learn the ropes:

Feel free to use these guides to learn more about the platform and how you can use it to your advantage. 

Purchase Web Hosting and Register Your Domain

You may have noticed our use of the term ‘self-hosted’ in the list above. This is because WordPress doesn’t provide hosting for your blog. Rather, it’s a CMS that you need to install on a server. Don’t worry — this is not as complex as it might seem.

All it means is that you will need to sign up for a web hosting plan if you want to get your site online. This will require some research to make sure you pick a host and plan that’s right for you. 

To help you out, let’s look at the main types of hosting that are available:

  • Shared hosting is the cheapest option for new bloggers (DreamHost plans start at $1.99/mo) but can be limiting in terms of performance. On this type of plan, you share a server and its resources with multiple other sites. Shared hosting is best suited for new sites with low traffic.
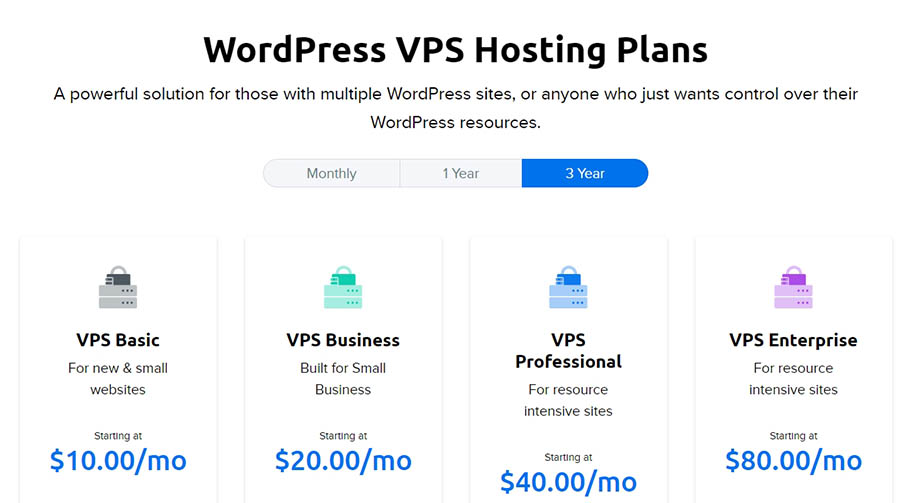
  • Virtual Private Server (VPS) hosting is a version of shared hosting where each site has its own resources. It’s slightly more costly but provides improved performance. As such, this kind of hosting is recommended if you want to focus on growing your blog.
  • Dedicated hosting is the most expensive and powerful option. As the name suggests, you’ll get an entire server that’s dedicated to your site alone. This is usually overkill for a blog, however, unless you want full control over your server or your site draws unusually large volumes of traffic.

In addition, you can decide whether or not you want managed hosting. When you have a managed plan, your web host will take care of several technical tasks required to keep your site running smoothly.

Of course, you don’t want to get your hosting and domain from just anywhere. Choosing the right hosting plan is crucial, as this will play a key role in your site’s performance, security, and other vital factors. It’s also smart to look for hosting companies that specialize in WordPress hosting specifically, as that means its services will be well-optimized for the platform.

Here at DreamHost, we offer a number of top-notch WordPress hosting plans to choose from.

These plans provide plenty of power for your site, along with tight security and fast performance. In addition, they come with handy features for WordPress users, such as pre-installed sites and automatic updates and backups. You’ll also get access to reliable and knowledgeable support via multiple channels. And if you sign up for certain annual plans, you can even get a free domain!

Our shared hosting plans are ideal for your brand-new blog. They start at just a few dollars per month and provide plenty of resources while your site is still small. Later on, when your blog begins to receive more traffic, you can upgrade to a more powerful option such as our WordPress managed hosting.

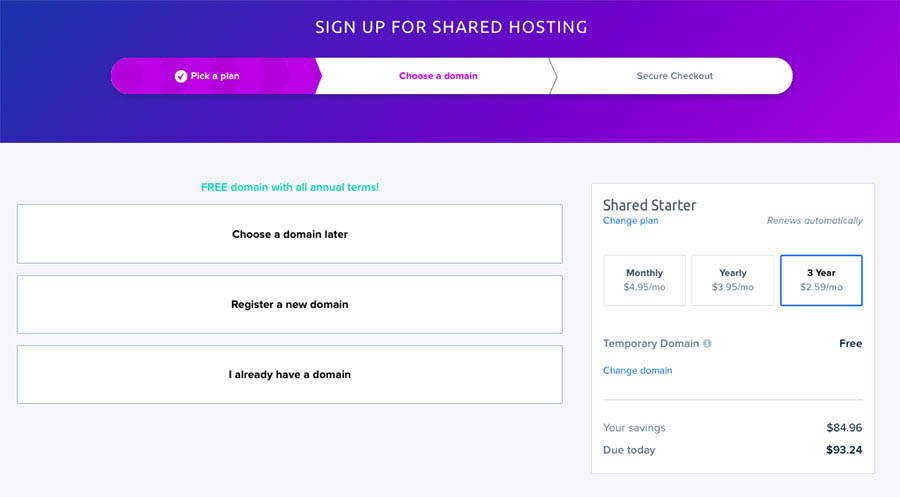
To purchase a shared hosting plan, simply select Sign Up Now on our plans page. Next, you’ll need to choose the billing term for your hosting account: monthly, annually, or every three years. The longer your term, the bigger your discount on hosting.

You’ll also be asked to select between DreamHost’s Starter Shared and Shared Unlimited packages:

DreamHost Shared hosting plans

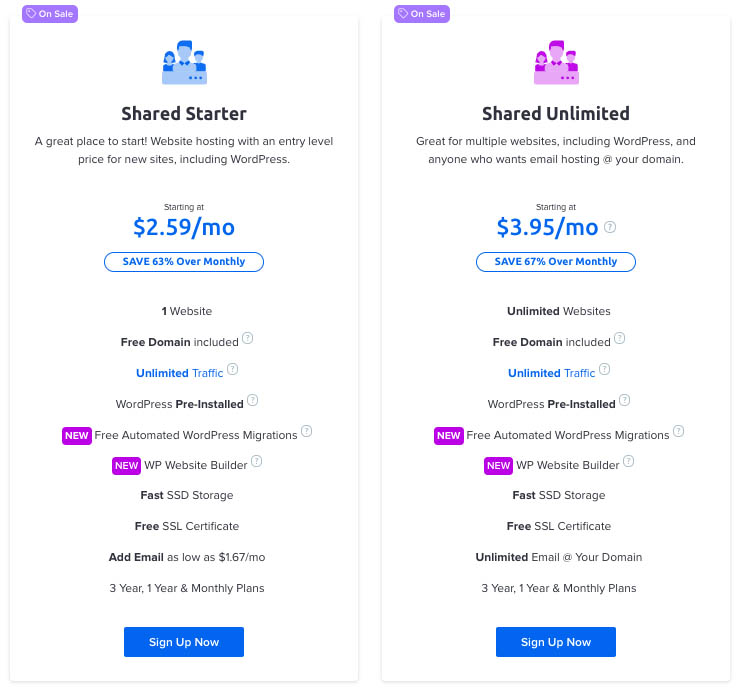
Starter Shared is the most cost-effective option, although you won’t get a professional email @yourdomain. For just a few dollars more each month, Shared Unlimited gives you everything you need to thrive online, including a specialized email address.

Register Your Domain Name

Next, you’ll be able to register a free domain (included with all annual terms) or enter a domain that you already own. Note: If you’re pressed for time or aren’t sure which Top-Level Domain (TLD) would be right for your site, you can easily add a domain at a later time:

The options to register a domain while signing up for DreamHost shared hosting.

Your domain name is the URL that will be used to access your blog. When it comes to creating a domain name, there are several things you’ll want to consider. One of the basic steps involves choosing which TLD you want to use, such as .com or .org. You’ll also need to make the domain name memorable.

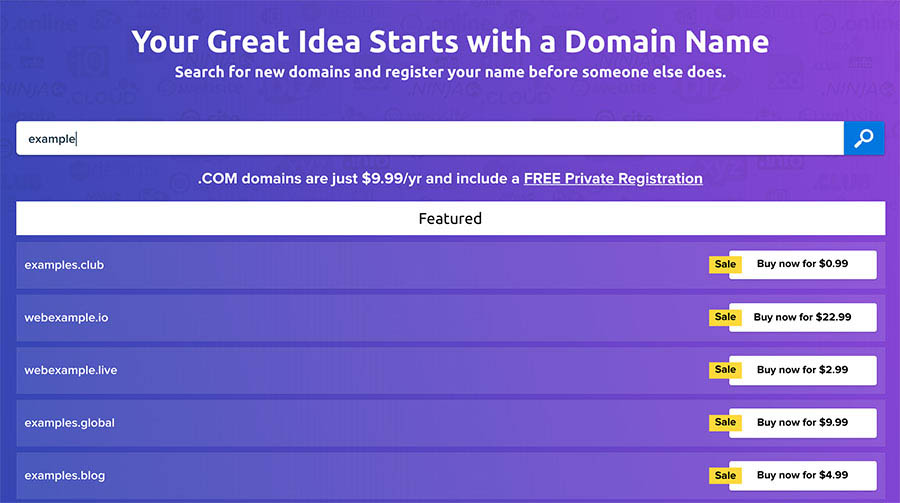
For this guide, we’ll assume that you want to register a new domain. Click on Register a new domain and type your proposed URL into the search box. We’ll pull up all the available domain names related to your search so you can select the ideal TLD for your site. 

Remember to keep search engine best practices for domains in mind when making your decision:

The DreamHost domain name search tool

We’re almost done with the setup. Next, you’ll add your billing info and review all the details about your hosting package. Make sure that the box next to Pre-Install WordPress is checked. This will get your site set up quickly and means you don’t have to worry about installing the CMS in the next step:

The billing information screen for a DreamHost hosting account

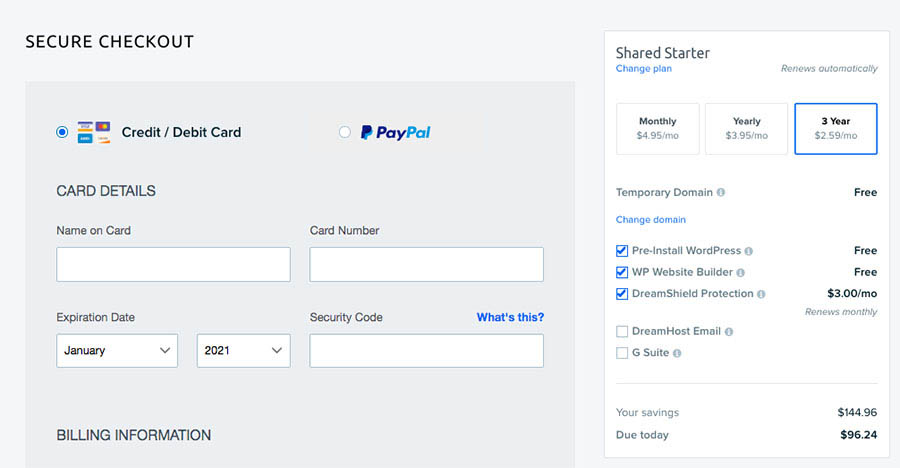
At this point, you can choose to add DreamShield, our in-house Malware Remover, to your hosting account. For $3 a month, DreamShield scans your site to identify malicious code, out-of-date software, and broken file permissions to help keep you safe online.

After you’ve made your account selections, you can decide on your payment method — DreamHost accepts all major credit cards and PayPal. Once you’ve entered your payment information, click on Submit Order at the bottom of the screen.

It will take a couple of minutes for the installation to complete. In the meantime, you’ll be sent an email with additional instructions on configuring your new WordPress software, including a link to create your WordPress password. If you run into any snags, help is just a click away.

Tips for Choosing a Domain

The domain name that you choose for your blog is critical. It can affect your SEO as well as how easily users are able to find and remember your URL. 

There are a few tips to keep in mind when choosing your domain name. First, you’ll want to keep it short, sweet, and memorable. Of course, you’ll also want to ensure that it’s relevant to your niche.

We also recommend that you avoid using numbers or hyphens. Complicated domain names are not only harder to remember, but can also lead to typos that take users to the wrong site. 

Finally, if you find that the domain name you want for your blog is already taken, you might consider using a different extension. Domain extensions are what come after the dot in the URL address. Popular domain extensions include “.com”, “.co”, and “.org”. However, you could also use different variations, such as “.name” or “.blog”.

If you already own a domain name but don’t have a live site attached to it, you might also want to consider transferring it to your blog. For assistance, you can follow our guide on how to transfer a domain to DreamHost

It’s worth noting that your domain registrar and hosting provider do not necessarily need to be the same. For example, you can register a domain name with DreamHost even if you host your site with a different provider. You can also use DreamHost hosting and a third-party domain registrar such as Namecheap.

However, to simplify the process, we recommend getting both from the same place (such as DreamHost). It can help streamline the domain registration and CMS configuration process. You’ll also be able to manage your site and domain from the same account. 

Install WordPress

As we mentioned earlier, we’ll be showing how to create a blog using WordPress. This platform is both user-friendly and intuitive, but it needs to be installed on your site before you can use it. If you checked the Pre-Install WordPress box during the sign-up process, you can move on to Step 2.

There are two main ways you can install WordPress:


  1. Manual installation. This requires you to manually upload and configure the WordPress software on your site. While the process is infamously quick, we only recommend this approach if you’re more technically savvy.
  2. One-click installation. This is an option offered by many web hosts, which enables you to install WordPress on your site almost instantly. As such, you don’t have to worry about configuration or manually installing any files.

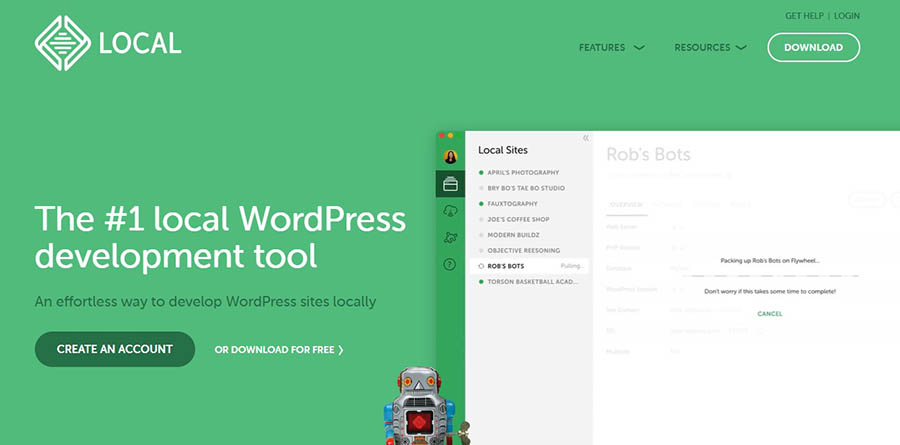
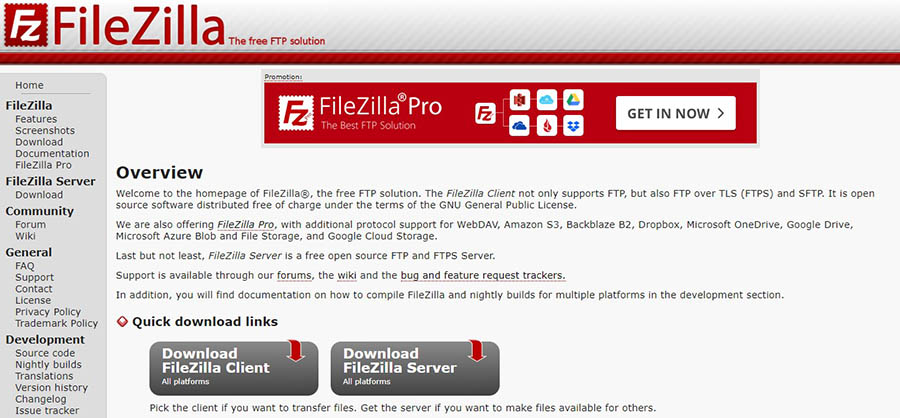
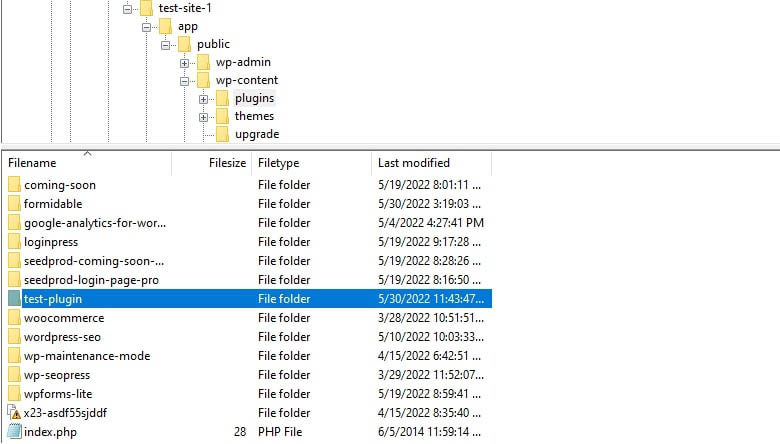
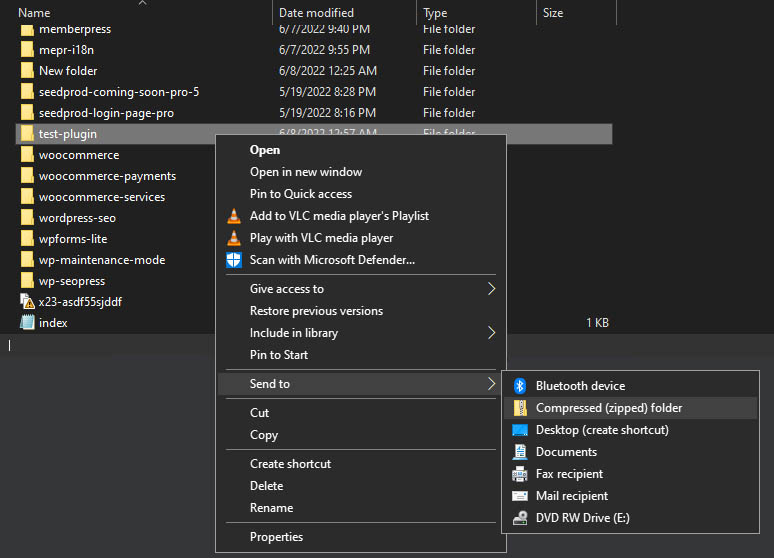
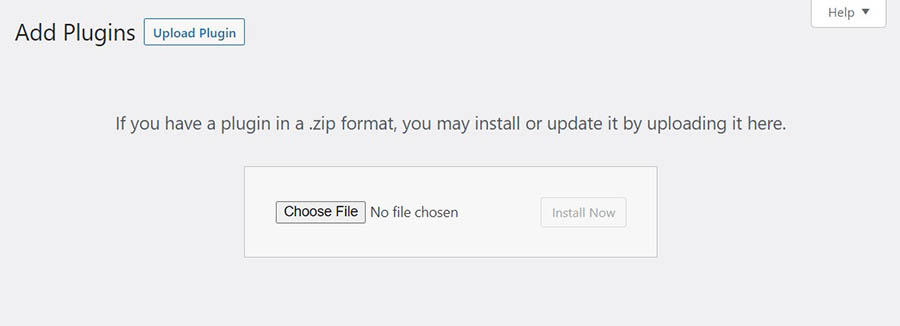
If you install WordPress manually, you’ll need to download the latest version of WordPress and use an FTP tool such as FileZilla to upload it to your site. However, using a one-click installation tool can help simplify the process.

To install WordPress at DreamHost, log into your panel and use the sidebar to navigate to WordPress > One-Click Installs:

DreamHost WordPress one-click installs. 

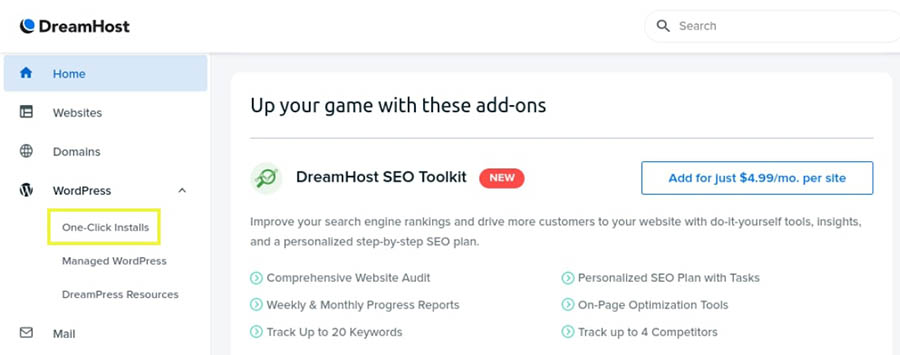
Here, you can see a WordPress one-click install option, which you can go ahead and select. This opens an overlay, where you can configure your installation:

The DreamHost one-click installer
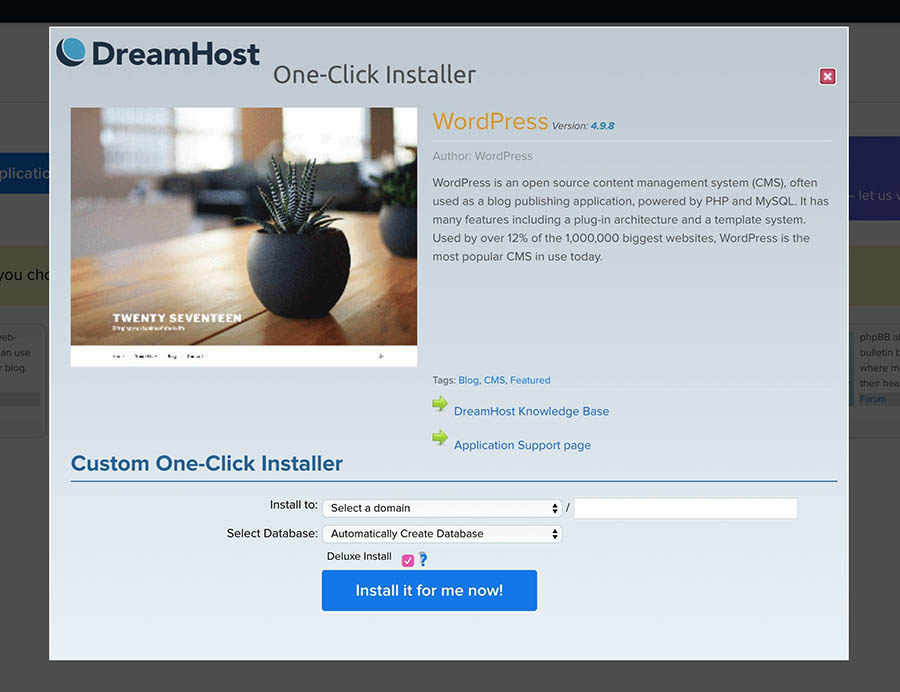
All you need to do here is select which of your domains you want to install WordPress on. In addition, you can pick an existing database to use for your new site. However, in most cases, you can just leave this set to Automatically Create Database.

The final option is Deluxe Install, which is selected by default. This provides a number of optional features beyond the basic WordPress installation. We recommend that you leave this checked, as it adds several useful tools for free.

Then, you can click on Install it for me now! to start the installation process. This can take several minutes. As soon as the installation is complete, you’ll receive an email containing the link and login information for your new WordPress site.

Step 2: Tweak Your Blog’s Appearance with a Theme

With WordPress up and running, it’s finally time to start putting together your blog. First of all, you’ll need to consider how you want your blog to look. You can easily change the appearance of your site with a WordPress theme.

A theme works like a template you can install on your site, which determines its layout and overall design. Some themes also include additional functionality, and they come in both free and premium varieties.

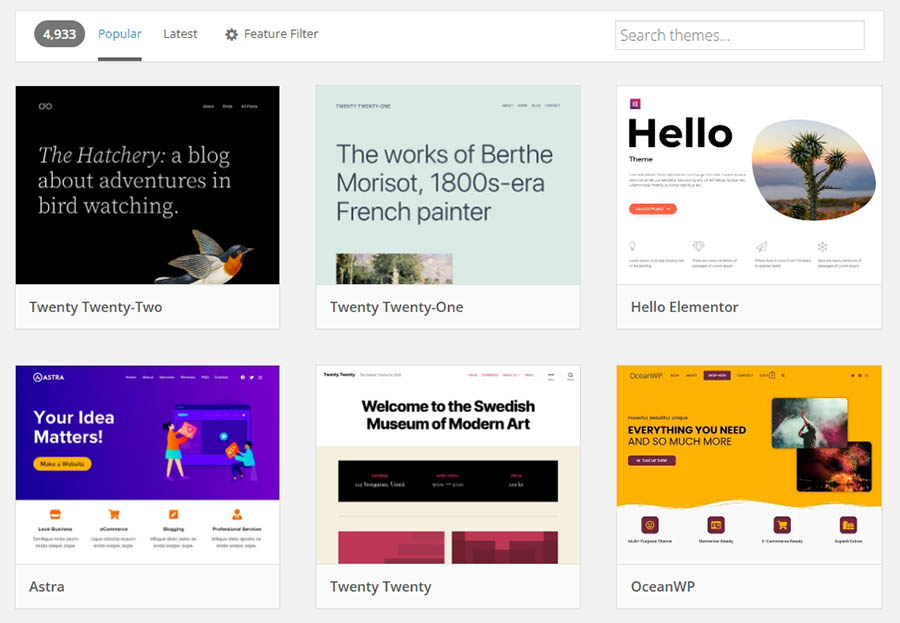
There’s a lot of ground to cover with themes, but for the time being you only need to worry about finding the one that fits your blog’s intended style. Picking the right theme can be a struggle if you don’t know where to look, but a good place to start is the official WordPress Theme Directory:

The WordPress Themes Directory

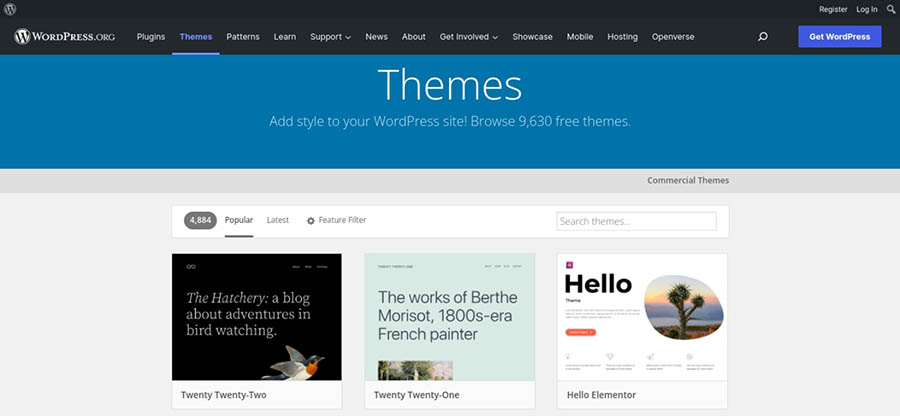
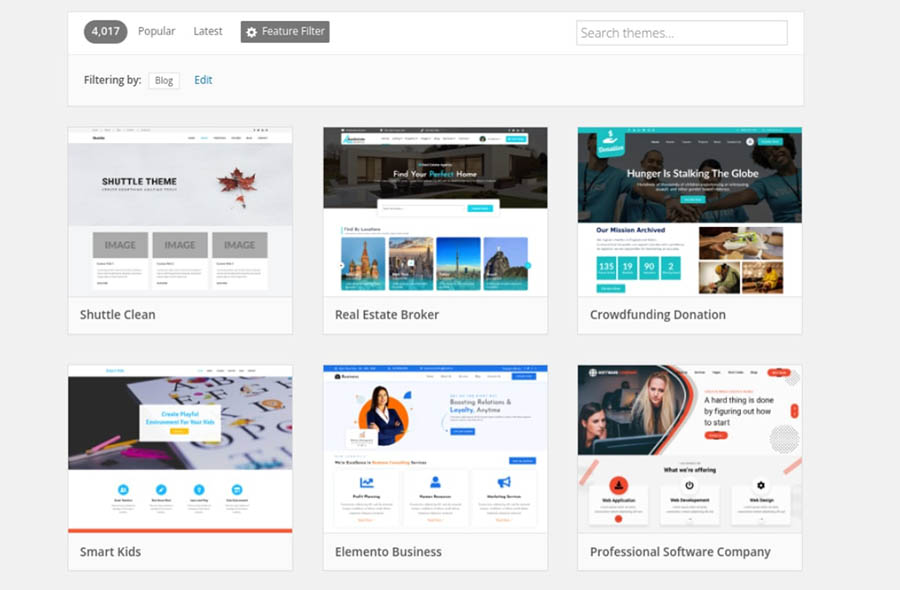
Here, you’ll find hundreds of free themes in several different categories. There are so many choices, in fact, that you’ll probably want to use the Feature Filter to narrow down the options:

The WordPress Themes feature filter.

As you can see, there’s even a search filter called Blog. If you select this, you’ll be able to see all the themes specifically created with blogs in mind:

The WordPress Blog Themes

If you find a theme you want to use, you can download it here and then install it on your site. However, you can also do this through your WordPress dashboard by navigating to Appearance > Themes:

The Themes installation page in WordPress

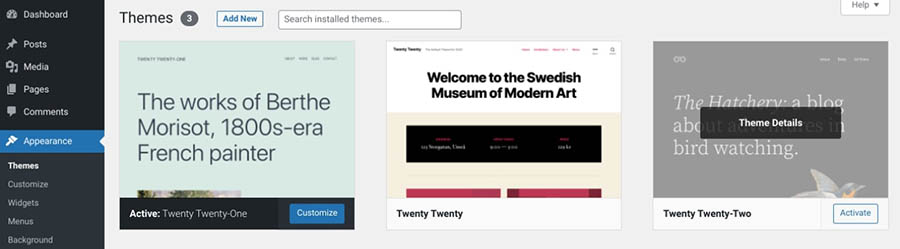
Here, you’ll see your currently installed themes. You can install new ones by clicking on Add New. This will open the Theme Directory again, letting you download and activate themes directly from this interface. Hover over your choice, and click on Install:

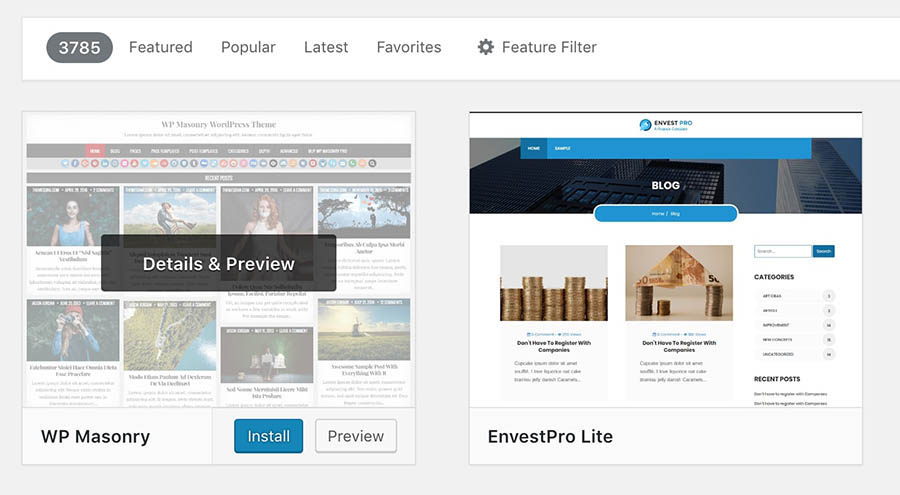
After the theme installs, you can select Activate to set it as the current theme for your site.

If you can’t find the perfect theme, you may be better off looking for premium alternatives through marketplaces such as ThemeForest. These will cost you some money, but they usually offer more options for customization and configuration.

Tips for Choosing a WordPress Blog Theme

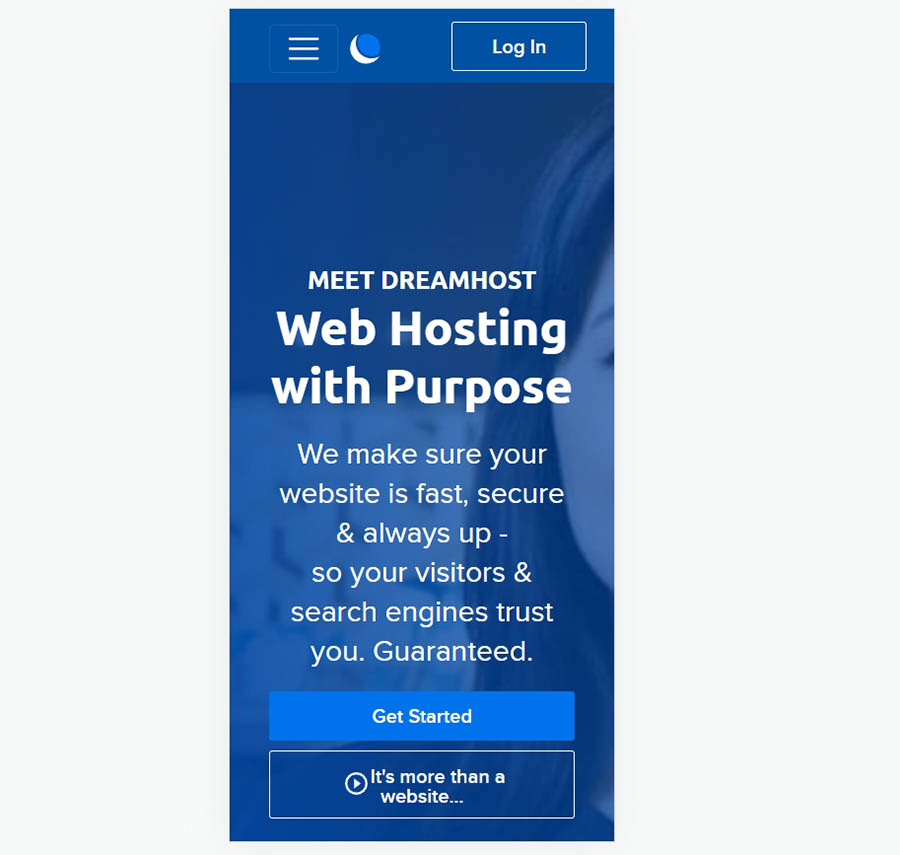
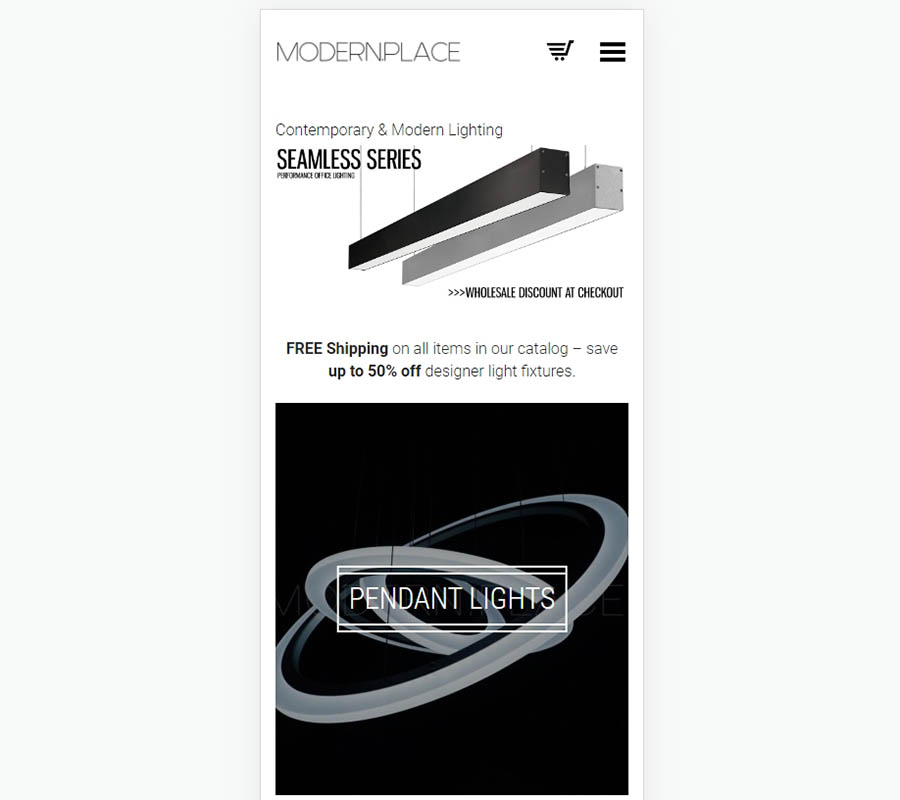
If you’re having trouble deciding which theme to use, it may help to consider some important features. First and foremost, your theme should be compatible with the most recent version of WordPress. Additionally, it is important to choose a theme that is responsive, meaning that it will adjust to fit any screen size.

Furthermore, you’ll want to make sure that your theme includes all of the features and functionality that you need for your blog. For example, in addition to being SEO-friendly, it’s also wise to look for themes that include social media integration, as this can help you share your posts more easily. 

It’s also helpful to find a theme that is easy to use and customize, especially if you’re new to WordPress. To further improve the User Experience (UX), we recommend looking for themes with fast loading speeds and support for multiple languages. 

Outdated themes (and plugins) can also pose a security risk. Therefore, it’s essential to ensure the theme that you pick is regularly updated and maintained by its developers. 

Finally, it is also important to consider the overall aesthetic of your theme. With these factors in mind, you should be able to find a WordPress blog theme that perfectly suits your needs.

Step 3: Customize Your Blog With Plugins

One of the reasons WordPress is so powerful is its built-in flexibility. You can add new functionality to your site by using plugins. In simple terms, plugins are add-ons that you can install to provide your blog with new features.

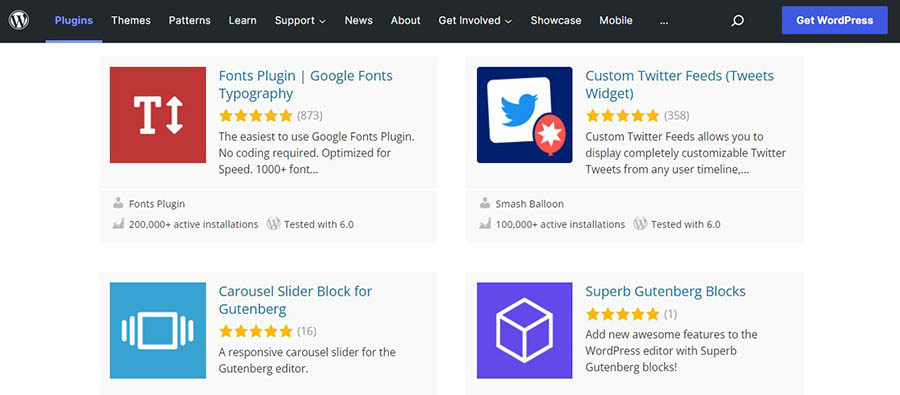
The process for finding and using plugins is very similar to how themes work. You simply need to download and install a plugin, at which point it will become active on your site. You can find lots of free options in the WordPress Plugin Directory:

The WordPress Plugin Directory.

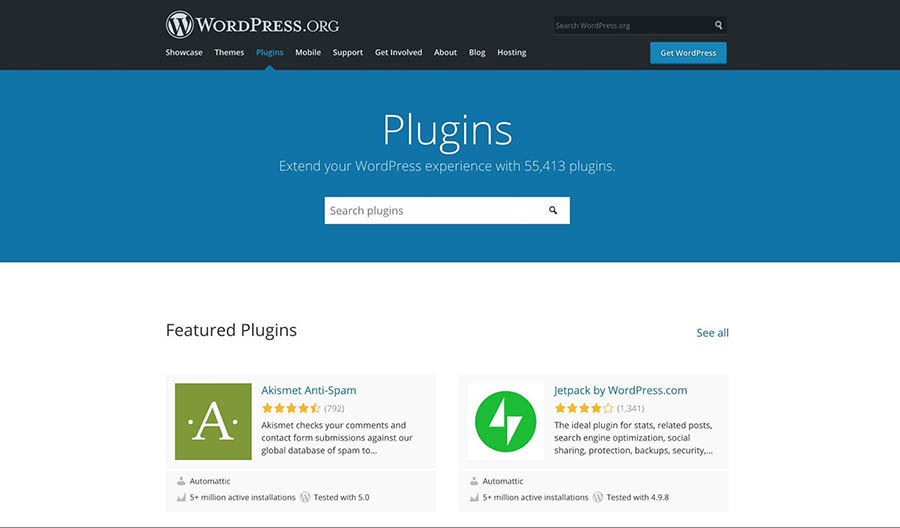
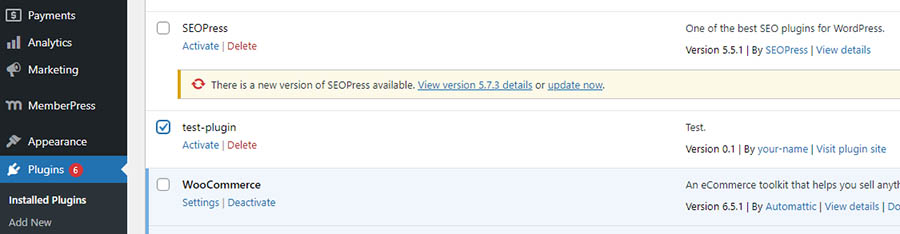
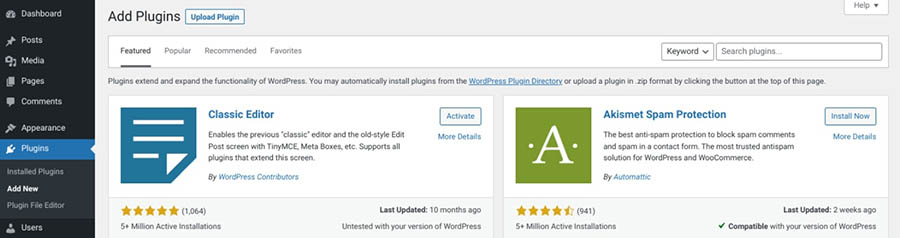
You can also access this directory from your admin dashboard by going to Plugins > Add New:

Adding a plugin in WordPress.

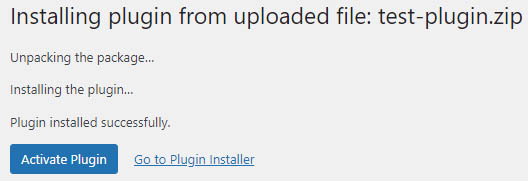
As before, all you need to add a plugin is to look for the one you want, then click on Install followed by Activate Plugin.

There are literally thousands of free and premium plugins at your disposal, many of which we’ve previously recommended:

However, when you’re first starting out, it’s best to stick to a few basic options. This will keep you from getting confused or cluttering up your site with unnecessary features.

With that in mind, let’s look at a few of the best plugins for blog owners.

Jetpack

You can think of Jetpack as several plugins in one, as it contains plenty of functionality in a single package:
The Jetpack plugin
In fact, it’s such a feature-heavy plugin that we don’t have room to discuss everything it offers in this article.

However, to quickly summarize, Jetpack gives options for improving your site’s security, optimizing its performance, sharing your posts on social media, and much more. Best of all, Jetpack is totally free, although it offers premium plans that add even more features.

Akismet Anti-Spam

The next plugin deals with something that concerns all sites but is especially pertinent for blogs: spam. To help ensure that spambots can’t take over your site, you’ll need a plugin to deter them. The best option for the job is Akismet Anti-Spam:
The Akismet Anti-Spam WordPress plugin.

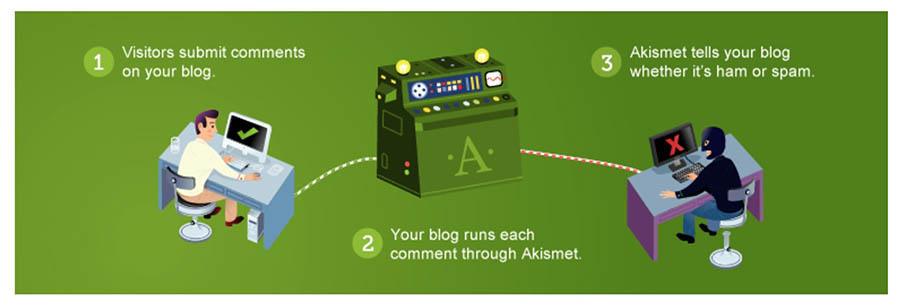
This plugin automatically detects and filters out spam from comments and contact form submissions. It also lets you manually specify which comments are spam, which helps the plugin improve its detection abilities for the future.

VaultPress

You’ll also want to consider a plugin like VaultPress:

The VaultPress WordPress plugin

This lets you create real-time backups, which are copies of your site. This can be incredibly useful if something goes wrong with your blog, such as if a hacker successfully attacks it or it breaks and you can’t access your content. In those situations, you can simply revert your blog to a previous backup to avoid losing data.

And deal alert: VaultPress is included for free with our DreamPress Plus and Pro plans.

Naturally, there are many more plugins that can help you out and we’ll discuss more of them later in this article. For the time being, however, these should get your site started on the right foot.

Step 4: Write Your First Blog Post

Next, it’s time to start thinking about your content. It’s usually smart to have at least a few posts ready to go when the blog launches.

You may already have a few ideas, but if you don’t, you’ll have to start brainstorming now. Naturally, you’ll want to focus on your blog’s niche. For instance, are there any recent events you can discuss? Alternatively, you might prefer to write a tutorial or a comprehensive guide about a particular topic.

The best way to find topics is to perform keyword research. You can use Google Keyword Planner for this, as it’s both comprehensive and free:

The Google Keyword Planner tool.

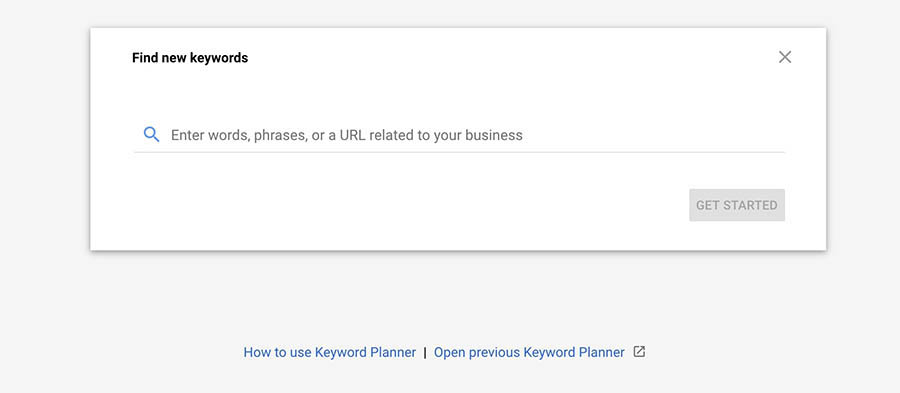
With this tool, you can search for keywords related to your blog to see what your audience is interested in. For example, if you enter the keyword “men’s fashion,” you’ll see that popular keywords include “stylish shirts for men” and “men’s summer clothes.”

You can then consider how to write blog posts that are optimized for these terms (something we’ll look more at later). Once you’ve found the right keywords, you can start writing your first post. However, you may want to familiarize yourself with Gutenberg first.

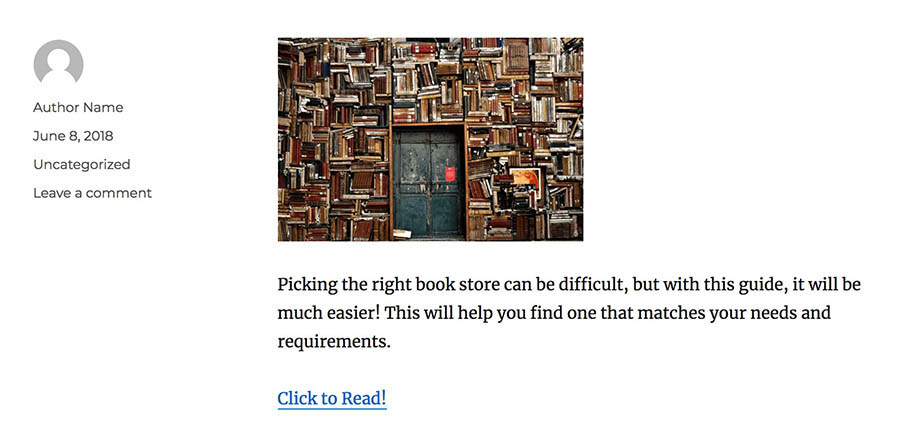
To get started, access your admin dashboard and click on Posts > Add New:

The option to add a new post in WordPress

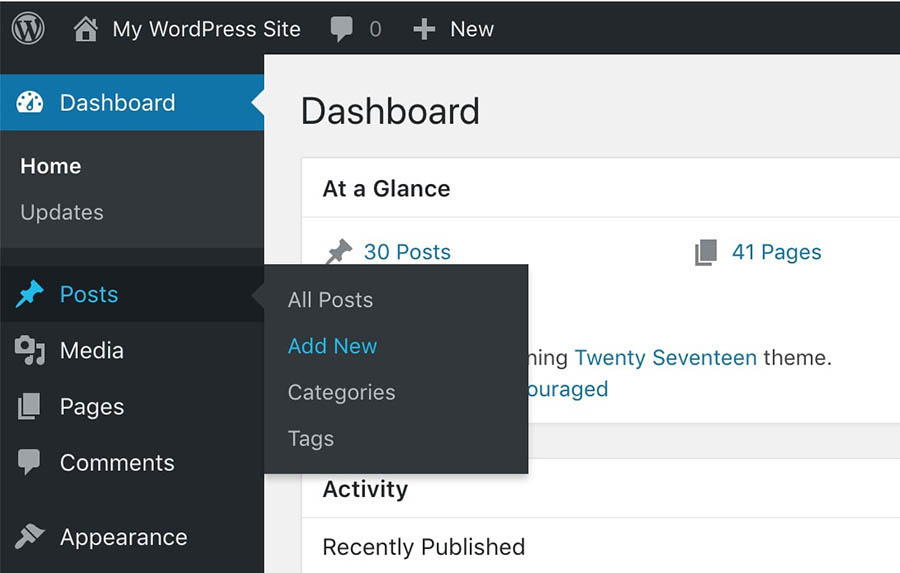
This will open the WordPress editor:

The WordPress Block editor.

Here, you can start putting together your post. We’ve previously written a comprehensive guide to writing quality blog posts, so we recommend you check it out. We’ll go through some of the basics here as well.

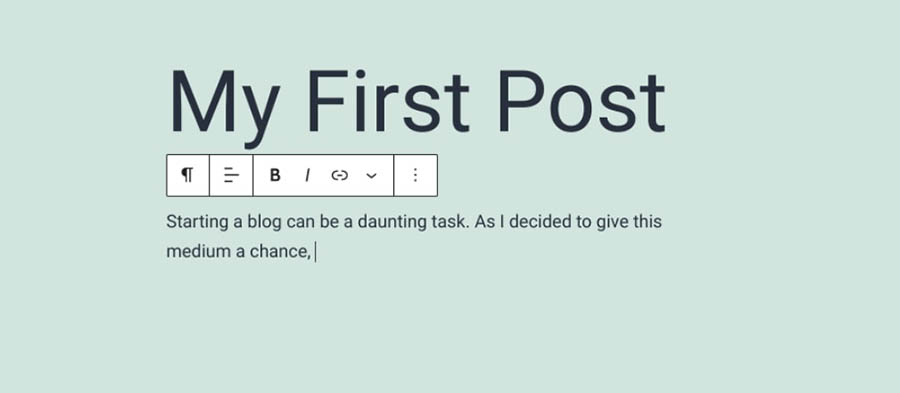
First off, you’ll want to set an attention-grabbing post title. The key to creating a snappy headline is to make it informative and specific. You’ll want to describe the article’s contents while keeping it concise.

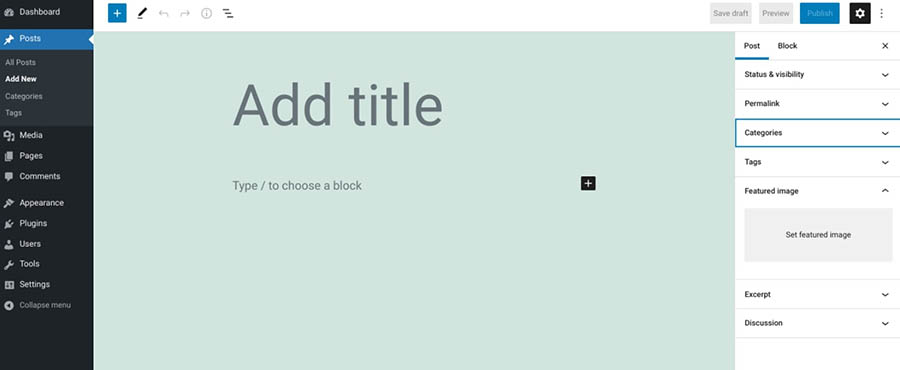
Next, you can start adding your body text by typing into the main paragraph block:

The WordPress paragraph block.

When you’re writing, you’ll find several relevant options in the right-hand sidebar:

The WordPress post sidebar settings

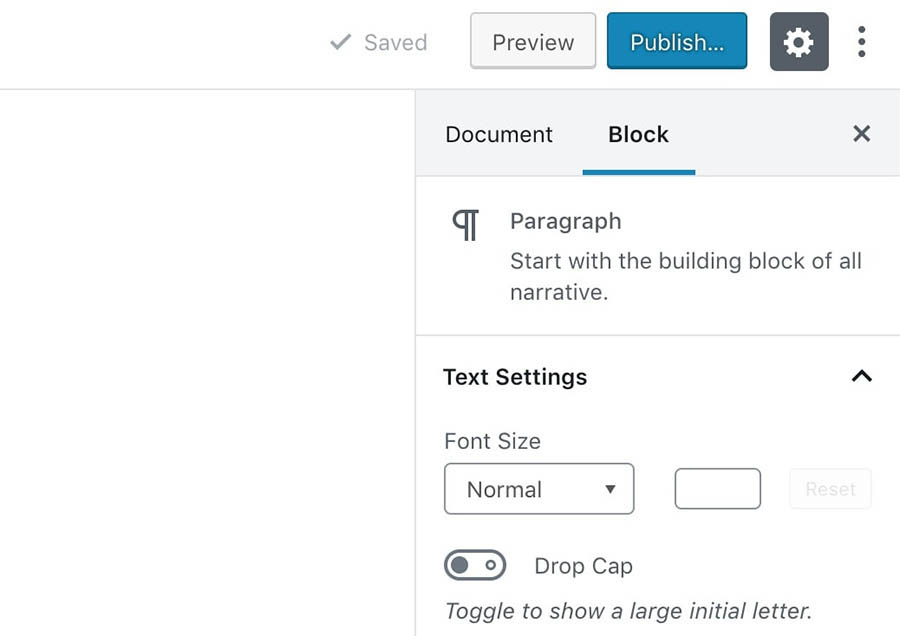
These settings will differ depending on the type of content you’re currently working on. You can add images and other media to your post by placing a dedicated block in the editor:

WordPress block options

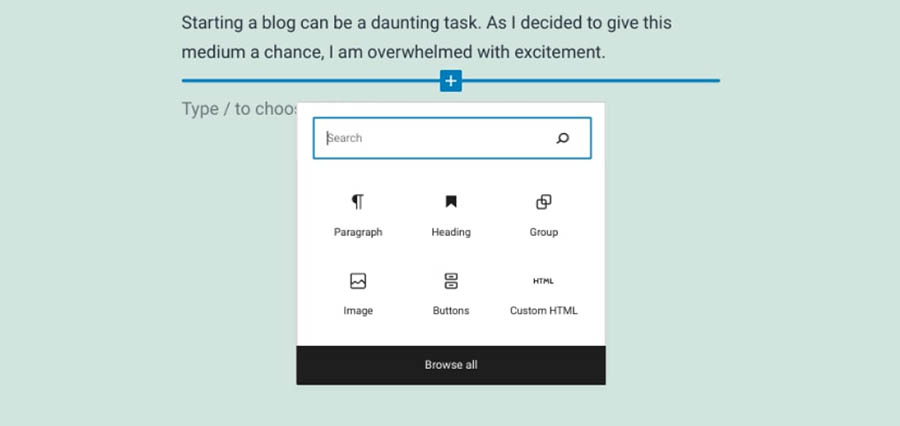
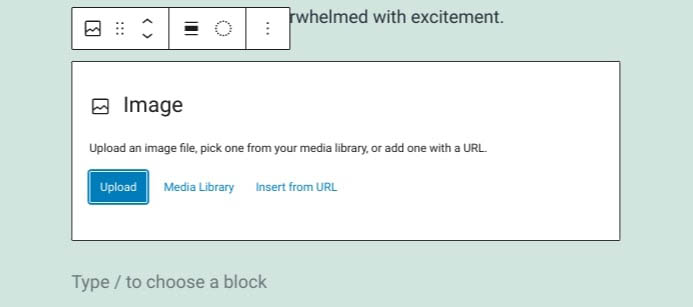
For example, selecting an Image block will let you upload a new image file or choose an existing one from your Media Library:

Adding an image to the WordPress editor.

When you’ve completed your post, you can add the finishing touches. For instance, you can assign it one or more Categories and Tags. These help you organize each post based on its type and topic.

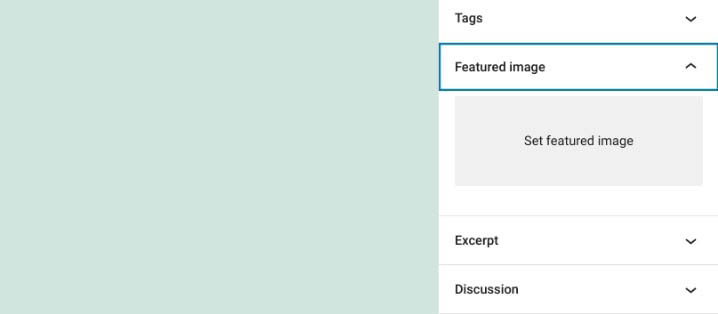
Finally, you can set a featured image for the post. The format of this image depends on your theme, but it’s usually featured on your blog’s homepage and at the top of the post. Select your headline and use the Featured Image option in the sidebar to choose a file:

Adding an image to the WordPress editor.

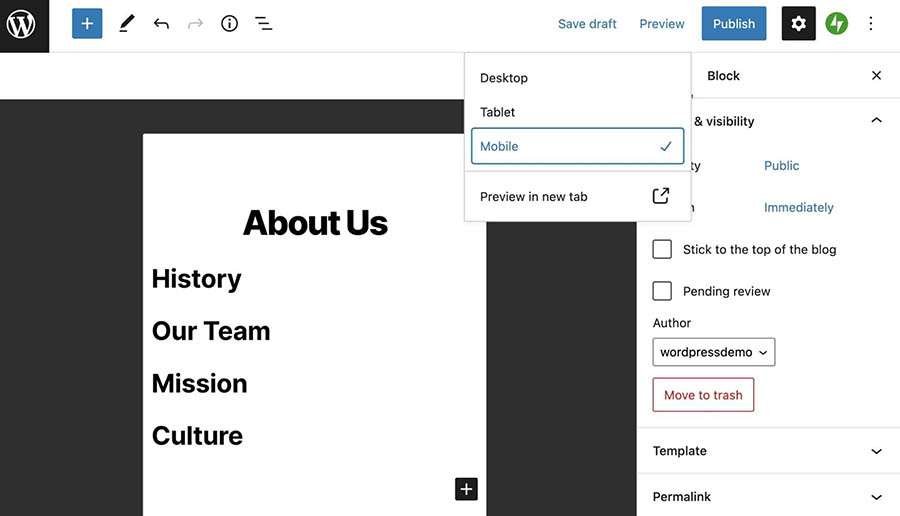
Your post is now ready, so go ahead and click on the Publish button in the top-right corner to make it live:

The Publish button in the WordPress editor.

You can also set how and when you want the post to appear on your site, if you’d like to delay its publication. You can also choose its visibility, which determines who can see it, or simply save it as a draft to continue working on it later.

Tips for Writing Engaging Blog Posts

There are many ways that you can boost the success of your blog posts. As we mentioned earlier, it’s important to create engaging headlines. It’s also a good idea to incorporate images, video, and other media. This can help make your posts more interactive and interesting, as well as break up long blocks of text.

However, there are some additional strategies you can use to improve the readability of your posts. For example, consider incorporating bullet and number lists. People love lists! If you can structure your blog post in the form of a list, it will make it much easier to read and digest. Plus, it’s just another way to add some visual interest to your post.

It’s also a smart idea to choose topics that you’re passionate about. Your readers will be able to tell that you’re genuinely interested in the topic, and this can make them more engaged with your content.

Also, your readers want to get to know you, so don’t be afraid to be personal in your blog posts. Share your thoughts and feelings on the topic, and let your personality shine through. This can help build trust and add a human touch that resonates with your audiences in ways that might not otherwise be possible. 

Step 5: Optimize Your Posts for Search Engines

There are a handful of measures you can take to help boost the success of your blog. Let’s explore some of the ways you can optimize your posts for visitors and search engines.

Install an SEO plugin

We previously discussed the importance of keyword research when it comes to finding topic ideas. Keywords are phrases that users enter into search engines to find what they’re looking for. By optimizing your posts for specific keywords, you can increase the likelihood that they’ll appear when users search for them.

This is also known as Search Engine Optimization (SEO) and is vital for increasing traffic and visibility for your blog. SEO involves a number of tasks, including (but not limited to) increasing your site’s speed and getting backlinks from other sites.

When it comes to your blog, the most important step is to optimize the posts themselves. There are several SEO tools that you can use to do this, but our recommended solution is Yoast SEO:

The Yoast SEO WordPress plugin

Yoast SEO is a freemium plugin that adds a new section to your WordPress editor:

The Yoast SEO plugin in the WordPress editor

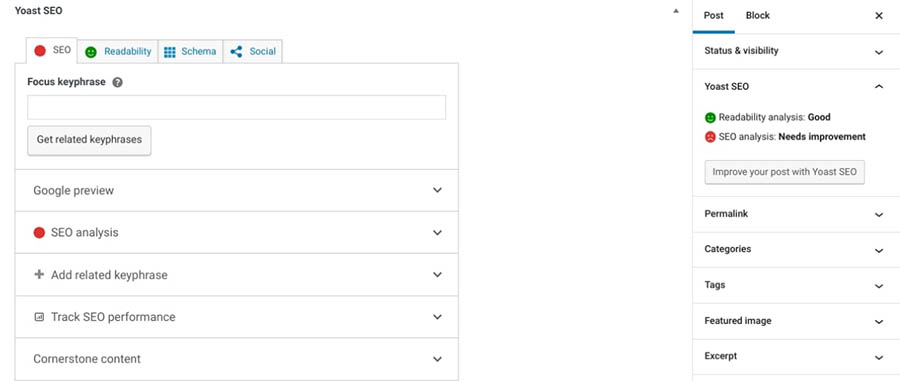
Here, you can set a ‘keyphrase’ for your post, which is the keyword you want to optimize it for. Once you’ve done that, Yoast will show you in real time how well-optimized the post is, giving you specific advice on how you can improve it:
Yoast SEO plugin suggestions

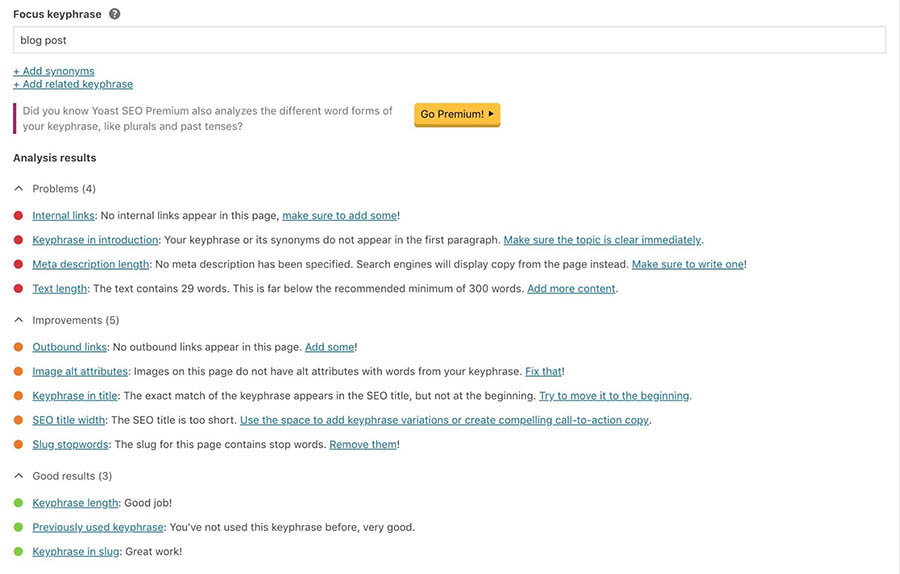
Yoast SEO also lets you add a meta description, which is a snippet of text that appears alongside the post in search results. By adding a description and following these guidelines, your posts will be likely to rank higher in relevant search results.

Set a Schedule (And Stick to It)

Google tends to favor sites that publish unique and relevant content on a consistent basis. It’s also important to publish posts to help boost readership. 

To make sure that readers return to your blog, you’ll need to publish content regularly. When you offer new posts on a consistent schedule, your blog won’t go silent for long stretches of time, and your audience will be more likely to return.

There’s no perfect publishing schedule. How often you publish will depend on your availability and your blog’s subject matter. Regardless, it’s a smart move to set a strict schedule for yourself and make sure you follow it.

The good news is that there are tools you can use to help you stick to your schedule. One such solution is the Editorial Calendar plugin:

The WordPress Editorial Calendar plugin

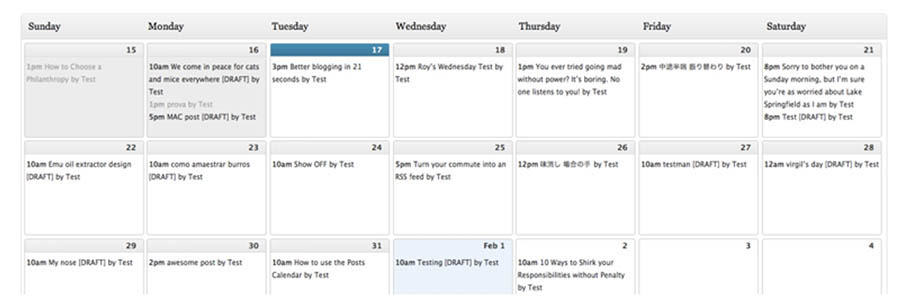
This tool lets you create a calendar for your posts and even schedule drafts to be published at a specific time and date. You can easily track upcoming deadlines and follow your schedule without slipping up.

Keep in mind that you can also change your posting schedule based on which days you get the most engagement. For instance, you can conduct research to determine the times that your target audience is most active, then structure your posting schedule accordingly. 

When you first start out, it’s wise to keep a close eye on your analytics. The more frequently you publish new content, the easier it will be to track and monitor which posts perform the best. This will help you refine your content calendar and schedule. 

Step 6: Create a Style Guide

Another helpful asset for any blogger is a style guide. As the name implies, this is a set of guidelines that determines how posts on your blog should be written and formatted. It helps you ensure that your content has a uniform tone and look, which in turn makes your blog appear more professional and authoritative:

An example of a writing style guide.

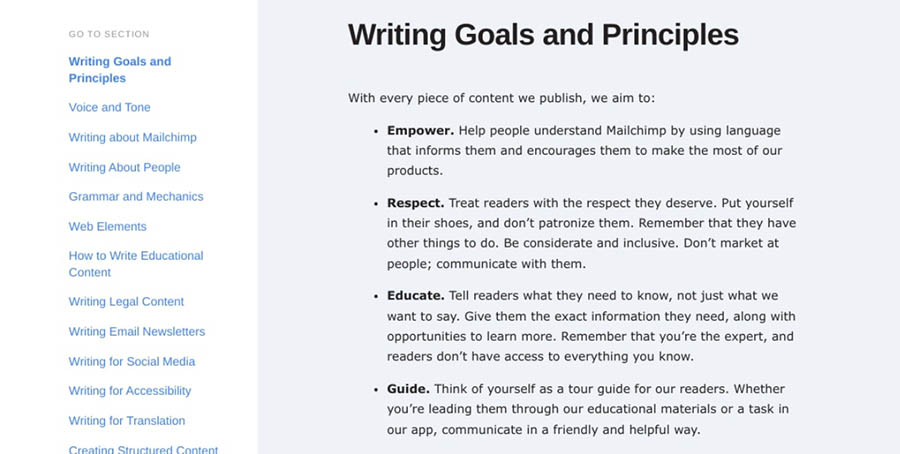
This style guide can help you maintain consistent branding and formatting across your blog posts. It can also be useful if you ever decide to bring on additional writers. They can refer to your guide to ensure that they follow the same practices.

Your style guide doesn’t need to be long or complicated. However, there are a few crucial elements to consider, including:

  • Voice and tone. Is your blog laid-back or serious? Is the writing casual or professional?
  • Language. For example, do you use British or American English?
  • Punctuation and formatting. Do you use en dashes or em dashes? When do you use single or double quotation marks?

You can answer a few key questions about your brand, then provide some examples of how you want your content to look. Some additional questions to ask yourself include:

  • What style of writing do you want to use? First person or third person? Active voice or passive voice?
  • What topics do you want to write about?
  • What kinds of posts do you want to publish? Interviews, roundups, listicles, how-tos, etc.
  • What format do you want your posts to be in? Long form or short form? Include images or not?
  • How frequently do you want to publish new content (daily, weekly, biweekly, monthly, etc.)?

Once you’ve answered these questions, you can start creating your style guide. Here are a few examples of what you might include:

  • Your blog’s mission statement
  • An overview of your target audience
  • A list of topics you want to write about
  • The tone and style you want to use in your writing
  • Guidelines for formatting your posts (e.g., headline style, image placement, etc.)
  • Any specific branding elements you want to use, like a certain color scheme or font

You can use an online tool like Canva to create your brand guide:

The Canva website

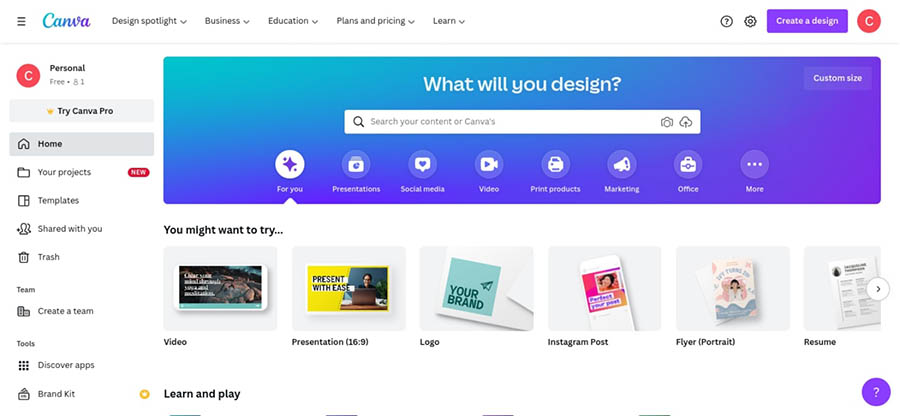
Canva is an online design tool that lets you choose from a variety of templates and customize the colors, fonts, and logo to match your brand. You can use Canva to create other marketing materials like business cards and flyers.

Naturally, a style guide will evolve as your blog grows and changes. As such, it’s best to think of it as a constant work-in-progress, rather than as unquestionable gospel.

Step 7: Market, Share, and Monetize Your Blog

Once you’ve published a few posts and settled into a groove of writing content, you might think you can relax. However, all your hard work thus far could effectively be for nothing if no one knows that your blog even exists.

This is why marketing your blog and posts is so critical. We’ve already discussed SEO, which is a key part of any online marketing strategy. Still, there are several other ways you can make sure you get more eyes on your new blog. Let’s take a look at some of them. 

Market and Share Your Posts

Naturally, you’ll want to start by sharing your posts on social media. This will help you gain more exposure while encouraging those in your network to share your content with their own followers.

It’s also smart to make your posts easy to share right from your website. One way to do this is by adding social media buttons to your posts, which you can do using the Jetpack plugin:

Social media share buttons on a blog post.

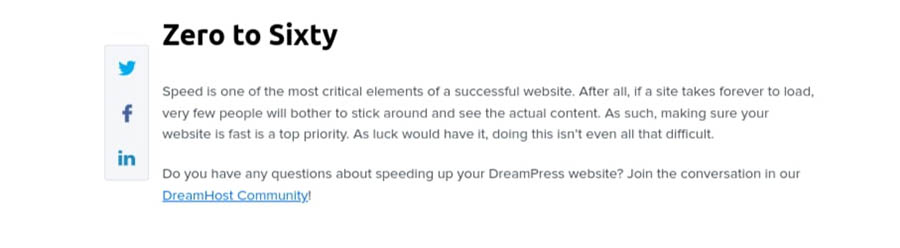
This plugin enables you to add social media sharing buttons to your posts and integrates with the most popular platforms. Jetpack also includes a feature that automatically shares your post on social media

If there are relevant groups or forums that discuss topics related to your blog post, you can share it there as well. This can help you generate more traffic and engagement.

Another strategy is to share your blog posts through your email newsletter. Email marketing can be a great way to keep your audience updated on your latest posts and drive more traffic to your site.

You might also consider partnering with other websites in your niche. If you have the opportunity to guest blog on another site, you can promote your blog post there as well. This can help you reach a new audience.

Another option to consider is paid advertising. This can help you get your post in front of more people and boost clicks and engagement. There are several options available, such as Google AdWords or Facebook Ads.

You’re likely wondering when you can expect to see results. There’s no easy answer to this question, as each blog is entirely different. It’s possible that you might see lots of traffic right away, which is more likely if you already have a strong online presence.

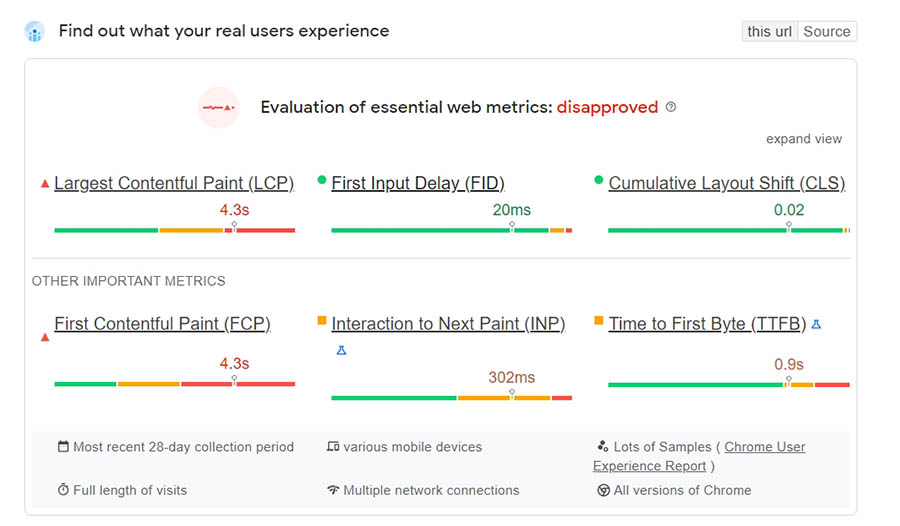
However, in most cases, it will take time for your blog to gain momentum. If you perform SEO, share your posts, and regularly publish high-quality content, you should see a gradual increase in readers. This is a sign that you’re on the right track. You can also keep a close eye on your site’s metrics with Google Analytics to see how well it’s performing.

Monetize Your Blog

Now let’s consider the options you have when it comes to monetizing your blog. After all, you’ve put a lot of work (and too much time) into creating your site, and you probably wouldn’t say no to making some money from your content. Let’s look at some effective ways to make money online

You can start by selling products and services alongside your posts. For instance, you could write and sell an e-book or produce a course on a relevant topic.

Selling premium or membership content can add value to your blog. It can also help you generate more revenue from dedicated readers. 

You could also get into affiliate marketing. This is a type of online marketing in which bloggers promote the products or services of another company in exchange for a commission on any sales made through affiliate links. 

Affiliate marketing can help you generate income by promoting products or services that you love. Additionally, it can provide a way for you to build relationships with other companies and connect with their audiences.

Another option is crowdfunding. You can ask your loyal readers to donate directly, which eliminates the need to market any external products.

There are a handful of donation plugins that you can use, such as GiveWP:

The GiveWP WordPress plugin for accepting donations

This free tool lets you easily add a donation button to your blog. You can use it to accept online payments and create customizable donation forms. 

You can also implement advertisements on your site in the form of links and banners. A popular and easy solution for doing this is Google AdSense. This automatically generates ads that are suitable for your blog and audience, so you can focus entirely on creating great content.

Start Writing Content and Earning Money

That’s it – you’re now ready to start blogging! You can write about topics that you’re passionate about, and monetize your content to make some money.

As we discussed in this post, you can start a blog in just a few simple steps. Once you choose a blogging platform such as WordPress and register your domain and hosting, you can customize your blog, optimize your content, and publish your first post. 

Are you looking to create a professional blog? Check out our DreamHost Shared Hosting plans to learn how you can register your domain and install WordPress in just a few simple clicks!

Power Your Blog with DreamHost

We make sure your blog is fast, secure and always up so your visitors trust you. Plans start at $1.99/mo.

The post How to Start a Blog in 7 Easy Steps appeared first on Website Guides, Tips & Knowledge.


source https://www.dreamhost.com/blog/how-to-start-a-blog-2/

Creating and Mastering GA4 Explorations

In the switch from Universal Analytics (UA) to Google Analytics 4 (GA4) — which will go fully into effect July 2023 — a lot of things have...