Google uses a handful of ranking signals to measure and assess websites. Among the most recent and important Page Experience scores are Core Web Vitals. If you’re not optimizing your site for these metrics, you might be hurting your Search Engine Optimization (SEO) and overall User Experience (UX).
The good news is that once you understand what Core Web Vitals are and how to measure them, you can take active measures to improve them. This can help ensure you’re providing a solid experience for your users and meeting Google’s standards to increase search engine visibility.
Related: How to Improve SEO Rankings
In this post, we’ll introduce you to Google’s Core Web Vitals, explaining why they’re important and how they work. Then, we’ll show you eight ways you can improve them. Let’s jump in!
An Introduction to Core Web Vitals
Google Core Web Vitals are a set of key performance indicators that Google uses to measure the health and vitality of websites:

They are page experience signals used to assess your website’s experience, including how fast users can interact with it. For example, site speed is important because a slow-loading page can lower engagement rates and higher bounce rates.
This can harm your website’s ranking in search results and the overall success of your business. The same is true if the page is difficult to navigate.
Why Core Web Vitals Are Important
Core Web Vitals can help improve your search results. They are important because they help Google understand how well a website is performing and identify areas where it can improve.
More specifically, these metrics consider:
- Loading
- Interactivity
- Visual stability
These are just a few factors that Google considers in its algorithms to measure the health of a website. It also considers mobile-friendliness. This is important because more people are using their mobile devices to access the web. If your website isn’t mobile-friendly, you could be losing out on a lot of traffic and business.
Another key aspect is website security, which helps you protect your site from online threats such as malware and hacking. It helps safeguard both your site content and the data of your users.
By ensuring that your website meets these standards, you can help boost its performance and rank higher in search results. In other words, prioritizing and optimizing Core Web Vitals can help enhance your user experience and SEO. Win-win!
How Core Web Vitals Work
Core Web Vitals are a subset of factors belonging to Google’s Page Experience score; a ranking signal rolled out in 2021. Let’s take a closer look at the three specific measurements that make up Core Web Vitals:
- Largest Contentful Paint (LCP). This considers how long it takes for your main content to appear to visitors. It measures how quickly the largest elements, such as your images and videos take to load.
- First Input Delay (FID). This metric analyzes the time it takes for a user’s browser to begin processing event handlers in response to their interaction. In other words, it measures the responsiveness of your web pages when users interact with them for the first time.
- Cumulative Layout Shift (CLS). This measures how long it takes for your web page to become visually stable. Not all of your site elements load at the same time, and some may move during the loading process. CLS assesses whether there are any elements on the screen that would interrupt or prevent visitors from consuming the content.
A fourth, less-talked-about Vital is First Contentful Paint (FCP). This measures the amount of time it takes for the browser to render the first piece of content (such as an image) on a web page.
How to Measure Core Web Vitals
Before you start working on improving your Core Web Vitals scores, it’s smart to get an idea of where your site currently stands. This way, you’ll be able to measure your progress. Regularly assessing your scores can be a valuable part of your website maintenance.
Let’s look at a few different ways to measure your website’s performance.
PageSpeed Insights
There are a handful of online tools you can use to measure Core Web Vitals, including Pingdom and GTmetrix. However, we recommend using Google PageSpeed Insights:
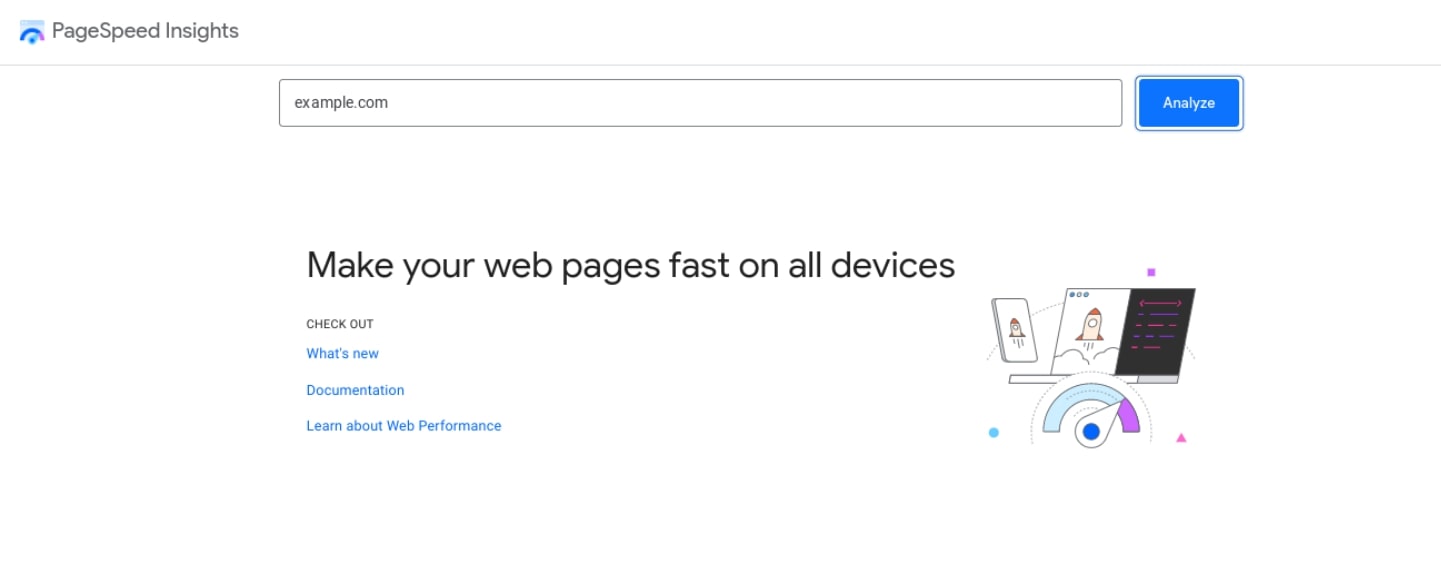
To get started, you can enter the URL of your website, then click on the Analyze button. When it’s done analyzing your site, the free tool will grade your site’s overall performance. Then it will provide a summary of some of the key data and Core Web Vitals metrics:
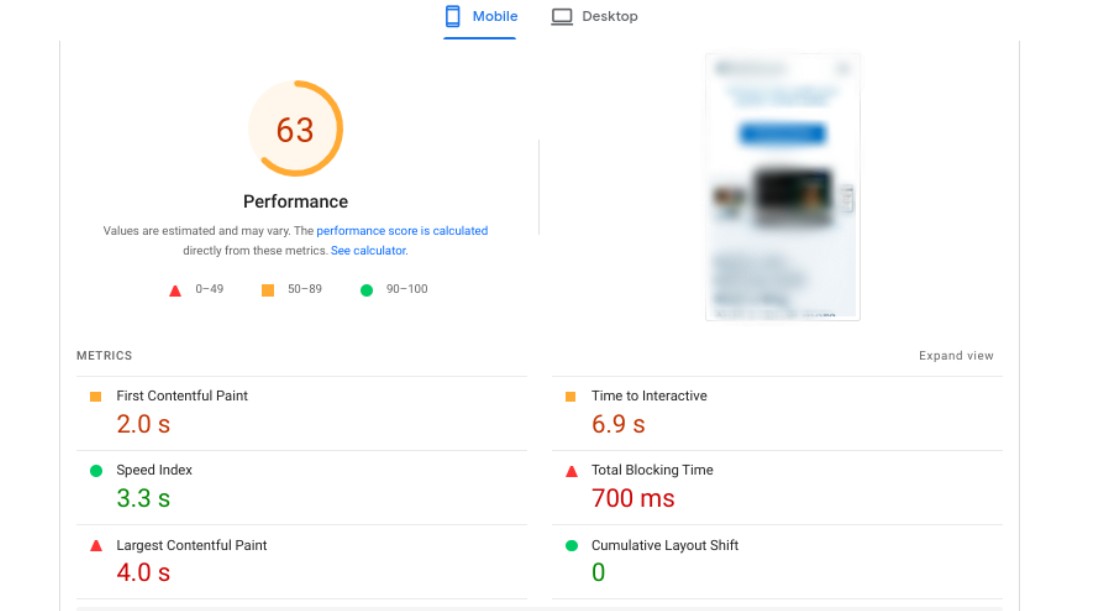
You can find the results under the Metrics section. As a general rule of thumb, you’ll want to aim for the following scores:
- LCP: 2.5 seconds
- FID: Less than 100 milliseconds
- CLS: Less than 0.1 second
Note that you can test both the mobile and desktop version of your website. PageSpeed Insights also lets you analyze individual pages on your site. To do so, you can select the Origin tab.
On the results page, you’ll also find some diagnostics and suggestions for improvements. Based on the score of your site, PageSpeed Insights will provide a handful of recommendations that you can use to increase your score and improve your site’s performance.
Chrome User Experience Report
You can also access your Core Web Vitals through your Chrome User Experience Report. This can be particularly helpful for developers and webmasters.
This report is available through Google Search Console, and provides real data and insights from your visitors. It helps you understand how your users use the web and interact with your site.
To view it, you’ll need to head to your Google Search Console dashboard. Then, navigate to Core Web Vitals, which is located under the Experience section.
Core Web Vitals Chrome Extension
If you’re a Google Chrome user, another helpful tool you can use to assess your Core Web Vitals is the Web Vitals Chrome extension:

The Web Vitals Chrome extension is a tool that helps you analyze the speed and performance of your website. It provides information on how well your website is performing, including page load time, page size, and requests made. It also offers suggestions on how to improve your website’s performance.
You can use it to test the speed and performance of any website, not just your own. To do this, simply install the extension and open the website you want to test. The extension will automatically start tracking the website’s performance. It will provide results in the form of an easy-to-read report:
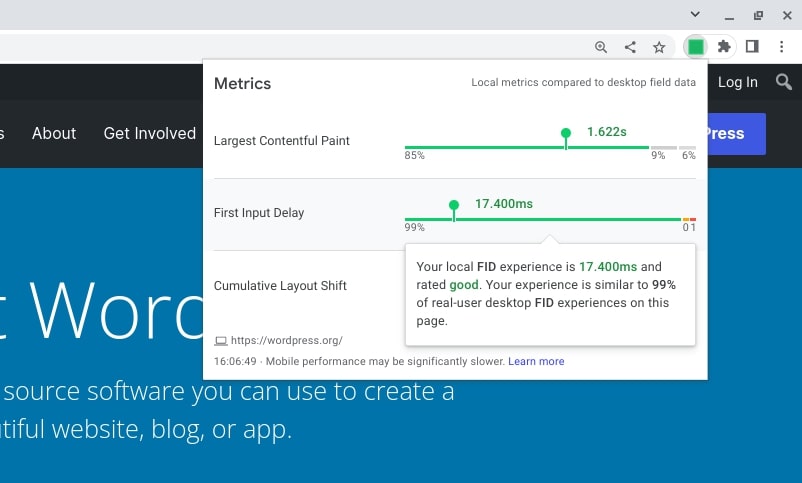
Within the audit, you’ll be able to automatically view the LCP, CLS, and FID scores. This can be useful if you plan on checking these scores often, as you can execute it without opening another tab.
Skip the line and get tips right in your inbox
Click below to sign up for more how-to's and tutorials just like this one, delivered to your inbox.

How to Improve Core Web Vitals (8 Ways)
Now that we understand what Core Web Vitals are and how they work, it’s time to look at some best practices. Keep in mind that the specific actions you’ll need to take to improve your scores will depend on the results of your test. Therefore, it’s important to also consider the suggestions and recommendations provided by PageSpeed Insights (or other testing tools that you use).
Here are a few effective ways to improve your Core Web Vitals scores.
1. Implement a Caching Solution
Caching your content can help reduce the load on your server. A caching tool stores static HTML versions of your pages, eliminating the need for them to be loaded every time a visitor accesses your site.
Depending on your web host, you may be able to leverage caching on the server level. For example, at DreamHost, we offer server-side caching on some WordPress plans.
However, as a WordPress user, there are also a handful of caching plugins to choose from. One of the most popular options is W3 Total Cache:

This free WordPress plugin can reduce page load times on your website to boost its performance. It offers caching of pages and posts, CSS and JavaScript, database objects, and much more.
Some additional free plugin options include:
If you’re looking for an all-in-one, powerful caching tool, you might consider WP Rocket:

Implementing a premium caching solution can be particularly helpful for improving your FID score. For example, WP Rocket comes with a feature that lets you easily optimize file delivery. It also includes a handful of other features that can help boost Core Web Vitals scores, which we’ll look at in the following sections.
Related: How to Improve SEO Rankings
2. Eliminate Render-Blocking Resources
Render-blocking elements refer to the static HTML, CSS, and JavaScript files needed to render a page on your site. Each of these files contains scripts that can prevent your users from viewing content. Typically, they’re created from third-party plugins and tools such as Google Analytics.
However, one way you can avoid these scripts from hurting your UX (and in turn, help improve Core Web Vitals) is to eliminate render-blocking resources and minify and remove any unused CSS or scripts.
There are multiple techniques you can use to go about this. One is to minify your JavaScript and CSS by eliminating any white spaces or unnecessary comments.
You can use a tool such as CSS Minifier to make this easier:
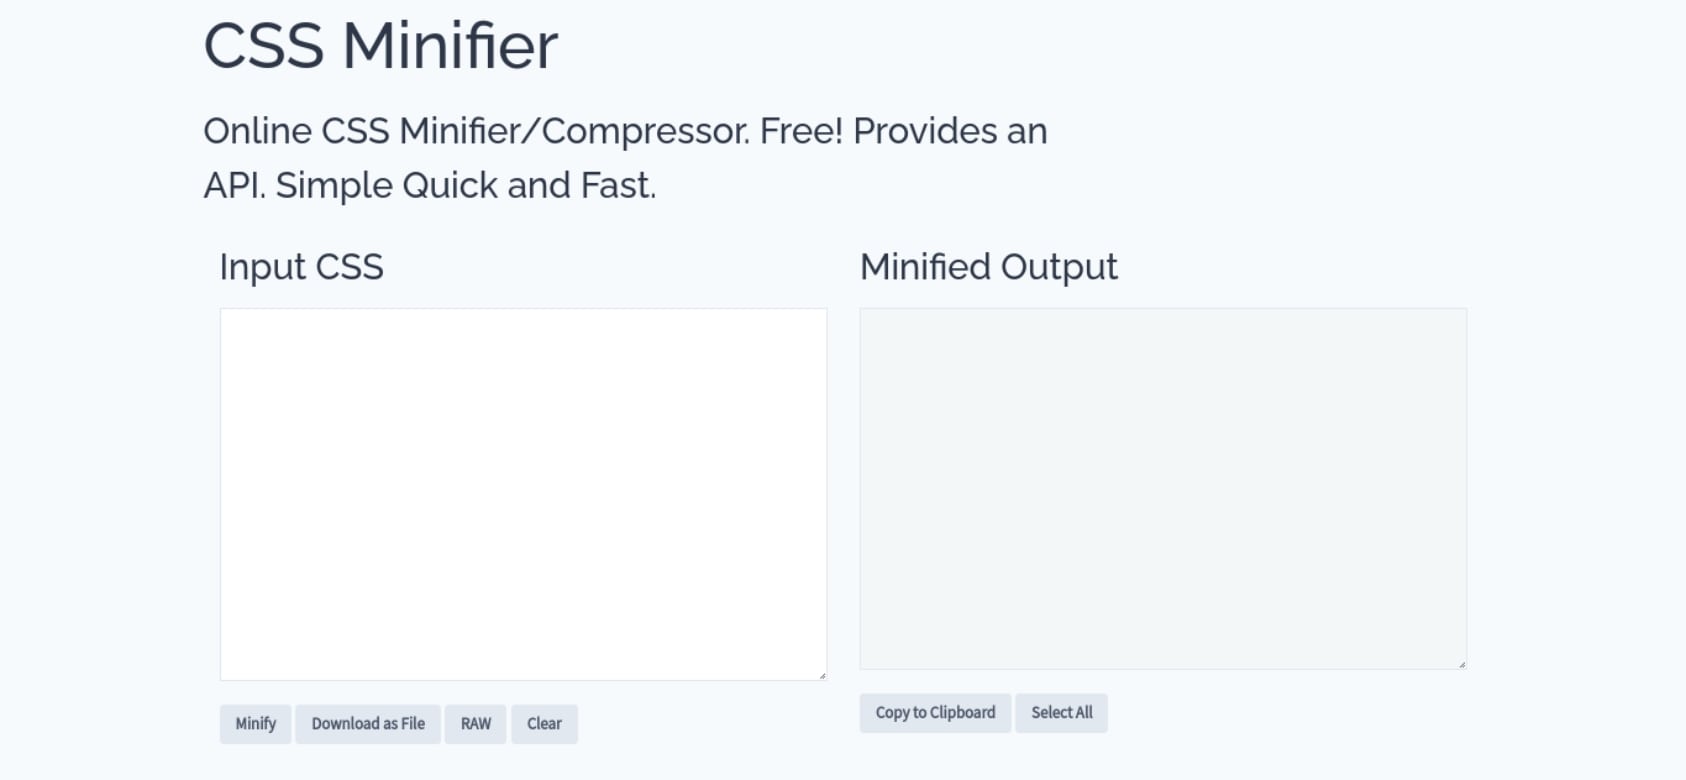
The tool is free to use. You can simply input your CSS and select the Minify button. Then, you can copy and paste the output to download and replace your code.
Another method is to condense your JavaScript and CSS by combining the files. This is another task that the file optimization feature in WP Rocket can help with.
3. Defer Loading of JavaScript
If you’re looking to boost your FID scores, you can use the technique known as deferring the loading of JavaScript. This is another way to eliminate render-blocking elements.
This process makes your web pages load faster because it delays the loading of JavaScript. In other words, it loads other content on the page once a visitor arrives, rather than waiting for all JavaScript files to finish loading. Your files will be forced to wait to load until everything else on your web page is ready.
Also, you can configure your site settings so that the critical CSS loads ‘above the fold content’ more quickly. ‘Above the fold’ refers to the elements on the web page that appear first.
You can do this by taking the content out of the main CSS file and inlining it into your code. This will help it load faster, thereby improving the UX. Some caching plugins like WP Rocket offer an Optimize CSS Delivery feature that can be helpful for this.
4. Use a Content Delivery Network
A Content Delivery Network (CDN) is a network of servers across the globe that you can use to store your content. This means that your visitors will be served your site content from servers that are in closest proximity to them. This can further help speed up loading times.
Using a CDN can speed up LCP times for your users. It can also help minimize the Time to First Byte (TTFB).
There are several third-party tools that you can leverage for your WordPress site. One of the most popular options is Cloudflare:
As with caching, some hosting providers offer CDN solutions with their plans. We recommend checking with your web host to evaluate which offerings (if any) come integrated with their plans before implementing one on your own.
5. Properly Size and Optimize Images
Another way to boost LCP scores is to optimize and compress your images to reduce file size. You can do this using a tool such as TinyPNG:

Image compression tools let you significantly reduce the file size without having to worry about a loss of quality. Additional image optimization plugins to consider using include:
You can also optimize your images by ensuring that they are the appropriate sizes and dimensions. When you upload images from the WordPress editor, the Content Management System (CMS) automatically assigns dimensions for you.
However, if you manually add images via code, it’s important to make sure that you’re defining the dimensions to specify room for these elements. The larger the images, the bigger the file size.
Therefore, it’s smart to ensure that you’re not using unnecessary image dimensions for certain areas on your site. Adding the right attributes can help your browser allocate the appropriate amount of space for your page elements, which can help minimize layout shifts.
You can adjust the image and videos’ width and height size attributes on your website by editing the code. To view these attributes, you can right-click on the image from the front end of your site, then select Inspect. This will bring up the Developer Tools panel. Here, you can see whether the proper sizes are assigned.
Related: Common WordPress Image Upload Issues
6. Implement Lazy Loading
We also recommend that you implement lazy loading. This helps ensure that your images will load exactly when users get to that section of the web page, rather than loading at the same time as everything else on the page.
Lazy loading images can help improve your LCP and loading speed. Many WordPress image optimization plugins, such as Smush, come with lazy loading features built-in.
7. Optimize Your Website Fonts
As with images, the fonts you use on your website can also influence its loading times. This is because they require the browser to download and load the font family, including each variation of its weight combinations.
Optimizing your web fonts can help improve your website’s performance. This is because optimized web fonts are smaller in file size and delivered more quickly.
Also, a browser may not automatically render text elements if the web font associated with it hasn’t loaded yet. On the other hand, using fallback fonts may cause layout shifts, hurting your CLS score.
We recommend being selective in which fonts you choose to use on your site. If you’re using more than two fonts, it’s smart to remove them from the specific elements and use global fonts to only apply the needed types and weights. This will ensure that only the fonts you need for the text are downloaded.
8. Upgrade Your WordPress Hosting
If your site is particularly slow to load, it may indicate that it’s time to upgrade your web hosting. For example, switching from shared hosting to a dedicated server can be an excellent way to improve your LCP.
Your WordPress hosting provider plays a pivotal role in your site’s performance. It affects everything from page speed to security. Therefore, it’s not an area we recommend skimping on, especially if you have a large or complex website. On the contrary, upgrading your hosting provider or plan is one of the quickest yet most powerful ways to optimize your website and improve loading times.
We suggest choosing a managed host that has servers optimized specifically for WordPress and can handle many technical aspects of site performance. For example, at DreamHost, we offer DreamPress plans that are aimed at WordPress site owners looking to get a high-performance site without breaking the bank.
Enhance the User Experience, Reap the Rewards
Continuously improving your user experience is an essential part of maintaining a successful website. And with the help of handy tools and plugins available today, this work can be a lot easier than it would traditionally be.
However, if you need a bit more developer power, our team here at DreamHost has the expertise you need to ensure your Core Web Vitals improvements and other development projects are done right.
You Dream It, We Code It
Tap into 20+ years of coding expertise when you sign up for Web Development services. Just let us know what you want, and we’ll code it. Core Web Vitals and all.

The post How to Improve Core Web Vitals (8 Ways) appeared first on Website Guides, Tips & Knowledge.
source https://www.dreamhost.com/blog/improve-core-web-vitals/
No comments:
Post a Comment