Monday, 28 February 2022

How to Create a Website for Free

When creating your first website, it can be difficult to find an option that fits your budget. If you’re a blogger or a small business owner, you might want to avoid the monthly fees from custom domain names, hosting plans, and fancy website builders.

Fortunately, it’s possible to build a website for free (or on a very limited budget). Accessible and user-friendly software such as WordPress.com and Google Sites can help you get a functional site up and running while avoiding unwanted costs.

In this post, we’ll discuss why you might consider creating a free or low-cost website. Then we’ll show you three different methods you can use. Let’s get started!

Is the Free Website Option Right for You?

Building a website can be an important first step in growing your online presence. Whether you want to reach new customers or simply start a blog, you can fully customize a website to suit your specific needs.

Here’s what any website can do for you:

  • Grow your audience
  • Establish your authority
  • Create a community
  • Provide a place to sell products and services
  • Increase your revenue

Before you get started, it’s important to know about the typical start-up costs to create a website. You’ll usually need to pay for domain name registration and a web hosting plan to get your site online.

However, it’s also possible to build a website for free. With a free website, you can:

  • Save costs by avoiding monthly and yearly fees
  • Quickly establish an online presence
  • Avoid the need for coding skills or advanced technical knowledge

Of course, free website builders do come with some limitations as well. For example, you’ll likely have limited control and customization options when you build a free website. This is fine if you want to create something very small, but you run the risk of your site looking generic.

free website

Hosting with free website builder tools does come with some downsides. For example, you may not have much control over page loading speeds. Also, you likely won’t be able to use a unique, professional domain name and instead need to opt for a subdomain (e.g., yourbusiness.freesite.com).

That said, if you need something straightforward, a free website builder might still be a good option for you.

Let’s dig in a bit further.

3 Methods for Creating a Free or Low-Cost Website in 2022

Method 1: Google Sites (Free)

Google Sites is a free website builder developed by Google. By simply signing in to Google Workspace, anyone can access this tool. It offers easy-to-use customization features that allow you to build a simple website without any coding experience.

free Google website

One of the main benefits of Google Sites is that you can easily integrate other Google services into your website. For example, if you need to add a calendar, you can simply embed your Google Calendar.

You might want to consider using Google Sites if you’re creating a simple personal blog or a static website. Google Sites could also be the best option for featuring a small, temporary project.

Unfortunately, Google Sites has limited customization options. Since it is a free service, there are few themes available for personalizing your site’s appearance.

Step 1: Create a New Site

To create a free website with Google Sites, navigate to the home page and sign in to your Google account. You’ll need to create a new account if you don’t already have one.

When you access the Google Sites home page, there will be an option to Start a new site:

create a free Google website with Google Sites

You can either begin with a blank site or use one of Google’s pre-designed templates. If you click on Template Gallery, you can view templates for personal, small business, and work use:

create a free website

Choose the template that suits your needs. Once you’ve selected one, the program will automatically create a new site. In the top-left corner, you can give your website a name.

Step 2: Pick a Theme

Now it’s time to choose your website’s theme. Themes are pre-designed styles you can use to determine your site’s overall look and layout. To see your options, navigate to the right-hand side of the customizer and click on Themes:

create a free website

There, you’ll find a variety of free themes to choose from. Simply click on one to apply it to your website. After you do that, you’ll see an option to customize your theme’s colors and font style:

free website builder

You can pick from the available color options or use the custom color picker.

Step 3: Customize Your Content

Finally, you can change how your website looks by adding a unique title, a banner, and some content. When you click on the area you want to edit, you’ll see various options for changing text, headers, and images:

create a free website

You can also add pages, such as an about section, contact page, or blog. To create a new page, navigate to Pages, click on the + icon at the bottom, and give your page a title.

create a free website

When you’re ready to add content, go to the side menu and find Insert. There, you can add text boxes, images, or content from your Google Drive. You can choose from the pre-designed layouts to organize a cohesive page:

create a website with Google Sites

At the bottom of the page, you’ll see options to embed content from other Google apps:

For example, clicking on Calendar will connect your Google Calendar to your website. You can follow this process to insert documents, maps, and other unique visuals.

Method 2: WordPress.com (Free or Low-Cost)

WordPress.com is one of the most popular site-building platforms. Many people choose to use this platform because it comes with built-in managed hosting. With WordPress.com, you can build a functional website without worrying about any of the technical aspects.

Here are some of the other benefits to using WordPress.com:

  • Easy to use and maintain
  • Beginner-friendly
  • Free and secure
  • Scalable

Although WordPress.com started as a blogging platform, you can now use it to create online stores, promote your business, or showcase a personal portfolio. Ultimately, you should consider this option if you’re looking for extra features, security, and support without having to purchase hosting.

WordPress.com doesn’t cost anything to use, but the free plan only offers up to 3GB of storage space. If you’re planning to feature many photos and videos on your website, you might have to purchase a subscription.

Additionally, WordPress.com places advertisements on your website. You won’t be able to control this content or where it’s placed. As with Google Sites, you’ll also need to pay extra if you want a custom domain name.

Step 1: Create an Account

If you choose WordPress.com to build your site, navigate to the home page and click on Start your website. Then enter your email, username, and password:

create a free WordPress website

Next, you’ll be prompted to choose a domain name. You can purchase a domain, which typically costs around $10 per year. However, you can avoid this fee by clicking on start with a free site.

If you choose that option, “wordpress” will be in your URL. Your site’s domain will look something like this: mysite.wordpress.com.

Step 2: Pick a Theme

When you choose a website theme, it’s important to find one that maximizes functionality and aligns with your target audience. Fortunately, WordPress.com has many pre-designed themes to choose from.

To find a theme, go to your website’s dashboard. Then navigate to Appearance > Themes. Next to the search bar, click on Free to only view no-cost themes:

free wordpress website

When you find a theme you like, click on it and select Activate this design. Then hit the Activate button on the following popup.

WordPress also offers options to customize your theme. To find this tool, go to Appearance > Customize:

create a free website

The options you find here will depend on your chosen theme. You may be able to add a background image, alter fonts, change the color scheme, and so on.

Step 3: Add Content to Your Website

Finally, you’ll want to add some content to your website. By going to Pages > Add New, you can add new sections. You might want to create an About page, a Contact page, a page for your blog posts, and so on:

create a web page

If you’re building a blog, you can navigate to Posts > Add New. There, you can start creating insightful content to build a dedicated audience:

free WordPress website

For your first blog post, it’s best to keep your ideal visitors in mind. You can also insert images and write short paragraphs to keep readers engaged. Finally, consider using SEO tools to make it more likely your content will rank highly in search engines.

When a new page or post is ready, hit Publish. It will then be live for visitors to see!

Skip the line and get tips right in your inbox

Click below to sign up for more how-to's and tutorials just like this one, delivered to your inbox.

marketing tips

Method 3: Self-Hosted WordPress (Low Cost)

There are actually two versions of the WordPress platform: WordPress.com and WordPress.org. As we’ve seen, WordPress.com is a simple hosted website builder. WordPres.org or ‘self-hosted WordPress’ refers to the open-source platform that you can download and use to build any type of website you like.

WordPress.org offers many advanced features and resources. Especially for business owners who need a functional online store or a site with complex functionality, free website builders such as WordPress.com might not provide enough customization or security.

To solve this problem, we’d recommend creating a website with WordPress.org. This option won’t be completely free, as you’ll need to purchase a domain and a hosting plan. However, it can still be very cost-effective, and it’s an excellent way to achieve better security and performance on a budget.

Step 1: Choose a Hosting Plan

To get started, you’ll need a hosting plan. There are many options out there, some of which are quite expensive. Fortunately, shared hosting plans are very affordable and should give you everything you need to get a starter website up and running.

Here at DreamHost, we offer shared hosting starting at just $1.99 per month:

cheap website hosting

When you choose this plan, you get access to one-click WordPress installation, a free domain, and fast loading speeds. Plus, thanks to automated backups and free privacy protection, you can make sure your website is secure.

Once you choose a hosting plan, you’ll need to register your site’s domain. In the search bar, enter your domain followed by the TLD (the extension at the end, such as .com or .org):

register a domain name

If your chosen domain is available, you can add it to your cart. If it’s already taken, you’ll see a list of alternative options you can pick from.

Then you can complete the checkout process. When they’re presented, be sure to check the Pre-Install WordPress and WP Website Builder options.

Step 2: Access WP Website Builder and Choose a Theme

After you’ve purchased a DreamHost plan, you can access the WP Website Builder. This handy tool comes with over 200 starter sites that you can use as a foundation for your website. Even without coding experience, you can create your own unique-looking website in minutes:

how to create a website for free

To access your WordPress site and WP Website Builder, check your email for login information. Then log in to the WP Website Builder setup wizard. There, you can choose from the available WordPress themes.

Step 3: Customize Your WordPress Website

After selecting a theme, you can continue to customize your website as needed. If you don’t like your theme’s default look or layout, you can navigate to Appearance > Customize and edit its details.

One of the many benefits of using WordPress is the ability to install plugins. You can find thousands of free plugins – extensions that add new features and functionality to your site.

To see what’s available, go to Plugins > Add New. On this page, you can look through the list of popular plugins or search for a specific solution you need:

free WordPress plugins

After that, you can also add new pages and content to make your website unique. For example, creating an About page can be a great way to make sure visitors remember and return to your site.

Get Started On Your New Website Today

Although creating a website is an important step in building an online presence, it can be expensive. Fortunately, you can avoid high monthly costs by using a free or low-cost platform.

To review, here are three methods you can use to set up a free or low-cost website:

  1. Google Sites: This simple, easy-to-use website builder can be perfect for creating static personal websites.
  2. WordPress.com: This is one of the most popular website builders and is great for small blogs and portfolios.
  3. Self-Hosted WordPress: If you’re willing to invest in a low-cost hosting plan, you can build your site with the software available from WordPress.org, which offers far more customization and control.

Sometimes, free website builders don’t offer enough features or security. At DreamHost, our shared hosting plans offer an affordable step up. They come with a free WP Website Builder for fast and cost-effective website creation. Your website can have automatic backups, free privacy protection, and unlimited bandwidth.

Low-Cost Shared Hosting, Accessible to Everyone

We make sure your website is fast, secure and always running. Plans start at $1.99/mo.

shared hosting

The post How to Create a Website for Free appeared first on Website Guides, Tips & Knowledge.


source https://www.dreamhost.com/blog/create-website-for-free/

Thursday, 24 February 2022

How to Fix the 503 Error in WordPress

Server errors can be incredibly frustrating, primarily because it isn’t always clear what’s causing the problem or how you can fix it. The 503 Service Unavailable Error generally means that your server has run out of resources. However, why this is occurring may vary.

For the most part, a 503 Service Unavailable Error happens because WordPress uses too much memory or because your hosting service is experiencing unanticipated issues. As such, the problem can be resolved by either reducing the amount of memory your site is using or upgrading the resources available on your hosting account.

This article will look at the 503 Service Unavailable Error, why it occurs, and what problems it can cause. Then we’ll walk through how to troubleshoot and fix it. Let’s get started!

What Causes the 503 Service Unavailable Error in WordPress

It’s important to note that this isn’t a WordPress-specific error. It may occur before WordPress has even had the opportunity to start running.

A 503 Service Unavailable Error typically means your web server ran out of the resources it needs to display your website. This can be frustrating because the error message is extremely vague and doesn’t convey the source of the issue.

Like an application on your computer, a website requires a certain amount of resources to run. For example, it needs memory, processing power, and hard drive space. This is true no matter what type of hosting you have.

With that in mind, here are some common causes of this error:

  • Your WordPress site is consuming an unusual amount of resources because a plugin or theme may be operating incorrectly. This is because each plugin that you run demands additional resources.
  • You’re experiencing unusually high volumes of dynamic traffic on your website. If many people are visiting your site at once, your resources are being consumed much faster than they ordinarily would be. The good news is that you can avoid slow loading times and prepare yourself for higher traffic levels in advance.
  • Your web server could be experiencing difficulties of its own. If your web hosting service recently upgraded its software, for instance, your site might not be properly configured or optimized. As a result, your web host might need to restart one or more server processes before you are able to see performance improvements.

Regardless of the root cause, the 503 Service Unavailable Error is not something that you can ignore. Unless it’s a host-level problem, the error won’t resolve itself, and it will likely create significant issues for your site and visitors.

Why the 503 Service Unavailable Error Can Cause Problems for Your Site

When a server-side issue like a 503 Service Unavailable Error pops up, it can be hard to know what you’re dealing with. Every circumstance is different. For example, sometimes, the site might work intermittently. On other occasions, specific pages may go down (the most resource-intensive ones), or your site may stop working entirely for a longer period.

Here are a few problems that a 503 error may cause for your business:

  • Your visitors will not be able to view your site.
  • Search engines won’t be able to read (and therefore rank) your site.
  • Your site’s utilities (such as security scanning) won’t run properly or at their scheduled times.

Overall, a 503 Service Unavailable Error makes it difficult for both you and your visitors to use your site. Fortunately, it’s an error that can be easy to fix.

How to Fix the 503 Service Unavailable Error in WordPress (4 Methods)

The harsh reality is that all sites will go down occasionally, if only for maintenance. Therefore, it is suggested that you check with your hosting service for any known downtime reports or maintenance windows before you start troubleshooting any 503 Service Unavailable Errors that you may be seeing.

Your web host’s servers may be down due to a planned service outage or an unplanned emergency. In that situation, all you’ll need to do is wait until your server is back up and properly configured. Then, if the server begins working again and your site is still down, you can attempt to manually reboot your service to see if that resolves the issue.

Should that not work, you may need to start troubleshooting yourself. Here are some useful strategies you can try.

1. Turn Off Your Plugins

All plugins modify the way that a WordPress site works. Some of them only affect a few elements of a single page, while other plugins dramatically alter your entire site’s functionality.

When it comes to plugins, you might be facing one of two problems. First, you may have recently installed a new plugin that utilizes too many of your server’s resources. Alternatively, you could have too many plugins running overall, and the newest plugin just so happens to be the one that has tipped the scales.

The bottom line is if you’ve recently installed a new plugin, you may need to deactivate it. To do this, you can go to your WordPress dashboard.

WordPress plugins page

Go to Plugins > Installed Plugins. Then click on Deactivate next to the plugins that you suspect may have caused the issue. After that, try checking your site again to see if that has cleared the 503 error.

Of course, there’s a good chance that you might not be able to log in to your WordPress admin area because of the 503 error. If that’s the case, you’ll need to try an alternative method.

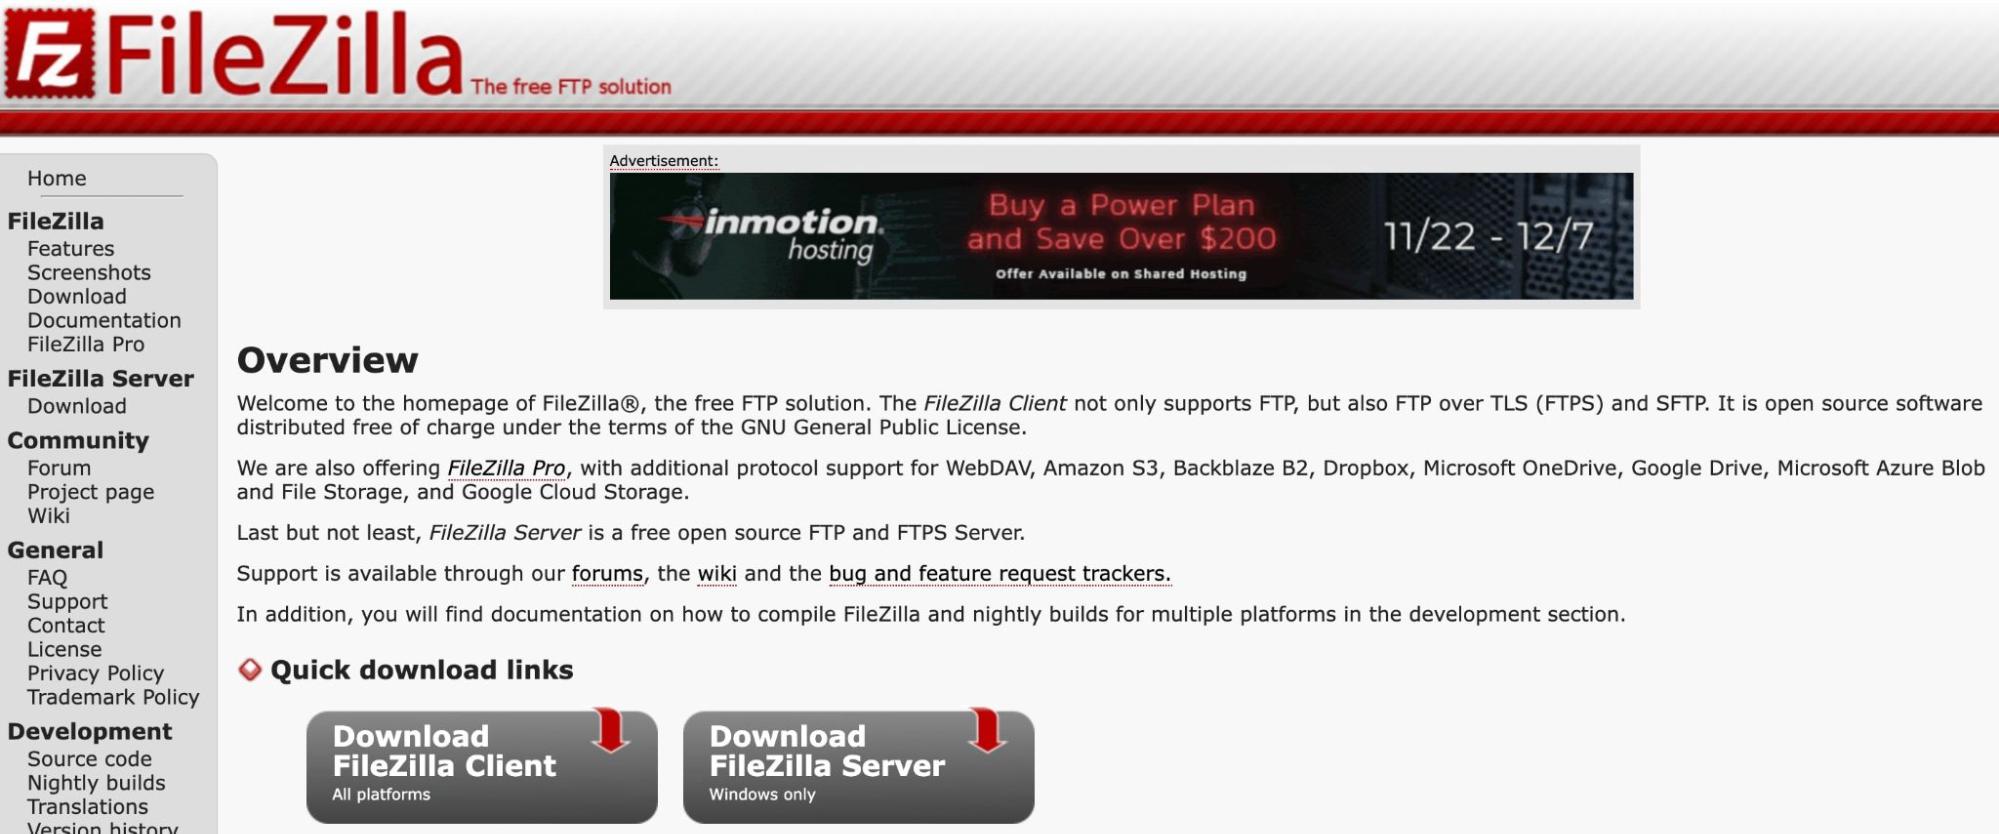
What you’ll need to do is access your site via Secure File Transfer Protocol (SFTP). First, download and open an SFTP program such as FileZilla.

Filezilla

Next, connect to your WordPress site using your hosting service’s login information:

FileZilla FTP Connection

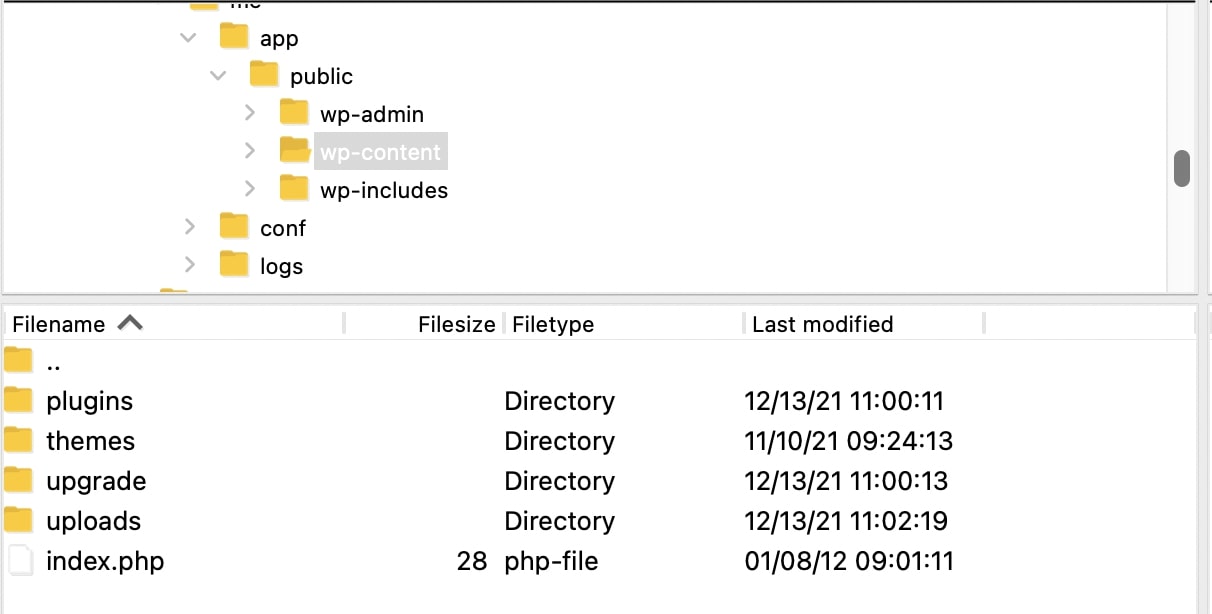
Then, click on the wp-content directory, and find the plugins folder.

FileZilla

Rather than outright deleting the plugins, it is suggested that you try renaming the directory itself. Finally, refresh your site to see if doing all of this has made a difference.

If removing or renaming your plugins doesn’t change anything, they probably aren’t what is causing this issue. You will need to activate your plugins through the WordPress admin page or by renaming the directory back to ‘plugins’ in your SFTP client.

It is important to note that regardless of the outcome of these tests, you should always take care when managing your plugins. Ideally, you should only have as many as you strictly need.

Unfortunately, a large number of third-party themes will come with a number of plugins to support both their design and functionality. You should be mindful of this when choosing a new look for your site.

Common culprits of the 503 Service Unavailable Error are high-resource plugins for security and malware protection. These tend to use a ton of resources because they are constantly scanning the files on your server. However, that doesn’t mean they aren’t important. On the contrary, they are often quite essential.

2. Change Your Theme

If you’re still experiencing issues with your site, your theme may be at fault, as it radically changes the way your site functions. Themes are often powerful enough to turn a plain blogging site into a full-blown news magazine.

Since a theme can make such dramatic changes to how a website functions, it can also greatly increase the site’s resource consumption. To determine whether your theme is what’s causing the error, you can revert back to a default core WordPress theme, such as Twenty Twenty-Two.

WordPress Twenty Twemty-Two theme

WordPress releases a new default theme almost every year. These themes tend to be a stripped-down design that showcases current WordPress features. They also end up being less resource-intensive than most other themes.

To change your theme to one of these options, navigate to the WordPress dashboard. Then go into Appearance > Themes to select and activate your preferred theme.

If you no longer get the 503 error after completing this test, then you’ve discovered the problem. Third-party themes can consume too many resources because of custom code or recent updates that weren’t properly configured. You can resolve this issue by permanently switching your theme.

As with plugins, you can also remove a WordPress theme through SFTP if you can’t access your dashboard. You will simply need to navigate to the /[domain]/wp-content/themes directory and delete the theme you want to remove. You can also rename the theme if you wish to save it for later.

3. Reinstall WordPress

If turning off your plugins and resetting your theme doesn’t work, you may need to reinstall WordPress. Typically, you will only need to resort to this option if a file in WordPress core has become modified (which it should never be) or corrupted.

If this is the case, you don’t have to worry about losing your data. WordPress stores your uploaded files on the server, and the rest of your information is safely housed in your site’s database. Therefore, you can reinstall WordPress core files specifically to try and resolve your issue.

Still, you may want to back up your files with your host before making any major changes. Every hosting service has its own backup tools. You’ll want to create a current backup or snapshot of your hosting account that you can restore later to ensure that you don’t lose any of your content or images.

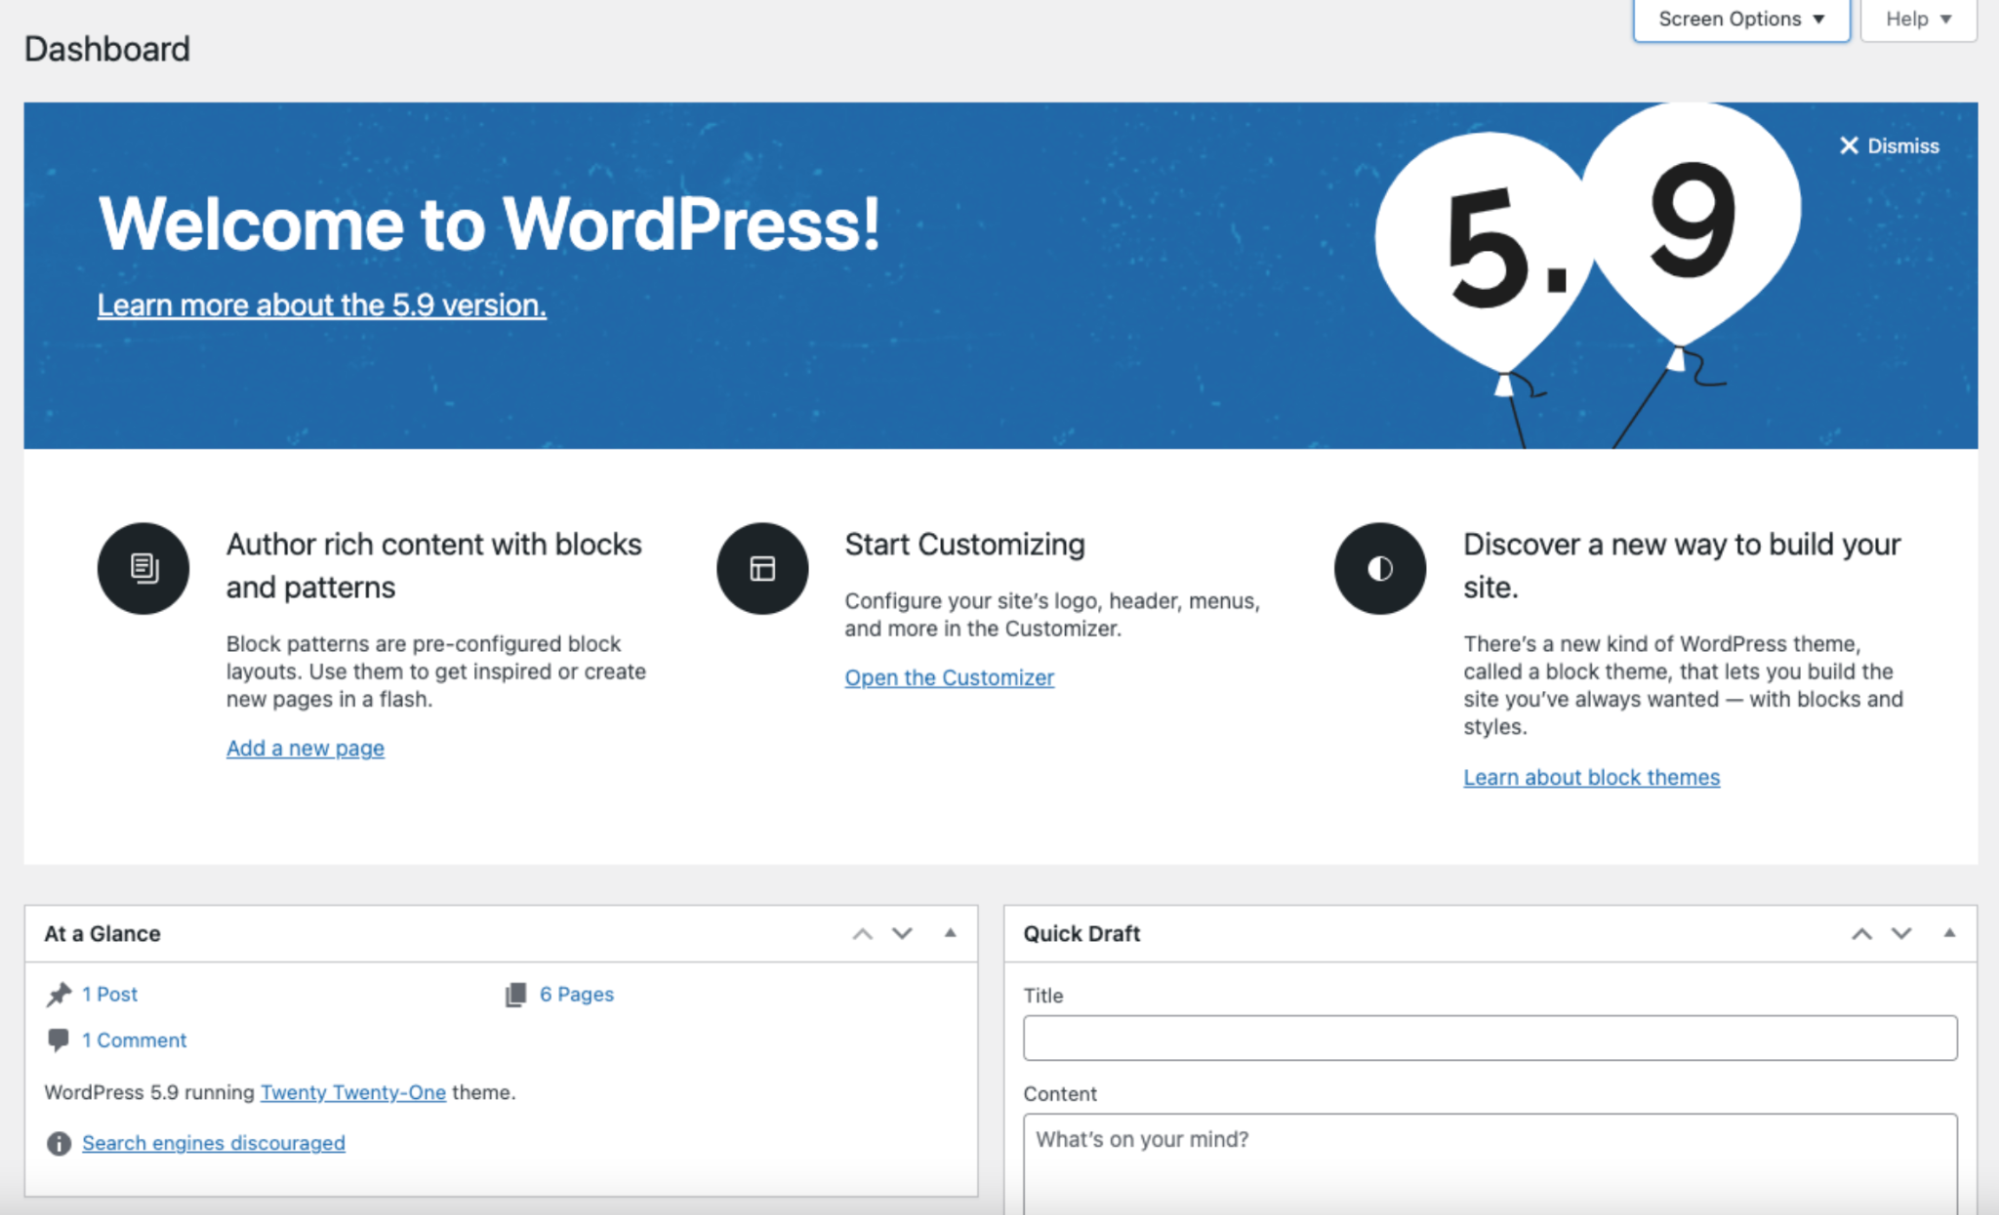
The easiest way to reinstall WordPress is through the dashboard. Go to WordPress > Dashboard > Updates. Then click on Re-install Version 5.9 (or whatever version happen to be running):

WordPress 5.9 update

WordPress will reinstall itself on its own. Once it’s done, refresh your site and see if that’s made a difference.

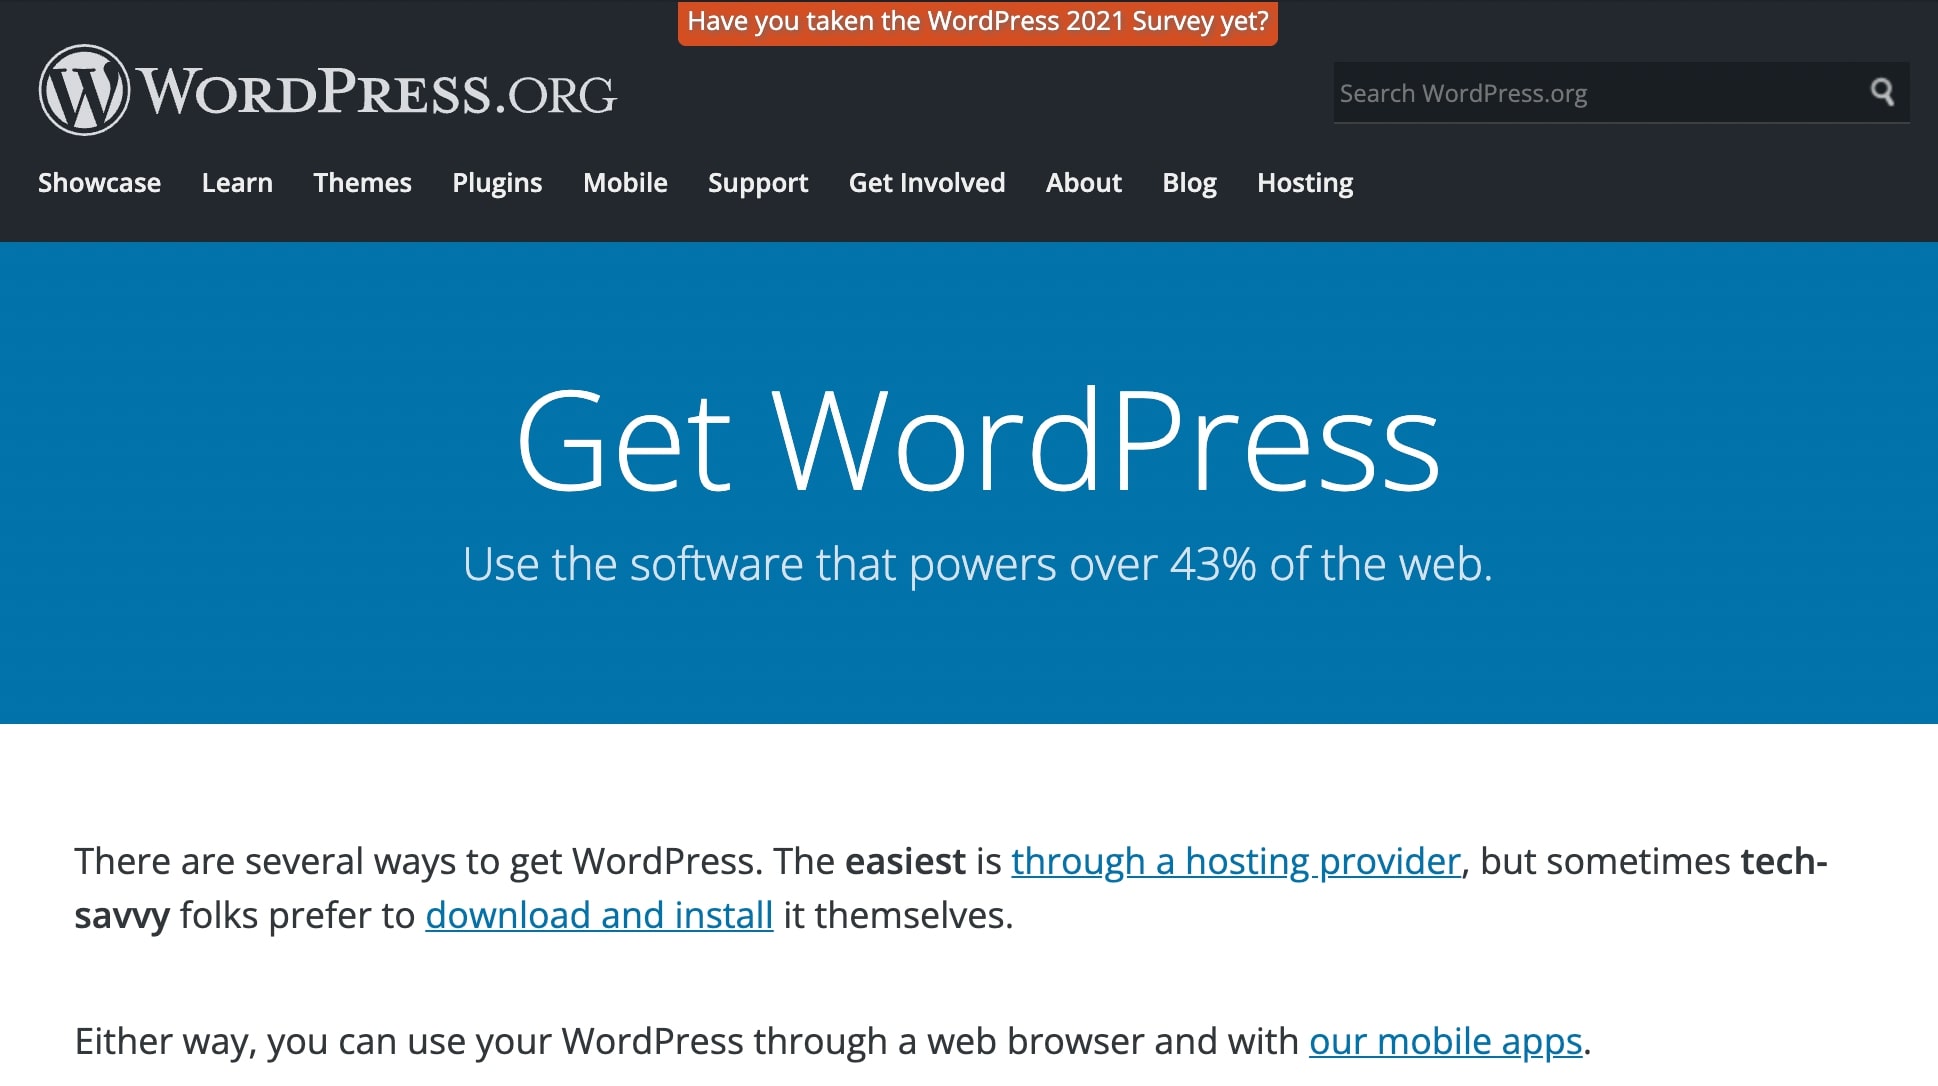
If you can’t access your WordPress dashboard, you can also manually reinstall WordPress via SFTP. First, you’ll need to download WordPress directly from WordPress.org.

WordPress.org

Then, unpack the .zip file for WordPress.org. 

Next, open FileZilla or another SFTP solution and make sure it’s connected to your WordPress site. Upload your freshly downloaded WordPress files to your WordPress directory.

Your new WordPress files should completely replace everything in the old WordPress directory. In general, it’s a good idea to check your site’s performance after every major change.

4. Upgrade Your Hosting Service

Finally, if none of the previous steps worked, it may be time to accept that your site has outgrown your hosting plan’s capabilities. It might be time to look into managed WordPress hosting.

WordPress hosting

This may also be true if you find that a non-negotiable theme or plugin is causing the issue. With better hosting and more resources, you can still use the plugins and themes you initially wanted. Hopefully, you’ll also encounter fewer 503 errors moving forward.

WordPress hosting can provide you with some of the following services:

  • Built-in caching. This means the server stores a snapshot of your website, so it doesn’t have to constantly serve dynamic content to your visitors. The better the caching is, the fewer resources your site should consume.
  • High-performance resources. The more powerful the server is, the more resources your site will have. A strong server will have fast processing, plenty of memory, and enough hard drive space for your site and its files.
  • WordPress-specific support. A hosting service made for WordPress will be tailored to and optimized for its unique needs.
  • Managed services. A managed hosting service will monitor many maintenance elements of your website for you, from backups to site speed tests. You may even get support to help you work through 503 Service Unavailable Errors.
  • WordPress migration. You’ll usually need to transfer your files and import your database to the new provider to switch hosts. Therefore, a web hosting service that provides hands-on support for WordPress migration is ideal.

If you’re tired of receiving regular errors, upgrading your web hosting may be the answer to your problems. Additionally, you’ll be able to benefit from a whole suite of convenient features.

Skip the line and get tips right in your inbox

Click below to sign up for more how-to's and tutorials just like this one, delivered to your inbox.

marketing tips

How to Fix Other Common WordPress Errors

Want to learn how to fix other technical issues on your WordPress website? We’ve put together several guides to help you troubleshoot some of the most common WordPress errors:

Check out our WordPress Tutorials section if you’re looking for tips and best practices for running a WordPress site. A collection of expert-written guides, it’s designed to help you navigate the WordPress dashboard like a pro.

Error Resolved

The 503 Service Unavailable Error can be frustrating to deal with, but troubleshooting it is pretty straightforward. This error occurs when your site consumes too many resources for the server to handle.

If you encounter this problem, you can try the following strategies to fix it:

  1. Turn off your plugins.
  2. Change your theme.
  3. Reinstall WordPress.
  4. Upgrade your hosting account.

Sometimes your WordPress site just needs more power. Our DreamPress Managed WordPress Hosting accounts have everything you need to launch a high-traffic website. Contact us today to learn more about our WordPress migration services and hosting plans.

Get More with DreamPress

DreamPress Plus and Pro users get access to Jetpack Professional (and 200+ premium themes) at no added cost!

Managed WordPress Hosting - DreamPress

The post How to Fix the 503 Error in WordPress appeared first on Website Guides, Tips & Knowledge.


source https://www.dreamhost.com/blog/fix-503-error-wordpress/

Tuesday, 22 February 2022

FOSS February (3 Ways to Support Open-Source in 2022)

When looking for a new piece of software, it’s easy to fall back on proprietary options. However, there’s another (and arguably better) way. 

Whether you’re a hobbyist, entrepreneur, or business owner, open source has much to offer. By opting for open software, you can positively impact this vital and innovative community.

In this post, we’ll look at the huge role that Free and Open-Source Software (FOSS) has played in the DreamHost story. We’ll then share three easy ways to support FOSS this February — and beyond. Let’s get started!  

DreamHost’s Open-Source Beginnings

Open source is in our blood and has powered every aspect of our services since the very beginning. DreamHost was founded in 1996 by four California undergraduate students who bonded over a mutual love for open-source tech and discovering new tools. With barely a dime to spend, the four created a web server running Debian Linux, Apache, and Perl.

This became the foundation of a business that hosted websites on top of free software — and DreamHost was born! Our business would not have been possible without open source, and today open software remains at the heart of many DreamHost systems.

The DreamHost homepage.

We respect our customers’ rights to the information they create, and that includes making sure they’re not locked into any of our services. Open software is such a vital aspect of our business that it’s even encoded into our core values as Embrace Open Source.

The Rise of the Black Box Cloud

The era before cloud computing was a golden age for the open internet. The tech landscape was dominated by some of the best examples of open-source technology. This includes Linux, Apache, and MySQL, plus languages like PHP, Perl, Python, and Ruby.

While the early days of cloud computing were exciting and revolutionary, it was also somewhat of a black box. The software and systems that power Amazon Web Services, Microsoft Azure, and many other cloud platforms were closed by design.

The Microsoft Azure cloud computing homepage. 

This left many users in the dark about implementing the most critical part of their application stack. So while we were excited about what the cloud had to offer, we didn’t want to live in a future dominated by black box technology. That’s why we decided to build our customers what they wanted, using best-of-breed open-source software.

DreamCompute: Partnering With OpenStack 

From the very beginning, we built the DreamHost platform on top of open-source tech. However, in 2014, we took things one step further and launched our DreamCompute service

DreamCompute is a public cloud computing service that’s designed to scale. It’s also built with open source at its very core.

The DreamCompute platform.

Based on the OpenStack cloud computing platform, DreamCompute makes heavy use of open software. The DreamCompute storage nodes run Ceph, the open source and massively distributed fault tolerant storage system.

In addition, the entire system is managed by the Chef automation software, plus other open-source tools. This includes the collectd daemon and Logstash data processing pipeline.

The Logstash data processing pipeline.

With DreamCompute, we set out to put more power in the hands of our customers than they’d ever had before — and we believe that we achieved that. However, OpenStack is more than just the heart of our DreamCompute service. ​​

We joined OpenStack early in its life, committing code, financial support, and leadership to the project. We joined the OpenInfra Foundation as a Gold member, and DreamHost CEO Simon Anderson was elected to represent us on the OpenStack Foundation Board of Directors for multiple consecutive years. 

Even today, our team is releasing new open-source frameworks, tools, apps, and other projects all of the time. For more information, check out our GitHub repository

Open Source Officially Powers 43% of the Web

No discussion about open source would be complete without mentioning the world’s most popular Content Management System (CMS). At DreamHost, we’re proud to have WordPress Core developers on our team while actively contributing to the WordPress Open-Source Project.

WordPress is a popular open-source CMS.

WordPress is an example of world-class open-source software, but that doesn’t mean this platform is automatically accessible to everyone. To help bring the power of open source to the masses, we designed our DreamPress hosting plan.

DreamPress managed WordPress hosting.

This managed WordPress service removes much of the technical complexity of running a successful website. In this way, we’re making the world’s most powerful open-source CMS available to more people than ever before. 

How to Support Open-Source Software in 2022 (3 Ways)

DreamHost has taken a lot from open source over the years, and we’re not the only ones! If you’ve ever downloaded a project from GitHub, built a WordPress website, or switched from proprietary software to an open alternative, then February is your chance to give back. Here are three ways to support FOSS this February.

1. Use and Promote Open-Source Software

The best way to support open source is to use it! This means actively seeking out open alternatives to your favorite proprietary software. 

If you’re using open projects in your free time, then this is a great start. However, if you really want to contribute to the community, you can always advocate for its use in formal settings, particularly at your workplace. 

Unlike property software, you can often download and install open-source code on your own server or company data center. In a climate where privacy and data security are a huge concern, this is definitely worth mentioning to your boss. 

If you have a particular piece of proprietary software in mind, then finding a replacement may be as simple as heading to your favorite search engine and typing: “open-source alternative to X”. There are also entire directories dedicated to recommending open-source replacements. The Awesome Alternatives list and crowdsourcing AlternativeTo website are two popular resources.

Finding open-source alternatives, using the AlternativeTo website

Once you’re using open-source software, you can go one step further and become an evangelist. Despite the religious connotations, today, the term evangelist simply means any person who is an enthusiastic fan of a product, brand, person — or even open-source software. 

Simply engaging with an open project on social media can help raise awareness. If you run your own blog, then you might consider publishing tutorials or articles about your favorite project. 

Even if you don’t run your own website, there are plenty of tech-focused sites that accept guest submissions. All of these simple acts can help spread the word and introduce more people to your favorite open project.

2. Get Involved in the Community

Some successful open-source projects are able to fund full-time staff. However, many projects rely entirely on volunteers. This means there are always opportunities to become a valued member of the open-source community.

To start, you may want to consider following your favorite project across all of the major social networking sites. This includes Twitter, YouTube, Slack, and Facebook.

The official WordPress Facebook group.

From here, you can connect with other members of the community and spot opportunities to get involved. This could be anything from supporting an upcoming meetup or webinar right through to answering a question that someone has posted on the project’s official Facebook page.

In addition, open-source projects often feature prominently on question and answer boards such as Stack Overflow and the Quora site. You may even find a board dedicated to your chosen program.

By visiting these boards regularly, you can help other users resolve issues that they’re having with the software in question. This can improve their experience, which will make them more likely to continue using the program. They may even become enthusiastic open-source supporters themselves.

You can minimize the number of complaints and queries that get escalated to the project’s development team by resolving these questions. This leaves them free to focus their efforts on improving the core software.

3. Become a Translator

Research suggests that 74 % of internet users speak a language other than English.

If your favorite open-source project doesn’t support multiple languages, it may struggle to attract an international audience

If you’re multilingual, you can help a project connect with an entirely new audience by offering your translation services. Even users who speak multiple languages will usually appreciate being able to enjoy software in their native tongue. In fact, 65% of consumers prefer to access content in their first language. By translating a project into one or more additional languages, you can help boost its appeal. 

For instance, you might translate self-help resources, such as the official documentation, blog posts, and FAQ pages, or user guides. However, these open projects may also need someone to translate User Interface (UI) elements, such as the labels and onscreen tooltips that help people interact with the software. All of this can be invaluable for improving the user experience and helping your favorite project find its spot on the world stage.

Conclusion

At DreamHost, we’re excited to continue contributing to open-source software throughout 2022 — and beyond. However, anyone can take steps to support their favorite open projects. 

With this in mind, let’s quickly recap 3 easy ways to help the open software community:

  1. Use open-source alternatives when possible, and promote your favorite programs.
  2. Get involved in the community by following open projects on social media and answering questions from users. 
  3. Become a translator for your favorite open project. 

When it comes to open software, WordPress is a huge success story. If you want to find out why this platform powers almost half of all websites, our shared website hosting is the fastest and easiest way to get started with WordPress. 

Cloud Computing and DreamHost

When you partner with us, your website is in good hands! Our services pair friendly expertise with top-notch technology to give you all you need to succeed on the web.

The post FOSS February (3 Ways to Support Open-Source in 2022) appeared first on Website Guides, Tips & Knowledge.


source https://www.dreamhost.com/blog/ways-to-support-open-source/

Thursday, 17 February 2022

17 Excellent Affiliate Marketing WordPress Themes

When it comes to your website, first impressions really do count. Everything from color palettes to font choices can impact whether a visitor clicks on your affiliate links. But, with so much riding on your site’s design, picking the perfect theme can be intimidating.

Fortunately, it doesn’t have to be a challenge. There are dozens of high-quality themes that are ideal for various affiliate marketing niches. By understanding a few of the stand-out options that are available, you can find your perfect fit.

Start Building Your Affiliate Marketing Website Today

This article will walk you through 17 of the leading affiliate marketing themes for 2022. So let’s dive right in!

1. Zeen

affiliate marketing WordPress themes

We’ll start with a remarkably flexible theme. Zeen can help you create anything from a magazine to an online store – all with highly-customizable features.

Here are just a few options you’ll gain access to:

  • Advanced design features to improve the User Experience (UX)
  • Built-in product swatches for colors, images, and buttons
  • Support for Google voice search

If you’re selling affiliate products, you might be particularly interested in this theme’s various sales features. For example, you can add a prominent ‘add to cart’ function wherever you like. By linking this button to your affiliate partners’ sites, you can provide users with an easy way to purchase products.

Pricing: Zeen costs $39 and comes with six months of support. If you’d like to extend that to 12 months, it will cost an extra $10.13.

2. Astra

Astra is a very popular WordPress theme. With super-light code and countless layout settings, it’s a powerhouse when it comes to fast loading times. However, that’s not all.

Its other powerful features include:

  • A huge library of pre-built websites to choose from
  • Design flexibility thanks to its compatibility with page builders
  • Optimized speeds for all device types

If you’re looking to reduce your site’s bounce rates, Astra might be the best option for you. Faster load times mean you can appeal to even your most impatient visitors. However, you might also choose this theme if you want maximum design freedom.

Pricing: The basic version of Astra is free. However, if you want full functionality, paid options begin at $49. You can also choose from two higher-tier plans with premium features: the Essential Bundle ($169) or the Growth Bundle ($249).

3. Divi

affiliate marketing WordPress themes

Divi is another incredibly flexible option. This theme enables you to control almost every aspect of your site.

You’re free to choose from a huge variety of design options, such as:

  • Subtle shadow features that you can use to highlight certain products
  • Dynamic animations to catch your visitors’ attention
  • Optional advanced code editing within the engine

Additionally, Divi also has a companion program: the Divi Builder. This page builder is optimized to work with the theme for a smoother website creation experience. If you’re looking for an all-in-one solution for seamless site design, we suggest that you consider Divi.

Pricing: Divi pricing begins at $67 per year. This includes the Divi Builder. If you’d prefer only to pay once, you can also get the same features for a lifetime license fee of $187.

4. Neve

Today’s users can access your website from various devices – and mobile is at the top of that list. So Neve prioritizes modern, mobile-friendly designs to help you reach the maximum number of shoppers.

You might also appreciate a few other stand-out features like:

  • Drag-and-drop customization for headers and footers
  • Lightweight code for excellent loading times
  • Global color palette options for centralized redesigns

We recommend Neve if you have a robust social media following. Visitors usually access these platforms from mobile devices. As such, your promotional links should lead them to a well-optimized mobile version of your website.

Pricing: Neve licenses start at $59 per year. However, the Business plan might be better if you’re making many affiliate sales. This plan starts at $149 per year.

5. Zox News

Zox News is a multi-purpose theme. You don’t have to run a news-based website to use it – as long as you’re looking for a dynamic, effective way to advertise your content, this theme is a smart choice.

Other benefits included in this theme are:

  • A free Reviewer Plugin to display reviews and comparison tables alongside your content
  • Featured areas to promote specific formats such as videos
  • Sticky sidebars to improve site navigation

Zox News also provides you with the choice of eight different article layouts. That’s why we recommend it if you want to provide more dynamic content. Users may feel that too many similarly-structured articles become repetitive. This theme’s built-in variety can help you easily add more diverse formatting.

Pricing: You can purchase Zox News for $55. You’ll also receive six months of support at this price point. To extend that to a full year, you can pay an extra $16.13.

Want more affiliate marketing tips in your inbox?

Click below to sign up for more how-to's and tutorials just like this one, delivered to your inbox.

marketing tips

6. Silk

If you’re building a fashion-forward blog meant to show off the latest trends, you might want to consider Silk. However, this theme isn’t just for fashion – as long as you’re seeking a way to showcase your work, Silk can be an excellent fit.

Other stand-out features you may like include:

  • A mega-menu option for ease of navigation
  • Integrated social tools to make sharing your affiliate offers easy
  • A huge selection of top-tier typography tools

If your affiliate sales strategy relies on a more visual approach, this theme can be a smart choice. That’s because Silk is an especially media-friendly theme. Thus, it’s an easy way to share high-quality product photos or videos with your audience.

Pricing: Silk’s pricing starts at €70 per year (about $79). This includes one year of support and updates. If you prefer a one-time fee, you can opt for the lifetime edition.

7. Affiliates Bloglet

affiliate marketing WordPress themes

If you run a website focused on written content, we recommend that you consider using the Affiliates Bloglet theme. That’s because it offers a clean interface and responsive design.

As such, your visitors can enjoy a minimalist experience no matter where they visit from, in addition to other features like:

Without busy elements, your blog can take center stage. However, minimalist doesn’t have to mean empty. You can also use the white space around your content. That’s why we recommend Affiliates Bloglet if you’re running ads alongside your affiliate products – there’s plenty of space for them.

Pricing: Affiliates Bloglet is a child theme of Blogrid and thus follows its pricing plans. The premium options start at $29. In addition to Affiliates Bloglet, you’ll also gain access to three other child themes.

8. CouponXL

Many affiliate sites offer deals and coupons as a part of their offers. If this sounds like your strategy, the CouponXL theme might be your perfect fit.

Whether you’re just starting out or an established figure in the affiliate marketing game, this theme can help you with features like:

Consider choosing the CouponXL theme if you want to use cloaked links. This feature helps you hide potentially spammy-looking URLs. That means you can build user trust while still earning affiliate commissions.

Pricing: You can purchase CouponXL for $39. To upgrade the six months of support to 12, you can pay an additional $10.13.

9. Tokoo

When it comes to promoting affiliate links, images can be extremely influential. That’s because they’re an easy way to demonstrate what you’re selling. If you want to take advantage of this strategy, consider using Tokoo.

Other impressive features of this theme include:

  • Responsive menu options for easy navigation
  • Predefined design palettes for a quick start
  • Minimum white space for a sales-focused approach

If you want to mimic the layout of top-tier ecommerce sites, you might want to choose Tokoo. It can help you apply the same attention-grabbing format to your affiliate products. The variety of image formats on offer will also help with this.

Pricing: Tokoo is available for $59. If you’re not ready to commit, you can also use the free trial offer to take it for a spin.

10. Mai Creative Pro

A stunning website can go a long way towards increasing sales. The more you can emphasize your professional skills, the more you can build up your users’ trust. That’s where Mai Creative Pro comes in.

It combines an aesthetically-pleasing design with clean, functional options such as:

  • Highly customizable widget areas
  • Full control over the appearance of your header to match your affiliate branding strategy
  • Custom page templates to help you build a beautiful site quickly

Mai Creative Pro might be the best choice if you’re a beginner. It may be customizable, but it’s also impressively user-friendly. When combined with the wealth of detailed tutorials, it’s a top choice for your first theme.

Pricing: You can purchase Mai Creative Pro for $99. You can also check out its full demo if you’re still on the fence.

11. Herald

Herald was designed to act as an online newspaper. However, that doesn’t mean you’ll be choosing a limited option. With plenty of ways to prioritize content, you can show off your favorite articles and best affiliate links.

You might also appreciate the following features:

  • Nearly 500 variations on your listing layouts
  • Unlimited sidebar and color combinations
  • Built-in social sharing features

If you’re using affiliate marketing as one of many monetization strategies, you might want to consider Herald. This theme makes it easy to add banner ads to your home page, archives, or even single posts – all without having to know a single line of code.

Pricing: Herald’s price comes in at $69. To upgrade from six to 12 months of support, you can pay an additional $21.38.

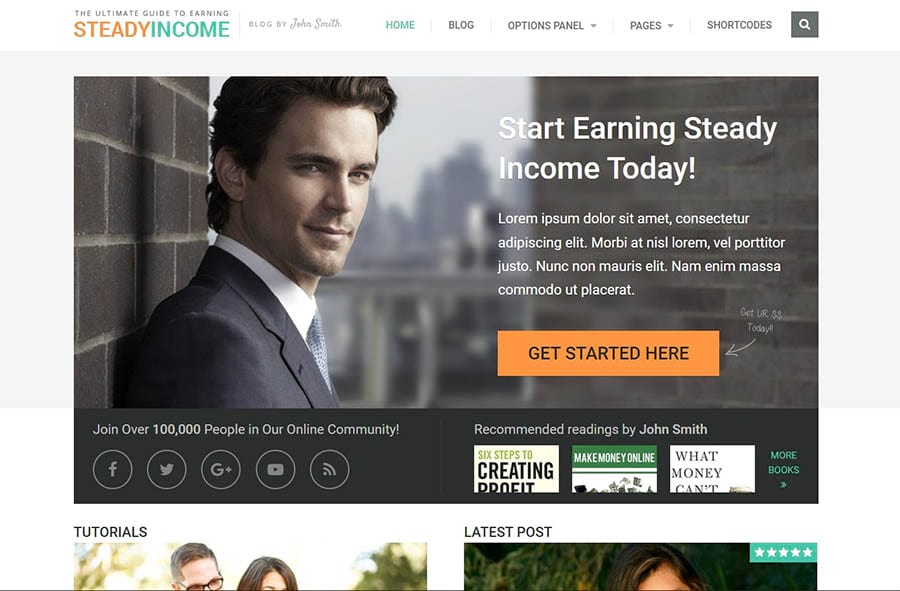
12. SteadyIncome

affiliate marketing WordPress themes

Affiliate marketing can be one of the most effective ways to turn a profit. Getting users to spend time on your site is the crucial first step of this process.

If you’re looking to make a positive impression right away, SteadyIncome can help with features like:

We recommend choosing SteadyIncome if you’re prioritizing new customers over repeat ones. The bold, professional design can help establish trust quickly. This, in turn, can help you make sales more efficiently.

Pricing: SteadyIncome costs $39. This will also get you a year of updates and support for unlimited sites. If you change your mind, you can also benefit from the 30-day money-back guarantee.

13. Consulting Multipurpose Classic Elementor

With plenty of modern content areas, Consulting Multipurpose Classic Elementor is a simple way to showcase professional advice. However, that’s not all it can do. You can also use this theme’s organized format for advertising anything from your brand to the products you’re promoting.

Plus, you’ll get access to other features such as:

  • The option to sort affiliate partners into discrete categories
  • Attractive icons and blurbs for your products
  • Built-in tab formatting to help you highlight particular offers

You might want to consider Consulting Multipurpose if you plan to appeal to a more local audience. Features such as integrated Google Maps can help you emphasize a visual location. However, a more global approach is also possible thanks to an included multilingual plugin.

Pricing: For full functionality on a single site, Consulting Multipurpose will cost $75. There are a variety of premium add-ons as well, such as customization services and an extended support period.

14. Sensational

No matter how well-run your website is, marketing your content is key to boosting affiliate sales. As such, finding ways to show off as much of your work as possible can be essential.

Sensational can be the perfect tool for this challenge, with features like:

  • Plenty of room for content balanced out by lots of white space
  • Subtle professional touches, such as hovering effects and transition slides
  • Unlimited color schemes and backgrounds for countless customization options

You might particularly enjoy Sensational if you prefer a column-based approach. Sensational makes the most of this simple format with four different styles to choose from. That means you can spend less time tweaking designs and more time sharing your links.

Pricing: Sensational is currently available for free. It typically goes for $77, so now might be a smart time to give this theme a try.

15. Marketing Pro

A marketing funnel can be an essential tool for affiliate marketers. You start by offering surface-level information to new users and move them towards more detailed content as they get closer to purchasing. Marketing Pro can support this use with its cohesive design flow.

Other contributing features include:

  • A commanding banner at the top that leads into more sales-oriented formatting below
  • Nine pre-made templates to make redesigning your site easy
  • $72 worth of premium plugins

We recommend Marketing Pro if your affiliate offerings are face-to-face services. For example, you might be promoting a life coaching program. This theme focuses on the buyer’s journey to secure conversions for long-term service plans.

Pricing: You can purchase Marketing Pro for $59. The theme offers an impressive amount of documentation, but to extend direct support to a full year, you can pay an extra $17.63.

16. Netube

Netube is a theme designed for building a video magazine. That means it enables you to showcase several videos at once. The large image spaces mean you can display accurate examples of your work without compromising on quality.

You might also appreciate this theme’s other features, such as:

  • The option to organize content by criteria, such as highest rated or most views
  • Easy opportunities to allow user-generated video uploads
  • A subtle, dark design that allows your videos to stand out

We’ve covered a lot of themes that accommodate written content. Netube stands out as one that prioritizes media instead. If you work with a lot of videos, we highly recommend checking Netube out.

Pricing: Netube is available for $59. This will also give you access to any future updates, so you don’t have to worry about your theme becoming obsolete.

17. iffiliate

affiliate marketing WordPress themes

There are plenty of high-quality themes that can support your affiliate marketing strategy. However, sometimes what you need is a specialized approach to help you focus on your goals. When it comes to promoting your partners’ products, iffiliate is one of the top tools for the job.

It includes features like:

  • A bundled mega menu plugin for better navigation
  • Ajax live search that makes for a more dynamic UX
  • Seamless integration with the Amazon Affiliate program

We’d recommend iffiliate if you’re building a more traditional ecommerce-style site. For example, you can create single-product pages to advertise each partner’s items. You can then replace the checkout links with your affiliate URLs.

Pricing: You can purchase iffiliate for $59. This comes with six months of support, but you can extend this to 12 for an additional $17.63.

The Right Themes Make All the Difference

Let’s face it: being an affiliate marketer can be tough. Fortunately, choosing the right tools can make all the difference. By carefully picking your WordPress theme, you can set your website up for success.

This article walked you through 17 of our favorite themes for affiliate marketing. We’ve considered everything from minimalist designs to media-heavy approaches. We’d recommend checking out the demos for your favorites and testing them fully before settling on your final choice.

If you want to earn more commissions, picking the right theme counts. However, your website also has to perform at its best and provide a top-notch user experience. For that, check out our DreamPress hosting plans!

Do More with DreamPress

DreamPress' automatic updates and strong security defenses take server management off your hands so you can focus on content creation.

shared hosting

The post 17 Excellent Affiliate Marketing WordPress Themes appeared first on Website Guides, Tips & Knowledge.


source https://www.dreamhost.com/blog/affiliate-marketing-wordpress-themes/

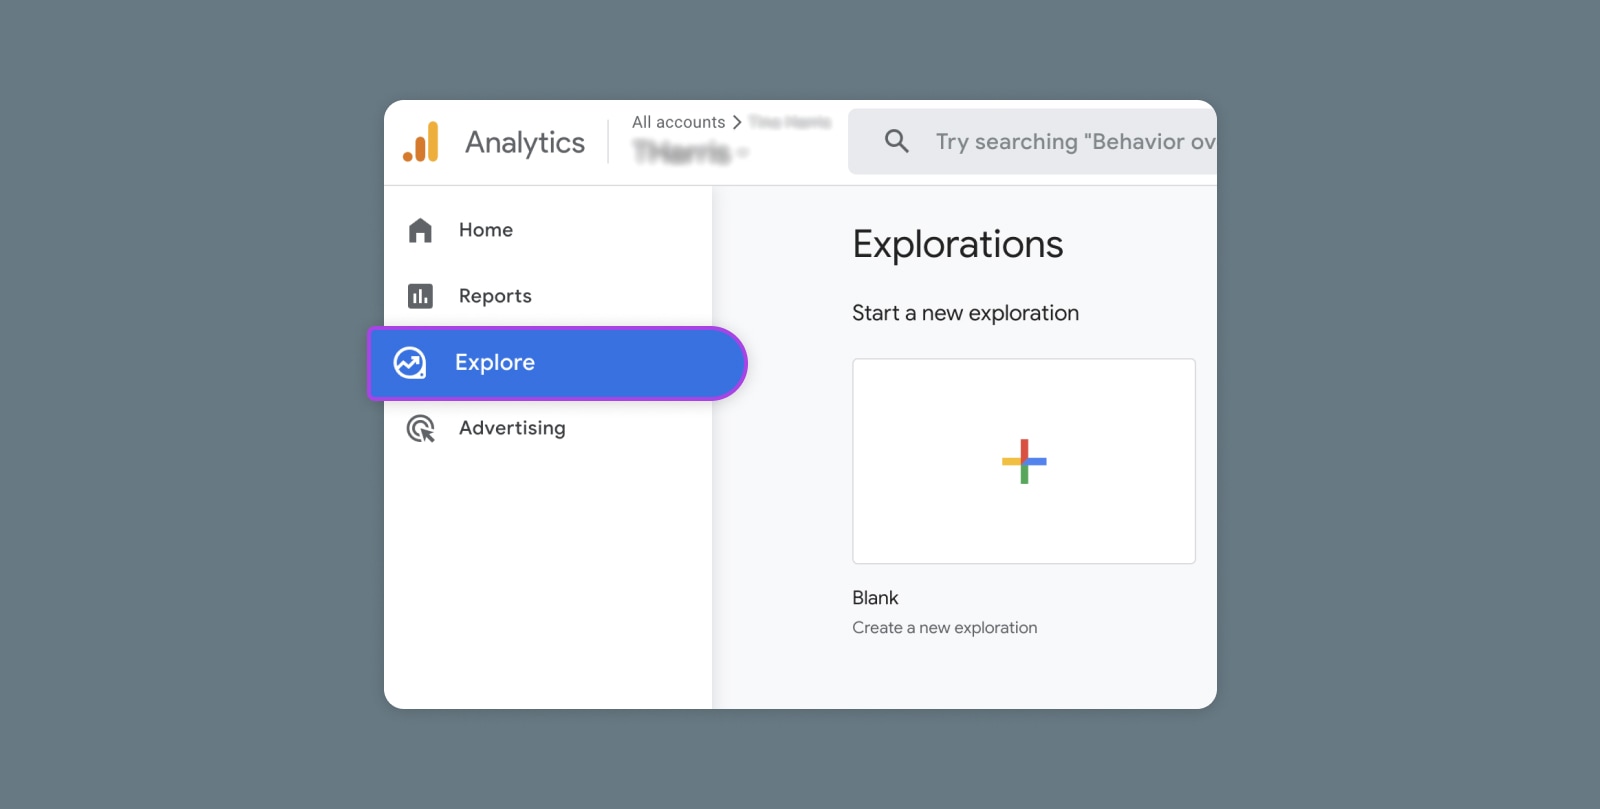
Creating and Mastering GA4 Explorations

In the switch from Universal Analytics (UA) to Google Analytics 4 (GA4) — which will go fully into effect July 2023 — a lot of things have...