You’ve worked hard to create your website and likely spent a ton of time and effort maintaining it. Your site may even be vital to your livelihood — you need those sweet, dollar, dollar bills to keep your business afloat.
And that, friends, is why making your website as secure as possible is vitally important.
So let’s get real about security.
WordPress is an excellent, secure platform out of the box, but there’s more you can (and should!) do to keep your site safe from creepsters with malicious intent. Many of these security enhancements are easy to implement and can be performed manually in mere minutes. Others simply require installing a particular plugin.
In this article, I’ll guide you through 10 different strategies for upping the defenses on your WordPress fortress. But first, let’s go a little more into the weeds on why website security should matter to you.
Securing a WordPress Site? Partner with DreamHost
Leave migrating your site, installing WordPress, managing security and updates, and optimizing server performance to us. Now you can focus on what matters most: growing your website.

Why Taking Steps to Secure Your WordPress Site Is Vital
If you’re looking to create a secure site (an obvious “no duh”), choosing WordPress as your platform is an excellent way to start. It’s not only a flexible, powerful platform for building websites — it’s also remarkably secure out of the box.
That’s because WordPress developers care about security and are dedicated to “hardening” the core platform as much as possible. Plus, they frequently release security-focused updates and patches, which will be automatically downloaded and installed on your site. This means your site will be well-equipped to deal with any new threats that pop up.
Related: The Difference Between WordPress.com & WordPress.org
Of course, no platform can be 100% secure. Hackers are hard at work trying to find their way into even the most well-protected sites (if only they’d use their powers for good, amirite?) And since WordPress powers more than 30% of the web, it’s popular enough to be a constant target.
It should go without saying, but if baddies do manage to break into your site, they can cause a lot of damage.
For example, they can steal or otherwise compromise sensitive information, install malware, make changes to your site to suit their needs, or even bring it down entirely. This is harmful to both you and your users, and if you’re running a business, it can mean lost customers and revenue.
Not good at all.
It’s vitally important to take additional steps to secure your WordPress website. You’ll want to put just as much time and effort into this endeavor as you spent designing your site in the first place (if not more). Fortunately for you, dear reader, there are lots of simple, quick ways to improve your site’s security, as well as some more complex techniques you may want to employ.
Related: How Much Does It Actually Cost to Set Up a WordPress Website?
10 Smart Ways to Effectively Secure Your WordPress Website
Hopefully, I’ve convinced you about the importance of maintaining a secure WordPress website. If not, I’m going to have to re-enroll in Persuasive Writing 101. Please don’t make me do that.
Glad you’re convinced (wink, wink).
Throughout the rest of this article, I’ll introduce 10 handy strategies for making your site safer and reducing the chances of it being compromised. Plus, I’ll point you in the right direction to get started with each technique.
You don’t have to implement every suggestion on this list — although you certainly can — but the more steps you take to secure your site, the lower your chances will be of encountering a disaster down the road.
1. Use a Quality Host
You can think of your web host as your website’s street on the Internet — it’s the place where your site “lives.”
Like a good school district matters to your kid’s future (so they say; I turned out fine), the quality of your website’s home base counts in a lot of big ways.
A solid hosting provider can impact how well your site performs, how reliable it is, how large it can grow, and even how highly it ranks in search engines. The best hosts offer many useful features, excellent support, and a service tailored to your chosen platform.
Related: 13 Simple Ways to Boost SEO on Your WordPress Website
As you’ve probably already guessed, your web host can also have a significant impact on your site’s security. There are several security benefits to choosing a solid hosting service, including:
- A quality host will constantly update its service, software, and tools to respond to the latest threats and eliminate potential security breaches.
- Web hosts often offer various targeted security features, such as SSL/TLS certificates and DDoS protection. You should also get access to a Web Application Firewall (WAF), which will help monitor and block serious threats to your site.
- Your web host will most likely provide a way to back up your site (in some cases, even carrying it out for you), so if you’re hacked, you can easily revert to a stable, previous version.
- If your host offers reliable, 24/7 support, you’ll always have someone to help you out if you do run into a security-related issue.
This list should give you a good starting point to work from when looking for a host for your new site, or even if you’re thinking about changing hosts. You’ll want to find one that offers all of the features and functionality you’ll need, plus has a reputation for reliability and excellent performance.
DreamPress is WordPress-specific hosting that’s fast, reliable, scalable, and, of course, secure. DreamPress includes a pre-installed SSL/TSL certificate and provides a dedicated WAF designed with rules built to protect WordPress sites and block hacking attempts. You’ll also get automated backups, 24/7 support from WordPress experts, and Jetpack Premium — a plugin that can add many additional security features to your site — at no additional cost.
With DreamPress, you’ll be able to rest easy knowing that your site is protected. Our hosting service even takes care of many of the following security-enhancing steps for you — although we still encourage you to read on to learn what extra measures you can take.
After all, safety first, kids!
Get More with DreamPress
DreamPress Plus and Pro users get access to Jetpack Professional (and 200+ premium WordPress themes) at no added cost!

2. Switch Your Site to HTTPS
Let’s talk more about an SSL/TLS certificate. This enables you to switch your site to HyperText Transfer Protocol Secure (HTTPS) — a more secure version of HTTP. These are important security concepts to understand but simple to grasp even if you’ve never heard of them before.
HTTP is the protocol that transfers data between your website and any browser trying to access it. When a visitor clicks on your home page, all of your content, media, and website code are sent through this protocol to the visitor’s location.
While this is necessary, of course, it does introduce some potential security issues. Baddies can try to intercept the data while it is in transit and use it for their own nefarious purposes.
HTTPS solves this problem! It does the same thing as HTTP but also encrypts your site’s data while it’s traveling from one point to another, so it can’t be easily accessed.
Initially, HTTPS was used mainly for sites handling sensitive customer information, such as credit card details. However, it’s becoming increasingly common for all sites, and big names such as WordPress and Google have been pushing for its widespread implementation.
To switch your site over to HTTPS, you’ll first need an SSL/TLS certificate. This communicates to browsers that your site is legitimate and its data is properly encrypted. You can also get one for free from certain sites, such as Let’s Encrypt.
A quality host will typically provide an SSL/TLS certificate as part o your hosting package. In fact, at DreamHost, we offer Let’s Encrypt certificates for free with all of our hosting plans!
Once you have an SSL/TLS certificate installed on your site, you’ll simply need to implement HTTPS. Your host may take care of this for you, although it’s also fairly easy to do yourself. If you’ve chosen to go with DreamPress, the stretch limo of hosting, your site will be created using HTTPS from the start. Roll out!
3. Create Secure Login Credentials
This one is a “no s***, Sherlock” suggestion, but folks, it’s really important to select your login credentials carefully. Like really, really important!
Why? This makes it harder for a sketchy weirdo to break into your site. You probably have plenty of experience choosing strong usernames and passwords for other accounts across the web — doing the same for your WordPress website is a big deal.
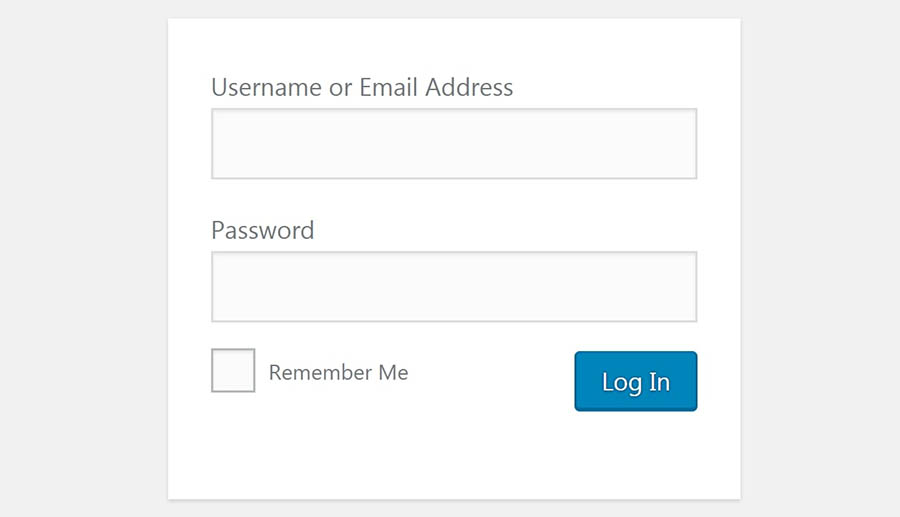
When you create your site, you’ll be given the opportunity to create a login username and password. The username will default to admin, although you can change it if you’d like (and probably should). But since there are various ways for people to find out what your WordPress username is, you can stick with the default option if you want to.
Your password, however, is crucially important, and you’ll want to choose a strong one. There’s recently been a U-turn of sorts on how to choose a strong password, with a recommendation of a simple four-word phrase trumping the classic mixture of random letters, numbers, and symbols. It’s a method that has been popular in some circles for a while.
If all the talk of choosing a password makes your head spin, we recommend sticking with WordPress’ own password generator as it automatically generates an (almost) ironclad password directly within the WordPress back end. Just be sure to record your credentials somewhere safe, like an encrypted password manager, so you don’t forget them.
If you’ve already created your site and chose less-than-ideal login credentials initially, you can still change them without too much trouble. You can alter your username by creating a new user, giving it the administrator role and attributing all your content to it, and then deleting your original account.
As for your password, you can simply go to Users > All Users from your WordPress admin dashboard, click on your username and enter a new password on the Edit User screen.
4. Enable a Web Application Firewall
You’re probably familiar with the concept of a firewall — a program that helps to block all sorts of unwanted attacks. Most likely, you have some kind of firewall on your computer. A Web Application Firewall (WAF) is simply a firewall designed specifically for websites. It can protect servers, specific websites, or entire groups of sites.
A WAF on your WordPress site will function as a barrier between your website and the rest of the web. A firewall monitors incoming activity, detects attacks, malware, and other unwanted events, and blocks anything it considers a risk. #winning
Related: What Is Malware and How Can You Protect Your Site from It?
If you’ve opted for our DreamPress package, you can relax; you won’t need an additional firewall. DreamPress includes a built-in WAF that will monitor your site for threats and block malicious users and programs from gaining access. No action required on your part.
DreamHost also offers DreamShield, our in-house malware scanning service. When you enable DreamShield on your hosting account, we’ll scan your site weekly for malicious code. If we find anything suspicious, you’ll be notified immediately via email.
Protect Your Website with DreamShield
For just $3/month, our premium security add-on scans your site weekly to ensure it is free of malicious code.
5. Implement Two-Factor Authentication
Before we move on, there’s one more technique to address: two-factor authentication (which also goes by two-step authentication and a variety of other, similar names). The term refers to the two-step process you’ll need to follow when logging into your site. This takes a little more time on your end but goes a long way towards keeping hackers out.
Two-factor authentication involves using a smartphone or other device to verify your login. First, you’ll visit your WordPress site and enter your username and password as usual. A unique code will then be sent to your mobile device, which you’ll need to provide to complete logging in. This enables you to prove your identity by showing you have access to something solely yours — such as a particular phone or tablet.
As with many WordPress features, two-factor authentication is easy to add with a dedicated plugin. Two Factor Authentication is a solid choice — it’s created by reliable developers, compatible with Google Authenticator, and will enable you to add this functionality to your site without fuss.
Another choice is the Two-Factor plugin, which is well known for its reliability and was built mainly by core WordPress developers. As with any plugin in this category, the learning curve is a little steep, but it will get the job done and is very secure. If you’re willing to spend a little money, you can also check out Jetpack’s Clef-like premium solution.
Whatever route you choose, make sure to plan ahead with your team if relevant, since you’ll need to gather their phone numbers and other information to get started. With that, your login page is now secured and ready to go.
6. Add New Plugins and Themes Carefully (And Update Them Often)
The ready availability of themes and plugins is one of the best things about using WordPress. With these handy tools, you can make your site look just right and add nearly any feature or functionality you can think of.
Not all plugins and themes are created equally, though.
Developers who aren’t careful or don’t have the right level of experience can create plugins that are unreliable or insecure — or, just downright sucky. They might use poor coding practices that leave holes hackers can easily exploit or unknowingly interfere with crucial functionality.
This all means you need to be very careful about the themes and plugins you choose to add to your site. Each one should be vetted to ensure it’s a solid option that won’t hurt your site or cause problems. There are many elements to keep in mind, but the following advice will help you select quality tools:
- Check user ratings and reviews to learn whether other people have had a good experience with the plugin or theme in question.
- Take a look at how recently the plugin or theme has been updated. If it’s been longer than six months, chances are it isn’t as secure as it could be.
- Install new plugins and themes one at a time, so if anything goes wrong, you’ll know what the cause was. Also, be sure to back up your site before adding anything to it.
- Get your plugins and themes from trustworthy sources, such as the WordPress.org Theme and Plugin Directories, ThemeForest and CodeCanyon, and reliable developer websites.
Finally, your work isn’t done once you’ve installed the plugins and themes you want to your site.
You’ll also need to keep them up to date to ensure they work well together and are secured against the latest threats. Fortunately, this is quite easy — you’ll simply need to go to your WordPress dashboard, look for the red notifications telling you there are themes and/or plugins with available updates, and click on update now next to each one.
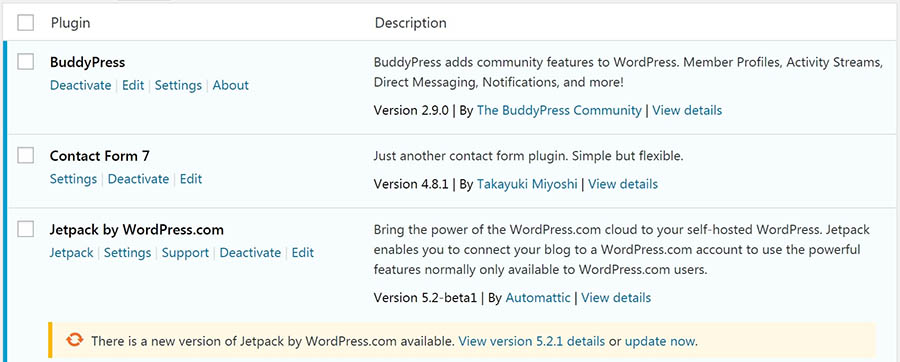
You can also update your plugins in a batch by selecting all of them and then hitting the update button, either here or in the WordPress panel. This is a quicker option, but keep in mind, updating all of them at once could make it more difficult to diagnose any problems that arise as a result of the updates. If you’re making sure to only choose reliable plugins and themes, however, this shouldn’t be a problem.
Before we move on, it’s worth mentioning that you should also keep WordPress itself up to date. Smaller patches and security updates will be added automatically, but you may need to implement major updates on your own (again, this is very simple to do). This probably goes without saying at this point, but DreamHost handles these updates for you, so you won’t need to worry.
Remember: leaving WordPress or any of your themes and plugins out of date is a risk you don’t want to take.
Related: How to Create Your First WordPress Plugin
7. Configure Your File Permissions
Let’s talk technical for a moment.
A lot of the information, data, and content on your WordPress site is stored in a series of folders and files. These are organized into a hierarchical structure, and each one is given a permissions level. The permissions on a WordPress file or folder determine who can view and edit it and may be set to allow access to anyone, only to you, or almost anything in between.
File permissions are represented by a three-digit number in WordPress, and each digit has a meaning. The first digit stands for an individual user (the site’s owner), the second digit for the group (for example, members of your site), and the third for everyone in the world. The number itself means that the user, group, or world:
- 0: Has no access to the file.
- 1: Can only execute the file.
- 2: Can edit the file.
- 3: Can edit and execute the file.
- 4: Can read the file.
- 5: Can read and execute the file.
- 6: Can read and edit the file.
- 7: Can read, edit, and execute the file.
So if a file is given a permissions level of 640, for example, it means the primary user can read and edit the file, the group can read the file but not edit it, and everyone else cannot access it. This may seem overly complicated, but it’s important to ensure that each person only has the level of access to your site’s files and folders you want them to have.
WordPress recommends setting folders to a permissions level of 755 and files to 644. You’re pretty safe sticking to these guidelines, although you can set up any combination you’d like. Just remember that it’s best not to give anyone more access than they absolutely need, especially to core files.
You’ll also want to keep in mind that the ideal permissions settings will depend somewhat on your hosting service, so you may want to find out what your host recommends.
Note: You should be very careful when making changes to your permissions levels — choosing the wrong values (like the dreaded 777) can make your site inaccessible.
8. Keep the Number of Users on Your Site Low
If you’re running your WordPress site solo, you don’t need to worry about this step. Just don’t give anyone else an account on your site, and you’ll be the only person who can make changes.
I call this strategy “With my, by myself.”
However, many humans like other people and do eventually add more than one user to their website. You may want to let other authors contribute content, or you might need people to help edit that content and manage your site. It’s even likely you’ll find yourself with an entire team of users who’ll regularly access your WordPress site and make their own changes.
This can be beneficial in many ways and is sometimes even necessary. However, it’s also a potential security risk.
The more people you let into your site, the higher the chance that someone will make a fat-finger mistake or that a user will cause problems just to be a putz. For this reason, it’s smart to keep the user count on your site as low as possible while not hampering its ability to grow. In particular, try to limit the number of administrators and other user roles with high privileges.
Here are a few more suggestions:
- Limit each user to only what permissions are necessary for them to do their job. Obvs.
- Encourage users to use strong passwords (remember No. 3?).
- Try to stick with one administrator, if possible, and a small group of editors.
- Give users who have left the site or no longer need access the boot.
- Consider downloading a plugin, such as Members, which provides a user interface for WordPress’ role and capabilities system.
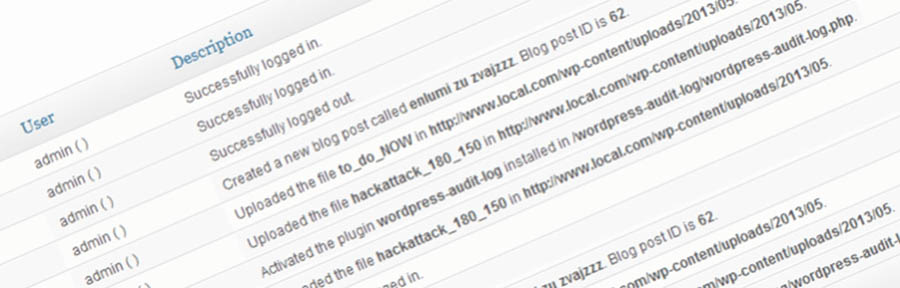
9. Track Your Admin Area Activity
If you’ve got multiple users, it can be a good idea to keep tabs on what they’re all doing on the site. Tracking activity in your WordPress admin area will help you spot when other users are doing things they shouldn’t and can indicate whether unauthorized users have gained access.
When a weird change has been made or something suspicious installed, you’ll want to be able to find out who was behind the activity. Plugins got you covered.
Most larger security plugins don’t provide this functionality out of the box, so you’ll want to find a dedicated solution. If you’d like to take a hands-off approach, Simple History lives up to its name by creating a streamlined, easy-to-understand log of important changes and events on your site.
For more involved tracking features, you can also check out WP Security Audit Log, which keeps an eye on just about everything that happens on your site and offers many useful, premium add-ons.
Once you have a suitable plugin installed, it’s a smart idea to check the log periodically for anything out of the ordinary. If something happens on your site that you weren’t expecting or bugs suddenly pop up, look through the most recent activity.
Related: Looking for a WordPress security plugin? Here Are 13 Great Options to Keep Your Website Safe
10. Back Up Your Site Regularly
I’d be lying if I said there was a magic solution for protecting your website from all threats. Even if you implement every suggestion on this list, there’s still a chance you may experience a security breach on your site.
Hackers are good at what they do.
You’ve just got to beat them at their game. A comprehensive security plan means preparing for what you’ll do if the worst happens, even while you’re trying to ensure it never does.
Backing up your site on a regular basis is the simplest and best way to safeguard it in the event of a disaster. If you have a recent backup handy, you can restore your site to the way it was before it was hacked or otherwise harmed. This will help you fix the issue and move on as quickly as possible.
Of course, you’ll want to be smart about the way you create and use your backups. The following tips are a good start:
- Keep more than one backup. A good rule of thumb is to have at least three recent backups on hand at all times since it’s possible your most recent backup could have issues you haven’t yet noticed.
- Save your backups in multiple external locations, such as cloud storage and physical hard drives.
- Set up and stick to a consistent backup schedule. The frequency and timing are up to you, although there are plenty of solid recommendations you can follow.
In addition to your regular backup schedule, it’s always smart to create an extra backup of your site before making any changes to it. So (nudge, nudge) before implementing any of these security-boosting techniques, make sure you have a recent backup ready to go.
Ready to Tackle WordPress Security Issues?
Whether you need help navigating the WordPress dashboard, fixing incorrect database credentials, or dealing with a brute force attack, we can help! Subscribe to our monthly digest so you never miss an article.

WordPress Security: Locking It Up
True fact: if your website is hacked, you’ll spend hours (even days!) trying to repair the damage. You may permanently lose data or see your personal information compromised — or worse, your clients’ data.
That’s why you’ve got to put a whole lotta time and energy into making sure that situation never occurs. Otherwise, you’re likely to lose valuable business and income while trying to repair the damage.
These 10 WordPress security tips should help. Some are simple tweaks. Others affect your entire site, such as switching to HTTPS or adding an SSL certificate. Of course, you’ll also want to make sure your site runs on a secured WordPress host.
Our DreamPress hosting (with free WordPress migration) is specifically designed for the WordPress environment. Plus, if you ever do encounter a security issue, we’ve got you covered with automatic daily backups, a weekly malware scan, and our support team of WordPress experts!
The post 10 Smart Ways to Effectively Secure Your WordPress Website appeared first on Website Guides, Tips & Knowledge.
source https://www.dreamhost.com/blog/secure-your-wordpress-website/


No comments:
Post a Comment