Friday, 8 July 2022

On-Page vs. Off-Page SEO: Complete Guide & Essential Tips

Search Engine Optimization (SEO) is a complex and ever-evolving field that can certainly be confusing for beginners — and understandably so. With over 200 ranking factors and new “rules” being added by search engines all the time, it can be tough to know where to start.

Well we’re here to shine the light on the situation for you. You see, there are two main “categories” of SEO — on-page and off-page. One refers to things you can directly control such as optimizing your website’s title tags and headings, while the other refers to external signals such as others linking to and sharing content from your site.

When you understand the foundations of these distinct optimization types, you’ll be able to develop a comprehensive and balanced SEO strategy. Knowing how to cover all your bases, from image optimization to link building, can help ensure your site’s organic search success.

In this complete guide, we’ll introduce you to SEO basics and explain the difference between on and off-page SEO. Then, we’ll share different ways you can improve both to boost your site’s rankings. Let’s get started!

Why SEO Is Important for All Websites

Before we get into the specifics of on-page and off-page SEO, let’s discuss the importance of search engine optimization more broadly.

On a daily basis, the average online user will conduct a wide variety of searches on the web. From looking up directions to the nearest shoe store, to learning exactly how many steps are in the Eiffel Tower, most of us turn to the search bar as a reflex. In fact, more than 50% of online traffic comes from organic search.

When it comes down to it, SEO is so important because all websites have the same goal – to be found and seen. A web page’s search rankings have the power to drive traffic, generate leads, and boost conversions. Therefore, SEO is relevant to almost every aspect of your online marketing strategy.

The Difference Between On-Page and Off-Page SEO

Now that we’ve covered the SEO basics, let’s dive into the differences between on-page and off-page SEO.

What Is On-Page SEO?

Also known as ‘on-site SEO’, on-page SEO is pretty self-explanatory. It refers to all the page ranking factors you can manipulate or optimize on your website. These elements can include the content on your product and service pages, blog posts, landing pages, and microsites.

On-page SEO encompasses title tags, meta descriptions, heading structure, content, image optimization, accessibility, and overall website performance.

What Is Off-Page SEO?

As you might expect, off-page SEO or ‘off-site SEO’ includes all page ranking factors beyond your website.

For instance, ‘backlinks’ (or ‘inbound’ links) are links on other web pages that direct back to your website. When your site has lots of backlinks from credible sites, they can benefit your search rankings because these pages can pass on some of their authority to you.

This is a classic example of off-page SEO, but there’s more to it. Off-page SEO is not as straightforward as on-page SEO. However, it includes concrete SEO strategies for social media, domain authority, and more.

Get Content Delivered Straight to Your Inbox

Subscribe to our blog and receive great content just like this delivered straight to your inbox.

10 Ways to Improve On-Page SEO

It’s time to go into more detail for on-page SEO. Here are 10 factors to consider when optimizing your web pages for SEO!

1. Create High Quality Content

Creating high quality content is one of the most effective strategies for boosting your chances of appearing higher on Search Engine Results Pages (SERPs). After all, Google’s algorithms are designed to provide users with only the best and most relevant content.

Keep in mind that quality includes everything from appearance to practicality. Your ultimate goal should be to create visually appealing, accurate content that will serve a useful purpose.

For instance, if you are starting a blog, you might want to make sure you have a clear niche and stick to it. That way, you can work on growing your knowledge and establishing credibility in your subject area:

gardening website example of high quality content

Similarly, you’ll want to produce new blog posts regularly because readers and Googlebots alike favor fresh content. You may also want to develop a brand style guide and reference it when creating new content. This way, your audience can feel reassured by consistency.

Calls to Action (CTAs) are also vital if you want your content to inspire your readers to make a move. Other indicators of high-quality material include images and reader-friendly text, but we’ll dive more into those later.

2. Use Target Keywords

Using target keywords on your page is one of the most straightforward SEO tactics you can implement. However, you’ll need to consider your intended audience before you can find target keywords.

For example, if you run a craft blog, your ideal reader might be parents of children under 12. You could hone it down further to parents in the Pacific Northwest. Once you know your audience, you can find target keywords using tools such as Google Keyword Planner.

You can start by introducing keywords that you anticipate your target audience may use. Then, see what similar words and phrases are produced. Choosing keywords with high monthly search volumes but low to medium competition is often best.

It’s also wise to choose a diverse range of keyword types and lengths. For example, you may decide to use some shorter, medium-competition words. On top of that, you could select some lengthier keywords that are highly specific. These are called ‘long-tail keywords.’

For example, if you run a candy store in Wisconsin, you might choose ‘candy shop’ and ‘candy store’. Then, for long-tail keywords, you could use ‘best candy shop in Milwaukee’:
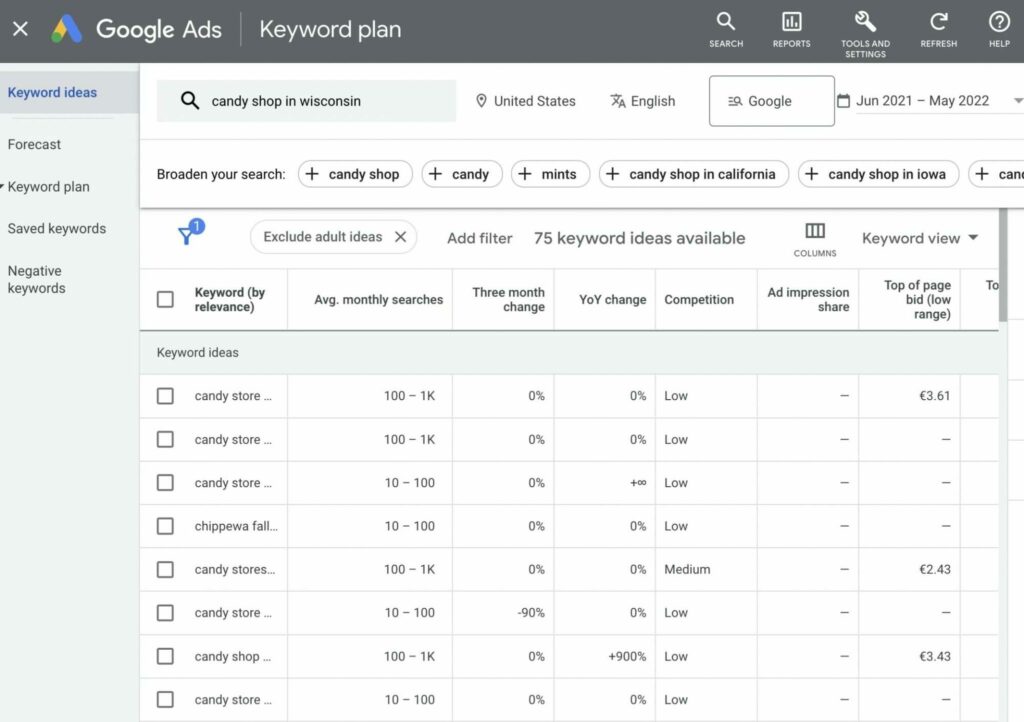
Google Ads Keyword Planner Tool
Google Keyword Planner

Once you have your keywords, you can place them anywhere on your site. You can add these phrases to blog posts, your About Us page description, product details, and anywhere else you like. However, you’ll want to avoid keyword stuffing.

Essentially, you can use keywords anywhere you see text on the front end of your site. We’ll get into less visible locations for keywords later.

3. Optimize Images

Users prefer high-quality images, and search bots favor lightweight, SEO-optimized ones. Let’s consider a few ways you can ensure your photos are helping your search engine rankings.

To start, it’s best if images are clear and high-resolution. Beyond that, you can compress image files so they are not large and heavy. Whenever possible, you may want to use a compression tool such as TinyPNG:
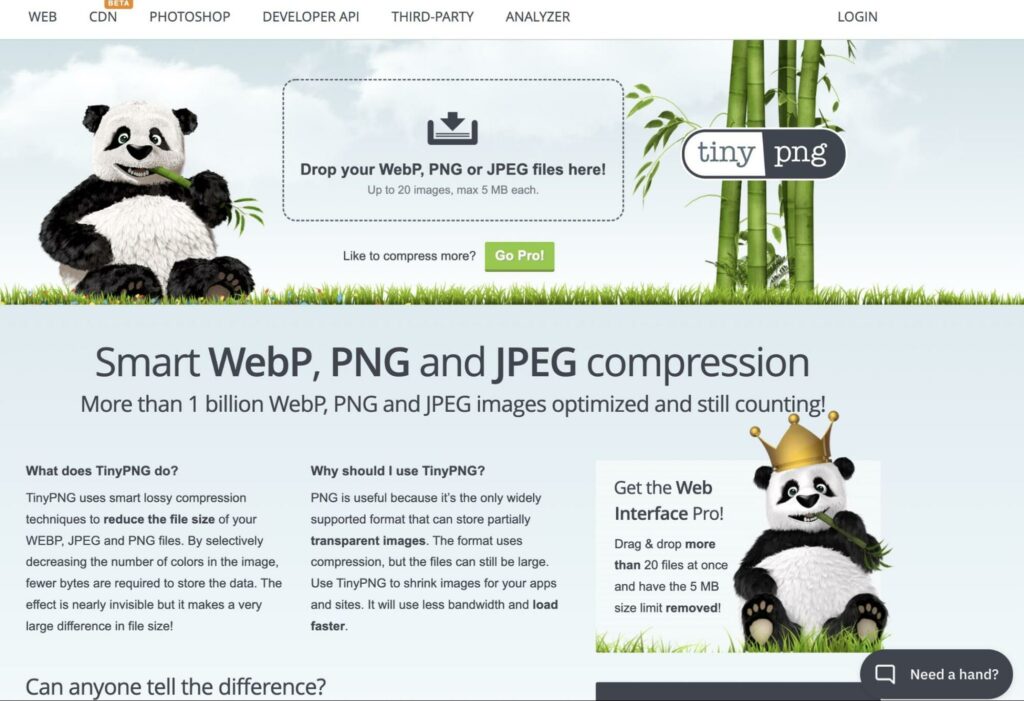
TinyPNG online image compression tool

This free tool enables you to shrink down PNG, JPG, and WebP files so that they don’t slow your site’s loading times (more on this later).

Another simple way to optimize images is by adding ‘alt text’ (alternative text). Simply put, alt text is a summary of an image that users on the front end can’t see. It serves two essential purposes.

Firstly, alt text increases your site’s accessibility by enabling users with impaired vision or complete loss of sight to interact with images. Assistive technologies (such as dictation tools) can help some visitors listen to the descriptions of your visual media files. Furthermore, bots can’t see pictures, but they can read the alt text.

How you add alt text will depend on the Content Management System (CMS) you use. With WordPress, the process is simple. When editing your site in the Block Editor, just select the block for an image and find Alt text in its settings. Here, you can easily type in a brief image description and input some relevant keywords.

4. Create Internal Links

Whether you run a blog or a multi-page website, you will likely deal with many unique links. An ‘internal’ link is a URL that leads to another page on your website. For instance, you may have a footer with links to your blog, contact page, and other essential information.

When creating your web pages, it’s a good idea to include internal links wherever possible. Of course, this process should always be done naturally. These internal links are crucial because web crawlers use them to jump from page to page while scanning information.

In fact, if one of your web pages doesn’t have any internal links leading to it, it’s considered an ‘orphan page’. Search bots can’t find it. Therefore, it can’t be indexed, and it definitely can’t be ranked.

Furthermore, internal links can keep users on your website for longer. This increased time on page may lead to conversions, lead generation, and more. Lastly, and most importantly, internal links help provide a positive UX.

For instance, in a blog post explaining a complex subject, it might make sense to link to another one of your articles elaborating on a related concept. Additionally, internal links can help users navigate around your site as they search for specific details, such as contact information.

5. Optimize Permalinks

While we’re on the subject of URLs, let’s discuss permalinks. These are the permanent URLs that represent your pages, and they are also crucial for strong SEO.

When creating new pages, you’ll want to ensure that your URLs are straightforward and intuitive. For example, if your domain is mywebsite.com, your other pages might have URLs like mywebsite.com/about and mywebsite.com/contact.

If you run a blog, your URLs may need to explain more complex information, but remember to keep things simple.

For instance, for an article titled “How to Declutter Your Bathroom in 10 Simple Steps”, using the full title would be too lengthy. Instead, you could use mywebsite.com/declutter-bathroom-guide.

Using concise permalinks is best. In fact, certain ‘stop words’ (prepositions, articles, connectors) are ignored by search engine bots. Therefore, they should be left out. It’s also wise to include any relevant keywords in your permalinks.

6. Consider Readability

Whether your content is brief or lengthy, readability is an important ranking factor. Your articles and pages should be well-written. It’s best to write directly and concisely, using shorter sentences and vocabulary that fit your audience.

Additionally, you can use headings and subheadings to organize your content. These elements are essential if you’re producing lengthy how-to guides or listicles:
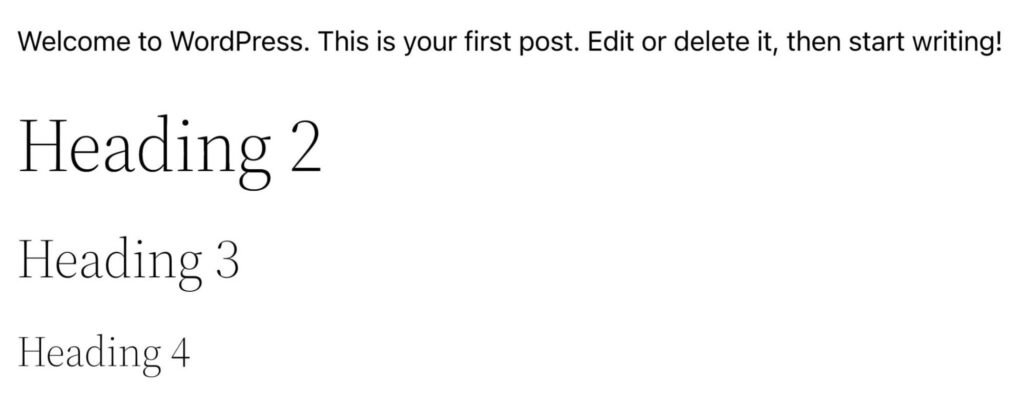
WordPress heading structure

Headings also create more opportunities to insert relevant keywords. Furthermore, you’ll want to ensure that sections are neither too short nor too lengthy. Quality content tends to be skimmable without large blocks of text. You can also use those high-quality images we mentioned before to break up the text.

7. Utilize Title Tags and Meta Descriptions

Meta tags are bits of HTML code that signal to search engines how they should read your content.

Title tags and meta descriptions are examples of these, and key for helping search engines understand how to rank your website’s content. These meta tags generate information that will appear to users in the search results and might encourage them to click on your page.

Here’s an example of a title tag:
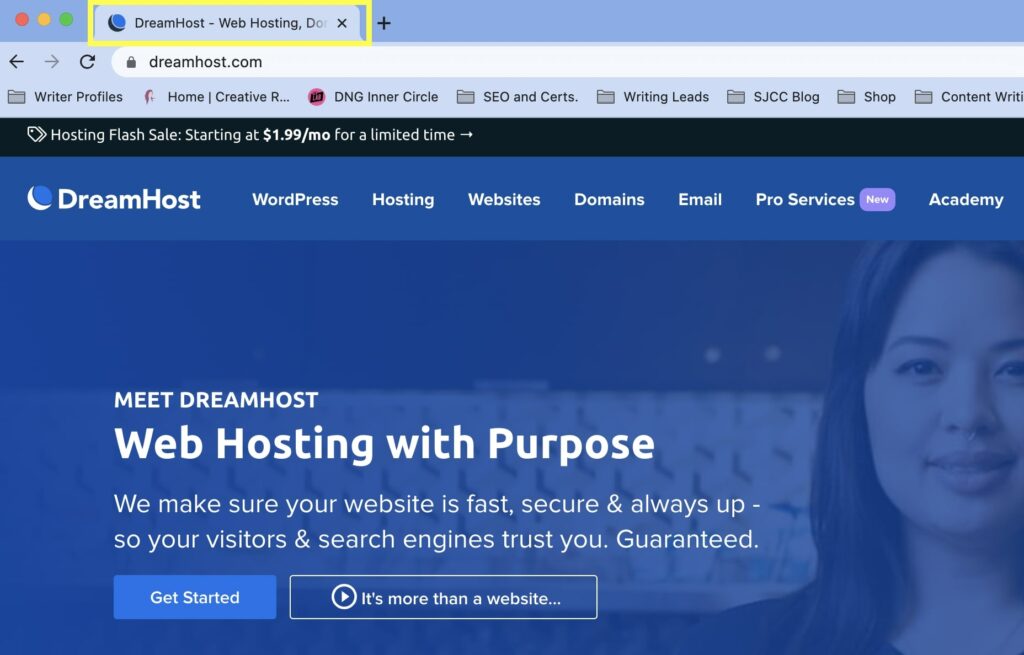
example of title tag appearing in web browser tab

Now let’s look lower down the page to see a meta description:
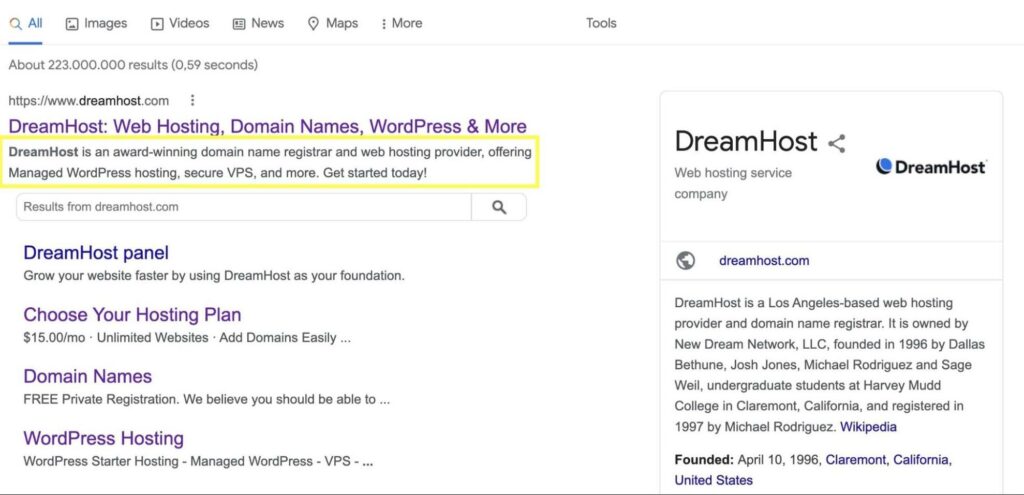
meta description example in Google search results

These elements are critical if you want to boost your search engine rankings. Without them, your page’s content will be advertised with a chunk of the first paragraph on the page. Furthermore, web users will have a hard time navigating back to your page when using multiple tabs in their browser.

To easily add title tags and meta descriptions to your posts, you might want to try out a free WordPress SEO plugin. Yoast SEO and All In One SEO (AIOSEO) are popular choices.

8. Monitor Site Performance 

Site performance also plays a crucial role in search engine rankings. Here, we’re mainly talking about speed.

As you can imagine, users looking at the search results don’t want to be led to pages that are slow or don’t work correctly. In fact, Google has created what it calls Core Web Vitals. It assesses page loading times, interactivity, and page stability to give you a Core Web Vitals score.

If you’d like to check how your site performs, you can test it using tools such as Google PageSpeed Insights:
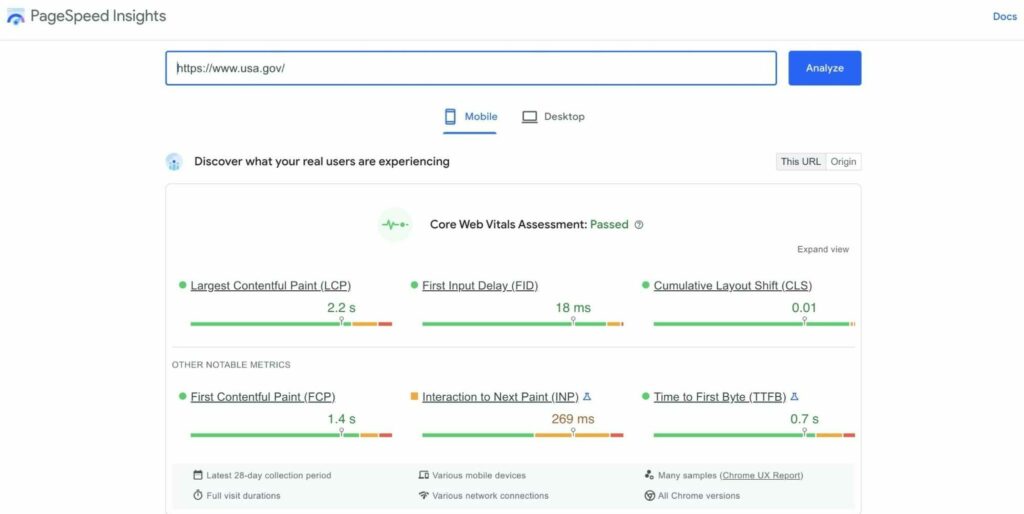
Google PageSpeed Insights - Core Web Vitals Results

Simply enter your website’s URL and see how it does. If your site needs some performance improvements, you can try implementing caching or lazy loading. Even better, you could ensure that your web host uses a Content Delivery Network (CDN), though this may require changing hosts.


9. Prioritize User Experience (UX)

As we approach the end of our on-page SEO strategies, it’s time to discuss UX. This concept is behind most other optimization tactics because the ultimate goal is to make a website more user-friendly.

On top of quality, performance, readability, and strong internal linking, there are a few more specific ways to create a positive UX for your site’s visitors.

A huge part of UX is linked to usability. Therefore, smooth navigation is particularly important.

To make exploring a multi-page website easier, it’s best to use a prominent navigation menu either at the top or left of your page:

example of accessible website navigation

Additionally, you may want to create a search bar feature and include helpful links in your footer. All these elements help users navigate around your site without scrolling.

10. Optimize Pages for Mobile Devices

Last but not least, if you want your pages to rank at the top of the search engine results, they must be mobile-optimized. This is because most internet users prefer to use their smartphones or other handheld devices.

There are currently more than 4.9 billion mobile internet users globally, and the number is growing. Therefore, it’s no surprise that Google declares mobile-friendliness a must for SEO. Plus, with the rise of m-commerce, any online businesses that neglect their mobile visitors are likely to miss out on significant sales.

There are a few very simple ways to ensure your website is mobile-optimized. For starters, you can opt for a mobile-friendly WordPress theme. That way, you can set it and forget it.

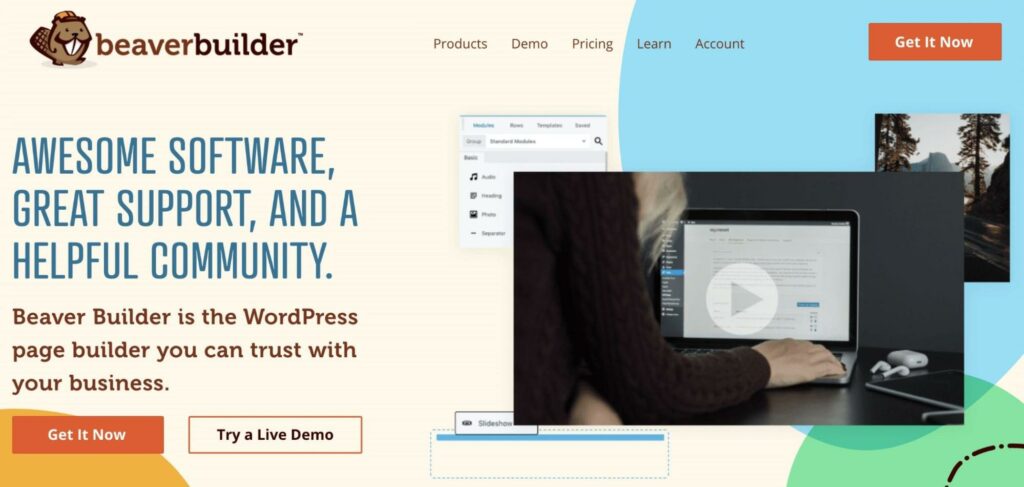
If you expect to customize your site extensively, you may want to use a WordPress page builder that has mobile previewing and modification settings:
BeaverBuilder website page builder tool

Beaver Builder is a popular choice that offers responsive designs and editing features. It’s also easy to use with a drag-and-drop interface.

How to Improve Off-Page SEO (3 Essential Techniques)

Now that you know everything about on-site SEO, let’s explore how you can improve your rankings by other means. Keep in mind that the following section is briefer, simply because you have more control over on-page than off-page SEO.

1. Build Backlinks (Domain Authority)

Backlinks to your site show Google that your content is credible. That’s why building backlinks can enhance your website’s ‘domain authority’. Your site accumulates a positive reputation through how many backlinks it has.

Gaining backlinks takes time and quality content, but you can use some measures to actively participate in the process. For instance, you can write guest posts for other credible blogs in your niche and link to your content

You can also monitor your site’s mentions online and request that any unlinked instances be credited. Furthermore, some common formats that get linked to include how-to guides, “best of” listicles, and even infographics.

Ahrefs

You’ll want to be careful not to participate in anything shady when building your inbound links because you can be penalized by Google. Since backlinks require time and effort, we recommend using tools such as Ahrefs, which has a backlink checker.

2. Support Social Proof

Another way to build trustworthiness is to provide simple evidence. ‘Social proof’ typically refers to things like reviews and testimonials.

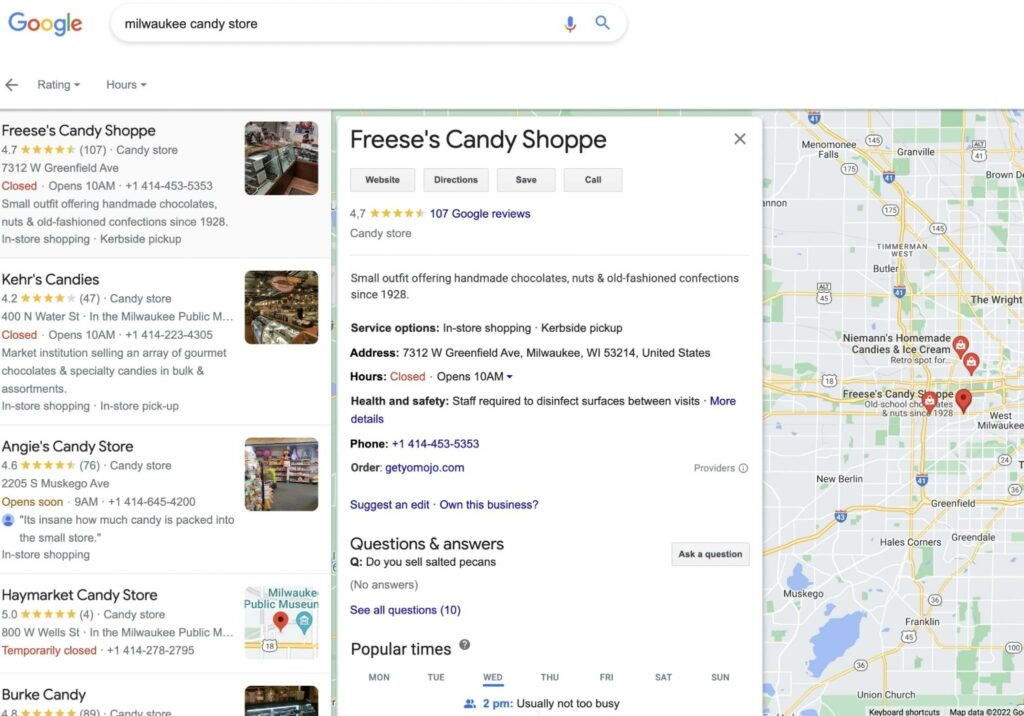
You can create a Google Business Profile for your company or website to gain social proof. This platform has a review feature built-in:
Google Local Search results

Other types of content marketing can also serve as social proof. For instance, conducting a survey and then publishing your findings is excellent evidence of your legitimacy and professionalism.

Additional forms of social proof include testimonials and partnerships with other credible brands or individuals. For example, some companies collaborate with influencers in their niche to build more social proof.

3. Grow Your Online Presence on Social Media

On the subject of influencers, social media is perhaps one of the most important channels where e-commerce businesses can further build their off-page SEO.

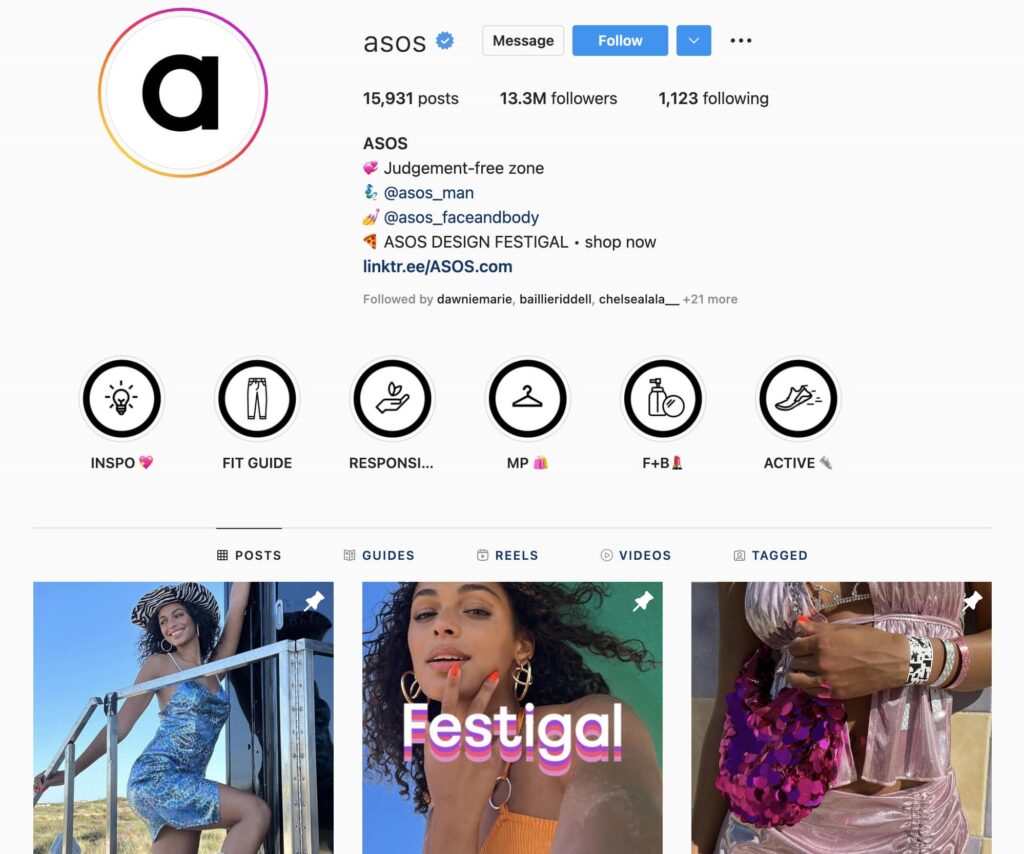
That’s because you can share quality content on any social media platforms you use. This material can include stunning images, target keywords, and links:
Instagram business page

Ultimately, social media is the place to build a brand, so we recommend developing an entirely separate (and complementary) social media strategy. All of these efforts will contribute to your off-page SEO because social media posts and pages can appear in search results.

However, you’ll want to consider which platforms your target audience uses. For instance, if you are appealing to millennials, you might want to focus on Instagram. Whereas with a younger audience, you may prioritize creating content for TikTok.

Improve Your Site’s Visibility Using On-Page and Off-Page SEO

Search Engine Optimization (SEO) is a complex and dynamic field. That can make it challenging to get started with both on-page and off-page SEO strategies. However, it’s essential to prioritize these optimization methods to boost your website’s visibility.

When it comes to on-page optimization, you can start small, implementing keywords, internal links, and high-quality content. Later, you can advance to elements such as title tags and meta descriptions. For off-page optimization, backlinks, testimonials, and a strong social media presence are essential.

If you’re a beginner in SEO,  you might want to forget the site audits and leave them to the professionals. Check out our DreamHost Pro Services and free up your time to focus on the creative side of your business. We offer specific plans for SEO marketing that will help you rank higher on SERPs. Plus, we have an SEO toolkit to take your site to the next level!

Search Engine Optimization Made Easy

We take the guesswork (and actual work) out of growing your website traffic with SEO.
shared hosting

The post On-Page vs. Off-Page SEO: Complete Guide & Essential Tips appeared first on Website Guides, Tips & Knowledge.


source https://www.dreamhost.com/blog/on-page-off-page-seo/

Wednesday, 6 July 2022

Decoding WordPress: New Theme Configuration Options with Theme.JSON File

New theme configuration options in WordPress are making it easier than ever before to modify the appearance of your site to your specific and unique needs. What’s more, the ability to convert classic themes to block themes is adding even more user-friendly functionality.

In this blog post, the fourth in our “Decoding WordPress” series, we’ll discuss both of these developments, including what they are and how they can make it easier for you to have a beautiful, tailored site whether you have beginner or intermediate WordPress development skills.

Get Content Delivered Straight to Your Inbox

Subscribe to our blog and receive great content just like this delivered straight to your inbox.

An Overview of WordPress Themes and Templates

Before going over the newest options for configuring your theme by utilizing the newest options made possible by a file called theme.json, we’ll get acquainted with what it actually means to configure a theme. In order to help our understanding of that, let’s first clarify the difference between a theme and a template in WordPress, since there’s often some confusion about it, especially if you’re a novice.

A theme is the complete design and foundation for your site’s cohesive look and feel. It includes things like color palettes, typography, page layouts, margins, line spacing, headers and footers, sidebar positioning, and other elements. When you choose a theme and install it, all of these elements are automatically installed as well. There are virtually countless numbers of free and paid themes available.

A template, however, is a single-page layout within a sitewide theme. And although modifications may be made to a template, they’re only applied to any of the pages that use that template, not to the entire site. Elements like customizing your blog’s layout, building landing pages, and giving other content a distinctive look are examples of what you can achieve through templates.

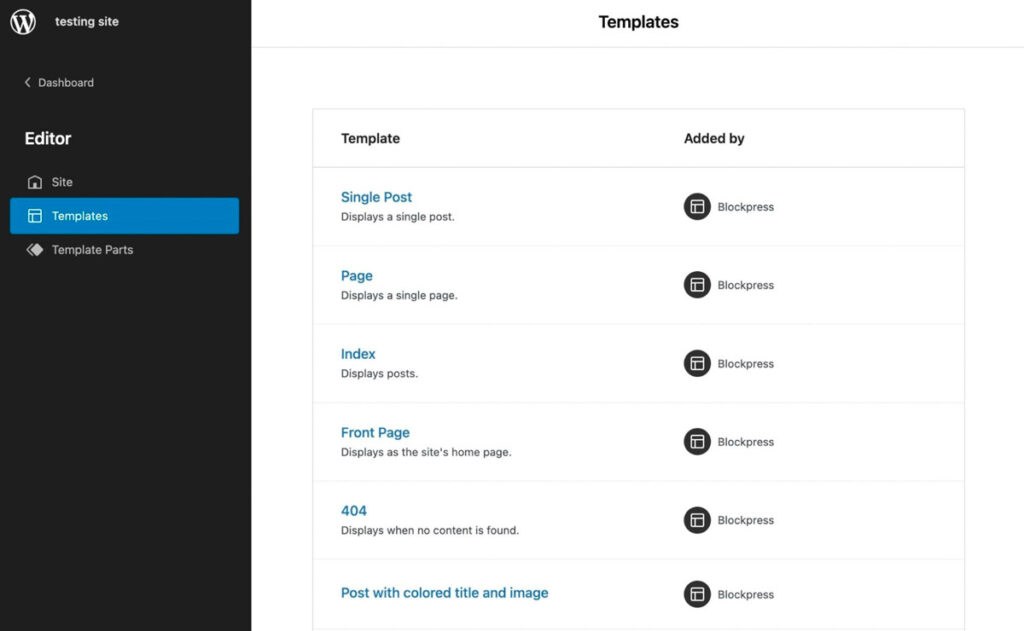
new WordPress Theme Configuration options

So, What Are Theme Configuration Options, Then?

Theme configuration options are admin pages that come with some WordPress themes. These admin pages allow you to customize the settings of your installed theme without having to modify any theme files or get bogged down with altering code. Some of these admin pages can offer a few options, while others may have many, many more. If you’re a beginner, the relative simplicity of an admin page versus the more complicated route can be a welcome time — and sanity saver.

If your goal is only to enhance or change functionalities within a theme, you can greatly simplify matters by installing a plugin rather than reconfiguring the entire theme. However, if you’re wanting to modify theme styles and block settings across your entire site, reconfiguring things through customizing is what you’ll need to do.

What the Heck is JSON?

To customize your WordPress theme when it doesn’t include an admin page, you’ll need to create and add a theme.json configuration file to the theme. But what is JSON? The acronym stands for JavaScript Object Notation, which is an open text-based data interchange format that can be read by both humans and machines and isn’t linked to any specific programming language. Its most common use is for transmitting data in web applications.

theme.json support was added to WordPress in version 5.8, and doesn’t work with older versions of WordPress unless you activate the Gutenberg plugin. (The Gutenberg editor was officially released in 2018 alongside WordPress 5.0.)

Some of the customization options you can choose from within theme.json include:

  • Enabling or disabling features like drop caps, block padding, margins, and custom line heights
  • Adding multiple color palettes, gradients, and duotone filters for photos
  • Modifying font sizes
  • Adding default widths for content
  • Managing custom CSS (cascading style sheet) properties. CSS is used to define visual appearance and formatting of HTML documents.
  • Assign template parts to template part areas

As Gutenberg development moves forward, the options that are available with theme.json in WordPress differ between version 5.8 (where version 1 of theme.json is used) to version 5.9+ (where version 2 of theme.json is used) as well as the Gutenberg plugin.

Options Explained

With these more granular customization options now within the reach of beginner and intermediate WordPress developers, let’s talk about both what they are and why they could be beneficial to you.

Enabling or disabling features like drop caps, block padding, margins, and custom line heights

Drop caps (a style technique in which the first letter of a paragraph has a larger font size), block padding (the space inside the block that lies between the element/content and the block’s border, and that surrounds all sides of the element), margins, and custom line heights can give your pages a more distinctive and even formal look, depending on how you manage to style them.

Adding multiple color palettes, gradients, and duotone filters for photos

The right color palette – or multiple palettes – can help to define and enhance the marketable identity of both your brand and your site, and gradients (backgrounds of two colors that transition into one another) can give your site a more dynamic identity than only using solid colors for the pages on your site. Duotone filters can be applied to photos you’ve uploaded to your site, and reduce the number of colors in the photo to just two – one for the dark parts of the photo, another for the light parts. Using these resources within your WordPress theme’s settings, your site’s overall color schemes can be formal, moderate, or avant-garde – limited only by your imagination.

Modifying font sizes

Sometimes, the fonts in your chosen theme may suit the specific identity, tone, or attitude you’re wanting to convey, but the set font sizes that are available may not. They may be too small or too large. By having the option to modify the sizes, you can tailor every aspect of the look of your site’s copy to your brand’s image.

Adding default widths for content

Content width is a theme feature whereby you can set the default or maximum allowed width (size) for any content in the theme, such as embeds and images added to posts. When you set default widths, WordPress can scale embed codes to specific sizes on the front-end and insert large images without breaking the main content area.

Managing custom CSS (cascading style sheet) properties.

If you’ve spent any time working with CSS, we’re sure you’re asking yourself why you’d even want to write your custom CSS in the radically different JSON format. In a word: flexibility.

Let’s say you’ve settled on a color, forest green, for your site that you really like. With CSS, you’d have to go through and add the color code to all of the places you want to use that color. Not a huge deal, right?

Now let’s say that a few weeks later you find a slightly darker shade of forest green that you’d much rather use. With CSS, you have to go back in and find/replace all of the instances of the “old” forest green color code with the new one.

But, by using theme.json, you’d only have to update the color definition once, in the JSON file, to get it to change across your entire site.

Assign template parts to template part areas

Page templates are files that control how a specific page looks, and they can be used to apply particular page layouts to different pages on your site. In WordPress, there are also template parts, which function as smaller structural sections of a page template.

If you are looking through your theme’s files, you will usually see template parts for things like headers or footers. theme.json allows you to assign template parts to the three available placement areas within a template: General, Header, and Footer.

To Convert or Not to Convert – That is the Question

Now that you’ve gained an understanding of the WordPress theme configuration options available to you courtesy of the theme.json file, we want to touch on one last thing: converting a classic theme to a block theme, and the issues that you should consider when converting.

Block themes in WordPress have a number of benefits, since they have been built to improve both scalability and performance.

  • Block themes enhance loading performance by loading the styles only for the  blocks that have been added to a page.
  • Block themes are not required to manually enqueue stylesheets for both the front-end and editors.
  • theme.json handles all aspects of add_theme_support(), which results in less time noodling around in PHP.
  • Accessibility features such as Skip to content, keyboard navigation, and landmarks are generated automatically without adding additional code.
  • With a block theme, an end user can edit all parts of their website without touching any code.
  • By using the Styles interface, users can customize colors and typography for the website and for any blocks they may use.

However, converting a classic theme to a block theme is not without some risks.

  • Converting a classic theme to a block theme may affect child themes that expect a classic theme. Consider the potential impacts — or creating a new project with a new theme name — before converting.
  • theme.json requires WordPress version 5.8 or later. Consequently, the support for Internet Explorer 11 was dropped when WordPress 5.8 was released. So, if your classic theme supports IE11 — or you have visitors who use IE11 — converting things over to a block theme potentially impacts your visitor’s experience.

Pro Help is Available!

Although customizing your WordPress themes with options through a theme.json file may be reasonably doable if you’re a beginner or intermediate WordPress developer, perhaps you’re not yet 100% certain it’s a step that you’re comfortable taking alone. Fear not, because when you sign up for DreamHost’s three DreamPress managed WordPress hosting plans, you automatically get access to our elite squad of fully in-house WordPress experts, who are available 24/7 to help you through this and any other components of your development journey!

Do More with DreamPress

DreamPress Plus and Pro users get access to Jetpack Professional (and 200+ premium themes) at no added cost!

Managed WordPress Hosting - DreamPress

The post Decoding WordPress: New Theme Configuration Options with Theme.JSON File appeared first on Website Guides, Tips & Knowledge.


source https://www.dreamhost.com/blog/wordpress-theme-configuration/

How to Learn CSS… Fast

Whether you’re an aspiring web developer or website owner, you’ve likely heard of Cascading Style Sheets (CSS). This programming language can be used to customize the look and feel of a website. However, it can be complicated to learn without the right resources.

Fortunately, there are plenty of ways you can learn CSS as a beginner. You can watch a step-by-step YouTube tutorial, take a comprehensive course, or even play virtual educational games. Any of these methods can help develop your CSS skills.

In this article, we’ll explain what CSS is and why you might want to consider learning it. Then, we’ll show you three easy and accessible ways to learn CSS. Let’s get started!

A Brief Introduction to CSS

Before you start learning how to code a website, you’ll need to know a bit about what’s happening behind the scenes. Every website contains different files, or coding languages. Here’s how some of them work together:

  • HTML: Defines the structure of a website.
  • JavaScript: Defines the behavior of a website.
  • CSS: Defines the appearance and style of a website.

CSS, or Cascading Style Sheets, is a stylesheet language that describes how HTML or XML documents are presented. It can be used to customize colors, fonts, positioning, and animation.

Without CSS, websites would have bland, default features. By customizing CSS, you can build a unique web design with an engaging layout, format, and style.

Although we’ll list some in-depth resources for learning CSS, let’s cover some of the basics. First, CSS is a rule-based language, meaning that you can define styles that are applied to specific items on your web page.

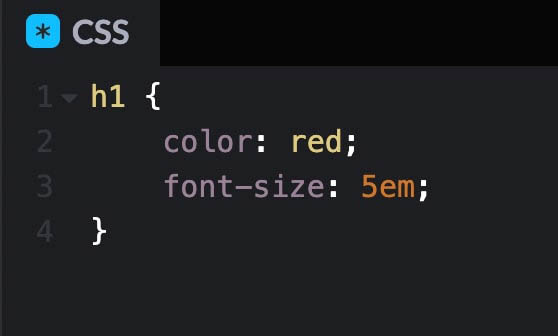
Here’s an example of what that might look like:

CSS example code

At the beginning of this CSS rule, it contains a selector. The <h1> in the initial line chooses which HTML element you want to customize. For this example, we’re selecting level-one headings.

Then, you can include declarations within a set of ‘curly braces’ like these: {}(also called ‘curly brackets’). Here, the declarations specify one for color and one for font size.

Each declaration has a pair of properties and values. In this case, the property ‘color’ is paired with the value ‘red’. The property defines a characteristic on a web page, while the value describes how it should be displayed.

In a CSS style sheet, you can list many different rules. This can help you modify or enhance the appearance of a web page with custom typefaces, colors, styling, and more.

Why You Might Want to Consider Learning CSS

Since it is technically possible to design a website without using code, you might be wondering why you should learn CSS. The bottom line is that customizing CSS can give you more control over how your site looks.

Without custom CSS, a website may be limited to the simple design a WordPress theme dictates. Default designs are not unique, and therefore won’t be very memorable.

Here are just a few of the many elements that you can customize with CSS:

  • Text color
  • Font style
  • Paragraph spacing
  • Column layout
  • Link hover effects

Ultimately, CSS can improve your website’s presentation. For instance, by adding animations, you can make your content more engaging. You can also use CSS to design your pages for mobile devices, ensuring that anyone can view your content.

Furthermore, using CSS, you can save time and effort when designing your website. You can simply write one tag and apply it to all occurrences across your site. This can minimize the code you have to write.

Plus, once you become familiar with CSS and HTML, it can make it easier to learn other coding languages like JavaScript or PHP. Combining these coding skills can often lead to high-paying jobs in web development or web design.

Even a basic understanding of CSS can be useful in many forms of employment. If you’re an email marketing specialist, content creator, or technical virtual assistant, CSS can help you design online content for your clients rather than relying on third-party tools.

Get Content Delivered Straight to Your Inbox

Subscribe to our blog and receive great content just like this delivered straight to your inbox.

How to Learn CSS Fast (3 Easy Methods)

Once you decide to start learning CSS, you might not know where to begin. To help you get started, we’ve compiled a list of some free, useful online resources for every stage of your learning journey.

1. Watch a YouTube Tutorial

One of the best places you can learn a new skill is on YouTube. By simply searching for videos about CSS, you can find many helpful tutorials that are free to watch.

In fact, many web development experts make step-by-step guides on how to start learning CSS. These videos are often segmented into different parts, so you can easily learn one topic at a time. Plus, CSS YouTube videos often allow you to watch developers code in real-time.

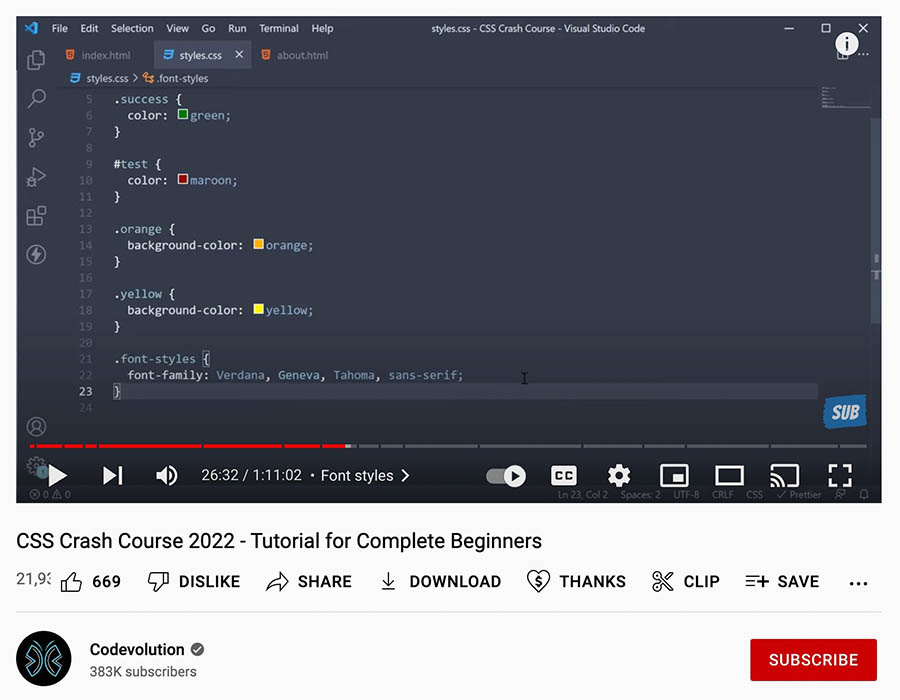
For a quick overview of CSS, you can watch Codevolution’s CSS Crash Course. This video explains how to format and customize CSS as a beginner:

YouTube CSS crash course

In this tutorial, the creator walks you through the first steps of adding CSS to an HTML document. You’ll learn how to style color, text, fonts, lists, tables, and more.

However, keep in mind that an hour-long video won’t be able to cover everything. This is a good place to get started, but you’ll likely need to watch additional videos on the CSS grid, flexbox, or other advanced techniques. 

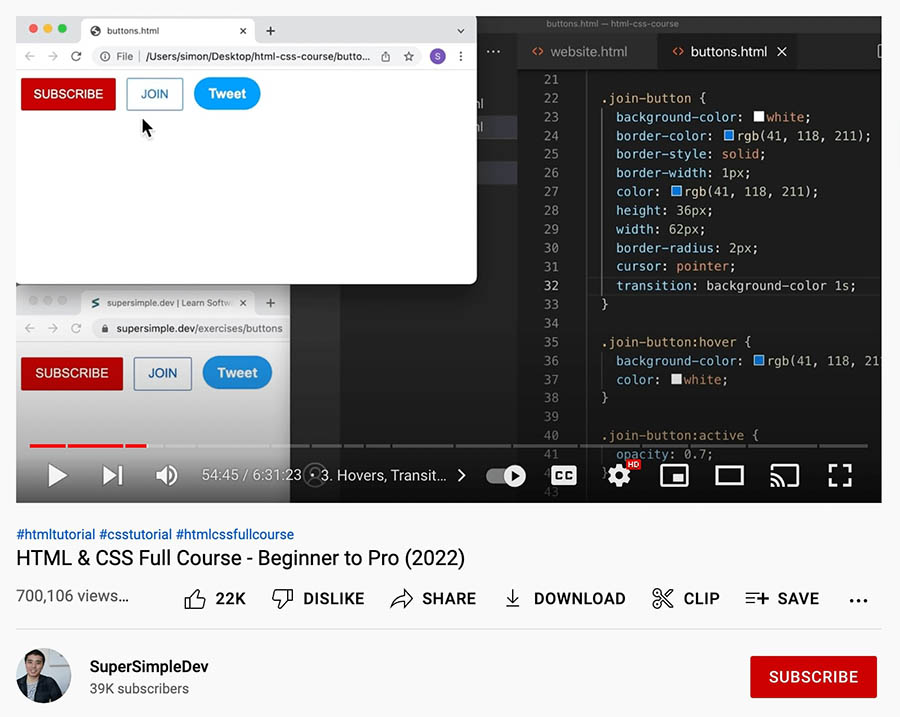
If you want to watch a fully comprehensive video about CSS, SuperSimpleDev created an HTML & CSS Full Course. In six and a half hours, this video teaches everything from the basics to more professional techniques:

HTML and CSS course

Since no previous experience is required, this tutorial can be your first step to becoming a professional developer. It also includes HTML guides, which makes a great resource for learning multiple coding techniques in one place. 

By following along with this tutorial, you can complete different exercises to practice CSS and HTML. It contains over 100 tasks. If you master the appropriate techniques, you should be able to create a YouTube web page by the end of the course.

2. Take a CSS Course

Although YouTube is a valuable resource for basic coding knowledge, it might not provide the information you are looking for. Plus, certain videos can contain outdated information. To continue advancing, you can try out an online CSS course.

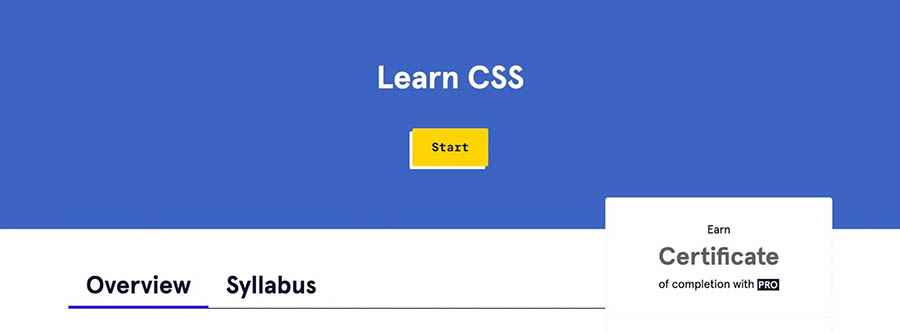
Fortunately, there are plenty of CSS classes that you can take for free. For example, Codecademy has a Learn CSS course that you can take after creating a free account:

Codecademy CSS course

In this course, you’ll learn how to style a web page with CSS. It’ll teach you how to format files correctly, add new features, and build aesthetically pleasing layouts. After learning about syntax, visual rules, the box model, display, colors, and typography, you can likely master CSS.

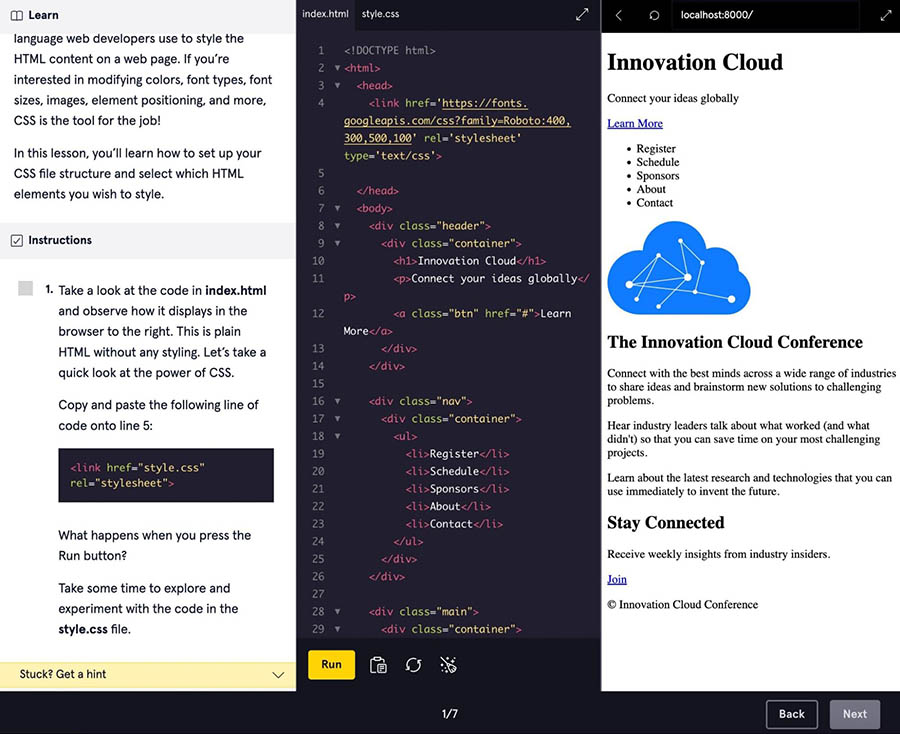
 Each module will give you a written lesson and instructions on how to implement it. You’ll be able to format code and see how it affects the front-end display:

Codecademy module

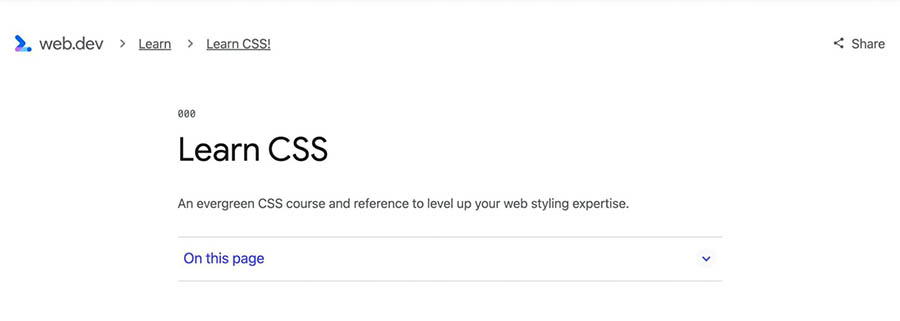
You can also find useful CSS tutorials on web.dev. In its Learn CSS course, each fundamental concept is broken down into easy-to-understand modules. This free course will take you through the box model, selectors, flexbox, and grid:

Web.dev CSS course

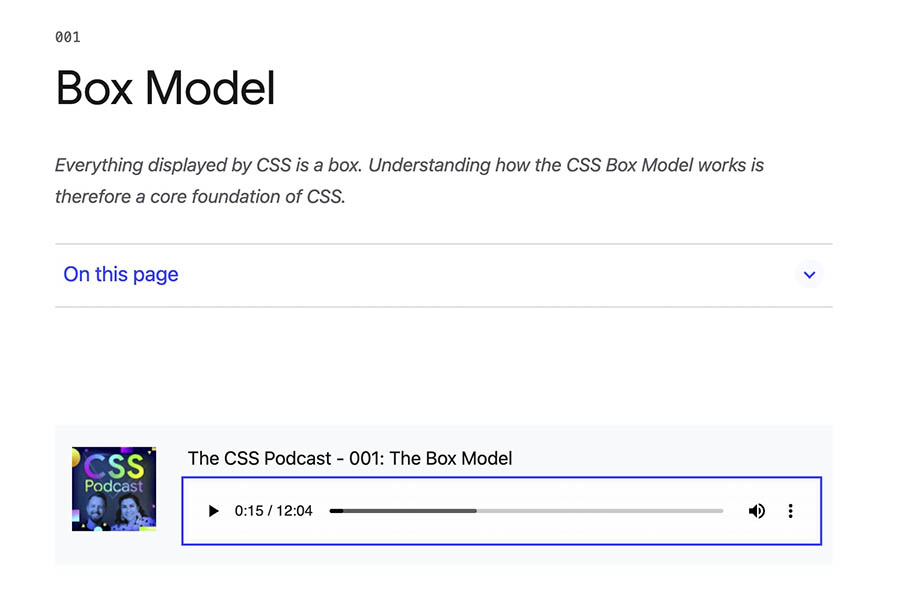
With this course, when you click on a module, you’ll find a clip from the CSS Podcast. If you’re an auditory learner, you may benefit from listening to people discussing certain CSS topics:

Web.dev course module

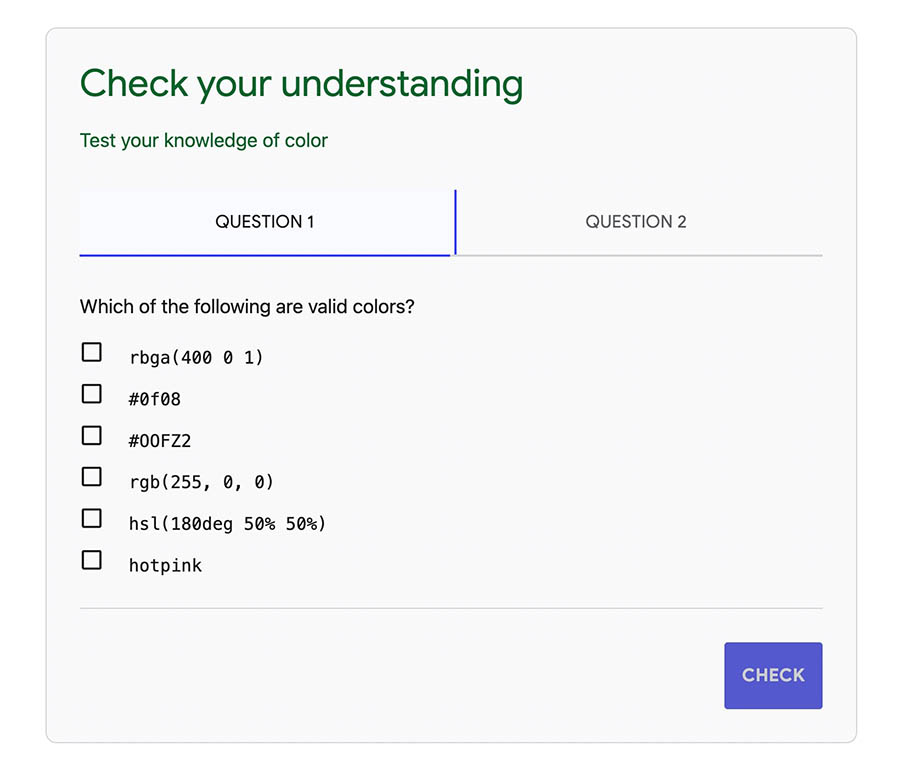
You’ll also have opportunities to test your knowledge. At the end of each module, you can answer a test question about that information:

Web.dev course quiz

Once you complete all 29 modules, you’ll be one step closer to becoming a CSS expert!

3. Play an Educational CSS Game

After you learn the basics of CSS from online courses, it’s time to put your skills to the test. You likely won’t want to start experimenting with website coding right away, but you can practice by playing an interactive CSS game.

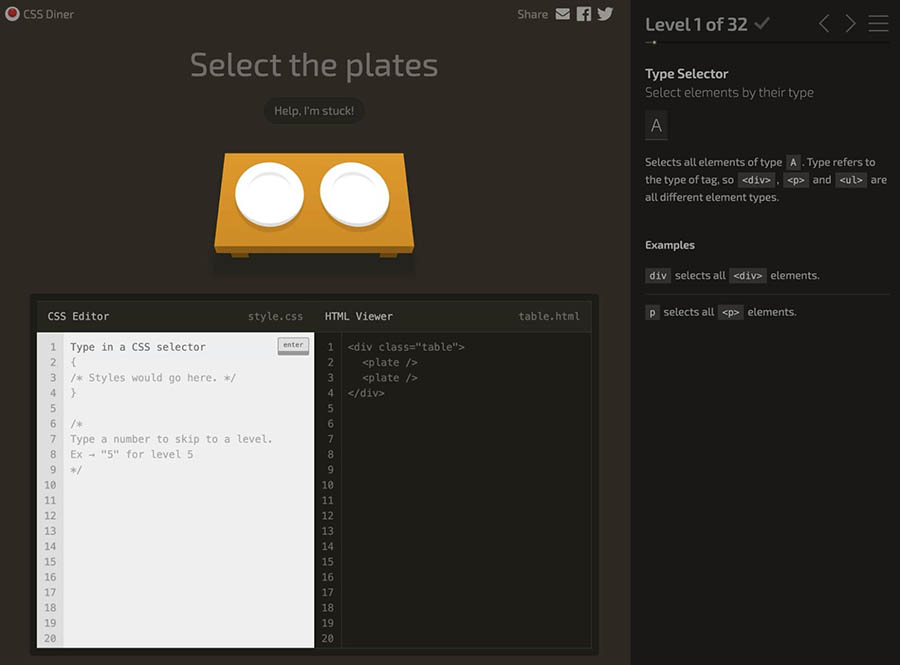
CSS Diner is an online game where you can master selectors. This will teach you how to specify certain elements at the beginning of your CSS code:

CSS Diner

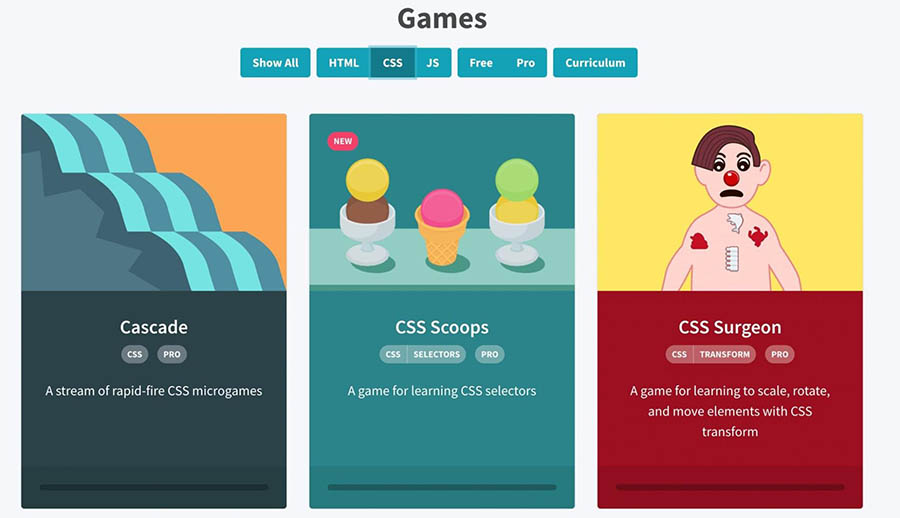
If you want a wider variety of games to choose from, you can create a free account on Codepip. Here, you’ll find many games for practicing CSS, HTML, and JavaScript:

Codepip CSS games

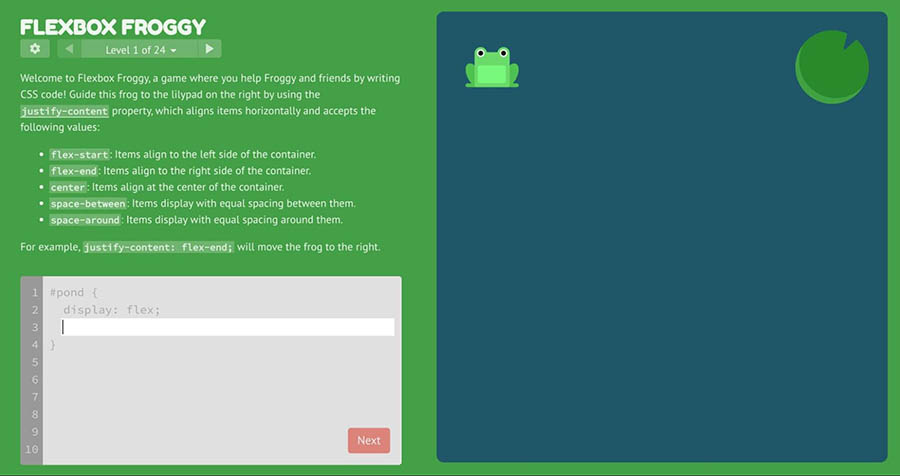
Flexbox Froggy is another popular option that allows you to practice CSS Flexbox. In this game, you can move an animated frog onto a lilypad by implementing CSS code:

Flexbox Froggy

When you use a CSS game to hone your skills, you can make mistakes without any consequences. Plus, you can learn more because of the engaging graphics!

Take Your CSS Skills to the Next Level

If you want to develop your technical web design skills, CSS is a good place to start. It is the foundation for many custom site designs, and you can use it to build unique features and functionality. Even if you don’t know how to code, many free educational guides can help introduce you to CSS.

To review, here are some of the best methods you can use to start learning CSS:

  1. Watch a YouTube tutorial from Codevolution or SuperSimpleDev.
  2. Take a CSS course from Codecademy or Udemy.
  3. Play educational games like CSS Diner or Flexbox Froggy.

When you start adding custom CSS to your site, you’ll likely want to rely on high-speed hosting. At DreamHost, our shared hosting plans can provide you with the support you need to keep your unique designs running smoothly!

Power Your Website with DreamHost

We make sure your website is fast, secure and always up so your visitors trust you. Plans start at $1.99/mo.

shared hosting

The post How to Learn CSS… Fast appeared first on Website Guides, Tips & Knowledge.


source https://www.dreamhost.com/blog/learn-css/

Thursday, 30 June 2022

How to Create a WordPress Plugin (Beginner’s Guide)

One of the main reasons that WordPress is so popular is its open-source nature. There are over 50,000 plugins that have been developed for this widely used Content Management System (CMS). However, you might be wondering how to create your own WordPress plugin. 

Fortunately, WordPress makes the process easy. Some coding knowledge will be needed, but it’s not terribly hard to learn how to create a basic plugin for your website. This will, among other things, enable you to add more functionality to your content. 

In this article, we’ll take a closer look at WordPress plugins and why you might want to create one. Then, we’ll show you how to develop your first plugin. Let’s get started!

An Introduction to WordPress Plugins

WordPress powers well over one third of all websites on the internet. This equates to around half a billion different sites!

A major factor in the success of WordPress is its open-source nature. This means the source code of the core software, its plugins, and themes is available for anyone to work with and modify as they see fit.

WordPress plugins are packages of code that extend the functionality of your site. These are created by different developers all around the world, and are designed for a variety of purposes. 

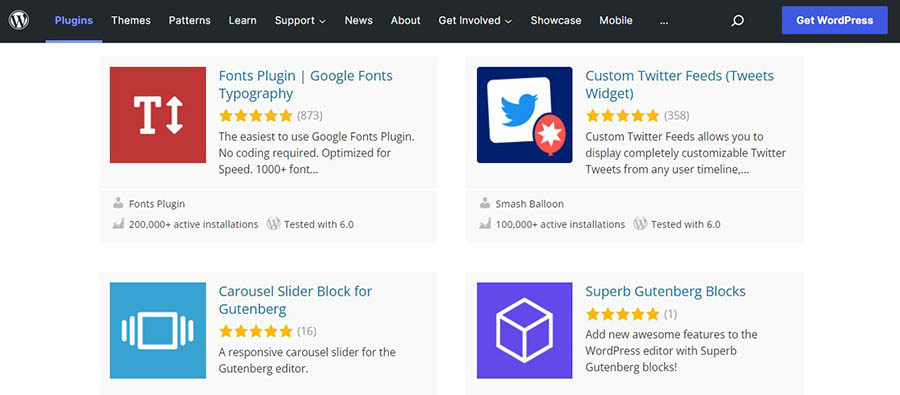
For instance, you’ll find plugins for adding social media share buttons, newsletter signup forms, popups, turning WordPress into a full blown ecommerce site, and more:

The WordPress Plugin Directory

The WordPress plugin ecosystem empowers those without coding knowledge to create and customize powerful websites. Additionally, it offers almost limitless opportunities for developers and webmasters alike.

Why Develop a WordPress Plugin

WordPress is one of the largest markets for developers. This means you’ll find plenty of resources to help you develop plugins for the CMS.

Moreover, the earning potential for WordPress plugins is also very high. While there is no shortage of competition, if you have a new or better solution to a common problem, you could quickly find your plugin used on thousands of sites. In fact, most plugins that are available for download were originally developed to help solve a problem.

The magic of WordPress is that you can develop a solution for your own site — you don’t have to share it on the plugin market. However, many developers choose to make their plugins available to other users to help them work around similar issues that may be bothering them.

Lastly, WordPress is a great platform for learning how to code. Because it has been around for 19 years, it provides plenty of resources and documentation to help you get started. On top of that, it has a massive user base, which can help you gain exposure as a developer if your plugin gets widely adopted.

Get Content Delivered Straight to Your Inbox

Subscribe to our blog and receive great content just like this delivered straight to your inbox.

How to Create a WordPress Plugin (In 6 Steps)

While different plugins will require different amounts of coding and know-how, they all tend to follow the same development process. Let’s look at how to create a WordPress plugin in six steps.

Step 1: Do Some Research and Planning

There are thousands of tools in the WordPress Plugin Directory. Therefore, the first thing you’ll want to do is carry out some research to see if your idea already exists.

However, even if it does, you could still go ahead with your plan. You may want to explore similar plugins and find out how you might be able to improve upon them. Alternatively, you could complement what is already available with something like your own custom post type and additional features. 

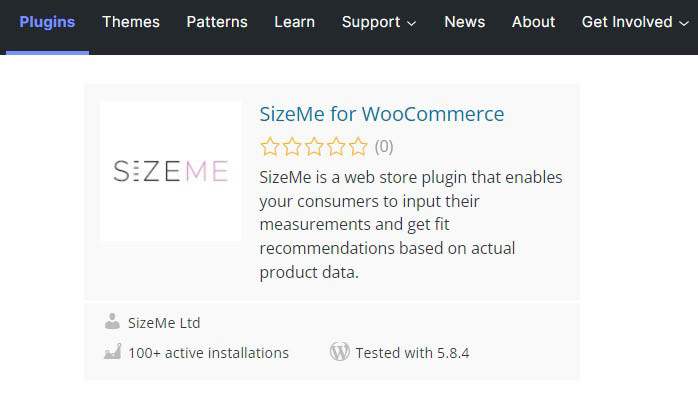
You might also want to check the status of existing plugins. For instance, if a plugin hasn’t been updated in some time, or is not compatible with the latest version of WordPress, there might be an opportunity to either adopt it or provide a better solution:

Abandoned plugin example

You can also look at the number of active installations to see if there’s a big market for the type of plugin that you have in mind. It’s also a good idea to test the plugin on your own site to see what it does well, and what could be done better. 

You’ll also want to give some consideration to how you will market your plugin. For instance, some developers create a dedicated website for their products. If you’re planning to monetize your plugin, you’ll need to think about both the pricing and subscription options. 

Finally, you’ll want to read up on the WordPress Coding Standards. This is particularly important if you’re planning to share your plugin with others. These coding standards are a set of guidelines and best practices that developers should try to adhere to when creating themes and plugins for WordPress. 

Step 2: Set Up a Testing Environment

The next step is to set up a testing environment. As a beginner, you are likely to learn a lot along the way and you wouldn’t want to experiment on an active site. A local environment or staging site will enable you to test your plugin privately as you work on it. 

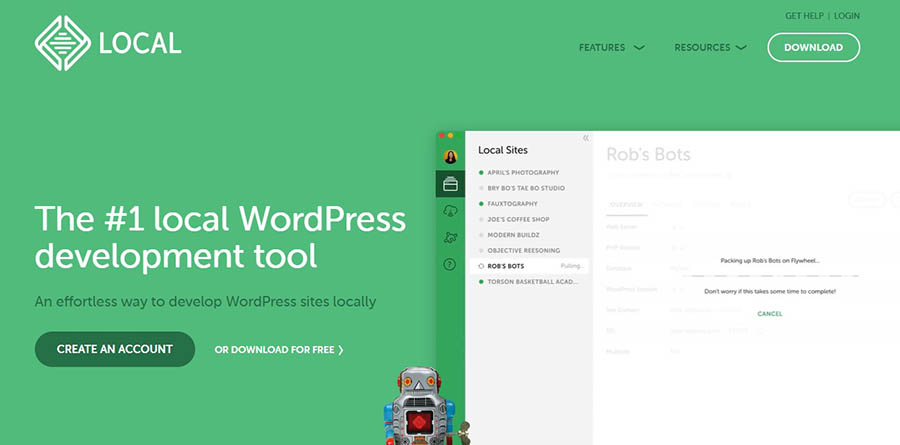
You can use Local to create a WordPress site on your computer:

Local homepage

You can also create an online staging environment. With DreamHost, you can make a copy of your existing site. This way, you can test your plugin without breaking your site or interrupting your visitors.

Step 3: Create the Plugin File

Once you have your staging environment set up, it’s time to create your plugin. The first step is to create a folder for it in your site’s directory.

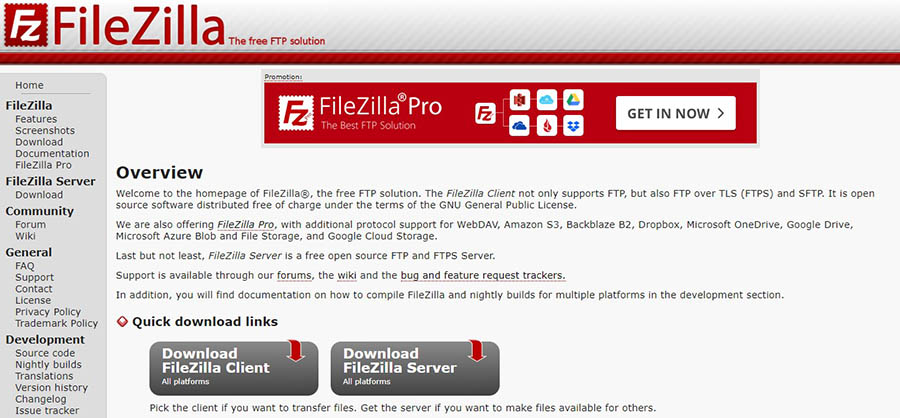
You can use a Secure File Transfer Protocol (SFTP) client like FileZilla to access your site’s files and folders:

FileZilla homepage

If this is your first time using FileZilla, you’ll need to enter your credentials, including your username and password. You can get this information from your hosting account. 

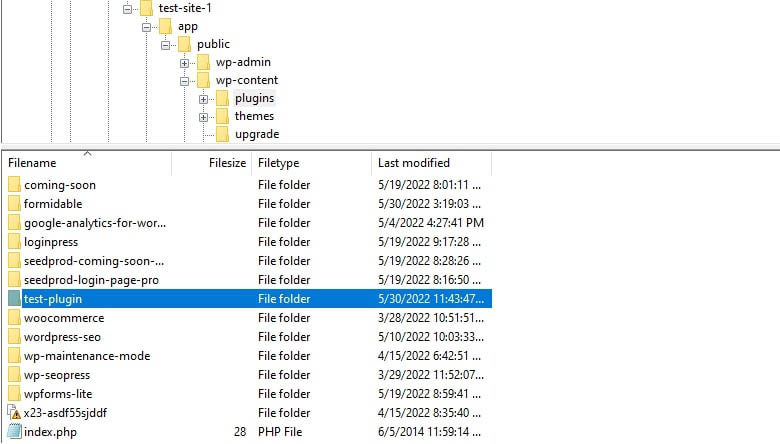
Once you’ve connected to your site’s directory, navigate to wp-content/plugins and create a new folder for your plugin:

New plugin directory example

Next, you’ll need to create a PHP file to add to this folder. To do this, open your preferred text editor and enter the following information:

<?php
/**
* Plugin Name: test-plugin
* Plugin URI: https://www.your-site.com/
* Description: Test.
* Version: 0.1
* Author: your-name
* Author URI: https://www.your-site.com/
**/

Of course, you’ll need to change the above information to match your details. When you’re ready, you can save your file. Remember to use the file extension php (e.g., my-first-plugin.php). 

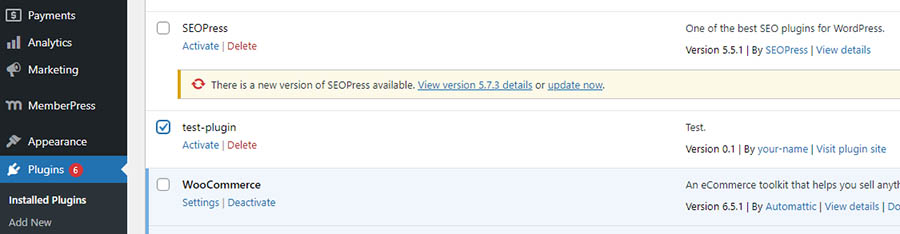
Then, you’ll need to upload this file to the plugin folder that you created earlier. Once you’ve done this, navigate to your test site’s WordPress dashboard and go to the Plugins page. Here, you should be able to see your new plugin.

Test plugin example

This plugin won’t do anything yet if you were to activate it. However, WordPress will recognize it as a functional add-on from this point forward.

Step 4: Add Code to Your Plugin

Every plugin is different. However, they all share common components. For instance, all plugins use hooks to interact with WordPress. 

A hook is how a plugin connects to the pre-existing code of WordPress core’s programming. In other words, the hook is the anchor point where a plugin inserts itself in order to add or change the functionality of the site. 

Hooks are an important part of WordPress development. There are hundreds of hooks that can be used as triggers for a plugin, and you can even create new ones if needed.

There are two types of hooks that you will need to consider when creating your plugin:

  1. Actions: These add or change WordPress functionality and make up the majority of hooks. 
  2. Filters: These are used to modify the functionality of actions.

To code your plugin, you’ll need to familiarize yourself with hooks and how they work. Fortunately, the Plugin Developer Handbook can help you get started. 

For this tutorial, we’ll use the following code as an example.

function modify_read_more_link() {
    return '<a class="more-link" href="' . get_permalink() . '">Click to Read!</a>';
}
add_filter( 'the_content_more_link', 'modify_read_more_link' );

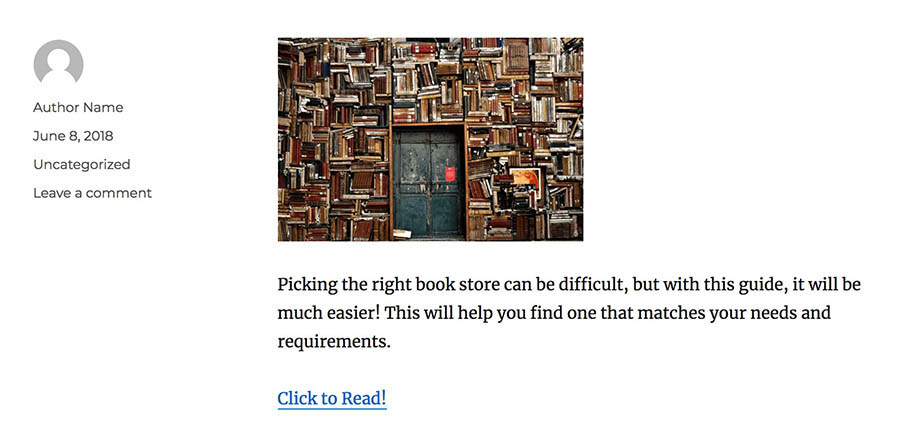
As you might be able to see, this code uses a filter to modify the standard “read more” link by replacing it with a different value: “Click to Read!” If you add this snippet to your PHP file and activate the plugin on your site, you’ll end up seeing the following anchor text below your post excerpts:
Click to Read! Plugin example

Feel free to experiment with the code and try using a different function. Please note that you can also add this code to your theme’s functions.php file. This file contains code that adds functionality to your site, and works in a way that is very similarl to how a plugin does. However, if you switch to a different theme in the future — or your theme is upgraded to a new version — you will lose these changes. 

Step 5: Test Your Plugin

As you continue developing your plugin, it’s important that you save your work often and test your changes on your staging site. You’ll also want to keep an eye out for any security issues, so you can resolve them before publishing your plugin. 

Once you’re satisfied with your plugin, you should try it on a live site. Again, you’ll want to make sure that you have thoroughly tested your plugin for any bugs and vulnerabilities.

It’s also a good idea to create a backup of your live site before testing your plugin on it. This way, if anything does go wrong, you can restore your content. 

If you’re happy with the performance of your plugin, you could offer it to other developers for them to use and test. This can earn you valuable feedback. You could also ask them to put your plugin through its paces and try to break it to prove its stability. 

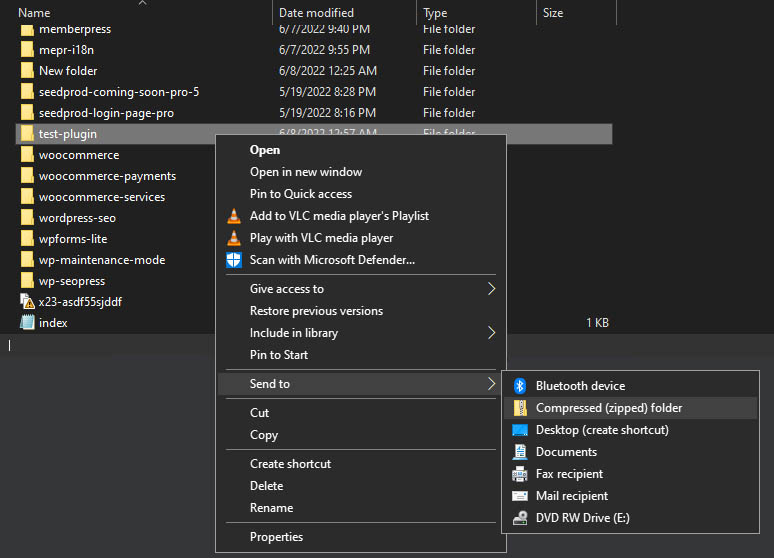
To do this, you’ll want to export your plugin to a zip file for easy distribution and installation. Locate your plugin’s folder in the site’s directory, then right-click on it and select Send to > Compressed (zipped) folder:

Send to compressed folder

Choose a destination and the files within your folder will be compiled into a zip folder that you can easily share. If you are developing on a live site, you may need to first download the plugin folder from your SFTP client before compressing it. 

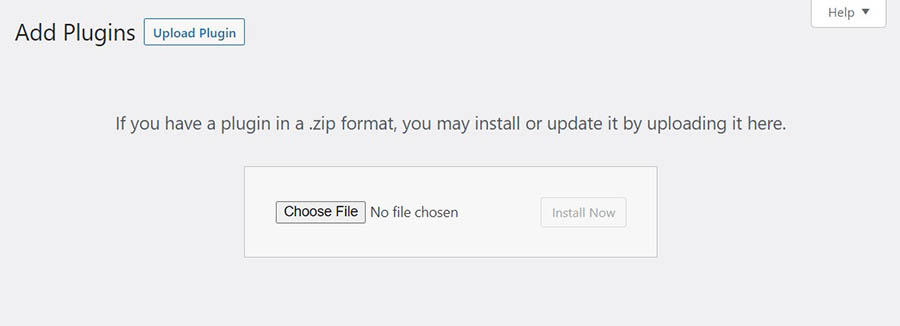
To install your plugin on a WordPress site, simply navigate to the Plugins page on your dashboard and select Add New. Next, click on Upload Plugin and you’ll be prompted to choose a .zip file to upload to your site:

Uploading plugin zip file in WordPress

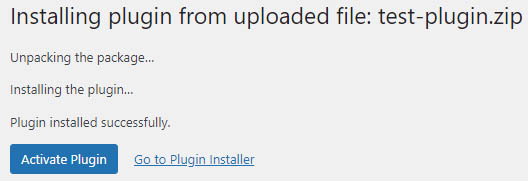
Simply select the compressed file and select Install Now. WordPress will then unpack and install the plugin on your site:

Unpack and install plugin

Once that is complete, just click on Activate Plugin. That’s it — your plugin is now live! 🎉

Step 6: Distribute Your Plugin

Once you’ve created and tested your plugin, you can start distributing it. Let’s look at the best ways to do this.

1. Publish Your Work on the WordPress Plugin Directory

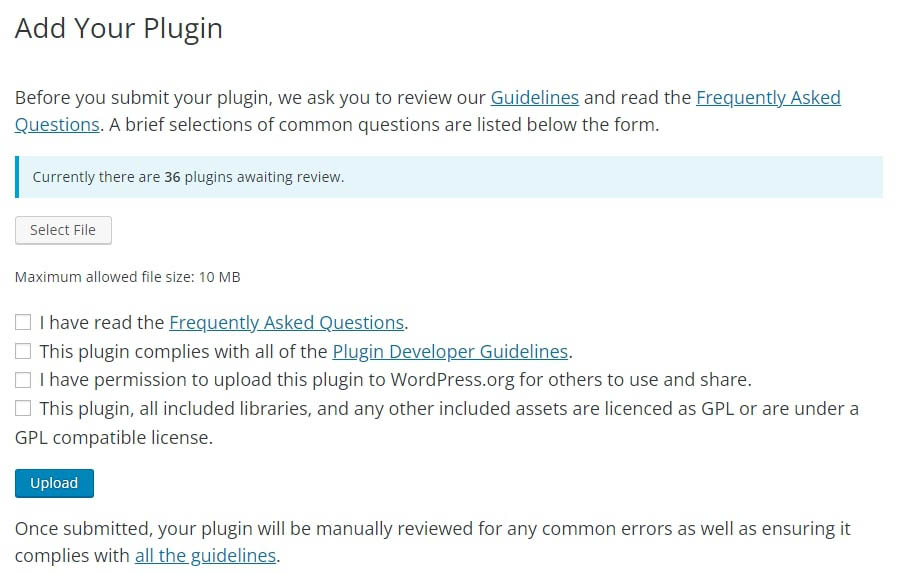
By submitting your plugin to the WordPress Plugin Directory, you can share your work with the community and gain exposure. You can take advantage of the massive WordPress user base and attract new clients:

WordPress Add Your Plugin screen

However, you’ll need to make sure that your plugin complies with best practices and the Detailed Plugin Guidelines before uploading it for review. It might take a while for your plugin to be reviewed and accepted.

Once your plugin is approved, you’ll need to add your files to the SVN directory. Then, WordPress users will be able to install your plugin on their sites. 

2. Share the Plugin on Your Own Website

Besides uploading your plugin to the WordPress directory, you could also create a website for it.  

You can use this site to provide more details about your plugin. You could also include documentation, tutorials, and marketing information: 

Yoast plugin website homepage

A developer will often use websites to promote their premium plugin, while providing a free or lite version in the WordPress directory. That way, users are able to download and try the product before upgrading. 

You can lock certain advanced features behind a paywall. Additionally, you can offer a multi-tiered membership model. For example, you might create several premium versions of the plugin to give users more options. 

The Power of Open-Source

As an open-source platform, WordPress enables you to develop your own plugin and share it with other users. While some coding knowledge will certainly be helpful, you can easily create a simple plugin to improve your site’s functionality. Once you’ve gained more experience, you can start selling premium versions of any plugins that you might create. 

To recap, here’s how to create your own WordPress plugin:

  1. Research your idea.
  2. Set up a testing environment. 
  3. Create the main plugin file and folder. 
  4. Add code to the plugin file.
  5. Test your plugin.
  6. Distribute your plugin on WordPress.org. 

Our DreamPress plans enable you to create a staging site so you can develop and test plugins with confidence. A staging site is the closest thing to the real deal, making it the perfect place to test how a new plugin might work when installed.

Do More with DreamPress

DreamPress Plus and Pro users get access to Jetpack Professional (and 200+ premium themes) at no added cost!

managed WordPress hosting provider

The post How to Create a WordPress Plugin (Beginner’s Guide) appeared first on Website Guides, Tips & Knowledge.


source https://www.dreamhost.com/blog/how-to-create-your-first-wordpress-plugin/

Creating and Mastering GA4 Explorations

In the switch from Universal Analytics (UA) to Google Analytics 4 (GA4) — which will go fully into effect July 2023 — a lot of things have...