Tuesday 31 January 2023

Get More Conversions with These Landing Page A/B Testing Tips

Many of the changes we make to our websites come down to intuition. We use designs we think users will love and write content that we believe will resonate with them — And while experience and intuition can go a long way toward helping you create a popular website, they’re poor replacements for real-world data.

The good news is that A/B testing can help you check different versions of a web page against each other in front of your target audience. You can use this information to better understand what your users like and make changes that will wow your visitors.

In this article, we’ll discuss how A/B testing works and what the experts have to say about it. We’ll also walk you through seven landing page A/B testing best practices to help you master your experiments. Without further ado:

An Introduction to A/B Testing (And How It Works)

Conversion Rate Optimization (CRO) is a broad term that describes the practice of making iterative changes to your website to improve the frequency with which website visitors are interacting (clicking, converting) with your website. A/B testing is conducted by serving two concurrent experiences to different user groups, often with just one change to a given page or section (such as the color, size, or position of a call-to-action [CTA] button).

DreamHost Glossary

Conversion Rate Optimization (CRO)

Conversion Rate Optimization (CRO) refers to the practice of making iterative adjustments with a goal of improving the number of conversions earned from web pages, email campaigns, and other marketing efforts.
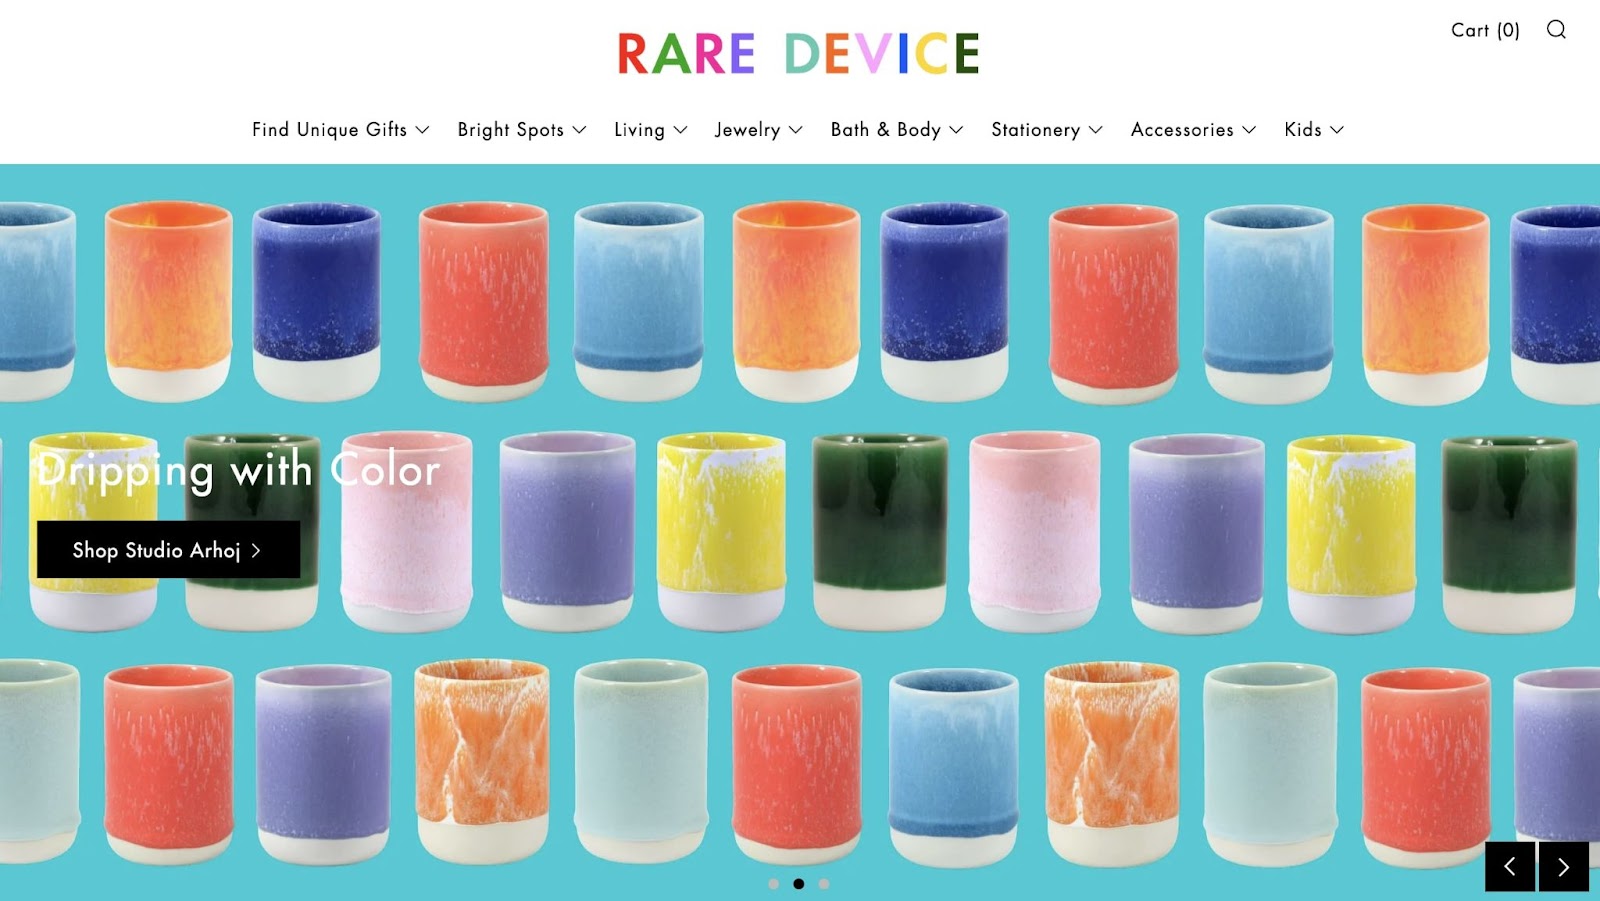
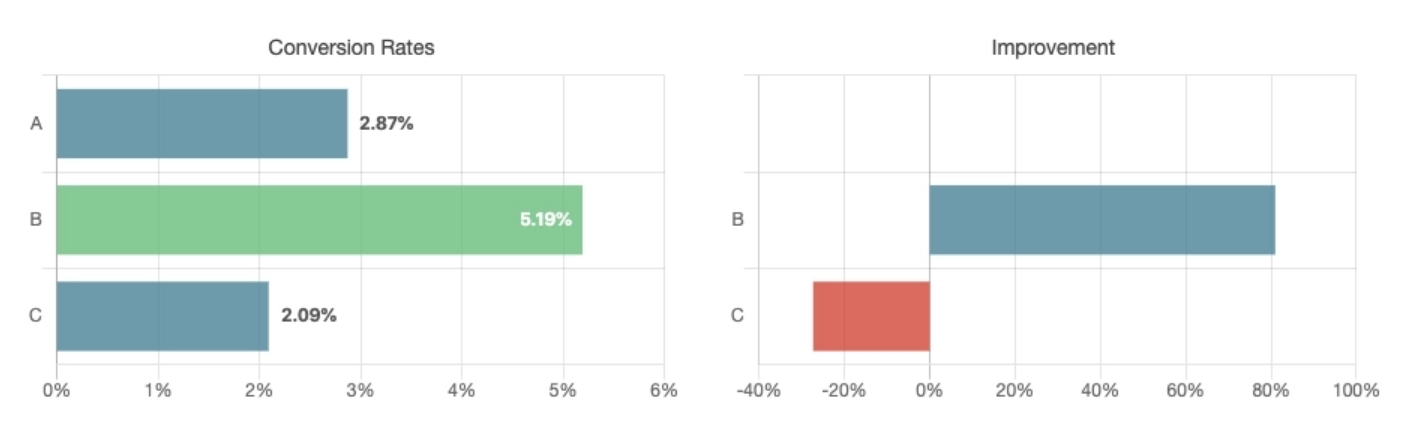
Read More

If you get enough traffic and split it equally across the two versions (variant A and variant B), one should yield better results and conversions than the other. This is why A/B testing is also commonly called split testing.

For example, if you’re testing two versions of a CTA, one should get more clicks than its counterpart. Those results tell you what your audience prefers, and you can then update your website and enjoy increased engagement:

Conversion rates test

Many modern tools enable you to handle all the technical aspects of A/B testing without too much trouble. In most cases, you can simply pick an element, use a page builder to create an alternate version, and then start the test almost immediately.

It’s important to note that, as with any type of experiment, the results will depend on whether you’re asking the right “questions” as well as your sample size. These are two aspects of A/B testing we’ll explore throughout the rest of this article.

What Elements Can You A/B Test?

First, you’ll want to come up with a game plan. “You can test almost anything on your site, from the length of your landing page to the color of your Buy Now button, but you want to prioritize those items that you think will make the biggest difference to your results,” Gallinger says. “A beginner should often start with one of the big four.”

Copy Length

The length of a website’s text can often dramatically impact a page’s conversion rate. Still, it’s hard to know in advance if you need more or less copy to explain your idea until you show it to actual potential customers using an A/B test:

Testing variants

We recommend against using A/B testing for blog content and articles because too many factors can affect conversion rates.

For example, a 3,000-word article might perform better than a “condensed” 1,500-word version. However, hundreds of factors can impact user engagement if you double the content on a web page. That means test results won’t return valuable information.

Instead, we recommend focusing on testing short text elements, such as lists and introductions. They are more likely to significantly impact how users react to the content, and they’re much easier to A/B test.

Get Content Delivered Straight to Your Inbox

Subscribe to our blog and receive great content just like this delivered straight to your inbox.

Headline

The headline is usually the first thing that people see, so it is critically important to use it effectively to grab their attention. Some sites will use A/B testing on ten headlines or more before settling on a final option.

Test headlines

Headlines can drastically affect click-through rates on blog pages and search engine results. In our experience, merely tweaking a headline can get some pages a lot more attention.

Ideally, you won’t have to test every headline you create. Instead, we recommend focusing on pages and posts that aren’t getting enough attention (and you think their content deserves it). Try to emulate the type of title you or your competitors use in other successful pages and see if that impacts how users react to the content.

Call to Action (CTA)

This tiny bit of text can often make a big difference. For example, a button that says “Buy Now” instead of “Buy” may create a sense of urgency that encourages people to click it or generate a sense of false urgency that makes people avoid it.

CTAs are some of the simplest elements of an A/B test when analyzing results. A “better” CTA will produce more conversions. Then, you can use that information to learn what types of prompts resonate better with your audience.

Moreover, CTAs tend to be short. That means there are fewer potential variations to test, making setting up tests easier than with regular copy, headlines, or images.
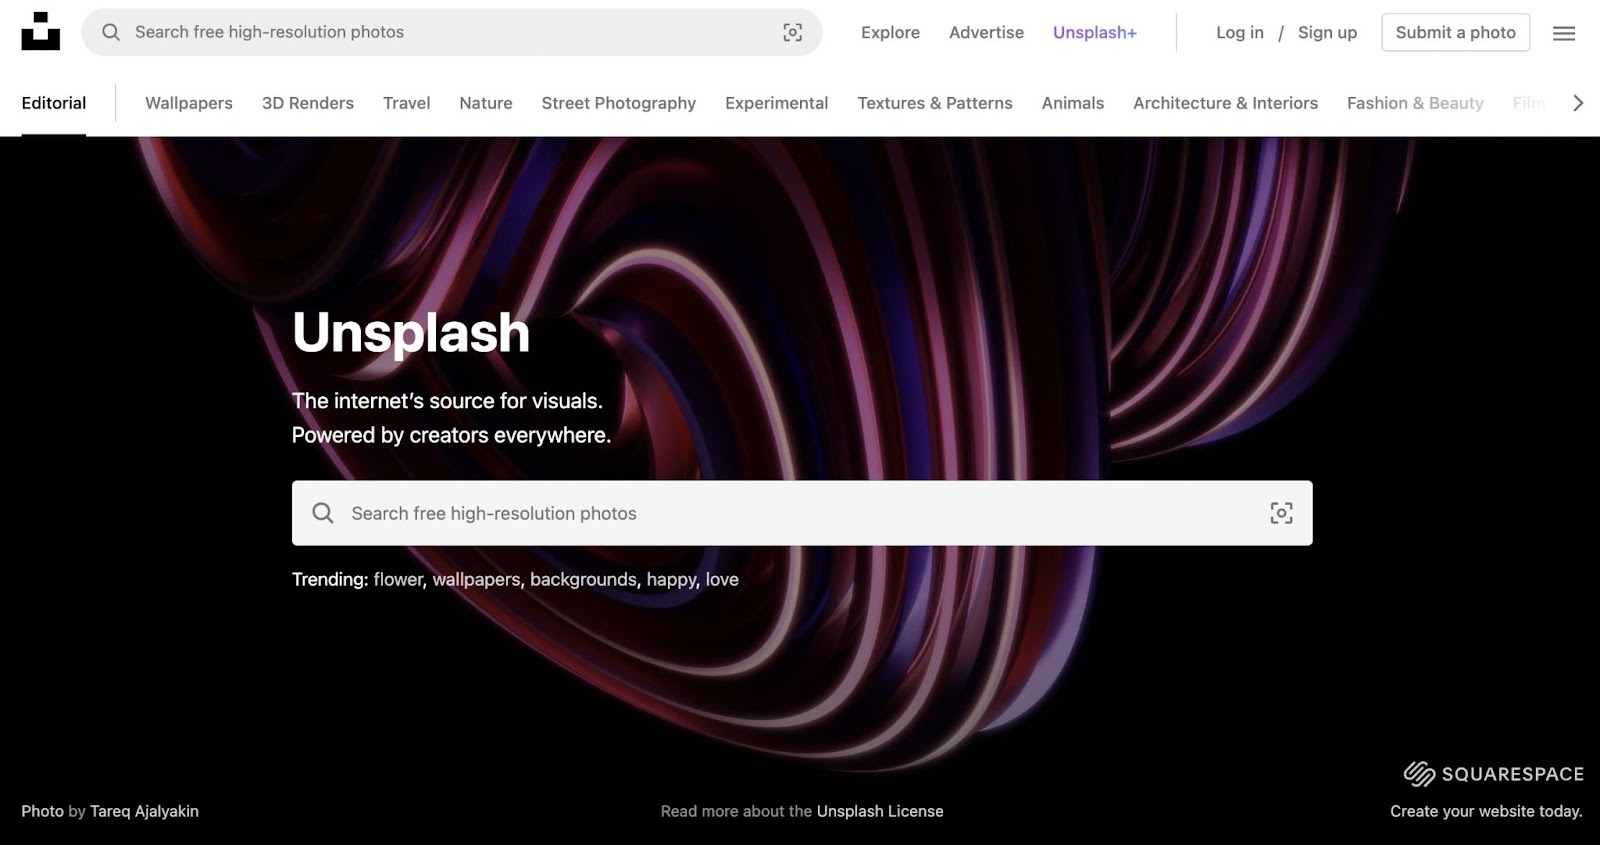
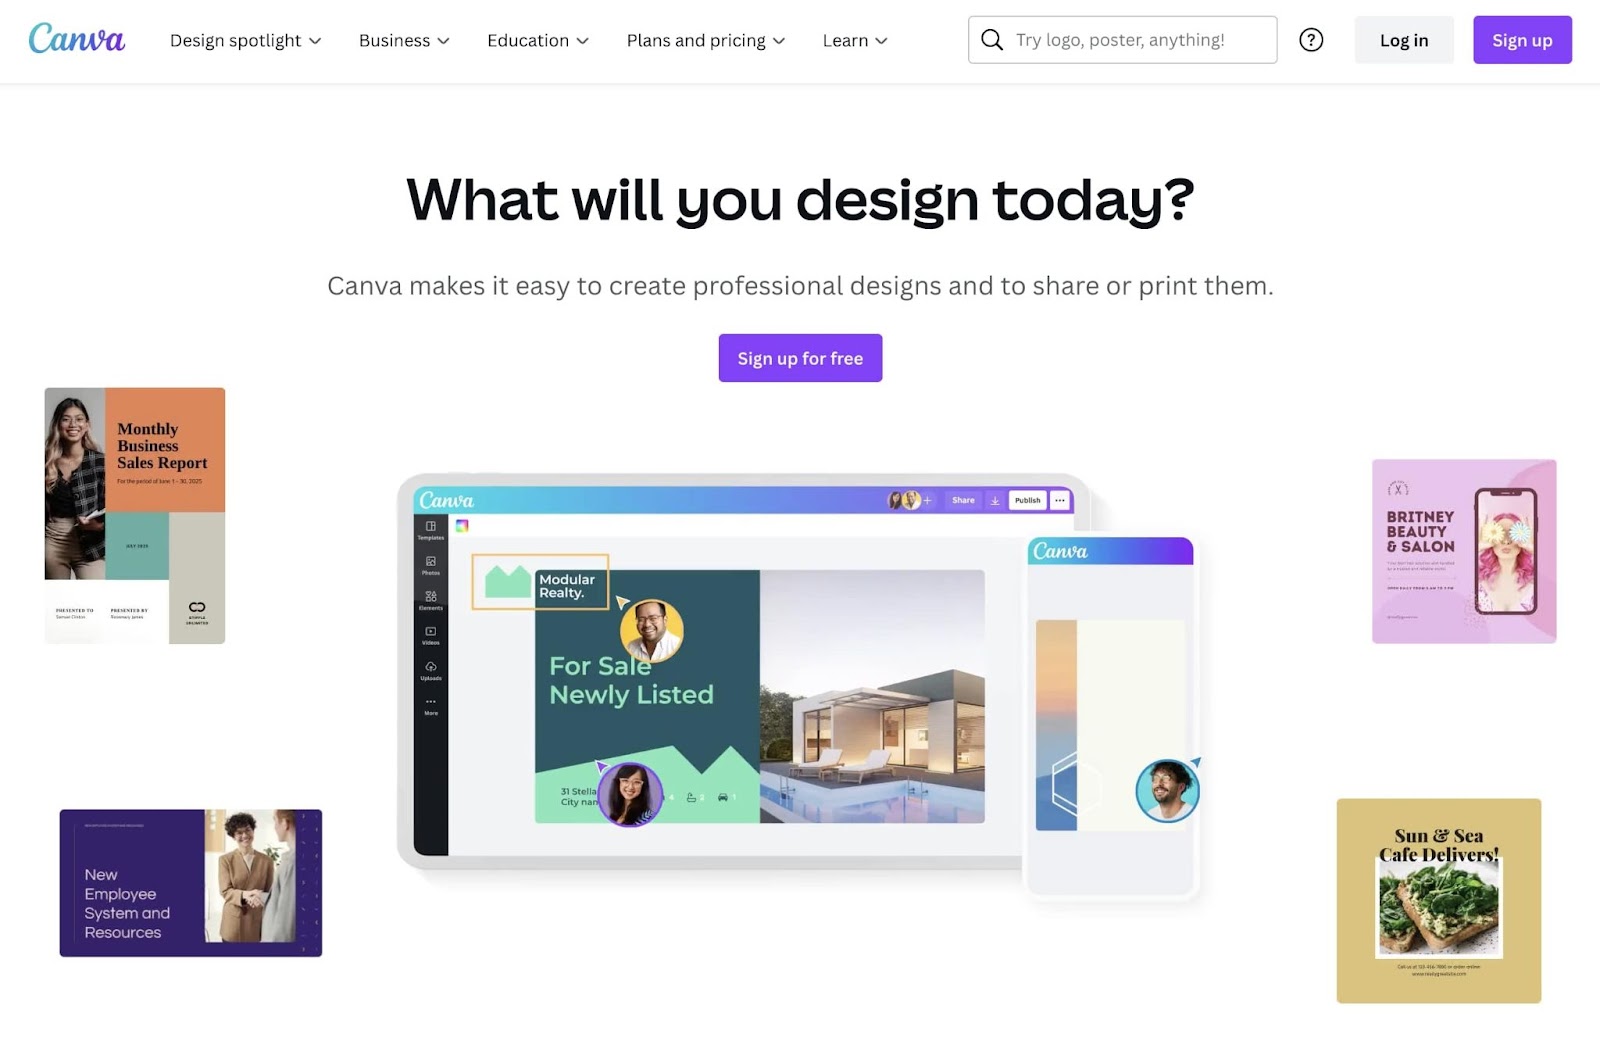
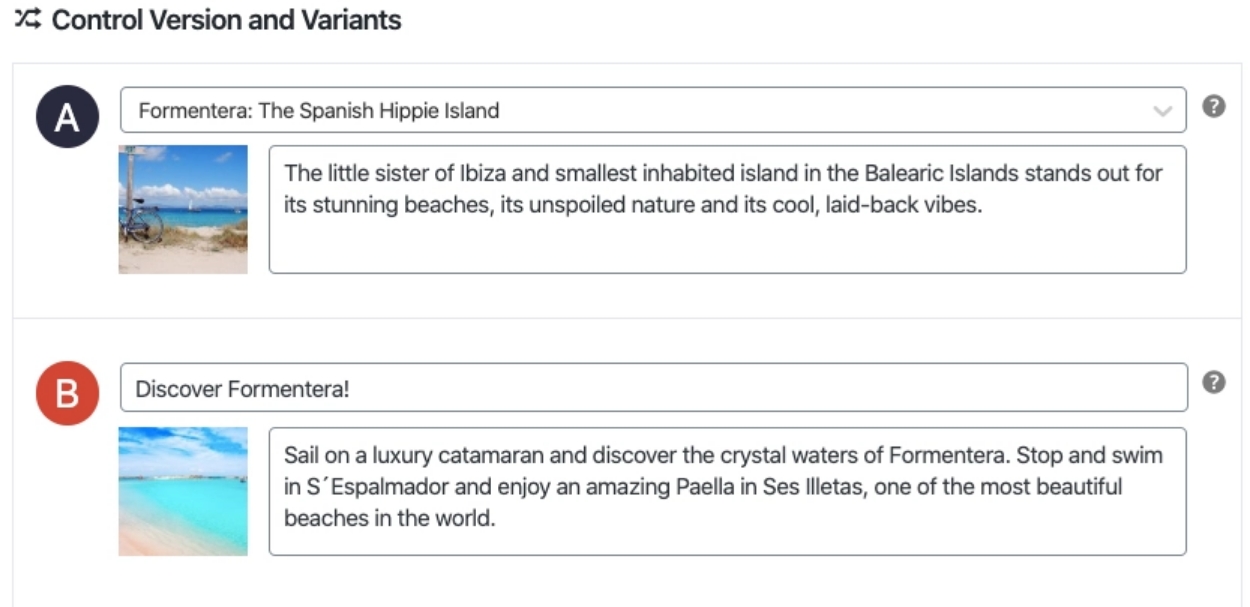
Images

Images convey important emotions, but it’s not always easy to know in advance which images work and which ones will fall flat with your audience. Much like headlines, you can test a wide variety of them before choosing the best one:

Test images nelio

As a rule of thumb, images should always be high-quality and related to the topic at hand. Moreover, you shouldn’t look to replace pictures randomly. Instead, pay attention to drop-off metrics and see which web pages are “losing” the most users.

That metric will point you toward pages that need to be redesigned or overhauled in some way. From that point, you can analyze existing images and consider if they may affect the user experience negatively.

How to Improve Your Landing Page A/B Tests (7 Tips)

These A/B testing best practices will help you set up more accurate experiments for any page within your website. However, a landing page is typically the perfect A/B test environment since it’s self-contained.

1. Develop a Hypothesis

Practically anything can be A/B tested, and the results can be used in various ways to improve your website.

“In broad terms, you can test the design, copy, or offer,” says Sid Bharath, a SAAS marketing consultant. “Design means the colors, layout, fonts, and visuals. Copy is the content on the page, like headers or product descriptions. Finally, the offer is what exactly you’re asking people to do, like signing up for an e-course or buying a product.”

However, just because you can use A/B testing to measure almost anything doesn’t mean it should be used for everything. It’s crucial to have a strategy to employ it in ways to truly make the most of it.

“There was a popular saying when testing became popular in the early aughts to ‘always be testing,’” Shukairy says. “What people assumed was ‘test a color and call to action on your site, and you will see massive improvements in conversions.’ This is not true at all.”

There is an art and science to testing, requiring regular statistical analysis of your site to spot potential problem areas and investigate the why. That means running qualitative polling, surveys, and usability tests to understand better what customers are struggling with.

“Only after you’ve compiled issues can you start prioritizing them and deciding what solutions could be tested to improve upon the issues uncovered,” Shukairy says. “A hypothesis is necessary for the test because ultimately it is statistics that makes A/B testing viable.

Running an A/B test takes time since you need to compile enough data to get statistically accurate results. That means it’s in your best interest to ensure you’re testing the correct elements.

For that to happen, you need to have a data-based hypothesis. For example, if your homepage has a high bounce rate, some valid hypotheses to explain it would include the following:

  • The page takes too long to load
  • Users are discouraged by the content they see above the fold
  • The page doesn’t offer a good experience on mobile devices

All of those are valid reasons and would be worth testing. However, you can narrow down the potential cause even further by conducting internal usability tests and asking other people for their feedback on your website. That extra effort will help you zero in on the exact elements you should be A/B testing.

2. Analyze User Drop-Off Points

Instead of deciding which pages on your site to A/B test randomly, we recommend focusing on the most prominent “drop-off” points. That is to say, the pages that are losing you the most users.

“By using Google Analytics, you should be able to highlight where the biggest drop-off points are. I would suggest starting your split testing there,” advises Andrew Wheller, digital marketing & SEO executive at Pierre Cardin Stationery. “Reviewing your top exit pages is a nice starting point for highlighting your page, which can have the potential for the biggest uplift.”

If you’re unclear about how to find your drop-off points, Bharath recommends starting with your existing data. For example, on an e-commerce website, the traffic flow might look like this: Home Page → Product Page → Cart → Checkout.

“At each step, you’ll notice people dropping out and leaving the site,” he says. “Find where the largest drop-off is and run a test on that step to reduce it. Prioritize tests based on where the largest improvement can come from.”

Focusing on drop-off pages is wise if your website has a large library of content you want to test. Finding the problems with these pages will yield the best short-term results if you develop rational hypotheses to test.

3. Give the Test Enough Time to Run

There’s no magic time frame when it comes to testing. “The time to declare what we call ‘statistical significance’ for an A/B test depends on the traffic flowing through your site,” says Blake Puryear, product lead at Engine Insights.

“If you’re getting a trickle of traffic, let that A/B test run for a while. You need about a week’s worth of traffic through both sides of your test before you can start to infer anything,” Puryear adds.

“Even if a test is killing it after an afternoon, that might be an anomaly of traffic. It’s easy to try and make gut decisions or favor a variant because you like it better. This is where it’s really important to step back and let the data speak.”

This is where the test “statistical significance” comes in. If you design an A/B test and, after 50 visits, one variant is clearly winning, that doesn’t prove anything. Fifty users is not a large enough data sample to make a decision grounded in data. If you let that test run longer, the trend might reverse completely.

The takeaway is to give your tests all the time they need until the results are unimpeachable. This process can be frustrating since it takes longer to implement changes. However, it’s the only way to ensure your tests aren’t returning inaccurate data.

For number nerds, there are tools that can help you determine your testing time. “An A/B test is complete when there is a statistically significant difference between the A and B versions of your landing page,” Gallinger says. “Most A/B testing software has a built-in calculator to determine when a statistically significant winner has been reached, so you don’t have to do the math.”

A/B test calculator

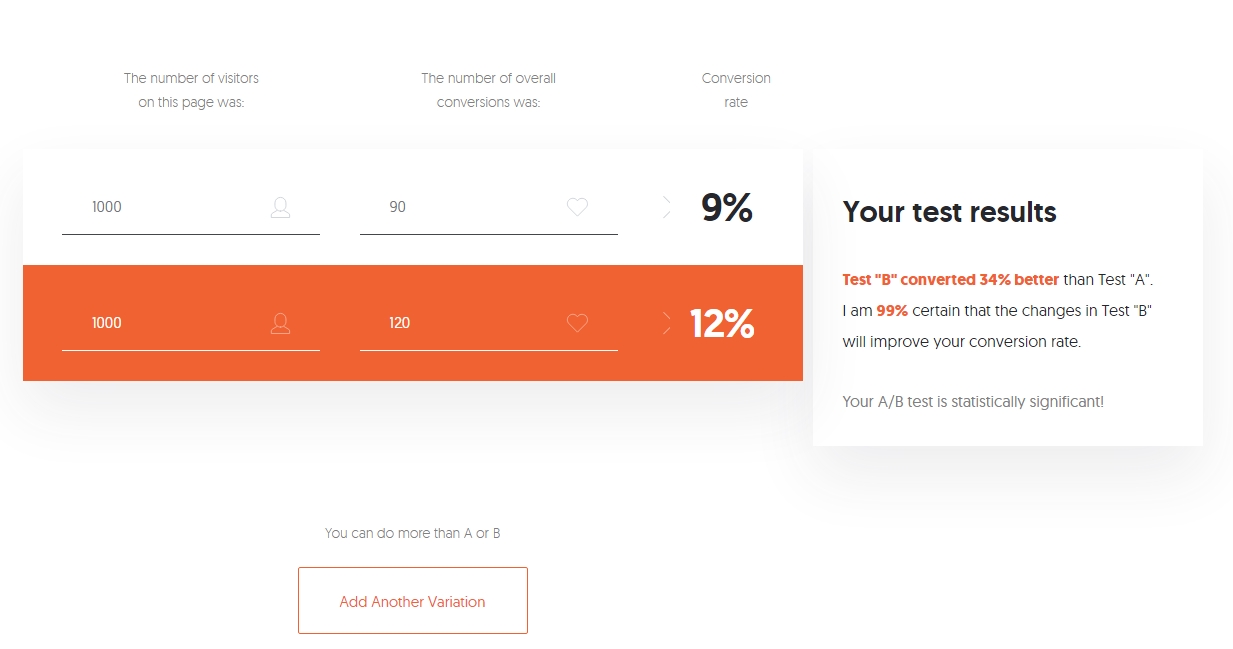
If you want to use a separate calculator, this one from Neil Patel works well and is easy to understand. The tool also lets you add more variants if you feel confident enough to try multi-variant (multivariate) testing.

4. Use the Right A/B Testing Tool

Depending on your skill level, you could set up the test yourself. “A/B testing can seem quite daunting at first, but there is no reason you shouldn’t try it yourself,” Gallinger says. “Before you do, make sure you have a good understanding of the changes you want to test and the tools you are going to use. If you need help setting up an A/B test, contact a web developer to assist with the setup process.”

The next step is to use software to show each version of your site to 50% of the site visitors. “You can use tools like Optimizely, VWO, or Omniconvert to create A/B tests on your site,” Bharath says. “With their point-and-click tools, you can create variations of a page and change elements to test without requiring any coding knowledge.”

Optimizely

“If a client already has a WordPress plugin, I’ll adapt to their toolset and use that for the duration of the project,” Puryear says. “The tools usually work in tandem with Google Analytics, so you’ll need to lean on that heavily.” For those with more complex needs, Gallinger recommends Kissmetrics, Crazyegg, or Optimizely.

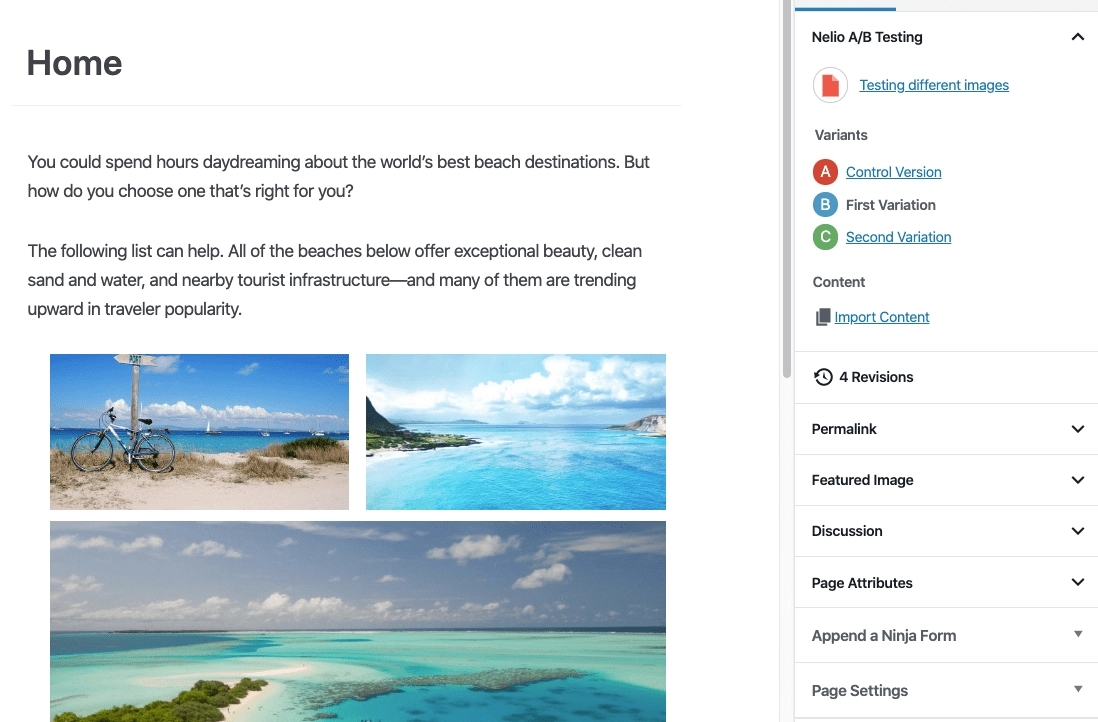
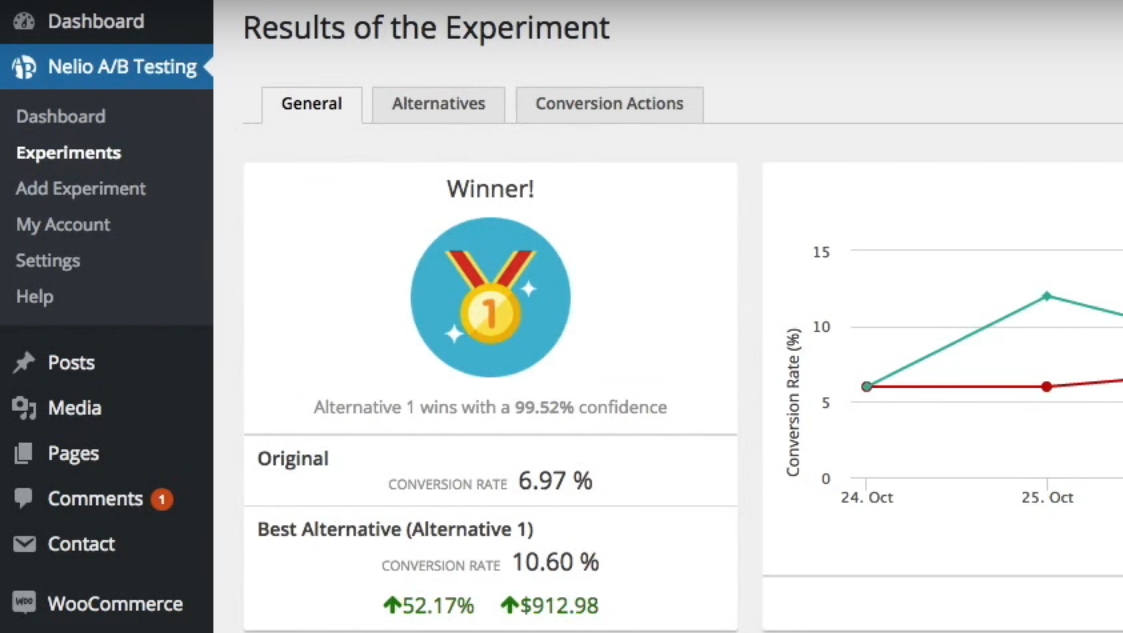
WordPress plugins for A/B testing can also be helpful to beginners. “They give you some bounds to operate in — Think of these plugins as training wheels. One that I’ve seen several clients use is Nelio A/B Testing for WordPress, Puryear says.

Nelio A/B testing

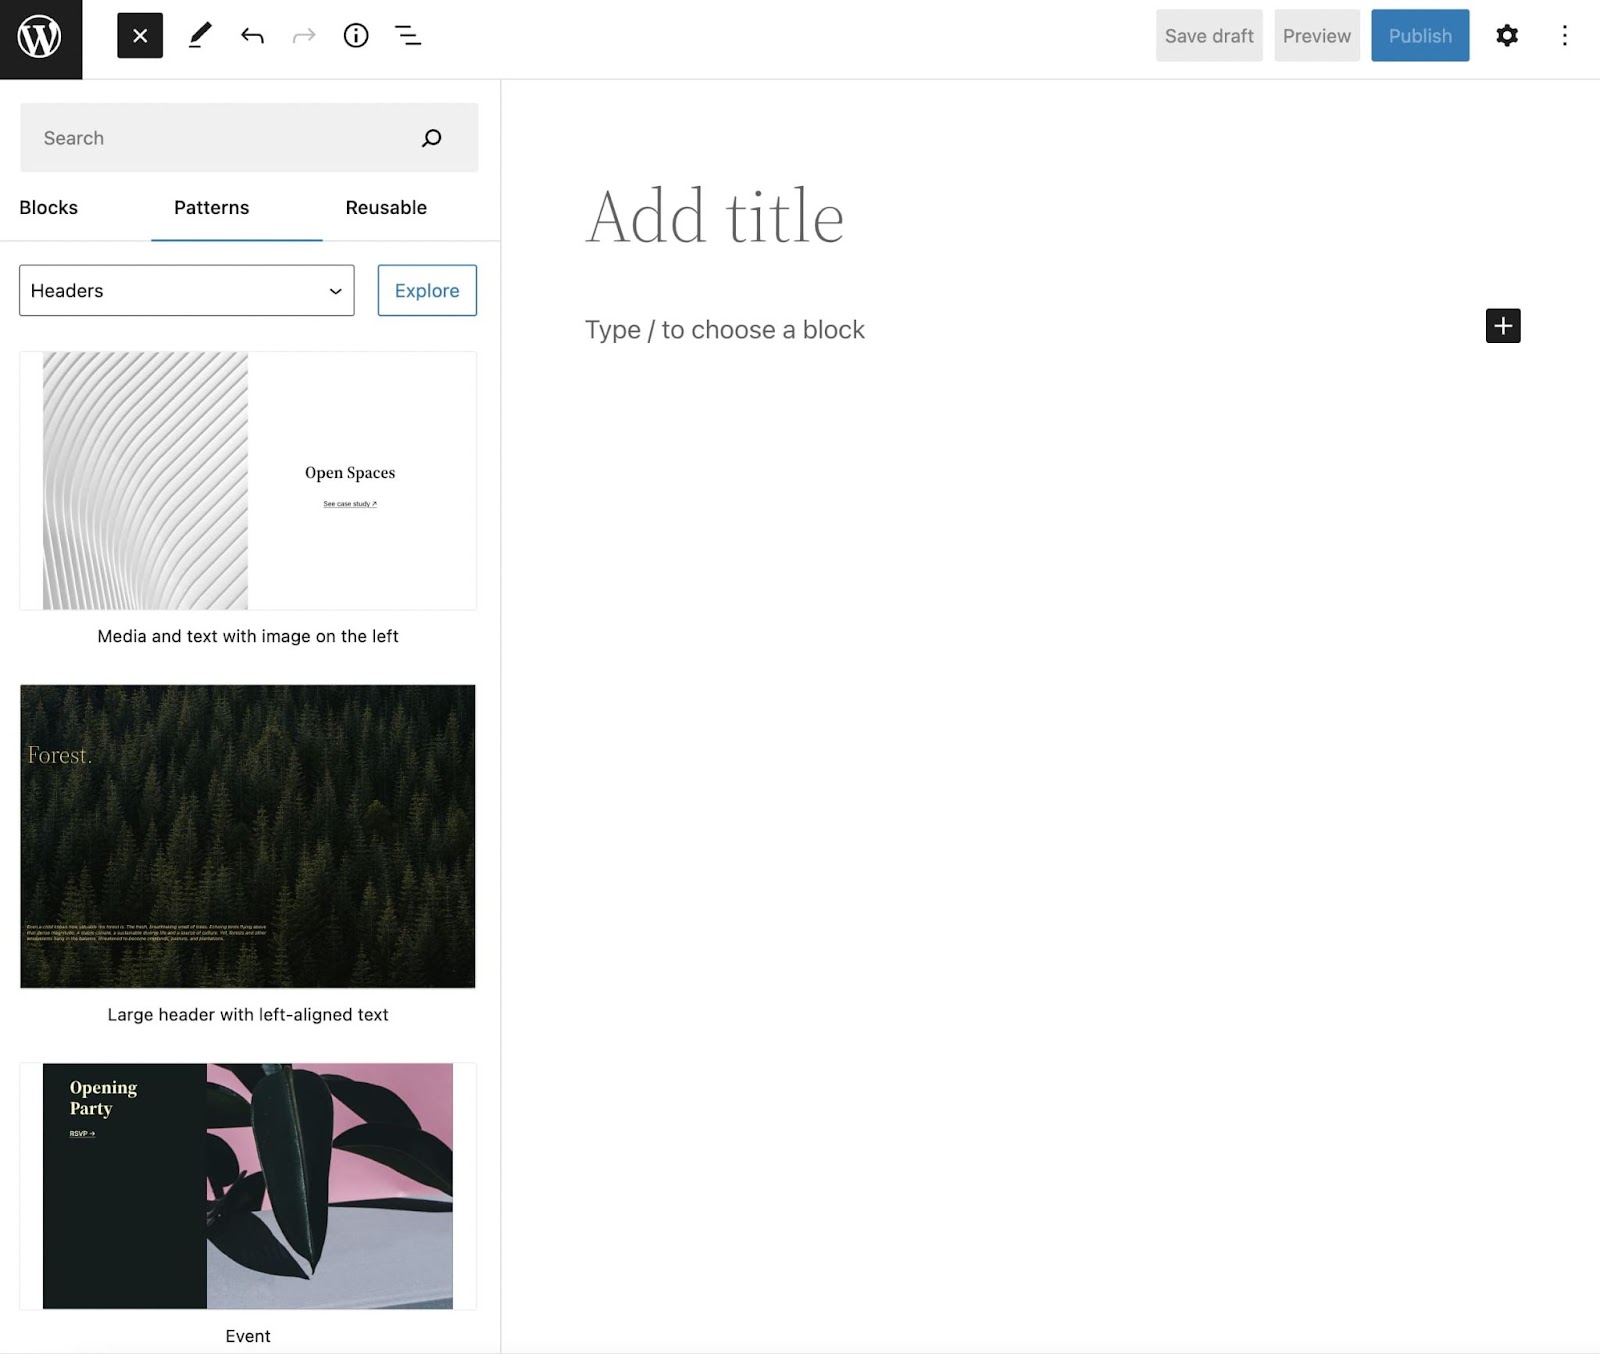
If you use WordPress, we recommend looking at popular A/B testing plugins since they can offer more straightforward implementation than third-party platforms. Puryear recommends Nelio A/B testing, but other tools can help you test more specific elements.

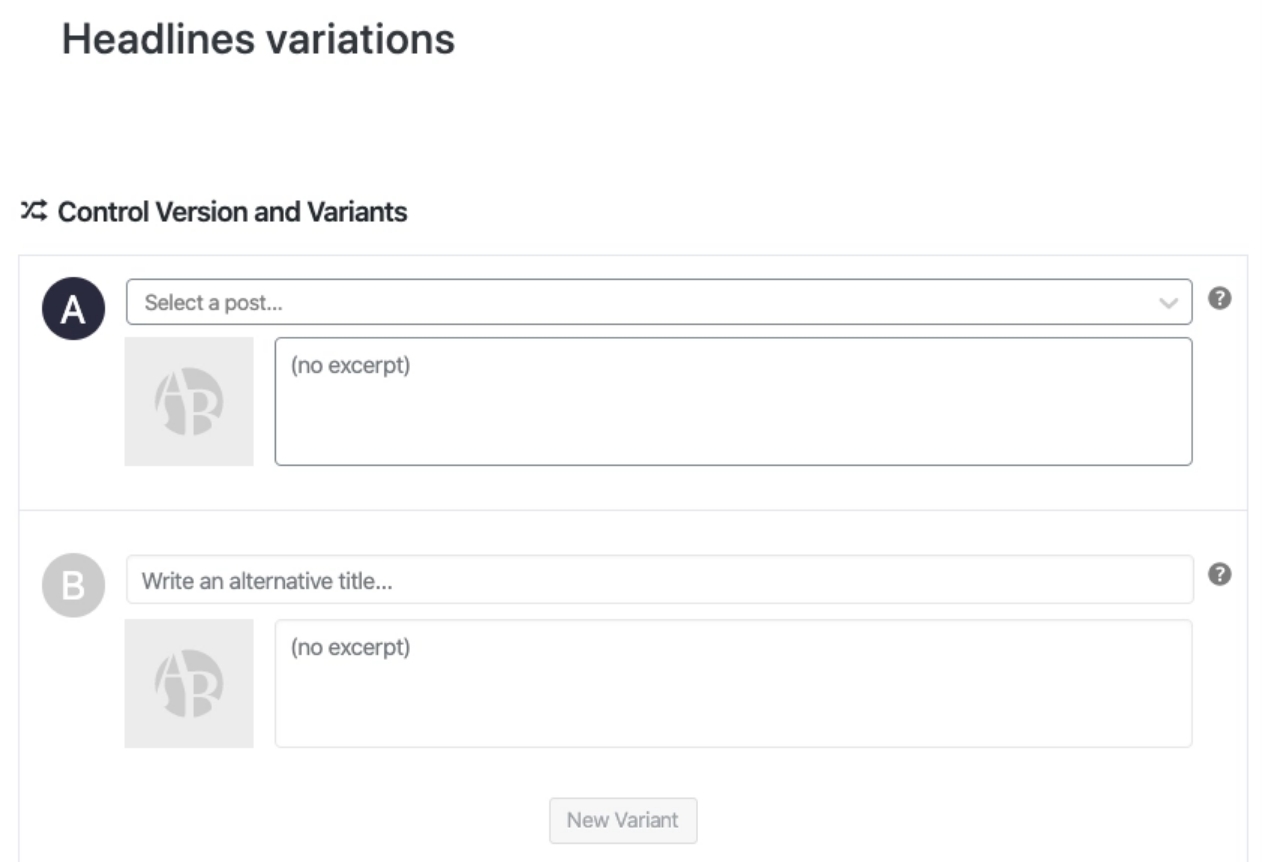
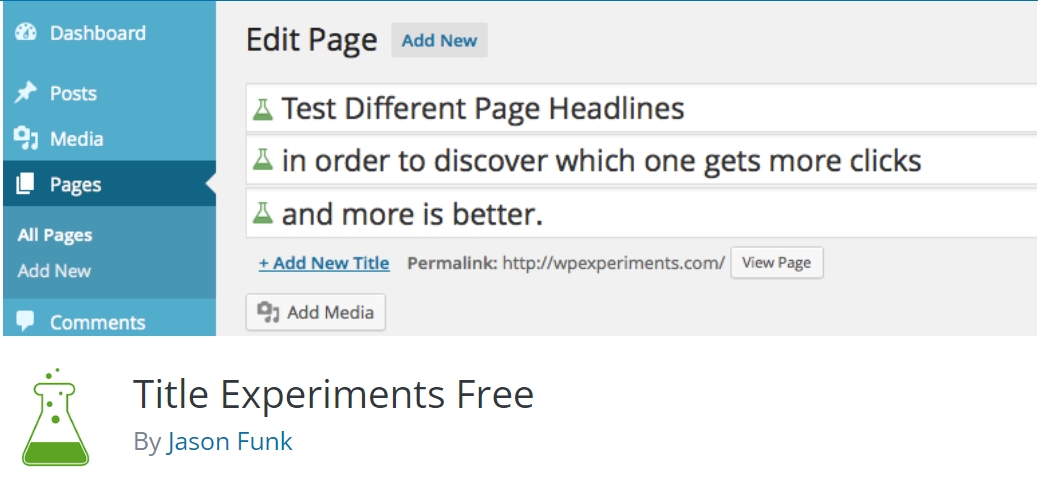
For example, Title Experiments Free can help you A/B test posts and page titles:

Title experiments

“Ultimately, you need an accurate tool that can help you split the traffic to two different designs and give you an output of information to signify the winner and other data points and metrics that may matter to you,” says Shukairy.

5. Learn How to Analyze Results

“A/B testing tools usually always have an analysis or statistics dashboard,” Puryear says. “If your tool doesn’t, you’re using the wrong tool for sure. These dashboards should show you the performance of your A variant versus your B variant. Look at the spread of performance and which variant had the most occurrences of the event you’re testing for. Good tools will provide you with a confidence value based off of the amount of traffic that has run through the test.”

Confidence experiment results

At the end of the experiment, look for a lift or possible decrease in conversion rate for the variant group. “It is important to consider that sometimes after an A/B test, the control group will remain the better option,” Edelstein says. “This is a common mistake as it can be tempting to favor changing the site due to an insignificant conversion increase.” And make sure you have enough data to give you a statistically significant result.

“Analyzing results is an important and often ignored part of testing,” Shukairy says. “First, you have to see whether your hypothesis was validated or not. Then, based on the results, verify if there are any other follow-up tests that can be considered.”

For instance, Shukairy tested removing a video and placing a static image on a client’s subscription site. Once her team validated that the static image increased conversions and confirmed the group’s hypothesis to declutter the top of the page, they reintroduced the video in another part of the page with the same static image, and conversion rates skyrocketed once more.

“The test reveals a lot about the customer behavior patterns, likes and dislikes, of course, depending on what element you are actually testing,” she says. “This data can influence future tests.”

6. Archive Past A/B Test Results

Even after you’ve moved on from a particular A/B test, you’ll want to save that data, just in case you want to refer to it in the future. “It’s a good idea to keep all test results and findings together,” Wheller suggests. “I personally use a separate folder on Google Drive; this is particularly good as you can easily share your findings with relevant team members and decision-makers.”

Most A/B testing tools will save test results for future reference. “Any A/B testing platform worth its salt is going to have an archive or reference feature that you can go back and look at old tests,” Puryear says. “One of my favorite things to do in a new year is to look at old tests that really moved the needle and then run those tests again to see how they hold up six, eight, or 12 months later. You might find the results to be really interesting as your customers or traffic profile can change over the course of a year.”

Another critical benefit of saving past test data is seeing how your hypotheses hold up over time. Running multiple tests will let you try making different changes, and some of them will resonate better with your specific audience.

For example, your audience might respond better to a specific tone within copy or types of images. By saving data from past tests and reviewing it periodically, you should be able to spot patterns that will help you refine future tests.

7. Start With Small Tests

One of the most common mistakes we see with A/B testing is that many people try to bite off more than they can chew. If you’re new to this type of testing, we recommend starting small. Identify a drop-off point on your website, develop a simple hypothesis around one element (such as a CTA), and test it.

That approach might not be groundbreaking, and even if the test goes well, it may not result in a lot of additional conversions. However, this scientific method is all about small, incremental changes applied over time to improve your website bit by bit.

Testing completely different versions of a page won’t get you accurate results, and running dozens of tests simultaneously will simply overwhelm you. Instead of thinking about A/B testing as a magical solution, we recommend viewing it as a long-term project.

“Start with small tests until you’re familiar with the statistical significance of your site and your traffic patterns,” Puryear says. “I’ve seen terrible things happen when someone jumps feet first into a huge test as their first stab at A/B testing. Optimize something small and become familiar with what you’re doing.”

Get More Conversions With A/B Testing

A/B testing isn’t a gimmick or a skill you need to be an expert marketer to pull off. At its core, A/B testing is as simple as asking, “Which of these two options works best?” and then seeing what users think in a controlled environment. With the right tools, setting up A/B tests can be remarkably simple.

The hardest part about successfully pulling off these tests is learning to ask the right questions and interpret the results. Here are some tips to help you succeed in both aspects:

  1. Develop a hypothesis.
  2. Analyze user drop-off points.
  3. Give the test enough time to run.
  4. Use the right A/B testing tool.
  5. Learn how to analyze results.
  6. Archive past A/B test results.
  7. Start with small tests.

A/B testing can help you determine what your audience likes, but for successful testing, your site will need a lot of visitors. At DreamHost, we provide professional SEO marketing services to help grow your audience and increase organic traffic. Find out more about our professional SEO marketing plans!

Get More Website Traffic

We take the guesswork (and actual work) out of growing your website traffic with SEO.

shared hosting

The post Get More Conversions with These Landing Page A/B Testing Tips appeared first on Website Guides, Tips & Knowledge.


source https://www.dreamhost.com/blog/ab-testing-landing-pages/

Thursday 26 January 2023

How to Design an Attention-Grabbing Homepage Hero (+25 Examples)

If you want new visitors to continue looking at your website, you’ll need to quickly catch their attention. Without engaging content above the fold, users may become bored before they can check out your products or read your blog posts.

Fortunately, you can use a hero image as the first visual element on your website. When you include a high-quality photo or graphic design, you can leave visitors with a positive first impression.

In this post, we’ll explain what a hero image is and how you can design one for your website. Then, we’ll show you 25 examples to provide some inspiration. Let’s get started!

What Is a Hero?

A hero is a larger banner that is displayed at the top of a website above the fold. This is the first element that visitors will see above the fold. It typically features a photo, video, graphic, or illustration along with a statement or CTA to immediately hook visitors.

DreamHost Glossary

What is a hero?

A hero image, or hero section, is a large banner featured at the top of a website. It can be the first element visitors see due to its prominent placement.

Read More

Hero images are a great way to grab attention. Within the first critical seconds of visiting your website, users want to be engaged by high-quality web design. Heroes can immediately leave a positive impression of your business or blog.

Since they appear at the top of the homepage, hero sections can have a great impact on your website. When used correctly, they’re able to convey everything visitors need to know about your brand. This can avoid overloading new visitors with too much information right away.

In a hero section, you can include a call to action (CTA) to motivate users to visit another page on your site. Interactive heroes can also feature carousels, sliders, and other animations. Ultimately, hero images aim to be attractive, engaging, and eye-catching.

How to Design an Attention-Grabbing Homepage Hero

Now that you know what hero images are, let’s discuss some best practices for creating them. This way, you’ll be able to design hero headers that draw users to your website.

1. Find High-Quality Images

The hero image will be the first thing visitors see on your homepage, so you’ll need to find a high-quality photo. If the image is too grainy or not compressed for fast loading, it may harm the user experience (UX) on your site.

To source images, you can use stock photos on websites like Unsplash. This platform provides free high-resolution photos without copyright protection:

Unsplash website hero

Keep in mind that you can also use graphic designs and videos instead of static photos. This can help your website stand out from your competitors.

Along with stock images, Pexels has many free videos that you can browse. Like with images, you’ll be able to customize the size before downloading:

Pexels hero

For graphic designs, we’d recommend using a flexible tool like Canva. This comes with thousands of starter templates for hero banners:

Canva website hero

Lastly, WordPress provides pre-designed headers in its Block Pattern Library. When designing your homepage, you can easily insert these full-width hero sections. If you decide to create these manually, you’ll have to use HTML containers instead:

Wordpress patterns

Keep in mind, as you’re searching for images, you’ll want to remember your website’s branding. Even if you find a high-quality photo, make sure it’s relevant to your niche.

Additionally, consider whether you want to evoke an emotion, promote a product, or achieve another specific goal. And, of course, if it’s appropriate and your budget allows, you might consider hiring a professional photographer to create images of your products or services.

2. Add Convincing and Informative Text

Many websites don’t just feature an image in the hero section. To generate new leads and conversions, they often add a text overlay. By including product promotions and calls to action, a hero can achieve the same goals as a landing page.

Although your hero text should vary depending on your objectives, here are some things to consider when writing your copy:

  • Keep it short: In a hero section, you won’t want to overload readers with information.
  • Use readable fonts: Although you may want to use a distinctive typeface, make sure it is easy to read.
  • Consider your target audience: It’s best to evaluate what new visitors will be looking for on your website.
  • Don’t use too many buzzwords: If you include advertising cliches like ‘act fast’, it may decrease your trustworthiness and make visitors leave.

It’s also a good idea to add a call to action. Paired with CTA buttons and lead generation forms, you can use your hero image to increase conversions.

Get Content Delivered Straight to Your Inbox

Subscribe to our blog and receive great content just like this delivered straight to your inbox.

3. Optimize Your Hero Image

After you download the hero image that you want, it’s a good idea to optimize it for your website. Like every image on your site, you’ll need to compress it. Otherwise, the photo could be too heavy and cause poor loading times.

Generally, your images should be less than 1MB. To make them smaller without losing image quality, you can use an image compression tool like TinyPNG. This will reduce the size of your WebP, PNG, or JPEG file with smart lossy compression:

TinyPNG hero

Sizing is another important factor in optimizing a hero image. Typically, it’s best for images to be at least 1,200 pixels and have an aspect ratio of 16:9. Banner hero images should be 1600 x 500 pixels, and you can go up to 1,800 pixels for larger screens.

25 Homepage Hero Examples to Inspire You

If you still need help designing your first hero image, don’t worry. We’ve compiled some of the best website hero images to give you some inspiration!

1. Tesla

Tesla homepage hero

What makes this a good homepage hero?

  • Tesla’s homepage features a sleek, professional hero image of its Model Y electric car.
  • There are clear CTA buttons that enable visitors to create orders, view inventory, or schedule test drives.
  • Since this homepage hero has a minimalist design, it doesn’t overwhelm visitors with unnecessary information.

2. The Better Fish

The Better Fish Website Hero

What makes this a good homepage hero?

  • The Better Fish’s hero section separates the food image and the main text. This makes it very easy to read.
  • The orange button draws attention to the CTA, telling visitors to ‘Try Barramundi’.
  • Additionally, the main text is simple but clearly states the company’s branding and what makes it stand out.

3. Koskela

Koskela homepage hero

What makes this a good homepage hero?

  • Koskela is an innovative furniture business, which is conveyed with a unique graphic of scattered wood pieces.
  • The hero section sums up the company’s goals in one sentence.
  • Although the color scheme is more muted, the ‘Shop Now’ CTA was designed in bright yellow to draw the eye.

4. The Art Institute of Chicago

Chicago Art Institute hero

What makes this a good homepage hero?

  • Rather than using a static image, this hero features a video that automatically plays when you visit the site.
  • The Art Institute of Chicago chose to highlight a specific exhibition, which encourages online users to visit in person.
  • When you click on the hero, it redirects to an online post about the art exhibition.

5. Surfrider Foundation

Surfrider Foundation hero

What makes this a good homepage hero?

  • Surfrider Foundation appeals to visitors’ emotions, motivating them to participate in protecting the ocean.
  • The image of someone cleaning up a beach conveys everything you need to know about this foundation.
  • This website makes it easy to get started by donating or volunteering.

6. Daily Harvest

Daily Harvest homepage hero

What makes this a good homepage hero?

  • Daily Harvest uses multiple cropped images, showing the variety of foods the company offers.
  • Readers can quickly understand that the company strives to be organic, high-quality, and low-maintenance.
  • The main heading has a simple message and an easy-to-read font.
  • Contrasting with the black and white background, Daily Harvest highlights its colorful foods.

7. Versed

Versed hero

What makes this a good homepage hero?

  • Versed promotes its products in an animated content slider. This showcases current discounts, best sellers, and holiday sets.
  • The soft, pastel color palette matches the skin care product packaging.
  • On each slider hero page, there are short calls to action for specific offers.

8. Dreaming with Jeff

Dreaming With Jeff homepage hero

What makes this a good homepage hero?

  • Since this website promotes sleeping tapes, the hero image uses a nighttime city landscape.
  • You can start listening to the album directly from the hero section.
  • The thin, sloping font adds to the slightly creepy and dark atmosphere of the entire website.

9. Ditto

Ditto hero

What makes this a good homepage hero?

  • Ditto’s hero image features a bright and well-designed living room. This properly advertises its real estate development services.
  • There is an animated slogan that automatically changes from ‘Living Made Better’ to ‘Living Made Happier’ and ‘Healthier’.
  • Visitors can immediately start browsing homes for rent and for sale.

10. Kindeo

Kindeo hero

What makes this a good homepage hero?

  • Kindeo uses short clips to showcase its digital group cards in action.
  • On this hero page, users can also see the app’s interface and how easy it is to use.
  • There is a good amount of white space separating the hero image from the below-the-fold content.

11. Pastini

Pastini hero

What makes this a good homepage hero?

  • Pastini chose to display multiple pasta dishes to advertise its catering services.
  • The heading ‘Good tidings of pasta and wine’ welcomes visitors and adds personality to the website.
  • There is a CTA that encourages users to keep scrolling below the hero image.

12. Sunshine Caramel Company

Sunshine Caramels hero

What makes this a good homepage hero?

  • Sunshine Caramel Company’s hero section has an animated sun that reflects the branding and company name.
  • There are close-up images of the caramels, which show visitors the product quality.
  • The CTA button was designed with a bright yellow background, aligning with the business’s personality and drawing the eye.

13. The Vault

Vault pizza hero

What makes this a good homepage hero?

  • The copy is simple and clear, describing what the restaurant makes and where it is located.
  • To differentiate the business from competitors, the hero image shows a pizza being wood-fired.
  • The Vault makes it easy to immediately view the menu or book a reservation.

14. RoverPass

Roverpass homepage hero

What makes this a good homepage hero?

  • Unlike other heroes, RoverPass enables users to look for RV parks and campgrounds using a search bar.
  • The image of a picturesque campground makes visitors want to start traveling.
  • RoverPass also includes a way to find nearby campgrounds and RVs directly from the homepage.

15. Rare Device

Rare Device hero

What makes this a good homepage hero?

  • This homepage hero features an image slider, displaying a variety of Rare Device products.
  • Like the rest of the website, the hero image is filled with bright colors.
  • Each slider page has CTA buttons for unique product collections.

16. Nomz

Nomz website hero

What makes this a good homepage hero?

  • Nomz’s website has a hero video that shows its organic snacks being eaten. This makes them more appealing to new visitors.
  • There is a tab on the side of the hero where users can find product reviews.
  • The CTA clearly directs users to start shopping.

17. Detour Coffee

Detour Coffee website hero

What makes this a good homepage hero?

  • Like many of the options on this list, Detour Coffee includes an auto-play content slider to advertise multiple products.
  • Each slide links to product pages for different coffee flavors and monthly subscription boxes.
  • The background colors of the hero seamlessly integrate with the site’s color scheme.

18. Allbirds

Allbirds hero

What makes this a good homepage hero?

  • Allbirds uses multiple images to make the hero seem like a collage.
  • There is a simple and clear call to action that reflects the current season.
  • Visitors can quickly access the shop pages for both men’s and women’s shoes.

19. Lunarbot Studio

Lunarbot studio

What makes this a good homepage hero?

  • To highlight its web design services, Lunarbot Studio created an engaging graphic as its hero.
  • The main font is futuristic, which aligns well with the company’s purpose.
  • You also get a small summary of the business, what it does, and where it’s located.

20. Heco

Heco hero

What makes this a good homepage hero?

  • Heco’s hero features a rolling animation that immediately draws attention when you open the website.
  • It uses plenty of white space to emphasize the hero’s main text.
  • The downward arrow encourages visitors to keep scrolling through the homepage.

21. Charbonnel Towns

Charbonnel hero

What makes this a good homepage hero?

  • New visitors can watch a video that artistically displays Charbonnel’s modern townhomes.
  • The company emphasizes that there are only a few homes left, so visitors should register as soon as possible.
  • With a vertical white sidebar, the hero reflects the classy and modern feel of the business.

22. Campos Coffee

Campos Coffee hero

What makes this a good homepage hero?

  • The slogan ‘Day made’ is a simple way to tell visitors about its high-quality coffee.
  • Campos Coffee shows potential customers exactly what they can purchase from its online store.
  • The same shade of green is used for the product packaging, business logo, and CTA buttons.

23. Rowing Dock

Rowing Dock hero

What makes this a good homepage hero?

  • In a few words, the business explains where Rowing Dock is located and what it offers.
  • This hero has a video showing a variety of people using the kayak rental service.
  • By including couples, families, and pets in the video, Rowing Dock shows visitors that it provides experiences for everyone.

24. Moss Botanicals

Moss Botanicals hero

What makes this a good homepage hero?

  • With floral imagery, this hero beautifully captures the essence of Moss Botanicals perfume.
  • Even though there isn’t much text, visitors quickly understand what the business is selling.
  • The dark hero background contrasts well with the white text and action button.

25. Seastreak

Seastreak hero

What makes this a good homepage hero?

  • Seastreak’s hero perfectly appeals to its target audience, which is anyone looking for a high-end ferry ride.
  • The slogan ‘The most civilized way to get there’ evokes a sense of luxury.
  • Plus, the hero automatically plays videos that show some of Seastreak’s boats and visited sights.

Design Engaging Above the Fold Visuals

Your homepage’s design can make or break your website. By adding a well-designed hero image, you can immediately grab your visitors’ attention and keep them on your site. This can ultimately increase conversions and reduce your bounce rate.

To review, here are some ways to design an attention-grabbing homepage hero:

  1. Find high-quality images.
  2. Add convincing and informative text.
  3. Compress your hero images with TinyPNG.

Since a poor web design can lead to a bad impression, you may want to leave it to the professionals. Using DreamHost’s custom web design services, you can receive a 100% unique website with an eye-catching hero image!

DreamHost Makes Web Design Easy

Our designers can create a gorgeous website from SCRATCH to perfectly match your brand and vision — all coded with WordPress so you can manage your content going forward.

custom website design

The post How to Design an Attention-Grabbing Homepage Hero (+25 Examples) appeared first on Website Guides, Tips & Knowledge.


source https://www.dreamhost.com/blog/homepage-hero-design/

Tuesday 24 January 2023

How to Create 301 Redirects in WordPress (4 Methods)

Sometimes, you’ll have to move or delete certain pages on your website. It’s the circle of [website] life.

But if you do move or delete a page, users could potentially be presented with a 404 error that prevents them from accessing your content, often leading to an exit. If you don’t properly set up redirects, you may increase your bounce/exit rates, which harms user experience (and potentially organic rankings).

Fortunately, it is easy to create 301 redirects in WordPress — by adding a 301 redirect for moved or removed pages, users (and search engines) will be whisked off to the new, updated URL. Whether you use a redirection plugin or edit your site files, building 301 redirects can effectively fix any broken links on your site.

In this post, we’ll explain what 301 redirects are and when you might want to use them. Then, we’ll show you four ways to create a 301 redirect in WordPress. Let’s get started!

An Introduction to Redirects

To get started, you’ll need to know what redirects are. Put simply, any redirect will send users and search engines to another web address. This automatically redirects the requested URL to a different location.

As a website owner, you can use a temporary or permanent redirect to prevent your visitors from seeing error pages. These “Not Found” errors, otherwise known as 404 errors, inturrupt the browsing experience and can lead to visitors exiting your website.

DreamHost Glossary

What are 404 Errors?

A 404 error is an HTTP status code that indicates that the page a user is trying to access does not exist. 404 errors can occur for a wide variety of reasons, but they almost always lead to a poor User Experience (UX).

Read More

There are many other different redirect types as well. Each one sends a unique HTTP status code from a web server to a browser. These codes indicate how the content is being moved.

Here are the most common URL redirect types:

  • 301: Permanent redirect from one URL to another.
  • 302: Temporarily redirect to a new URL.
  • 303: Non-cacheable redirect to temporarily replace content.
  • 307: Informs search engines that the redirect may periodically update.
  • 308: Permanent redirect that disallows changes from POST to GET request methods.
  • Meta refresh: Client-side redirect that often appears as a refresh countdown timer.

By far, the most used redirect type is a 301 redirect. This will inform both search engines and online users that the original resource is no longer available. Instead, it will permanently redirect to a new page.

Whenever someone clicks on the original link, they’ll automatically be taken to a different URL. The redirect will seamlessly direct users to the correct pages on your website and prevent them from seeing 404 errors.

Reasons You Might Use a 301 Redirect

Since there are different redirect types, it can be difficult to know which is right for your website. Fortunately, 301 redirects are useful when performing a few essential management tasks.

One of the most common reasons to use a 301 redirect is when you’re deleting old content. If a post is no longer relevant but still receives traffic, you’ll want to take these users to an updated resource.

In this case, 301 redirects tell search engines that you’re permanently moving the URL. Since it will preserve your traffic and backlinks, this redirect can improve your Search Engine Optimization (SEO). However, keep in mind that it can take time for search bots to discover the new page and associate it with the same ranking.

Additionally, you may implement 301 redirects if you’re moving to a new domain. If you don’t redirect your URLs, you may quickly lose your current audience. However, 301 redirects will seamlessly take visitors to your new location.

Similarly, a 301 redirect can be useful when moving from an HTTP to an HTTPS connection. To make sure users visit the secure version of your website, it’s best to permanently redirect your content.

You might also want to consolidate separate posts. After compiling the information onto one page, you can redirect all the old links to the new location.

Get Content Delivered Straight to Your Inbox

Subscribe to our blog and receive great content just like this delivered straight to your inbox.

How to Create 301 Redirects in WordPress (4 Methods)

Now that you know about 301 redirects, you may want to apply them to your website. Let’s discuss some best practices when creating 301 redirects in WordPress!

Method 1: Install a Redirection Plugin

One of the best ways to extend the native functionality of WordPress is to install a plugin. Fortunately, there are many useful plugins available for creating and managing your website’s redirects.

For example, Redirection is a free tool that adds a redirect manager to your site. You can use this plugin to set up 301 redirects, track broken links, migrate permalinks, and much more:

Redirection WordPress plugin

To get started, install and activate Redirection in WordPress. Then, navigate to Tools > Redirection. On this welcome page, click on Start Setup:

Redirection plugin setup

For the next step, you’ll need to decide whether you want Redirection to monitor permalinks, redirects, and 404 errors on your site. If so, enable these options and select Continue:

Redirection plugin monitoring

After this, the plugin will test your REST API to see if it can communicate with WordPress properly. Once you receive a ‘Good’ rating, you can click on Finish Setup:

Redirection test REST API

Now you’ll be able to create a 301 redirect! To do this, find Tools > Redirection > Add New. Then, add your source URL and target URL:

Add new redirection

Lastly, click on the gear icon to open additional settings. Be sure to select a 301 – Moved Permanently HTTP code:

Create 301 permanent redirect

When you’re finished, hit Add Redirect. Now, whenever users visit the old URL, their browser will automatically reroute to the new resource!

Method 2: Use Your SEO Plugin

Although you can install new redirection plugins like Redirection or Simple 301 Redirects, you may already have all the tools you need to create redirects on your website. Often, SEO plugins provide redirection managers along with Search Engine Optimization features.

Rank Math is a free SEO plugin with built-in redirection tools. With this tool, you’ll be able to enable, disable, and delete any of your site’s redirects. Plus, it even imports information from the Redirection plugin:

Rank Math SEO plugin

After you install and activate Rank Math, open the dashboard. Then, find the Redirections tool and enable it:

Enable Rank Math redirections

Now you’ll have a new Redirections tab. On this page, click on Add New:

Rank Math redirections

First, you can add your original source URL, which will be the content you’re redirecting from. By hitting Add another, you can paste URLs in bulk. This can be an efficient way to consolidate multiple pieces of content into one source:

Bulk 301 redirects

Next to each URL, choose Exact Match if you want to redirect this exact link. However, you can also enter a more general term. By selecting Contains instead, every page with that keyword will be redirected:

Source URL keyword

Under Destination URL, insert the link you want users to visit. Be sure to also select 301 Permanent Move as the redirection type before hitting Add Redirection.

Method 3: Edit Your .htaccess File

If you want to avoid installing another plugin, you can also create 301 redirects manually. Since this involves editing your site files, be sure to back up your website first. This will save a copy of your current website to revert back to if anything goes wrong.

Next, you’ll need to connect to a File Transfer Protocol (FTP) client or your host’s file manager. For DreamHost users, sign into your account panel. Then, navigate to Websites > Manage Websites > Manage Files SFTP > Manage:

Open DreamHost SFTP file manager

This will open DreamHost’s file manager. Here, you’ll need to find the .htaccess file within the root directory:

Edit .htaccess file

If you don’t want to back up your entire website, you can simply download this original file. If you experience any problems, you can re-upload it to the server:

Download .htaccess file

Once you locate the .htaccess file, right-click on it and select Edit. If you’re using the DreamHost file manager, a text editor will automatically open:

.htaccess file editor

Right below the ‘# END WordPress’ line, add this new coding to create a 301 redirect:

RewriteEngine On
Redirect 301 /new-content/ https://mywebsite.com/new-content/

Be sure to update both of these URLs so that they’re unique to your website. Keep in mind that if you already have Rewrite Engine on in your .htaccess file’s coding, you don’t need to repeat it. You can simply copy and paste the redirect code.

As we mentioned earlier, you may want to redirect your entire website to a new domain. In this case, you can use the following coding instead:

RewriteEngine on
RewriteCond %{HTTP_HOST} ^olddomain.com [NC,OR]
RewriteCond %{HTTP_HOST} ^www.olddomain.com [NC]
RewriteRule ^(.*)$ https://newdomain.com/$1 [L,R=301,NC]

If you’re migrating your website from an HTTP to HTTPS connection, you can also do this in your .htaccess file. Simply paste this code:

RewriteEngine On
RewriteCond %{HTTPS} off
RewriteRule ^(.*)$ https://%{HTTP_HOST}%{REQUEST_URI} [L,R=301]

After this, save the file and close it.

Method 4: Create a Server-Side Redirect

As another alternative, you can also create 301 redirects in PHP. This will be a server-side redirect that uses header() functions.

PHP redirects are server-facing, so they can often be faster and more secure. However, this is a fairly technical process that can easily go wrong. Make sure you’re knowledgeable in PHP coding before getting started.

To properly redirect in PHP, you’ll need to write a header() function. In the location response-header field, define the URL where you want to send search engines and users:

header('HTTP/1.1 301 Moved Permanently');
header('Location: https://www.example.com/newurl');
exit();

Be sure to include a die() or exit() function at the end of the header. Without it, search engines like Google may process the original page and ignore your new redirect.

How to Troubleshoot 301 Redirects

After you create a 301 redirect, it may not perform correctly. Sometimes, it’ll turn into a redirect chain or loop. This happens when there are multiple redirects between the original URL and the target URL.

If your website has a redirect chain, visitors can see a ‘Too many redirects’ error. Essentially, the browser won’t be able to fulfill the redirect and display the correct page.

As the site owner, you may not notice redirect chains. To check for any errors, you can enter URLs into a redirect checker like HTTP Status:

HTTP Status redirect checker4

You’ll be able to paste up to 100 URLs into the text box. Then, hit Check status. At the bottom of the page, you’ll see the HTTP status code and the number of redirects:

Redirect checker results

If the page loads correctly, you’ll see a ‘200’ HTTP status code. You should also make sure there is only one redirect for every URL. Otherwise, you’ll likely have a redirect chain.

Common Redirect Mistakes

A common mistake when building website redirects is confusing 301 and 302 redirect types. Although both will redirect to a new page, they communicate with search engines in different ways. Since this can negatively impact your SEO, it’s important to know the difference.

As we mentioned earlier, 301 redirects are permanent. This will inform search crawlers to stop indexing the original content because it was permanently moved. In this case, the new content will receive the link equity of the old page.

On the other hand, 302 redirects indicate that the redirect is temporary. If you’re testing out a new redesign, you may temporarily redirect visitors to another location during development. A 302 redirect tells search engines that the original content will return, so it needs to keep its PageRank and indexing.

Additionally, you’ll want to regularly keep track of any redirects you create. If you don’t, your site could end up with infinite redirect loops that increase your bounce rate. Ultimately, you’ll want both search crawlers and online users to easily and quickly access the right content.

Lastly, make sure you redirect to updated content that is relevant to the original page. Since visitors clicked on the original link, you’ll need to provide helpful information.

This will ensure the transition is smooth, preventing users from quickly leaving and going to your competitor. Plus, it will make sure crawlers continue to understand your content so you rank higher in search results.

Permanently Redirect Old Links

If you’re trying to consolidate your online content or move to a new domain, you’ll need to set up 301 redirects. This can help you maintain steady traffic and avoid losing your high Google search ranking. Plus, redirects can prevent visitors from clicking on broken links.

To review, here’s how to create 301 redirects in WordPress:

  1. Install the Redirection plugin.
  2. Use an SEO plugin like Rank Math.
  3. Edit your .htaccess file.
  4. Create a server-side redirect with PHP.

Are you worried that your redirects will negatively affect your SEO? Here at DreamHost, we provide professional SEO marketing services to help your website rank high in search results!

Search Engine Optimization Made Easy

We take the guesswork (and actual work) out of growing your website traffic with SEO.

shared hosting

The post How to Create 301 Redirects in WordPress (4 Methods) appeared first on Website Guides, Tips & Knowledge.


source https://www.dreamhost.com/blog/301-redirects-wordpress/

Thursday 19 January 2023

Beginner’s Guide to Schema and How It Can Help Improve Your SEO

The main goal of Search Engine Optimization (SEO) is for your content to rank higher in the search results for the keywords that matter most to your brand or business.

However, getting one of the top spots in the rankings may not be enough to differentiate your site from the competition and earn that coveted organic click. You might need that extra edge to get the most clicks (and actual traffic) — that’s where schema markup comes in.

Schema markup is a form of structured data that provides search engines additional information about your content. The cool thing about schema is that it creates the ability for your content’s appearance in organic search results to be visually enhanced so it stands out.

For example, you can use schema to tell Google if a page represents a recipe, a blog post, or a product page, and your search listing might include some of that extra information. Moreover, you can choose what data to include using markup, such as star ratings, prices, and even cooking time.

In this article, we’re going to explain what schema markup is and break down its benefits. Then we’ll show you how to add schema markup to your website.

Let’s get to it!

What Is Schema?

Every page you create should contain a fair amount of metadata. Some of the most important elements for SEO include page titles, meta descriptions, alt text, and heading tags. That metadata significantly affects how your site appears in the Search Engine Results Pages (SERPs).

DreamHost Glossary

What is Schema?

Schema refers to a collaborative markup strategy used by the major search engines. It enables webmasters to include helpful information about their web page content that can be used by search engines to enhance search appearance.

Read More

Think about schema markup as the “next level” of metadata for pages. Instead of simply telling search engines what a page’s title and description are, the schema provides context.

You can use schema to indicate each page’s content, such as locations, recipes, products, and hundreds of other options. To give you an example, here’s what the search result for a recipe looks like without schema:

An example of a search result for a macaroni recipe

It looks good and could definitely get some clicks. Let’s compare it with a rich snippet search result that uses schema markup, including ratings, numbers of upvotes, and cooking time. The rich results are possible because of schema markup:

An example of a rich snippet for a macaroni recipe

If you’re looking for a recipe, which of those two results would you click on? For many people, the answer would be the latter, as it provides more information right off the bat.

There are a lot of schema “categories” for different types of content. Besides recipes, you also have options for a person. This could be perfect if you want the search result snippets to contain information such as date of birth, parent and sibling names:

An example of a search result with schema markup

One of the most common approaches for adding Schema to a web page utilizes JavaScript Object Notation for Linked Data (JSON-LD).

Here’s what an example of schema markup using JSON-LD would look like if you were working on, say,  a banana bread recipe:

<script type="application/ld+json">
{
  "@context": "https://schema.org",
  "@type": "Recipe",
  "author": "John Smith",
  "cookTime": "PT1H",
  "datePublished": "2009-05-08",
  "description": "This classic banana bread recipe comes from my mom -- the walnuts add a nice texture and flavor to the banana bread.",
  "image": "bananabread.jpg",
  "recipeIngredient": [
    "3 or 4 ripe bananas, smashed",
    "1 egg",
    "3/4 cup of sugar"
  ],
  "interactionStatistic": {
    "@type": "InteractionCounter",
    "interactionType": "https://schema.org/Comment",
    "userInteractionCount": "140"
  },
  "name": "Mom's World Famous Banana Bread",
  "nutrition": {
    "@type": "NutritionInformation",
    "calories": "240 calories",
    "fatContent": "9 grams fat"
  },
  "prepTime": "PT15M",
  "recipeInstructions": "Preheat the oven to 350 degrees. Mix in the ingredients in a bowl. Add the flour last. Pour the mixture into a loaf pan and bake for one hour.",
  "recipeYield": "1 loaf",
  "suitableForDiet": "https://schema.org/LowFatDiet"
}
</script>

That script would go into the page’s HTML, and you have full control over the schema elements. Some tools let you add schema markup without using code by selecting what kind of content you’re working on and filling out a few fields.

(Don’t worry, we’ll share some of our favorite schema generator tools down below.)

To recap, schema is markup you add to website pages to provide search engines with additional information about your content. Now let’s talk about how that process can benefit your website.

Get Content Delivered Straight to Your Inbox

Subscribe to our blog and receive great content just like this delivered straight to your inbox.

Why Using Schema Markup Can Improve Your SEO

To be clear, the mere existence of structured data on a web page doesn’t provide a blanket rankings boost.

For example, let’s say you have two websites, one that uses schema markup and one that doesn’t. If they’re competing for the same keywords with a similar domain authority and content quality, they will probably get similar rankings.

However, schema markup does help with organic click-through rates. By making your search results look more appealing, you increase the chance that users will click on your results versus your competitors.

Research from Google backs this up. In a study, Google found that Rotten Tomatoes added schema markup to over 100,000 of its web pages and saw a 25% increase in click-through rates compared to pages that didn’t use it:

A movie page with schema markup

The Food Network saw similar results. Adding schema markup translated to a 35% increase in organic traffic visits:

Recipe results with schema markup

On top of helping you get more clicks, schema markup can make your website appear in local searches, depending on the metadata you add to your website.

For example, if you add location metadata to a page for a venue or an event, it may appear when users look for nearby options:

A venue page with schema markup showing upcoming events

Likewise, Google pulls schema information from pages to fill knowledge panels in search results. These panels might not link directly to your website, but they offer a better experience for search users.

Although schema markup doesn’t affect search engine rankings, implementing it is still a smart move from an SEO perspective. Adding markup can increase clicks to your pages that are already ranking well, and that’s definitely worth the (small) effort it takes to set it up.

How to Add Schema Markup to Your Website (2 Methods)

Depending on whether you’re using WordPress or a different website builder, there are two ways to add schema markup to a website. With a WordPress site, you can access schema markup plugins that simplify the process.

Otherwise, you’ll need to add the markup manually (which is not that complicated). Let’s go over both methods!

1. Use a Schema Markup WordPress Plugin

Unsurprisingly, there are multiple schema plugins you can use in WordPress. In fact, some of the most popular SEO plugins, including Yoast SEO and Rank Math, enable you to add schema markup to posts and pages out of the box.

The only downside of using SEO plugins for adding schema code is that you don’t have much control over the metadata. Yoast SEO, for example, only lets you choose which type of page or article you’re working on:

Yoast SEO’s schema options

You’ll need to use a specialized plugin if you want more control over the schema data you add to your WordPress content. One of our favorite tools for the job is Schema & Structured Data for WP & AMP:

The Schema & Structured Data for WP & AMP plugin

This plugin enables you to add custom JSON-LD markup to any post or page. You can also set up pre-configured types of schema markup and decide which fields to include depending on the content you’re working on.

After enabling the plugin, go to Structured Data > Schema Types in the WordPress dashboard and select the Add Schema Type option:

Adding a schema type using a plugin

The plugin will ask you what schema you want to set up. You can choose from a list that includes all the schemas available on Schema.org. Some of the most common options include markup for articles, products, news articles, and FAQs:

Configuring a schema type using a plugin

The markup elements you’ll have access to will depend on the schema you choose. Afterward, you can decide for which types of content to enable this schema.

In this example, we configured the markup for the “post” content type:

Configuring which types of content to use a schema type for

After adding a type of schema, you’ll be able to edit it immediately. The schema editing page will show the default fields it includes.

For the Article schema, you can select whether you’re dealing with a list-based article and whether it’s speakable. You can also add other properties by clicking on Add Property:

Adding properties to a schema type

We recommend taking the time to customize each type of schema by adding the properties you want to appear in the search results for each page. However, keep in mind that if you add too many schema properties, not all of them will show up in the results. On average, Google displays between three and four schema elements for each result.

Since the plugin lets you configure which types of content will use different kinds of schema, you don’t need to enable the markup on a page-by-page basis.

However, if you’re editing a page or a post and you want to add custom schema, you can do so by going to the Schema & Structured Data on this post widget and selecting the Custom Schema option:

Using the Custom Schema option

If you’re unsure how to structure schema markup using JSON-LD, we recommend checking out Schema.org. Schema markup can be very manageable, even if you’re unfamiliar with code, since it follows a very straightforward set of rules and properties.

2. Add Schema Markup Manually

The steps for adding schema markup manually to a website will depend on which format you’re using. So far, we’ve focused solely on JSON-LD because it’s the most popular option for schema markup data (and it’s recommended by Google).

JSON-LD

Adding JSON-LD markup to a page is relatively simple. You need to put together the markup script using the properties you want to include and structure it in the correct format.

Let’s revisit the earlier example of a JSON-LD schema markup snippet:

<script type=”application/ld+json”>
{
“@context”: “https://schema.org”,
“@type”: “Recipe”,
“author”: “John Smith”,
“cookTime”: “PT1H”,
“datePublished”: “2009-05-08”,
“description”: “This classic banana bread recipe comes from my mom — the walnuts add a nice texture and flavor to the banana bread.”,
“image”: “bananabread.jpg”,
“recipeIngredient”: [
“3 or 4 ripe bananas, smashed”,
“1 egg”,
“3/4 cup of sugar”
],
“interactionStatistic”: {
“@type”: “InteractionCounter”,
“interactionType”: “https://schema.org/Comment”,
“userInteractionCount”: “140”
},
“name”: “Mom’s World Famous Banana Bread”,
“nutrition”: {
“@type”: “NutritionInformation”,
“calories”: “240 calories”,
“fatContent”: “9 grams fat”
},
“prepTime”: “PT15M”,
“recipeInstructions”: “Preheat the oven to 350 degrees. Mix in the ingredients in a bowl. Add the flour last. Pour the mixture into a loaf pan and bake for one hour.”,
“recipeYield”: “1 loaf”,
“suitableForDiet”: “https://schema.org/LowFatDiet”
}
</script>

Any JSON-LD script you add must go within the <body> tags of the HTML file you’re working on. The code should vary depending on the type of content you’re creating, but all you need to add it is a text editor.

If you’re unfamiliar with schema properties, you’ll also want to keep the Schema.org website open. The site shows you the properties you can use with schema markup and examples of how to add them.

Our Favorite JSON-LD Schema Markup Generators

RDFa and Microdata Formats

Aside from JSON-LD, you might also use the RDFa and microdata formats. Both of these formats are less popular because they rely on inline code.

Here’s what the schema markup snippet for a movie might look like, indicating its director, genre, and linking to a trailer:

<div itemscope itemtype ="https://schema.org/Movie">
  <h1 itemprop="name">Apocalypse Now</h1>
  <span>Director: <span itemprop="director">Francis Ford Coppola</span>
  <span itemprop="genre">Action</span>
  <a href="../movies/apocalypsenow-theatrical-trailer.html" itemprop="trailer">Trailer</a>
</div>

Microdata requires adding properties directly within the <div> tags for each item, and the same applies to RDFa. In practice, this approach is too time-consuming, and you can’t automate it, unlike working with JSON-LD markup.

How to Validate Your Schema Markup

Why spend all of that time understanding and creating all of that Schema markup if it’s not valid? Remember to use the Schema.org Markup Validator to check your work. To use it, simply insert your URL and hit ‘Run Test.’

Schema Validator tool

Alternatively, you may add a raw code snippet to the tester and see if everything validates properly. In the right half of the screen, pay special attention to the “errors” and “warnings” notices, which will help you troubleshoot your schema if there are any issues.

Schema Validator tool enter code snippet

Either way you test it, this important step will ensure search engines recognizes the additional structured data you’ve added to your content and it is displayed appropriately in search results.

Add Schema Markup to Improve Your SEO and Boost Your Organic Traffic

If you want your website to get as much traffic as possible, you’ll need to improve its search engine rankings and its click-through rate. Schema markup can help you with the latter goal, and if you’re not using it, you could be missing out on a significant number of visitors.

Adding schema markup to your website isn’t difficult. However, the process varies depending on whether you’re using WordPress or not:

  1. Use a schema markup WordPress plugin.
  2. Add schema markup manually.

To ensure your website is ready for the additional traffic you can receive from using schema markup, you should look into our DreamPress plans. Thanks to managed WordPress hosting, you’ll never have to worry about a slow website or security issues again. Check out our plans today!

Do More with DreamPress

DreamPress Plus and Pro users get access to Jetpack Professional (and 200+ premium themes) at no added cost!

managed WordPress hosting provider

The post Beginner’s Guide to Schema and How It Can Help Improve Your SEO appeared first on Website Guides, Tips & Knowledge.


source https://www.dreamhost.com/blog/schema-markup-beginners-guide/

Creating and Mastering GA4 Explorations

In the switch from Universal Analytics (UA) to Google Analytics 4 (GA4) — which will go fully into effect July 2023 — a lot of things have...