To draw new visitors to your site, you may consider publishing blog posts regularly. However, without featured images, your posts likely won’t look inviting enough to earn clicks.
Fortunately, you can easily create well-designed featured images for your articles. Once you know how to find the right photos, size them correctly, and optimize them for search engines, you can instantly revitalize your WordPress posts.
In this post, we’ll explain what a featured image is. Then, we’ll share some tips on how to use them. Let’s get started!
What is a Featured Image?
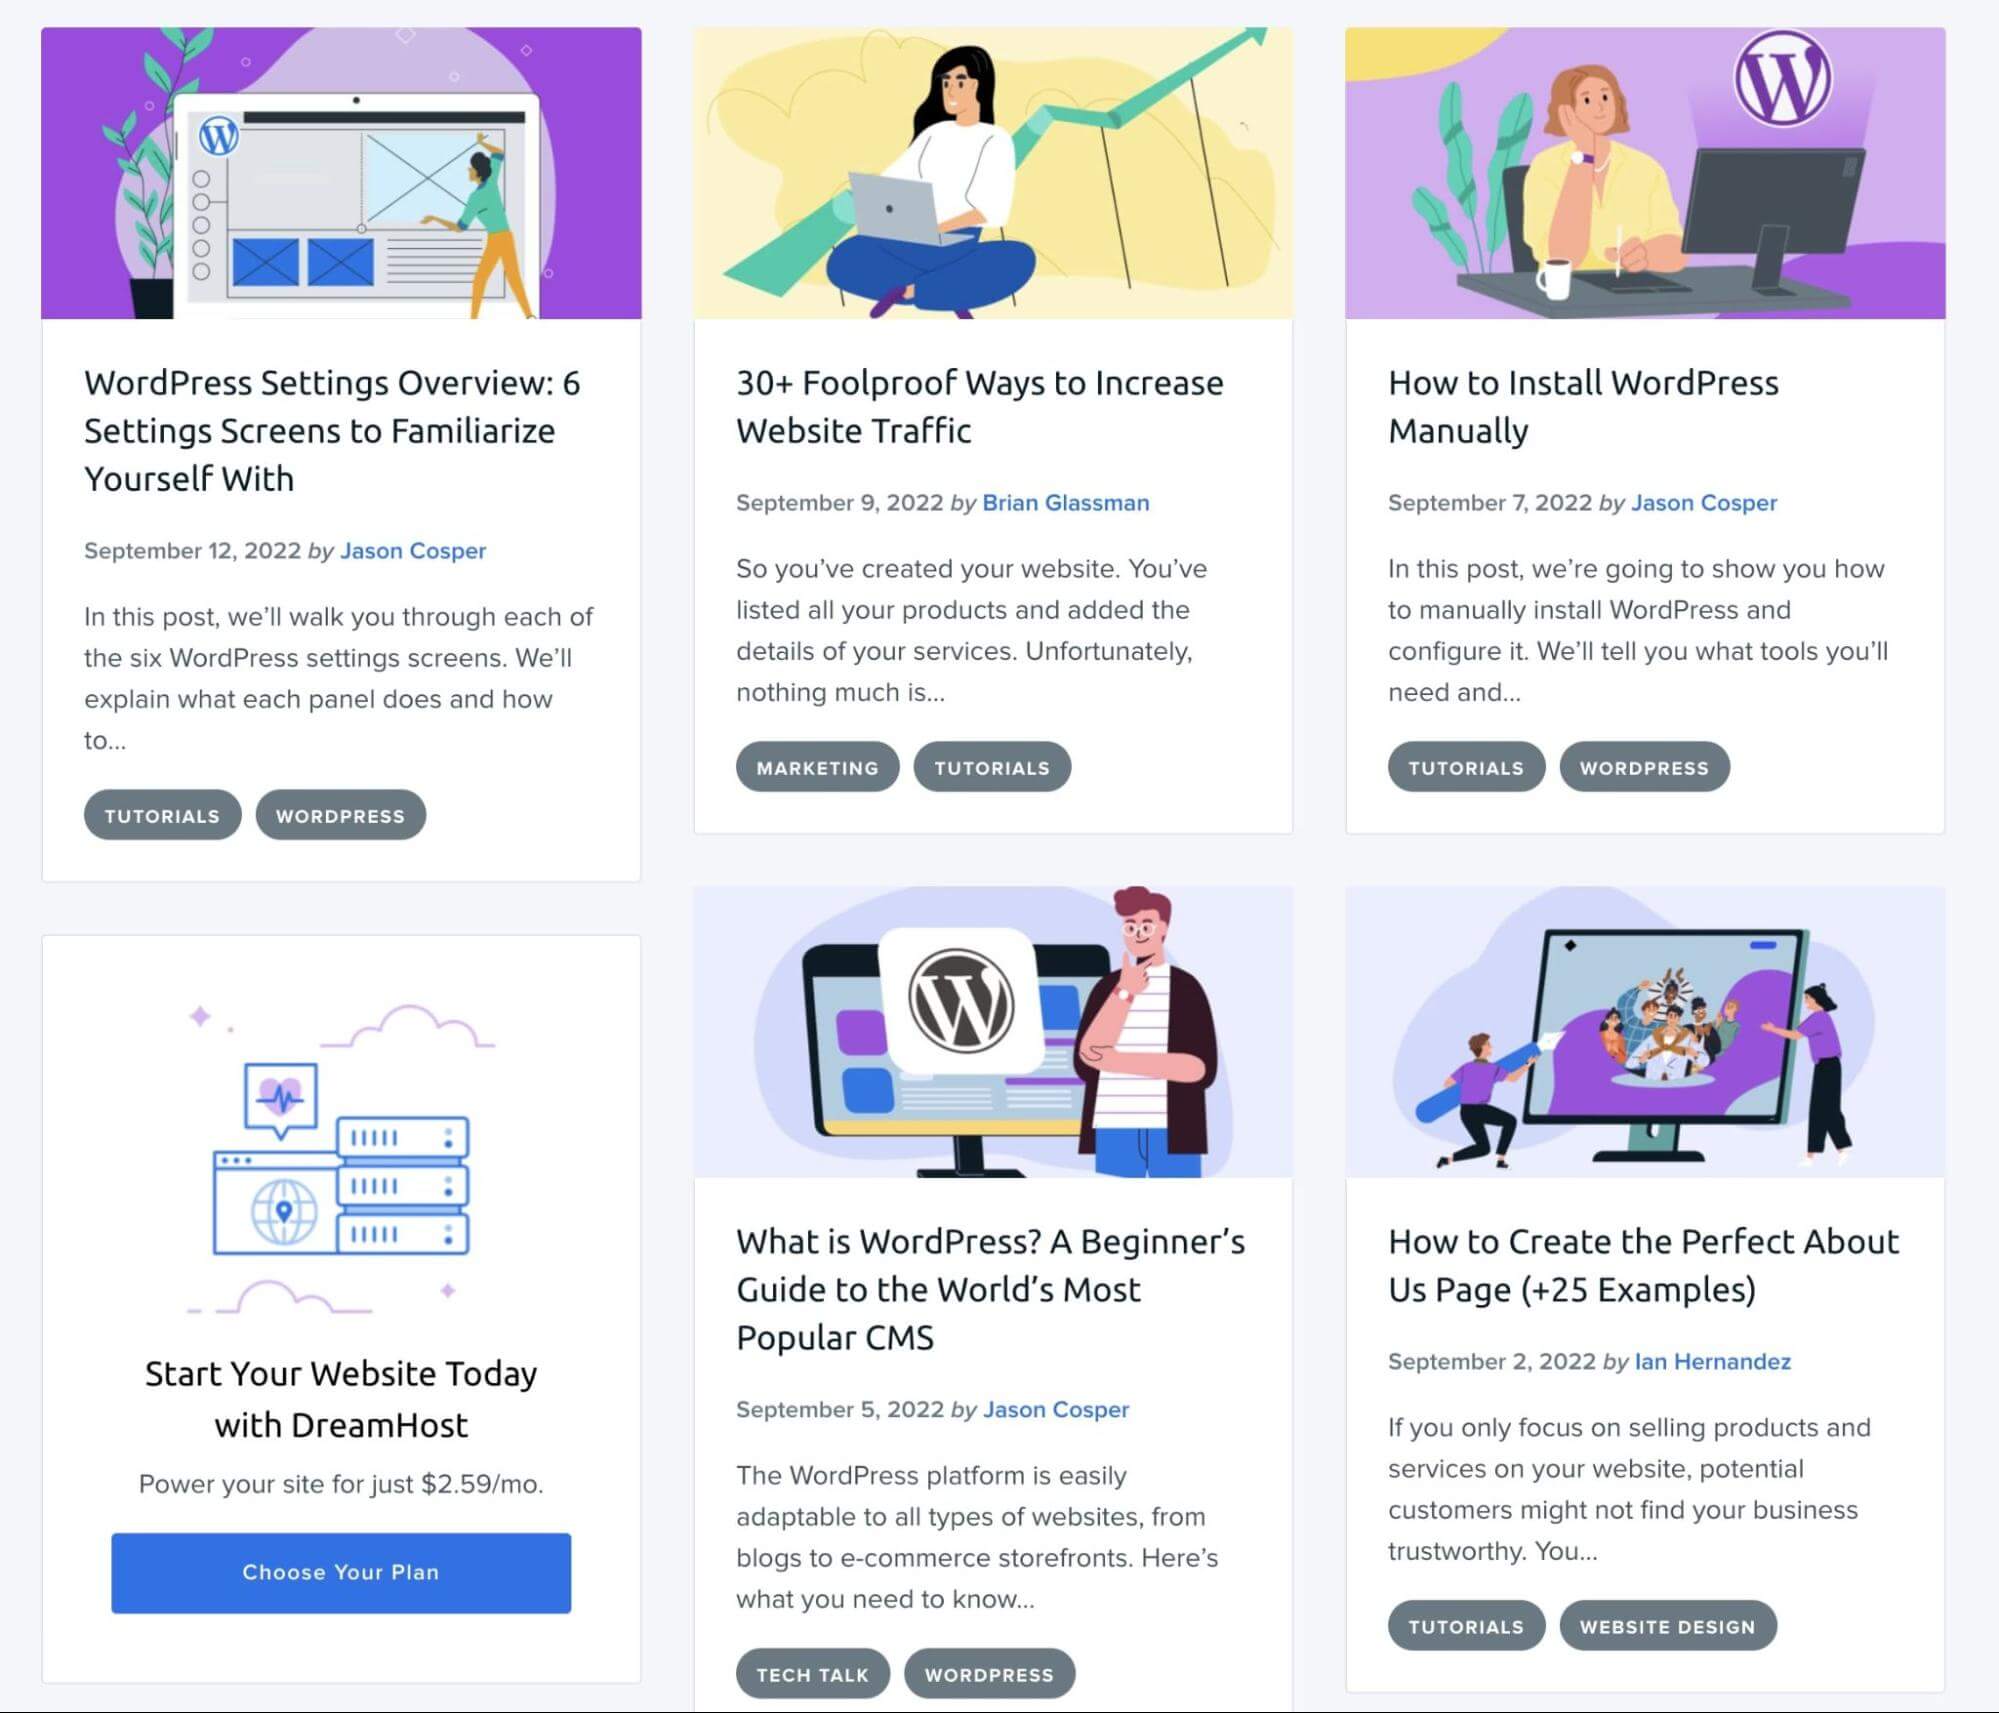
In WordPress, the featured image is the visual representation of a specific post, page, or custom post type. When someone visits your website, these images will usually appear at the top of posts or in your blog feed:
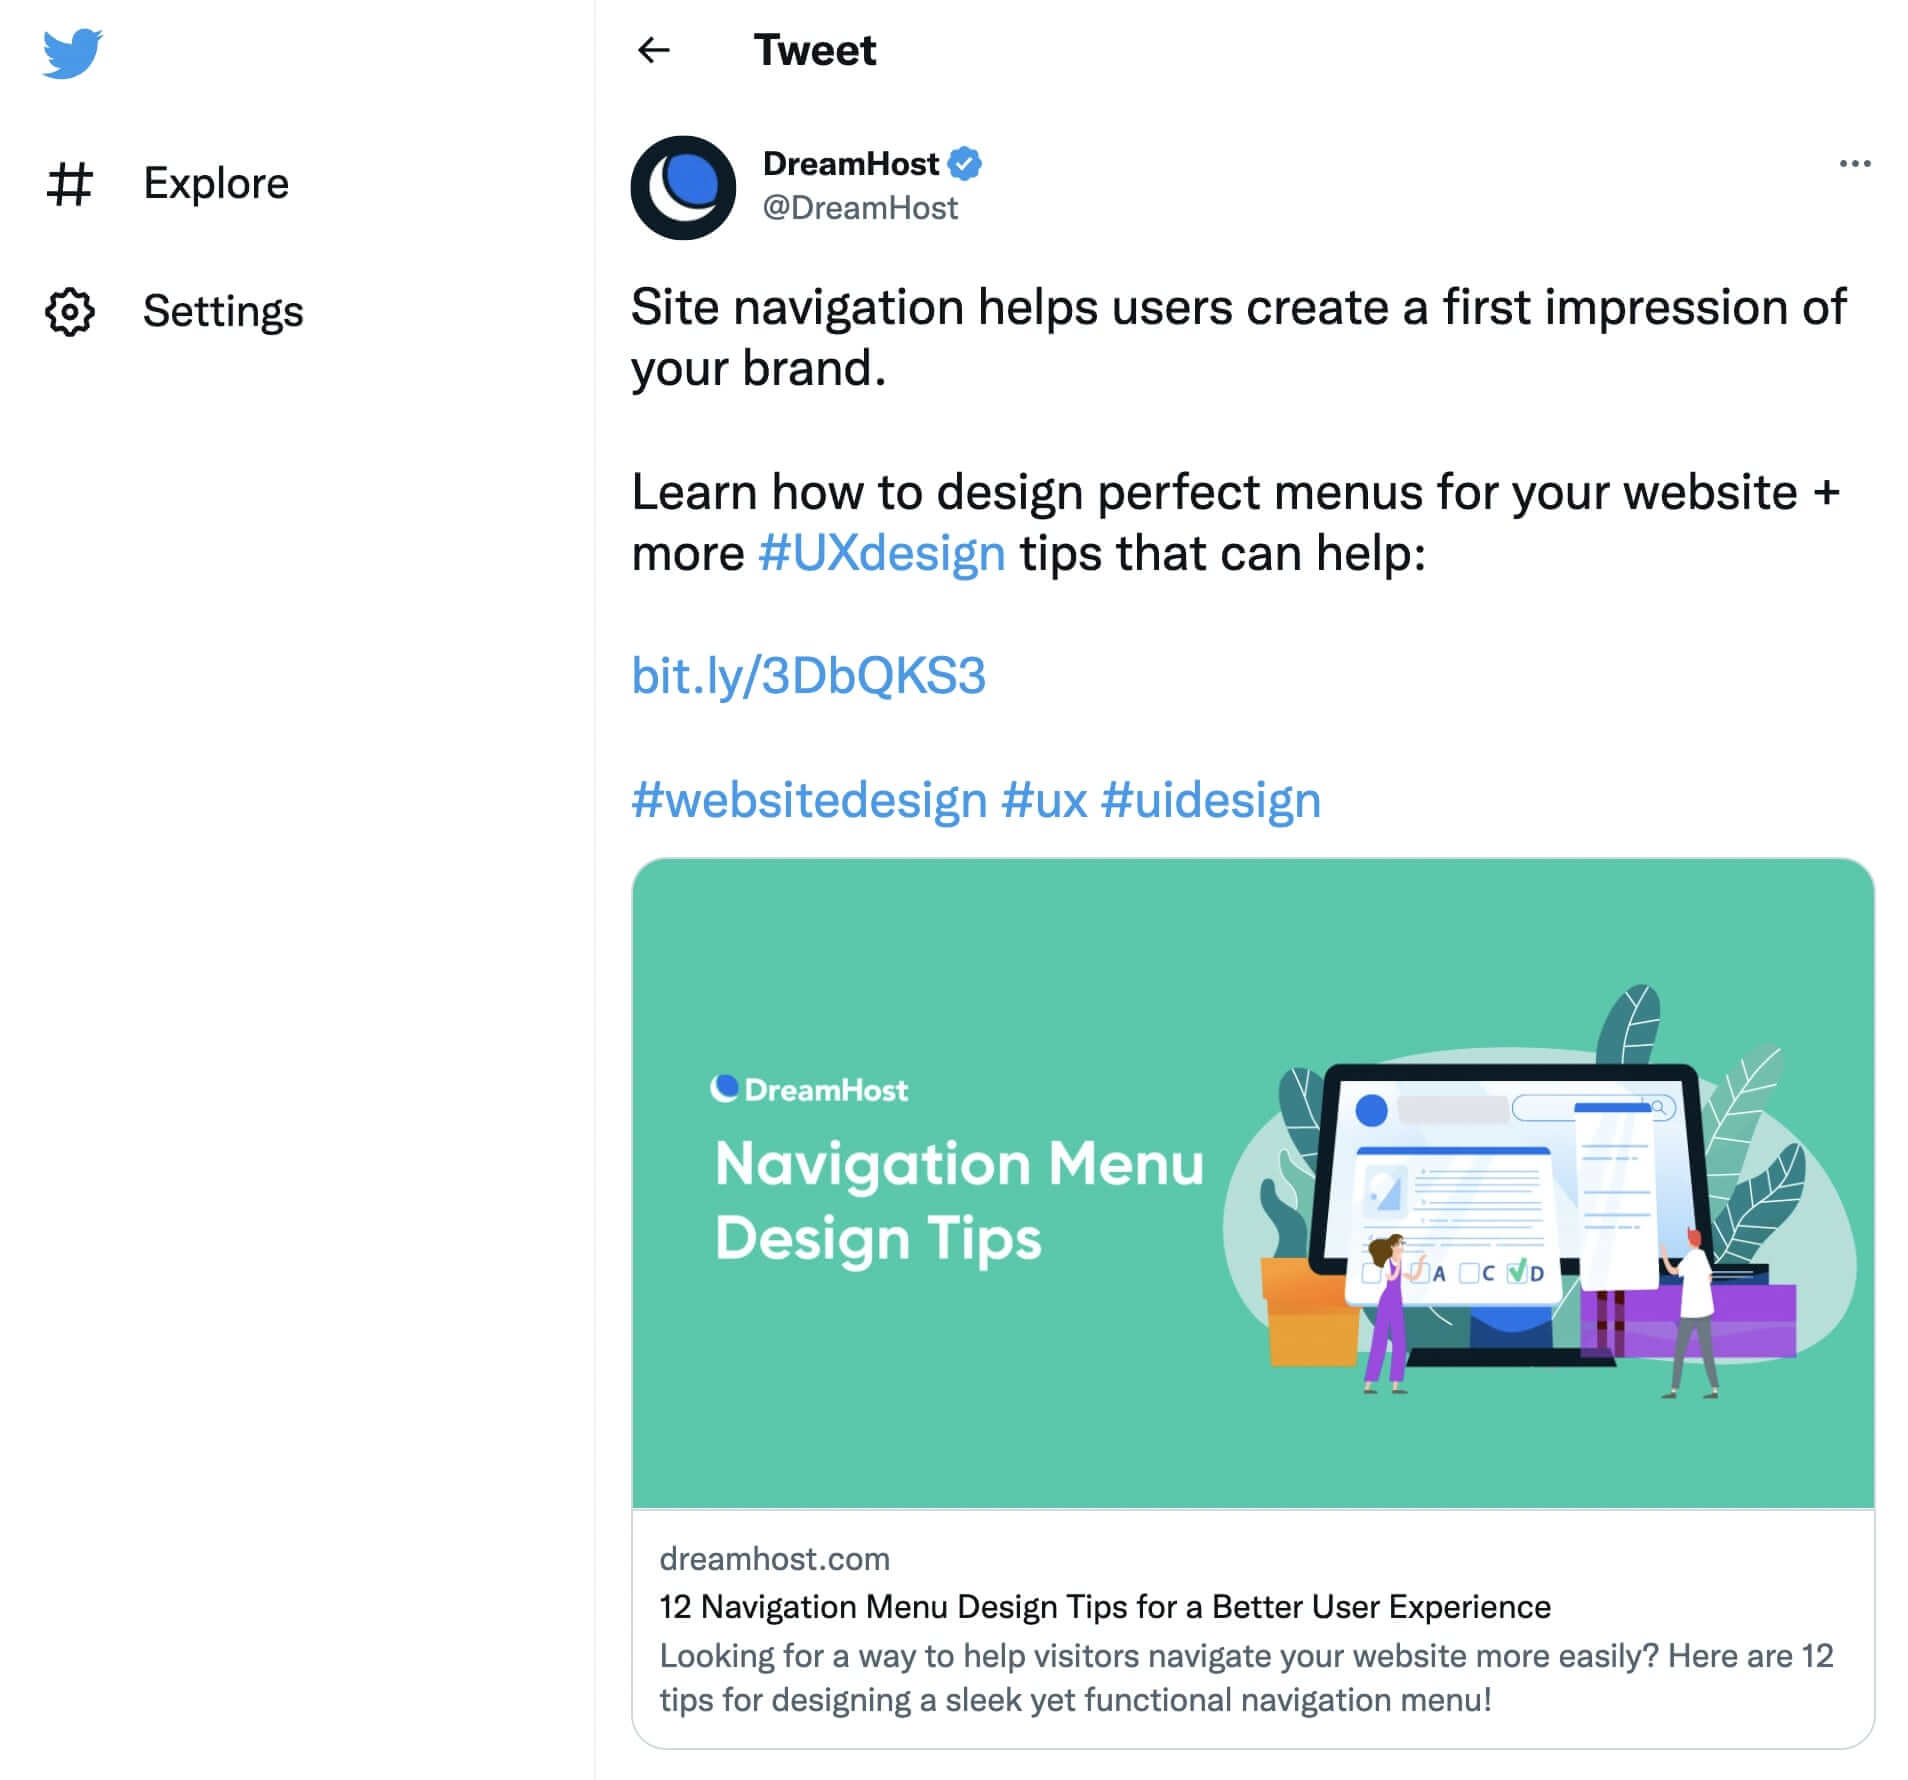
Essentially, the featured image is the default thumbnail of your post. If someone shares the post on social media, this image will appear with the link:
In WordPress, the featured image settings are determined by your theme. This includes the location and size of your images.
Typically, featured images are displayed in the following places:
- The top area of posts or pages
- Pages on your website that link to blog posts, like your WordPress homepage, recommended posts section, or search results
- Thumbnails for social media links
Sometimes, featured images may be included in image galleries or sliders. You may also see them as background images.
The Advantages of Using Featured Images
If you’re new to WordPress, you might be wondering why you need a featured image for every post on your website. However, these can be the key to making a good first impression with new visitors.
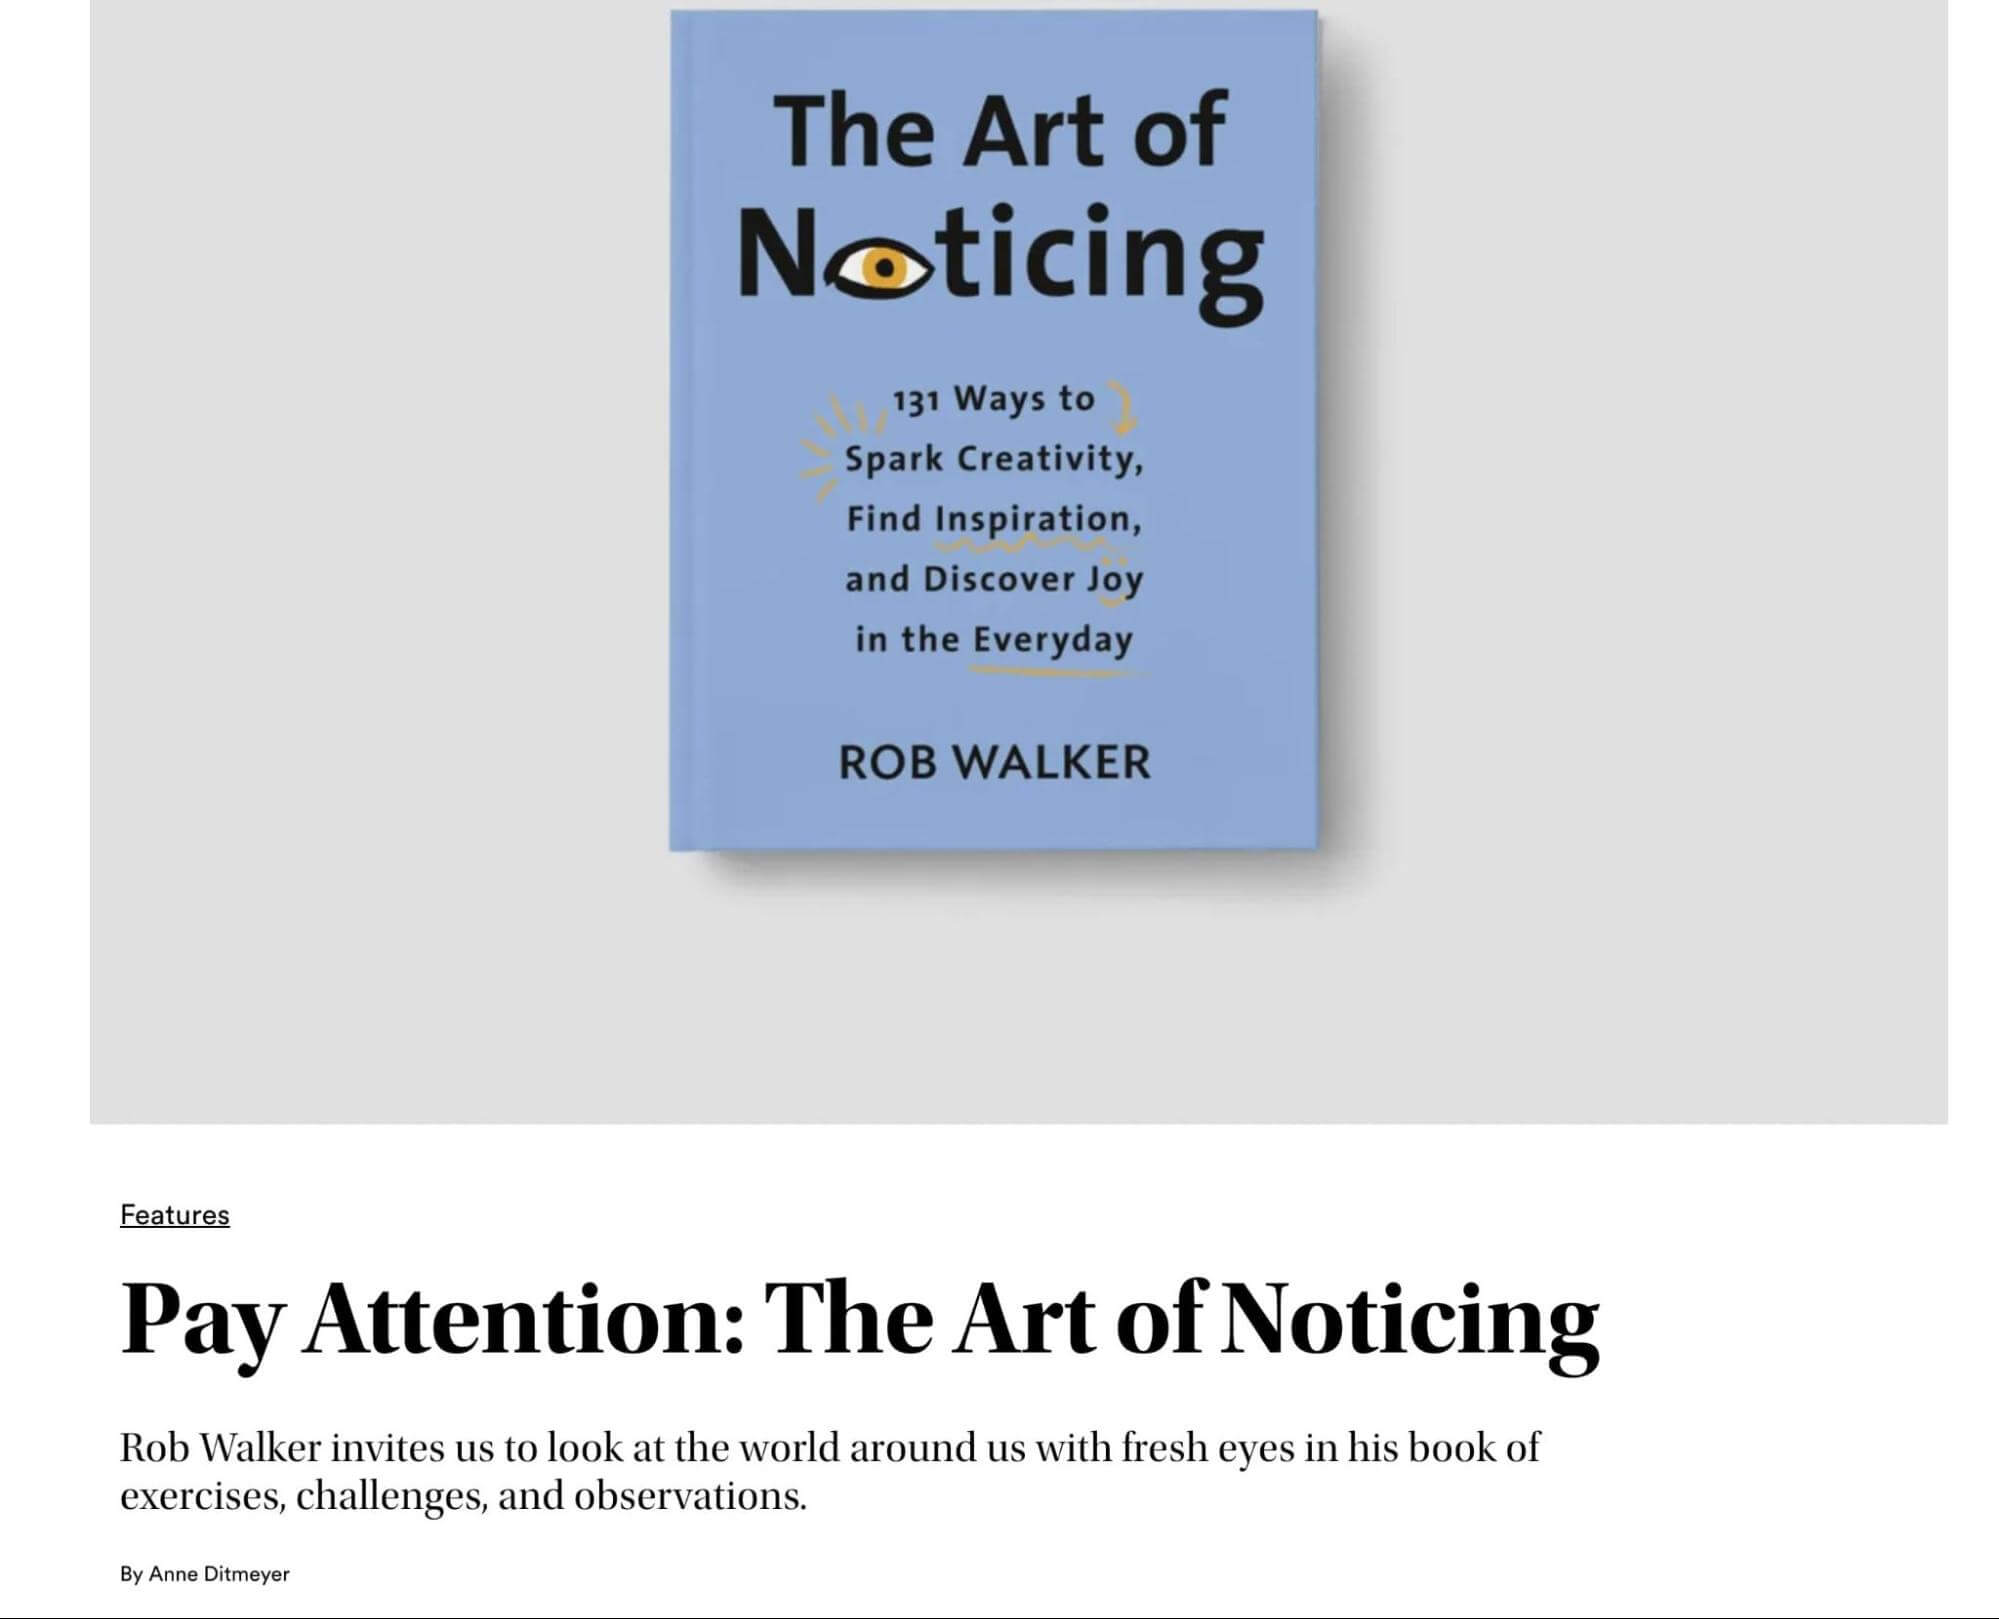
After users click on a link to one of your posts, featured images are often the first thing they’ll see and this can engage them enough to continue reading the article:
You’ll likely have a list of your published posts on your homepage. You can motivate visitors to read your content by including well-designed featured images.
Plus, having a featured image for each post can help you establish visual consistency on your website:
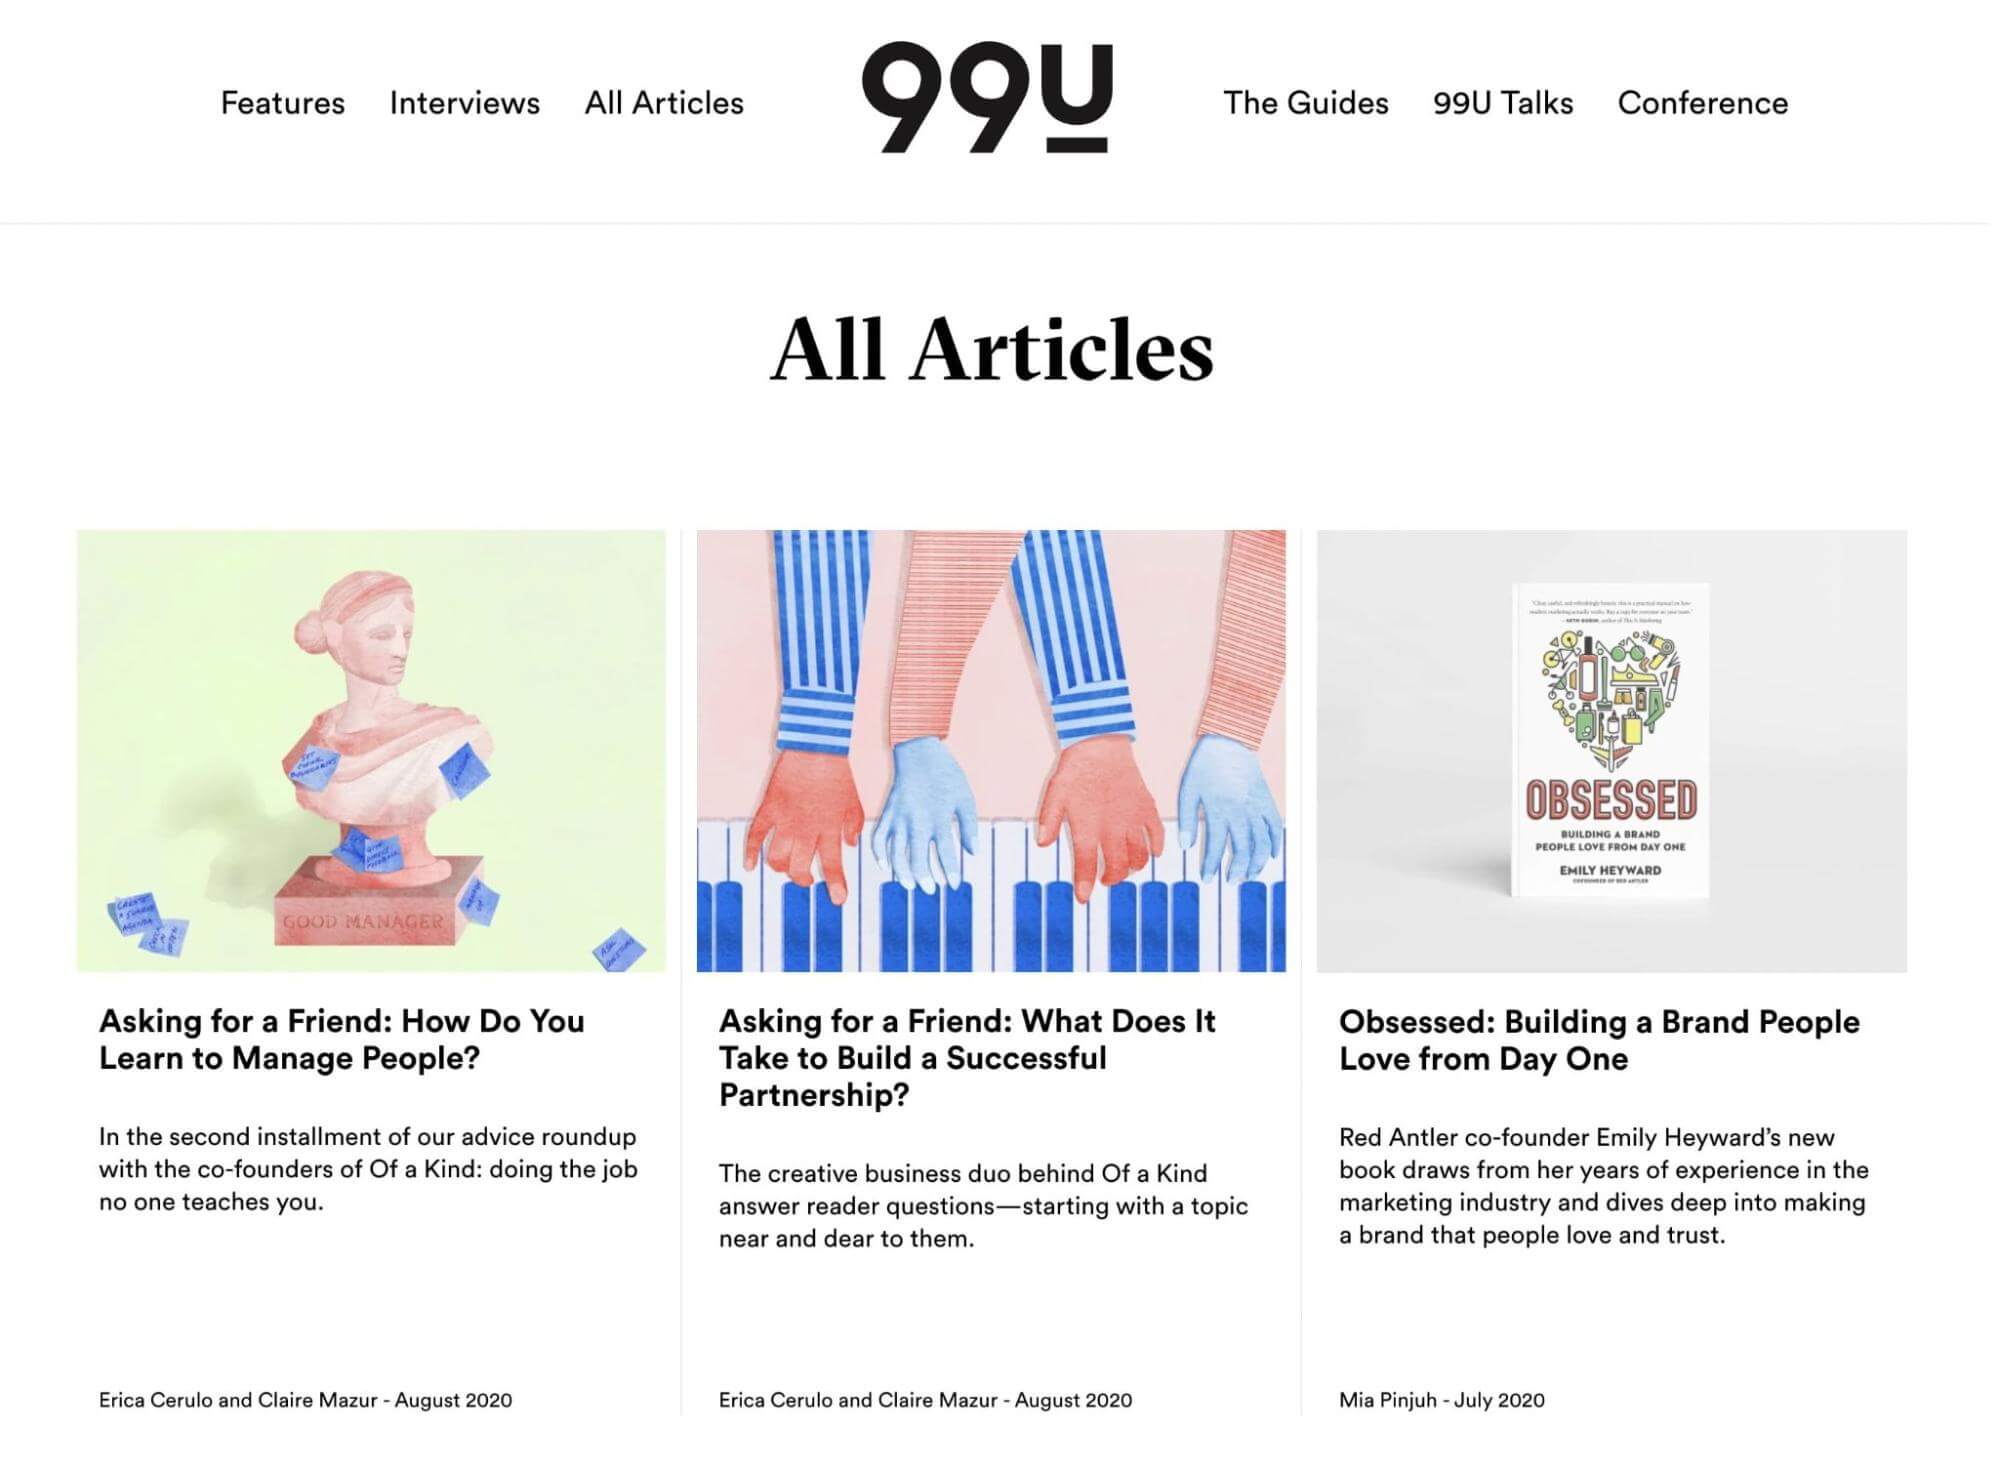
When you share your posts on social media, featured images can help advertise your content to users browsing their feeds. A well-designed image can increase engagement and generate more clicks to your site.
What is the Ideal WordPress Featured Image Size?
As we mentioned earlier, different WordPress themes can have various sizes for featured images. However, the general size is 1200 x 628 pixels.
Here’s how this would look with the default Twenty Twenty-Two theme:
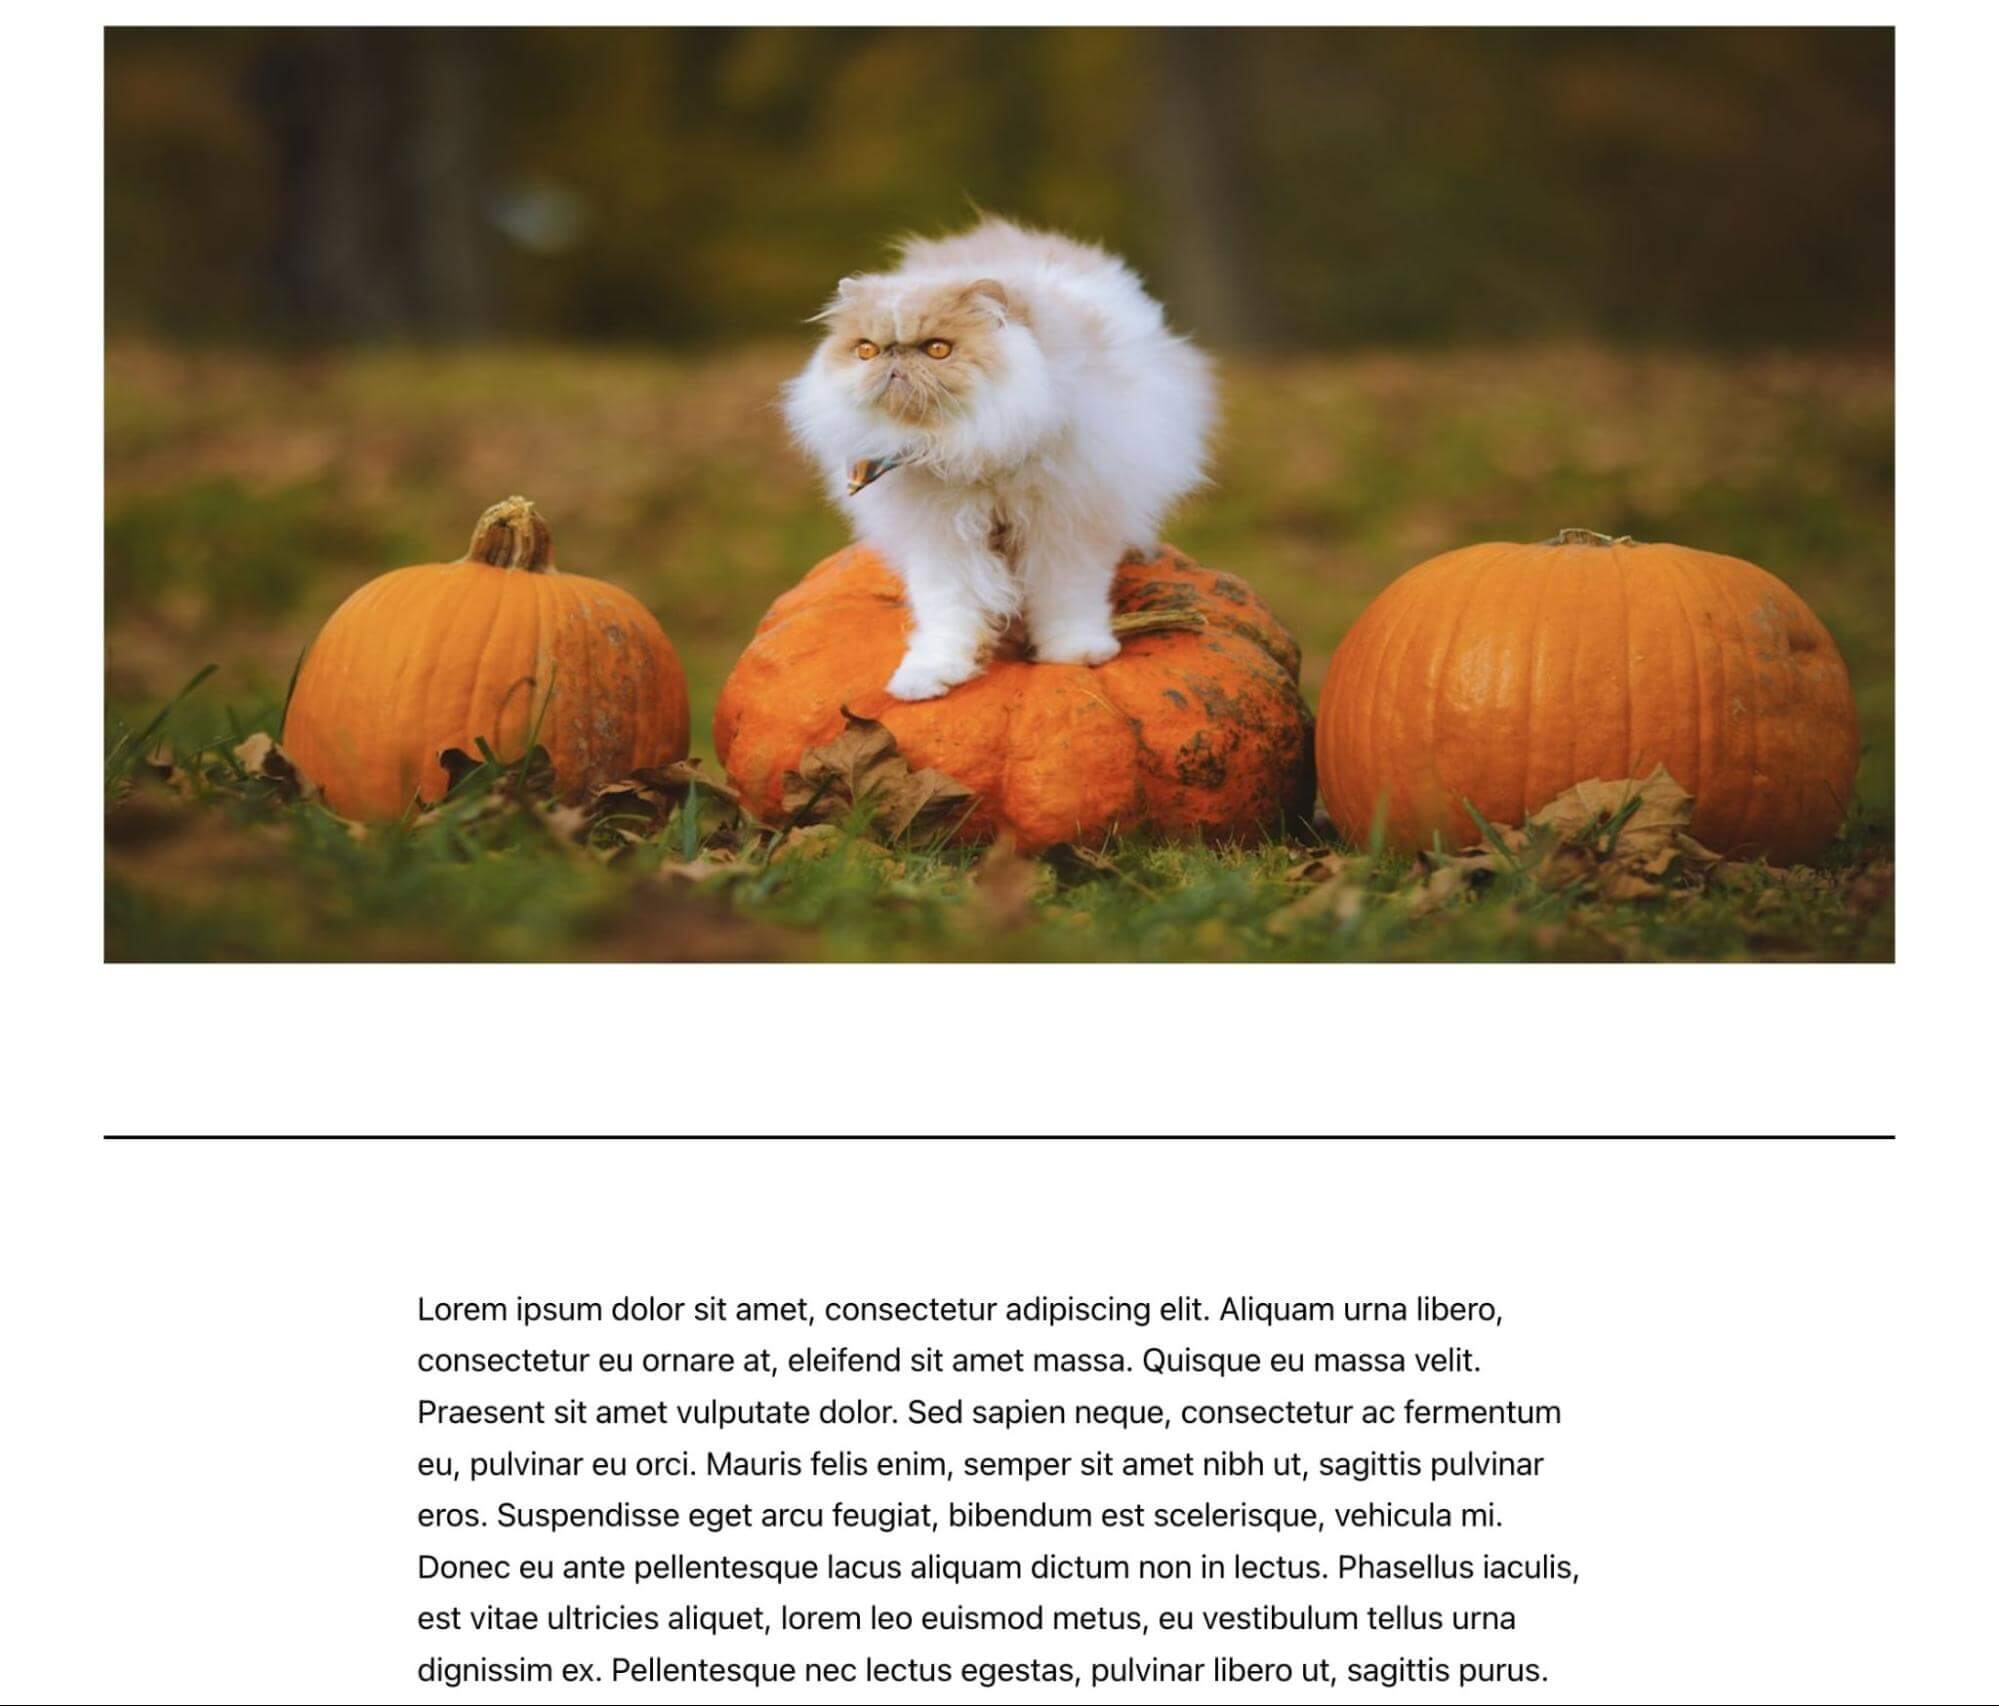
This size will work effectively with many WordPress themes. However, your featured image sizing may vary based on your personal preference and the layout of your theme.
It’s important to note that WordPress will resize your images to its default settings. Whenever you upload an image, it creates three different versions:
- Thumbnail: 150 x 150 px
- Medium: 300 x 300 px
- Large: 1024 x 1024 px
If you want to keep the original size of the featured image, this will be its ‘Full Size.’ To edit any of these sizing options, you can navigate to Settings > Media:
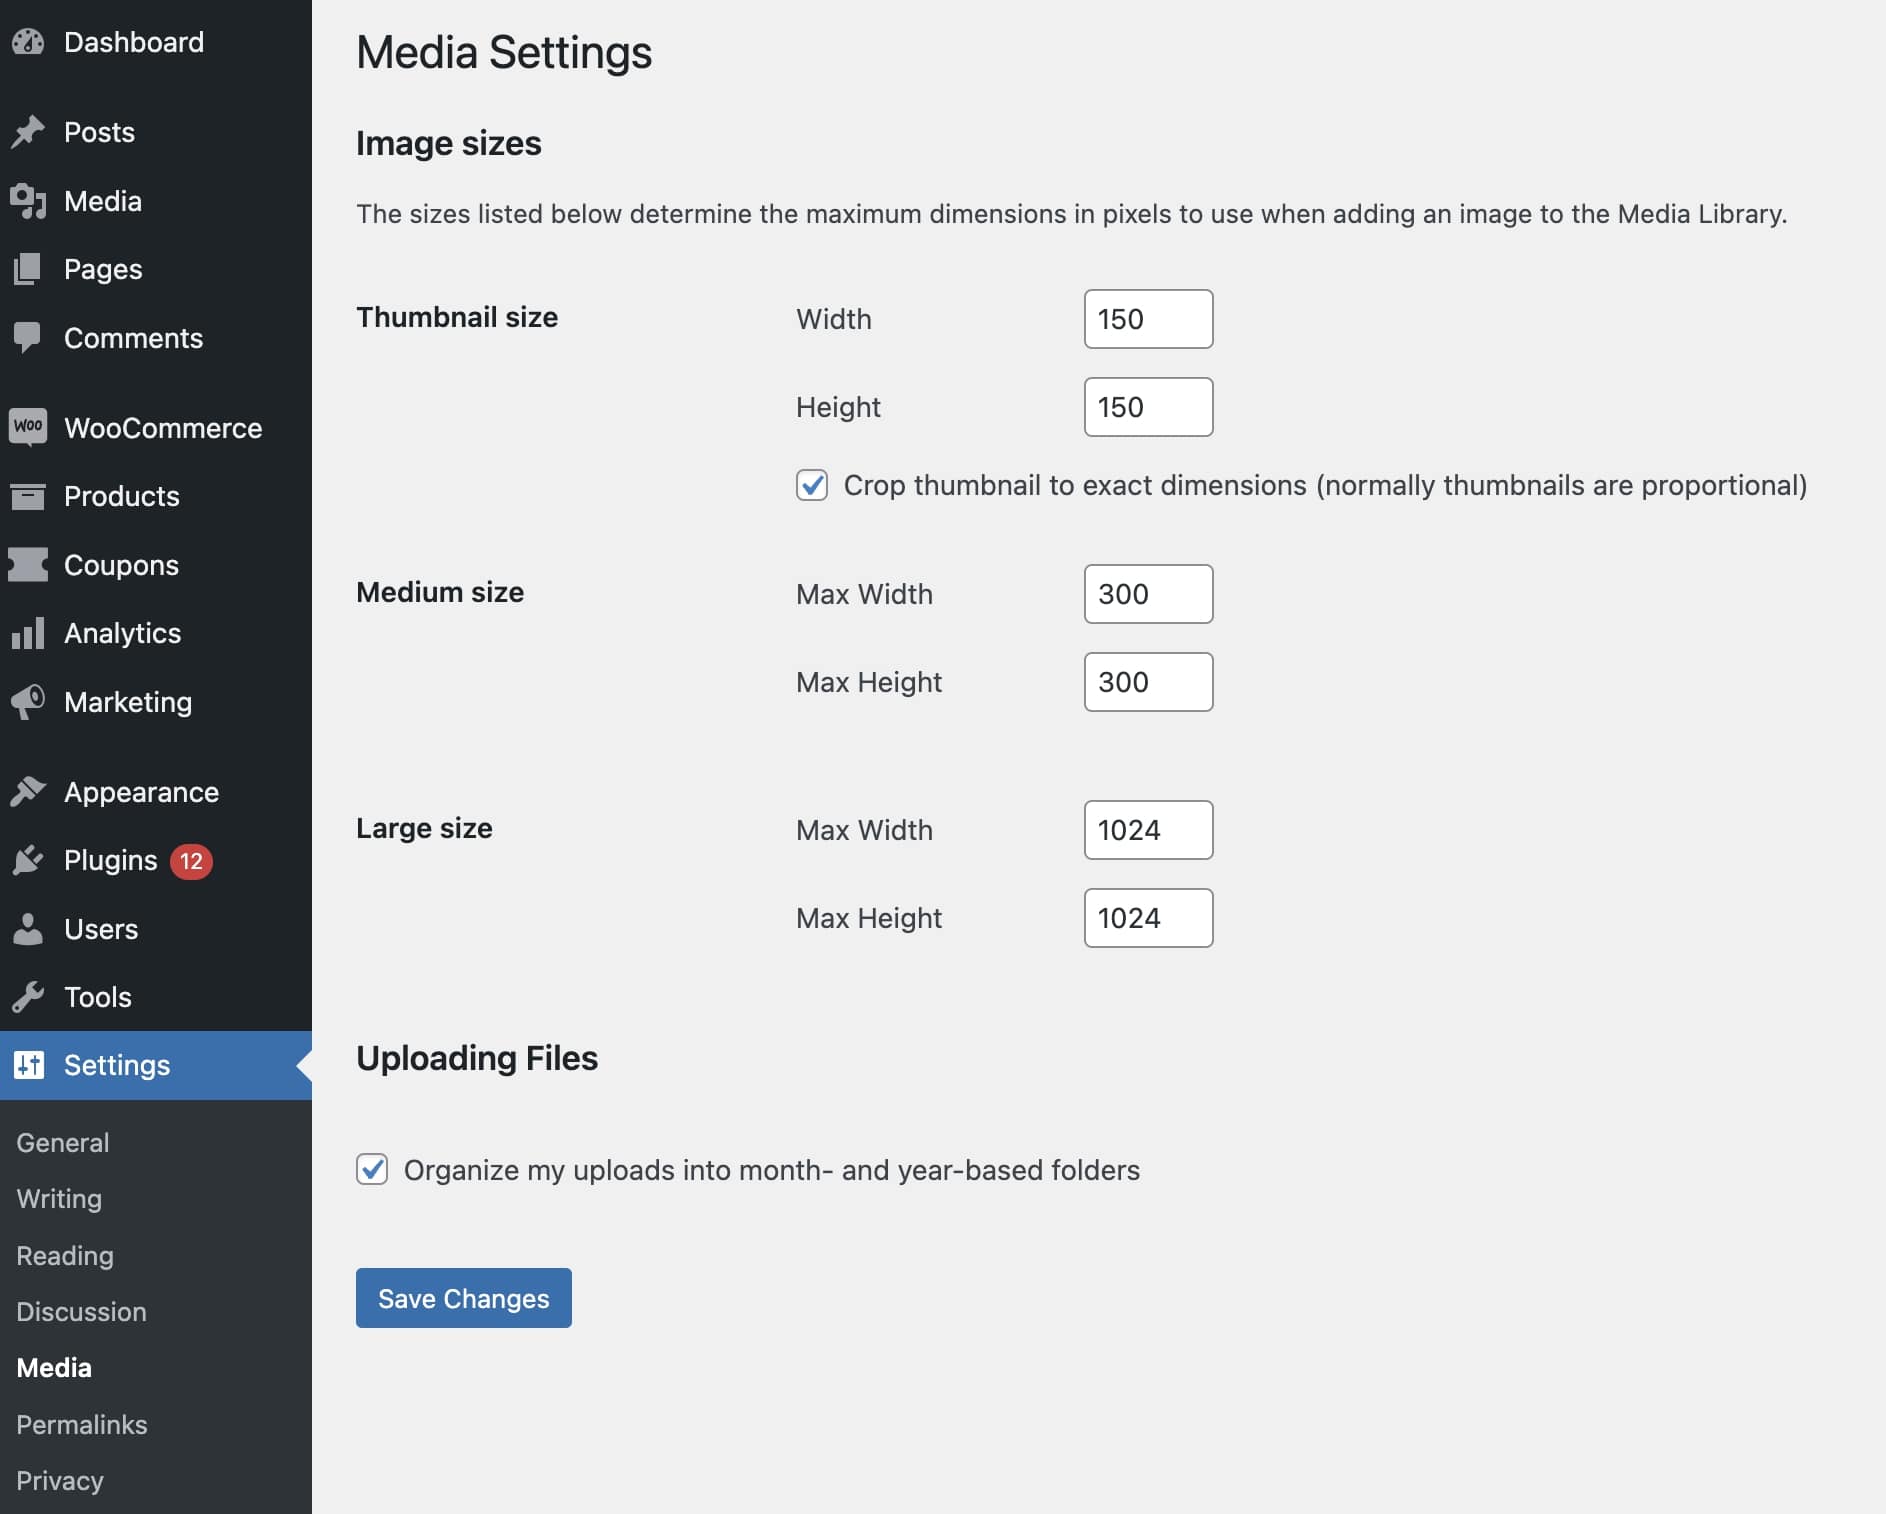
Here, you can update the width and height with new values. Once you save your changes, uploaded images will resize to these dimensions.
You can also add a custom featured image size. Before you do so, it’s a good idea to back up your website. After this step, you can add the following code to your functions.php file:
add_image_size( string $name, int $width, int $height, bool|array $crop = false )
Make sure to update these values with your new featured image sizes. Here’s an example of how this might look:
add_image_size( 'post-thumbnail size', 800, 1500 );
Next, you’ll need to display the new size within your theme. In your theme template file, update the_post_thumbnail() function:
if ( has_post_thumbnail() ) {
the_post_thumbnail( 'your-custom-size' );
}
Once you save the file, you’ll have a new custom-featured image!
Get Content Delivered Straight to Your Inbox
Subscribe to our blog and receive great content just like this delivered straight to your inbox.
How to Set a Featured Image in WordPress
To set a featured image, open your WordPress dashboard and create a new post. Then, in the right-hand sidebar, look for the Featured Image section:
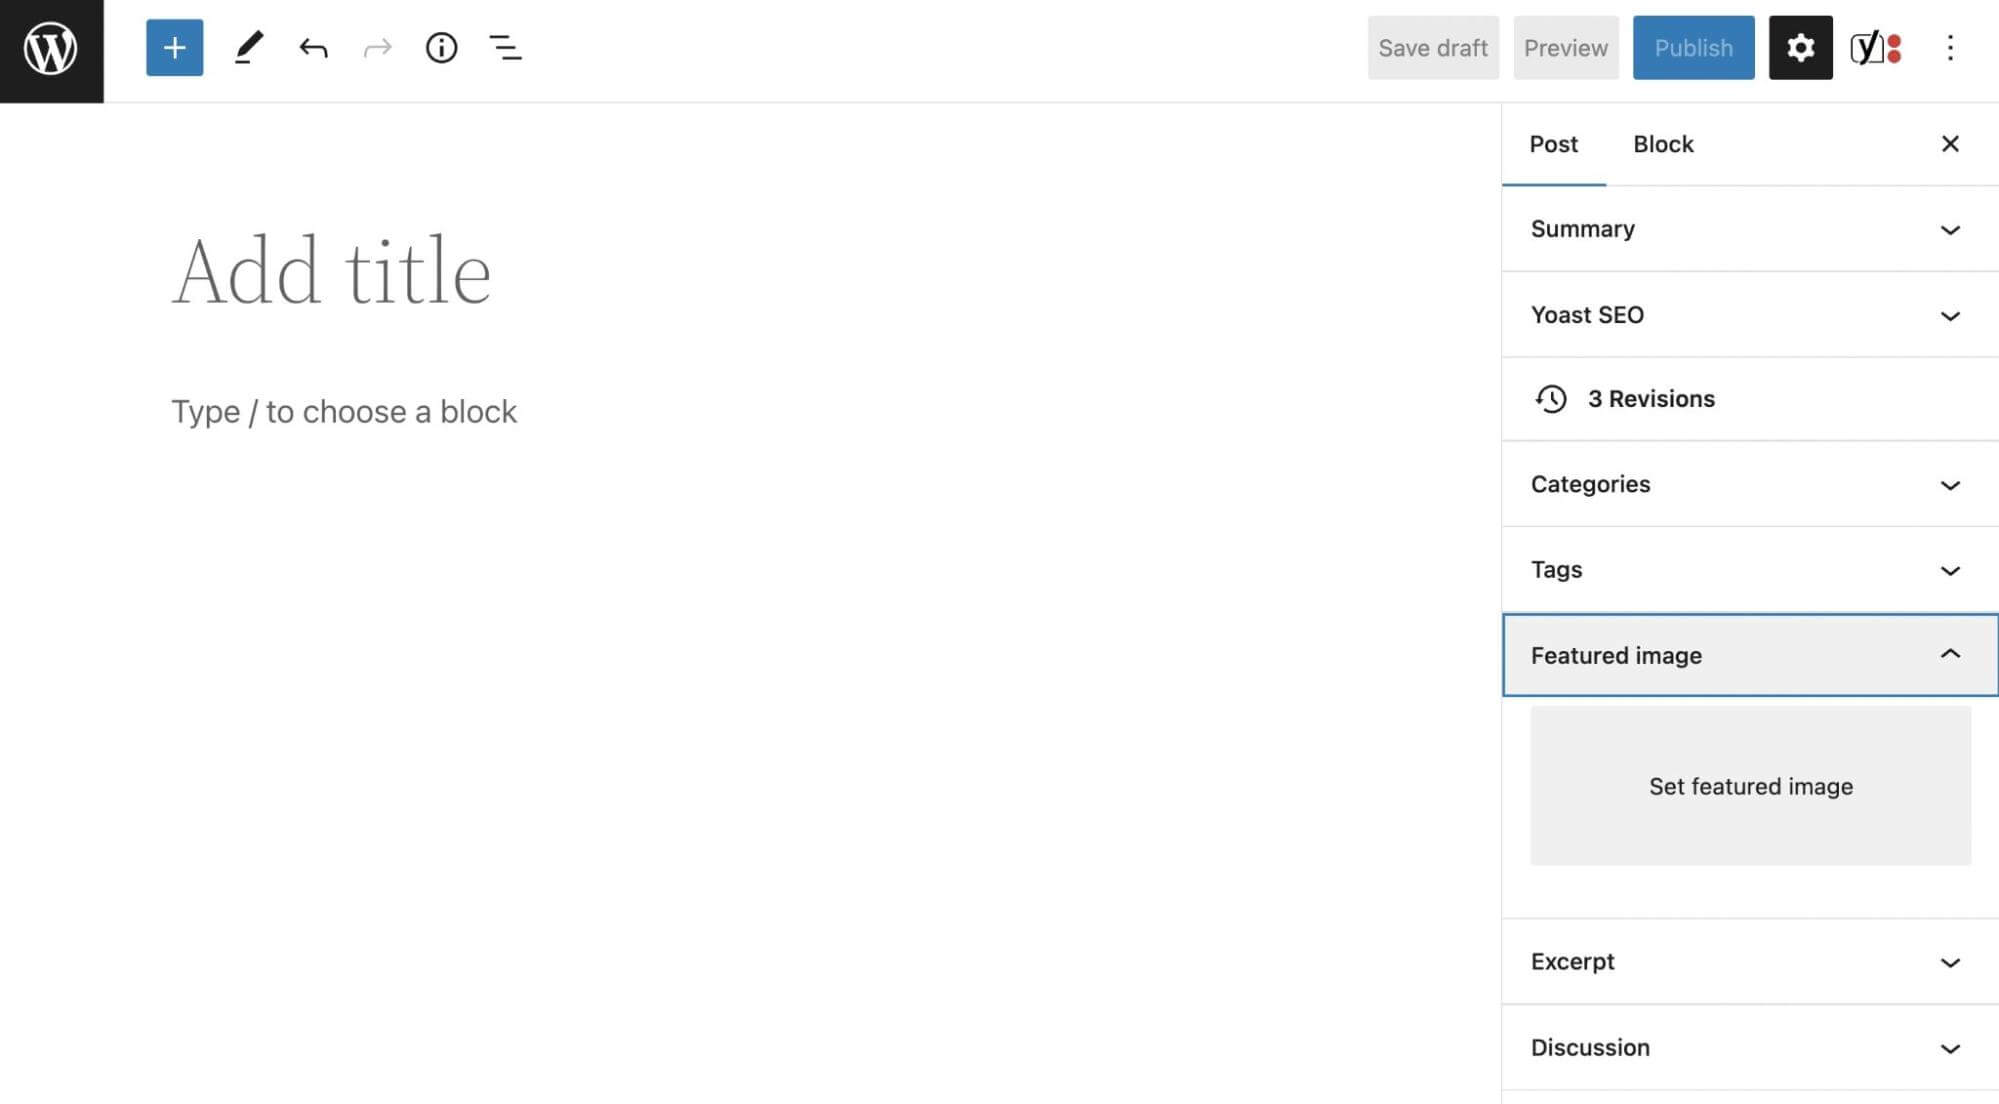
Here, click on Set Featured Image. This will open a pop-up where you can upload your media file. Alternatively, you can select an image from your Media Library:
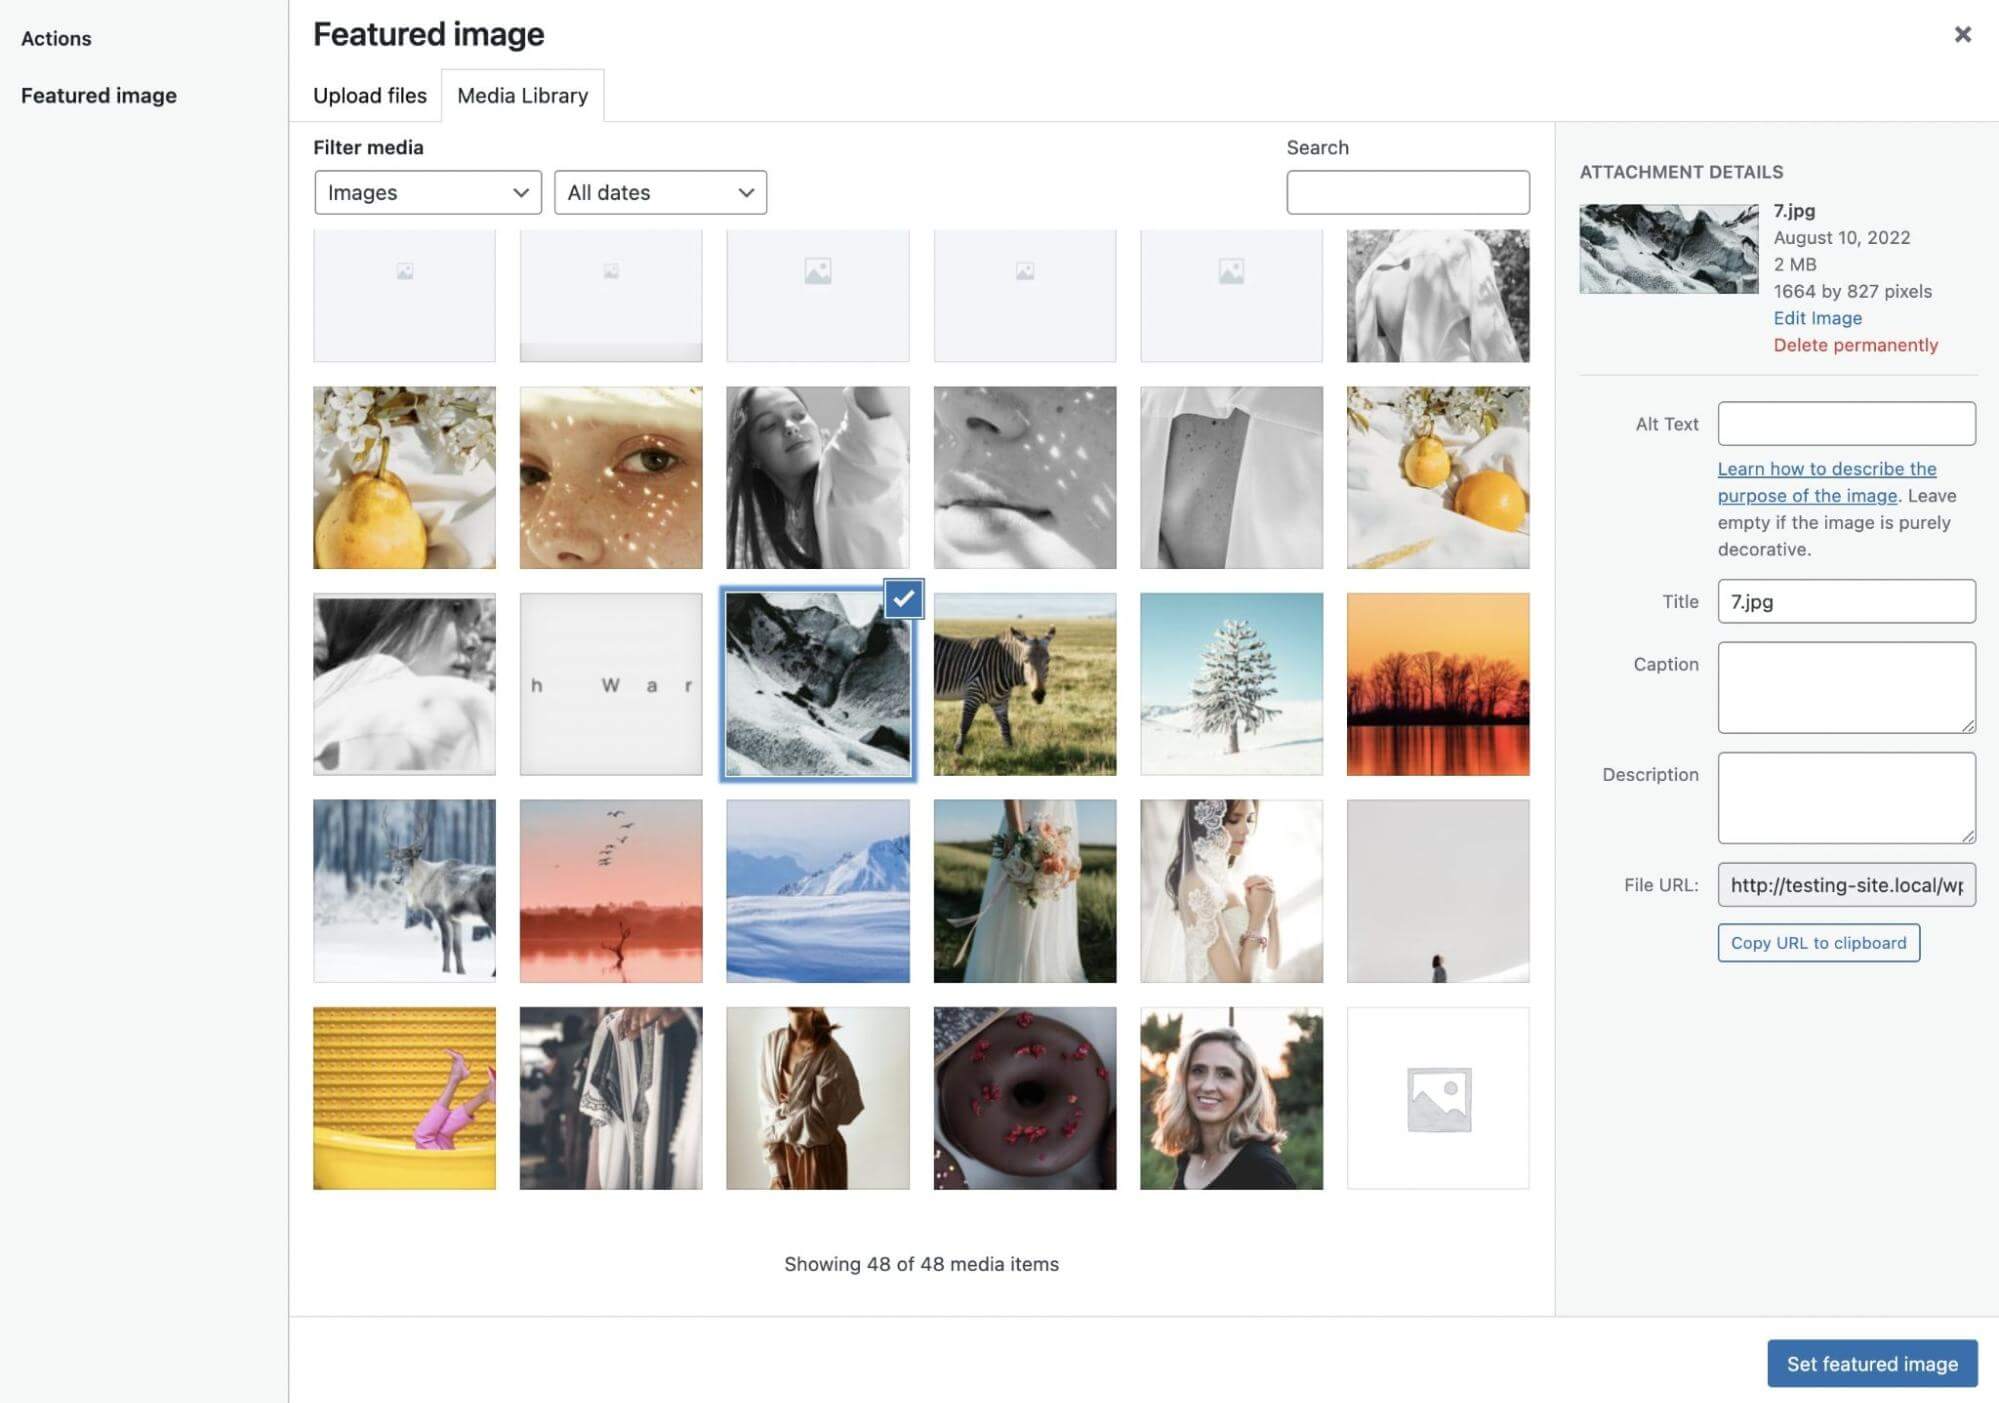
If you need to adjust the size, find the Edit Image button. Then, use the various editing options to scale, crop, rotate, or flip the image as needed:
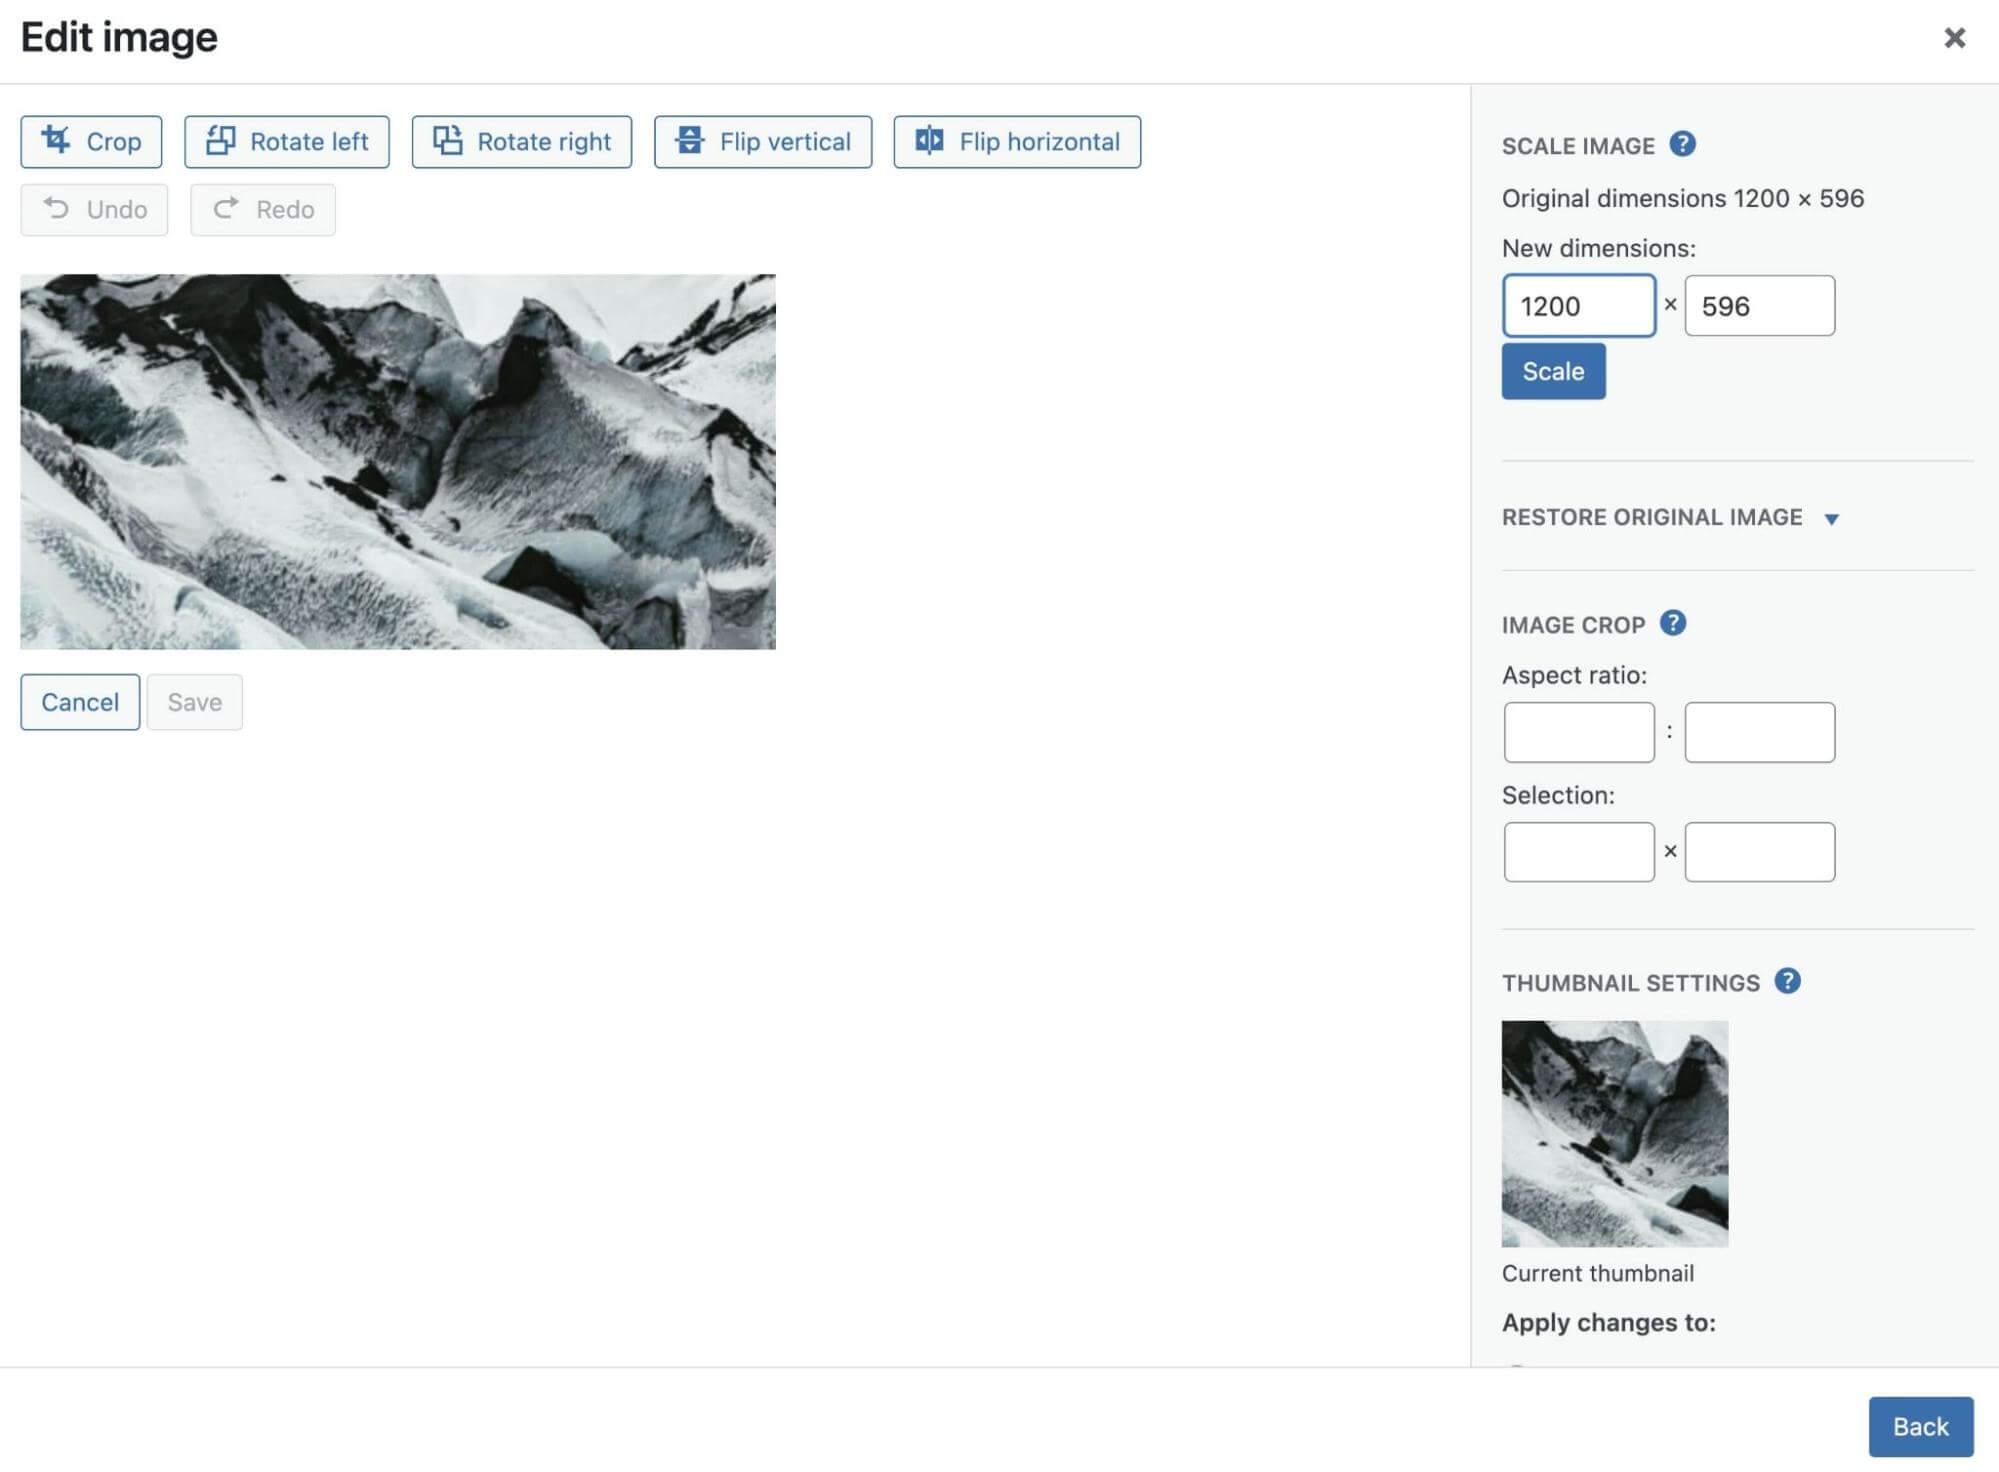
When you’re done, hit Set featured image. You’ll now see a preview of the image while you create the post:
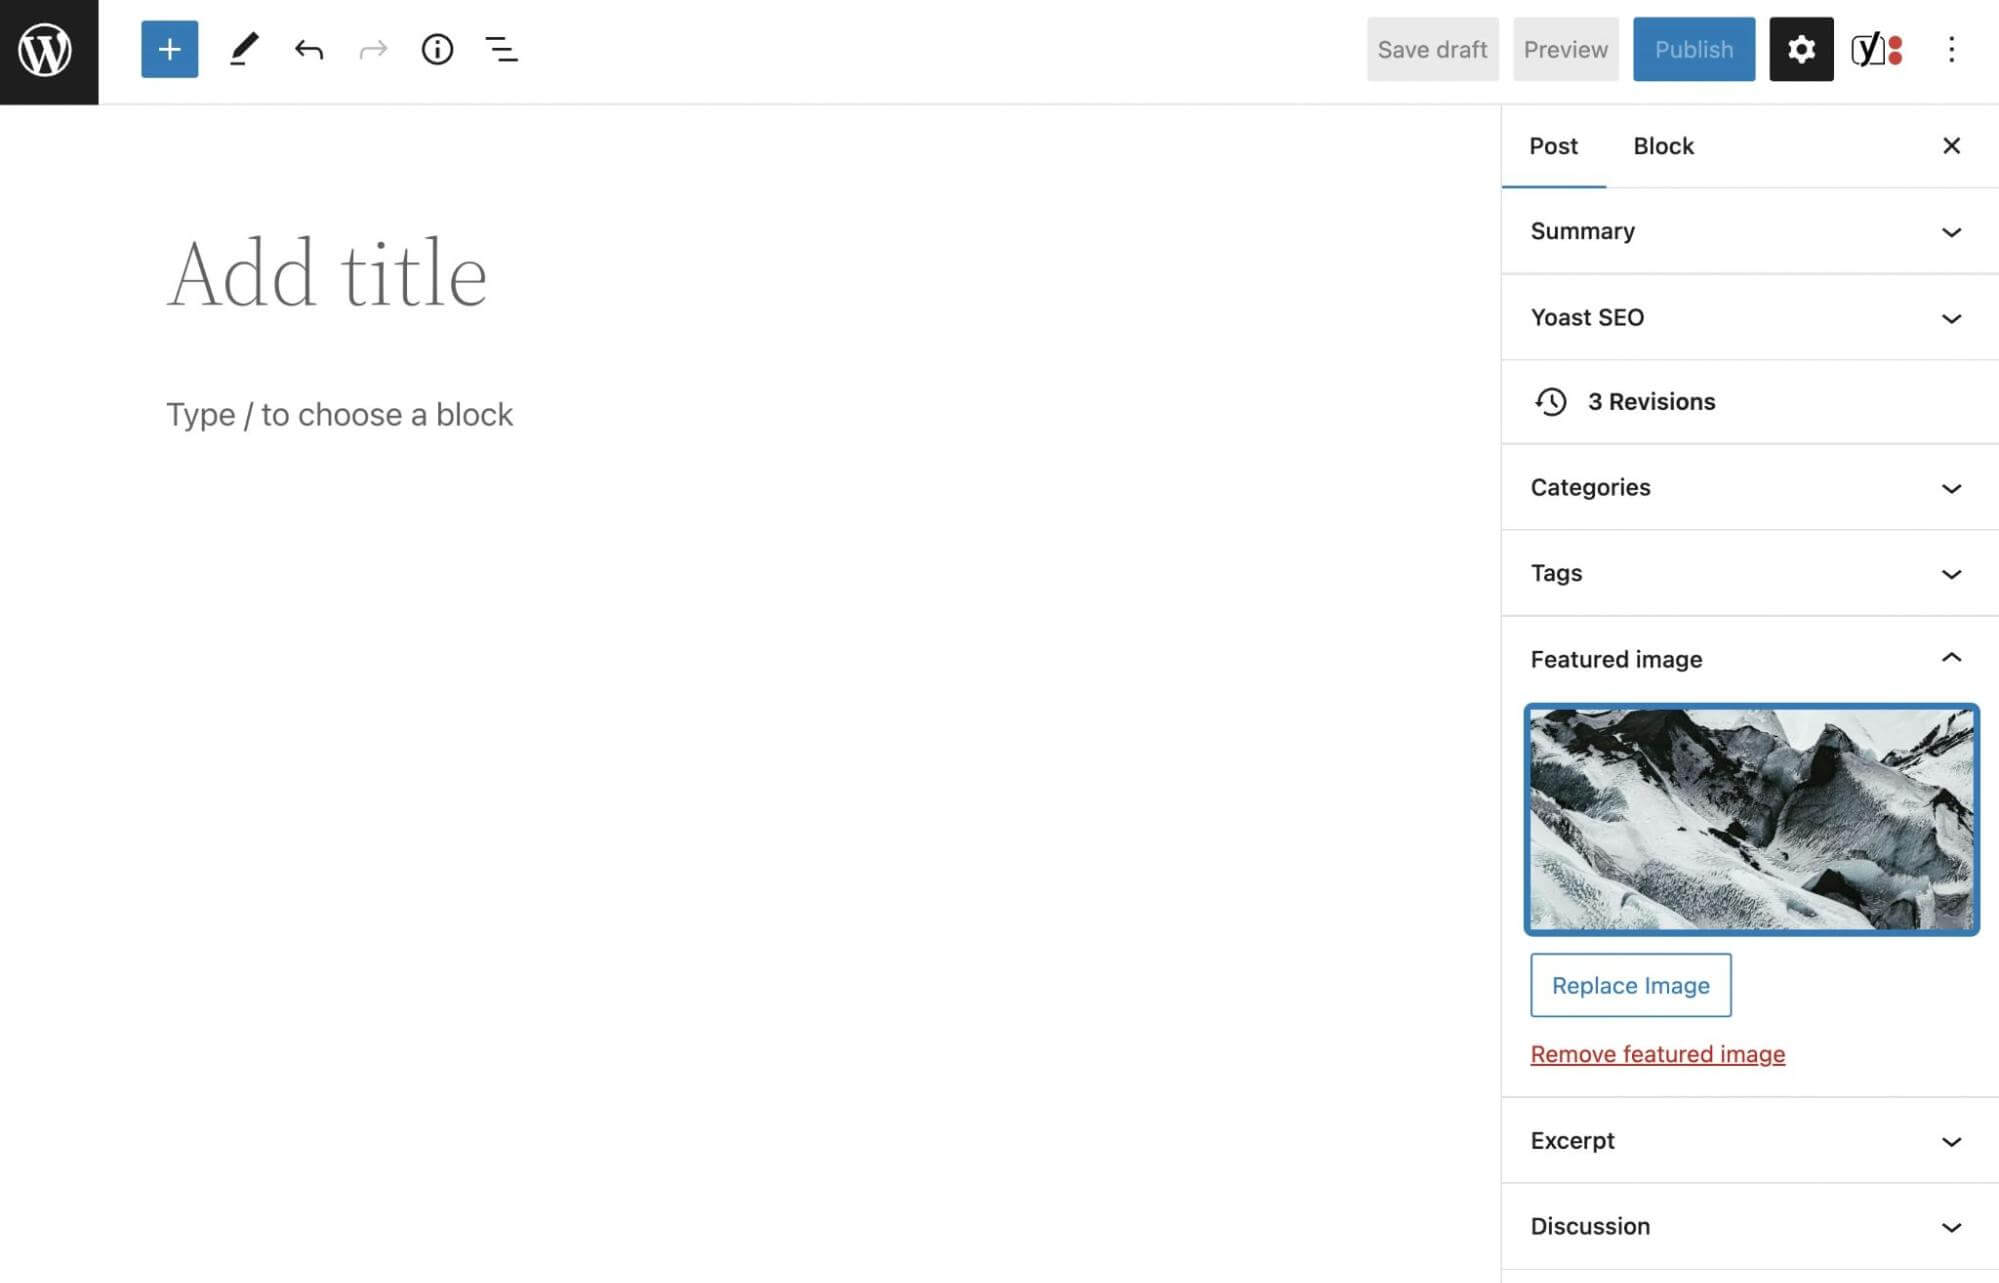
Before you publish the post, you’ll want to preview it to ensure the featured image is showing. Remember that your theme may require more specific dimensions to work correctly. You can refer to your theme’s documentation if you experience difficulties during this process.
Additionally, you can install a few plugins to make this process easier. For example, Auto Featured Image will automatically use the first photo in your post as the featured image. You can also use Default featured image to select a picture that will be used as a featured image in case you forget to add one to a post.
How to Create the Perfect WordPress Featured Image (6 Tips)
Featured images can turn your website into an engaging, media-rich experience. Let’s discuss some best practices for creating them!
1. Be Relevant and Consistent
When used correctly, featured images can enhance your blog posts and make them more attractive to visitors, but there are a few things you’ll need to keep in mind.
First, you’ll want to avoid using random images. A featured image should serve as an introduction to a post, so it needs to be relevant to the content.
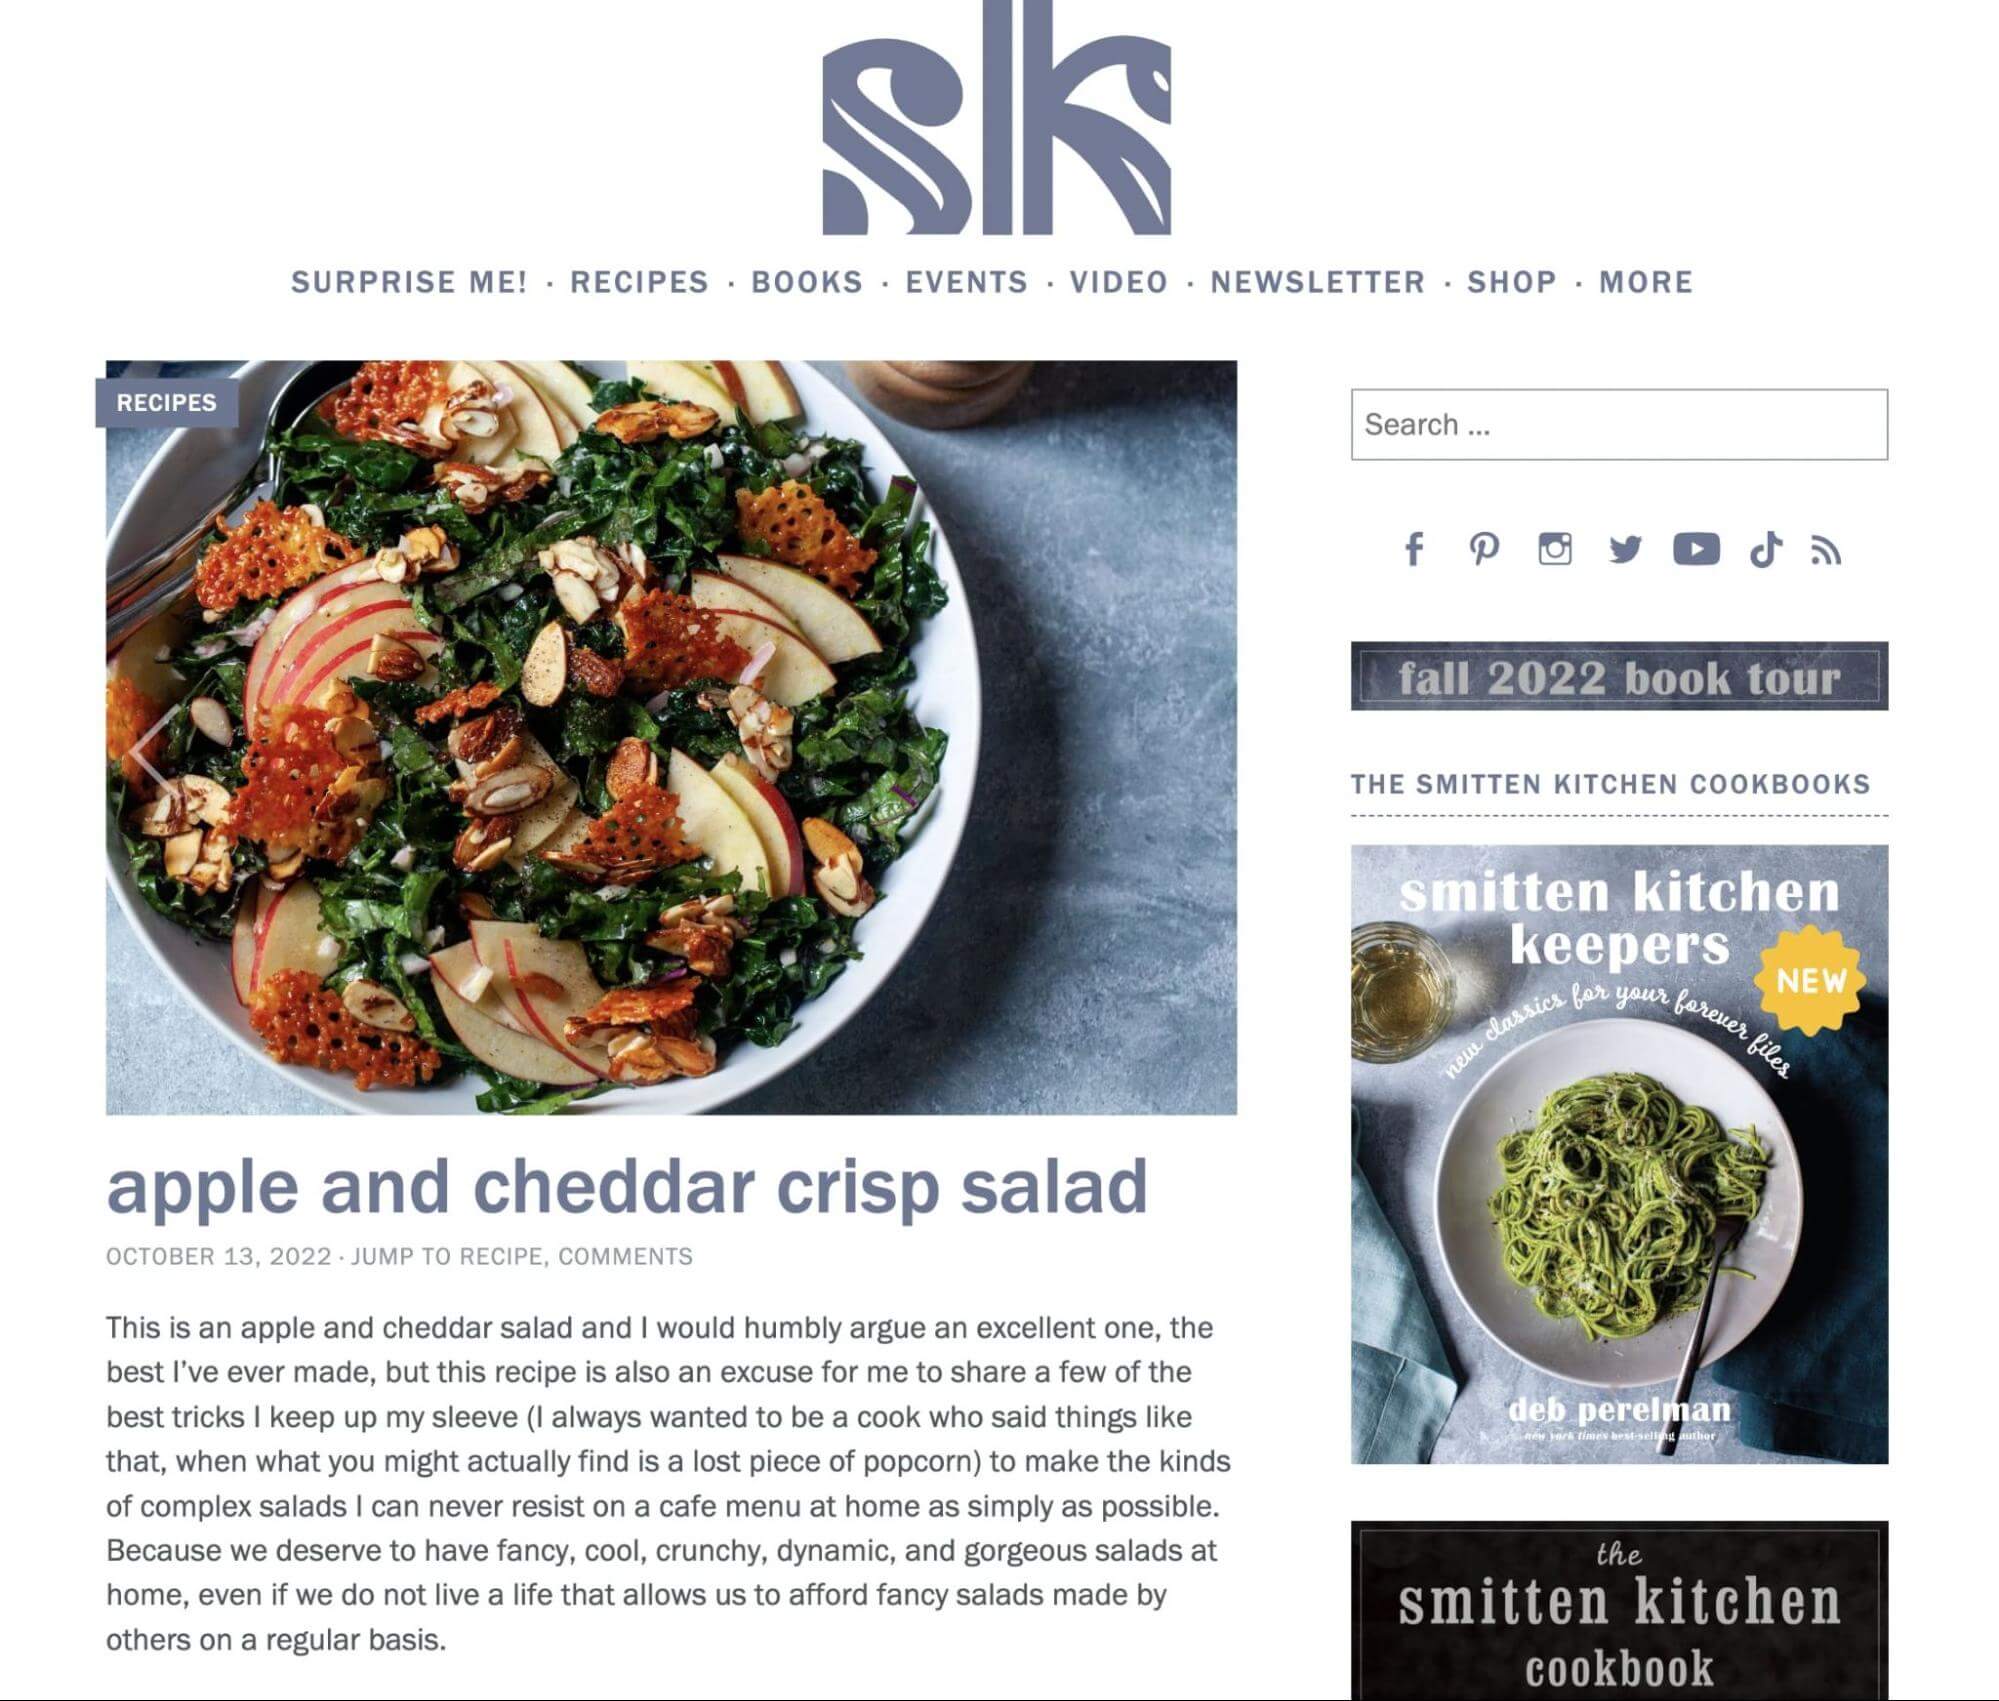
For example, if you run a food blog, you probably publish posts with new recipes. In this case, your featured image can be a photo of the finished meal:
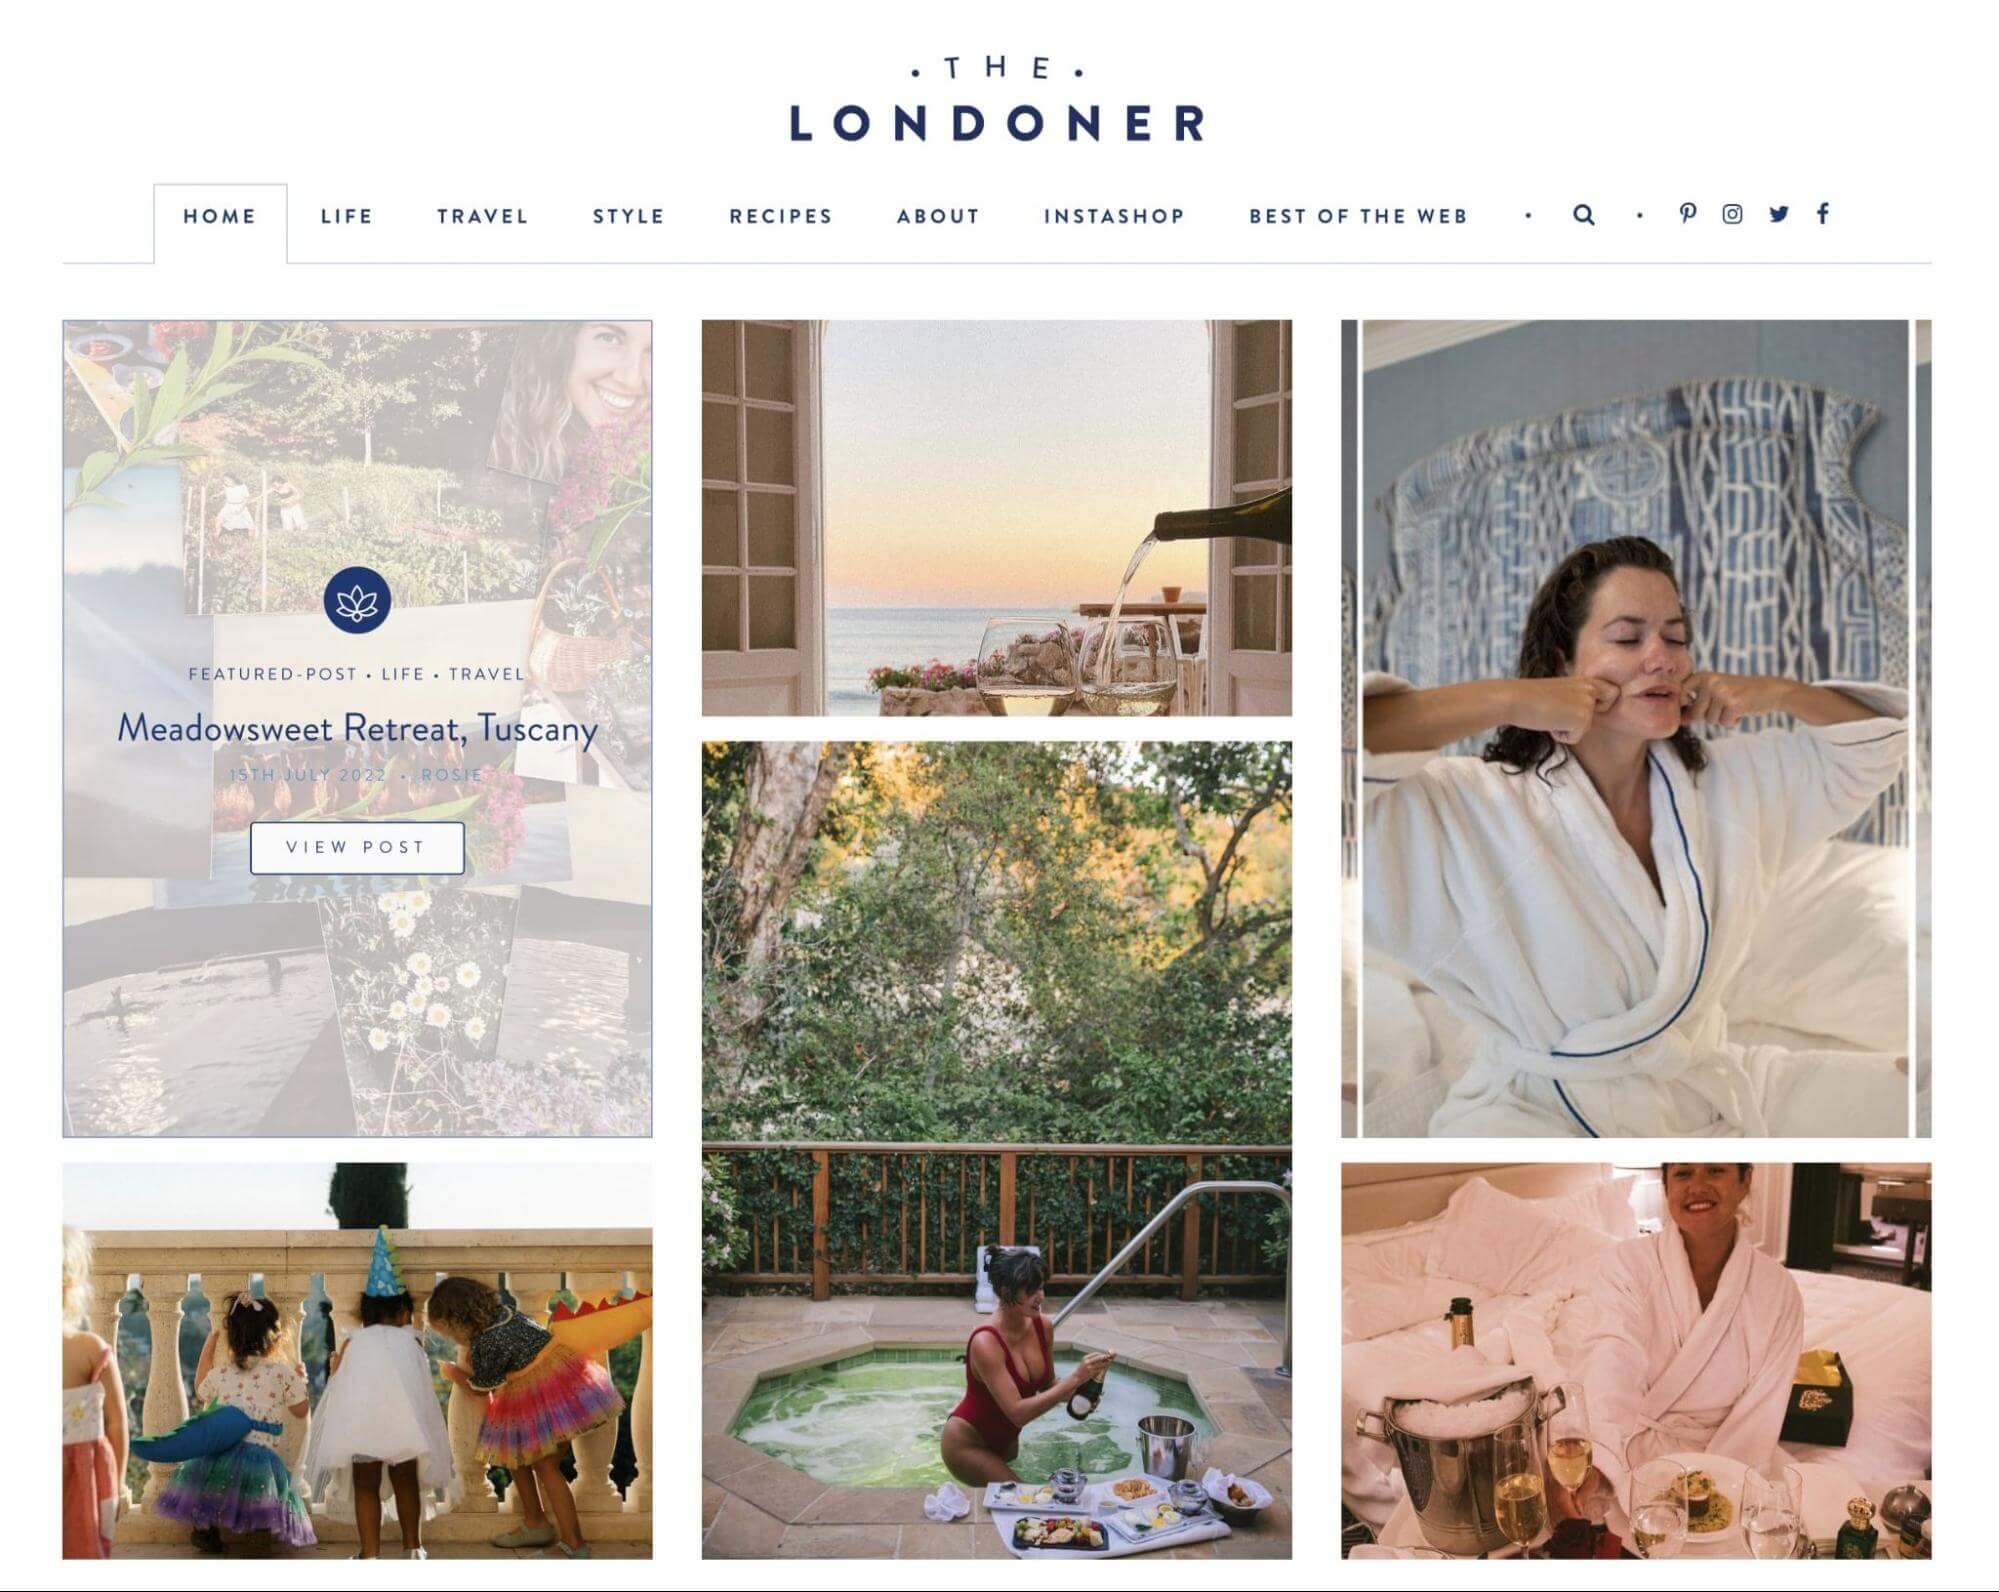
It’s also good practice to keep your featured images consistent throughout your entire website. Since these will be displayed on your homepage, archive, and blog, you’ll want photos that align with your web design:
To find the right featured image, consider your current WordPress theme and layout. Then, select a high-resolution image that can be easily scaled down. After you finish creating the post, make sure to preview it to evaluate how well the image fits into your website.
2. Avoid Using Copyrighted Images
As you’re browsing images on the Internet, you may stumble across a photo that would look great as a featured image. However, before you upload it to your WordPress site, you’ll need to ensure that it isn’t copyrighted to avoid legal issues.
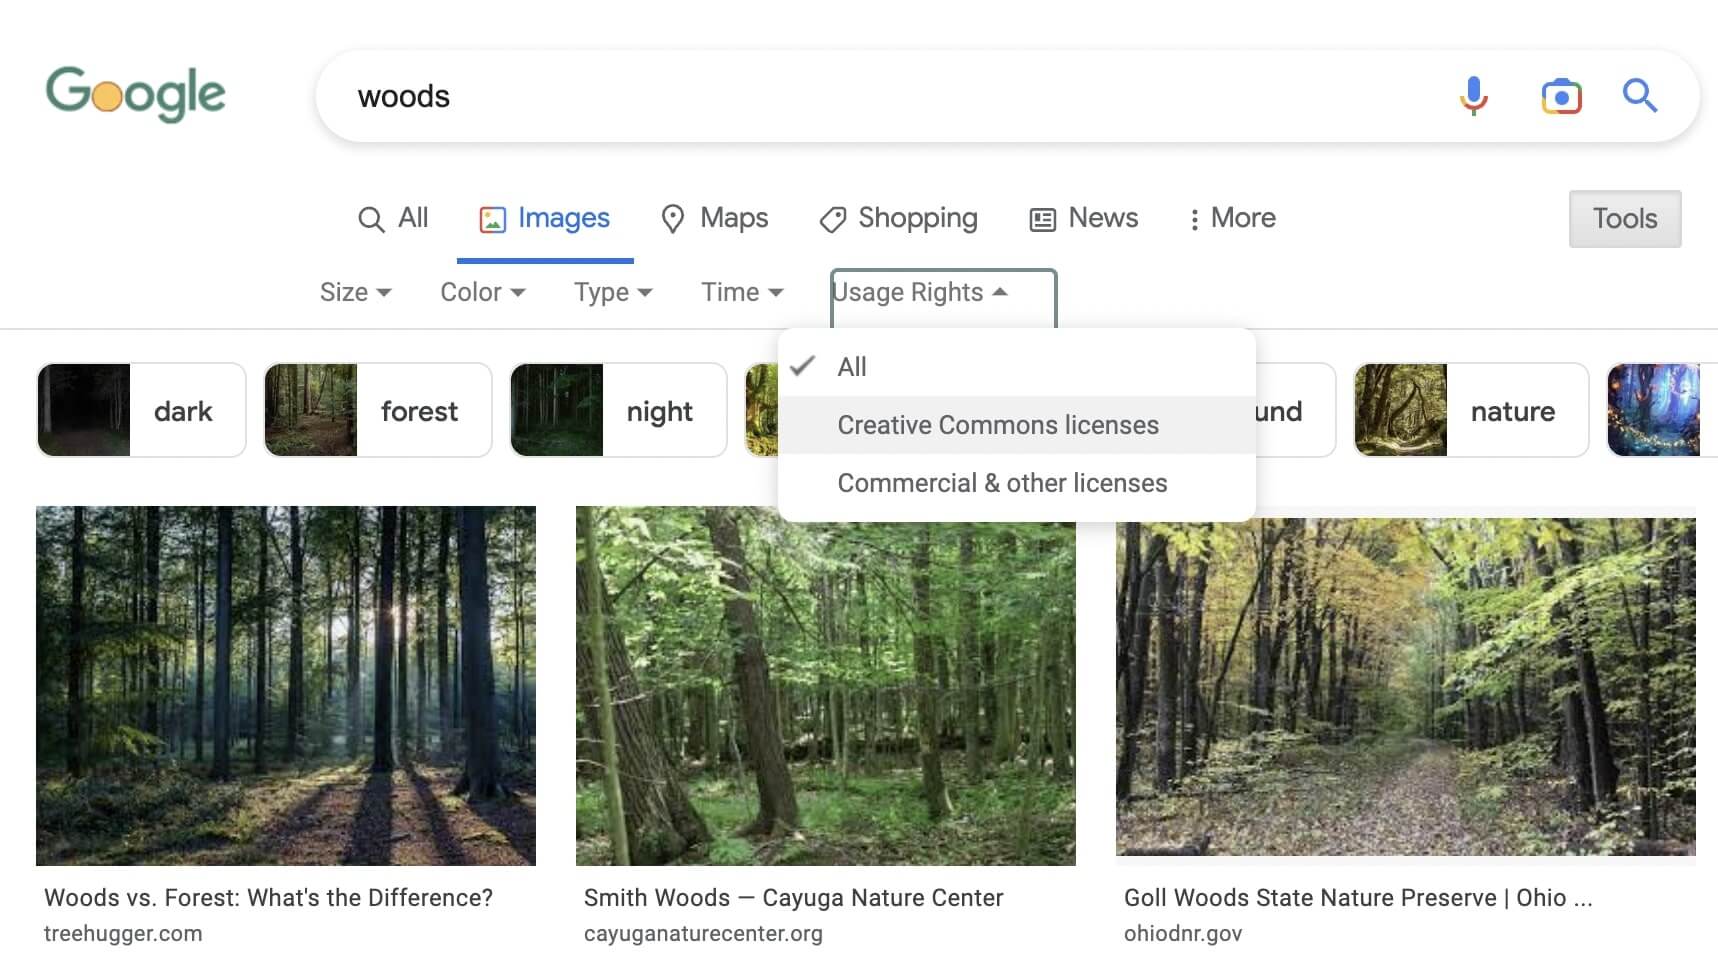
When sourcing images, you can typically use anything under a Creative Commons license. These will be free to download and use on your website, except if they’re for commercial purposes.
To find Creative Commons images, open Google Images. Then, click on Tools > Usage Rights > Creative Commons licenses. Once you refine your search, you’ll get a wealth of free images to choose from:
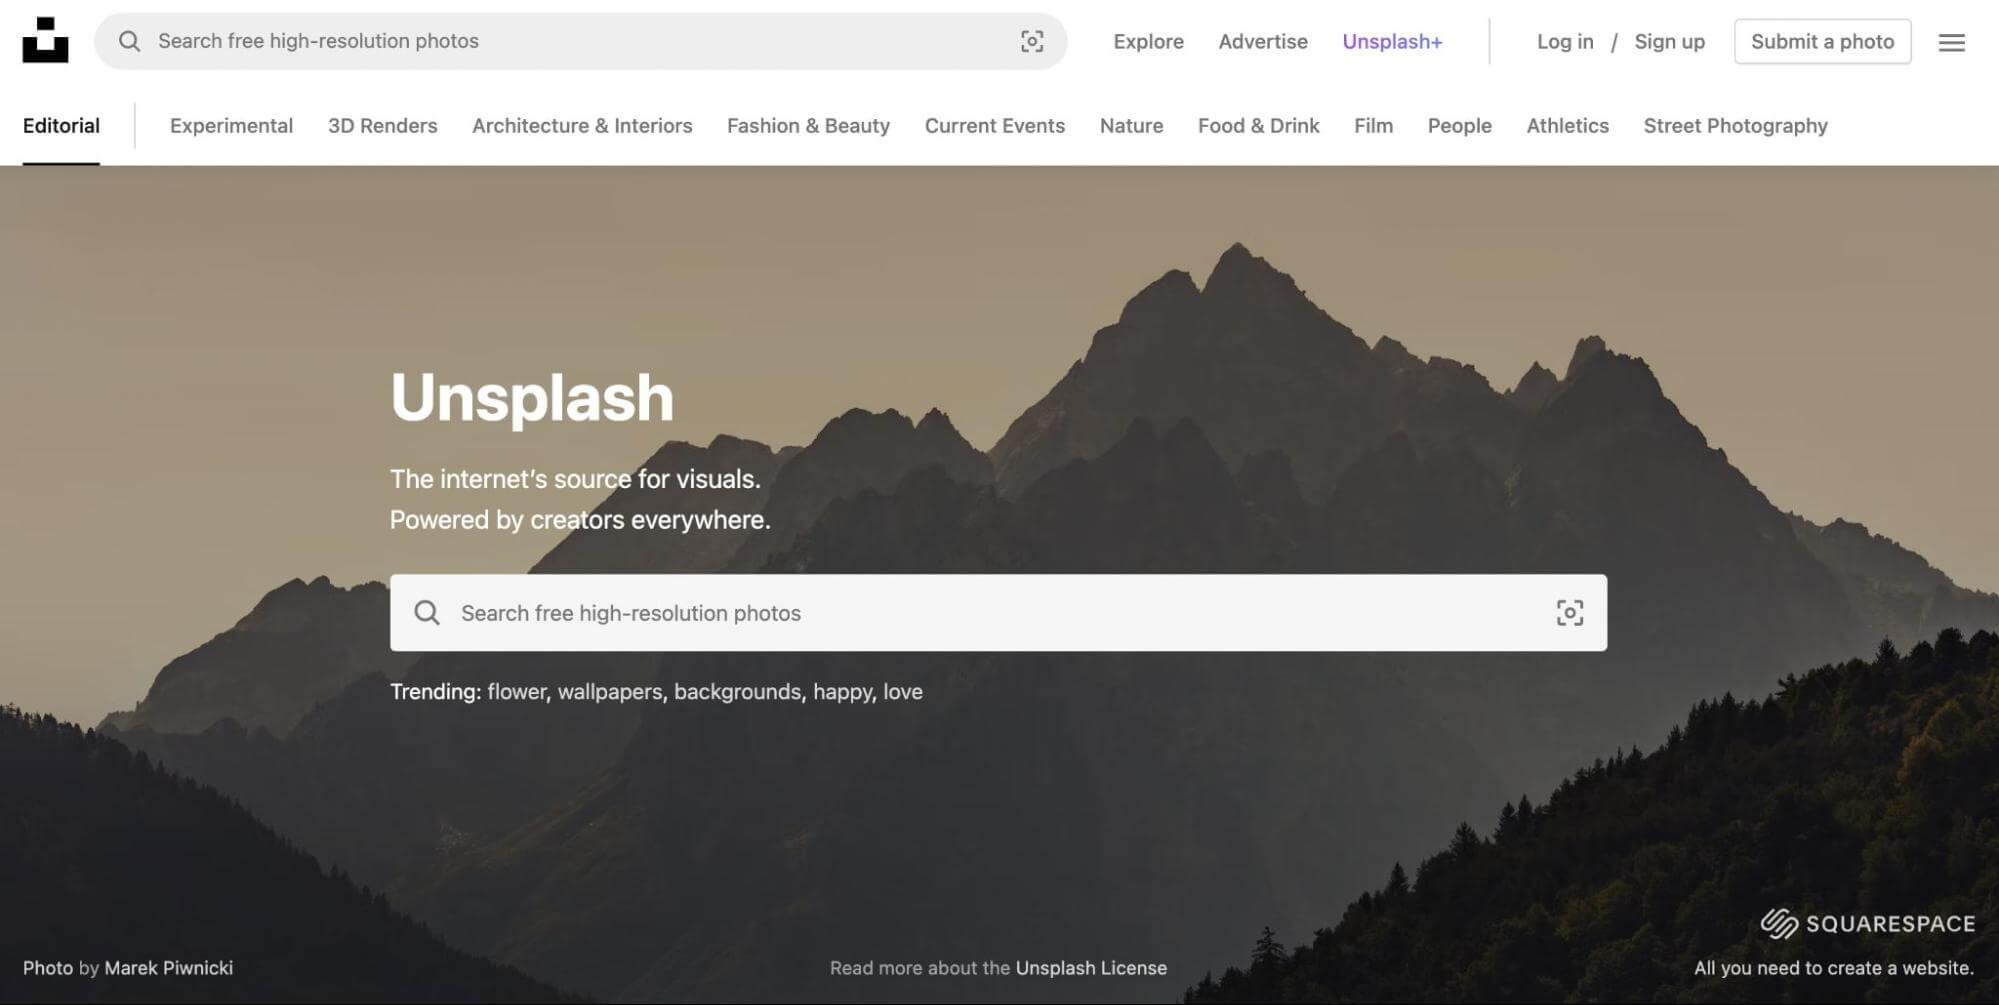
There are also entire websites with these stock images. On a platform like Unsplash, you can download high-resolution photos that are free from copyright claims:
Another alternative is to make your own featured images. By taking photos yourself or creating graphics in Canva, you can ensure that you avoid any copyright violations. Plus, these will be completely original!
3. Optimize Featured Images to Reduce File Size
If you publish posts on a regular basis, featured images will start taking up a lot of space in your Media Library. If they aren’t optimized properly, these photos could negatively affect your site performance.
Essentially, optimizing your images involves reducing their file sizes. By compressing your featured images, you can minimize your loading time.
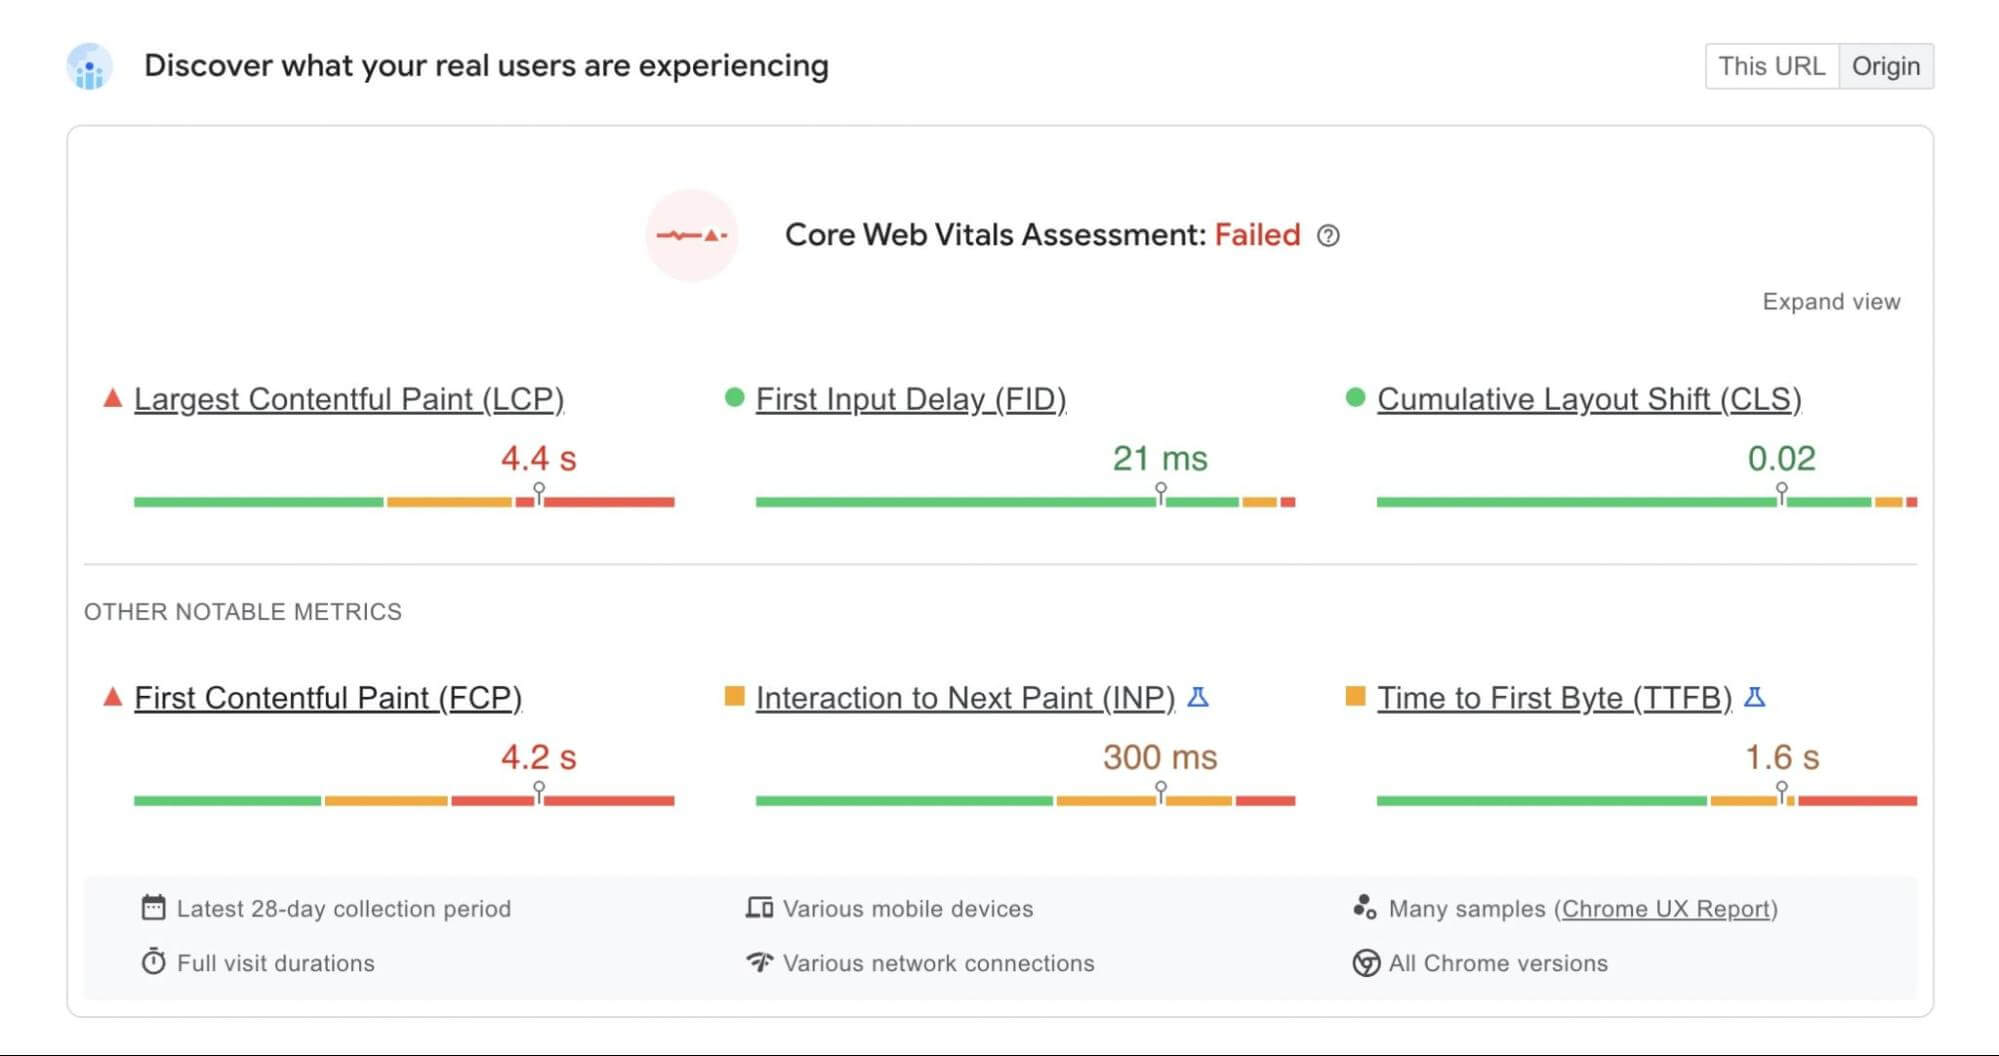
If you don’t do this, you could end up with a poor Core Web Vitals score. Images might take too long to render, and you’ll see performance issues in your PageSpeed Insights reports:
Fortunately, there’s an easy solution for this common image issue. A plugin like TinyPNG can automatically compress images as you upload them:

Plus, you’ll even be able to compress all images that you’ve already uploaded to your website. TinyPNG lets you bulk optimize any JPEG, PNG, or WebP images in your Media Library.
4. Regenerate Old Thumbnails
When you upload images to WordPress, it will resize them according to the pixel guidelines in your settings. Once you set new default sizes, your previously uploaded images will still have the outdated sizing.
If you want to resize your featured images, you can manually reupload them. However, this will take some time.
To solve this problem, you can install a WordPress plugin like reGenerate Thumbnails Advanced. This tool can regenerate the thumbnails for each of the images in your Media Library:

After you install and activate the plugin, go to Tools > Regenerate Thumbnails. Under Regenerate Options, select the box next to Regenerate only Featured Images:
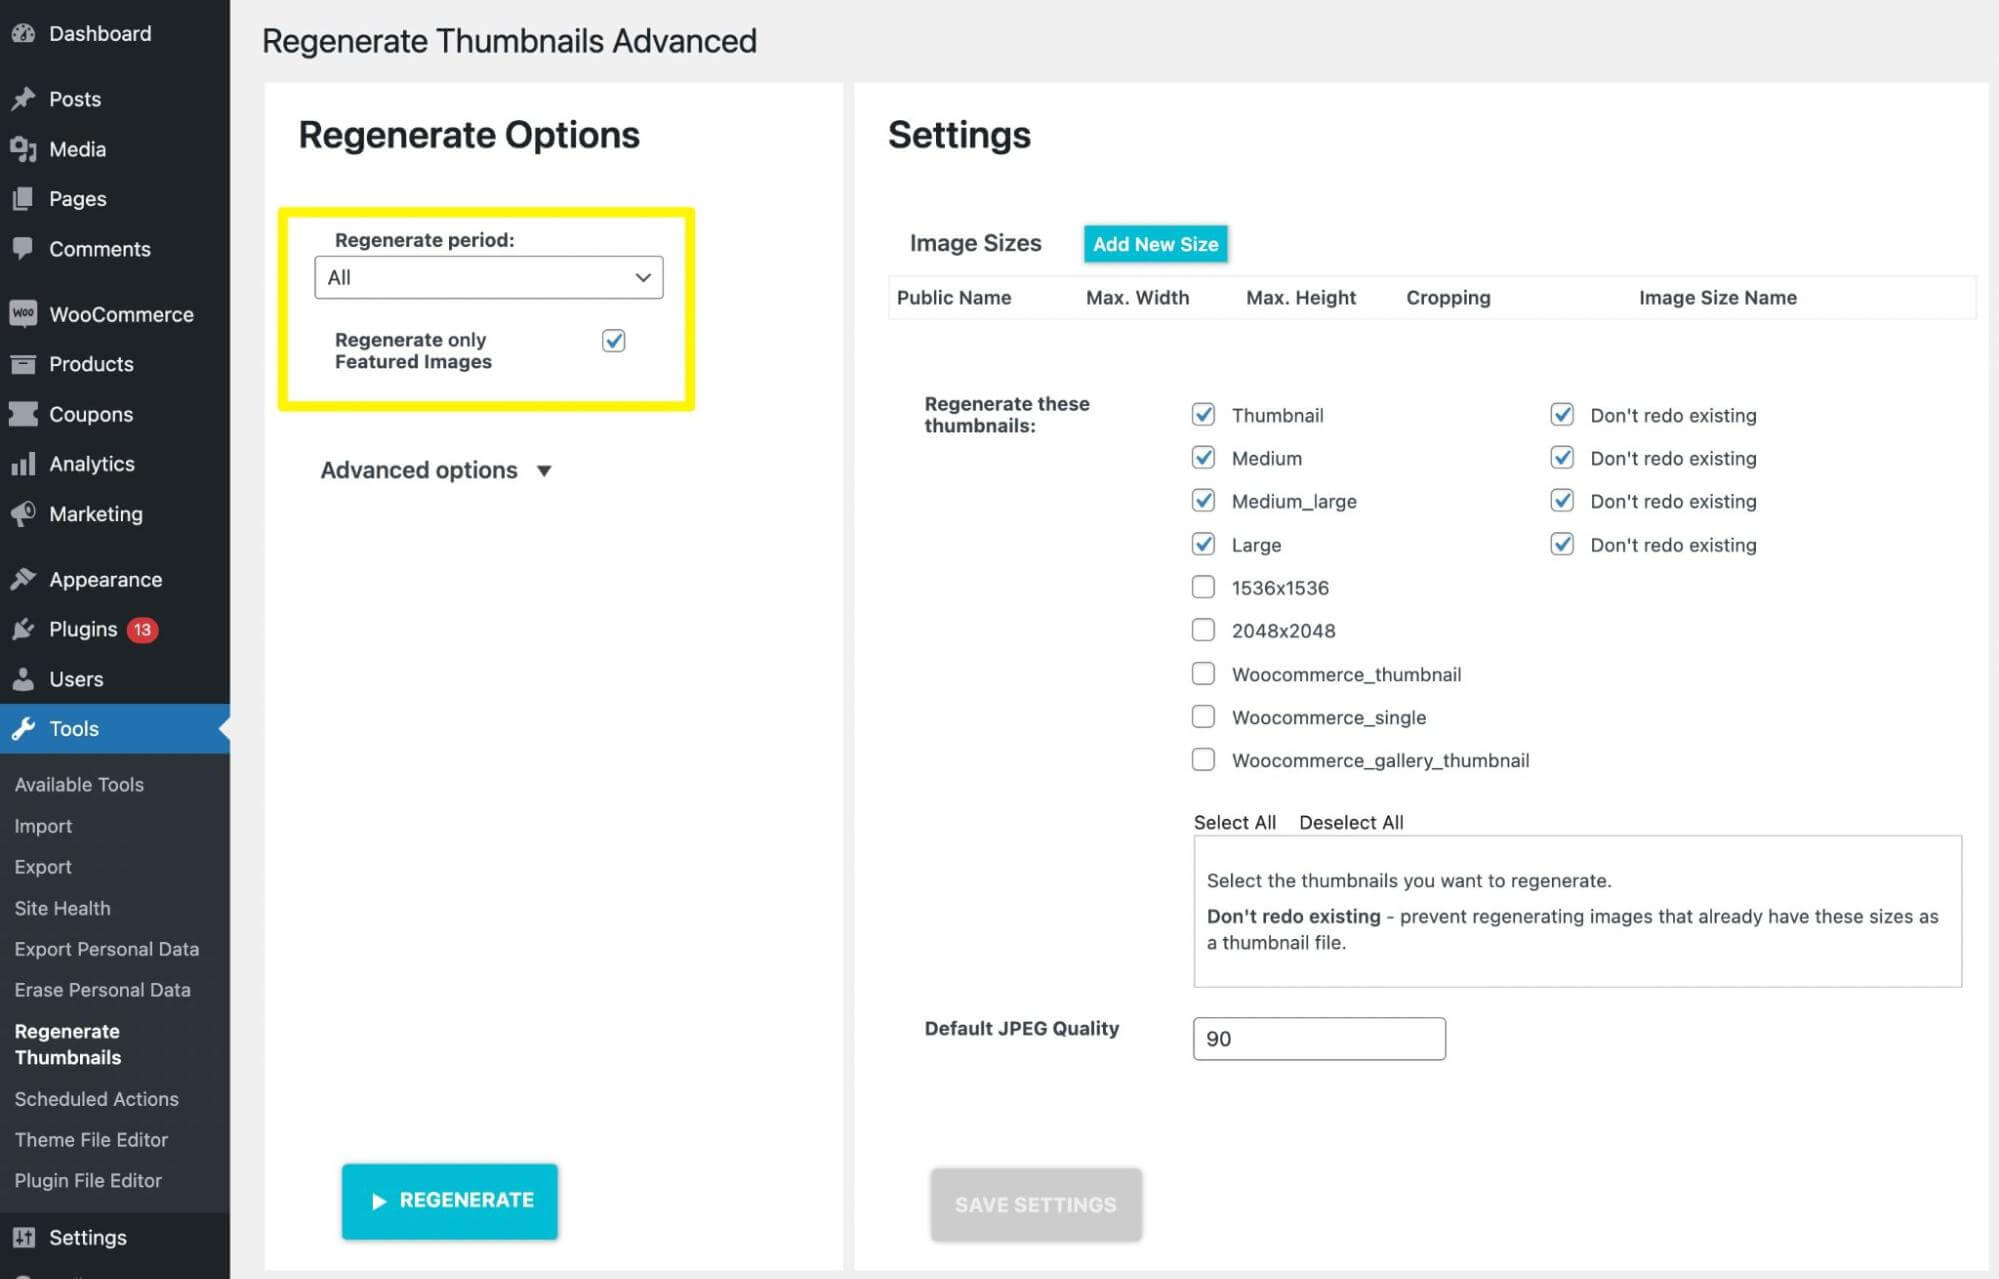
Finally, hit Regenerate. This will automatically update all your featured images with the correct sizing.
5. Optimize Images for Search Engines
As a website owner, you probably already know how vitally important Search Engine Optimization (SEO) is. If you want to avoid paying for expensive advertising methods, you’ll want to rise to the top of search results by optimizing your content. This can help you bring in more organic traffic.
Having featured images can help you improve your site’s SEO. By simply tweaking a few elements, you can make your images more appealing to search engines and users.
First, you’ll want to make sure to add alt text. This will describe the featured image to search engines and screen readers. For instance, you could write “Orange and white cat standing in a pumpkin patch”:
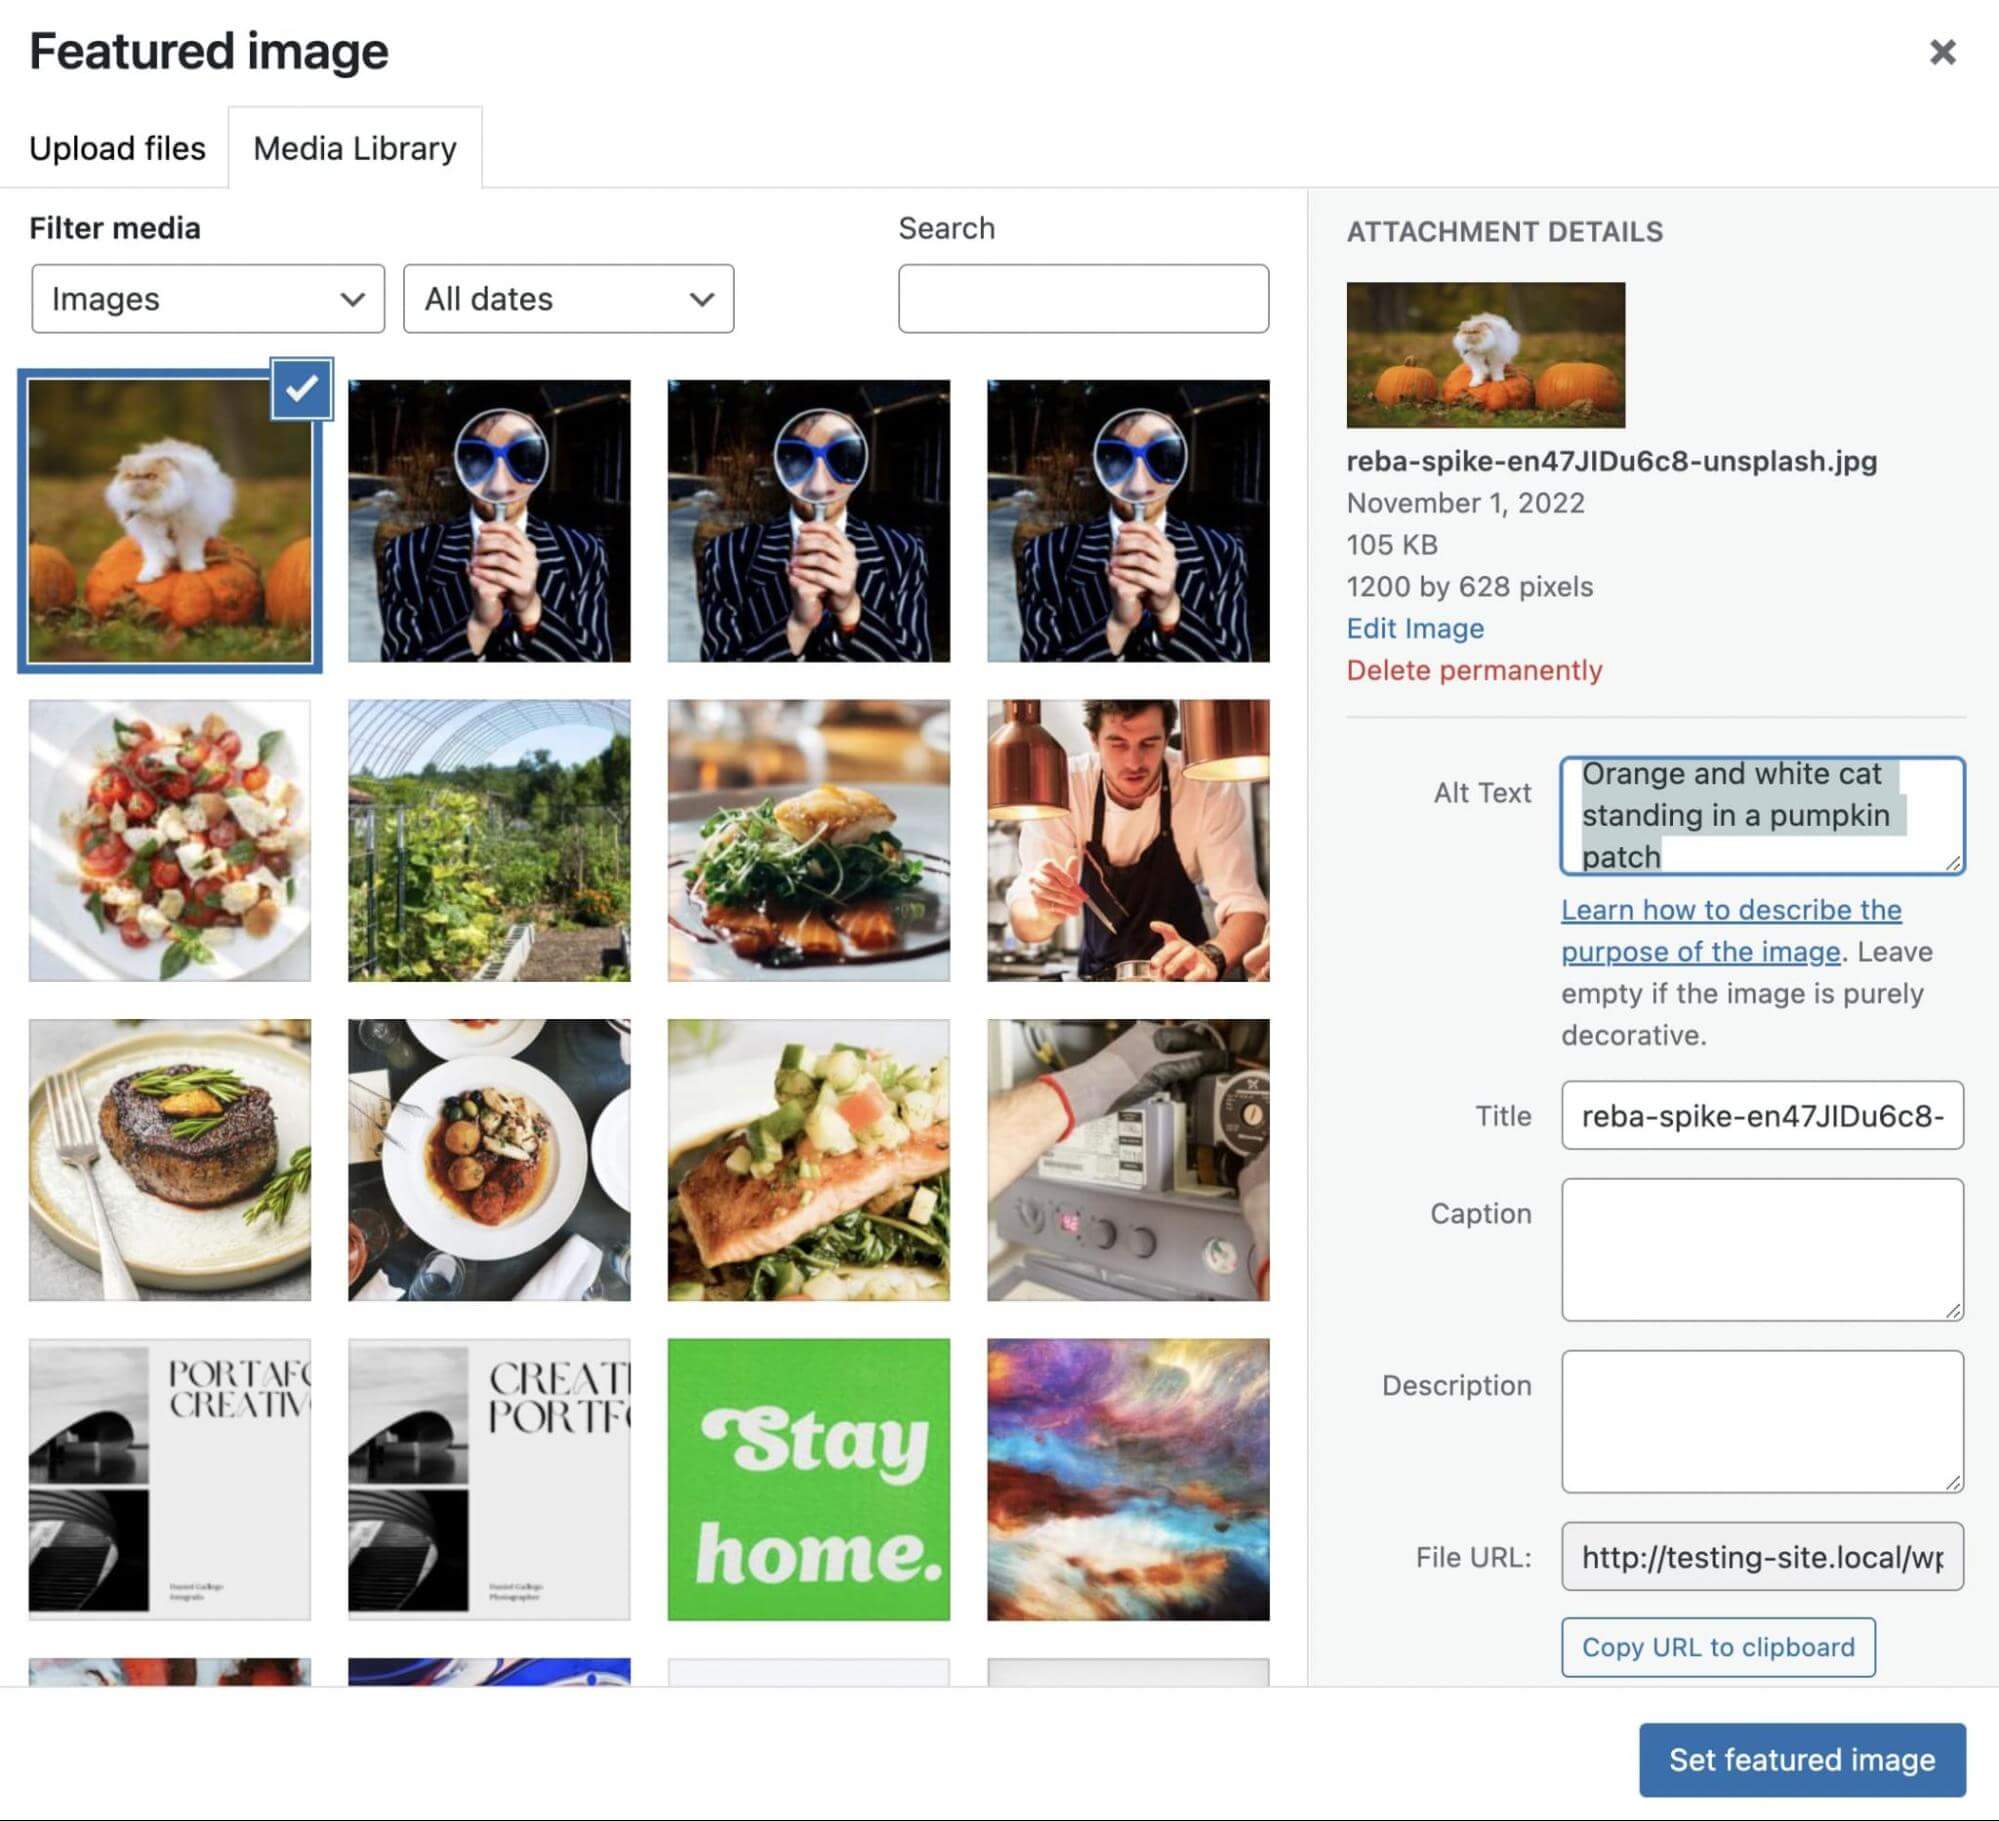
Remember to include the post’s keyword in the alt text. This way, Google can understand what the post is about and rank it higher for related queries. Similarly, you can include these target keywords in the title, caption, and description for the featured image.
6. Enhance Social Post Thumbnails
Social media can be the perfect platform for promoting your blog posts. Before you encourage social sharing, it’s crucial to optimize your featured images for these platforms.
You can easily customize your social media links using a plugin like Yoast SEO. For example, the premium version enables you to see previews of your Twitter and Facebook thumbnails.
To get started, install and activate Yoast SEO. Next, find Yoast SEO > Social. On this page, fill out the URLs for your various social media pages:
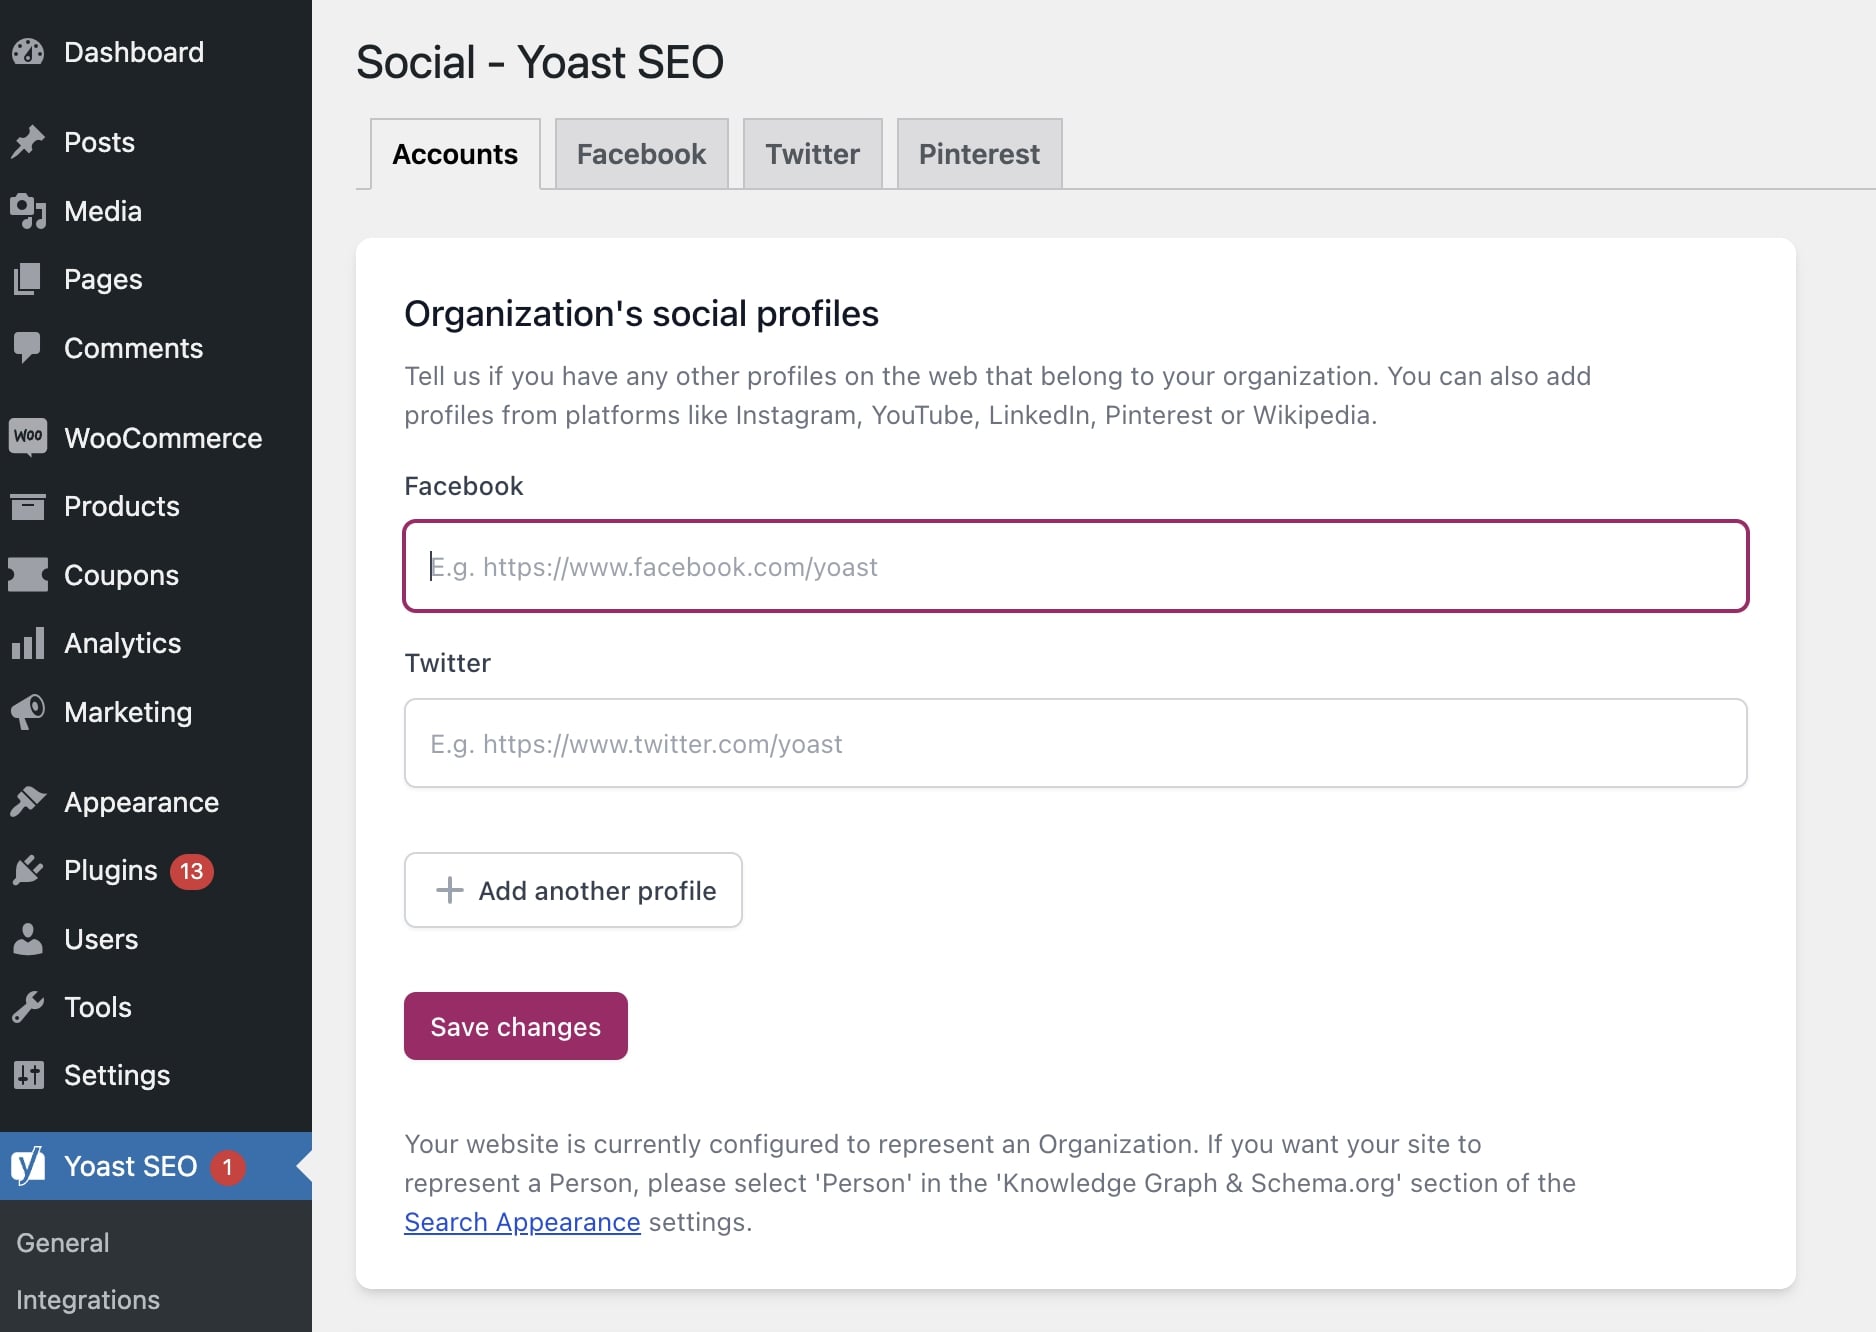
Then, open a new post and scroll down to the Yoast SEO settings. In the Social tab, you can click on Select image to upload your featured image.
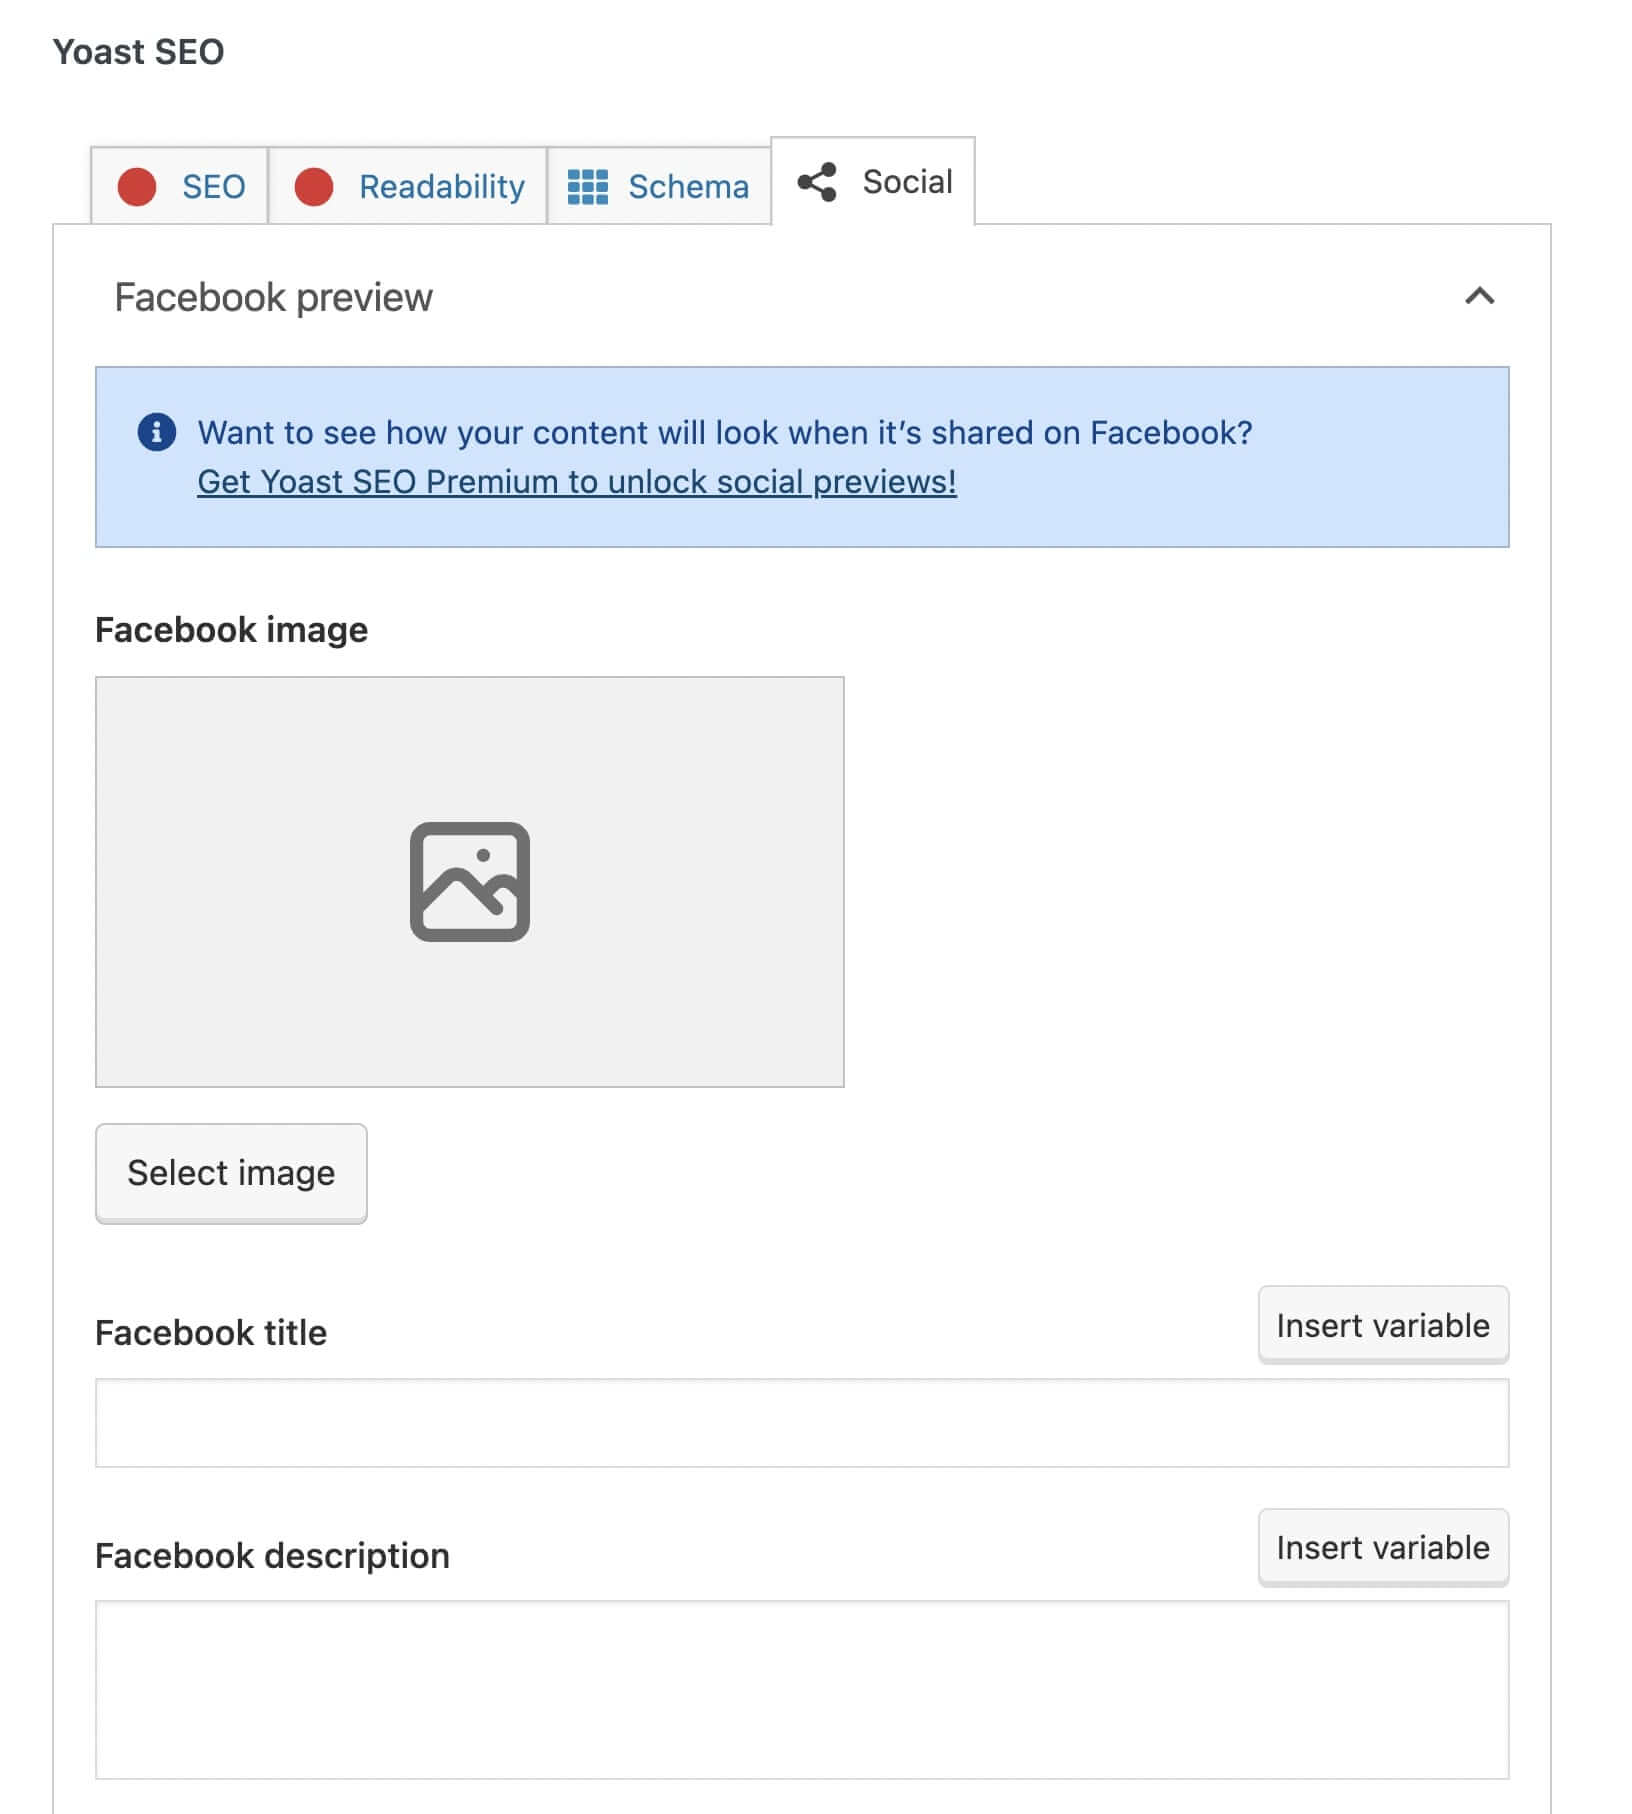
You can also add a title and description for each social media platform. This will give visitors a taste of your content. Once you publish the post on social media, it will have a featured image and snippet that conveys precisely what the article is about.
Use Featured Images Effectively
Featured images can help make your posts stand out. Whether people are browsing your content on social media or your website, they can look at the featured image to see what the post is about before they start reading it.
To review, here’s how you can create the perfect WordPress featured image:
- Be relevant and consistent.
- Find copyright-free images on platforms like Unsplash.
- Compress featured images with TinyPNG.
- Regenerate old thumbnails with reGenerate Thumbnails Advanced.
- Optimize images for search engines using keyword-focused alt text.
- Enhance social post thumbnails with Yoast SEO’s social settings.
When you create your own featured images, you can build an original website without facing copyright issues. At DreamHost, our custom website design services can help you use the right images on your site.
DreamHost Makes Web Design Easy
Our designers can create a gorgeous website from SCRATCH to perfectly match your brand and vision — all coded with WordPress so you can manage your content going forward.

The post How to Create the Perfect WordPress Featured Image (Sizing & Design Guide) appeared first on Website Guides, Tips & Knowledge.
source https://www.dreamhost.com/blog/create-wordpress-featured-image/
No comments:
Post a Comment