For website owners picking out a WordPress theme, you may find yourself unable to achieve the look and feel you want while maintaining the functionality you need. While plugins can get you most of the way there, sometimes you have to make customizations to your chosen theme. Customizing a theme takes time and effort, however. Also, if you do so, you may have things all dialed in when suddenly the theme creator releases an update that erases everything you worked so hard on.
Fortunately, there’s a better solution. You can implement a child theme that inherits the parent theme’s functionality but allows you to perform customizations and protect your styling from updates. Even if you apply an update to your parent theme, your child theme will remain intact with your changes.
This post will discuss WordPress child themes, why you need one, and how to create one in just a few easy steps. Let’s dive in!
An Overview of Child Themes
A child theme takes its functionality and content from its parent. However, customizing a child theme does not affect the parent. Therefore, you can take the base settings of a theme and then adjust them to fit your needs.
Child themes are stored separately from their parent themes. Therefore, if the parent theme is automatically updated, you won’t lose any changes to your child theme. Furthermore, you can adjust or delete the child theme without affecting its parent.
Using a child theme makes it easier to maintain and update your site. It will also help you avoid the risk of editing the parent theme directly, which can be overwritten and lost.
Differences Between Child and Parent Themes
There are several differences between a parent theme and a child theme. For example, a parent theme typically includes:
- A style.css file that determines the look and feel of your website
- A functions.php file that enables you to add features or modify the default behavior of WordPress
- Several template files that define how different pages on your site are displayed
In contrast, a child theme only needs two files: style.css and functions.php. You will add these files within the /wp-content/themes/ directory.
You can use a child theme to make stylistic changes to your website, such as colors, fonts, and layouts.
For example, let’s say you want to change your site’s color scheme. You can do this by creating a new style.css file in the child theme directory and adding the following code:
body {
background-color:#fff;
}

h1 {
color: #000
}
We’ve changed the background color and H1 color in the code above. These edits will override the parent theme’s styling and update the colors on your site. You can make as many changes as needed in the child theme’s style.css file.
A child theme inherits everything from the parent theme. This includes all template files, functions, and assets such as images and JavaScript files. If you want to make changes to these elements, you need to copy them into the child theme directory from the parent theme. You can then edit the files.
Advantages of Using a Child Theme
There are many advantages to using a child theme on your WordPress site, including:
- Protecting theme changes against automatic updates
- Adjusting visual elements of your theme
- Learning how to edit themes, which is helpful when developing your own theme
Using a child theme also requires minimal coding experience. In most cases, you only need to add a few lines of code to the style.css file. This makes it easy to get started with a child theme, even if you’re not a developer.
However, there are also plenty of tools to help you learn how to code if you’d prefer to dive deeper into the topic.
How to Create a WordPress Child Theme Using a Plugin
Using a plugin is one of the easiest ways to create a WordPress child theme. The plugin can walk you through the entire process, meaning you won’t need to touch any code.
In this tutorial, we’ll be working with the Child Theme Configurator plugin. This user-friendly tool can help you analyze your theme for issues, create a child theme, and even edit it to meet your web design layout and style specifications.
Related: WordPress Web Design Trends That Will Inspire You
Step 1: Download and Install the Child Theme Configurator Plugin
To start, you’ll need to download and install Child Theme Configurator. You can do this by navigating to the plugin’s page and clicking on the Download button:

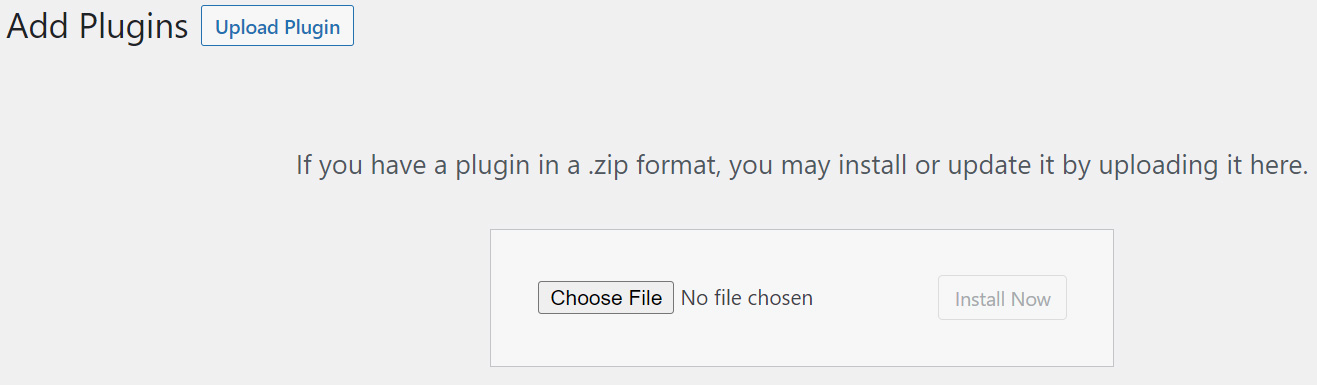
Your computer will download the theme files in a .zip folder. Then, navigate to your WordPress dashboard and go to Plugins > Add New to upload the files.
Click on Upload Plugin > Choose File, and select the downloaded folder:
Once the plugin is installed, you’ll just need to activate it. Keep in mind that you’ll also need to choose a WordPress theme from which to make your child theme.
Step 2: Analyze the Parent Theme
Next, navigate to Tools > Child Themes:

The plugin will walk you through the steps to create a child theme. Simply select CREATE a new Child Theme to get started:

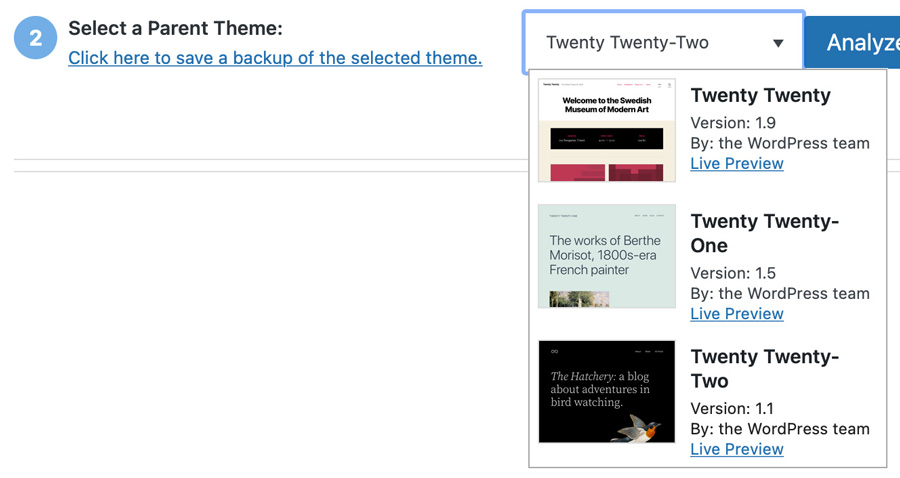
You’ll be prompted to select your parent theme from the dropdown menu. If you have multiple themes on your WordPress site, make sure to choose the one you want to customize:
Now hit Analyze to check the parent theme for any potential code issues:

If the plugin finds any compatibility or coding issues, it will list them here. Otherwise, you’ll see a green success message telling you it’s okay to proceed with making the child theme:
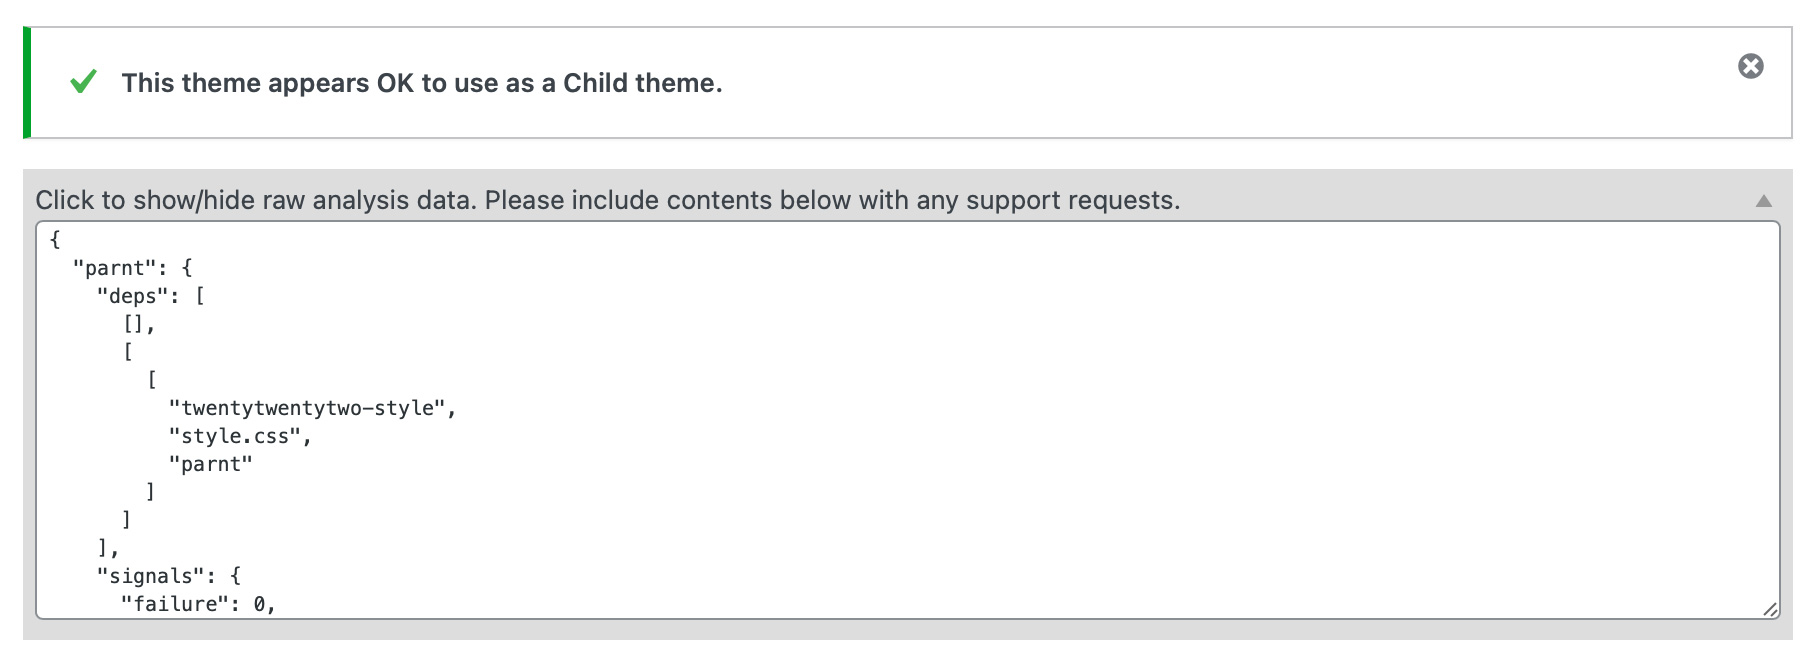
Once you’ve determined your parent theme will be suitable for a child theme, you can move on to the next step. You can also show a raw data analysis or submit support requests to the plugin’s creator from this page.
Related: 20 Incredibly Popular WordPress Plugins
Step 3: Name Your Child Theme Directory
Next, you’ll be prompted to name the directory for your child theme. It will be the name of the folder within your website’s files.
You can name it anything you like as long as it’s unique to your site and contains acceptable characters. We’re using “twentytwentytwo-child” for simplicity’s sake:

Keep in mind that naming the theme directory is not the same as naming your child theme or adding a theme description. Those steps will come later.
Step 4: Select the Child and Parent Theme Stylesheets
Next, you’ll need to choose the new stylesheet for your child theme. If you select the primary stylesheet (style.css), your custom styles will override the existing theme content. This is the default option, and we recommend choosing it if you’re new to child themes:

You’ll now be prompted to choose your parent theme stylesheet handling method. There are various options, but we recommend sticking with Use the WordPress style queue for most use cases:
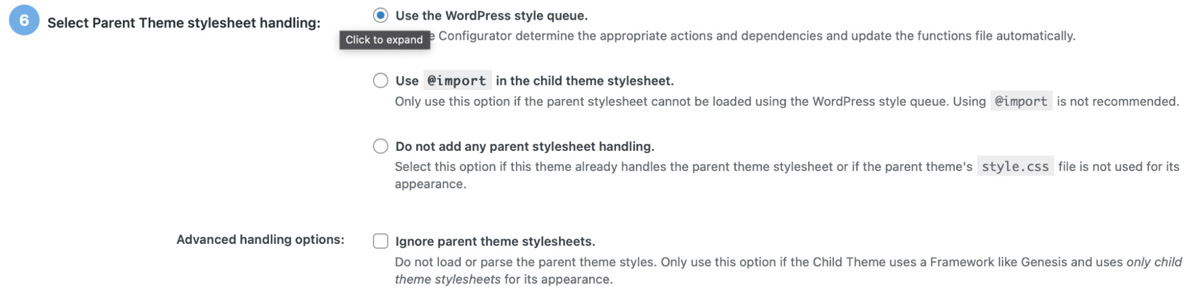
As a beginner, it’s best to use the default option until you’re more familiar with how the parent theme handles the stylesheet. The other options aren’t always compatible with all themes.
Step 5: Name Your Child Theme
The next step is naming your child theme and writing a description for it:
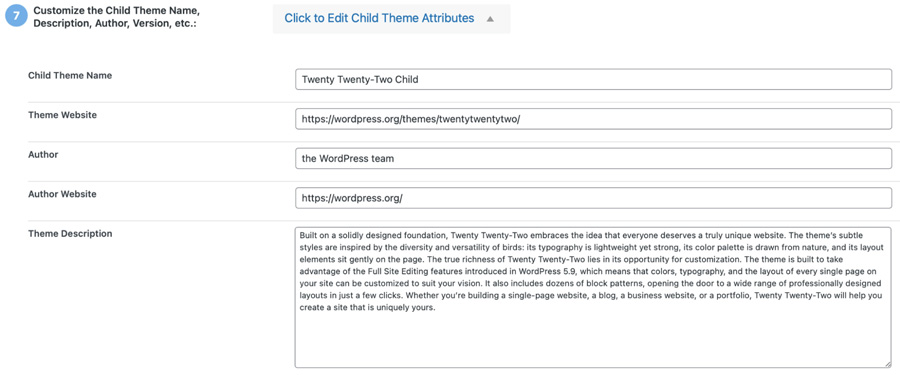
Child Theme Configurator will pull the default information from your parent theme and display it here. If you’re simply making a child theme for personal use, you can leave the data as-is.
However, if your parent theme will serve as the basis for a new theme you’re developing, you might like to add a brief description and unique name.
Step 6: Copy the Parent Settings to the Child Theme
The plugin will now ask you to confirm that it can copy the parent theme’s settings to your child theme:

This step will ensure that your child theme pulls all its functionality and appearance from the parent theme. However, if you’re working with a premium or restricted theme as the parent, you may not be able to perform this step.
Step 7: Create Your New Child Theme and Preview it
The final step is making your child theme. Click on the Create New Child Theme button and wait for the plugin to do its job:

You should get a notification that your child theme was created successfully:

You should always preview your child theme before activating it on your website. This step will help you verify that everything is working as it should. Then, hit Activate & Publish to start working with your child theme.
How to Manually Create a WordPress Child Theme
If you’d rather not use a plugin to create your child theme, you can tackle this approach manually. You might prefer this method if you’re already using too many plugins on your website.
Additionally, manually creating a WordPress child theme lets you make all the changes you want at a granular level. However, keep in mind you’ll need an intermediate knowledge of CSS.
Step 1: Develop a Plan for Your Changes
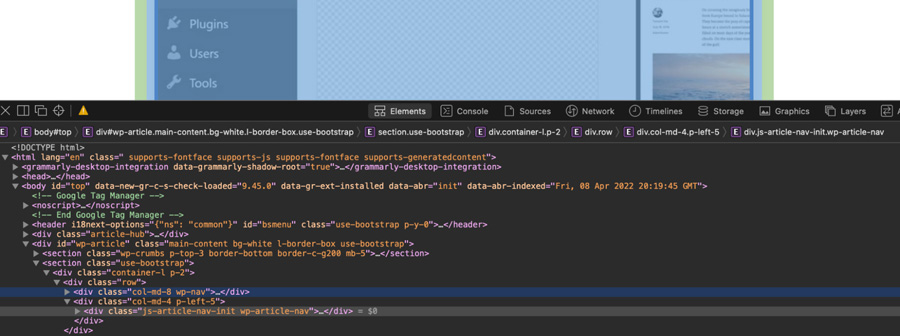
First, find a parent theme you like and list the changes you want to make. You can view the developer tools and see the theme’s code to make the correct changes.
To view the developer tools, right-click anywhere on your site while running the theme and select Inspect Element. You’ll then see a page of data that looks something like this:
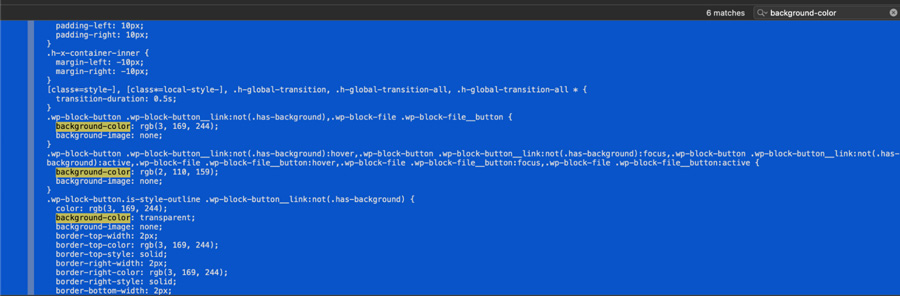
Here, you can search for background colors, font information, margin size, and more. Then, you can make a list of features you’d like to adjust in your child theme.
Step 2: Back Up Your Site
It’s essential to back up your current site before making any changes so that you don’t lose your settings. You can always revert to this backup if needed. You might also consider utilizing a staging website in case you make critical mistakes.
There are a couple of different ways to back up your site. You can do it manually using a backup plugin, which is probably the easiest method for most people.
Related: How to Back up Your WordPress Website
Alternatively, you can partner with a WordPress hosting provider that takes care of your website’s backups. Our DreamPress managed hosting plans include automatic and on-demand backups to safeguard your site’s data.
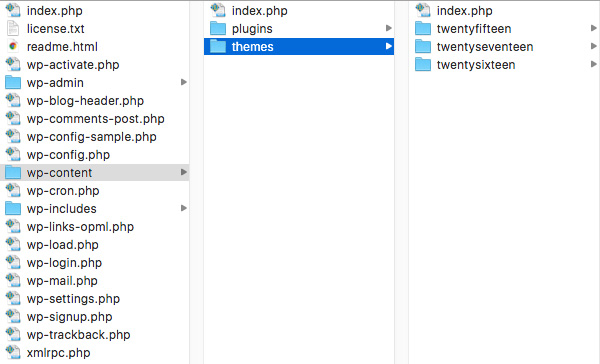
Step 3: Create a Folder for Your Child Theme
You’ll need to create a folder to store files for your child theme. Access your files via a Secure File Transfer Protocol (SFTP) client such as Filezilla and navigate to the themes folder:
Here you’ll create a new directory for your child theme. Make a new folder that carries the parent theme’s name and add “-child” to the end.
For example, if your parent theme is Twenty Twenty-Two, your child theme directory will be called “twentytwentytwo-child”.
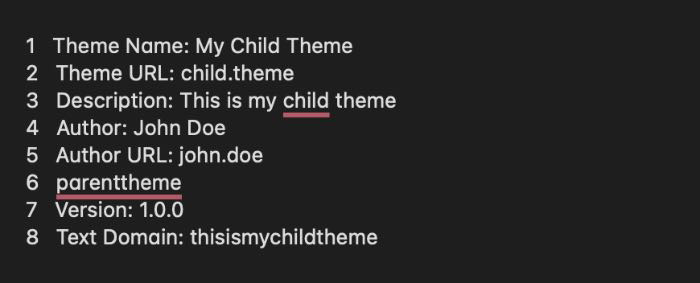
Step 4: Make a Stylesheet for Your Child Theme
Now you’ll need to make a new text file and name it “style.css”. This file will form the basis of your child theme. It will need some basic header information, including its name, URL, description, and more:
Now save and add the style.css file to the directory folder you just made.
Step 5: Enqueue the Stylesheets
Next, you’ll need to enqueue the parent and child theme stylesheets. This method ensures that your child theme will take its style data from the parent theme. It also enables you to edit the child theme without affecting its parent.
Make a new file in your child theme directory and name it “functions.php”. You can then tell your child theme to reference the parent theme by adding the following code:
<?php
add_action( 'wp_enqueue_scripts', 'enqueue_parent_styles' );
function enqueue_parent_styles() {
wp_enqueue_style( 'parent-style', get_template_directory_uri().'/style.css' );
}
?>
Save the text file and navigate to your WordPress dashboard to activate the theme.
Step 6: Activate the Child Theme
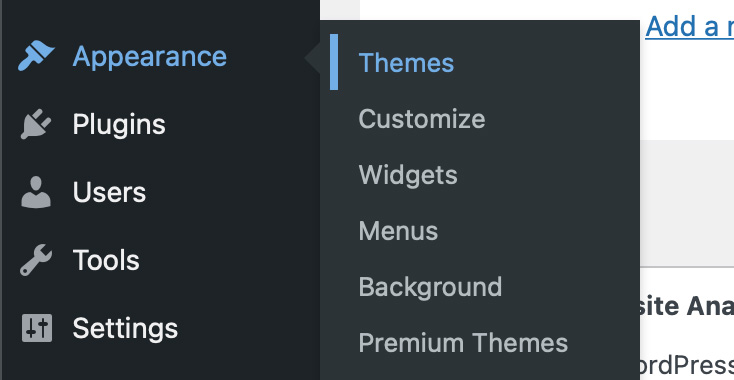
Finally, you’ll need to activate your child theme. You can upload it manually by going to Appearance > Themes > Upload. Then, choose a .zip version of your child theme directory:
Activate your child theme. It should now be live!
How to Customize Your Child Theme
Once you’ve activated your child theme, it’s time to play around with its CSS. This step enables you to make design changes without losing the theme’s core functionality.
The best way to find the CSS you want to modify is by using the Inspector Tools in your browser. You can look at the CSS and the HTML behind any webpage by right-clicking on it and selecting Inspect Element.
At the bottom or the right side of your screen, you’ll find the code for the page. Hover your mouse over the code and highlight the HTML in sections:
As you hover, it will also display the CSS rules. You can edit the CSS directly with the developer tools to see how it looks.

In this example, we changed the background color from “#9888fd” to “#9888fe” to see how it would look. The background color will change instantly, but it’s not permanent.
You now need to copy the CSS rule and add it to the style.css file of your child theme like this:
body {
Background-color: #9888fe;
}
Save these changes in the style.css file and return to your WordPress dashboard to preview the theme. This process might require trial and error, so take your time until you get the styling perfect.
Protect Your Theme Customizations and Updates
Using a child theme helps you avoid the complications of editing a parent theme directly. A child theme is easy to adjust, enabling you to make sweeping design changes to an existing website. Furthermore, it isn’t affected by automatic theme updates.
Here’s a quick recap of how to create a child theme manually:
- Make a plan.
- Back up your current site.
- Create a folder for your child theme using an SFTP client.
- Make a style sheet and upload it to your site.
- Enqueue the child and parent theme stylesheets.
- Activate and preview your child theme.
- Make changes using CSS.
Having a beautiful theme is just one part of running a successful website. You’ll also need a hosting provider that fits your needs. Check out DreamHost’s shared hosting packages for affordable plans that prioritize website performance!
Website Hosting That Powers Your Purpose
We make sure your website is fast, secure and always up so your visitors trust you. Plans start at $1.99/mo.

The post How to Create a WordPress Child Theme appeared first on Website Guides, Tips & Knowledge.
source https://www.dreamhost.com/blog/how-to-create-wordpress-child-theme/


No comments:
Post a Comment