Wednesday, 1 September 2021

How to Make a Professional Resume Website (In 7 Easy Steps)

Are you still using standard single-page CVs and resumes to apply for jobs? If so, it might be time for an update!

Why? Because traditional paper resumes can come across as boring and outdated — not a good look if you’re trying to stand out in a crowded job market.

Fortunately, thanks to modern technology, anyone can create their own professional resume website. This is a great way to distinguish yourself from the competition and showcase your skills and experience to a prospective employer in style.

In this post, we’ll show you how to make your own professional resume website in seven easy steps with the help of our Unlimited Shared Hosting plan.

  1. Get a Domain and Sign Up for Web Hosting
  2. Choose a WP Website Builder Template
  3. Create Your Resume Website Pages
  4. Fill Your Pages with Content
  5. Optimize Your Website for Search and Mobile Devices
  6. Get Someone Else to Review Your Website
  7. Publish Your Website and Track Results

Don’t worry, it’s not as hard as you might think. Let’s simplify your job search!

Why You Should Consider Creating a Resume Website

Your professional resume website is a digital version of your CV that you can show to potential employers. It includes all the information you need to apply for a job, such as relevant qualifications, previous work experience, and your bio.

However, it can also show many other things you may not be able to accurately share using a paper resume. For example, you can include full-size photographs, a complete online portfolio, links to your social pages, or previous projects.

Here are some of the main advantages of using a resume website instead of a paper CV:

  • It’s easy to update. You don’t have to print off a brand new resume every time you gain more skills/experience. You can just update your website.
  • It’s more shareable. Resume websites are easier to share with potential employers. You can just email them a link rather than having to attach or print out a document.
  • Employers can find you online. If you rank well in search engines for relevant keywords, employers may come to you first.
  • You can use it to showcase your work. You can’t display a portfolio of work samples on a single-page resume, but you can on a website.
  • It’s interactive. Unlike paper resumes, employers can click around on your website. For example, they can navigate to different pages to find out more information about your personal brand.
  • It’s more professional. A website can lend you an air of credibility and help you to land higher-paying roles.
  • It demonstrates transferable skills. Building and maintaining a personal website demonstrates technical skills to potential employers.

Plus, as you’ll soon see, it’s not as hard or costly to create an online resume as you might think. Our take: Anyone can learn to be a bang-up digital resume maker.

Build a Website to Support Your LinkedIn Profile

We offer budget-friendly Shared Hosting services with robust features and resources to help you create the perfect professional resume website. Plans start at $2.59/mo.

How to Make a Professional Resume Website (In 7 Easy Steps)

Next, we’re going to show you how to make your professional resume website step-by-step. Just follow the advice below, and you should be able to get it up and running in just a few hours!

Step 1: Get a Domain and Sign Up for Web Hosting

Before you can get your resume website online, you need a domain name and web host. Your domain name is the address people type in their URL bars to navigate to your website.

Web hosting is what makes your website accessible via the internet. Your web hosting service provider is the company that has the servers to host your website’s files. It also takes care of many of the other technical services you need to make your site live.

You can get both your domain and hosting service by signing up for the DreamHost Unlimited Shared Hosting plan.

DreamHost’s Shared Hosting Page

You’ll also get access to a free SSL certificate, an @yourdomain email account, and our WP Website Builder (more on that later).

You’ll also need to register your domain name after you’ve signed up. When it comes to choosing your domain, we recommend using your name (first and last) followed by .com if it’s available.

You can check to see if your preferred domain name is available using our domain search tool:

DreamHost’s Domain Search Tool

If your preferred choice isn’t available, you can consider adding an extra word or using a less popular Top-Level Domain (TLD). For example, if your name is Joe Smith, but the domain name joesmith.com is not available, you could consider options such as:

  • Joesmithresume.com
  • Hirejoesmith.com
  • Joesmith.co

You get the idea! WordPress comes pre-installed with your hosting plan, so once you’ve signed up, you can start building your resume website straight away.

Step 2: Choose a WP Website Builder Template

Next, you’re going to start building your resume website in WordPress. The easiest and fastest way to go about this is to start with a resume template and customize it.

Fortunately, DreamHost’s WP Website Builder makes this easy. It provides 200+ starter templates that you can use to lay the foundations of your site. Additionally, it has an intuitive, drag-and-drop page builder that lets you design your website pages entirely on the front end.

DreamHost’s WP Website Builder Page

Once you’ve installed WP Website Builder on your site, you’ll see the setup wizard, Boldgrid Inspirations.

BoldGrid Inspirations Menu

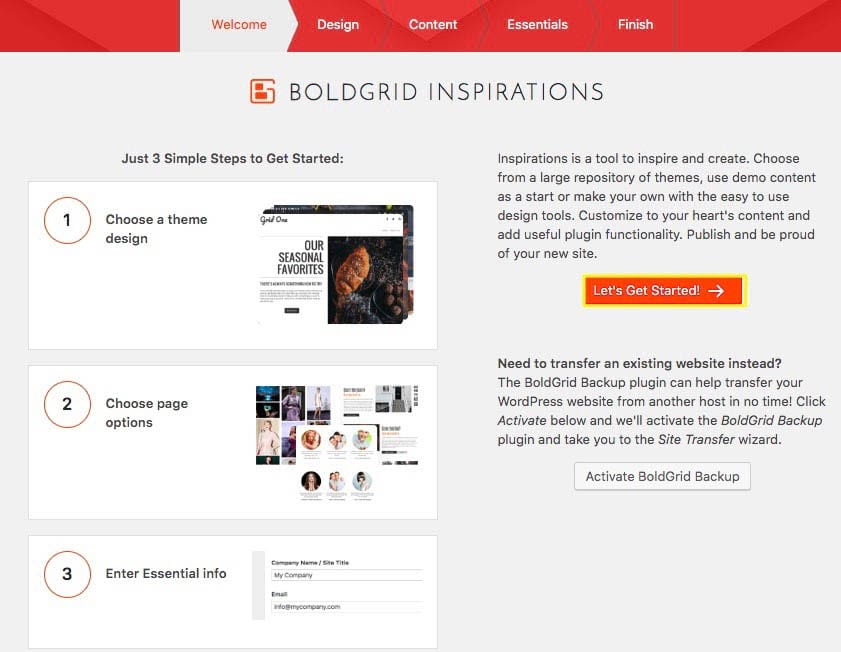
Follow the instructions in the setup wizard. You’ll first be prompted to choose your design, where you can select from more than 200 professionally-designed starter templates.

Starter templates available with WP Website Builder.

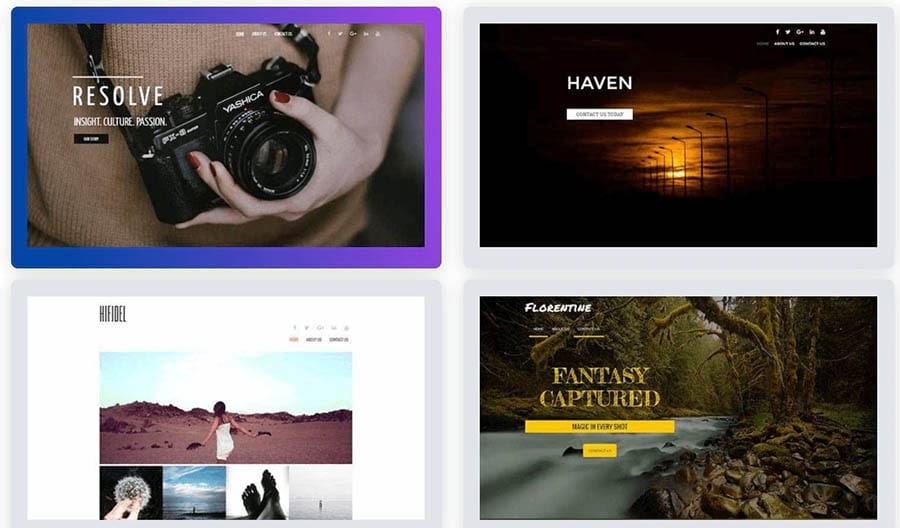
Pick a resume website template that matches the kind of layout and aesthetic you’re looking for. If you’re a photographer or anyone who wants to include a design portfolio in your online resume, we’d recommend the modal photography 1 theme. It has a grid-style portfolio section you can use to showcase your work.

Modal Photography 1 Template

Remember that you can change every element of the template, so don’t worry if it doesn’t precisely match what you’re looking for. Follow through with the rest of the setup wizard — think of it as your personal resume builder — until the basic foundations are complete.

Step 3: Create Your Resume Website Pages

Depending on which template and options you chose during the setup wizard, you may already have all the pages you need. If not, you can add new pages via your WordPress dashboard.

Some pages you might want to include on a typical resume website include:

  • Homepage: This is where you outline a brief overview of who you are (think of it like your cover letter).
  • Resume/CV: This page can include a more detailed CV, complete with details about your education, past employment, and so on.
  • References: This page includes testimonials from past employers or contact details for your references.
  • Portfolio: This page houses samples of your work that you want to share with a potential employer.
  • Contact Form: This page includes information about how to contact you.

Adding a new page in WordPress is easy. From your dashboard, simply click on Post and Page Builder > Add New Page.

Adding a new page

Then, give your page a title and save it as a draft. You’ll fill out the different pages with content in the next step.

Step 4: Fill Your Pages With Content

Next, you’re going to add relevant content to your professional resume website. Each of the pages that came with your starter template should already be pre-loaded with sample content. However, you’re going to replace it with your content.

For example, you might want to include the following elements:

To add content, click on Post and Page Builder > All Pages from your WordPress dashboard. Then, click on Edit underneath the page you want to change. You should now see the editing panel.

Editing panel in WP Website Builder.

From there, you can click on any element on the page to change the text. You can also modify or add new images, backgrounds, and links. Overall, you can tweak the design in any way you see fit.

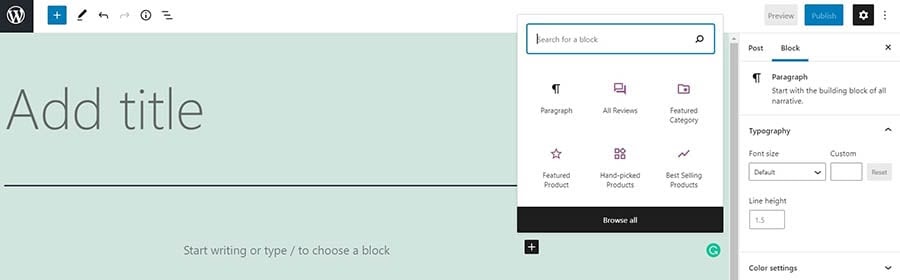
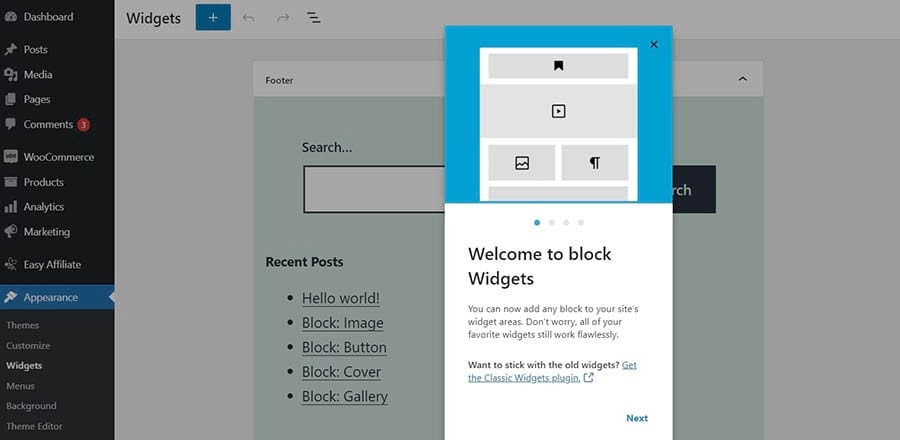
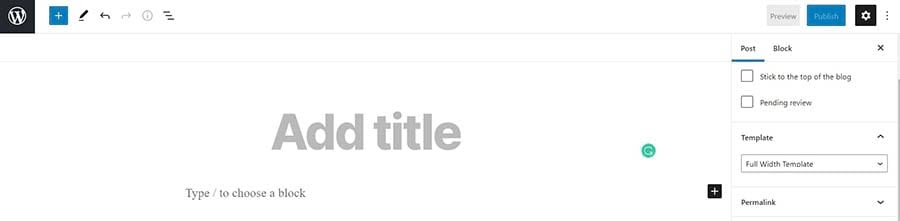
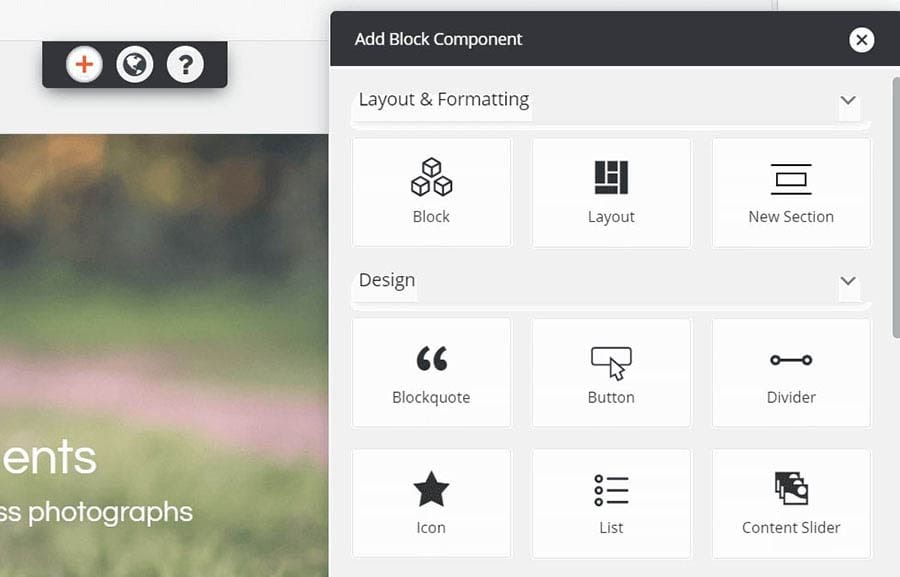
If you want to add a new block component, just click on the plus icon at the top of the editing panel and drag an element onto the page:

Adding a block component.

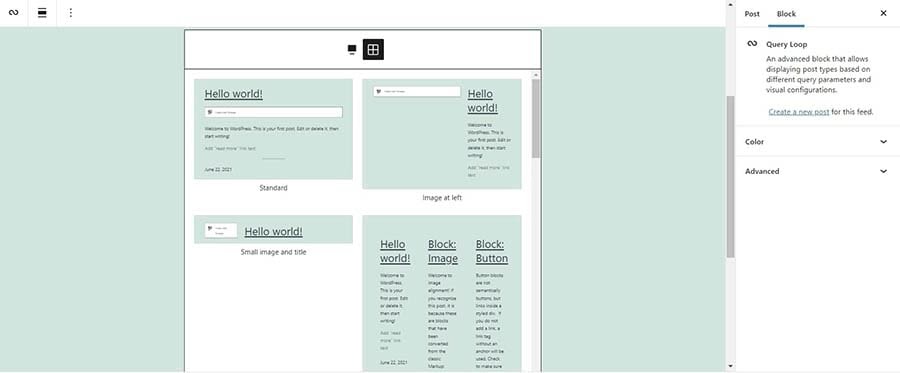
If you want to make more significant changes to the overall page layout, click on Add Block. This will open up a live view of your page where you can drag around existing blocks to rearrange them, or pull in new ones from the library.

Continue making changes until your website looks exactly how you want it.

Step 5: Optimize Your Website for Search and Mobile Devices

Let’s imagine that you’re hoping to get hired as a web developer in London, UK. When potential employers search for new employees, they might type something like “web developers in London” into Google to find candidates. When they do, you probably want them to be able to find your website, right?

If so, it’s important to make sure that your professional resume website is easy to find. This process is called Search Engine Optimization (SEO). A lot goes into optimizing your website for SEO, but here are some general guidelines about getting started.

First, start by picking keywords that your potential employers might search for. Then, optimize the content on your website’s pages around those keywords. You can do this by including them in your heading and body text, SEO title, image alt text, and meta description.

You also want to make sure your website is responsive and loads well on mobile devices, since mobile usability is an important ranking factor. Additionally, try to build some backlinks to your website to improve the domain authority.

Various WordPress plugins come with tools to help with your SEO efforts, including Jetpack. If you want to get serious about SEO, you might also want to consider adding the DreamHost SEO Toolkit to your hosting plan.

DreamHost’s SEO Toolkit Landing Page

SEO Toolkit provides everything you need to make your website more visible on the search engine results pages. For example, it includes do-it-yourself tools, deep insights, and a personalized SEO plan.

Step 6: Get Someone Else to Review Your Website

By this point, your professional resume website should really be coming together. However, it’s helpful to have someone else look over it with a fresh pair of eyes before you launch. This can help make sure there are no glaring errors that might look bad to potential employers.

Ideally, you should ask for feedback from a friend, family member, or colleague who has previous experience in hiring staff. Show them your website and ask them to look at it as if they were considering employing you.

If they point out any changes that could improve your chances of getting hired, you’ll want to implement them before making your website live.

Step 7: Publish Your Website and Track Results

Finally, it’s time to launch your website. If your pages are still saved as drafts, publish each of them by opening them in the block editor and clicking on the Publish button.

Hitting the publish button.

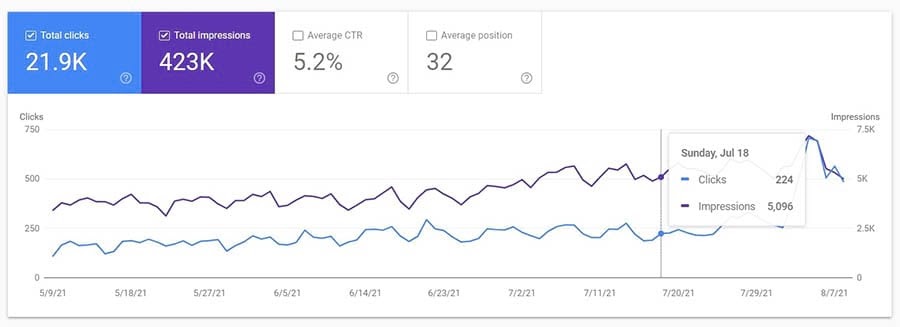
Once you’ve launched your website, it can be useful to track your results and see how your website is performing. Tools like Google Search Console and Google Analytics can help you monitor how many clicks your website is getting and where they are coming from.

For example, you can use Search Console to get an overview of the different keywords driving traffic to your website pages. You can also see how organic traffic is trending up or down over time.

Search Console results page.

You can also navigate to Core Web Vitals to find out if there are any problems with your website’s page experience. We recently wrote a complete guide explaining what Core Web Vitals are, why they’re important, and how you can improve your Core Web Vitals score.

Core Web Vitals view

To use Google Search Console, you’ll need to sign up and verify site ownership first.

Ready to Build Your Resume Site?

Whether you need help finding a target audience, crafting the ideal social media strategy, or setting up a newsletter, we can help! Subscribe to our monthly digest so you never miss an article.

Congrats on the Perfect Resume, Job Seeker

Regular CVs and resumes can seem old-fashioned and easily get overlooked by a potential hiring manager. Setting up a professional resume website is a great way to make your application stand out from the competition.

Here’s a recap of how to make a professional resume website in seven easy steps:

  1. Get a domain and sign up for web hosting.
  2. Choose a WP Website Builder template.
  3. Create your resume website pages.
  4. Fill your pages with content.
  5. Optimize your website for search and mobile.
  6. Get someone else to review your website.
  7. Publish your website and track the results.

Ready to get started? You can begin by signing up for the DreamHost Unlimited Shared Hosting plan and securing your free domain. It comes with everything you need to set up your visual resume, including access to the WP Website Builder editor and free templates. What are you waiting for? It’s time to land your dream job!

The post How to Make a Professional Resume Website (In 7 Easy Steps) appeared first on Website Guides, Tips & Knowledge.


source https://www.dreamhost.com/blog/make-a-professional-resume-website/

Wednesday, 25 August 2021

How to Fix the “Upload: Failed to Write File to Disk” Error in WordPress (3 Ways)

Are you encountering the “Upload: Failed to write file to disk” error message when uploading files in WordPress? Whether you’re trying to add images or videos to your site, this message can be very frustrating, as it prevents you from sharing your amazing visuals with your audience.

Fortunately, you can troubleshoot this issue by following a few simple steps. In some cases, you’ll just need to contact your web host to get it fixed.

In this post, we’ll take a closer look at the “Upload: Failed to write file to disk” error and its main causes. We’ll then show you three simple ways to fix this problem. Let’s get started!

What Causes the “Upload: Failed to Write File to Disk” Error in WordPress

The “Upload: Failed to Write File to Disk” error message typically comes up when you’re trying to upload media files to your WordPress site. There are a few possible causes, the most common one being incorrect file permissions.

Every file and folder on your WordPress site comes with a set of permissions. These are controlled by the web server and determine which site users can access and edit your files and folders. Thus, if the permissions are incorrect, you may be unable to perform certain actions on your site, such as uploading images to your media library.

However, this error could also be caused by other issues, including a full WordPress temporary folder. It’s also possible that you’ve reached the disk space limit provided with your hosting plan.

Next, we’ll take a closer look at these possible causes. We’ll also walk you through a solution for each scenario.

Skip the Stress

Avoid troubleshooting when you sign up for DreamPress. Our friendly WordPress experts are available 24/7 to help solve website problems — big or small.

How to Fix the “Upload: Failed to Write File to Disk” Error in WordPress (3 Ways)

Now, let’s look at three easy ways to fix this disk error in WordPress. As always, we recommend that you perform a backup of your site before proceeding. That way, if something goes wrong, you can restore your site to an earlier version.

1. Change the File Permissions

As we mentioned earlier, the “Upload: Failed to write file to disk” error is likely caused by incorrect file permissions. If you want to check these permissions, you can contact your hosting provider and ask them if they can do it for you. Alternatively, you can do this yourself by accessing your site’s root directory.

First, you’ll need to connect to your site via a Secure File Transfer Protocol (SFTP) client such as FileZilla. You can also access your site’s directory through the file manager in your hosting account.

If you have a DreamHost account, start by navigating to Websites > Files in the sidebar. Then locate your domain and click on the Manage Files button.

Accessing your site in DreamHost

This will take you to the file manager. To access your site’s directory, you can open the folder labeled with your domain name. Inside, locate the wp-content folder and right-click on it.

Next, select File permissions.

Locating the wp-content folder in your site’s root directory.

In the pop-up window, go to the Numeric value field and enter “755” or “750” in the corresponding box. Next, you can select the Recurse into subdirectories and Apply to directories only options and click on OK.

Changing the file permissions of your subdirectories in FileZilla.

You have now set the correct file permissions for all subdirectories inside the wp-content folder. This includes the uploads folder, which is where your uploaded media files are stored.

However, you’ll also need to set the correct permissions for the files within those folders. To do this, you can right-click on the wp-content folder again and select File permissions.

In the Numeric value field, type in “644”. Then select the Recurse into subdirectories and Apply to files only options, and click on OK.

Changing the file permissions of your files in FileZilla.

Don’t worry if you’re still unable to upload files to your site after checking your file permissions. There are a couple of other things you can do to resolve the issue.

2. Empty the WordPress Temporary Folder

If changing the file permissions doesn’t solve the problem, you may need to empty your temporary folder. WordPress processes your media uploads in PHP. This means that your images are first saved in a temporary folder on your web server before being transferred to your uploads folder.

If the temporary folder is full, WordPress won’t be able to write your files to disk until you’ve emptied it. Unfortunately, you cannot access this temporary directory via SFTP.  However, you can simply contact your hosting provider and ask them to empty the folder for you, and then check to see if the error has been resolved. If you have sudo users, you could ask them to clear your temporary folder.

Alternatively, you can try to resolve this issue by defining a new location for WordPress to store your media (instead of the temporary folder). First, you’ll need to connect to your site via an SFTP client or the file manager. Then locate the wp-config.php file, right-click on it, and select View/Edit.

Editing the wp-config.php file in FileZilla.

Next, you’ll need to paste in the following code right before the line that reads “That’s all, stop editing! Happy publishing”:

define(‘WP_TEMP_DIR’, dirname(__FILE__) . ‘/wp-content/temp/’);

Save your changes, then navigate to the wp-content folder, open it, and create a new folder inside it called temp.

Creating a temp folder inside the wp-content folder.

When you’re done, you can return to your website and try to upload an image. If the file disk error was caused by the temporary folder, the issue should now be resolved.

3. Upgrade Your Hosting Plan

The disk error could also be a sign that you’ve outgrown your current hosting plan. For example, if you’ve been adding a lot of content to your site, including media files, new pages, and plugins, you might have used up all the disk space available in your account.

Your web host may be able to tell you how much disk space you have left. If you’re a DreamHost client, you can check your disk usage by logging into your hosting account and navigating to Billing & Account > Disk Usage in the side menu.

Checking your disk usage in your DreamHost account.

If you’ve reached your disk space limit, you might need to upgrade to a more advanced hosting plan. This will give your site more room to grow. We recommend getting in touch with your hosting provider to discuss the possibility of switching to a higher plan.

Additional WordPress Error Articles

Do you want to learn how to resolve other technical issues on your site? We’ve put together several tutorials to help you troubleshoot the most common WordPress errors:

If you’re looking for more information about running a WordPress site, make sure to check out our WordPress Tutorials. This is a collection of guides designed to help you navigate the WordPress dashboard like an expert.

Take Your WordPress Website to the Next Level

Whether you need help navigating file permission issues, choosing a web hosting provider, or finding the best plugin, we can help! Subscribe to our monthly digest so you never miss an article.

Fix the “Upload: Failed to Write File to Disk” Error

The “Upload: Failed to write file to disk” error message prevents you from uploading files such as images and videos to your WordPress site. Incorrect file permissions on your site normally cause this error. However, you may also be seeing this message because you’ve used all the disk space offered with your hosting plan.

In this article, we looked at three simple ways to fix this common WordPress error:

  1. Change the file permissions of your WordPress site using an SFTP client like FileZilla.
  2. Empty the WordPress temporary folder by getting in touch with your web host.
  3. Upgrade your hosting plan to access more disk space.

At DreamHost, we provide 24/7 expert support to help you efficiently resolve technical issues. We also offer reliable managed WordPress hosting solutions to help you grow your business while also making it easy for you to upgrade to an advanced plan as your site grows.

The post How to Fix the “Upload: Failed to Write File to Disk” Error in WordPress (3 Ways) appeared first on Website Guides, Tips & Knowledge.


source https://www.dreamhost.com/blog/how-to-fix-upload-failed-wordpress-error/

Tuesday, 17 August 2021

Bestselling Independent Fantasy Author Helps Aspiring Writers Find A Voice

Years before becoming a bestselling fantasy author, Nat Russo figured that the ability to write was “some mystical gift from the universe.”

After three decades of starting and stopping his efforts at becoming a writer, and with help from his mentor, writer James Scott Bell, Russo realized there was no point waiting on the universe to bestow him with words. He knew he had the power to nurture the skill himself.

“Talent certainly helps, but almost 100% of a writer’s success is related to how hard they’re willing to work to learn the craft and market their stories,” Russo says. “As in most cases, hard work will trump talent nearly all of the time.”

A software programmer by day, Russo decided to take his writing hobby seriously in his 40s. Perfecting his craft and leveraging his own talent and hard work, he built the world of Erindor,  self-publishing three fantasy novels set there and landing in Amazon’s bestseller lists for Metaphysical and Visionary Fantasy, Fantasy, Dark Fantasy, and Horror.

He’s still got more of Erindor to explore, words to pen, books to sell, and novels to publish. And, along the way, he’s creating a resource that both shares tricks of the trade with aspiring independent authors while promoting his own novels — a blog hosted by DreamHost.

“The single biggest lesson I hope aspiring authors take from my blog is this: the ability to write engaging stories and characters is not a gift from the universe,” Russo says. “It’s a craft that can be learned like any other craft. You just have to put in the work. Practice what you’re bad at, not what you’re good at. Get outside of your comfort zone, because that’s where growth happens.”

Want to Meet More Awesome Site Owners?

Subscribe to the DreamHost Digest for inside scoops, expert tips, and exclusive deals.

The Constants

When Russo was 10 years old, he learned two things that would shape his future: He taught himself how to program and grew a love for reading fantasy novels. And he never stopped doing either.

Reading became a lifelong hobby that later inspired his own writing. “My love for computers and everything related to them” also became a constant in Russo’s life — the programming skills he practiced since childhood eventually led to a career in software engineering.

The other constant he could always count on while growing up? Change.

“My dad was 53 years old when I was born, so he was able to retire when I was very young,” says Russo. “My parents had a bit of wanderlust, which made us move around a lot.”

That kind of childhood built a resilience for change in him that carried over into adulthood, as Russo embraced change across careers and locations. For proof of his adaptability, just take a quick look at Russo’s Amazon author bio:

“Nat Russo was born in New York, raised in Arizona, and has lived just about everywhere in-between. He’s gone from pizza maker, to radio DJ, to Catholic seminarian (in a Benedictine monastery, of all places), to police officer, to software engineer. His career has taken him from central Texas to central Germany, where he worked as a defense contractor for Northrop Grumman.”

Russo after completing his training to become a police officer.

The four years he spent in the 1990s studying to be a priest led to a degree in philosophy. But unfortunately, his experience was far from what he hoped it would be.

“I was witness to and victim of much psychological abuse,” Russo says. “It took decades, and a lot of therapy, for me to untangle all of those knots. That period of time, and some subsequent experiences in the heart of the church, feeds most of what I write.”

Abuse of power, specifically religious authority — “which can lead to a particularly insidious form of abuse when wielded by unethical people,” he adds — permeates Russo’s written works.

“Through my writing, I hope to guide others to see the early warning signs of this abuse, and also to see the consequences of turning over our faculty of critical thought to someone else for no other reason than they have religious authority over us.”

Building a World

To make the world a little better, Russo crafted a world of his own, bringing readers to a place called Erindor in each of his three published novels: the Mukhtaar Chronicles, which include Necromancer Awakening and Necromancer Falling (with a third novel in the works), and The Road to Dar Rodon.

“I created the world of Erindor, which can be thought of as an Earth-sized planet full of a diverse set of cultures, religions, and creatures,” Russo explains. “I tend to shy away from traditional fantasy races (elves, dwarves, etc.) and instead make my stories all deal with human relationships.”

Setting these human relationships against the backdrop of a fantasy world lets Russo explore our own societal issues, “without smacking the reader in the face with them,” he says. “Instead of addressing issues of race, religion, politics, etc., directly, I can paint an analogous picture in a fantasy world and allow the reader to draw their own conclusions from what they see.”

Erindor is his personal sandbox — “a living, breathing world in my imagination that I can build and tweak however I like.” Many fantasy authors finalize the landscape of their worlds by publishing a map to accompany their stories. But Russo’s found that keeping his map a work in progress works to his advantage: “If a new story warrants a new culture or continent, I can simply create one and continue with the story!”

Russo’s Mukhtaar Chronicles — published both in e-book and paperback — centers on Nicholas Murray, a Texas college student. He ends up in Erindor, where he discovers and masters powers of necromancy. The Road To Dar Rodon, an e-book-only novelette also taking place in Erindor, is a story about Mujahid Mukhtaar — a character from the Mukhtaar Chronicles that has been a part of Russo’s life for years.

“Mujahid is near-and-dear to my heart because I created him for a fantasy game back in the late ‘90s,” says Russo. Mujahid became Russo’s main character in the game EverQuest, which he still plays to this day, and his alter ego in online forums.

“In my books, Mujahid is a necromancer lord, which is an exalted position that most are incapable of achieving due to magical/mystical limitations,” Russo explains. “He’s usually my voice of reason. Mujahid struggles with the battle between his dark side and light side, as do we all, I think. And though he usually ends up on the side of light, he stumbles and falls like the rest of us. It’s how he stands up and carries on that impresses me.”

Declaring Independence

Russo’s novels have topped bestseller lists on Amazon — but you won’t find them at Barnes and Noble. So after debating whether to seek an agent and query publishers, like many writers in recent years, Russo decided to self-publish.

“Whether or not a writer is represented by an agent has very little to do with the writer’s ability,” Russo says. “It’s more about marketing and what an agent believes they can currently sell. I’ve seen more than my fair share of traditionally published books that needed serious editing, and more than my fair share of independent books that aren’t given the reception and recognition they deserve.”

Self-publishing feels like a 2000s, age-of-Amazon phenomenon, but Russo points out that historically, publishing houses are the more modern innovation. “Independent authors used to be the standard of the day until the Industrial Revolution came along and savvy capitalists saw there was money to be made in publishing,” Russo says.

Because we’re all so accustomed to what Russo terms the “traditional middleman model of publishing,” independent authors face a huge obstacle: imposter syndrome.

“The challenge all new authors need to overcome is their sense of authority,” he says. “Embracing one’s personal authority as a writer is a difficult process. We just have to keep repeating the positive message to ourselves that we have authority over our words, and our words deserve a hearing.”

The independent life works well for Russo. Instead of chasing someone else’s deadline, he can write at his own pace, balance a day job, and keep most of his royalties.

“There are some amazingly talented independent authors out there nowadays,” says Russo. His favorites list is long, topped by The Night Traveler author Fiona Skye and Robert Pruneda, author of Devil’s Nightmare.

Note to Self

As Russo took to honing his writing craft, he jotted down lessons learned about writing along the way. The list grew longer, and he shared these tips of the trade on his Twitter account.

“In truth, they were more reminders to myself than anything else,” Russo says. “But, before long, I discovered there was an audience for these writing tips.”

Russo went into software engineer mode to reach that audience: He wrote a program that would keep his Twitter feed active throughout the day. Each time he discovers something new about the craft of writing, he composes a “note to self” in the form of a tweet. His software randomly selects a list of tweets to cycle through and a paid service keeps the tweets coming to a global audience. This keeps his worldwide audience supplied with plenty of writing tips — plus marketing plugs for his novels. “The tweet train has been running 24/7 for nearly 10 years now,” Russo says.

Much like online reviews for restaurants and services, Russo says social media offers readers social proof of the legitimacy of a writer:  “It’s in the form of likes and shares, and the more followers a person has, the more influential they are in evoking this social proof.” And with 91.6K followers on Twitter, Russo has plenty of proof to offer.

Many of his tweets link to Russo’s blog, A Writer’s Journey. This website has become a platform to mentor aspiring writers and includes a homepage for promoting and sharing updates about his own writing. The role of mentor feels natural to Russo after years of leading ministries, working with Boy Scouts, and training junior software engineers.

“The primary audience of my website and social media platforms are up-and-coming authors who are in the process of writing or publishing their first book,” Russo says. “I try to offer a baseline level of knowledge that new writers can adopt and build upon to suit their own unique voices.”

One of the most important lessons in promoting a self-published book lies in establishing an online presence — Russo calls it an “author platform,” and offers a primer on how to build one. Russo’s own platform is grounded in his website, hosted by DreamHost. When searching for a trustworthy host, he found that DreamHost offered up plenty of its own social proof:

“I heard nothing but good words from folks who are actual DreamHost customers,” Russo says. “That drew me to DreamHost. But, what keeps me at DreamHost is how amazingly helpful and friendly the technical support is. I’ve had some issues crop up, and the tech support team has always been there to get my site back up and running as quickly as possible.”

That kind of stability, he says, helps him keep connected with readers and an audience that spans the globe.

We Support Your Dream

Whatever your online goals, we’ll be right there with you, making sure your site is fast, secure, and always up. Plans start at $2.59/mo.

Full Circle

In addition to landing on bestseller lists, Russo’s work has drawn positive feedback from readers and reviewers alike.

“Some of the quotes from review organizations have truly blown me away,” Russo says. For example, one reviewer compared him to George R.R. Martin and Neil Gaiman, and another to Brandon Sanderson. “Those men are absolute giants of the industry, and to be named in the same breath as them is indescribable.”

Perhaps more meaningful has been messages from readers who, thanks to Russo’s writing, recognized psychological abuse in their own lives and got themselves out.

“I’m just so glad my work is actually helping,” he says. “If I can get just one person out of an abusive situation, my work would be complete.”

It’s that determination to affect change in the world that keeps Russo coming back to the keyboard, even while undergoing chemotherapy after a recent cancer diagnosis. “My current focus is on just getting better,” he says. “That takes more time than I thought it would! But, beyond that, my work and writing take up the lion’s share of my time.”

He’s got several outlines for more stories in the works, mostly fantasy, with some literary fiction mixed in. And he’s on the verge of completing the Mukhtaar Chronicles trilogy, which he started a decade ago.

“I’m hoping to have it in readers’ hands sometime in 2022.”

The post Bestselling Independent Fantasy Author Helps Aspiring Writers Find A Voice appeared first on Website Guides, Tips & Knowledge.


source https://www.dreamhost.com/blog/customer-spotlight-nat-russo/

Friday, 13 August 2021

How to Create and Host Your First Webinar

Hosting a webinar is still one of the most significant — if not slightly daunting — tactics for engaging your existing audience, building a new one, and growing your business online.

Especially in this new era of working from home, online events have proliferated, with a threefold increase in webinar audience reported in 2020 compared to 2019.

If the very mention of a webinar works you up into a cold sweat, you’re not alone. Webinars can be super scary if you’ve never created and hosted one before.

But take a few breaths. Relax. Stay calm.

We’re here to break it down for you and make sure you’re extra-prepared for hosting your very first webinar.

To save you scrolling through this entire article, here are the things we’re going to cover so you can jump down to the bits you want:

What Is a Webinar, Anyway?

A webinar is simply a video workshop or presentation. It’s often live (but not always) and is usually interactive and largely unscripted.

The point isn’t to sell, sell, sell to the webinar attendee. It’s about providing information and advice to encourage and inspire your audience to solve issues themselves. Of course, there’s no harm in promoting your service and product somewhere along the way, but making it your primary focus won’t go down well with most audiences.

Our take: The best webinar marketing focuses on building brand awareness and engagement with attendees rather than hard sells.

Shared Hosting That Powers Your Purpose

We make sure your website is fast, secure, and always up so your visitors trust you. Plans start at $2.59/mo.

Why You Should Host a Webinar

Here are some important reasons for you to host your first webinar:

They’re Cheap and Easy

For a start, webinars are a lot less hassle than they seem. They’re relatively straightforward to create, as long as you find the right hosting software and have a good strategy. That said, you’ll still need to put in the hard work to make it a success.

They can also be done on a shoestring budget, using just your smartphone. So, while you can splash out and buy all the fancy gear, there’s absolutely no reason you can’t do it on the smallest of budgets.

They Make Great Evergreen Content

These days, a lot of visual content is here today, gone tomorrow, but an evergreen webinar can live on and on!

If you record your webinar, you can reuse it in the future, either by reposting it or repurposing it for different audiences.

For example, you might try chopping your webinar into smaller pieces and posting them in a series on your social media or blog. Or you could put it on your website in full to be downloaded in return for a sign-up to your newsletter.

They Add Value

By providing something informative, valuable, and high-quality, you’re both helping your customers solve a problem while simultaneously promoting your own brand. It’s a win-win.

So whether you’re demonstrating your latest product or educating about a certain technique or issue, make sure you focus it on your audience’s real — rather than perceived — need.

It’s Great for Your Brand

Along with social media, interactive content like a live webinar is a good way to connect with your audience and potential customers.

Not only do webinars help put a human face to your brand — they’re a great way of showing your customers a sneak peek behind the curtain — but they can also set you up as a thought leader in your industry.

By providing your audience with actionable tips and valuable knowledge, you can come across as an authority, not just another brand.

They Can Boost Conversions

Whether the goal for your webinar is to directly increase your revenue or whether conversions are a happy by-product, there’s good evidence to demonstrate that webinars have a great ROI.

By establishing yourself as an authoritative, trustworthy brand and by reaching your audience more directly, you can expect to increase sales on your website.

1. Choose Your Webinar Topic

Choosing your topic isn’t quite as easy as it sounds. Should you talk about what you know? Of course.

But first, consider this: What does your audience want to know?

After all, you can spend all day talking about things you’re passionate about. But if those topics don’t help your audience, they’ll drop out fast.

If you’re looking to provide value to your audience, your webinar needs to match up with what your audience is asking for. Your expertise needs to answer their questions.

But how do you know what your audience wants to hear about?

The most obvious answer is to ask them directly. Use your social channels to directly ask your audience what questions they need answers to. You could also send out a survey to your email list to gather more details.

Alternatively, you can search through your data to see which social posts or blog articles get the most traction. Or, you can look at your Google Analytics to identify some of the search queries that bring people to your website.

2. Choose Your Webinar Format

There are several options for how you conduct your webinar.

You could go down the traditional route of a webinar presentation or take on a more dynamic Q&A interview format. Just keep in mind that the best webinars always find a way to solicit audience participation.

What’s most important for your first webinar is that you choose a format that you think will work best for your goals. You can always iterate for future webinars based on what you learn from the first attempt.

A Presentation

Most webinars are done as presentations simply because presentations are the most straightforward format. They’re also a good option if you’re targeting a small audience.

Usually, the host will address the camera while delivering a presentation that can be followed on a PowerPoint, whiteboard, or video running in the background.

If you want to inject a bit more interactivity into this option, you could enable a chat box so your audience can ask questions throughout the webinar for you to answer at the end.

Product Demonstrations

Great for e-commerce businesses, a demonstration-style webinar is a good option if you have a new product or service that you’d like to share with users.

Depending on your product, you can simply address the camera while showing your audience how to use the item, or you can screen share if your product is digital.

Interview

A Q&A with an industry expert or panel of influencers is guaranteed to give your audience extra value.

Identify and reach out to people who are regarded as thought leaders in your niche and make it an exciting opportunity for them to take part in (after all, it will give them exposure too).

This format might take a bit more preparation. You shouldn’t rehearse the interview ahead of time, as it may come across as stale to your audience. But it would be helpful to create a list of questions and send them to your interviewees in advance so they can be prepared and share informative responses.

3. Build Your Toolkit

Next, it’s time to handle the technical details of creating a webinar.

There are plenty of tools for hosting webinars available, as well as popular webinar software like Zoom, Livestorm, or ClickMeeting.

When choosing your webinar platform, you need to think about a few things:

  • How much does it cost?
  • How big an audience does it allow?
  • How easy is it to use?
  • Does it let you record the video?
  • Does it allow for Q&As?
  • Does it let you screen share or show a PowerPoint presentation?

Once you’ve chosen a webinar service, it’s time to think about the other tools you might need: a camera (although most smartphones have high-resolution cameras), microphones, a recording device (if this isn’t built into your hosting tool), strong internet, and good lighting.

4. Produce the Webinar Content

So, you know your topic. You’ve identified your format. You have your webinar tool. Now it’s time to focus on the content.

If you’re hosting a presentation, then you can get started on producing your slide deck. Be careful not to write a formal script, but make a few points on your slide deck to allow your audience to follow along with what you’re saying.

Make your slide deck visually appealing and include images and color. Bright Talk has found that video-based learning is their preferred learning format among its respondents, and 85% prefer the video to be webinars.

A Q&A with an expert or a panel will involve more planning. Ask for questions from your audience in advance so that you can field them to your experts on the day.

Make sure you plan out your speakers and the order of the questions, ensuring you time it so you know how long to allow for your webinar.

5. Set Up a Landing Page

Your webinar’s landing page is where you can send your audience to find out more about the event and register to attend. This should be hosted on your website, allowing you to learn more about your attendees and giving your attendees an easy way to learn more about your business by clicking around on your website after they’ve signed up for the webinar.

Your landing page needs to be fully optimized. Include a target keyword in your page title and in the on-page copy. Embed a registration form that captures enough information without being overly complex.

Ideally, you should integrate your form into your other marketing tools so that you can turn an attendee into a prospect (use an opt-in checkbox and watch out for GDPR rules for data privacy).

6. Determine the Date and Time

When is the best time to host your webinar? ON24 says Wednesdays and Thursdays at 11:00 a.m. are best. LiveWebinar suggests that any midweek day (Tuesday to Thursday) is fine.

We suggest letting your own data tell you when’s best. Use Google Analytics to see when people are most engaging with your website. Chances are that when they’re on your website, they’ll also be likely to check out your webinar.

Watch out for time zones if you have an international audience. And steer clear of the start or end of the working day when your audience may be commuting.

7. Promote Your Webinar

Of course, your webinar is nothing without an audience.

But how do you ensure you get people — the right people — to attend?

You’ve already optimized a landing page. You now have to be creative in how you share that link.

First of all, you could set up a series of paid ads, either on Google AdWords or social ads (Facebook Ads, Sponsored Tweets, etc.). This tactic gives you more control over the audience you’re trying to reach, but it does come at a modest cost.

Your free options include promoting your landing page on your free social media accounts. If you already have a regular e-newsletter, create an email campaign inviting your contacts to the webinar.

Send reminder emails as the date approaches, and entice your audience with some information about the webinar, such as the key points you’ll be covering or, for instance, the guest speaker.

8. Prepare and Practice

When it comes to your first webinar, you won’t want to leave anything to chance.

Set aside time to rehearse your webinar and do a tech run, paying particular attention to details like lighting and sound, camera angles, and your backdrop. Make a note of timing so you don’t run over or, worse, have time to fill. Have a plan in place for any technical issues that might arise on the day.

Most importantly, practice strategies for staying calm and confident. Focus on your breathing and remind yourself that you are the expert and you’re well-prepared.

9. Follow up After Your Webinar

You just hosted a great webinar — congratulations! Give yourself a well-deserved pat on the back.

But the job’s not over yet.

The last thing you want to do is let all your hard work go to waste by forgetting to follow up with your audience.

After your webinar ends, send the attendees a thank you email with the webinar recording or slide deck, along with a request for feedback. If your webinar included a product demonstration or special offer, be sure to include those details in a post-webinar email campaign.

Make sure you send the recorded webinar to your audience who registered but who couldn’t attend as well. And don’t forget to repurpose the webinar into a blog post, YouTube video, Twitter series, or ebook as part of your content marketing strategy.

Ready to Host Your First Live Event?

Whether you need help finding a target audience, crafting the ideal social media strategy, or building a webinar registration site, we can help! Subscribe to our monthly digest so you never miss an article.

Now Over to You…

You know that hosting an online webinar is a solid marketing idea. It’ll improve your brand awareness, set you apart as a trusted authority, and drive brand awareness for your business.

These tips will help prepare you to host a successful webinar, but if you need help hosting your website, we’re here to help you with that too. Check out our affordable shared hosting plans today!

The post How to Create and Host Your First Webinar appeared first on Website Guides, Tips & Knowledge.


source https://www.dreamhost.com/blog/how-to-create-host-your-first-webinar/

Wednesday, 11 August 2021

What Is WordPress Full-Site Editing? And How Will It Affect Your Site?

Customizing your WordPress website’s appearance is one of the best ways to control your site’s image and tailor it to your needs. However, planned WordPress updates may leave you feeling nervous about potential changes. With Full Site Editing (FSE), there will be a completely new interface to master.

Fortunately, the new WordPress FSE features look set to be user-friendly and incredibly useful.  While the developments are still in the works, you can take the time to familiarize yourself with what to expect.

In this article, we’ll take a closer look at WordPress FSE. We’ll look at what it is, why it’s such a big deal, and how it will affect your site.  Let’s get started!

We Make WordPress Easier for You

Leave migrating your site, installing WordPress, managing security and updates, and optimizing server performance to us. Now you can focus on what matters most: growing your website!

What Is Full Site Editing in WordPress?

FSE is the second part of the Gutenberg project. The first part was the Block Editor, which launched with the WordPress 5.0 update on December 6, 2018. It introduced the concept of using blocks to design the layout of your blog posts.

The WordPress Block Editor.

This site editor is also known as the Block-Based Editor, and it uses segments called Gutenberg blocks. These blocks refer to units of markup with different functions. With each block, you can insert other elements into your posts, such as paragraphs, headings, images, lists, and videos.

You may be familiar with some aspects of FSE if you use the Gutenberg plugin.

The Gutenberg editor plugin.

This dev plugin enables you to play around with different block elements, including trialing new features. However, it doesn’t have complete FSE functionality (so please don’t use it on any live sites).

The new FSE became available to general users as part of the WordPress 5.8 update on July 20, 2021. Additional developments for WordPress 5.9 are also planned for release in December 2021.

FSE aims to build upon the block functionality and make it applicable to your wider site, not just your content. Doing so will enable you to customize more aspects of your site’s appearance and layout.

For example, you will be able to use blocks in your site’s template and change its overall layout — imagine a block-based theme. Additionally, FSE will add to the Block Pattern library and enable the application of Global Styles that you can use to create design rules across multiple pages.

This general overview shows some of the key features of WordPress FSE. Still, we can expect adaptations over the next few months.

Why Is Full Site Editing a Big Deal?

FSE is an exciting development for all WordPress users. It doesn’t require coding knowledge or other technical skills that are unique to developers. Therefore, it will enable general WordPress users to customize their sites’ appearances easily and quickly, saving both time and effort.

It is possible that FSE could reduce dependency on drag and drop page builders. If you use any of these plugins, you may find them unnecessary once the FSE features are rolled out.

If you run a business, the FSE customization options could enable you to change your site to better suit your brand image. They can also be handy if you rebrand with different colors, fonts, or other stylistic elements. With Global Styles, you will be able to adjust the new branding easily across your entire site.

We also anticipate that FSE could change the way that developers design and create WordPress themes. They will need to focus on block-based themes if they want to stay ahead in the changing marketplace.

Want a Free Theme?

When you host with DreamHost you get access to our WP Website Builder tool and more than 200+ industry-specific starter sites for free!

How Will Full Site Editing Affect Your Site? (5 Ways)

Now that we know what FSE is and why it matters, we can take a closer look at the practical implications for your WordPress site.

1.  There Will Be More Block Categories and Block Placement Options

Blocks are already the framework of your blog posts and pages in the Block Editor. FSE will enable you to use blocks on different parts of your pages, including headings, footers, and sidebars. Therefore, you will be able to adjust both the content and appearance of your website using blocks.

One of the most significant developments with FSE is that you will be able to use blocks in your widget areas. Widgets are the content that is displayed around the edges of your site rather than in the body of posts and pages. With the current Block Editor, you are restricted by specific widgets that may not fit your design vision or page needs.

FSE will give you the flexibility to add any element that you choose to widget areas.

The block widgets dashboard.

FSE will also come with new block types, including:

  • Page List
  • Site Title
  • Logo
  • Tagline
  • Query Loop
  • Duotone

The Page List block adds a series of headers that direct to the different pages of your website.  It enables your readers to navigate to each page directly from that block without having to navigate to your search bar or secondary menus.

The Page List block.

Query Loop is one of the most exciting new blocks that come with FSE. It enables you to show different categories of posts and arrange them in various visual layouts.

The Query Loop block.

For example, you could display a portfolio of your digital marketing posts with their featured images and an enticing headline. This Query Loop block is a much more visually exciting way of driving readers to specific parts of your website.

Each of these new blocks enables you to display your content in unique ways or provide dynamic navigational tools.

2.  Global Styles Will Change the Way You Can Apply Design Elements

Global Styles is a new set of features that will become available with FSE. It will enable you to change the stylistic elements of your site, such as fonts, colors, or other visual parts. With the Block Editor, you can change your site’s appearance across pages and posts. However, it can be challenging to apply styling rules to multiple site elements.

The Global Styles system is still in development. When it’s functional, you will be able to apply styles globally or to different pages according to established categories. With Global Styles, you will be able to control these elements on a larger scale with a global interface that you can operate from the site editing mode. It will use code in this style:

Global styles in WordPress.

This development is significant because your chosen theme constrains your site’s current appearance. When the WordPress editor switched from Classic to the Block Editor, not all themes were updated to accommodate styling across the different block types. Additionally, all themes are made of Cascading Style Sheets (CSS), making them challenging to change with all the block variations.

Global Styles is currently the most mysterious FSE feature because various aspects are still in development. So we can probably expect to wait until the end of the year for full functionality.

3.  Block-Based Templates Will Enable You to Configure Page Layouts

Templates control the layout and appearance of individual pages on your WordPress site. For example, they may determine the placement of headings and sidebars within the framework of your site’s theme. Your theme may come with set templates for blog posts, landing pages, and your blog archives.

One of the most significant features of FSE will be block-based templates. With this tool, you will be able to customize the layout of every page on your site. You will also be able to apply template rules for particular page categories, such as landing pages.

The template editor in WordPress.

You can choose from existing templates or create your own layout. First, navigate to Post > Template > New and name the template. Then you can start adding blocks in unique configurations.

Most themes are likely to become block-based over time to adapt to WordPress FSE. This format would make it even easier to change your page layouts, as they would already contain the same block elements as the templates.

4.  Theme Blocks Will Enable You to Apply Template Functionality

In the Block Editor, templates determine the placement of specific elements on your pages. For example, they put the post title at the top of the page, and the featured image usually sits underneath the title.

With FSE Theme Blocks, you can add these elements in any position within your page or post.

Theme blocks in WordPress.

The Theme Blocks enable you to control your page layout independent of your theme and its associated templates. You could even use different theme elements between different page types, such as landing pages.

Additionally, you can use Theme Blocks together with the block-based template editor. By creating custom templates with these blocks, you can completely control how users navigate your site and access your content.

5.  Some Plugins May Need Updates or Reactivation

Plugins are the tools that you use to enhance your WordPress user experience. They can do everything from tracking your SEO to protecting your site from security threats. However, plugins need continual updates to function correctly. Otherwise, they may become buggy or even leave you vulnerable to hacking attempts.

So it is likely that you will need to update your plugins after FSE becomes available.  You can do this by going to your WordPress dashboard and clicking on Plugins > Installed Plugins. Then, under each plugin that has a new version available, you can click on Update now.

Updating plugins in WordPress.

In the same area, you can deactivate and reactivate plugins. We recommend following all of these steps after the introduction of FSE to ensure that everything works as it should.  It is also advisable to check all elements of your WordPress site for regular updates if you don’t already.

We doubled our WordPress blog’s traffic

We'll show you how to do it. Join 180,000+ others who get our monthly newsletter with insider WordPress tips!

Theme Experiments

Full Site Editing (FSE) will change the way you customize your website’s appearance and functionality. The new features are still in development. However, once they’re all rolled out, they will revolutionize the Block Editor interface and offer non-technical users an unprecedented level of control over their websites’ designs.

These are some of the key ways that FSE will affect your site:

  1. There will be more block categories and block placements to use on your site.
  2. You can apply Global Styles to change design elements across your website.
  3. It will enable you to use and customize block-based templates.
  4. You can use Theme Blocks to access template functionality in themes.
  5. You may need to change, update, or reactivate some of your plugins.

Ready to grow your business? Our DreamPress managed WordPress hosting packages give you all the tools and support you need to succeed. Take away the technical hassles so you can focus on what really matters: your content!

The post What Is WordPress Full-Site Editing? And How Will It Affect Your Site? appeared first on Website Guides, Tips & Knowledge.


source https://www.dreamhost.com/blog/wordpress-full-site-editing/

Creating and Mastering GA4 Explorations

In the switch from Universal Analytics (UA) to Google Analytics 4 (GA4) — which will go fully into effect July 2023 — a lot of things have...