Thursday, 15 December 2022

How to Create the Perfect WordPress Featured Image (Sizing & Design Guide)

To draw new visitors to your site, you may consider publishing blog posts regularly. However, without featured images, your posts likely won’t look inviting enough to earn clicks.

Fortunately, you can easily create well-designed featured images for your articles. Once you know how to find the right photos, size them correctly, and optimize them for search engines, you can instantly revitalize your WordPress posts.

In this post, we’ll explain what a featured image is. Then, we’ll share some tips on how to use them. Let’s get started!

What is a Featured Image?

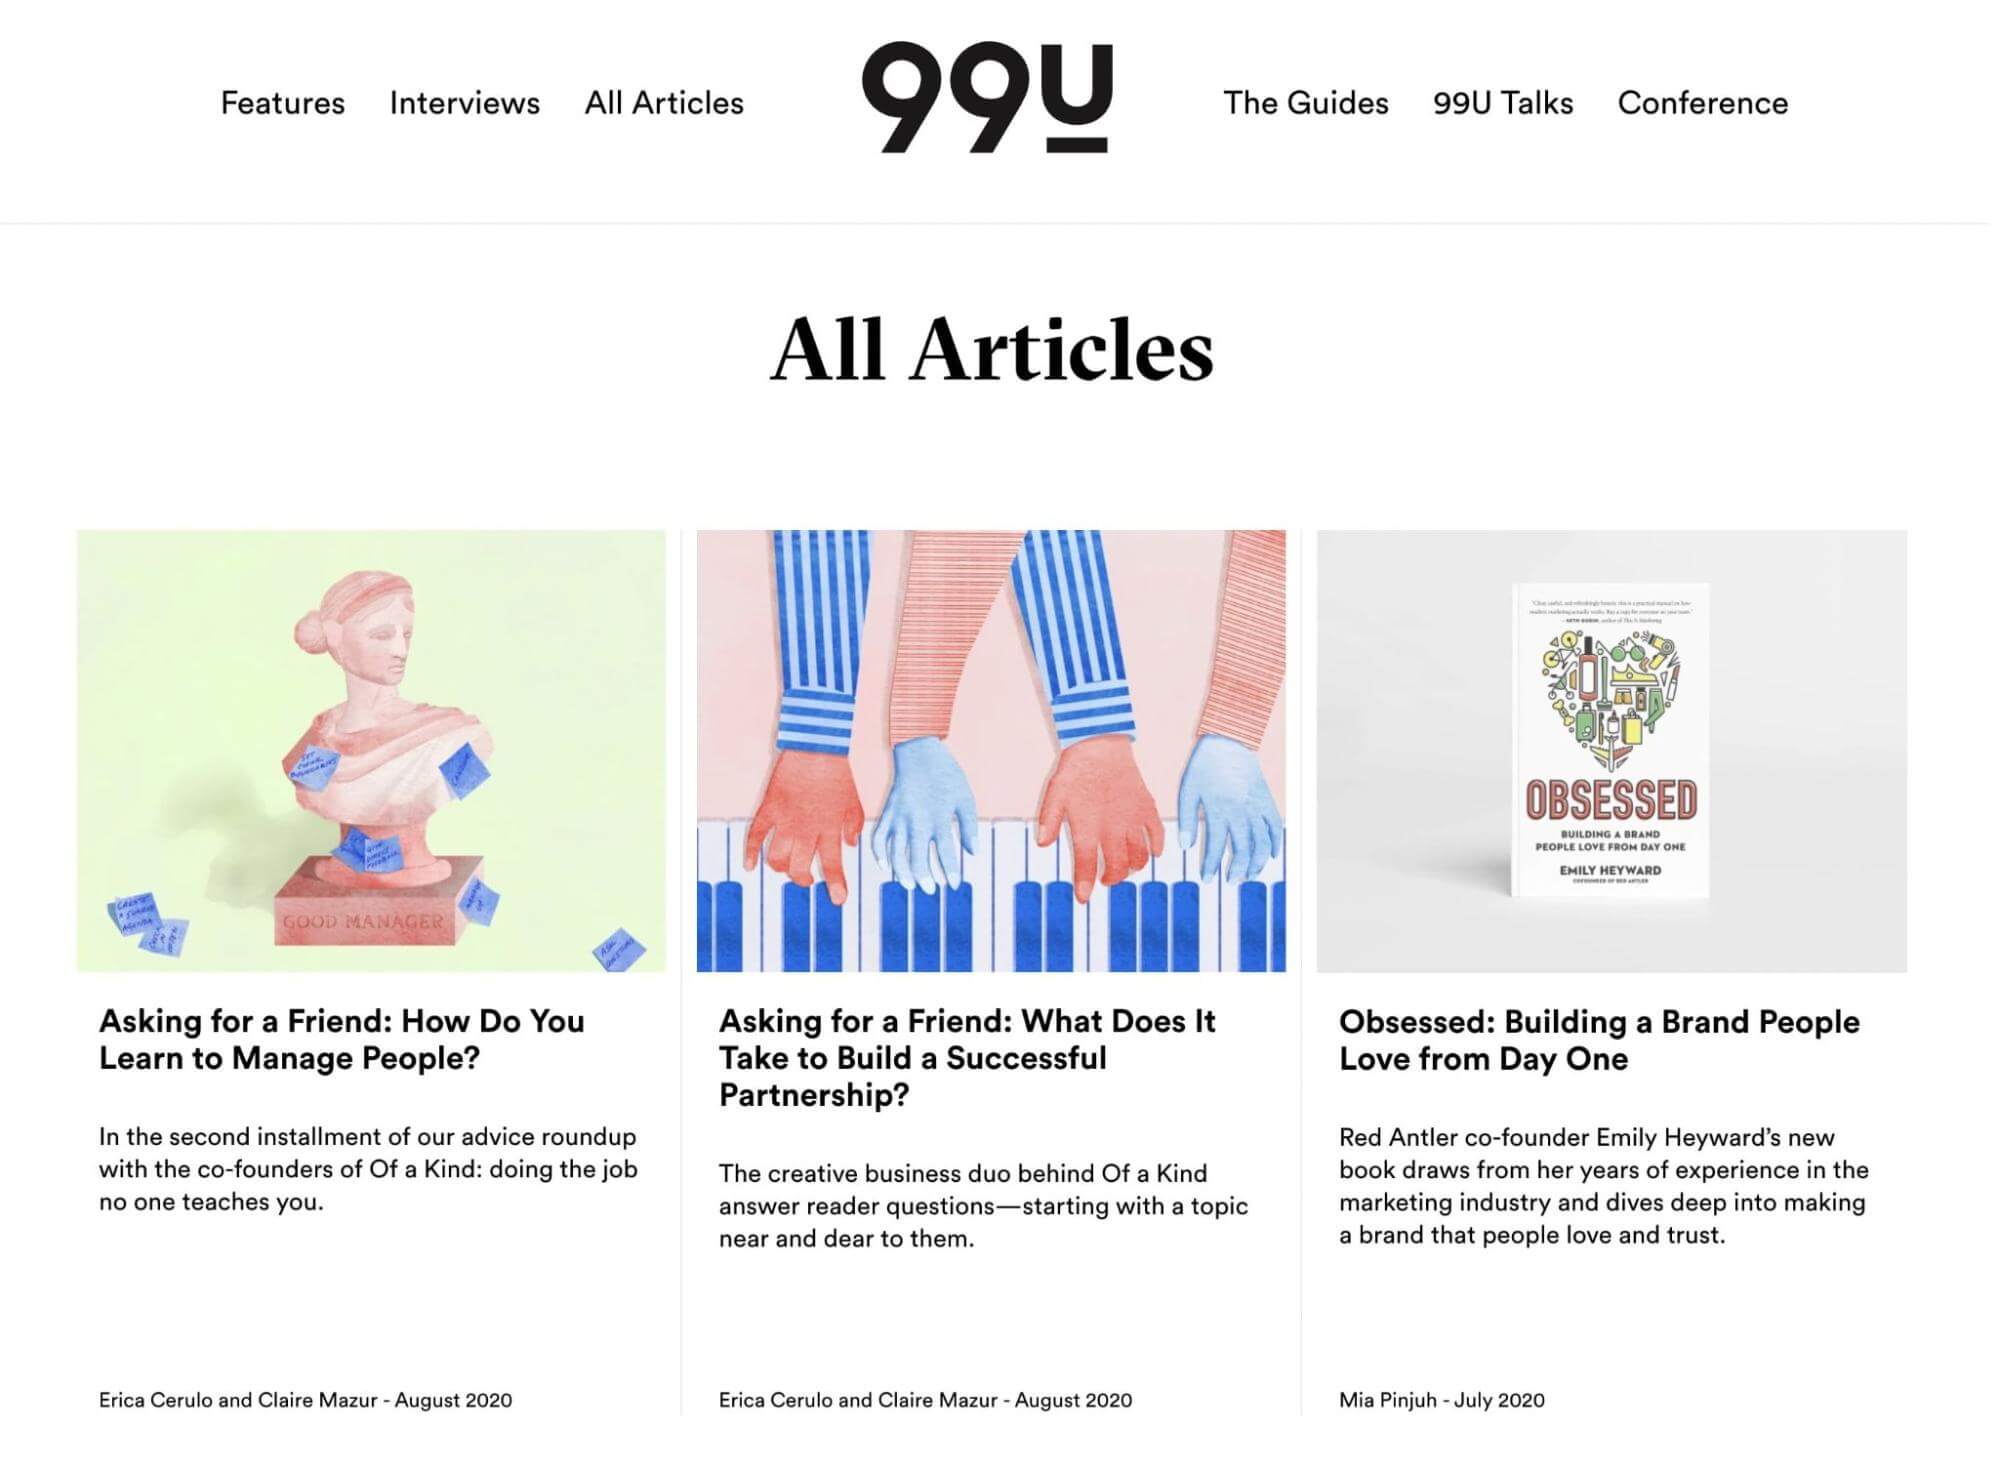
In WordPress, the featured image is the visual representation of a specific post, page, or custom post type. When someone visits your website, these images will usually appear at the top of posts or in your blog feed:

WordPress featured images

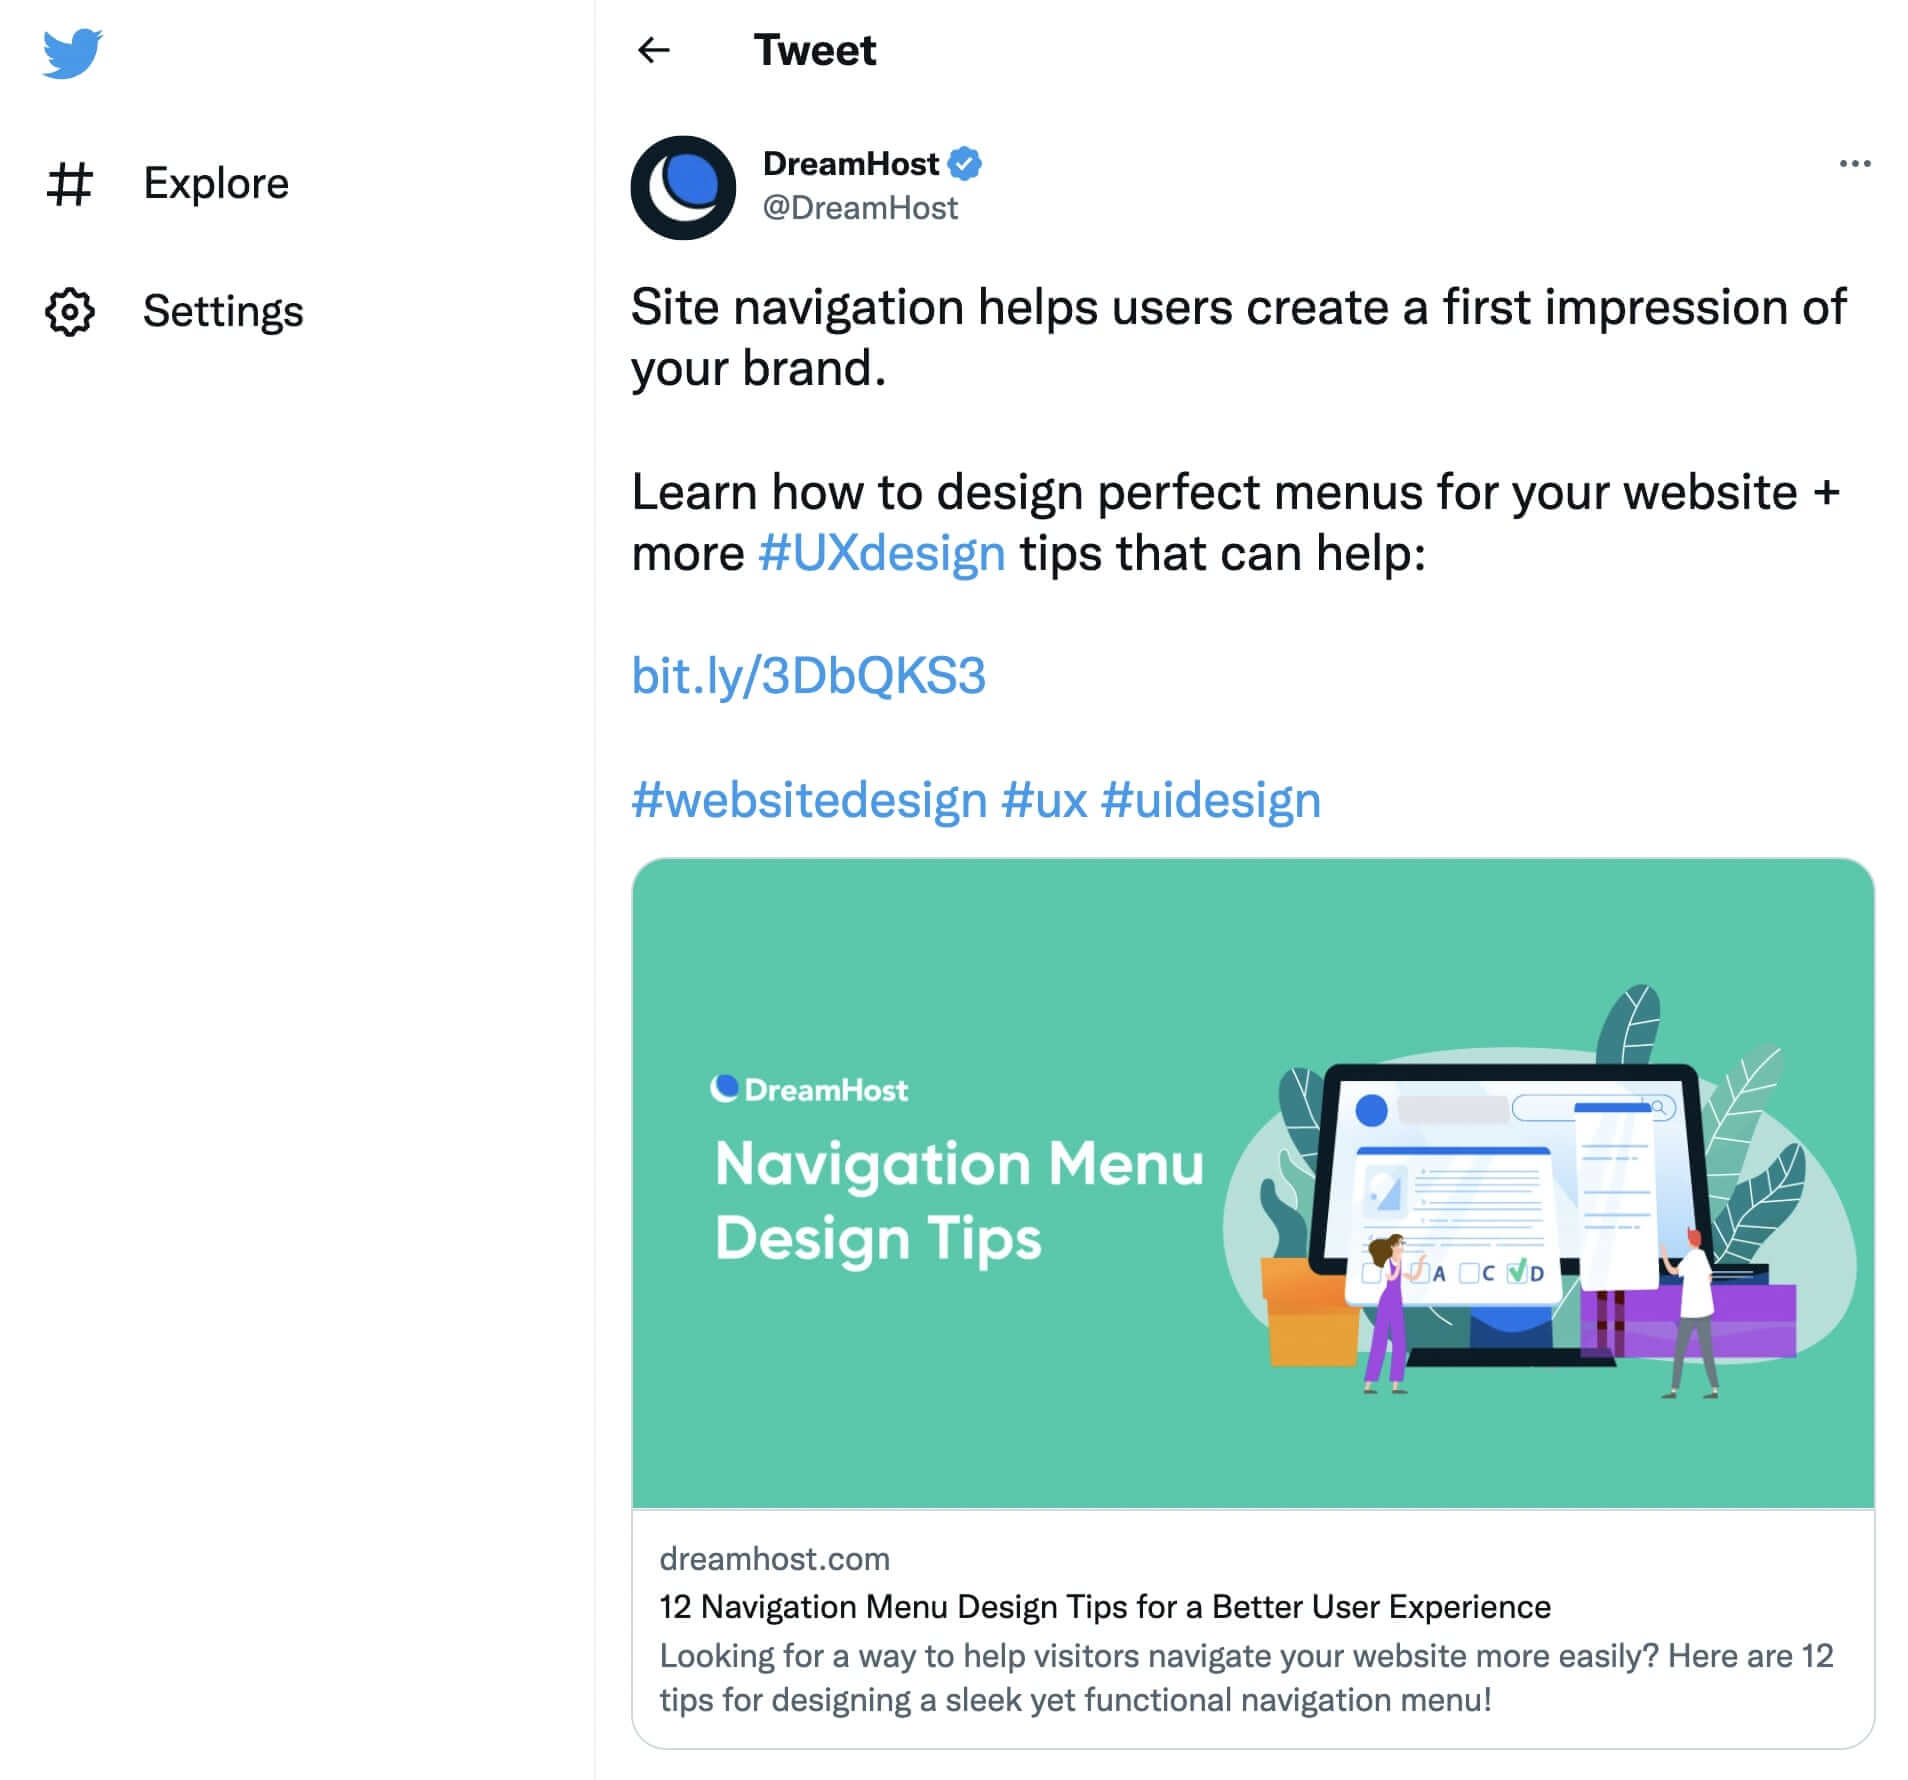
Essentially, the featured image is the default thumbnail of your post. If someone shares the post on social media, this image will appear with the link:

Social media featured image

In WordPress, the featured image settings are determined by your theme. This includes the location and size of your images.

Typically, featured images are displayed in the following places:

  • The top area of posts or pages
  • Pages on your website that link to blog posts, like your WordPress homepage, recommended posts section, or search results
  • Thumbnails for social media links

Sometimes, featured images may be included in image galleries or sliders. You may also see them as background images.

The Advantages of Using Featured Images

If you’re new to WordPress, you might be wondering why you need a featured image for every post on your website. However, these can be the key to making a good first impression with new visitors.

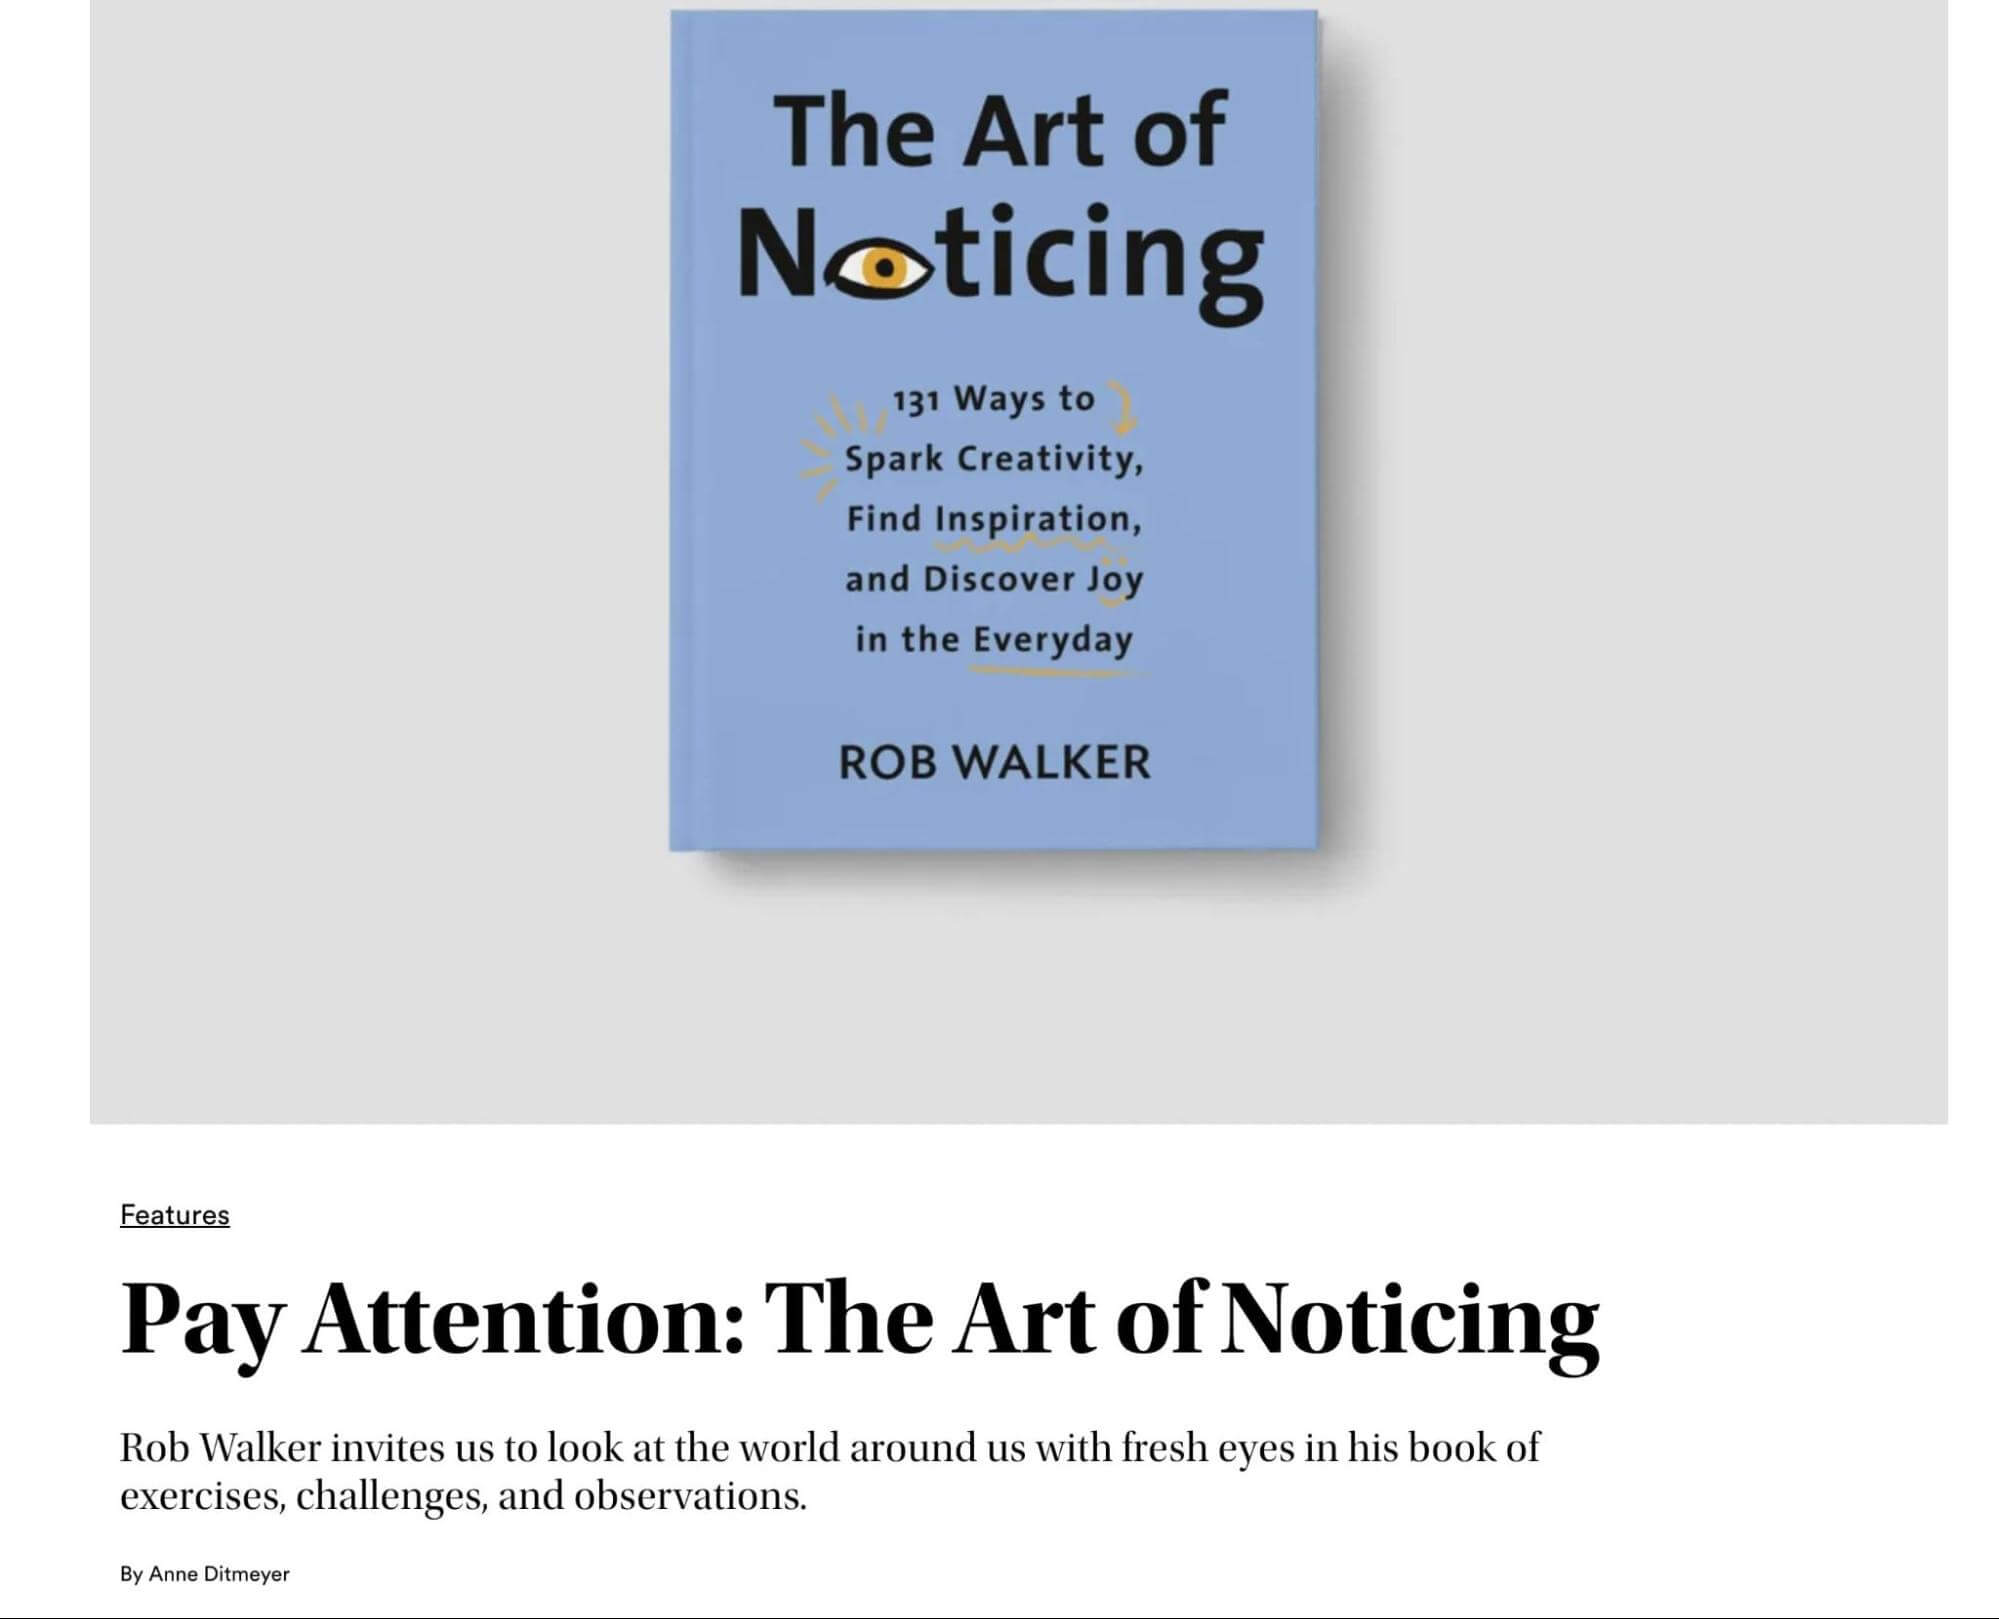
After users click on a link to one of your posts, featured images are often the first thing they’ll see and this can engage them enough to continue reading the article:

Post featured image

You’ll likely have a list of your published posts on your homepage. You can motivate visitors to read your content by including well-designed featured images.

Plus, having a featured image for each post can help you establish visual consistency on your website:

Home page featured images

When you share your posts on social media, featured images can help advertise your content to users browsing their feeds. A well-designed image can increase engagement and generate more clicks to your site.

What is the Ideal WordPress Featured Image Size?

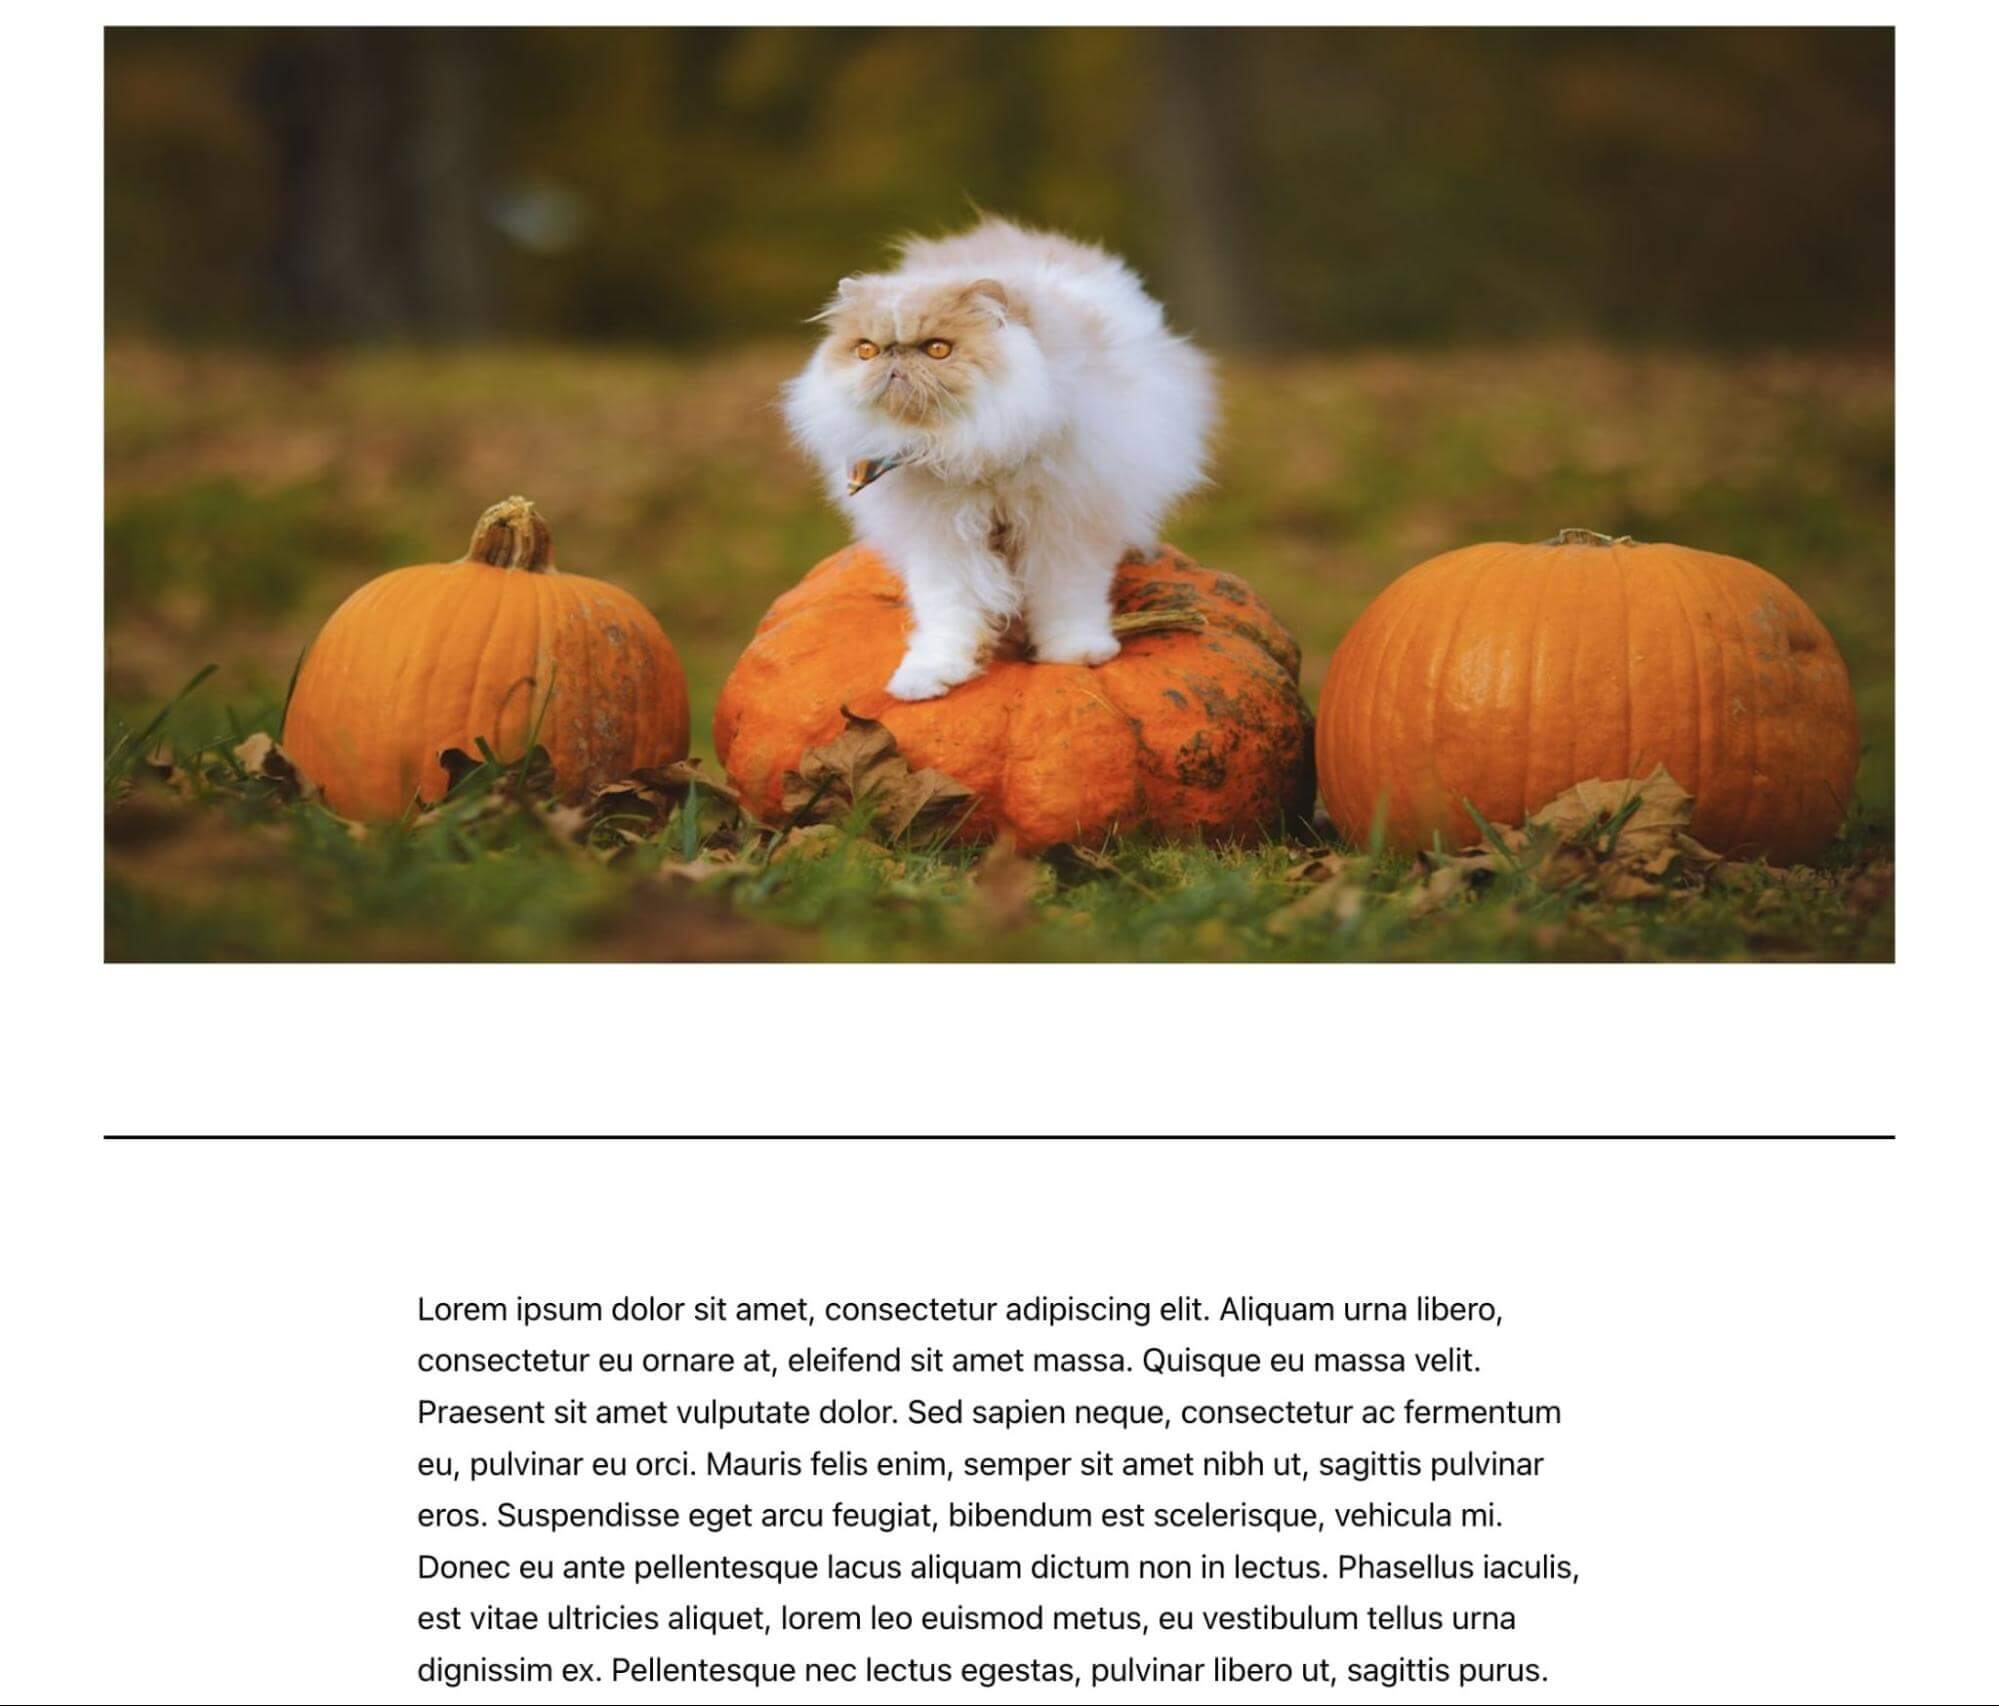
As we mentioned earlier, different WordPress themes can have various sizes for featured images. However, the general size is 1200 x 628 pixels.

Here’s how this would look with the default Twenty Twenty-Two theme:

Featured image size

This size will work effectively with many WordPress themes. However, your featured image sizing may vary based on your personal preference and the layout of your theme.

It’s important to note that WordPress will resize your images to its default settings. Whenever you upload an image, it creates three different versions:

  • Thumbnail: 150 x 150 px
  • Medium: 300 x 300 px
  • Large: 1024 x 1024 px

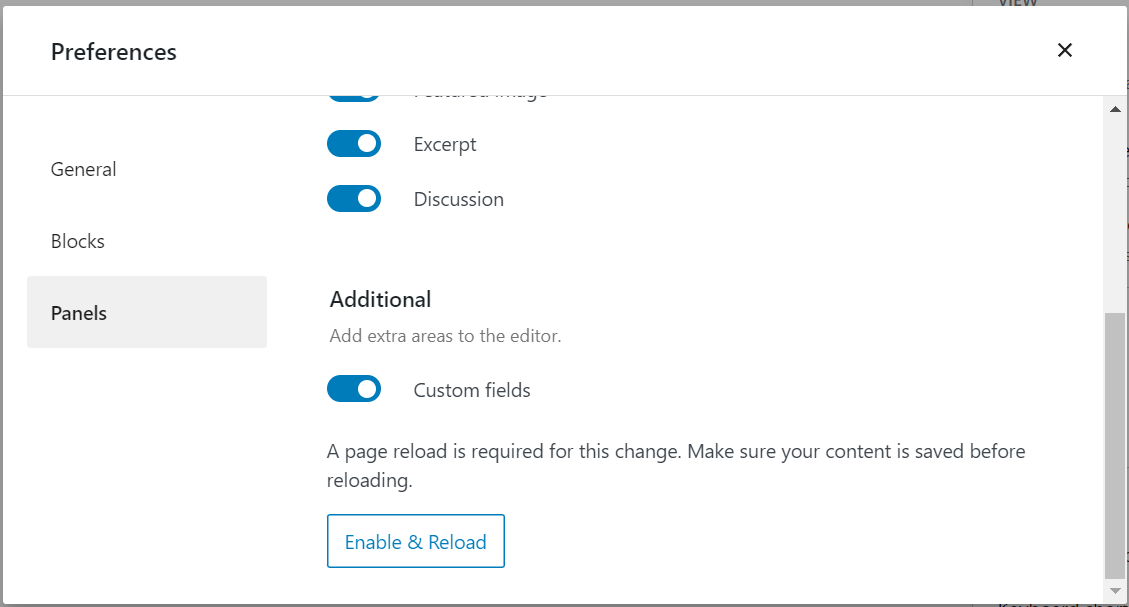
If you want to keep the original size of the featured image, this will be its ‘Full Size.’ To edit any of these sizing options, you can navigate to Settings > Media:

WordPress media settings

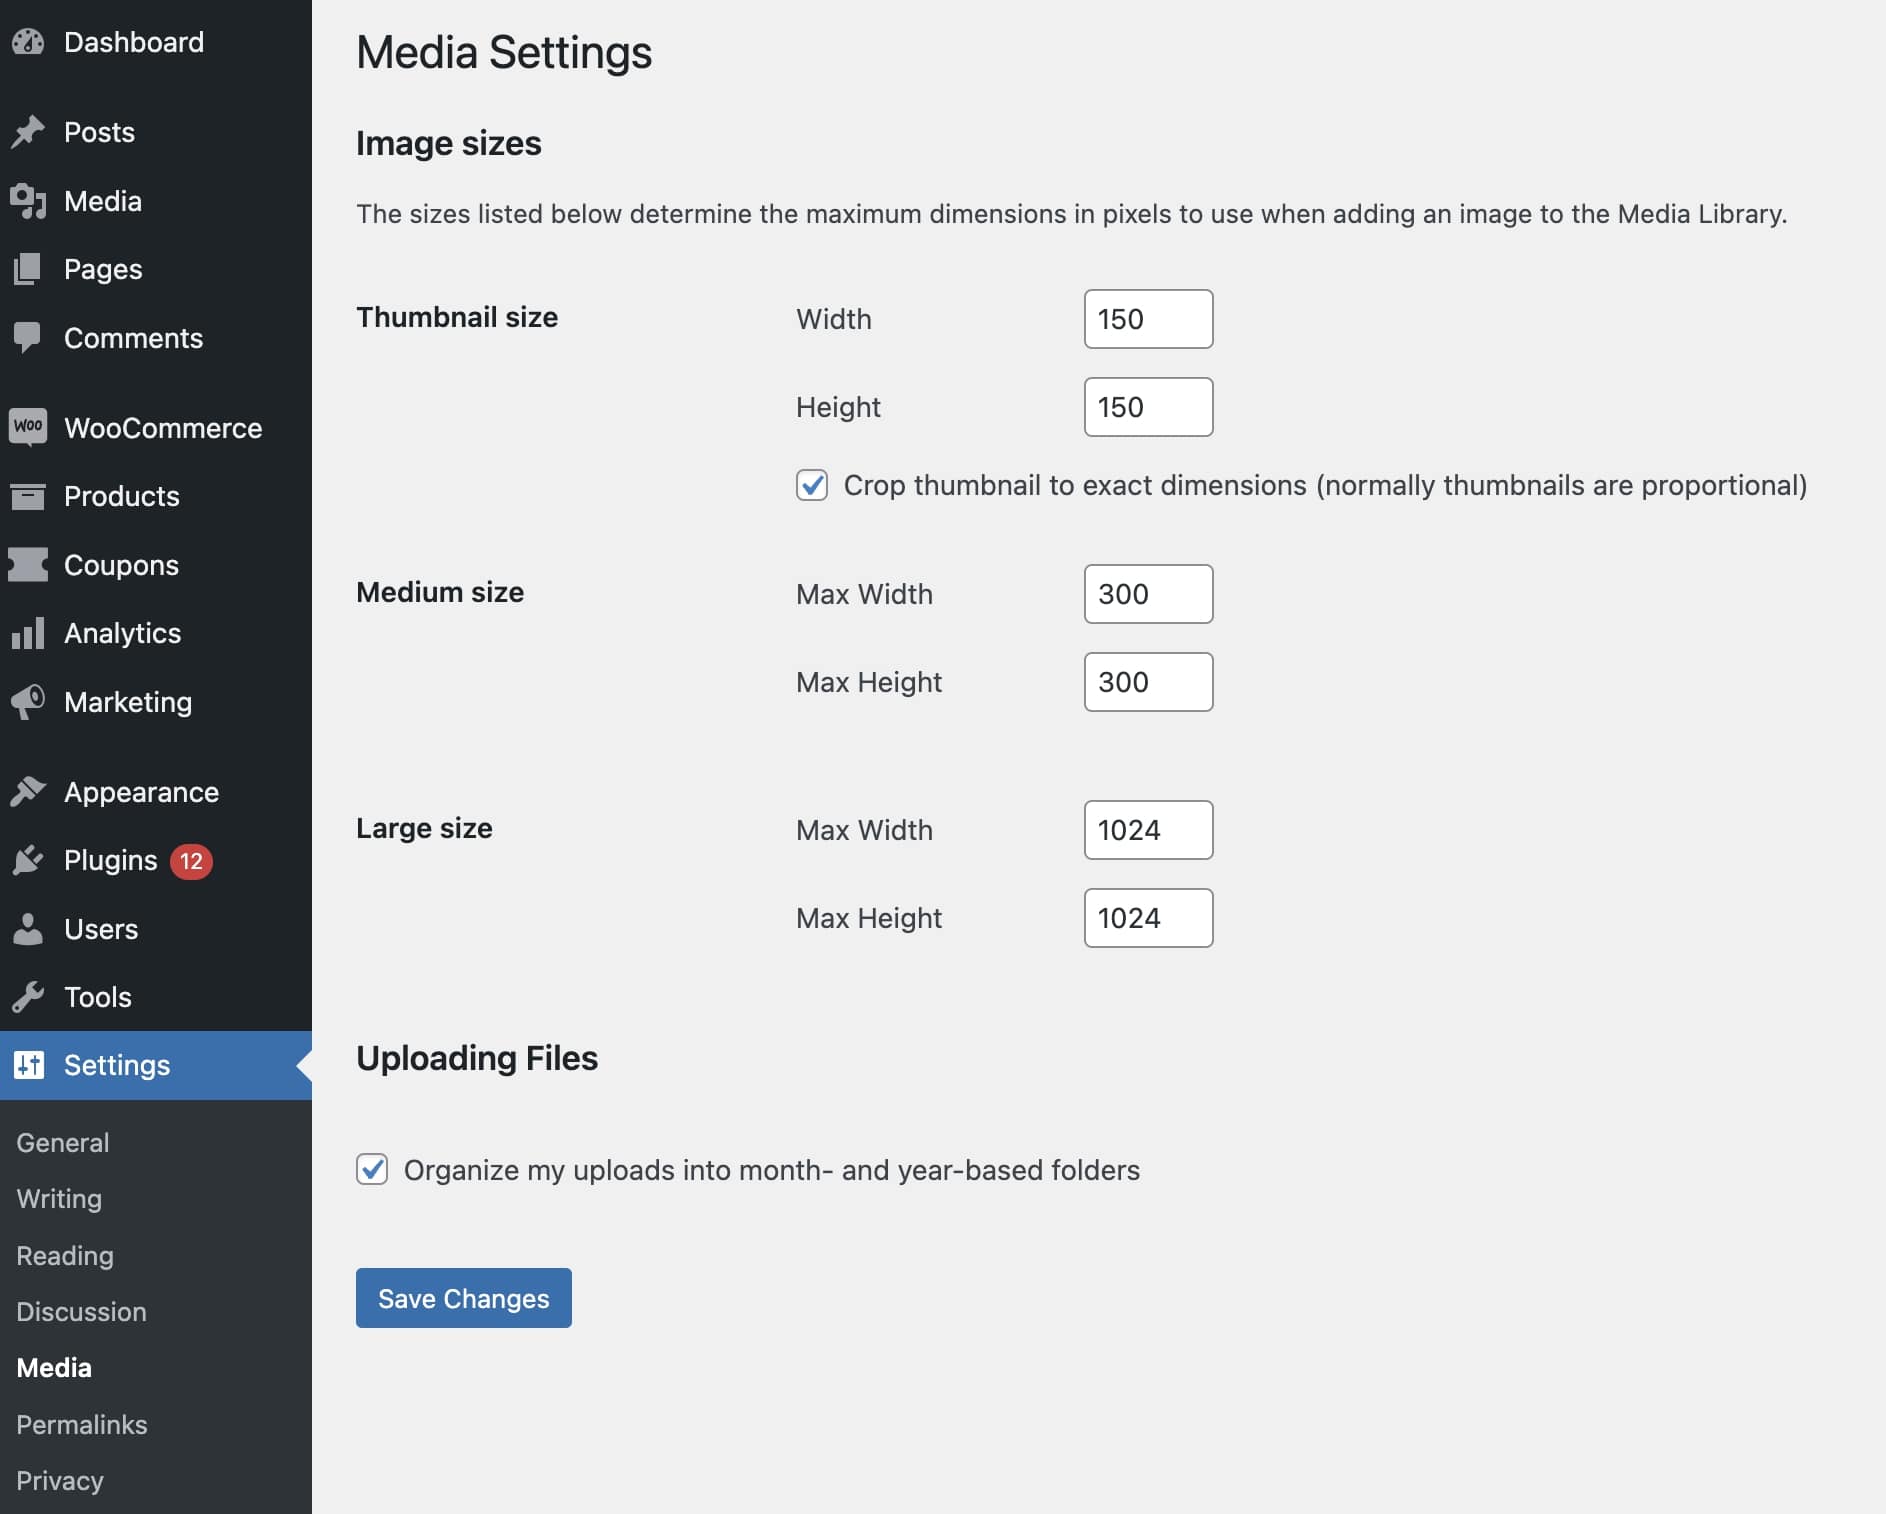
Here, you can update the width and height with new values. Once you save your changes, uploaded images will resize to these dimensions.

You can also add a custom featured image size. Before you do so, it’s a good idea to back up your website. After this step, you can add the following code to your functions.php file:

add_image_size( string $name, int $width, int $height, bool|array $crop = false )

Make sure to update these values with your new featured image sizes. Here’s an example of how this might look:

add_image_size( 'post-thumbnail size', 800, 1500 );

Next, you’ll need to display the new size within your theme. In your theme template file, update the_post_thumbnail() function:

if ( has_post_thumbnail() ) {
the_post_thumbnail( 'your-custom-size' );
}

Once you save the file, you’ll have a new custom-featured image!

Get Content Delivered Straight to Your Inbox

Subscribe to our blog and receive great content just like this delivered straight to your inbox.

How to Set a Featured Image in WordPress

To set a featured image, open your WordPress dashboard and create a new post. Then, in the right-hand sidebar, look for the Featured Image section:

Add WordPress featured image

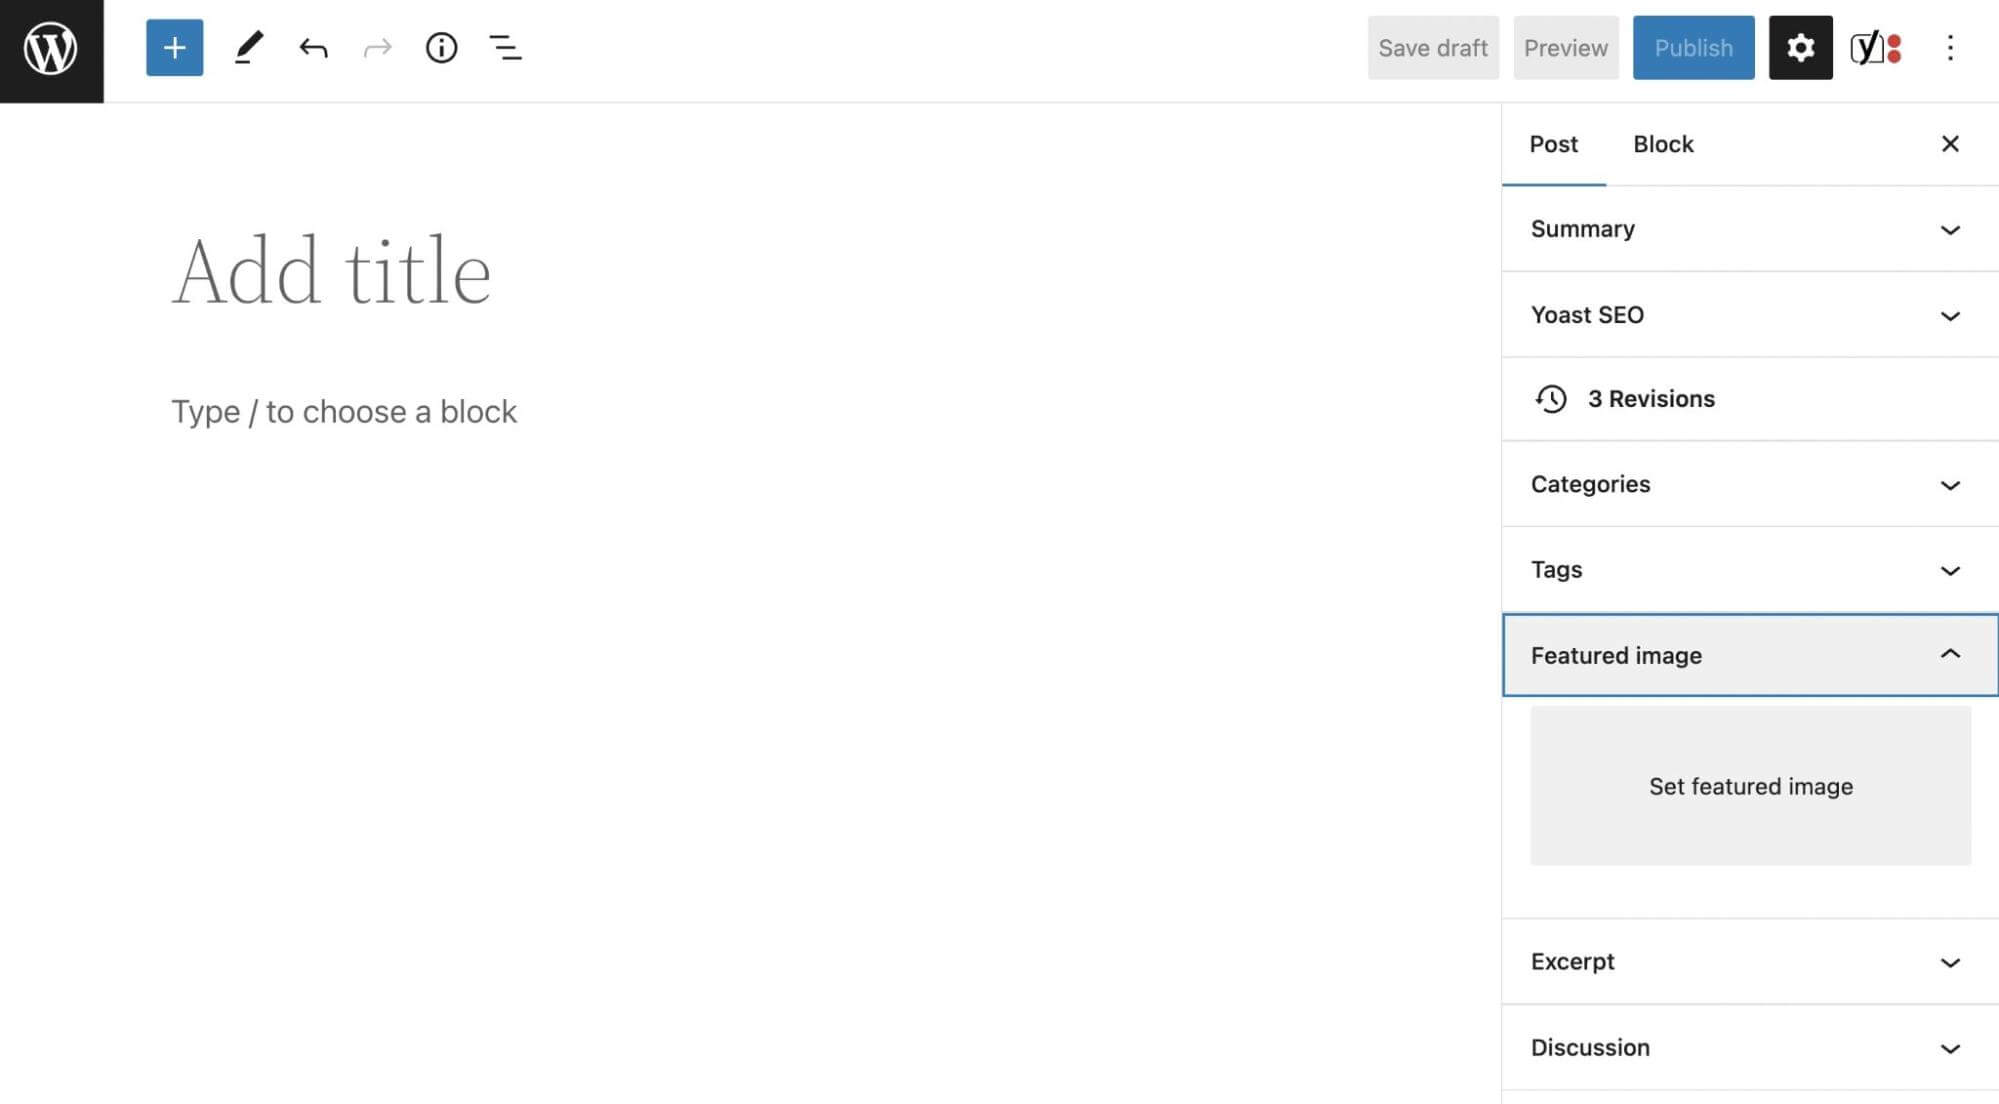
Here, click on Set Featured Image. This will open a pop-up where you can upload your media file. Alternatively, you can select an image from your Media Library:

Select featured image

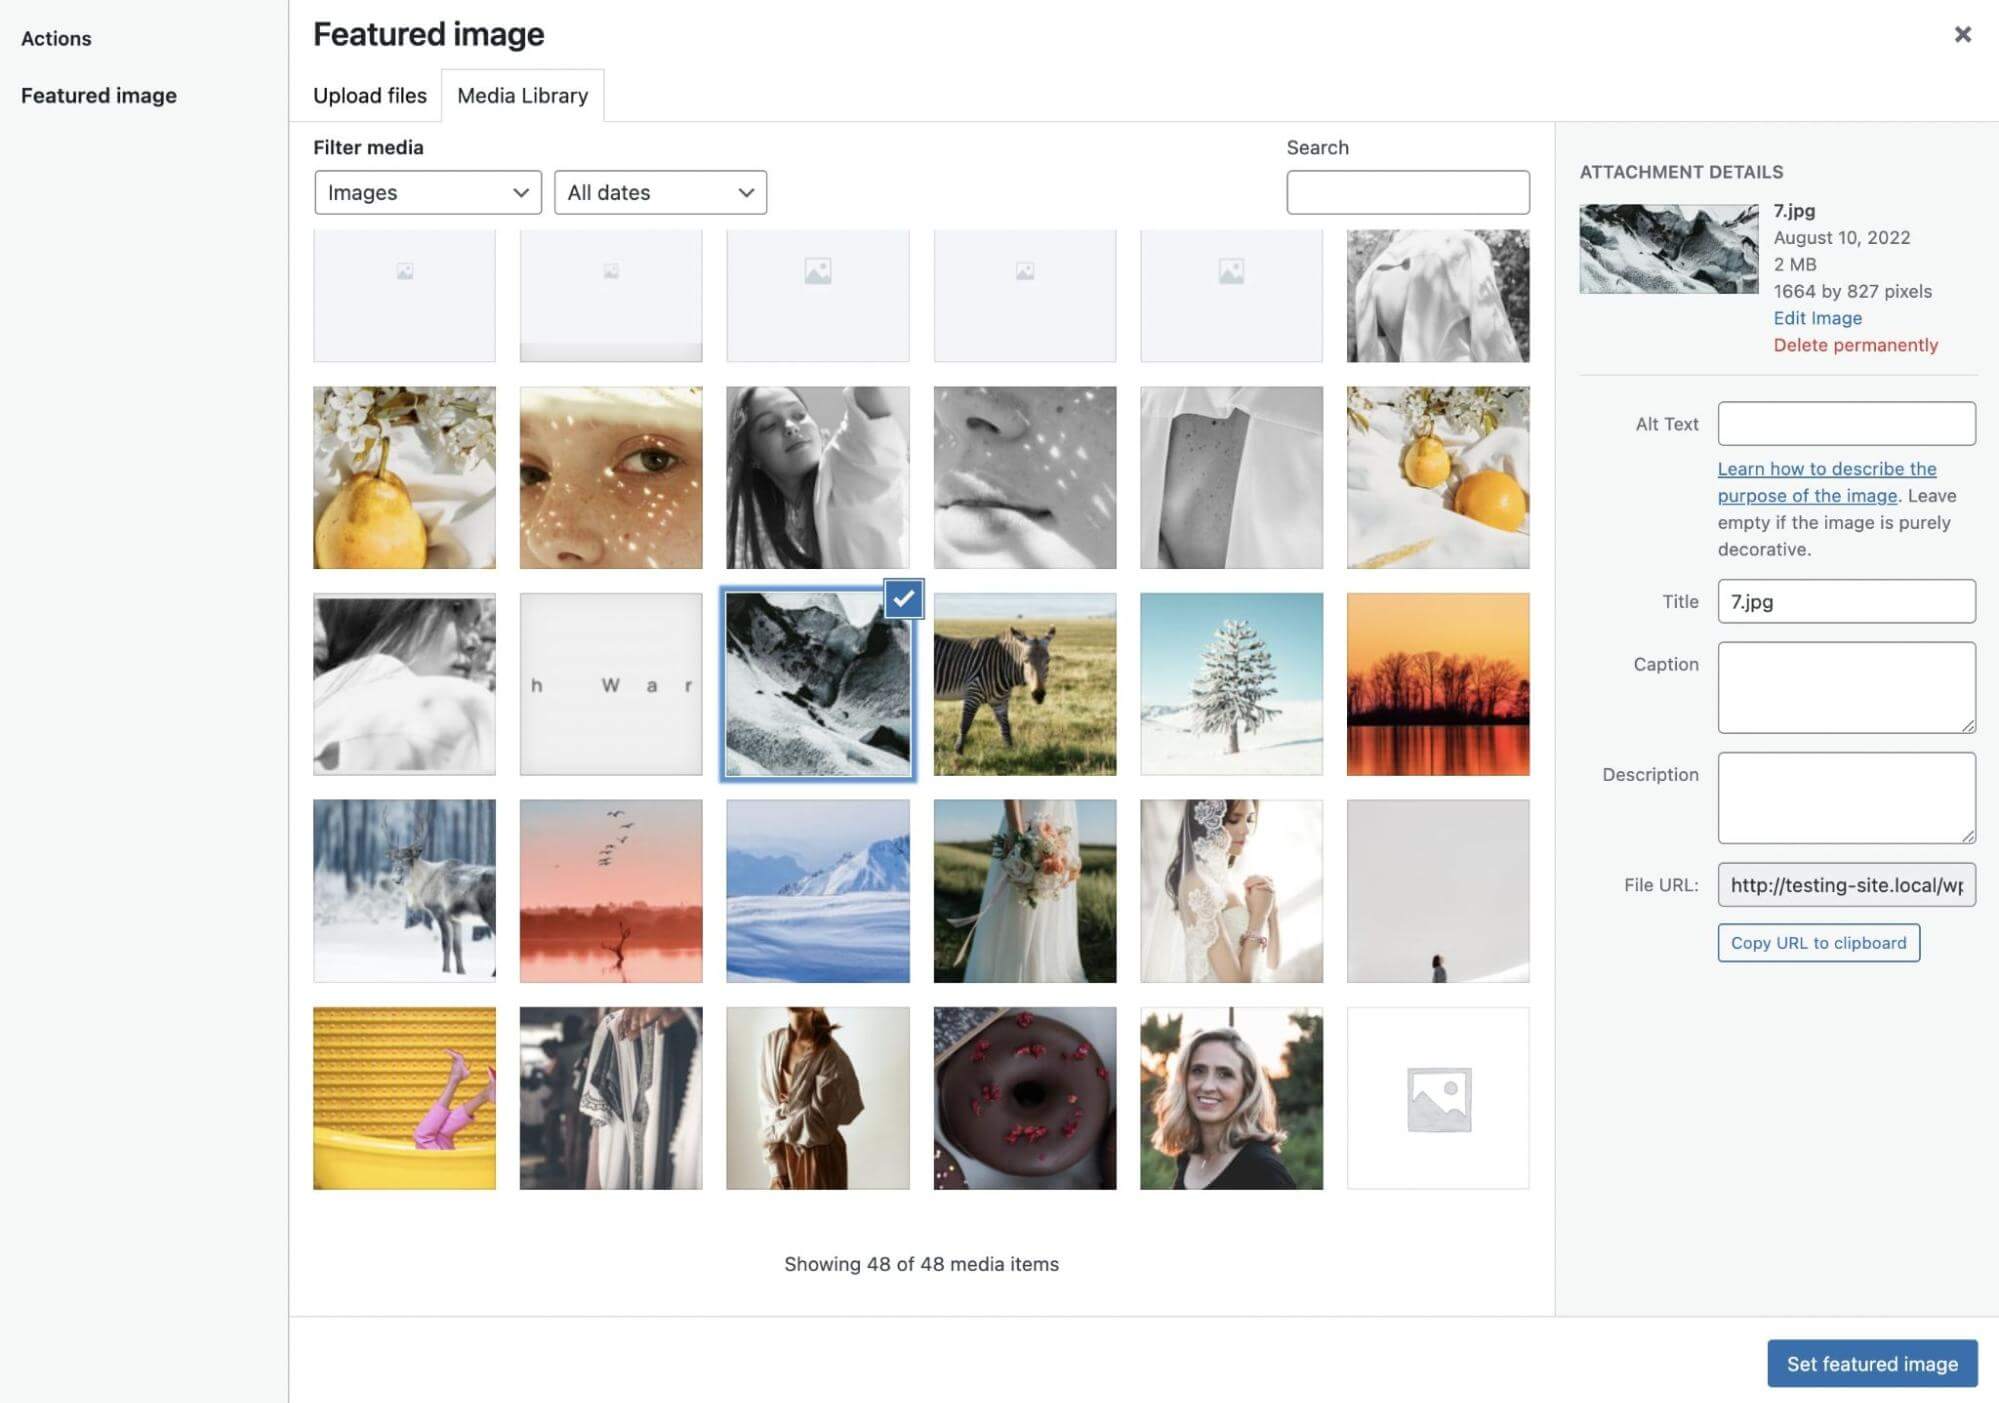
If you need to adjust the size, find the Edit Image button. Then, use the various editing options to scale, crop, rotate, or flip the image as needed:

Edit featured image

When you’re done, hit Set featured image. You’ll now see a preview of the image while you create the post:

New WordPress featured image

Before you publish the post, you’ll want to preview it to ensure the featured image is showing. Remember that your theme may require more specific dimensions to work correctly. You can refer to your theme’s documentation if you experience difficulties during this process.

Additionally, you can install a few plugins to make this process easier. For example, Auto Featured Image will automatically use the first photo in your post as the featured image. You can also use Default featured image to select a picture that will be used as a featured image in case you forget to add one to a post.

How to Create the Perfect WordPress Featured Image (6 Tips)

Featured images can turn your website into an engaging, media-rich experience. Let’s discuss some best practices for creating them!

1. Be Relevant and Consistent

When used correctly, featured images can enhance your blog posts and make them more attractive to visitors, but there are a few things you’ll need to keep in mind.

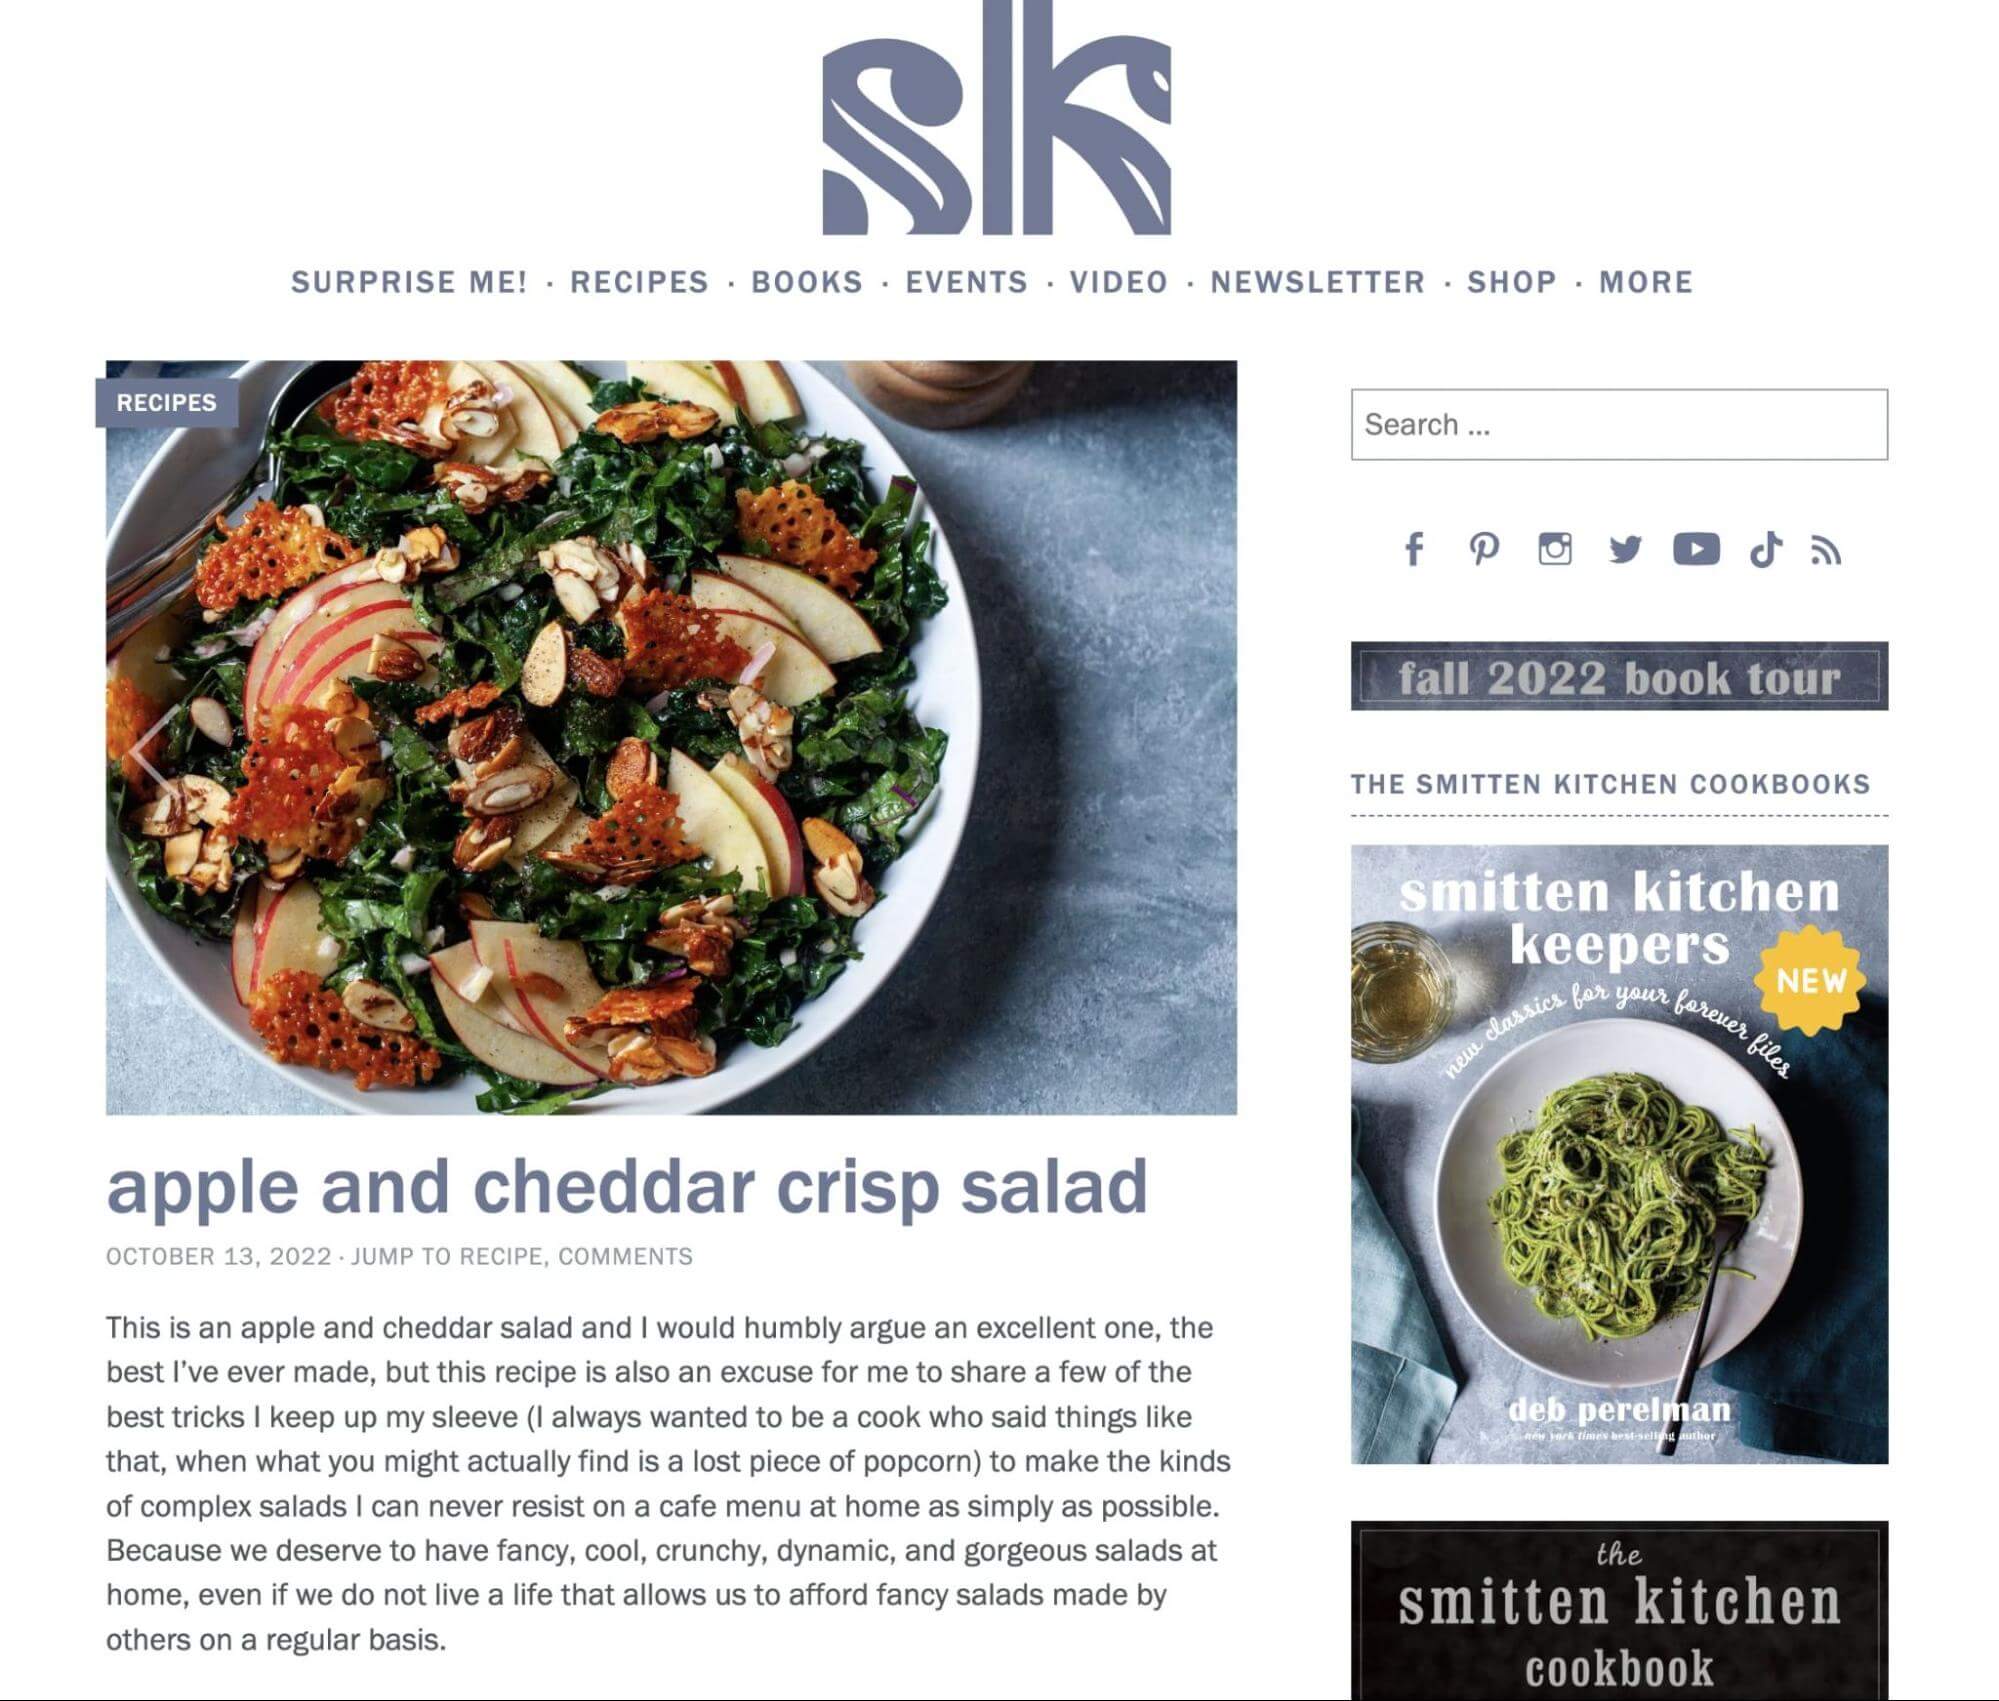
First, you’ll want to avoid using random images. A featured image should serve as an introduction to a post, so it needs to be relevant to the content.

For example, if you run a food blog, you probably publish posts with new recipes. In this case, your featured image can be a photo of the finished meal:

Relevant featured image

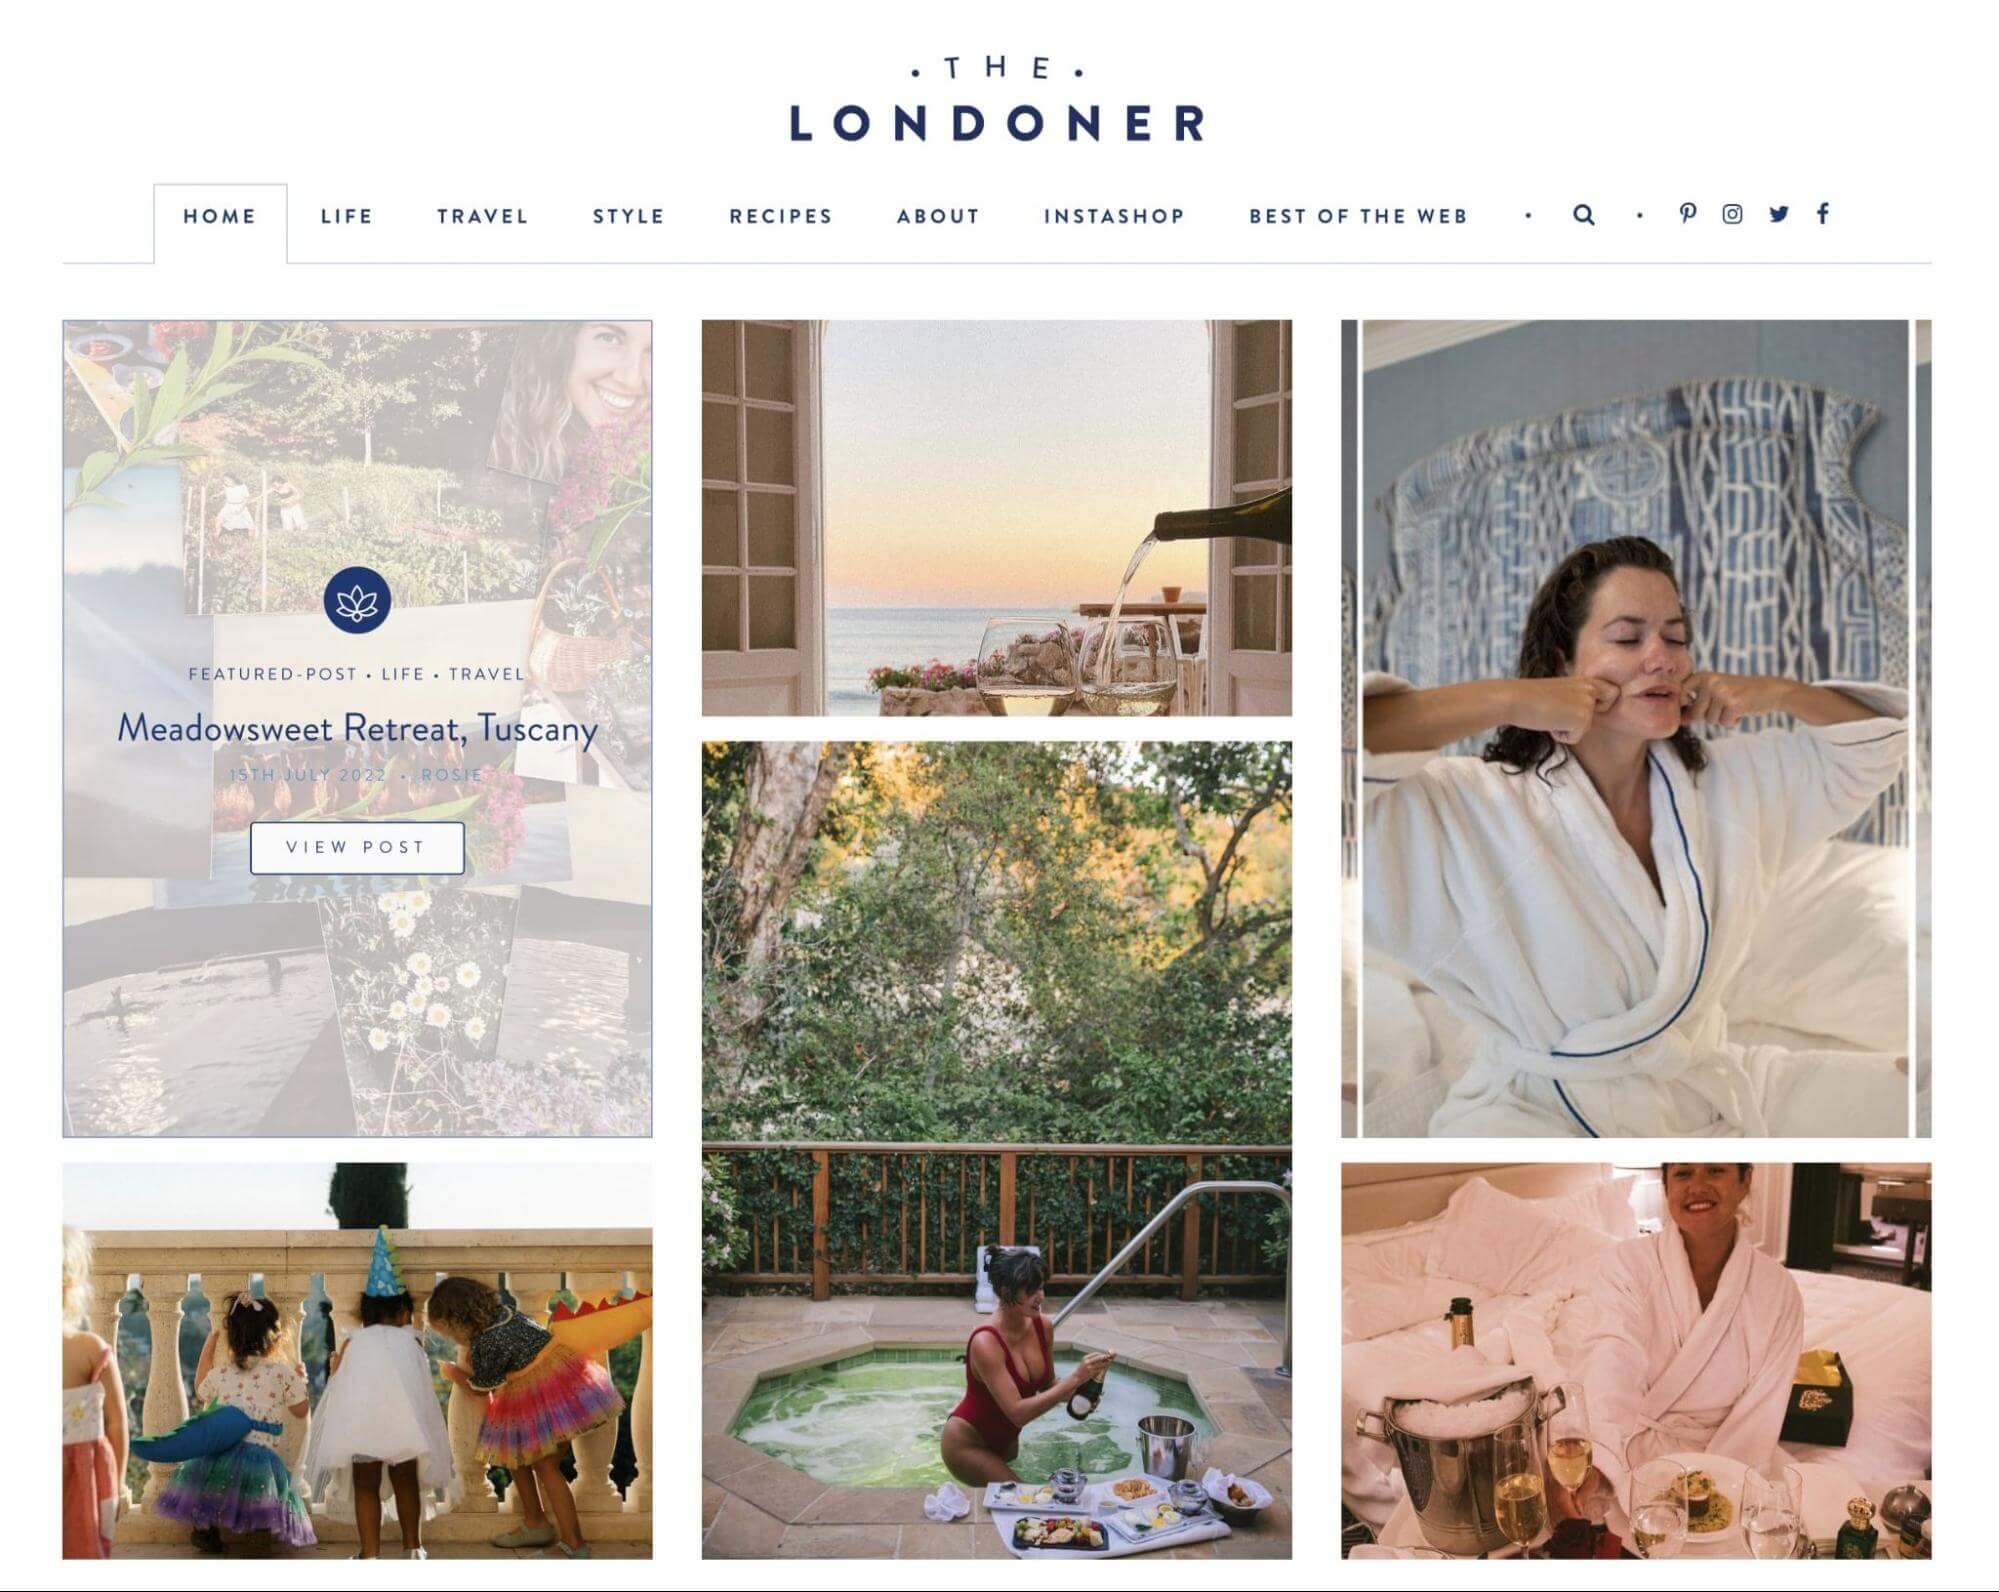
It’s also good practice to keep your featured images consistent throughout your entire website. Since these will be displayed on your homepage, archive, and blog, you’ll want photos that align with your web design:

Consistent featured images

To find the right featured image, consider your current WordPress theme and layout. Then, select a high-resolution image that can be easily scaled down. After you finish creating the post, make sure to preview it to evaluate how well the image fits into your website.

2. Avoid Using Copyrighted Images

As you’re browsing images on the Internet, you may stumble across a photo that would look great as a featured image. However, before you upload it to your WordPress site, you’ll need to ensure that it isn’t copyrighted to avoid legal issues.

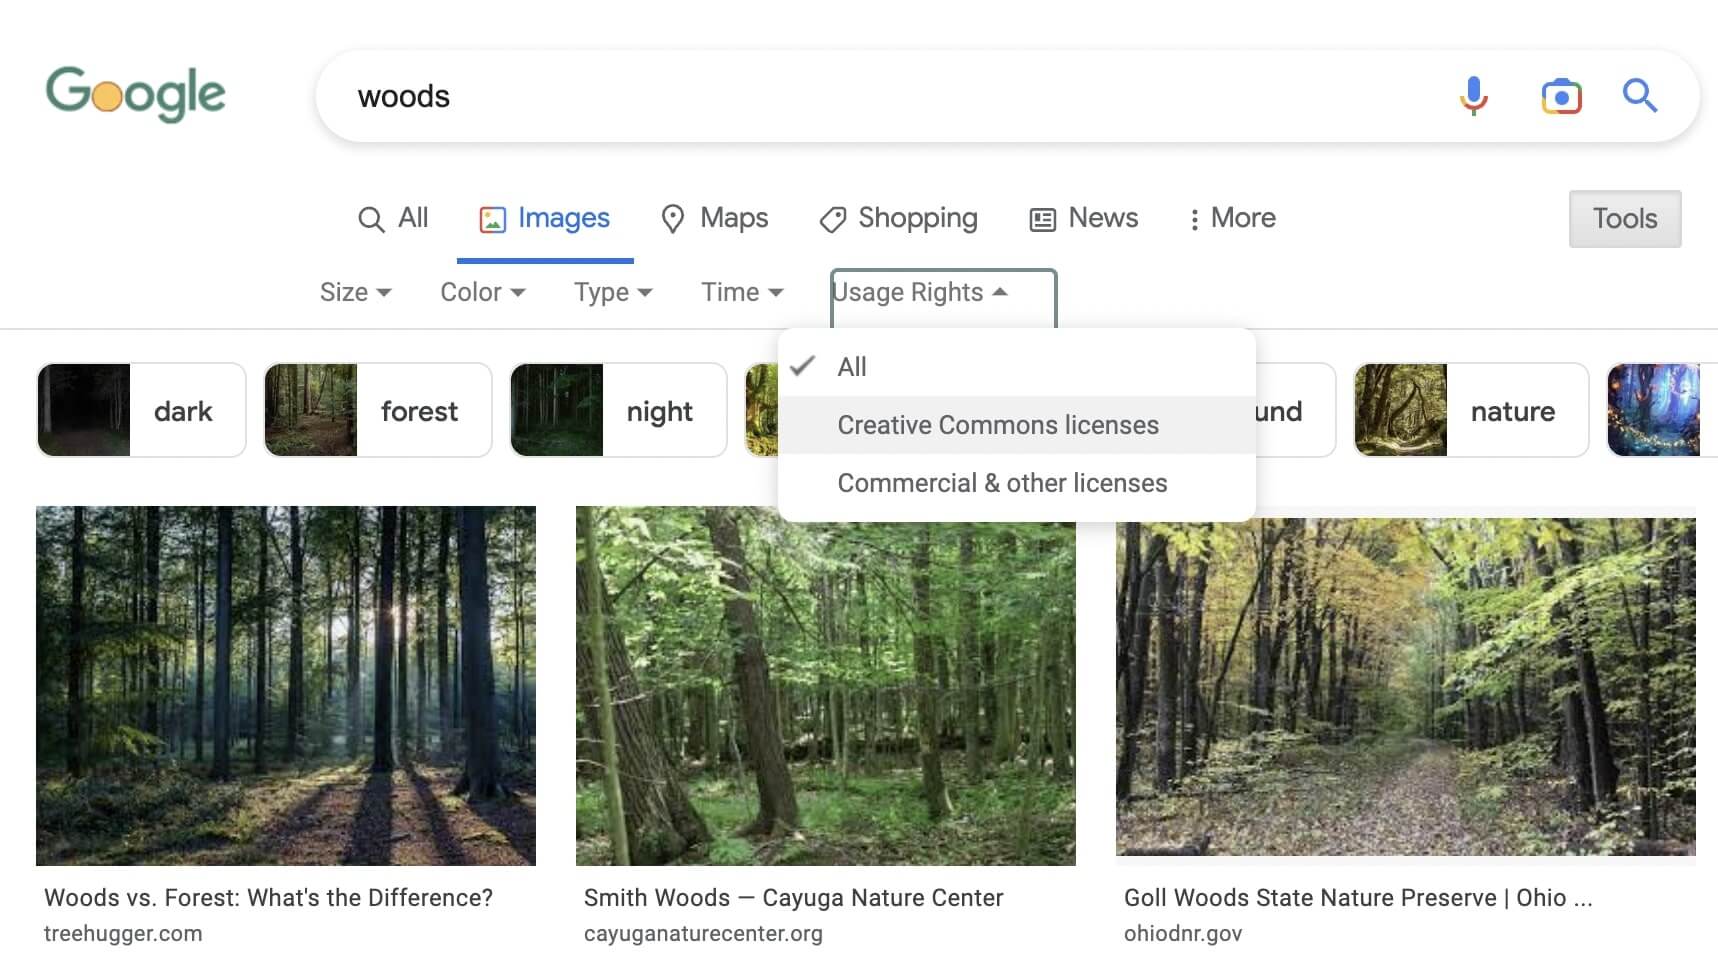
When sourcing images, you can typically use anything under a Creative Commons license. These will be free to download and use on your website, except if they’re for commercial purposes.

To find Creative Commons images, open Google Images. Then, click on Tools > Usage Rights > Creative Commons licenses. Once you refine your search, you’ll get a wealth of free images to choose from:

Creative commons images

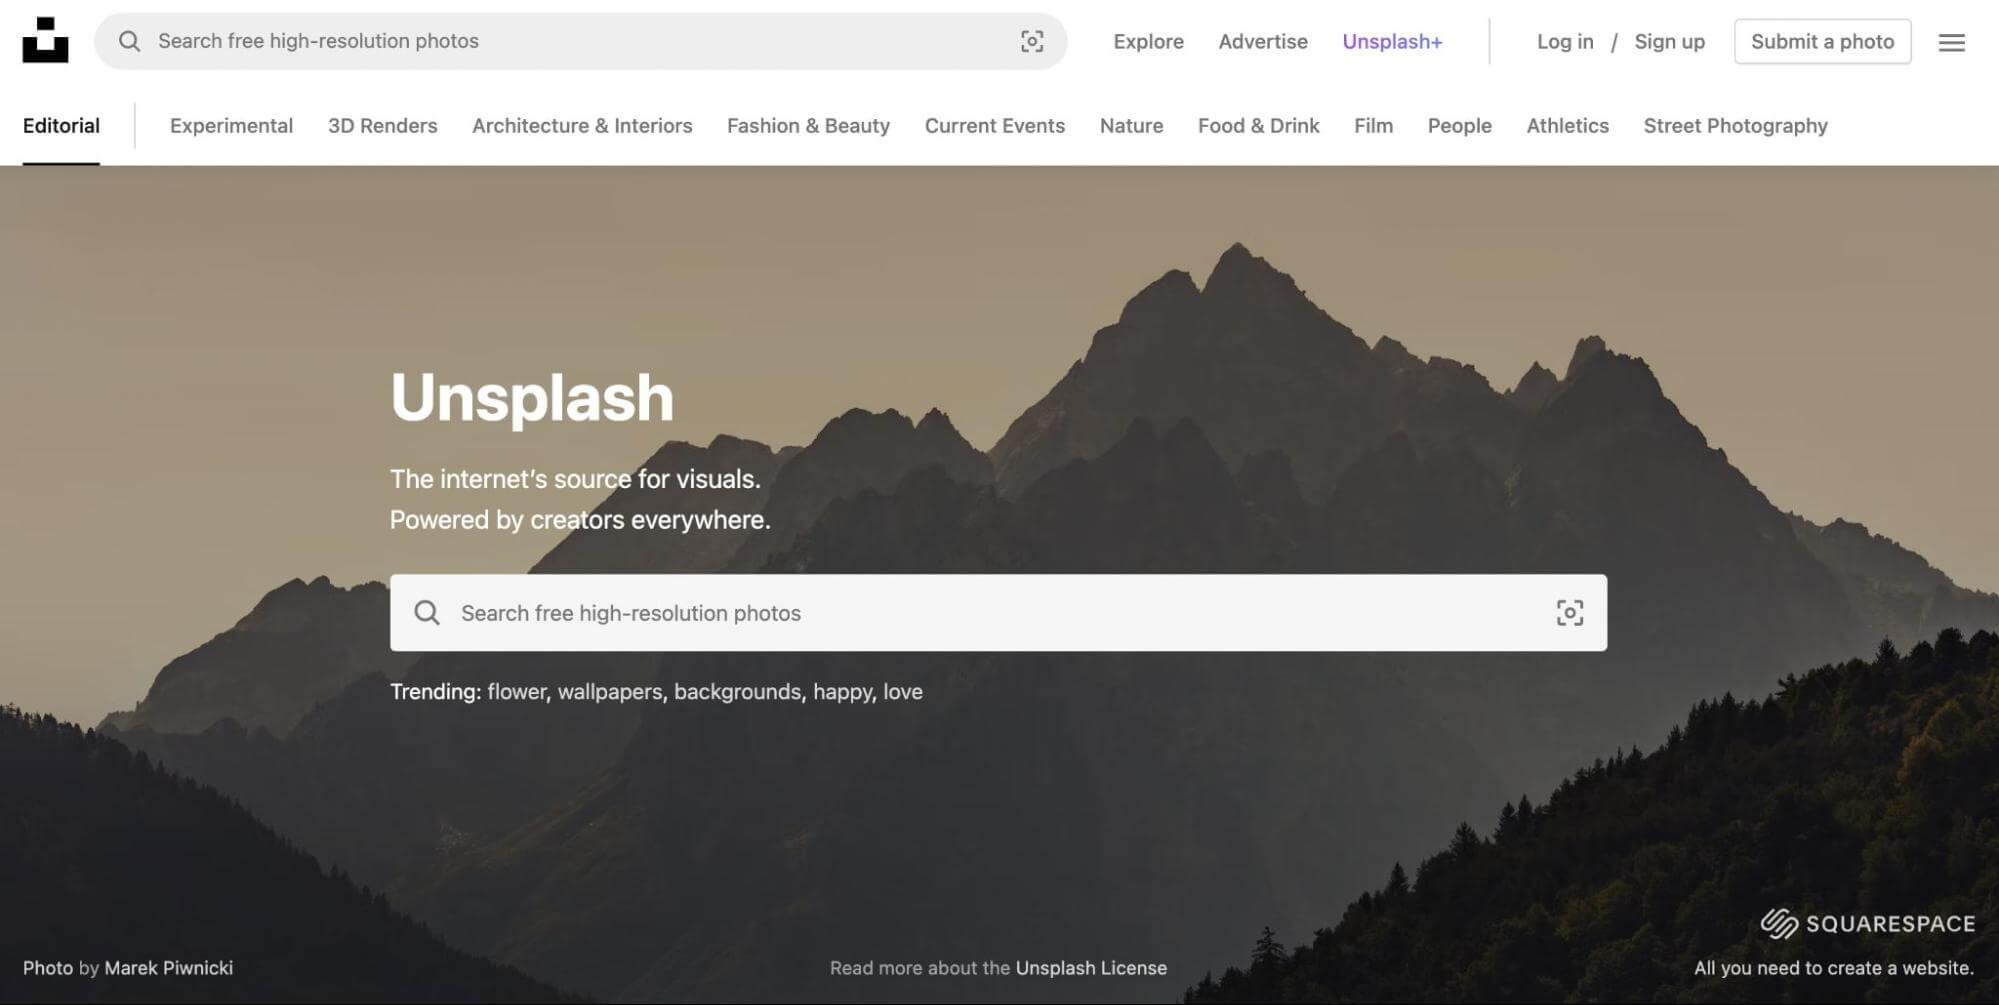
There are also entire websites with these stock images. On a platform like Unsplash, you can download high-resolution photos that are free from copyright claims:

Unsplash website

Another alternative is to make your own featured images. By taking photos yourself or creating graphics in Canva, you can ensure that you avoid any copyright violations. Plus, these will be completely original!

3. Optimize Featured Images to Reduce File Size

If you publish posts on a regular basis, featured images will start taking up a lot of space in your Media Library. If they aren’t optimized properly, these photos could negatively affect your site performance.

Essentially, optimizing your images involves reducing their file sizes. By compressing your featured images, you can minimize your loading time.

If you don’t do this, you could end up with a poor Core Web Vitals score. Images might take too long to render, and you’ll see performance issues in your PageSpeed Insights reports:

Failed Core Web Vitals report


Fortunately, there’s an easy solution for this common image issue. A plugin like TinyPNG can automatically compress images as you upload them:

TinyPNG plugin

Plus, you’ll even be able to compress all images that you’ve already uploaded to your website. TinyPNG lets you bulk optimize any JPEG, PNG, or WebP images in your Media Library.

4. Regenerate Old Thumbnails

When you upload images to WordPress, it will resize them according to the pixel guidelines in your settings. Once you set new default sizes, your previously uploaded images will still have the outdated sizing.

If you want to resize your featured images, you can manually reupload them. However, this will take some time.

To solve this problem, you can install a WordPress plugin like reGenerate Thumbnails Advanced. This tool can regenerate the thumbnails for each of the images in your Media Library:

Regenerate Thumbnails Advanced plugin

After you install and activate the plugin, go to Tools > Regenerate Thumbnails. Under Regenerate Options, select the box next to Regenerate only Featured Images:

Regenerate featured images

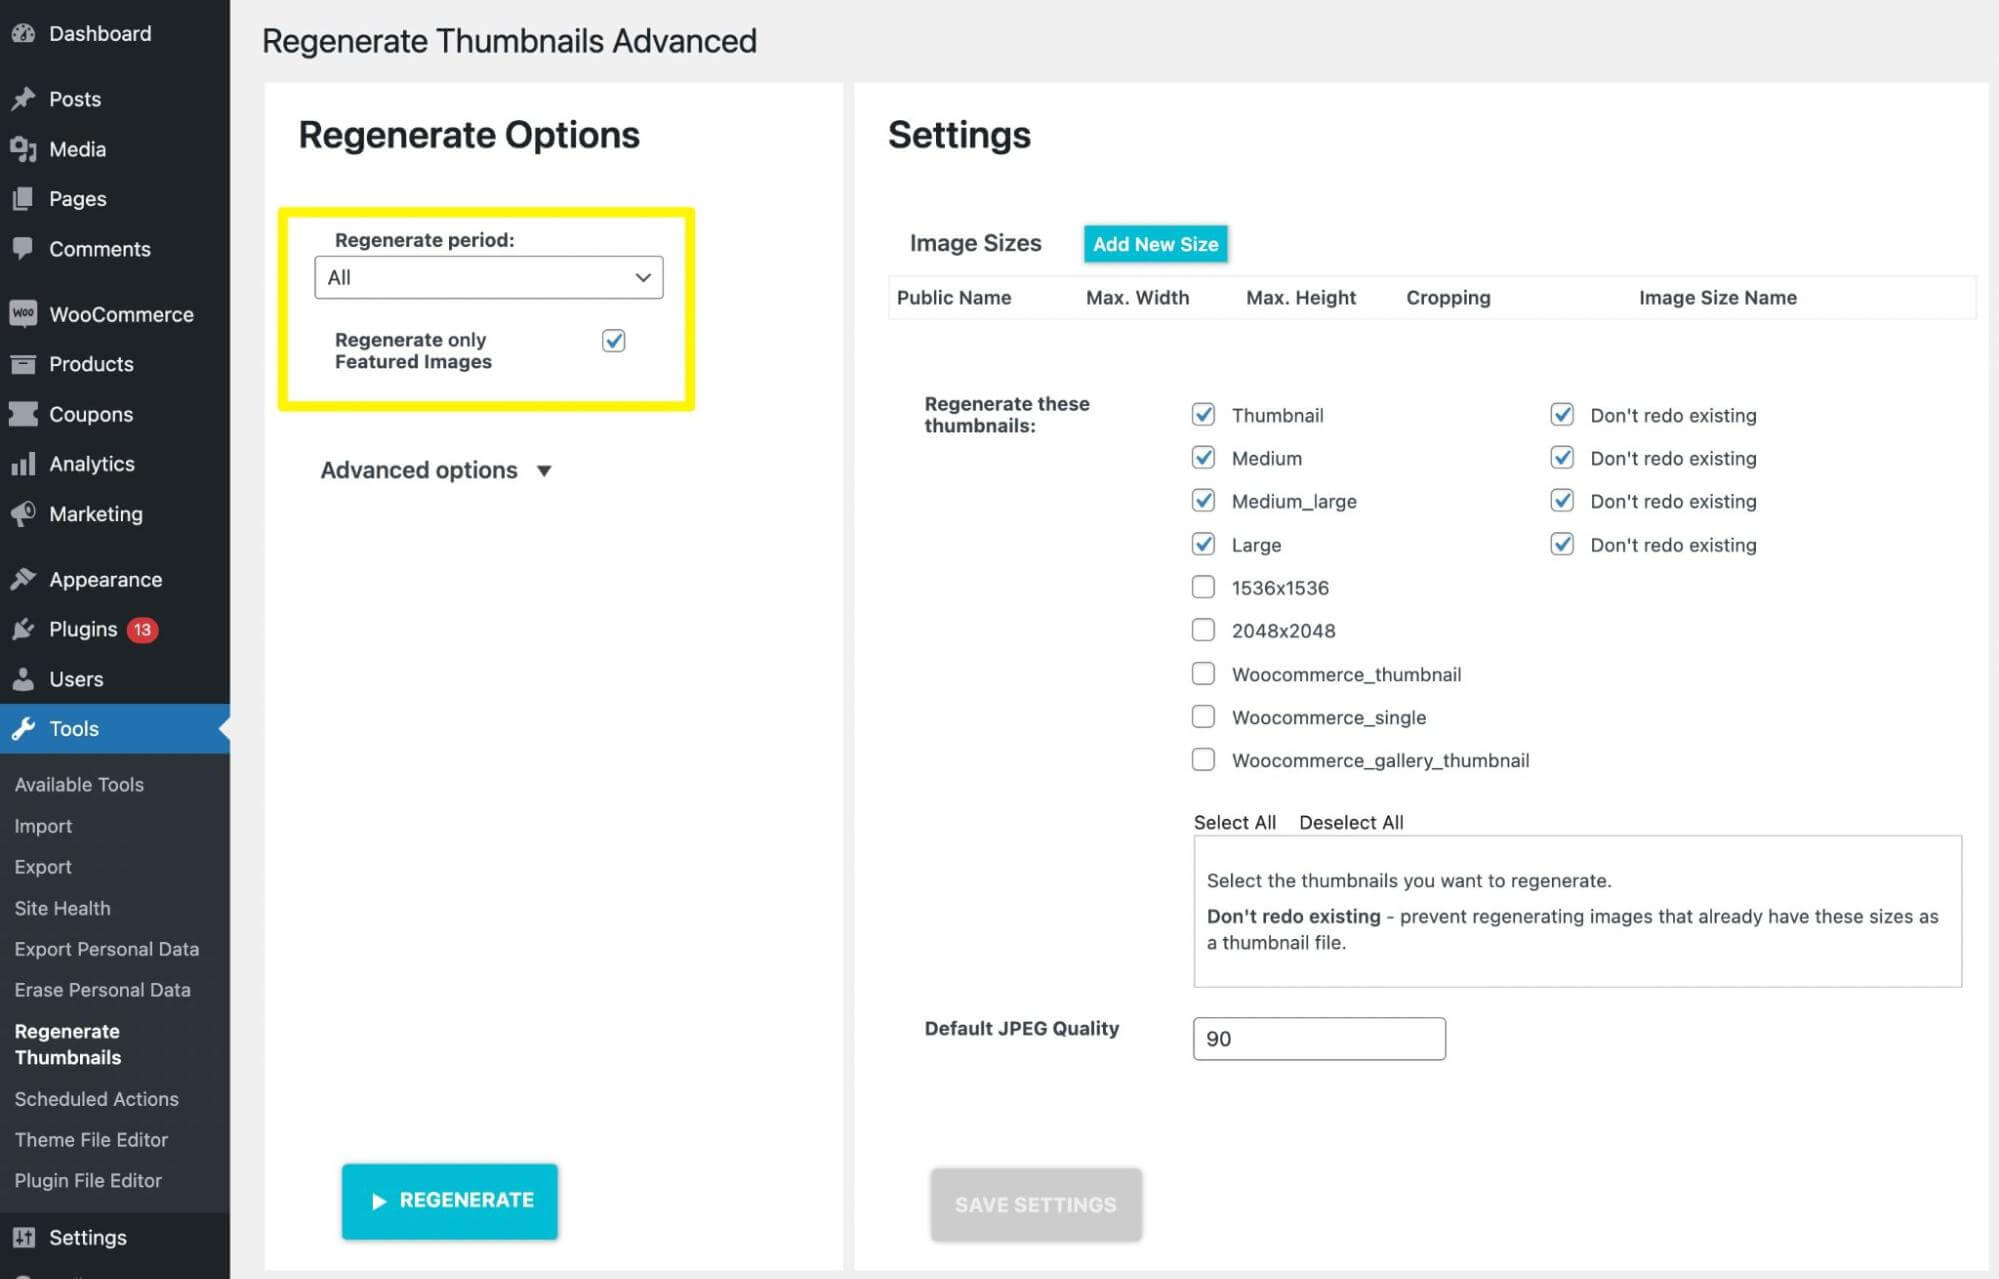
Finally, hit Regenerate. This will automatically update all your featured images with the correct sizing.

5. Optimize Images for Search Engines

As a website owner, you probably already know how vitally important Search Engine Optimization (SEO) is. If you want to avoid paying for expensive advertising methods, you’ll want to rise to the top of search results by optimizing your content. This can help you bring in more organic traffic.

Having featured images can help you improve your site’s SEO. By simply tweaking a few elements, you can make your images more appealing to search engines and users.

First, you’ll want to make sure to add alt text. This will describe the featured image to search engines and screen readers. For instance, you could write “Orange and white cat standing in a pumpkin patch”:

Featured image alt text

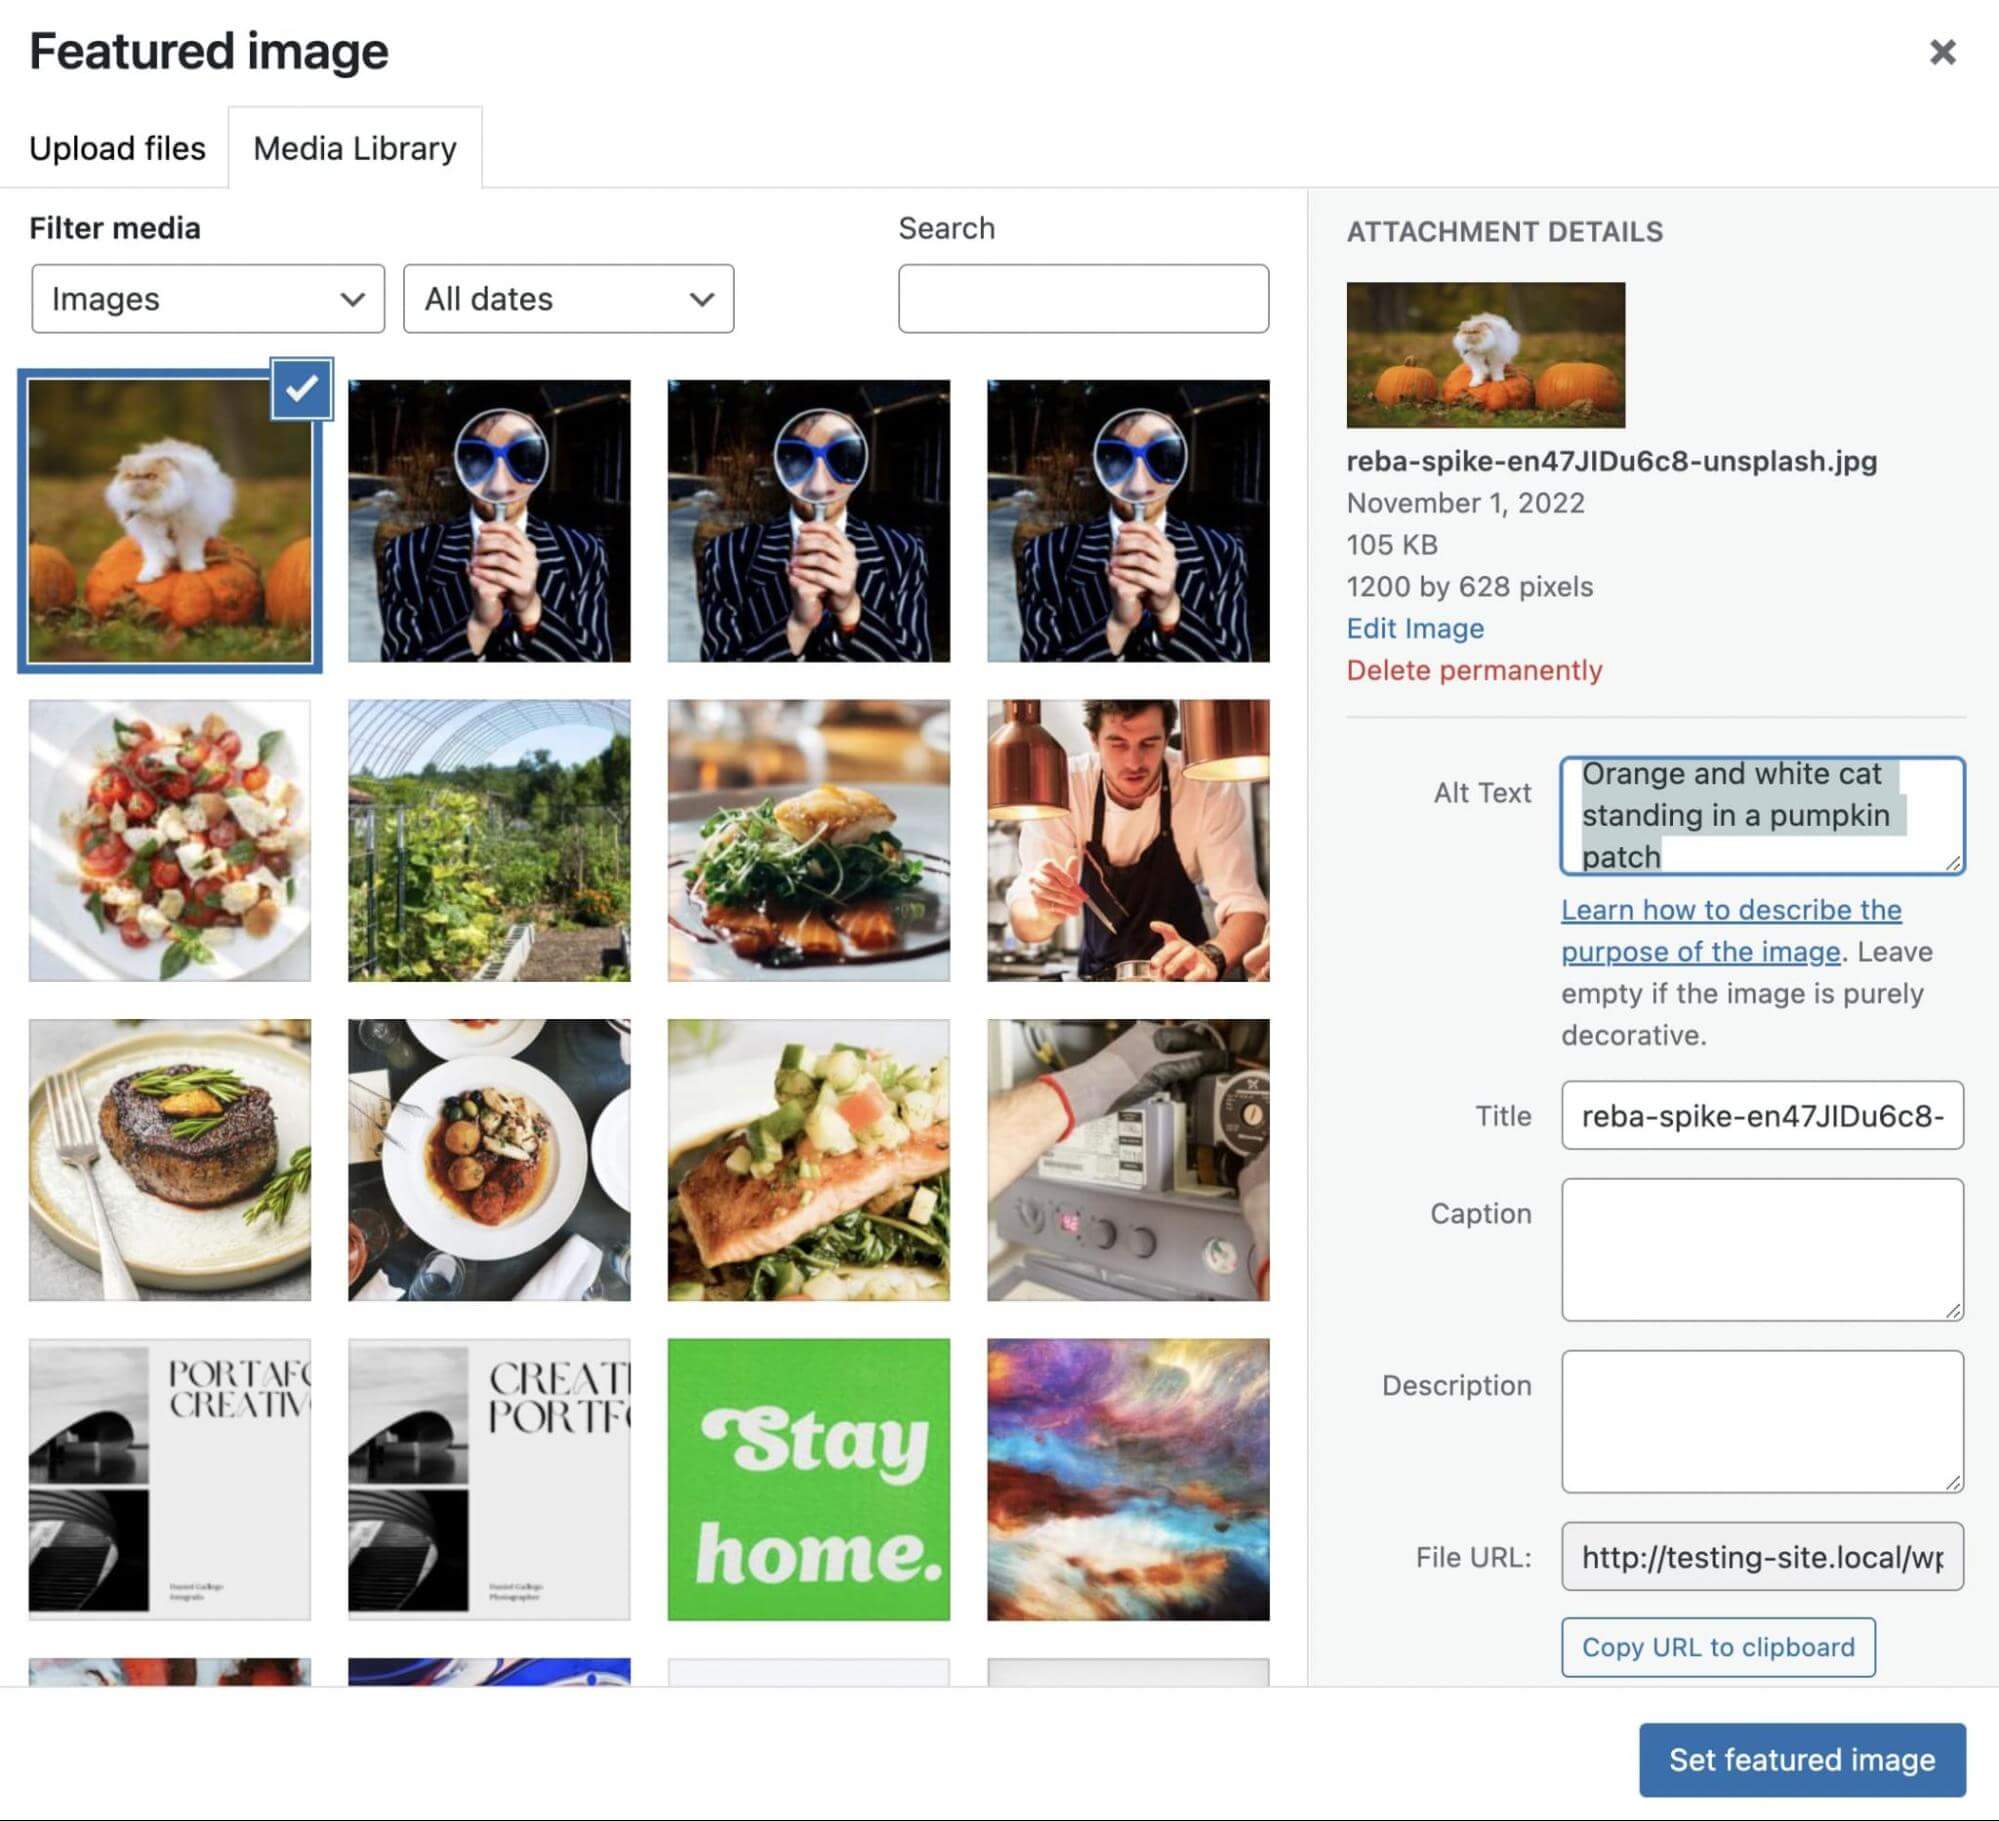
Remember to include the post’s keyword in the alt text. This way, Google can understand what the post is about and rank it higher for related queries. Similarly, you can include these target keywords in the title, caption, and description for the featured image.

6. Enhance Social Post Thumbnails

Social media can be the perfect platform for promoting your blog posts. Before you encourage social sharing, it’s crucial to optimize your featured images for these platforms.

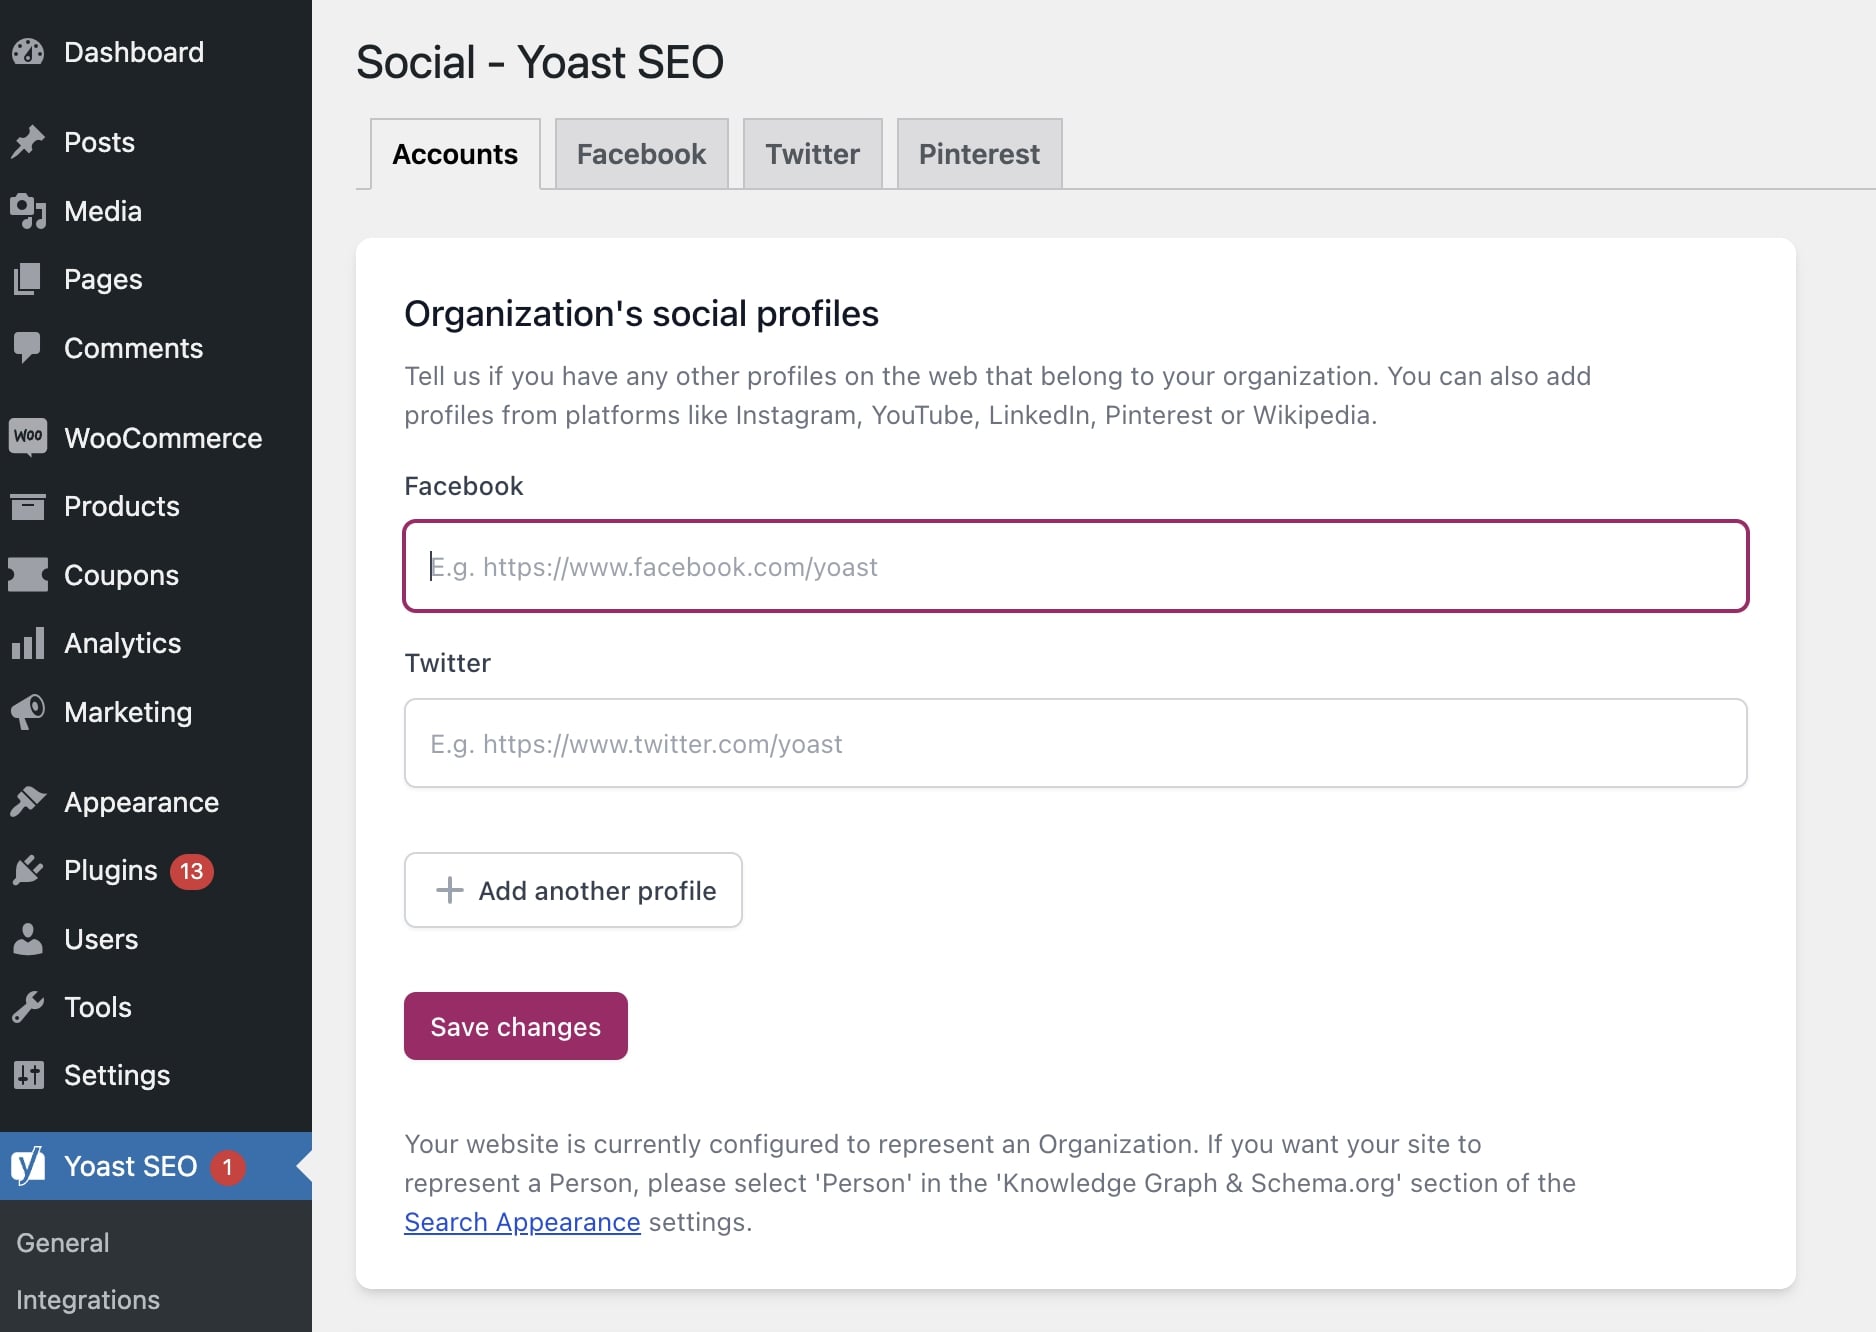
You can easily customize your social media links using a plugin like Yoast SEO. For example, the premium version enables you to see previews of your Twitter and Facebook thumbnails.

To get started, install and activate Yoast SEO. Next, find Yoast SEO > Social. On this page, fill out the URLs for your various social media pages:

Add social media accounts

Then, open a new post and scroll down to the Yoast SEO settings. In the Social tab, you can click on Select image to upload your featured image.

Featured image for social posts

You can also add a title and description for each social media platform. This will give visitors a taste of your content. Once you publish the post on social media, it will have a featured image and snippet that conveys precisely what the article is about.

Use Featured Images Effectively

Featured images can help make your posts stand out. Whether people are browsing your content on social media or your website, they can look at the featured image to see what the post is about before they start reading it.

To review, here’s how you can create the perfect WordPress featured image:

  1. Be relevant and consistent.
  2. Find copyright-free images on platforms like Unsplash.
  3. Compress featured images with TinyPNG.
  4. Regenerate old thumbnails with reGenerate Thumbnails Advanced.
  5. Optimize images for search engines using keyword-focused alt text.
  6. Enhance social post thumbnails with Yoast SEO’s social settings.

When you create your own featured images, you can build an original website without facing copyright issues. At DreamHost, our custom website design services can help you use the right images on your site.

DreamHost Makes Web Design Easy

Our designers can create a gorgeous website from SCRATCH to perfectly match your brand and vision — all coded with WordPress so you can manage your content going forward.

custom website design

The post How to Create the Perfect WordPress Featured Image (Sizing & Design Guide) appeared first on Website Guides, Tips & Knowledge.


source https://www.dreamhost.com/blog/create-wordpress-featured-image/

Monday, 12 December 2022

Why It’s a Good Idea to Change Your WordPress Login URL (& How to Do It)

A strong, unique password can help prevent unauthorized access to your WordPress website. However, attackers have clever ways of getting around this. Therefore, it isn’t always enough to properly protect your site against attacks.

Fortunately, you can reduce the risk of hackers getting into your site by moving your WordPress login page to a new URL. This can put you in a better position to defend against hacks and brute-force attacks.

This article will take a closer look at why you should consider changing your WordPress login URL. Then, we’ll show you how to find your login URL and modify it using two different methods. Let’s get started!

Why It’s a Good Idea to Change Your WordPress Login URL

Since WordPress doesn’t hide your login page, any user can find it as long as they know how WordPress structures its URLs. The default structure for a login page looks something like this:

https://example.com/wp-login.php

This means when a user plugs in your website name into the URL structure above, they should see a page in their browser prompting them to log in to the back end of your website:

WordPress login page

Of course, users will lack the credentials to gain access to your site.

For simplicity’s sake, many people prefer to stick with this default wp-login structure for signing into WordPress. However, by leaving this as it is, you’re actually handing over half of your login credentials to attackers.

This is especially risky if your password is common, weak, and easy to guess. In a nutshell, this is an unnecessary vulnerability that’s easy to resolve.

You can secure your login page more thoroughly by changing your WordPress login URL. As a result, you can prevent unauthorized access to your site and reduce the risk of brute-force attacks.

How to Find Your WordPress Login URL

As we mentioned in the previous section, WordPress uses a standard sign-in link structure that looks something like this:

https://example.com/wp-login.php

So, all you have to do is add the suffix to your domain, and you should land on your login page. You can also find your login page by trying to access your WordPress dashboard while logged out. Simply enter “yourwebsite.com/wp-admin” into the search bar and you’ll land on the same login page.

However, keep in mind that some web hosts change your WordPress login page automatically for security reasons. Therefore, you might already have a custom login URL. We’ll show you how to find this in the next section.

How to Find a Custom WordPress Login URL

If your web host has changed your login URL, you can usually retrieve it from an email or locate it within your control panel. Some hosts even include one-click access links to the WordPress admin dashboard, which can be useful.

However, if you can’t identify your custom login URL using one of those options, you can locate it manually. All you’ll need to do is connect to your site using SFTP.

You can use a client like FileZilla. Keep in mind that you’ll need your FTP credentials, which you can get from your web host. Then, open the root folder that contains the login link. This folder is usually labeled public_html:

Website root folder in File Manager

Find and open the wp-login.php file, keeping an eye out for the string that reads site_url. This will lead to a line of code that specifies your custom login URL.

How to Change Your WordPress Login URL (2 Ways)

Now that you know where to find your WordPress login URL let’s take a look at two easy ways you can change it.

Method 1: Change Your WordPress Login URL with a Plugin

The easiest way to change your WordPress login URL is by using a plugin. Luckily, there are plenty of plugins available that can enable this functionality.

WPS Hide Login is a great option since it’s lightweight. It allows you to safely change your WordPress admin login page to anything you want:

WPS Hide Login plugin

Better yet, WPS Hide Login also prevents all logged-out users access to the wp-admin directory and wp-login.php.

To get started, you’ll need to install and activate the plugin. Then, head to Settings > WPS Hide Login:

Configure the WPS Hide Login plugin on WordPress

Here, you can type in a new login URL and hit Save Changes. It’s as simple as that. The plugin also has a pretty active support forum that you can check out if you need any help.

Bear in mind that once this plugin is active and you make your changes, you won’t have access to your old login screen. Instead, you’ll be directed to the new login you created.

Based on our example above, you would now need to enter “/login” after your domain to access your site. Additionally, keep in mind that your site will revert back to using wp-admin and wp-login.php if you deactivate the plugin.

Get Content Delivered Straight to Your Inbox

Subscribe to our blog and receive great content just like this delivered straight to your inbox.

Method 2: Change Your WordPress Login URL by Editing Your wp-login.php File

This second method is a little trickier and only suitable for experienced users. Therefore, before you get started with the following steps, it’s best to make a fresh backup of your site in case anything goes wrong.

It’s also important to know that your changes may revert to their previous settings when you update your theme. However, you can avoid this issue by using a child theme.

First, you’ll need to access your root folder, which you can do via your File Manager or using FTP. Again, you’re looking for the folder titled public_html:

Root folder of website

Inside the root folder, locate the wp-login.php folder. This is where the code that generates your site’s login page is kept:

The “wp-login.php” file

Once you’ve found the file, you can download a copy of it to your computer. Then, open the folder using a text editor like Sublime or Notepad++.

Ideally, it’s best to use an editor that provides a “search and replace” tool. This way, you can change all the existing WordPress login URL instances much more quickly.

If you have access to it, use the search tool to find every instance of the wp_login_url string:

The “wp-login.php” file

Then, change these strings to the new login URL that you’d like to use. Remember, you can keep it simple and straightforward so long as it’s original (and different from the default). For example, you might prefer something like access.php or wp-new-login. 

Once you’re happy with your changes, save and close the editor. Then, rename the file after the new URL that you chose (such as access.php).

Now, you can upload the new file to your root directory using your FTP client or File Manager. Simply select the modified login file from your computer. Then, register the new login file using the “login_url” filter hook. This enables you to use any page as your sign-in page as long as it contains a login form.

To do this, navigate to wp-content > themes to find your theme functions file. Select your active theme and open the functions.php file:

Finding the theme functions file

Now that you’re here, you can paste the following line of code into the file:

/*
*Change WP Login file URL using “login_url” filter hook
*https://developer.wordpress.org/reference/hooks/login_url/
*/
add_filter( ‘login_url’, ‘custom_login_url’, PHP_INT_MAX );
function custom_login_url( $login_url ) {
$login_url = site_url( ‘wp-your-new-login-file-name.php’, ‘login’ );
return $login_url;
}

Then remember to save your changes.

It’s important to test your new login before deleting the old file. To do this, simply type out your site’s domain with your new login URL added to the end. Then, if you see the WordPress login form, you can delete the original wp-login.php file. 

Other Ways to Secure Your WordPress Login Process

Changing your WordPress login URL is great for tightening up security on your site. However, it’s not all you can do. Here are some other ways to secure your WordPress login process.

1.  Limit Login Attempts

When you limit login attempts, you can stop hackers and bots that attempt to access your site by trying hundreds of usernames and passwords. This is especially important since brute force attacks are the second most common type of online threat.

The easiest way to do this is by using a plugin like Limit Login Attempts Reloaded:

Limit Login Attempts Reloaded plugin

This plugin gets to work as soon as it’s activated on your site. By default, users have four chances to log in before they get locked out of WordPress. However, you can visit the plugin’s settings to modify this:

Configure the Limit Login Attempts Reloaded plugin on WordPress

Here, you can also determine the length of time that users stay locked out. In your dashboard, you’ll see how many brute-force attacks have been blocked by the plugin. Plus, you can switch to the Logs tab to manually blocklist specific IP addresses.

Implement Two-Factor Authentication

Two-factor authentication requires users to submit more than just their standard login credentials. Instead, users are asked to generate a second key in real-time. This is often a code sent via SMS text message, email, or an app:

An example of two-factor authentication

Since bots and hackers are unable to produce the second key, this is a great way to prevent unauthorized access to your site. One of the best ways to add this functionality to your site is by using a plugin like miniOrange:

miniOrange two-factor authentication plugin

Once activated, head to the new miniOrange 2-Factor link in your admin area and find the Account section. To configure the plugin, you’ll have to register for an account. This is completely free and only takes a minute. Then, you’ll receive a code that enables you to verify your email.

At this stage, navigate to Two Factor and use the Setup Two Factor tab. Here, you can choose your preferred method of authentication. For instance, you can use the Google Authenticator app, SMS text messages, QR codes, or security questions:

Enabling two-factor authentication on WordPress using miniOrange

Lastly, if you switch to Settings, you can enable two-factor authentication for all users, specific users, and display your two-factor prompt on your login page.

3. Use CAPTCHA

CAPTCHA or reCAPTCHA provides an extra layer of security for your website. Typically, it’s used to control access to sensitive pages. What’s more, it can deter bots from creating spam or accessing personal information via order forms or login forms on your site.

Again, a plugin is the easiest way to enable CAPTCHA on your site. With reCaptcha, you can add a simple CAPTCHA checkbox to any form you like:

reCaptcha plugin

You’ll need to install and activate the plugin on WordPress. Then, register your site with Google to retrieve your Google API keys. In WordPress, you can head to Google Captcha > Settings to enter your keys and determine which forms should use CAPTCHA.

4. Enforce Strong Passwords

It’s a great idea to change the WordPress login URL, so you’re not using the easily-guessable “admin” suffix. However, your efforts are wasted if you continue using weak or repeated passwords that put your account at a greater risk of attack.

In fact, only 24% of U.S. web users use a different password for each of their online accounts. Meanwhile, just 44% of users use a password manager to generate and store passwords securely.

Going forward, it’s best to opt for lengthy passwords with upper and lower case letters combined with numbers and special characters. We’d also recommend using a password manager like LastPass for extra peace of mind:

LastPass password manager

Plus, it’s important to encourage strong passwords from users with access to your website. You can clarify this in the welcome email users receive upon registering to your site.

Change Your WordPress Login URL to Increase WordPress Security

It can be challenging to ensure foolproof security on your WordPress website. Fortunately, one way you can do this is by changing your WordPress login URL. This way, your login page is almost impossible to find unless you provide users with your new, custom login URL.

Here are two ways to change the WordPress login URL:

  1. Use a plugin like WPS Hide Login.
  2. Edit your wp-login.php file.

Another excellent way to tighten WordPress security is to use a quality web host. At DreamHost, we offer a range of solutions to suit all kinds of users, from managed WordPress hosting to managed VPS hosting. Check out our plans to get started!

Do More with DreamPress

DreamPress Plus and Pro users get access to Jetpack Professional (and 200+ premium themes) at no added cost!

managed WordPress hosting provider

The post Why It’s a Good Idea to Change Your WordPress Login URL (& How to Do It) appeared first on Website Guides, Tips & Knowledge.


source https://www.dreamhost.com/blog/change-wordpress-login-url/

Wednesday, 7 December 2022

Cyberduck vs. FileZilla: Which is the Better FTP Client?

As you become more experienced with web design and development, you may need to access your site’s files directly to make advanced customizations. File Transfer Protocol (FTP) clients make it easy for you to manage these files. However, you may not know which FTP software is the right option for you.

Cyberduck and FileZilla are two powerful tools that you could use. However, once you compare their features, you should be able to determine which option is better suited for your needs.

This post will provide a detailed comparison of Cyberduck and FileZilla. We’ll also discuss their pros and cons. Let’s get started!

What Is an FTP Client?

When you create a website, your core files are stored on your web host’s server. File Transfer Protocol (FTP) is a method of transferring data between this server and your computer.

Essentially, an FTP client is software that enables you to access your site files directly. By downloading this program, you can connect to the server from your computer.

With an FTP client, you can easily upload, edit, and download your website’s files. For example, you may want to modify your wp-config.php file to disable automatic updates.

Here are some additional tasks you can complete with an FTP client:

Additionally, it enables you to access your site even when it’s down. For example, if you encounter errors or issues like the White Screen of Death (WSoD), you may become locked out of your WordPress dashboard. Using an FTP client, you can access your site’s root directory and troubleshoot the problem.

Some programs also support Secure File Transfer Protocol (SFTP) connections. This means they use a Secure Shell (SSH) connection to make the process safer.

Your web host may use a file manager, which functions the same way as an FTP client; However, instead of downloading a third-party program to your computer, you can use the file manager in your hosting account to access your site’s files.

If you’ve decided to use an FTP client, you may not know which program to use. To make this decision easier, let’s discuss the two popular options: Cyberduck and FileZilla.

An Introduction to Cyberduck

Cyberduck is an easy-to-use program that supports both FTP and SFTP connections. It has a beginner-friendly user interface and is compatible with Mac and Windows operating systems:

Cyberduck FTP client

At first glance, Cyberduck may not seem that different from other FTP clients. However, it does have some features that you might find particularly useful. Let’s review some of them.

Key Features

Originally, Cyberduck was developed as an FTP client for Mac users. Now, it has become compatible with Windows operating systems as well. Cyberduck is available for download directly from its website or the Mac and Microsoft app stores.

Its modern and minimalist interface makes Cyberduck stand apart from other options. The UI is fully compatible with macOS computers, seamlessly blending into the well-known Mac aesthetics.

Here are some important features included with Cyberduck:

  • Compatibility with macOS and Windows operating systems
  • FTP and SFTP connections
  • Third-party cloud storage in Google Drive, Microsoft Azure, Dropbox, and more
  • Cryptomator for encrypted, secure file transfers
  • Integration with external file editors
  • Ability to share files with a URL generator
  • Bookmarking tool to log history, imports, and files
  • Quick Look feature for file browsing
  • 30+ languages

Cyberduck is a feature-packed FTP client with a minimal and easy-to-use UI. It’s free software that simplifies file management. Let’s take a closer look at its advantages.

Pros

One of Cyberduck’s advantages is its easy setup process. You’ll simply need to download the correct version for your operating system. Since it supports both Mac and Windows, Cyberduck is a flexible FTP client:

Cyberduck download options

Once you’ve installed the app, you can create a new connection by entering information about your server, port, username, and password. You’ll also be able to change the protocol method:

Cyberduck FTP connection

To edit a file, right-click on it and select your preferred text editor:

Cyberduck file editing

Cyberduck also comes with third-party storage locations, making it easy to share files with other users. It supports cloud services like Amazon S3, OpenStack Swift, Azure, Backblaze B2, Microsoft OneDrive, Dropbox, Google Drive, and more.

It also lets you create bookmarks that store details about your different FTP connections. You can drag and drop these bookmarks into the Finder app and import them from third-party software:

Cyberduck bookmarks

Another unique feature of Cyberduck is the Quick Look. This gives you a preview of your selected file without downloading it. Instead, you’ll just need to press the space key:

Cyberduck Quick Look

Additionally, Cyberduck has its own command line interface. You can also integrate this program with other tools like Keychain and Bonjour.

Cons

If you have a Mac or Windows computer, you’ll be able to connect to your server using Cyberduck. However, the program may be slightly more compatible with Mac users. Plus, it doesn’t support Linux operating systems.

It’s also important to note that Cyberduck’s interface is very minimal. As a result, some users might find it too simple.

Additionally, Cyberduck isn’t divided into side-by-side panels. This makes it less efficient when transferring files to and from your server.

Cyberduck is completely free to use, but it will display pop-ups that request donations. To remove them, you’ll have to become a contributor.

You might also encounter some speed issues. Since Cyberduck has high-end security measures, this can slow down file transfers. So if you want a fast FTP client, you may need to look for an alternative.

An Introduction to FileZilla

FileZilla is one of the most popular FTP clients. Similar to Cyberduck, this open-source software falls under the GNU (General Public License), making it completely free to use:

FileZilla FTP client

FileZilla is often the go-to choice for developers due to its quick setup, variety of protocols, and ease of use. Plus, there is a comprehensive knowledge base where you can browse tutorials and troubleshooting methods.

Key Features

FileZilla is a very flexible program. Since it is compatible with many different operating systems, virtually anyone can use this tool to access their site files.

Plus, the interface is incredibly beginner-friendly. For example, in the main window, you’ll see side-by-side displays of your local and remote server files. This enables you to easily drag-and-drop files from one location to another.

Here are some features you can expect in FileZilla:

  • Compatibility with Linux, macOS, and Windows operating systems
  • FTP, SFTP, and FTPS protocols
  • Third-party cloud storage in Google Drive, Google Cloud, Microsoft Azure, Dropbox, and more
  • Encrypted master password
  • Search, filter, and compare files
  • Site Manager for organizing multiple sites and bookmarks
  • Synchronization with Site Manager data
  • Command line interface
  • 50+ languages

As you can see, FileZilla has a wealth of features. Let’s discuss some of its pros in more detail.

Pros

As a beginner, you may be looking for an FTP client that enables you to learn file management without having to deal with a complicated interface. With FileZilla, you can do just that.

Similar to Cyberduck, you’ll have to choose the correct download option based on your computer type. In the installed app, you can use the Quickconnect option to easily connect to a remote server:

FileZilla Quickconnect

The Site Manager lets you change the protocol if needed. Although it will default to FTP connections, you can update this to SFTP:

FileZilla Site Manager

Once you’ve set it up, you’ll see your local files and remote site in two side-by-side boxes. You can then drag and drop files between them.

One of the main advantages of FileZilla is that it supports large file transfers without running slowly:

FileZilla dashboard

When you right-click on a file, you’ll see options for downloading, editing, and creating new directories. You can also add new files, delete unnecessary ones, and update file permissions:

FileZilla file editing

Along with being user-friendly, FileZilla performs frequent software updates. Although the interface may appear slightly dated, there are continuous bug fixes and performance improvements.

Cons

FileZilla is the trusted FTP client for many users, but it has had a few controversies regarding its security. In a few cases, FileZilla was flagged for having malware in its product bundles.

In 2013, SourceForge was FileZilla’s hosting site. At the time, the SourceForge installer bundled adware into the program, and as a result, some users found unwanted changes to their toolbars, homepages, and search providers.

As recently as 2018, users continued to see adware in FileZilla installers. A few cases resulted in unwanted programs, miners, rootkits, and trojans. This caused some security researchers to advise against using FileZilla.

To remove these ads, you’ll have to upgrade to FileZilla Pro, which costs $19.99. You can also avoid this adware by downloading FileZilla directly from the main website. This will give you a more secure connection.

Cyberduck vs FileZilla: Which Is the Better FTP Client?

Before making changes to your server, you’ll want to find the best FTP client for the job. This can speed up your workflow, enabling you to perform many management tasks in a fraction of the time.

Cyberduck and FileZilla are well-designed FTP clients that you can use to open, edit, and download files. However, there are a few key differences to keep in mind.

Since FileZilla supports Linux, macOS, and Windows operating systems, it’s a more flexible option. Cyberduck is not Linux-compatible, and its interface is best suited for Mac users.

Many developers prefer FileZilla because its main window is separated into different boxes. As a result, you can view your local files and remote server in the same place and easily transfer files between them.

On the other hand, Cyberduck has a more minimalistic design. It will only display your site files, but you may find this simple layout easier to use. Plus, it won’t install adware on your computer.

To choose between the two, you’ll need to evaluate your priorities. FileZilla can be a better option if you’d like a fast FTP client with a visually intuitive interface. However, Cyberduck is known to be more secure, with a simple and straightforward dashboard.

Alternatively, there are other free FTP clients that can easily handle file editing and data transfers. If you need additional options, check out Free FTP by CoffeeCup and WinSCP.

Choose the Right FTP Client

If you want to access your WordPress files, you’ll need a reliable FTP client. Cyberduck and FileZilla are two popular programs that can be used on different operating systems.

FileZilla is a flexible FTP client with drag-and-drop capability and a side-by-side display. On the other hand, Cyberduck has a macOS-friendly modern interface and many external storage locations.

To receive more software reviews and how-to guides, you can subscribe to the DreamHost blog. We’ll send new content straight to your inbox!

Get Content Delivered Straight to Your Inbox

Subscribe to our blog and receive great content just like this delivered straight to your inbox.

The post Cyberduck vs. FileZilla: Which is the Better FTP Client? appeared first on Website Guides, Tips & Knowledge.


source https://www.dreamhost.com/blog/cyberduck-vs-filezilla/

Monday, 5 December 2022

How to Add Custom Fields to Your WordPress Posts

As you become comfortable with WordPress, you may want to start pushing its boundaries. This means experimenting with some of the platform’s more advanced options, which includes learning how to create custom fields.

Adding a custom field to your WordPress post enables you to assign extra data to it. In turn, this helps you add specific information or features only to particular posts. As an example, you could use a custom field to tell WordPress which of your posts are sponsored, then add some code to your theme file that will display a disclosure statement only on those posts.

An Introduction to Custom Fields

The WordPress Block Editor is pretty flexible by default and enables you to customize your content to the Nth degree. You can add just about anything you like to your posts. However, the more content you have, the more you may start wishing for better ways to organize and manage it.

Custom fields are a somewhat more advanced WordPress feature that lets you add extra information to specific posts. That information is called ‘metadata’. Custom fields and metadata are of particular use to developers, who can use them to extend posts with all sorts of additional coding. However, they can still be beneficial for the more general WordPress users.

For example, let’s say you wanted to indicate which of the posts on your blog are sponsored to ensure you’re being transparent with your audience. You could add a short disclosure statement to each relevant post individually. Alternatively, you could save time by using a custom field that displays a relevant message. Then, you could add code to your theme file to make your disclosure statement appear on the correct posts.

If this sounds complex, don’t worry. Using custom fields is more straightforward than it looks. In fact, we’ll show you exactly how to implement this example below. If you’re interested in other potential applications for custom fields and metadata, you may also want to check out the WordPress Codex entry on the topic.

How to Add Custom Fields to Your WordPress Posts (In 2 Steps)

The concept of custom fields might seem a bit abstract, so let’s walk through an example to see exactly how this feature works in action. This general custom field process can be used for a wide variety of applications. You could add status updates to your posts, include a disclosure notice on sponsored content, and much more.

However, you’ll first want to take a moment and back up your website. If you’re following these instructions, you’ll be implementing changes to your theme’s primary file, and you don’t want to risk making any permanent mistakes. For extra security, creating a child theme and using it instead of your base theme is also advisable.

Step 1: Enable Custom Fields and Assign New Metadata to Your Post

The first thing you’ll need to do is open up a post to which you would like to add a custom field. It can be an old post or a new one.

Click on the three dots in the top right corner and select Preferences from the dropdown list:

Accessing Preferences from the WordPress Block Editor

Then, select Panels from the popup menu and enable Custom fields. You’ll now be prompted to Enable & Reload:

Enabling custom fields with the WordPress Block Editor

Now, if you scroll down below the post, you’ll find a new section:

Adding custom fields to a post in WordPress

Under Name and Value, you’ll add some metadata describing the information you want to add to this post. Depending on the themes and plugins you have installed, you may already have some options listed under Name. Regardless, you’ll want to create new metadata in this instance.

Get Content Delivered Straight to Your Inbox

Subscribe to our blog and receive great content just like this delivered straight to your inbox.

Choose a name for your metadata. It can be anything, although it’s best to keep it short and descriptive. Continuing our example from above about displaying a disclosure statement on specific posts, we’ll call it Sponsored Post. Then we’ll add a simple “Yes” to the Value box, indicating that this particular post is sponsored:

Click on Add Custom Field, and this metadata will now be assigned to your post. Don’t forget to save or update the post itself too.

Step 2: Add Conditional Code to Your Theme File

The previous step told WordPress a critical piece of information about your post: whether or not it is sponsored content. Now, you need to add directions so that your site knows what to do about that. As we mentioned earlier, this does involve a bit of coding. However, don’t let that scare you off. Even if you aren’t a developer, you should find the process relatively straightforward.

Within WordPress, you’ll want to navigate to Tools > Theme File Editor. Here, you can look through and make changes to the files that make up your site. You’ll want to check out the sidebar on the right-hand side and find the Single Post file (also known as single.php):

This is where you’ll add the code that will tell WordPress what to do in response to your custom fields. The exact code you’ll use will vary somewhat, depending on what you want to do. In our example, you’d want to add this snippet:

<?php
$meta = get_post_meta( get_the_ID(), 'Sponsored Post' );
if( $meta[0] == 'Yes' ) {
?>
<p>This post is sponsored content, and we received a free copy of the product in order to conduct our review.</p>
<?php } ?>

Then, click on the Update File button. This code tells WordPress to check and see if a post has the Sponsored Post custom field and if the value is set to “Yes”. If so, it will display the message. If there is no custom field or the Sponsored Post value is set to “No”, nothing extra will be added to the post.

Also, where you place the code will determine when it appears in the post. For example, to get it to appear at the top of the page, you would add it before this line in the single.php file:

while ( have_posts() ) : the_post();

Hopefully, you are beginning to see how custom fields can be useful. There are a lot of possibilities when using this feature, so don’t be afraid to play around a little and see what you can accomplish with it.

Using Plugins to Manage Your Custom Fields

You now know how to add custom fields and metadata to your WordPress posts. However, what if you want to get more flexibility from this feature or just want to simplify the process?

This is WordPress we’re talking about, so of course, there are plugins that can help you out. There may not be a lot of plugins related to custom fields, but you can find a few quality options. For a great example, check out Advanced Custom Fields:

Advanced Custom Fields plugin.

This very popular, free plugin streamlines the process of adding custom fields to WordPress. It also gives you more choices for where metadata can be added, such as users, media, and comments. Finally, it adds tools to provide more options for displaying custom field values within your theme files. There’s even a premium version with even more functionality.

If that plugin seems like overkill — and it can be for non-developers — Custom Field Suite is a solid alternative:

Custom Field Suite WordPress plugin

This tool is essentially a lightweight version of Advanced Custom Fields. It adds a handful of useful new custom field types to your site. Plus, it simplifies adding and managing custom fields without overwhelming you with too many new options.

This can be a smart plugin to start with if you’re looking to get more out of your custom fields. What’s more, you can always switch to a more robust solution once you feel more confident with the process.

Add Custom Fields to WordPress Content

Custom fields and metadata are concepts that might seem a smidge confusing at first. However, with time and patience, you’ll find that they enable you to get even more out of the WordPress platform.

Want a Free Theme?

When you host with DreamHost you get access to our WP Website Builder tool and more than 200+ industry-specific starter sites for free!

custom website design

The post How to Add Custom Fields to Your WordPress Posts appeared first on Website Guides, Tips & Knowledge.


source https://www.dreamhost.com/blog/guide-to-wp-custom-fields/

Creating and Mastering GA4 Explorations

In the switch from Universal Analytics (UA) to Google Analytics 4 (GA4) — which will go fully into effect July 2023 — a lot of things have...