Thursday, 5 August 2021

How to Fix “The Site Ahead Contains Harmful Programs” Warning in WordPress

WordPress warnings are never pleasant. However, there’s one message that website owners particularly dread: “The site ahead contains harmful programs.”

Fortunately, this doesn’t have to spell disaster for your website. By following some simple steps, you can remove every trace of this suspicious software.

In this post, we’ll explore exactly what’s causing the “harmful programs” error. We’ll then show you how to resolve the underlying issue and banish this error message before it can inflict irreversible damage on your search engine rankings. Let’s get started!

What the Harmful Programs Warning Is (And What It Means)

If you encounter the “harmful programs” error, then your site has most likely been hacked. In an effort to provide a safe browsing experience, search engines routinely scan the web for digital threats. If they detect malware on your site, they will flag it as unsafe (or label it as a deceptive site) and display a warning to anyone who tries to access your website.

A Google Chrome search warning.

Some search engines even display different warning messages based on how your site has been compromised. Depending on the severity of the threat, visitors may get the option to bypass this warning and proceed to your website anyway.

“The site ahead contains harmful programs” warning.

When a compromised website appears in the Search Engine Results Pages (SERPs), some engines show an additional warning alongside the site in question. For example, Google’s SERP warnings include “This site may harm your computer and “This site may be hacked.”

Google’s search engine results warning.

These security warnings are designed to help keep internet users safe. However, a “harmful programs” message can have several consequences for your site.

Most website owners see their traffic levels plummet. This will affect your search engine rankings and your conversions. In addition, if your hosting provider discovers that your site has been hacked, they may even suspend your account until you resolve the issue.

Hacked WordPress Site? We'll Fix It Fast

With our Hacked Site Repair service, we'll fix the malware infection and restore your website so it's back up and running fast.

How to Fix the “Site Ahead Contains Harmful Programs Warning” Error in WordPress (In 5 Easy Steps)

By taking immediate action, you can preserve your SEO success and your site’s reputation as a secure platform. With that in mind, here’s how to remove Google’s “harmful programs” warning message in five easy steps.

Step 1: Check Your Site Status in Safe Browsing

Many search engines have built-in mechanisms designed to help keep internet users safe. For example, if Google is warning people away from your site, you might see a huge drop in organic traffic.

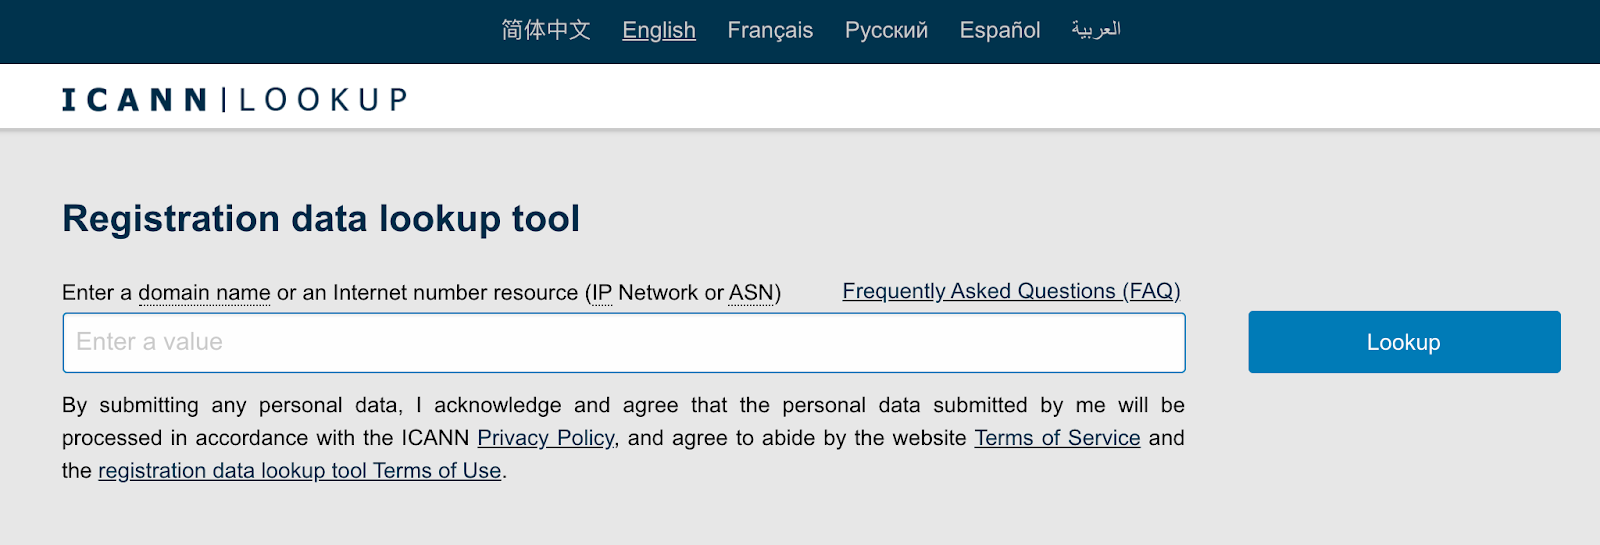
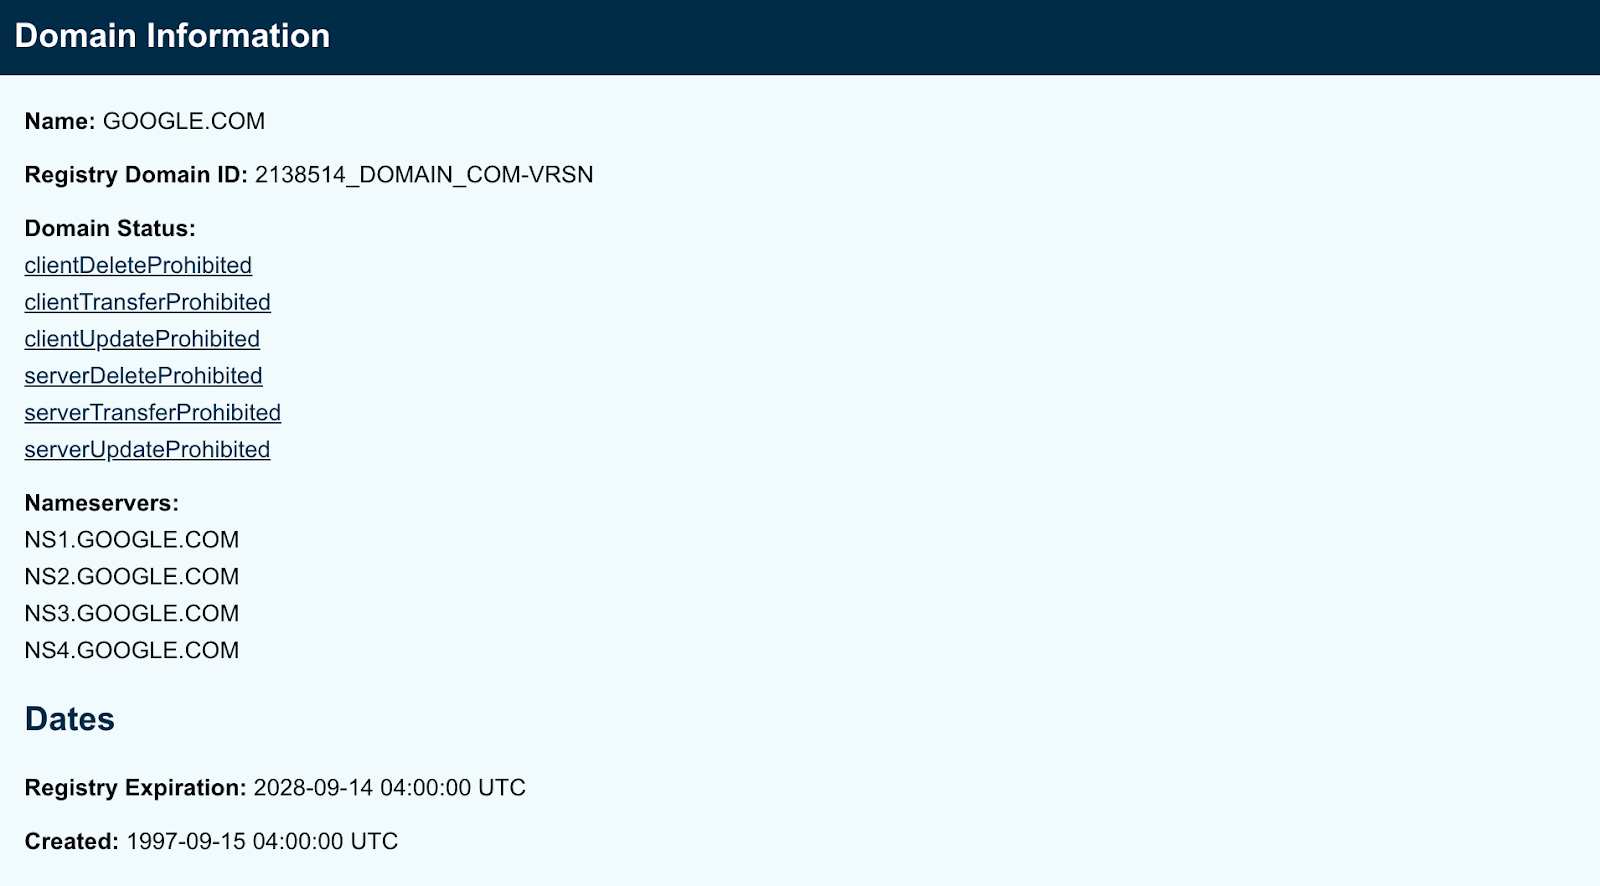
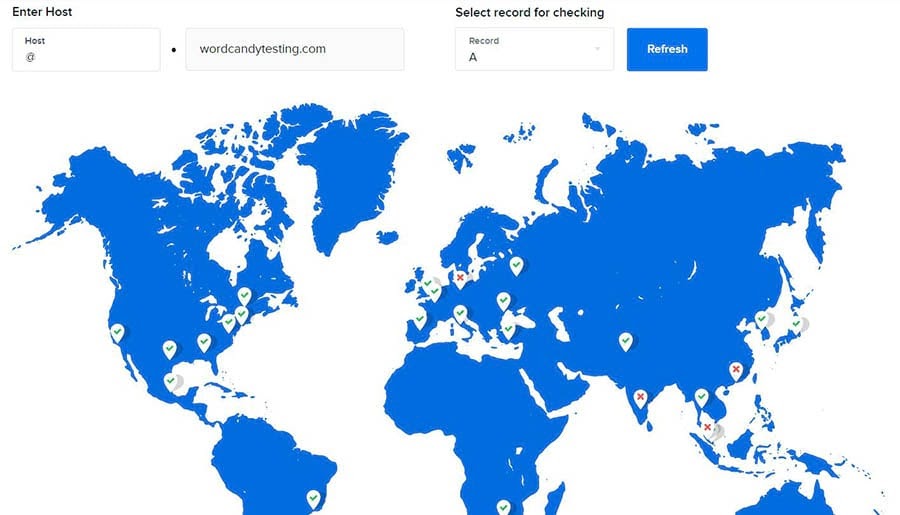
Fortunately, you can verify whether Google has blacklisted your website using the Site Status diagnostic tool.

Google’s Site Status diagnostic tool.

Start by entering your WordPress site’s URL. The diagnostic tool will then run its tests and display a warning if it detects any unsafe content.

If it does warn you about malicious content, your site has been blacklisted. With Google accounting for more than 60% of U.S. desktop search queries, this could have a devastating impact on your traffic. With so much at stake, you must take immediate action to resolve this problem.

Step 2: Find the Malicious Code

Once you’ve verified that malicious software is present on your site, it’s time to track down the offending code and files. While it’s possible to look for malware manually, this can be a time-consuming process that often requires a significant amount of technical know-how.

Hackers are also coming up with new tricks all the time, so it’s not always easy to manually identify every single piece of malicious code. If you do leave some malware behind, search engines may continue to turn visitors away from your site. This means the hack will continue to impact your traffic, conversions, and search engine results.

If the “harmful programs” warning persists for a significant period of time, it might even inflict long-term damage to your reputation. Your customers may begin to question how seriously you take security and whether you can really be trusted with their personal information.

With the stakes being so high, we recommend using a professional malware removal service. Our DreamShield add-on can help ensure that your website is free from every trace of malicious code.

When you add DreamShield to your plan, it will immediately scan your site for malware. It will then repeat this scan automatically every week. If DreamShield detects an issue, it will notify you via email and your DreamHost panel. Thanks to this powerful tool, you may be able to resolve a security breach before Google even realizes there’s a problem!

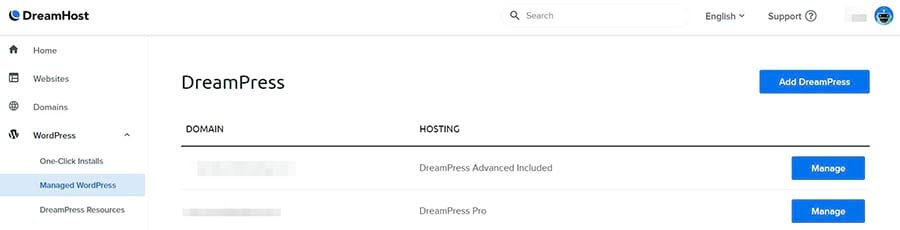
To add DreamShield to your account, log in to your DreamHost dashboard. You can then navigate to Domains > Manage Domains.

DreamHost’s DreamShield service.

Now, find the domain where you want to enable DreamShield, and click on the accompanying Add Malware Remover link. You can then select the DreamShield Package Remover add-on that you want to use.

Step 3: Remove the Malware From Your Site

DreamShield will routinely scan your site and notify you about any issues. These notifications will specify how to remove the detected malware. Simply follow the instructions, and you should be able to eliminate the “harmful programs” warning.

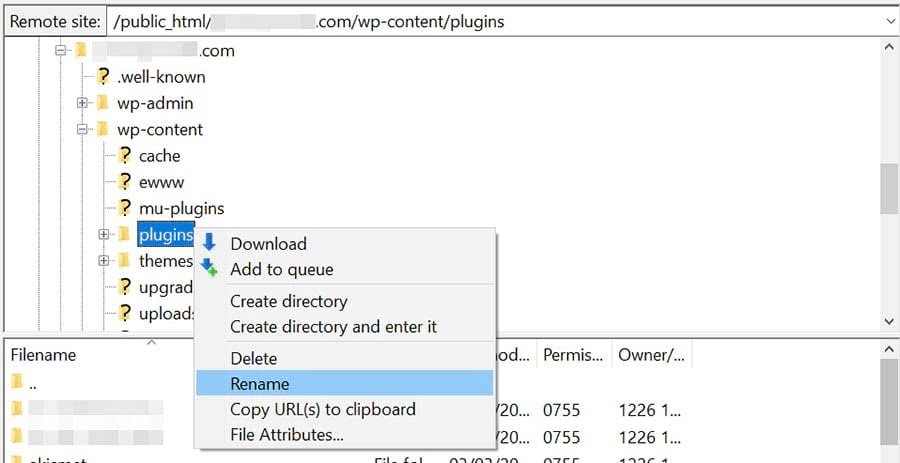
If you don’t have the DreamSheild add-on, you’ll need to remove these files manually. The best approach will vary, depending on the nature of the hack. However, you can often get positive results by connecting to your site via Secure File Transfer Protocol (SFTP) using a client such as FileZilla.

Then, carefully work your way through all of your site’s files and delete any that have been compromised.

A Secure File Transfer Protocol (SFTP) client.

To speed up the process, it may help to look for files with modification timestamps that occurred around the time of the security breach. You may also want to examine any files where the timestamp seems suspicious, for example, if it’s dated after you last edited your site.

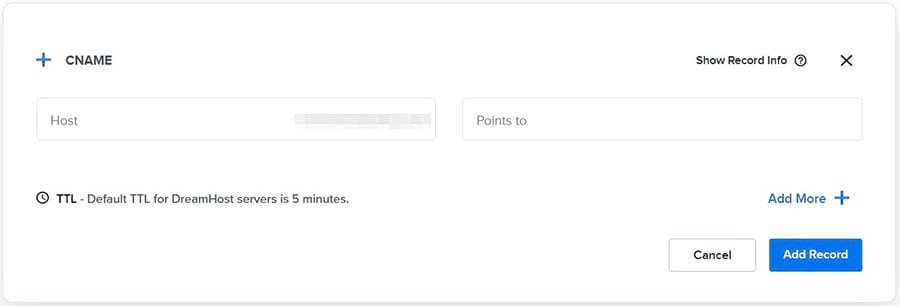
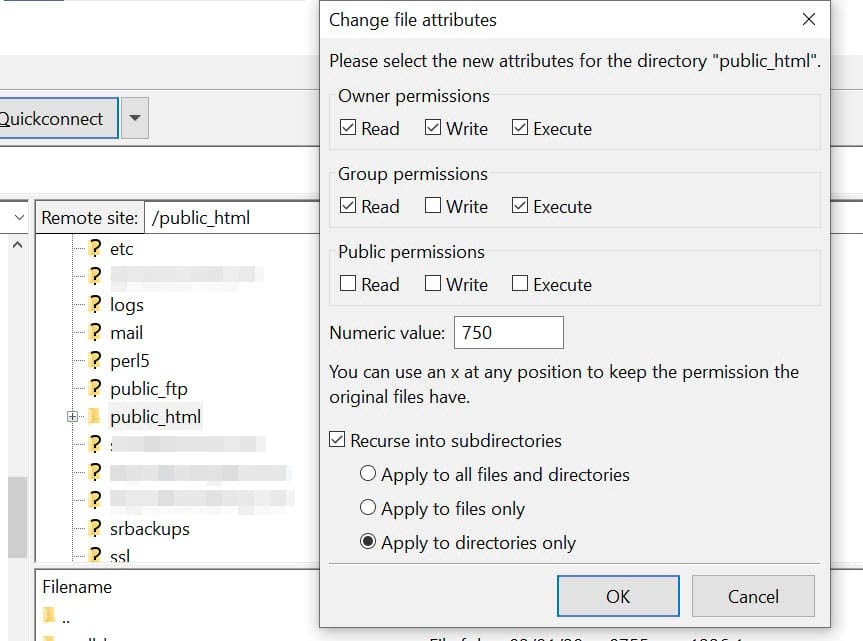
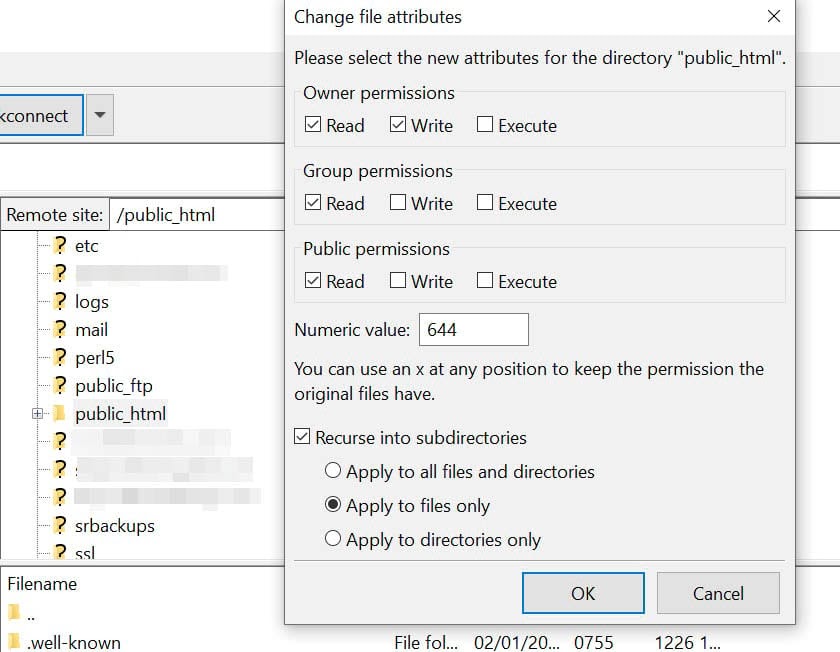
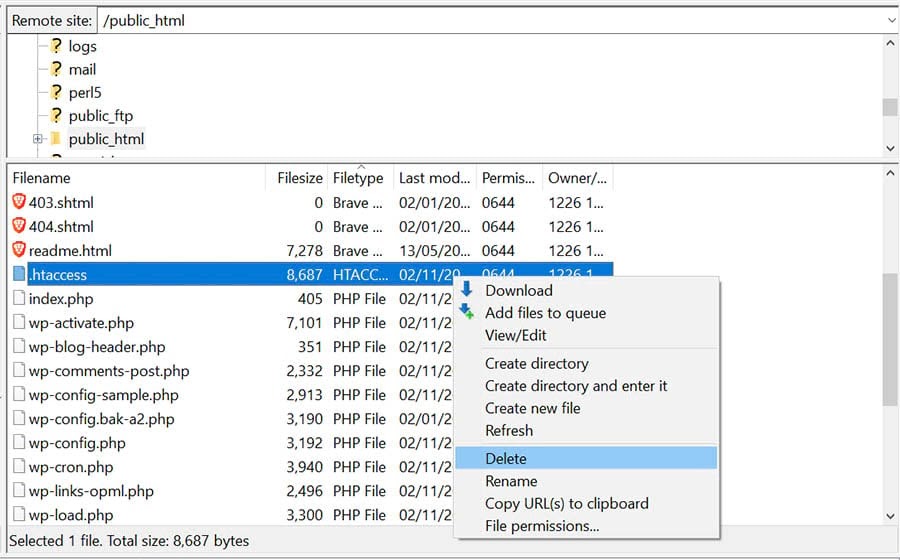
Some hackers may try to insert code into the .htaccess file. To sanitize this file, connect to your site using an SFTP client. Then navigate to your public_html directory, which contains the .htaccess file.

WordPress’ .htaccess file.

Delete this file and then switch over to your WordPress dashboard. You can now navigate to Setting > Permalinks.

WordPress’ permalink settings.

Then, simply click on the Save Changes button at the bottom of the page. WordPress will automatically generate a new .htaccess file that’s completely free from malicious code.

Step 4: Submit Your Site to Google for Review

Once you’re confident that you’ve removed every trace of malware, you can ask Google to rescan your site. If you haven’t already, you’ll need to sign up to Google Search Console and verify that you own the website in question.

After claiming your site, log in to the Search Console and navigate to Security & Manual Actions > Security Issues. On the next page, select Request a Review.

Google will now process your request and provide a response in your Google Webmaster account or your Messages in Search Console. Assuming that you’ve managed to erase all malicious code, Google will remove the “harmful programs” error, and you can resume business as usual.

Step 5: Harden Your Site Against Future Hacks

Once you’re back in Google’s good books, it’s smart to perform a security audit. While no website can ever be 100% secure, there are steps you can take to strengthen your site against attack.

Your password is essential for preventing unauthorized access to your dashboard. However, even with multiple security mechanisms in place, if a hacker manages to guess or steal your password, then all of your hard work may be for nothing.

To start, it’s always a good idea to follow password best practices. This means using a minimum of eight characters and a mix of upper and lowercase letters, numbers, and symbols. You might also want to consider using a password generator such as Strong Random Password Generator or LastPass.

The LastPass password generator.

If you’re using a long and complex password, then you’re off to a great start. However, there are some attacks where password strength has less impact on whether the hacker succeeds or fails. This includes credential stuffing attacks, where a malicious third party attempts to break into your site using dozens or even hundreds of usernames and passwords.

Two-Factor Authentication (2FA) can make your site far less susceptible to password-based attacks, including credential stuffing. With 2FA in place, a hacker will need to pass an additional security check before they can access your website. For example, they may need to enter a one-time PIN that’s sent to your smartphone.

We always recommend installing a Secure Sockets Layer certificate (sometimes referred to as an SSL certificate or secure certificate). This ensures that you’re transferring data via Hypertext Transfer Protocol Secure (HTTPS) instead of Hypertext Transfer Protocol (HTTP). When your data is encrypted, it becomes much harder for an attacker to get their hands on information that they can use against you.

Additional Troubleshooting Tutorials

Do you want to learn how to resolve other WordPress issues? Here are some of our favorite troubleshooting tutorials:

If you want more information about keeping your site in tip-top shape, check out our WordPress Tutorials. There, you’ll find everything you need to run a successful website.

Dealing with Suspicious Code? You Can Skip the Stress

Avoid troubleshooting unwanted software when you sign up for DreamPress. A friendly WordPress expert is always available 24/7 to help solve your website problems — big or small.

Fixing the Harmful Programs Error

If you encounter the “harmful programs” warning when trying to access your site, a hacker may be to blame. While this may sound scary, don’t panic – it is possible to recover a compromised website.

Let’s quickly recap how to fix the “harmful programs” warning:

  1. First, verify your site status in Safe Browsing.
  2. Find malicious code using a service such as DreamShield.
  3. Remove malware from your site.
  4. Submit your site to Google for review via the Search Console.
  5. Harden your site against future attacks.

If you’re seeing the “harmful programs” warning, our team of experts can get your site back to normal before the hacker has a chance to do more damage. As part of our Hacked Site Repair Service, we’ll even review your site and upgrade your security at no additional cost.

The post How to Fix “The Site Ahead Contains Harmful Programs” Warning in WordPress appeared first on Website Guides, Tips & Knowledge.


source https://www.dreamhost.com/blog/how-to-fix-harmful-programs-warning-wordpress/

Tuesday, 3 August 2021

Starting a Side Hustle? Follow These 10 Social Accounts to Grow Your Business

Are you looking for that extra push and motivation to kickstart and scale your side hustle? Whether it’s graphic design or an online course, we’ve got you covered with our top 10 social media accounts to follow to start your side hustle and grow your business.

Whether you’re just starting your side hustle or looking for a way to push harder and cross things out on your vision board, these accounts are sure to inspire you!

Your Side Hustle Needs a Website

We’ll make sure your site is fast, secure, and always up so your visitors trust you. Plans start at $2.59/mo.

1. Sunny Lenarduzzi (YouTube)

Sunny Lenarduzzi’s YouTube channel.

If you’ve ever been on the fence about making a YouTube channel, you should check out Sunny Lenarduzzi.

Sunny is a YouTube and course consultant featured on Forbes and Entrepreneur for her incredibly active community of more than 500k people. According to a case study on her website, she consistently makes $300K per month through YouTube and helps entrepreneurs figure out how YouTube fits into their strategy.

She makes videos that showcase:

  • How to build your own YouTube empire
  • How to bag brand deals as an influencer
  • Behind the scenes of her entrepreneurial ventures
  • Social media influencer tutorials and equipment
  • Interviews breaking down the success stories of million-dollar businesses

Along with her videos, Lenarduzzi has a ton of freebies on her website to help you dominate your niche through YouTube.

2. Side Hustle Pro (Twitter and Podcast)

Side Hustle Pro homepage.

There’s nothing quite like listening to other people who’re in the same stage of your journey or just a few steps ahead. You feel like you’re not alone in your struggles; it gives you someone to look up to and a chance to learn from other people’s mistakes.

Nicaila brings powerful stories of women entrepreneurs who inspire us to hustle and achieve our goals to her podcast, Side Hustle Pro. Her guests are women who transformed their side hustles into profitable and successful businesses.

She started her podcast as a side hustle and scaled it to the point that it allowed her to quit her day job. Nicaila now helps others like herself grow their influence through social media marketing and launch their own podcasts.

Follow Side Hustle Pro on Twitter if you want to learn:

  • All about content marketing and social media marketing
  • Stories of entrepreneurs who have made it big in affiliate marketing, influencer marketing, or built a passive income stream
  • Productivity tips for how to manage a full-time job and side hustles

3. Vishen Lakhiani (Instagram and Podcast)

Vishen Lakhiani’s Instagram account.

Speaking of people who have built wildly successful side hustles, Vishen Lakhiani of Mindvalley is an inspiration. Vishen’s aim for Mindvalley, a course membership platform, was to make enough extra cash to quit his 9-to-5 job. While he did achieve that, he did not stop there. He has built Mindvalley into a $100 million company with no funding and just $700 in cash.

Lakhiani’s mission is to help people be better versions of themselves. He helps entrepreneurs include ethical marketing, spirituality, and fitness routines along with their business growth.

Lakhiani posts regularly on his Instagram about:

  • Self-sabotaging beliefs for entrepreneurs
  • Productivity hacks for busy founders
  • The power of manifestation and spirituality in entrepreneurship

He’s also the host of the Mindvalley Podcast, where he interviews successful business owners on their mindset and growth strategies.

4. TEDx Talks (YouTube)

TEDx Talks YouTube channel.

TEDx is huge. This community hosts hundreds of talks by content creators like graphic designers, Instagram influencers, and freelance writers who tell you about their life stories and offer insights into the particular field they specialize in.

TEDx is a great way to discover people you might relate to and who have gone through similar experiences as you find yourself in.

The main purpose behind TEDx Talks is to:

  • Help translate your goals to reality
  • Bring unique perspectives from experts in your fields
  • Show you the potential of your small business idea
  • Change your mindset with real-life stories of people who were in your shoes.
  • Teach you how to persuade people through narratives

5. Neil Patel (YouTube and Blogs)

Neil Patel YouTube channel.

Neil Patel shows up on Google’s first page in every single search about digital marketing and SEO. And he’s got the credentials that prove he deserves it — Forbes Top 10 marketer, Entrepreneur Top 100 companies, and one of the top 100 entrepreneurs under 30 recognized by President Obama.

If you want to expand your freelance side hustle, Neil Patel’s YouTube channel is where you should start. His videos serve as mini online courses for virtually every topic on digital marketing.

His channel focuses on:

6. Sean Ellis (Twitter)

Sean Ellis’ Twitter account.

Sean Ellis specializes in scaling small businesses through methods that cut through the noise. He helped companies like Dropbox, Eventbrite, LogMeIn, and Lookout grow to the million-dollar businesses they are now.

Ellis is a category maker. He coined the term “growth hacking,” which is now used as a job description. He directly helps other entrepreneurs replicate his success and become growth hackers through his venture Go-Practice, a simulation-based learning experience for growth. His book on growth hacking is now an international best-seller and has been published in 16 languages.

So whether you are a B2B startup or a freelancer, Ellis’s business ideas will help you growth hack your way to success.

Sean tweets about:

  • Critical skills needed for growth hacking
  • Creative ways to accelerate growth and increase your earning potential
  • New trends and podcasts in the field of growth hacking

7. Barbara Corcoran (Twitter)

Barbara Corcoran’s Twitter account.

Barbara Corcoran is one of the two female investors, alongside Lori Greiner, on the famous ABC show Shark Tank. Her journey, like many others on this list, is a turnaround story. Barbara quit her day job with just $1000 in the bank and started a real estate company. Over the next 25 years, she successfully transformed it into a $5 billion real estate empire, The Corcoran Group.

On Twitter, Corcoran shares her experience over these 25 years. Her quirky, entertaining, yet inspiring tweets will help motivate you to stop making excuses and start your side hustles.

Corcoran makes sure that both small business owners and large-scale entrepreneurs remain rooted in their goals and ambitions through her tweets. Follow her to address your limiting beliefs and skyrocket your business.

Find her tweeting about:

  • Social media management strategies for small businesses and social media managers
  • Motivational moments and quotes from her real-life experiences
  • Personal challenges and insights into her entrepreneurial journey

8. Melinda Emerson (Twitter)

Melinda Emerson’s YouTube channel.

Also known as “SmallBizLady,” Melinda Emerson is ranked by Forbes as the No. 1 most influential woman entrepreneur, so you know she’s an influencer you’ll want to follow. Every third Wednesday of the month, you can see Melinda live on her YouTube, Twitter, and Facebook pages answering questions from small business owners.

Emerson has lectured at educational institutions like MIT, The University of Pennsylvania, and many more. She is also currently running a marketing consulting firm, Quintessence Group, for Fortune 500 brands like American Express and FedEx, which target small businesses.

On her social media platforms, Emerson shares:

  • Marketing skills and social media selling tips for small business owners
  • #SmallBizChat conversations with SMB owners
  • How to build your own business from scratch

If you run or dream of running a small business side hustle, Melinda and her tweets will help you understand your target audience and serve them better.

9. Copy Posse – Alex Cattoni (YouTube and Instagram)

Copy Posse Instagram account.

If you’re a freelance writer or a virtual assistant, Alex Cattoni’s posts are a great way to upskill yourself. Alex has a unique niched-down community of copywriters and freelancers and helps them write words that sell.

When she first started out, everyone Cattoni knew told her copywriting was too niche a topic. But, she didn’t listen to them — and now she’s built a 7-figure business just on the sheer power of her community of more than 100K YouTube and 30K Instagram followers. Cattoni has also been featured on Forbes and at digital marketing conferences like AdWorld for her copywriting skills.

Alex posts:

  • Copywriting tips to help you sell better
  • Strategies to book potential clients and earn extra money
  • Her experiences with copywriting for over a decade (the good and the bad!)
  • Community engagement posts with tasks, challenges, and rewards

Her blog is also a great place to start if you want to make copywriting your side hustle.

10.  Authority Hacker (YouTube and Podcast)

Authority Hacker homepage.

Founded by Gael Breton and Mark Webster, Authority Hacker focuses on helping people build highly profitable websites and multiple income streams. Its target audience is affiliate marketers and niche websites, but its marketing tips can easily be extended to SaaS (software as a service) businesses.

The best part about Authority Hacker’s advice is that it comes from real-time experience. Breton and Webster actively build websites and allow their audience to follow along on the journey. Therefore, the information is highly relevant and up to date, which you don’t find on many other websites.

Apart from their combined experiences, Authority Hacker also brings on other business owners in the affiliate and SEO spaces to share their wisdom.

They delve deep into internet marketing and extra income ideas on their channel, covering topics like:

  • Affiliate marketing websites targeting a specific niche
  • SEO concepts like keyword research and backlink outreach with guest posts
  • Tips and tricks for high-converting affiliate copy
  • Best software and tool reviews for internet marketers

We Doubled Our Blog’s Traffic with WordPress

We'll show you how to do it. Join 180,000+ others who get our monthly newsletter with insider WordPress tips!

Start Your Side Hustle with Inspiration

While starting a freelance business or a side hustle might seem scary, these accounts break it down and show you exactly how others have done it.

Pick a couple accounts you resonate the most with and start consuming their content. Use their failures as stepping stones for your success. You have everything you need right at your fingertips — make the best use of it.

With your inspiration in place, we’re here to support you as you launch and grow your business. Whether it’s shared hosting for small budgets, building out the website for your side hustle, or assisting with marketing, DreamHost can help your new income stream grow.

The post Starting a Side Hustle? Follow These 10 Social Accounts to Grow Your Business appeared first on Website Guides, Tips & Knowledge.


source https://www.dreamhost.com/blog/start-a-side-hustle-inspiration/

Tuesday, 27 July 2021

Nameservers vs. DNS: A Complete Guide

If you’re thinking about migrating your site to a new hosting provider, you may be wondering what it will mean for your domain registration. Perhaps you’re worried visitors will be unable to access your content if you switch web hosts.

This is why it’s important to understand what nameservers and the Domain Name System (DNS) are and how they work. This understanding can help you manage your migration more efficiently.

In this post, we’ll take a closer look at nameservers and DNS records. We’ll also show you how you can access these essential components of your site. Let’s get started!

Nameservers vs. DNS Records: What They Are and How They Work

A nameserver connects your domain name with the Internet Protocol (IP) address of the server that hosts your website. Thanks to nameservers, browsers like Google Chrome and Mozilla Firefox can direct users to the right page when they type in a site address.

Typing a site address into Google.

For example, if you type “myblog.com” into Google, the nameserver tells the browser where that domain is located (i.e., the address of your web host). Without this information, the browser wouldn’t be able to display the site.

Nameservers form part of an online database known as the Domain Name System (DNS). This system is part of the  Transmission Control Protocol (TCP) and the Internet Protocol (IP), which defines how computers communicate via the internet and private networks.

DNS plays an important role, as it aids the conversion of simple domain names (e.g., myblog.com) into an IP address (e.g., 12.34.56.78), which computers then use to identify one another on the network. Effectively, DNS functions like a phone directory. It contains records of web devices, such as computers and servers, and their associated IP addresses.

Every domain has its own DNS records, which include the nameserver. These are generated when you register your domain name with a hosting provider or a domain registrar. Therefore, your nameserver points your domain name to the IP address of your host or registrar.

Your Great Idea Starts with a Great Domain

Don’t let someone else register your URL. Search DreamHost’s 400+ TLDs to find the perfect fit for your website.

How the Browser Finds Your Website

Everything that is connected to the internet has an IP address, including websites and servers. There are millions of IPs in use all over the world, and they are all unique. Your site will have its own IP address, which your host provides.

However, your domain name needs to be able to connect with your site’s IP address. For example, when you enter a site’s URL into an address bar, your browser will try to access the corresponding page. To do this, it will go through some steps that the user doesn’t see.

First, the browser connects to the target site’s domain registrar. Then the registrar points the browser to the target site’s hosting provider (e.g., dreamhost.com). Once the browser arrives at the web host, it will look for the correct nameserver (e.g., ns1.dreamhost.com).

The process is practically instantaneous, so as users, we don’t fully appreciate the additional steps. However, should you decide to change your hosting provider, you’ll need to point your domain name to your new host. This is a vital step. Otherwise, users will not be able to find or access your site.

How to Use Nameservers and DNS Records

Knowing how to access your domain’s DNS records, including your nameservers, can help you arrange a smoother transition to your new host. Let’s take a look at the different ways you can locate and manage these important records.

Locating and Managing Your Nameservers

Your domain’s nameservers can be found in your web hosting account. These might also be available on the hosting company’s documentation page.

The nameservers for domains managed by DreamHost are:

  • ns1.dreamhost.com
  • ns2.dreamhost.com
  • ns3.dreamhost.com

If you’re a DreamHost client, you can also log in to your hosting account to view your nameservers. To start, navigate to Websites > Manage Websites in the side menu.

Managing your websites in DreamHost.

Next, find the domain you wish to edit and click on the DNS tab on the right side of the screen. This will bring up a page with your nameservers.

Locating your nameservers in DreamHost.

Note that if your domain is registered with a different company, you won’t be able to update your nameservers from your DreamHost account. To manage your nameservers, you’ll need to log in to your account with the company that manages your domain.

If your domain is registered with DreamHost, you’ll be able to edit your nameservers. For instance, if you wish to replace your current nameservers, you can simply erase them from the box and type in your new ones.

You can also manage your domain from the Registrations page in your account. For more information about this, you can read our complete instructions for editing your nameservers on DreamHost.

Alternatively, you can find out what a website’s nameservers are by performing a WHOIS lookup. Nameservers are public records, so it is possible to find this information by using a third-party tool.

Several sites offer this service, including lookup.icann.org.

Running a WHOIS search.

You can type the domain into the search bar, and a list of records will appear. For example, here are the nameservers for google.com:

Viewing nameservers in a WHOIS search.

Note that a WHOIS search can also show the personal details of the domain’s owner, including their name and email address. Some hosting providers and domain registrars offer WHOIS privacy, which protects the identity of the user.

Locating and Managing Your DNS Records

Your DNS records are just as easy to locate and manage. You can log in to your hosting account to view your records and make changes to them. If your domain is managed by a third party, such as a domain name registrar, you’ll need to log in to your account with that company.

If you have a DreamHost account, your DNS records can be found on the same page as your nameservers.

Viewing your DNS records in DreamHost.

You can add a new DNS record to your domain by clicking on the blue Add Record button. As you may notice, there are different types of records you can create. Let’s take a closer look at the most common ones.

A Record

The address record is the most basic type of DNS record. It is used to point a domain (or subdomain) to an IP address.

CNAME Record

The canonical name record points a domain to another domain, as opposed to an IP address. This is used when a site has subdomains, such as shop.myblog.com or donations.myblog.com.

Adding a CNAME record in DreamHost.

These are subdomains of myblog.com. Let’s say that each of these subdomains has a CNAME record containing the value “myblog.com.” Since the DNS is looking for an IP address, when the CNAME record is accessed, a further lookup is carried out at myblog.com (as this is the value contained in the CNAME file).

It will then return the IP address stored in myblog.com’s “A” record. This means that these subdomains are aliases of the main domain, and the canonical name (or “true name”) of these subdomains is actually “myblog.com.”

MX Record

A mail exchange record is used to direct emails to an address registered on your domain (e.g., hello@myblog.com) per the Simple Mail Transfer Protocol (SMTP), the standard protocol for email.

It is important to ensure that your MX records point to the right mail server. If not, emails won’t be delivered to your account. We also recommend that you back up your emails before switching to a different host.

Adding an MX record in DreamHost.

NS Record

As mentioned previously, this is the nameserver record. You can use this setting to change your nameservers so that they point to your new hosting provider.

TXT (Text) Record

This one allows you to insert text into your DNS records. Originally, the TXT record was designed for human notes, such as site descriptions or development details. However, it is possible to include machine-readable data.

Adding a TXT record in DreamHost.

This record can help you to protect your site against spam. It also enables you to verify your domain, such as by adding a Google Site Verification record. It is very common to have multiple TXT records for a single website.

Monitoring Your DNS Records

When updating your nameservers and other domain records, you’ll need to take DNS propagation into account. This is the time it takes for your DNS records to update across the internet. For example, when you modify your nameserver to point to your new hosting company, this change can take up to 72 hours to come into effect.

At DreamHost, we offer a DNS propagation checker to help you monitor your records. To access this tool, simply click on DNS checker on your Records page.

Accessing the DNS Checker in your DreamHost account.

On the next page, you can check your website’s current IP address and DNS record information. Our interactive maps show you the status of your records across nameservers in different locations.

Using the DNS checker to view the status of your records.

The green checkmarks on the map indicate that your DNS is up-to-date in the specified locations. Meanwhile, a single red cross suggests there might be a problem with the DNS server in that location.

If you see multiple red crosses, it may mean that you haven’t configured your DNS at the company where you registered your domain. However, this could also be a sign that your new DNS settings haven’t yet finished updating.

DNS Management Made Easy

Whether you need help identifying a domain's nameservers, understanding a DNS query, or choosing a web host, we can help! Subscribe to our monthly newsletter so you never miss an article.

Nameservers vs. DNS in a Nutshell

Understanding how nameservers and DNS Records work can ensure a smooth transition when migrating your site to a new host. It is imperative that your domain name points to the correct nameserver. Otherwise, site visitors will be unable to access your pages.

At DreamHost, we make your life easier by managing the entire transition process, including your domain transfers. We also enable you to manage your own domains and DNS from your hosting account, and our service comes with free privacy protection for your domain.

The post Nameservers vs. DNS: A Complete Guide appeared first on Website Guides, Tips & Knowledge.


source https://www.dreamhost.com/blog/nameservers-vs-dns-guide/

Monday, 26 July 2021

7 Great Web Accessibility Examples to Inspire You

Here at DreamHost, we believe everyone should be able to use any website on the internet, regardless of any disability they may have. However, while we care about web accessibility, we also understand that designing a website that’s both accessible and visually attractive can be challenging.

The good news is that accessible websites don’t have to be ugly. On the contrary, some stunning websites out there are designed with accessibility in mind — which we could all learn a thing or two from.

In this post, we’ll start by showing you what strong web accessibility looks like. Then we’ll show you seven of the best web accessibility examples on the internet and see what we can learn from them. Let’s get started!

Create a Website for All

We make sure your website is fast and secure so you can focus on the important stuff.

What Great Web Accessibility Looks Like

According to The World Bank, over 15% of the global population has some form of disability. These can include:

  • Visual impairments: Some users have visual impairments that inhibit their ability to see clearly or perceive color contrasts
  • Hearing impairments: This includes deafness and partial hearing loss.
  • Physical disabilities: Some people have mobility impairments that can impact their dexterity and ability to make precise movements, possibly making using a mouse difficult.
  • Cognitive disabilities: Conditions like dyslexia and dementia can affect a person’s cognitive abilities.

It’s important to keep all of these different challenges at the forefront of your mind when creating your website to ensure there are no barriers to disabled users. To help web designers with this, W3C has developed a set of Web Content Accessibility Guidelines (WCAG).

Solid web accessibility means adhering to these guidelines and carefully following the four guiding principles of web content accessibility. These guiding principles state that all websites should be:

  1. Perceivable
  2. Operable
  3. Understandable
  4. Robust

Ensuring that your website is “operable” might mean implementing keyboard-friendly navigation for people who cannot use a mouse. “Perceivable” might mean making sure to use high-contrast colors for people with visual impairments.

We’ve already outlined 10 practical ways to implement the web accessibility guidelines and make your website more accessible (including advice on accessibility testing and UI components). Now we’re going to look at some examples of websites that are already doing it right.

7 Great Web Accessibility Examples to Inspire You

Below, we’ve listed some of our favorite web accessibility examples. These seven websites set the bar when it comes to accessibility.

1. Scope

The Scope home page.

Scope is a disability equality charity based in England and Wales dedicated to creating a fairer, more equal society. As a champion of disability equality, you’d expect that this organization’s website would be as accessible as possible — and it is.

Not only does it fully adhere to WCAG 2.0 and WCAG 2.1 guidelines, but the site is even customizable for individual users. For example, users can change the site’s colors, increase the text size, or even turn on text narration to have the content read aloud.

If you look at the top-left section of the home page, you’ll see an Accessibility tab. Click on this, and the site will bring you to its accessibility page, which includes instructions on how to adapt the experience to your needs, links to assistive technologies, and a list of known accessibility issues that are being worked on.

Scope uses short sentences and large, clean fonts throughout the site for maximum readability. Plus, the site is fully compatible with screen reader software.

Despite already being a fantastic example of website accessibility, the team at Scope continues to make improvements. Every three months, they test the website for accessibility and make updates where necessary.

2. Paralympic.org

The IPC home page.

Paralympic.org is the official website of the International Paralympic Committee (IPC). The IPC is a powerful advocate of social inclusion, and its website is a testament to that.

It features keyboard-friendly tab navigation and an instant “scroll-to-top” button to make it easy to move around the page. Images and videos are large and highly visible, and there’s plenty of white space to make visual elements stand out.

If you go to the home page, you’ll notice a text size adjuster in the top-right corner of the screen. This is easily visible and allows users with visual impairments to quickly customize the size of the text to meet their needs.

3. KidzWish

The KidzWish home page.

KidzWish is an organization that provides therapy, support services, and an annual Christmas party for children who are disadvantaged or have a disability. It caters to many people with different disabilities, so naturally, it needed to build a website that was as accessible as possible.

It definitely achieved that goal. The KidzWish website is wonderfully designed, with a logical structure, keyboard-friendly navigation, high-contrast colors, and large text. Plus, it’s easy to navigate with prominent, clickable elements.

The design is also very child-friendly. It boasts a bright, bold color scheme and tons of fun graphics.

4. SSE Energy

The SSE Energy home page.

SSE Energy is a UK-based energy company. Its website features information about tariffs and bundles and includes a main login portal for its customers to service their accounts.

The company has done a wonderful job of making the site accessible to all by using large readable text and a clear interface. It also incorporates keyboard navigation to make it easy to get around the site.

The designers went above and beyond to ensure that the site is accessible to visually- and hearing-impaired users. There are SignVideo services for British Sign Language users, and the color contrast meets WCAG guidelines.

Customers can also request bills in Braille and larger formats. In addition to all of this, the site is compatible with assistive technology.

5. BBC iPlayer

The BBC iPlayer home page.

BBC iPlayer is the BBC’s online streaming service. Its website is where users go to watch programs online. It’s also another fantastic web accessibility example that we can all learn from.

First, the website is both very easy to navigate and compatible with assistive technology. You can move around the page by clicking on the Tab button. Navigating over the iPlayer logo brings up an option for Accessibility help, which links to a resource page with a lot of useful information for users with disabilities.

The content is logically laid out, and all buttons use a clear visual design with high contrast colors. There are also keyboard and mouse-accessible tooltips that provide extra information for users and descriptive alt text for all images.

The video content is also accessible. All shows on BBC iPlayer feature subtitles. There are also audio-described and signed content categories.

6. NSW Government

The NSW Government home page.

The NSW Government website is the government hub for the New South Wales area of Australia. It’s perfectly designed to make it easy for residents of all backgrounds and abilities to use.

This site features tab navigation, making it simple to navigate pages using a keyboard or screen reader. Thanks to large fonts and contrasting colors, it’s also extremely readable and is compatible with assistive technology.

7. GOV.UK

The GOV.UK home page.

GOV.UK is the central hub for all U.K. government web pages. It can be used to access everything from information about benefits and disability aid to visa and immigration support.

The U.K. Government has done an amazing job of making its site accessible for everyone who needs it. The site features keyboard navigation and ARIA attributes, making it easy to find pages and navigate the site. It also is adapted to support 300% zoom for visually impaired users.

DreamHost Takes Inclusivity Seriously

We regularly report on diversity, accessibility, and representation in the tech industry. Subscribe to our monthly newsletter so you never miss an article.

Make an Accessibility Statement

Making sure your website is as accessible as possible is both a moral and a professional obligation. It might seem like a challenge, but it’s worth it. You can simply follow in the footsteps of the web accessibility examples above to create an inclusive website that all users can enjoy.

Ready to build your accessible website? Let us take care of the technical side for you, so you can devote more of your time and energy to what matters: the design. Sign up for our Shared Unlimited Hosting Plan and get unlimited, secure hosting for all of your websites!

The post 7 Great Web Accessibility Examples to Inspire You appeared first on Website Guides, Tips & Knowledge.


source https://www.dreamhost.com/blog/great-web-accessibility-examples/

Tuesday, 20 July 2021

How to Fix the 403 Forbidden Error in WordPress (5 Methods)

Being barred from your own site can be very frustrating, especially when you have no idea what is causing the problem. The 403 Forbidden error typically occurs when you’re trying to log in to WordPress or visit a specific page on your site.

Fortunately, there are a few simple fixes for this common WordPress error. Depending on your hosting plan, you may even be able to resolve the issue with help from your web host.

In this post, we’ll take a closer look at the 403 Forbidden error and its main causes. We’ll then show you five ways to fix it. Let’s get started!

What the 403 Forbidden Error Is (And What Causes It)

The 403 Forbidden error is one of several HTTP status codes used by servers to communicate with your browser. When the 403 status code shows up on your screen, it means that your server thinks you do not have the required permission to access that particular page.

The 403 Forbidden error typically appears when you’re trying to log in to your WordPress admin area or when you visit a specific page on your site. You may also encounter it while installing WordPress.

The error is usually accompanied by one of the following messages (or similar variations):

  • “403 Forbidden – Access to this resource on the server is denied.”
  • “Forbidden – You don’t have permission to access [directory name] on this server.”
  • “You are not authorized to view this page.”
  • “It appears you don’t have permission to access this page.”
  • “403. That’s an error. Your client does not have permission to get URL [address] from this server.”

Instead of the “403 Forbidden” status, you might come across a simple notification that says “Access Denied.” It is also possible that you will get the following message: “Access to [domain name] was denied. You don’t have authorization to view this page.”

There are several possible causes of this 403 Forbidden error. The most likely one is an incorrect file permission on your server. However, this error can also be triggered by a faulty plugin or a corrupt .htaccess file.

In most cases, you should be able to resolve the issue on your own. However, you might also need to get in touch with your hosting provider to access or change some settings on your site.

Skip the Permission Settings Stress

Avoid WordPress troubleshooting when you sign up for DreamPress. Our friendly experts are available 24/7 to help solve website problems — big or small.

How to Fix the 403 Forbidden Error in WordPress (5 Methods)

Now, let’s go through a few ways you can fix the 403 Forbidden error in WordPress. First, we recommend that you make a backup of your site just in case something goes wrong and you need to restore it to an earlier version.

1. Change Your File Permissions

Every WordPress file on your site’s server has its own permissions. These settings control who can access and modify its contents. If these files have incorrect permissions, your server will stop you from accessing them.

If you want to check your file permissions, you can simply contact your hosting provider, and a technical expert should be able to take care of it. You can also do this yourself by connecting to your site with a Secure File Transfer Protocol (SFTP) client such as FileZilla.

Alternatively, you can also access your site through the file manager in your hosting account. If you have a DreamHost account, you can navigate to WordPress > Managed WordPress in the sidebar. Then, find your domain and select Manage.

Accessing your domain in your DreamHost account.

On the next page, click on the Manage Files button in the Details section.

Accessing your file manager via your DreamHost account.

You’re now in the file manager. Next, open the folder labeled with your domain name to access your site’s directory.

Inside your root directory, select the folder that contains all of your WordPress files. If you’re using FileZilla, this is the public_html folder. Then, right-click on it and choose File Attributes.

Changing the file permissions using FileZilla

In the popup window, locate the Numeric field and enter “755” or “750” in the value box. Then select the Recurse into subdirectories and Apply to directories only options, and click on OK.

Changing the file permissions for the directories.

So far, you’ve applied the correct file permissions for your directories. You’ll now do the same thing for your files.

To start, right-click on your public_html folder and select File Attributes. This time, you’ll need to type “644” in the Numeric value field. Then choose Recurse into subdirectories, select Apply to files only, and click on OK.

Changing the file permissions in FileZilla.

Note that your wp-config.php file requires a different numeric value than the ones stated above. This unique value prevents other users on your servers from accessing the file. Therefore, you’ll need to manually change its file permission.

In your root directory, find the wp-config.php file, right-click on it, and select File permissions. Next, set the numeric value to “440”, and click on OK.

Changing the permissions for the wp-config.php file in FileZilla.

Now, every one of your WordPress files and folders should have the correct permissions. Once you’ve completed the above steps, go back to your site and try to reproduce the 403 Forbidden error. If your site is working fine, you don’t need to do anything else.

However, don’t worry if you’re still facing the same problem. There are still a few more fixes to try, and some of them are very simple.

2. Deactivate Your Plugins

As we mentioned earlier, the 403 Forbidden error can also be caused by a faulty plugin. To find out if this is the case, you’ll need to deactivate your plugins and then reactivate them one by one.

To start, connect to your site via FileZilla or the file manager in your hosting account. Then, in your site’s root directory, open the wp-content folder and locate the plugins folder. Then right-click on the plugins folder and select Rename.

How to rename the plugins folder in your site’s root directory.

Next, give the folder a new name, for example, “plugins_test. This will automatically deactivate all of your plugins.

If you can access your site after renaming the folder, then the 403 Forbidden error was caused by a glitchy plugin. Your next step is to find out which one it is.

First, return to your site’s root directory and rename the plugins folder back to “plugins”. Then navigate to the Plugins page in your WordPress dashboard and activate the plugins one at a time. Keep doing this until you are able to reproduce the error. Once you’ve identified the faulty plugin, you can either remove it or contact its developer for support.

3. Delete and Restore the .htaccess File

A corrupt .htaccess file can also trigger the 403 Forbidden error. This file is located in your site’s root directory and enables WordPress to interact with your server.

Inside your site’s root directory, locate the .htaccess file, right-click on it, and choose Delete.

Locating and deleting the .htaccess file in your site’s root directory.

Now, try accessing your site again. If the 403 Forbidden error has disappeared, then your .htaccess file may have been corrupted. This means you’ll need to create a new one.

To do this, navigate to Settings in your WordPress dashboard and select Permalinks. Then click on the Save Changes button at the bottom of the page, and a new .htaccess file will be generated. You can look for the file in your site’s directory to ensure that it has been restored.

4. Deactivate Your CDN

If you’re still getting the 403 Forbidden error after completing the above steps, you may have a problem with your Content Delivery Network (CDN). This is a network of servers located in different parts of the world, with each server hosting a copy of your website. Many hosting plans come with a CDN to help boost your site’s performance.

To see if your CDN is the cause of the error, you’ll need to temporarily disable it. You can do this by logging into your hosting account and locating your CDN settings. If you’re unable to access your CDN, we recommend getting in touch with your hosting provider.

5. Check Your Hotlink Protection

Finally, you might want to check your site’s hotlink protection. Hotlinking is when someone embeds media files on their site by linking them directly from another site. Some individuals may do this to use another site owner’s bandwidth (rather than their own), which is effectively theft.

Some hosts and CDN providers offer hotlink protection. However, if this is not set up properly, it can trigger a 403 Forbidden error on your site. Therefore, you may want to contact your web host about this issue. While you may want to look into this yourself, it’s best to get help from a technical expert to ensure that your hotlink protection is configured correctly.

Additional WordPress Resources

If you’re new to WordPress, you’re bound to run into some technical issues while setting up your site. To help you fix some of the most common WordPress errors, we’ve put together several how-to guides:

Meanwhile, if you’re looking for more WordPress tips and hacks, check out our WordPress Tutorials. This collection of guides will help you set up and design your first WordPress site like a professional.

Take Your WordPress Website to the Next Level

Whether you need help navigating the WordPress dashboard, decoding an error message, or finding the plugins folder, we can help! Subscribe to our monthly digest so you never miss an article.

Bye, WordPress 403 Error

The 403 Forbidden error appears when your server denies you permission to access a page on your site. This is mainly caused by a faulty security plugin, a corrupt .htaccess file, or incorrect file permissions on your server.

In this post, we looked at five main ways you can fix the 403 Forbidden error using an SFTP client like FileZilla or the file manager in your hosting account:

  1. Change your file permissions.
  2. Deactivate your plugins.
  3. Delete and restore the .htaccess file.
  4. Deactivate your CDN.
  5. Check your hotlink protection.

If you want to receive expert help when encountering WordPress errors, you may want to consider a managed WordPress hosting plan. Our DreamPress plans come with 24/7 technical support for WordPress site owners, so you can spend less time troubleshooting and focus your efforts on growing your business.

The post How to Fix the 403 Forbidden Error in WordPress (5 Methods) appeared first on Website Guides, Tips & Knowledge.


source https://www.dreamhost.com/blog/how-to-fix-403-forbidden-error-wordpress/

Creating and Mastering GA4 Explorations

In the switch from Universal Analytics (UA) to Google Analytics 4 (GA4) — which will go fully into effect July 2023 — a lot of things have...