As you’re browsing the web, you may stumble across an invalid page. Sometimes, a site’s server won’t be able to understand your request for its content. Instead of the requested resources, you’ll see a “400 Bad Request” error message.
Fortunately, the 400 Bad Request issue is easy to resolve. Often, fixing typos in the URL will do the trick, but you may also need to clear your browser cache or temporarily disable extensions.
In this post, we’ll explain what the 400 Bad Request error is and what causes it. Then, we’ll look at six different ways to fix it. Let’s get started!
An Introduction to the 400 Bad Request Error
When you try to access a web page, your browser requests the site’s data from its server. The web server will then process the request. Within the HTTP header, there will be a status code explaining whether the request was successful or not.
In a successful HTTP request, you won’t see the status code. However, sometimes your web browser may display an error message like “400 Bad Request”:

This 400-level HTTP status code indicates that there was a client-side error in the request. As a result, you won’t be able to view the page you requested.
While this error typically shows up as “400 Bad Request”, you may see some variations:
- Bad Request – Invalid URL
- HTTP Error 400
- HTTP Error 400 – Bad Request
- HTTP Status 400 – Bad Request
- 400 – Bad Request. The request could not be understood by the server due to malformed syntax. The client should not repeat the request without modifications.
- Bad Request. Your browser sent a request that this server could not understand.
- 400 Bad Request. Request Header Or Cookie Too Large
- Bad Request – Error 400
The 400 Bad Request error can be very frustrating, as it blocks access to the site without giving you any helpful information. Let’s discuss some of the most common causes.
Potential Causes for the 400 Bad Request Error
When a server returns a 400 Bad Request, it means that it cannot understand and process your request. Usually, this is due to a client-side error, which means there’s a problem on your end.
Here are some common issues that may cause a 400 Bad Request error:
- Invalid URL syntax: You may have mistyped the URL or used invalid characters.
- Corrupted browser cache or cookies: If your browser cookies have expired or your cache is corrupted, the server may not be able to process your request properly.
- Conflicting browser extensions: In some cases, your browser extensions can interfere with the request and cause a 400 Bad Request.
- Bad DNS cache: Your locally cached DNS data could be out of sync with the current DNS registration for the domain.
- Large uploaded file size: If you’re uploading a large file to a site, it could exceed the maximum upload limit.
Alternatively, a 400 HTTP error could appear due to a server-side error. For example, the website may have a misconfigured server or a temporary glitch.
How to Fix the 400 Bad Request Error (6 Methods)
When you see a 400 Bad Request error, you can try refreshing the page. In some cases, this will resolve any temporary glitches. If it doesn’t work, you can try the following steps.
1. Check for Errors in the Address
First, you’ll want to check your URL for any errors. This is one of the most common causes of a 400 Bad Request.
There could be typos, malformed syntax, or extra characters in the address. It’s important to go back to the domain name, directory path, and query string to make sure the address is correct.
During this process, check for special symbols. For example, random characters like hyphens (-) or percentages (%) could cause the Bad Request:

Some URLs have special characters, but you’ll need to make sure they’ve been coded correctly. You can check the address using a URL Decoder/Encoder. This tool will identify any invalid characters in the URL:
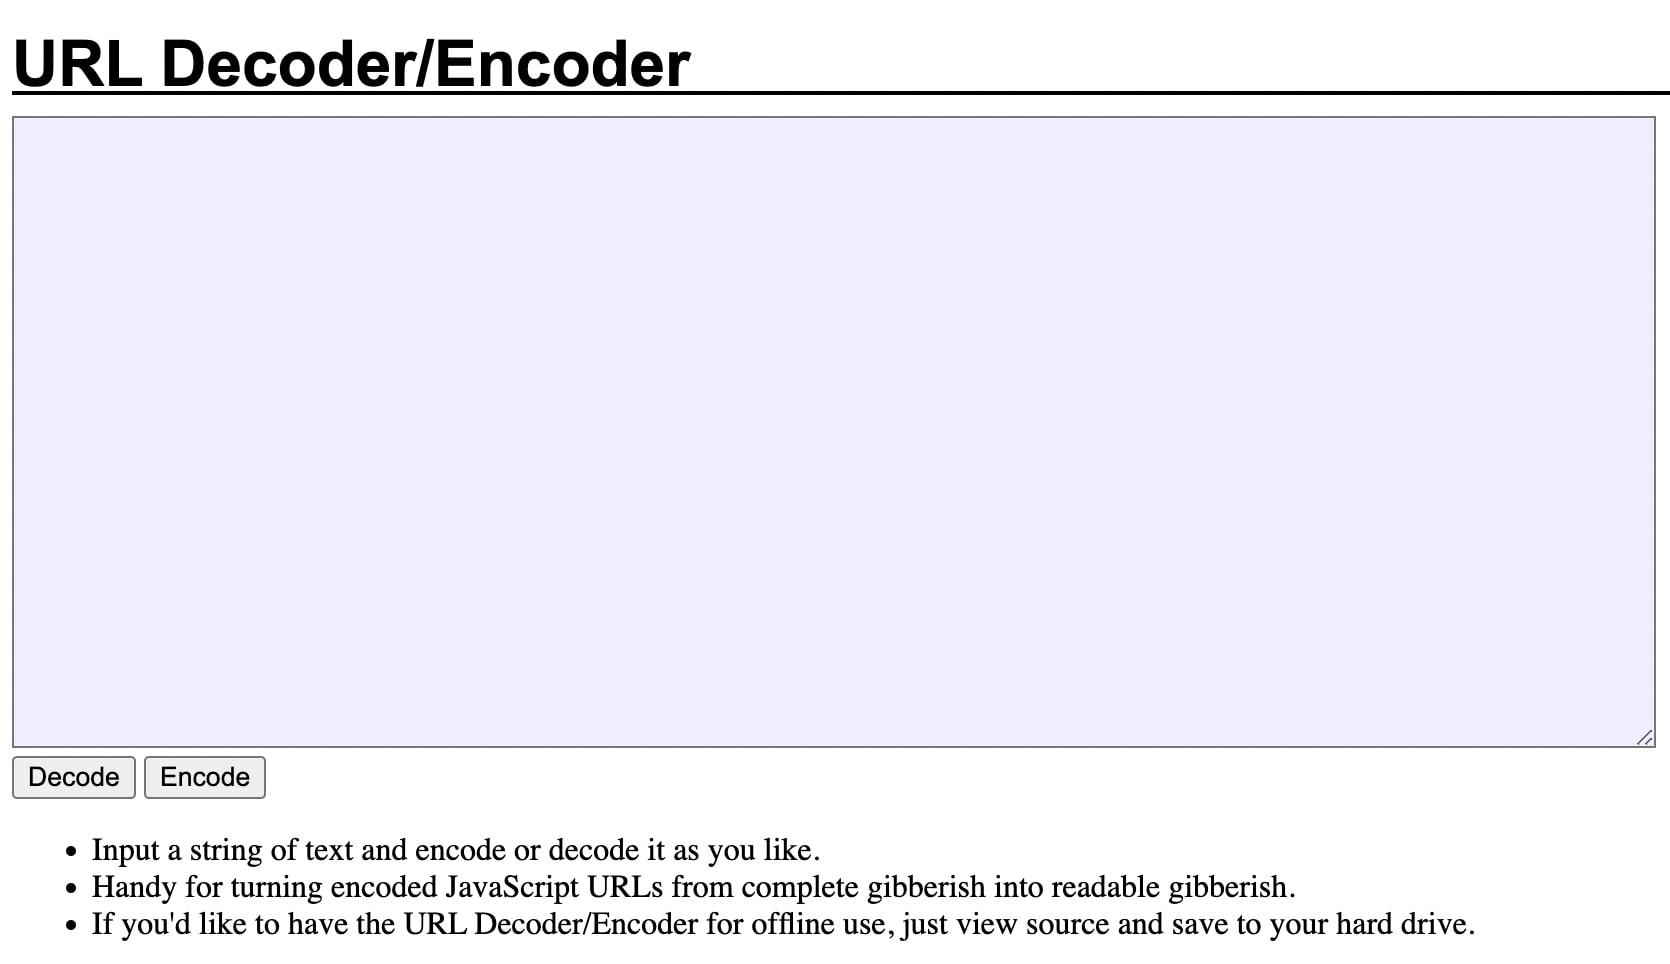
Then, try searching for the URL again. If the same 400 error pops up, you can also try searching for the web page in a different way.
For example, you can run a search for the site’s domain name and a relevant keyword. If you were looking for our post on featured image sizes, you would type ‘site: dreamhost.com featured image sizes’ into a search engine:

This will enable you to access the page without having to type the URL manually. However, you may still get a 400 Bad Request error. If this happens, continue to the following method.
2. Clear Your Browser’s Cache and Cookies
Your browser saves site data in a cache. This way, when you revisit that site in the future, the browser will serve the cached content to make the page load faster.
As you’re browsing the Internet, cookies will also be stored in your browser. These are small files that contain data such as the length of your browsing session. Cookies can also remember personalized information like your login details or site preferences.
Although your browser’s cache and cookies can be helpful tools, they can also become corrupted. Additionally, cookies can eventually expire. When this happens, it can trigger a 400 Bad Request.
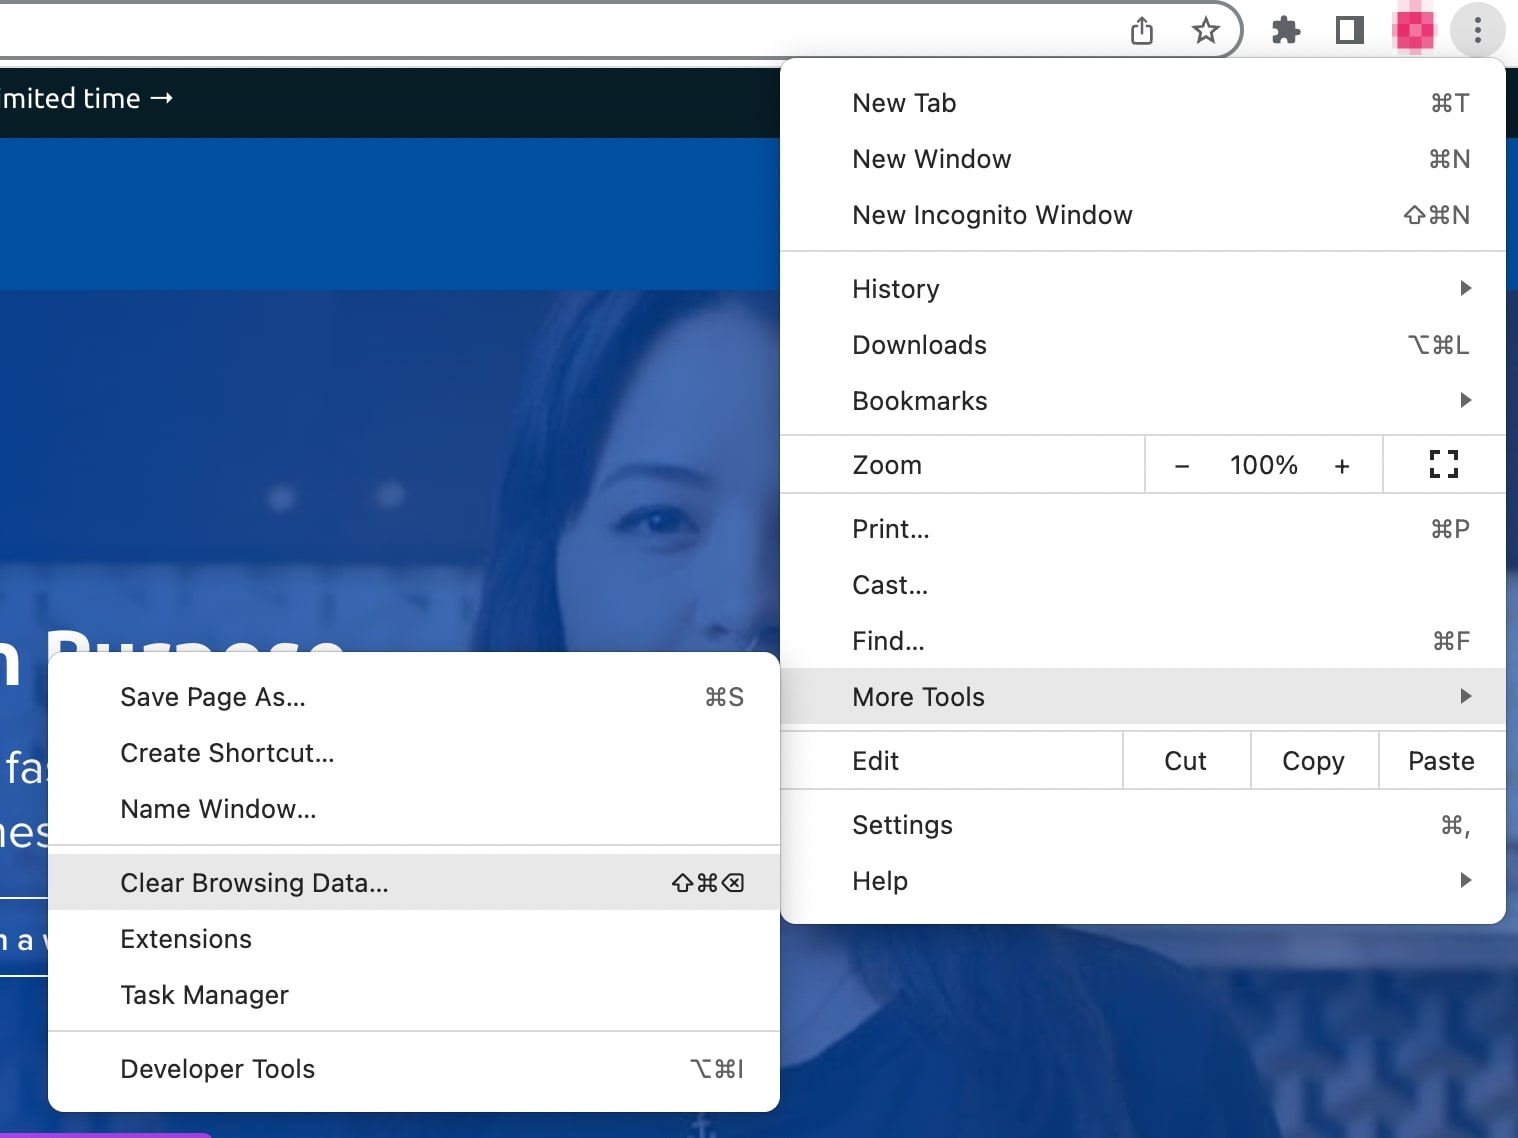
To solve this problem, consider clearing the cache and cookies in your browser. In Google Chrome, you’ll need to hit the three-dot icon in the upper right-hand corner. Then, select More Tools > Clear Browsing Data:
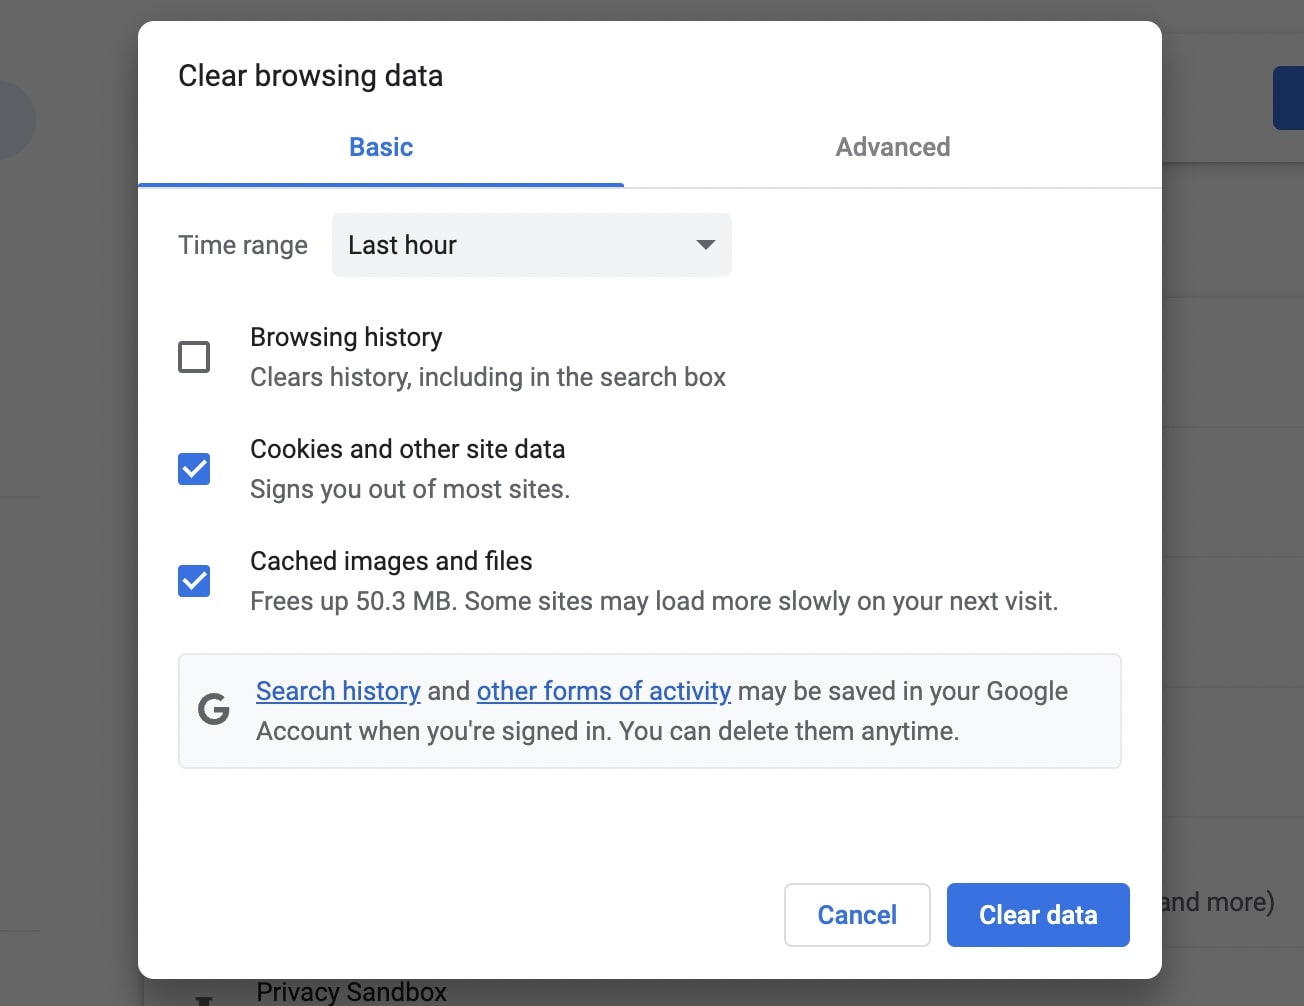
This will open a pop-up window where you can choose the data you want to clear. Make sure to select Cookies and other site data as well as Cached images and files:
If the Bad Request error happens on a different device or browser type, this process will look a little different. If you use an iPhone or Microsoft computer, you’ll have to review the company’s knowledge base for clearing your specific cache, cookies, or browsing data.
Keep in mind that this will sign you out of many websites. You may also experience slower loading times when you visit these sites again. However, it could remove corrupted or expired data that may cause a 400 Bad Request.
3. Disable Browser Extensions
If you’re a website owner, you likely know that third-party plugins can cause many WordPress errors. Similarly, the software in your browser extensions could interfere with your request.
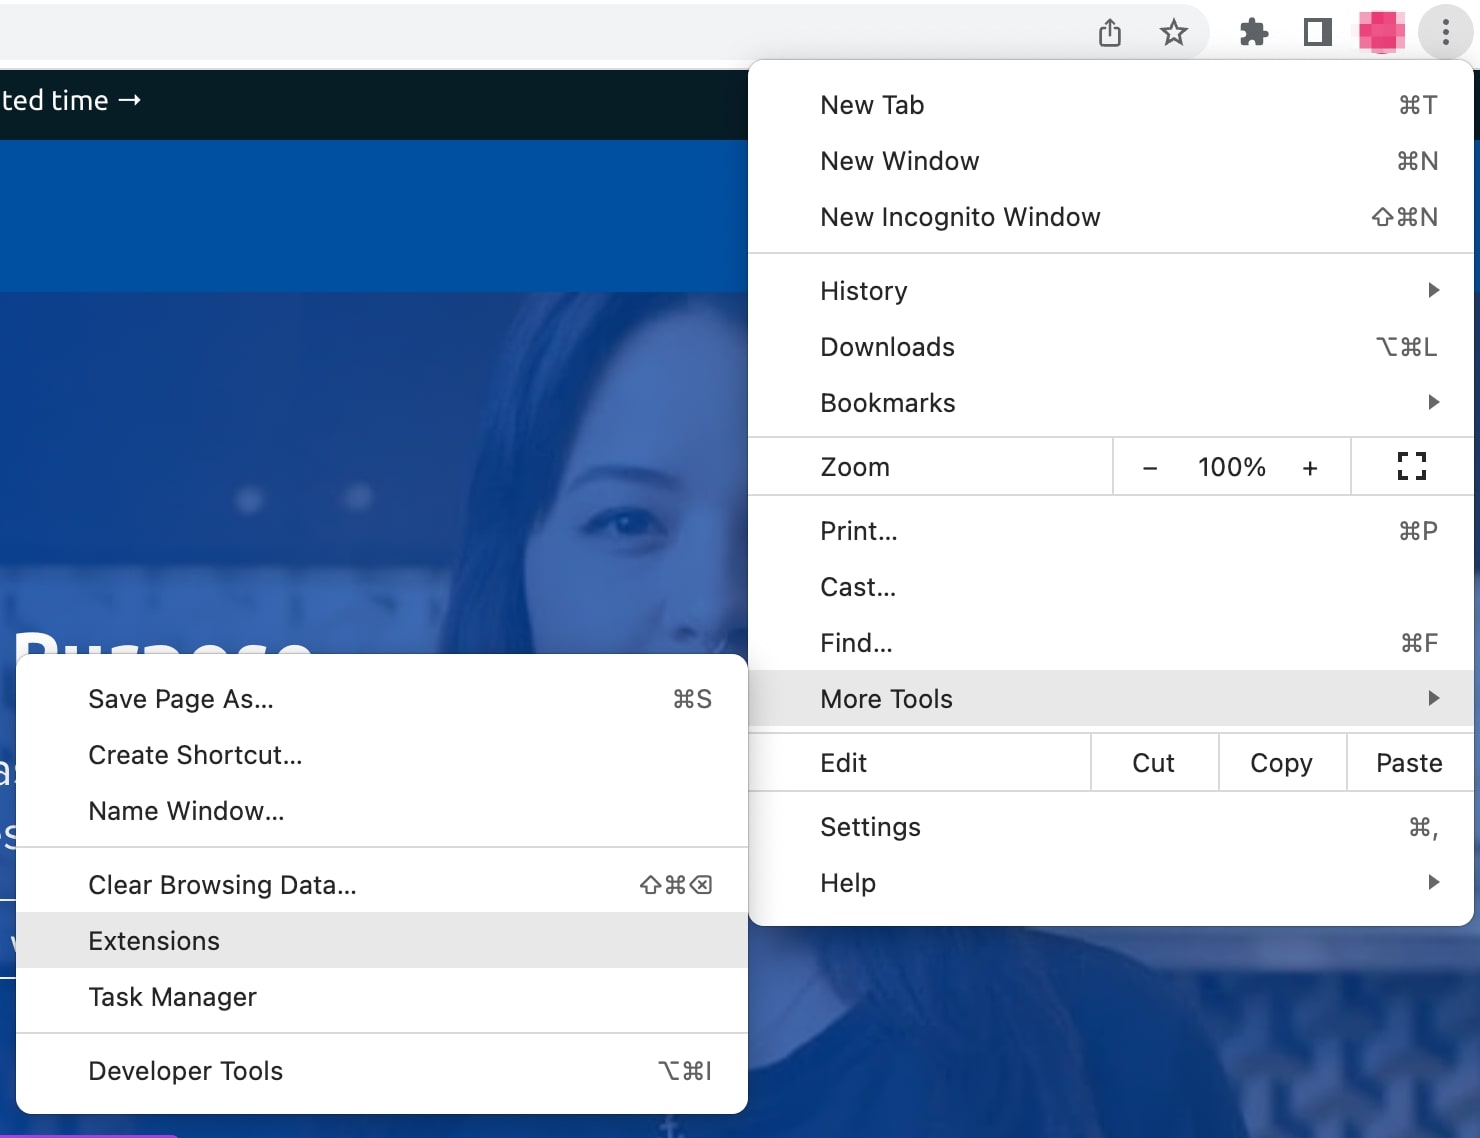
To get started, try disabling your extensions. If you’re using Google Chrome, click on the three dots again and navigate to More Tools > Extensions:
This will take you to a page where you can manage your Chrome extensions. Using the toggle switches, turn all of them off:

Now, reload the page that triggered a Bad Request. If it loads successfully, then one of these extensions caused the error.
To find the problematic extension, reactivate them one by one, each time checking to see if the error has returned. Once it does, remove the extension that caused it. This should prevent any 400 HTTP status codes in the future.
4. Flush the DNS Cache
The first time you visit a website, some of its data is stored locally in a cache. To load pages faster, your computer will save DNS information about websites. This will eliminate the need to search for the site’s nameserver and IP address every time you come back.
Just like your browser cache, the DNS cache can also become corrupt or outdated. Sometimes, a website will update its DNS information. If this conflicts with your cached data, it can lead to a 400 Bad Request error.
To fix this error, you’ll need to flush your DNS cache. For macOS operating systems running on Monterey and Big Sur, open the Terminal and enter this command:
sudo dscacheutil -flushcache; sudo killall -HUP mDNSResponder
If you have Windows 10, open the Command Prompt and type in the following command:
ipconfig /flushdns
With Linux operating systems, you’ll use Terminal as your command line. To flush the DNS, simply execute this command:
sudo systemd-resolve --flush-caches
You may also need to flush the DNS cache for your browser. To do this in Google Chrome, paste the following line into your search bar:
chrome://net-internals/#dns
Then, click on Clear host cache. This will flush your browser’s DNS cache:
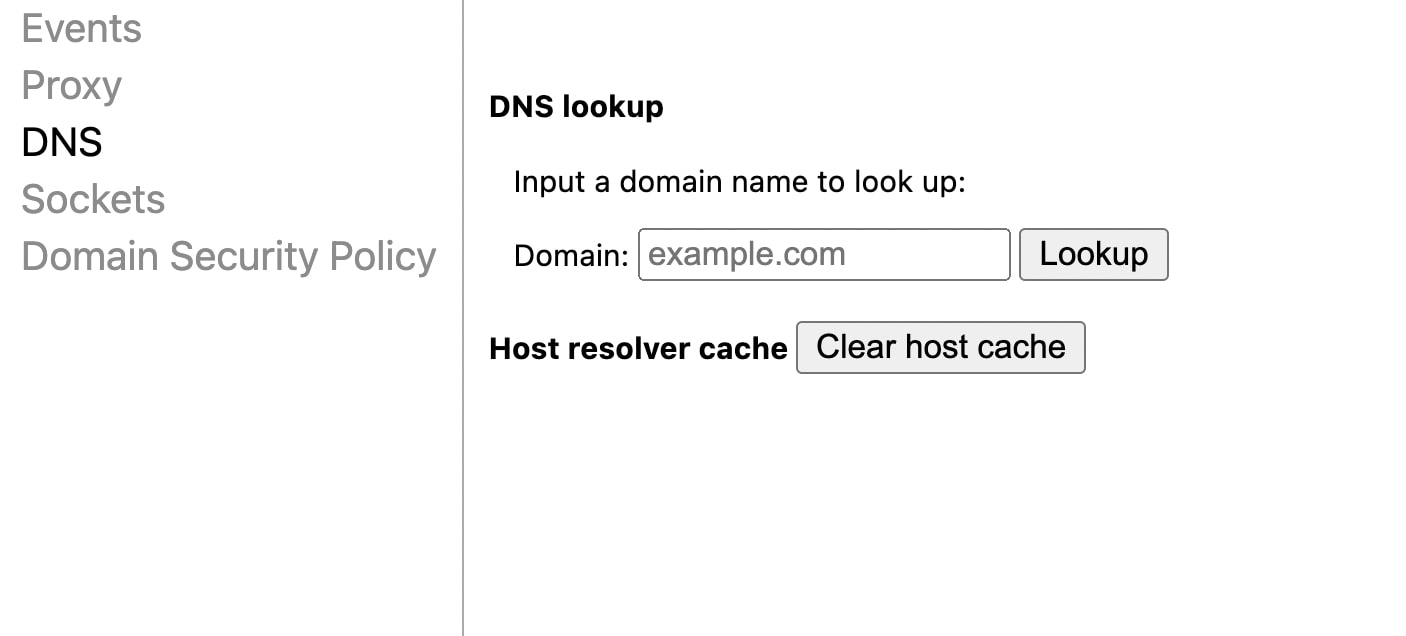
After you successfully flush your DNS, check to see if this resolved the error. If not, you’ll need to try another method.
5. Check the Uploaded File Size
Sometimes, you’ll see the 400 Bad Request error right after uploading a file to a website. In this case, your file may be too big to upload to the site’s server.
Every site has a maximum file upload size. Although this is set by the hosting provider, it usually falls between 2 and 500 MB. If you upload a larger file, you’ll likely receive a Bad Request.
To see if this is the case, start by uploading a smaller file. If this is successful, you’ll need to resize or compress the original file.
You can use a tool like TinyPNG to reduce file sizes:
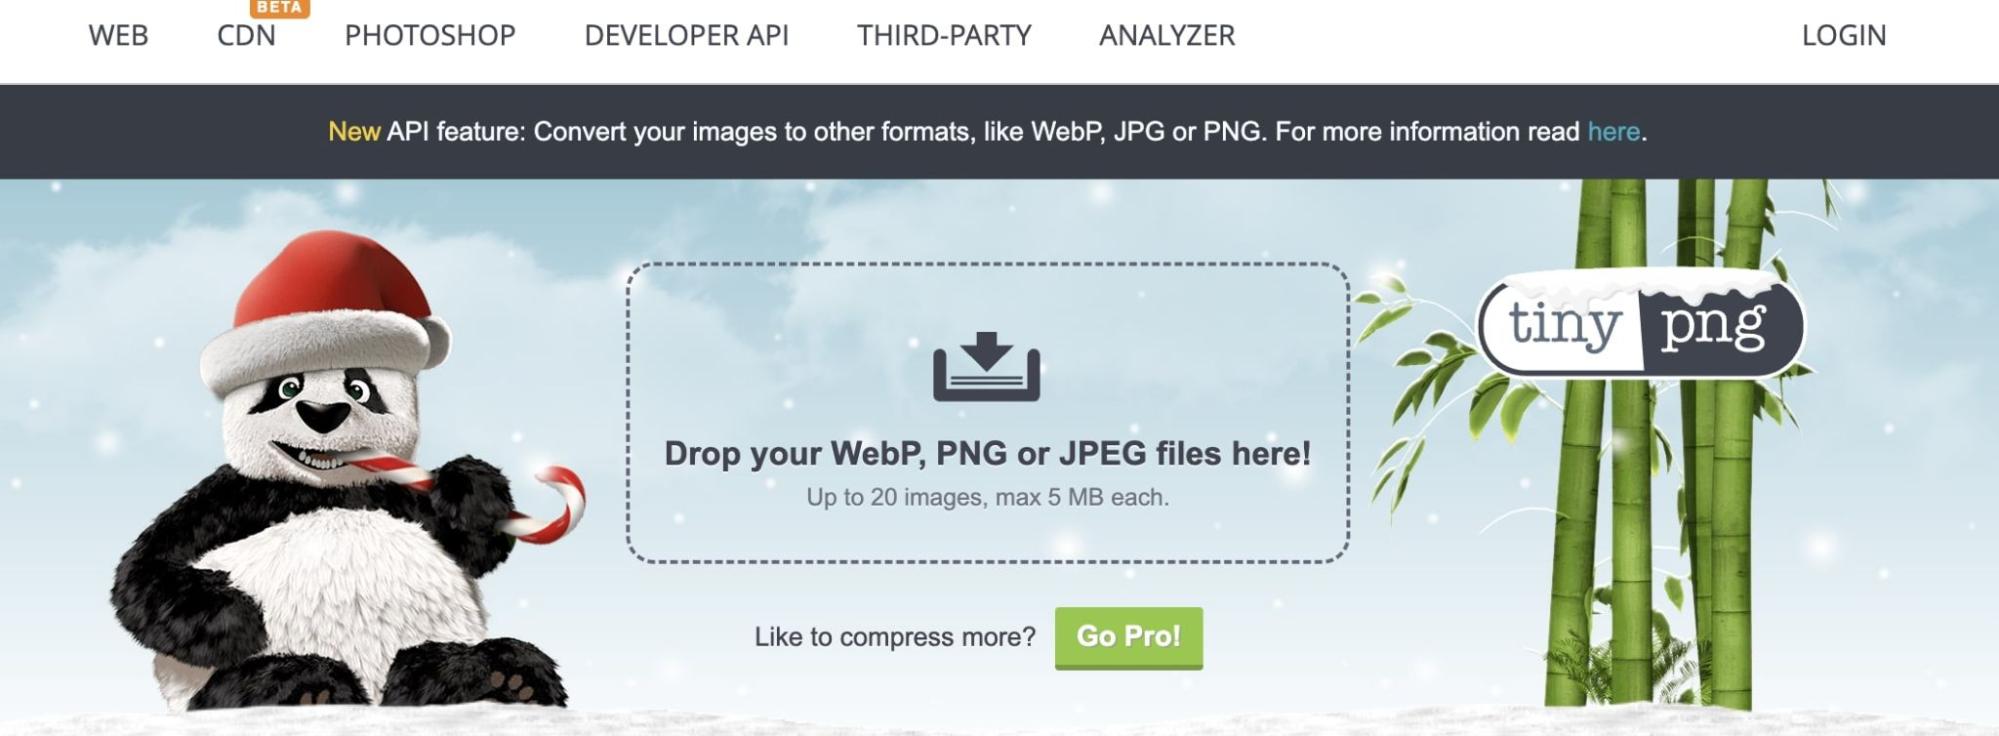
If allowed by the site, you can also try uploading a zip file. Ultimately, you’ll want to reduce file sizes enough to stay within the server’s file size upload limit.
6. Troubleshoot Your Device and Internet Connection
When every single page you visit returns a 400 Bad Request, you might have a poor Internet connection. To see if this is the case, try switching to a different network. For example, you can turn off Wi-Fi for your mobile device and use cellular data.
If this resolves the error, you can troubleshoot your Internet connection. You may need to restart your Wi-Fi router. Alternatively, consider contacting your service provider to fix the issue.
You can also try turning your device off and back on again. Since this can clear Random Access Memory (RAM), flush temporary caches, and close running programs, it may help solve a Bad Request.
Error-Free Browsing
The 400 Bad Request error is a client-side HTTP status code that crops up when a server is unable to fulfill a request. This is usually caused by typos in the URL, corrupt browser cookies, or conflicting browser extensions.
Fortunately, there are many ways to resolve the issue. One simple solution is to reload the browser and check for temporary glitches. However, you may need to flush your DNS cache, restart your device, or reduce uploaded file sizes.
For more error troubleshooting tips, subscribe to the DreamHost blog! We’ll update you every time we post new content.
Get Content Delivered Straight to Your Inbox
Subscribe to our blog and receive great content just like this delivered straight to your inbox.
The post How to Fix: 400 Bad Request Error appeared first on Website Guides, Tips & Knowledge.
source https://www.dreamhost.com/blog/400-bad-request-error/
No comments:
Post a Comment