Wednesday 30 November 2022

502 Bad Gateway Error: What It Is and How to Fix It

If you run an online business, you’ll want your website to be available at all times. Unfortunately, WordPress problems like the 502 Bad Gateway error are common and can prevent users from accessing your site.

The good news is that this error is relatively easy to fix. Once you’ve determined the cause, you can take the necessary steps to resolve the problem and make your website accessible again.

In this post, we’ll take a closer look at the 502 Bad Gateway error message and its leading causes. Then, we’ll show you how to fix it. Let’s get started!

What Is the 502 Bad Gateway Error?

Whenever you try accessing a website, your browser sends a request to the site’s server. This server processes the request and returns the data (i.e., the site’s content).

You’ll see an HTTP status code if something goes wrong during the process. Sometimes, this is accompanied by a message that describes the problem.

A 502 Bad Gateway error indicates that the server received an invalid response from an inbound server and usually happens if the site is using a proxy or gateway server.

The error message you see may vary, depending on your browser and the server you’re trying to access. However, typically you’ll receive one of the following alerts:

  • “502 Bad Gateway”
  • “502 Proxy Error”
  • “Error 502”
  • “HTTP Error 502 – Bad Gateway”
  • Temporary Error (502)
  • “502 Service Temporarily Overloaded”

As you can see, the 502 status code may indicate an issue with the proxy server or a server overload. However, there are other possible causes of this error.

What Causes the 502 Bad Gateway Error?

Several issues can return a 502 Bad Gateway error. These include:

  • An unresolved domain name. The domain name might not be connecting to the correct IP address. This can happen because you’ve recently migrated your site to a new host, and the DNS servers haven’t yet finished propagating.
  • An over-sensitive firewall. If your site or your web host is using a firewall, it may be blocking certain internet providers or IP addresses. This happens when the firewall detects a false threat.
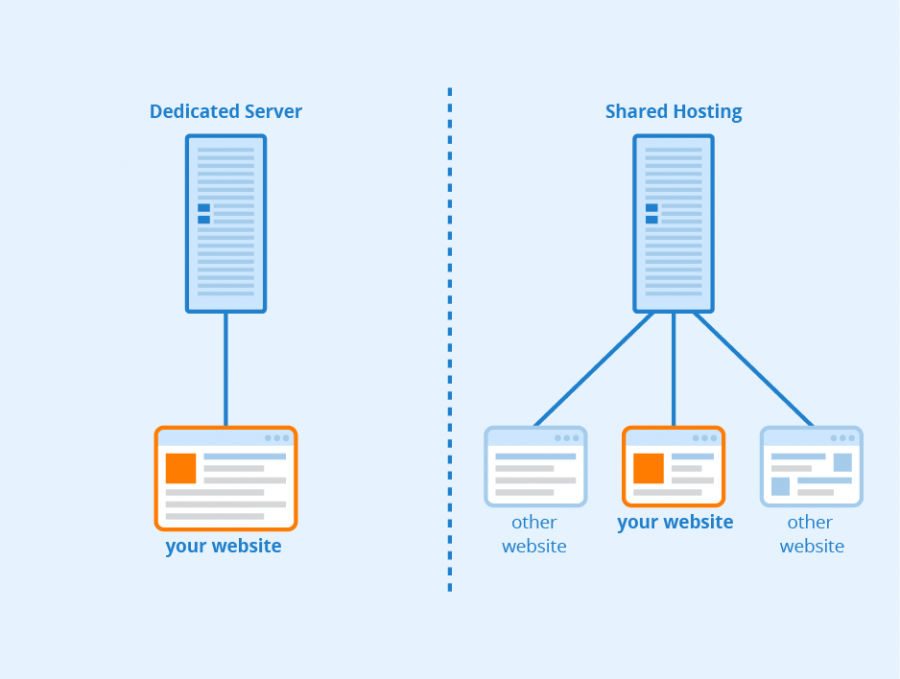
  • Server overload. The origin server may have crashed due to a sudden spike in traffic. This problem is more common if you’re on a shared hosting plan and your server has limited resources.

It’s worth noting that the 502 Bad Gateway error doesn’t always indicate a problem with the server. It can also be caused by a client-side issue, like an outdated browser version or corrupted files in the browser cache.

How Do You Fix the 502 Bad Gateway Error? (10 Possible Solutions)

Now, let’s look at how to fix the 502 Bad Gateway error! We’ll cover two scenarios: an issue on the client side and a problem with the server.

1. Refresh the Page and Try a Different Browser

Let’s start with the simplest solution. The 502 Bad Gateway error could be a temporary issue. For example, the web server may have become overloaded for a few minutes or experienced a brief surge in traffic.

Therefore, wait a few moments and reload the site. It’s also a good idea to try accessing the page on a different browser or device. This process will help you determine if it’s a client-side or server-side issue.

Additionally, you could use a tool like Down for Everyone or Just Me, or Is It Down Right Now to confirm whether the problem is on your end or with the site’s host:

The “Down for Everyone or Just Me” online tool

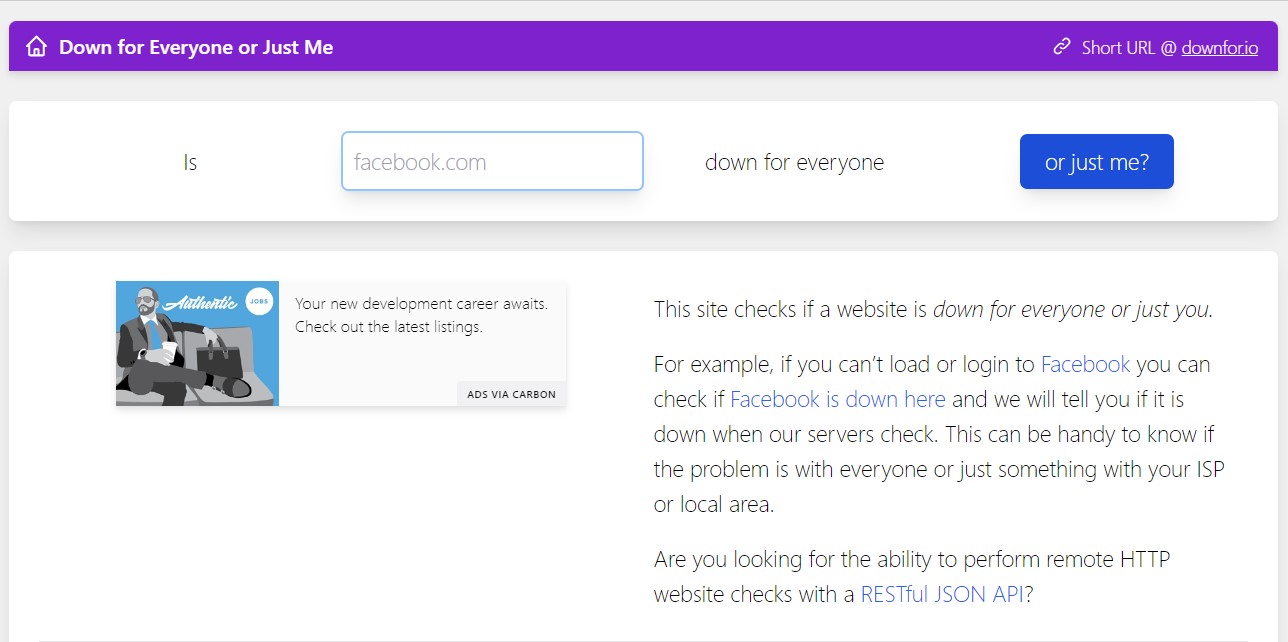
If the results show that the site is up, you’ll need to try a few things on your browser and computer (which we’ll show you in the following steps). On the other hand, if the site is down for everyone, then you’ll have to go into your site’s back end to locate the problem — we’ll look into this later in the post.

2. Clear Your Browser’s Cache

Your browser might be storing outdated data for your site, which could lead to the Bad Gateway error. Alternatively, it may contain corrupted files that prevent access to your website.

It’s a good idea to clear your browser cache. For example, in Google Chrome, click on the three dots in the top right-hand corner and select More tools > Clear browsing data.

This will launch a popup window:

Clearing the browser cache in Google Chrome

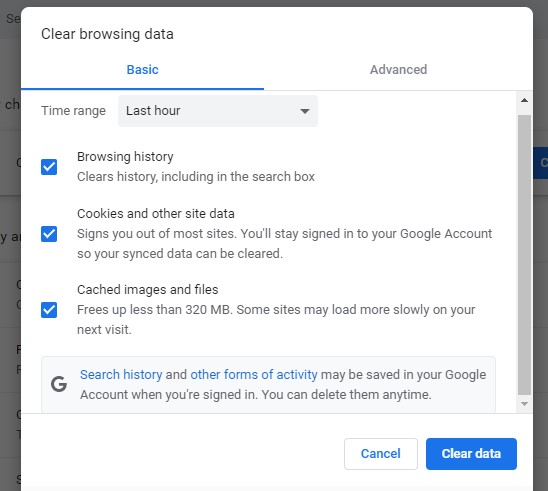
Then, choose a time range, make sure the options for Cookies and other site data and Cached images and files are selected, and hit Clear data. Once complete, re-launch the browser and try accessing your site.

The process for clearing cache in other browsers like Mozilla Firefox is similar. However, if this method doesn’t resolve the 502 gateway issue, you’ll need to move on to the next step.

Get Content Delivered Straight to Your Inbox

Subscribe to our blog and receive great content just like this delivered straight to your inbox.

3. Flush the DNS Cache

The 502 gateway error could also be caused by a Domain Name System (DNS) issue. For example, if you’ve just migrated your site to a new web host, the propagation process may take up to 48 hours.

However, there might also be an issue with your local DNS cache. This temporary storage on your device contains information about visited domain names.

To flush the DNS cache in Windows, press the Windows key, then type in “CMD” and hit Enter:

Launching the Command Prompt in Windows

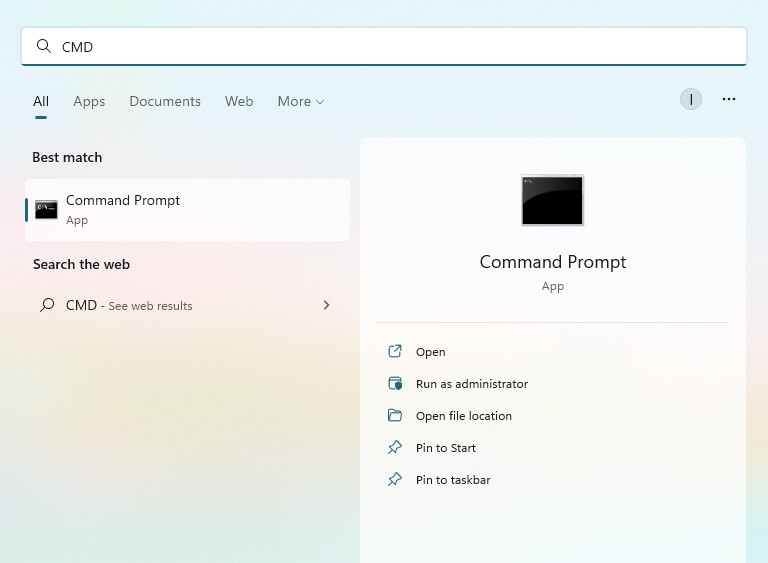
This will bring up the Command Prompt window:

The Command Prompt Window

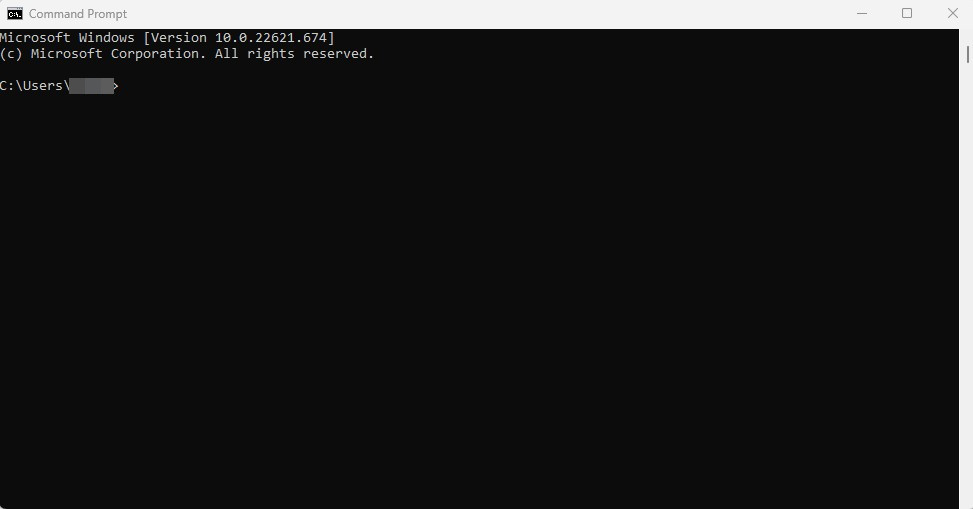
Here, you’ll need to type in the following command:

ipconfig /flushdns

When it’s ready, you should see a message that says, “Successfully flushed the DNS resolver Cache”.

If you have a macOS device, you’ll need to enter the following command in the terminal:

dscacheutil -flushcache

Alternatively, you could temporarily change your DNS server to a third-party service, such as Google Public DNS.

4. Check Your Site’s Error Log

If your site is down for everyone and the problem is not with your device, you may want to check your error logs. These can help you identify what caused the issue. For example, a plugin conflict or update may have triggered the 502 Bad Gateway error.

You’ll need to access your site’s files to view these logs. You can do this via the File Manager in your hosting account or a Secure File Transfer Protocol (SFTP) client like FileZilla.

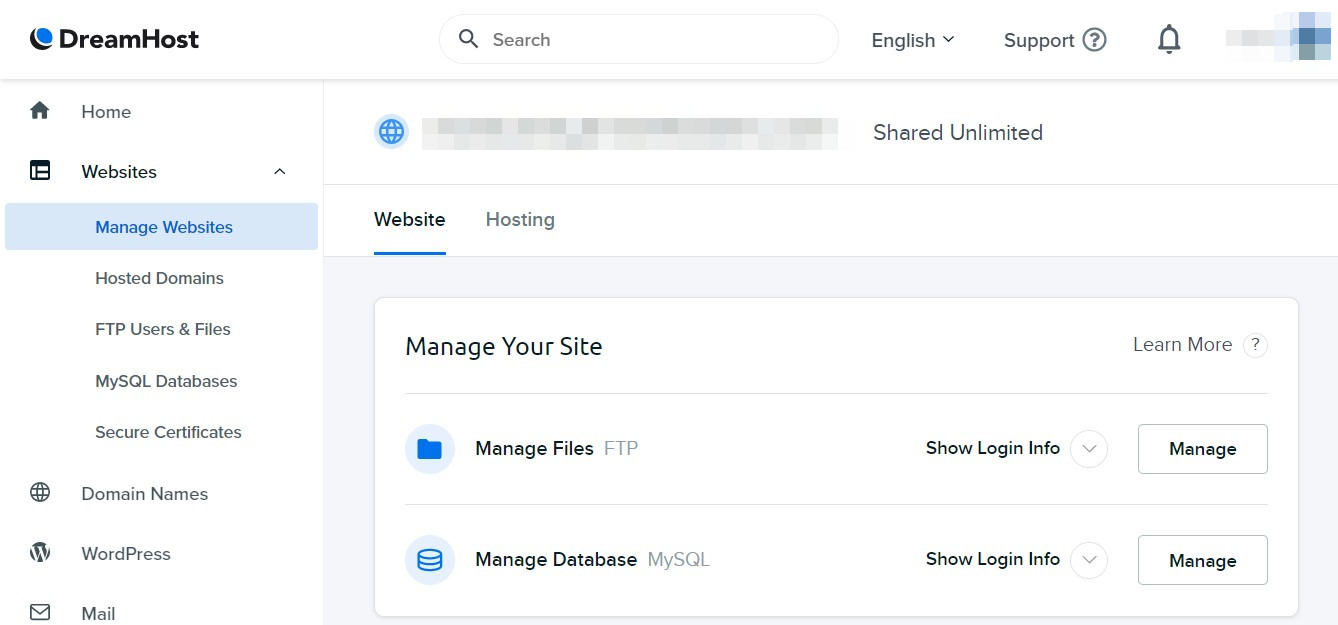
If you’re a DreamHost customer, log in to your account and navigate to Websites > Manage Websites. Select your site, then navigate to Manage Files and click on Manage:

The DreamHost hosting account

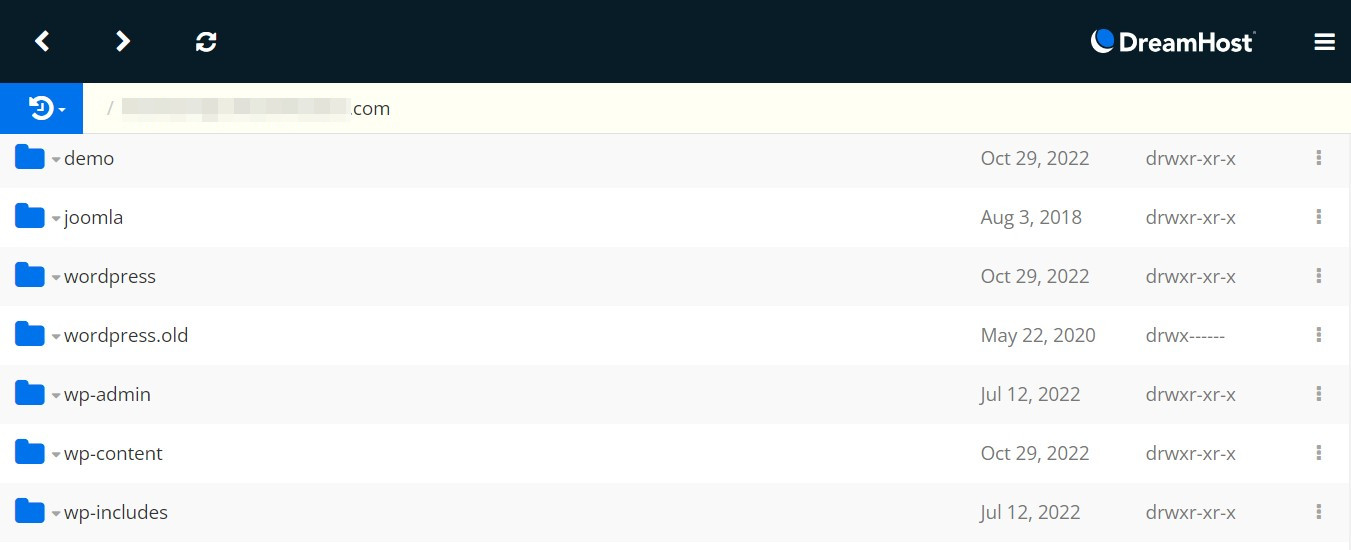
This will launch the File Manager. Click on the folder that contains your domain name, and look for wp-content:

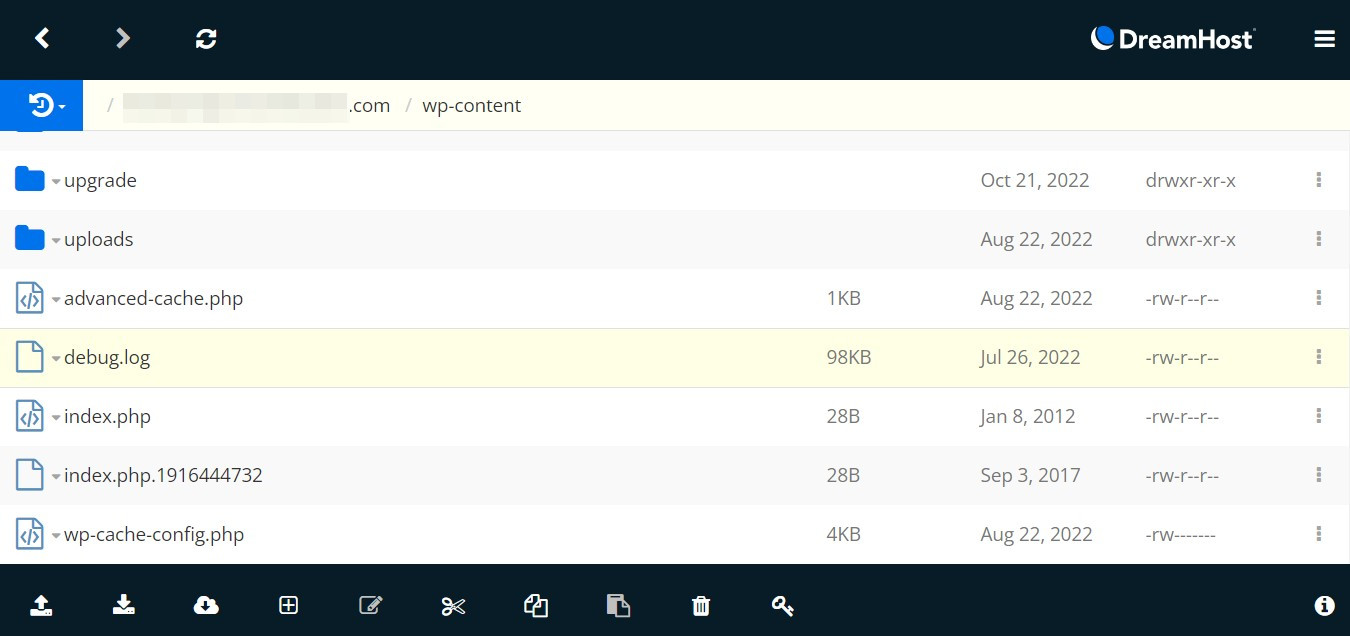
Open the folder and locate a file called debug.log:

The debug.log file in the File Manager

Look for the last logged error. It might give you clues as to what has gone wrong. You can then take steps to resolve the issue. For example, you might need to disable a plugin. (We’ll show you how in the next section).

The process is almost identical if you use an SFTP client or a different hosting account. You can look for a file called error_log (or something similar) in your wp-content folder.

5. Deactivate Your Plugins and Themes

If you’ve installed a new plugin or theme, it might conflict with another tool on your site, prompting a 502 gateway error. A recent plugin update might also cause this.

Since you cannot access your WordPress dashboard, you’ll need to deactivate your plugins and themes from the File Manager in your hosting account. Alternatively, you could use an SFTP client.

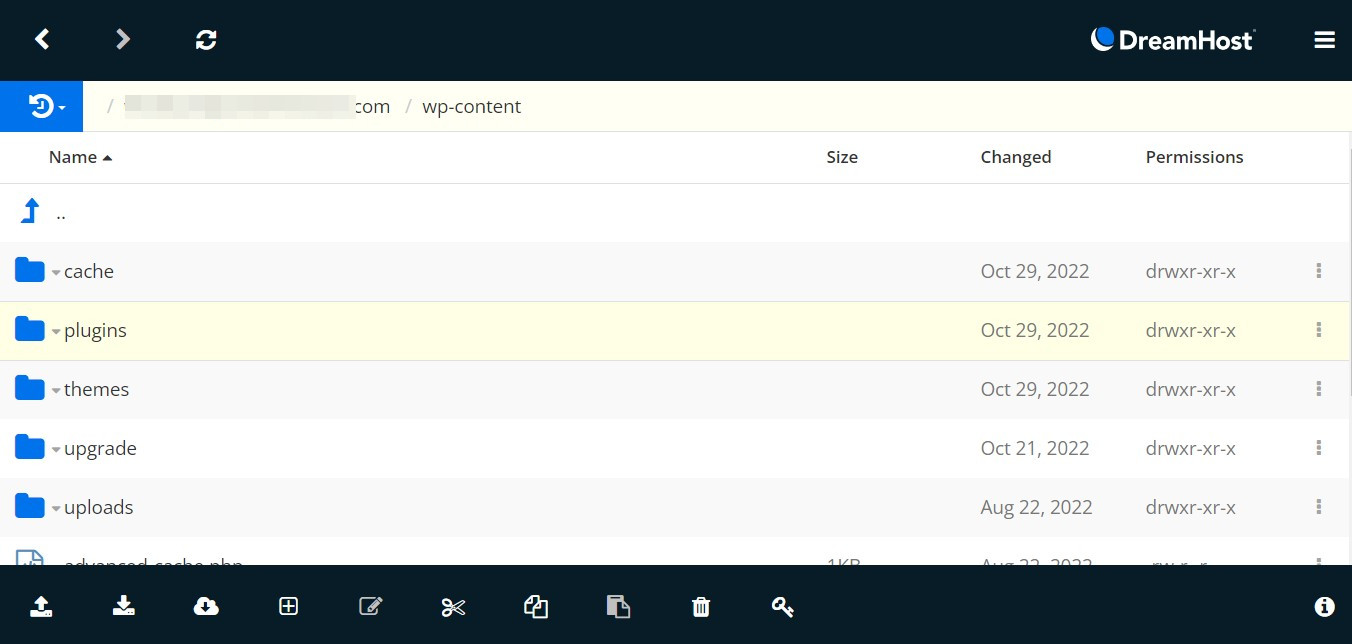
If you’re a DreamHost user, log in to your account and open your site’s File Manager (as shown in the previous step). Then, go to wp-content and look for a folder called plugins:

The plugins folder in the File Manager

To deactivate your plugins, all you need to do is rename this folder. However, if you already know which plugin is causing trouble, you can locate it inside the plugins folder and rename its folder instead.

You can now try accessing your site again. If it’s up and running, log in to the WordPress dashboard and re-activate each plugin one by one while refreshing the page. This process will help you identify the culprit.

If you know which plugin is causing the 502 gateway error, we recommend removing it from your site or disabling it until the developers release a fix. You’ll just need to repeat the same process to deactivate your themes.

Don’t worry if you’re still having issues after deactivating your plugins and themes— there are still a couple more things you can try.

6. Disable Your CDN or Firewall

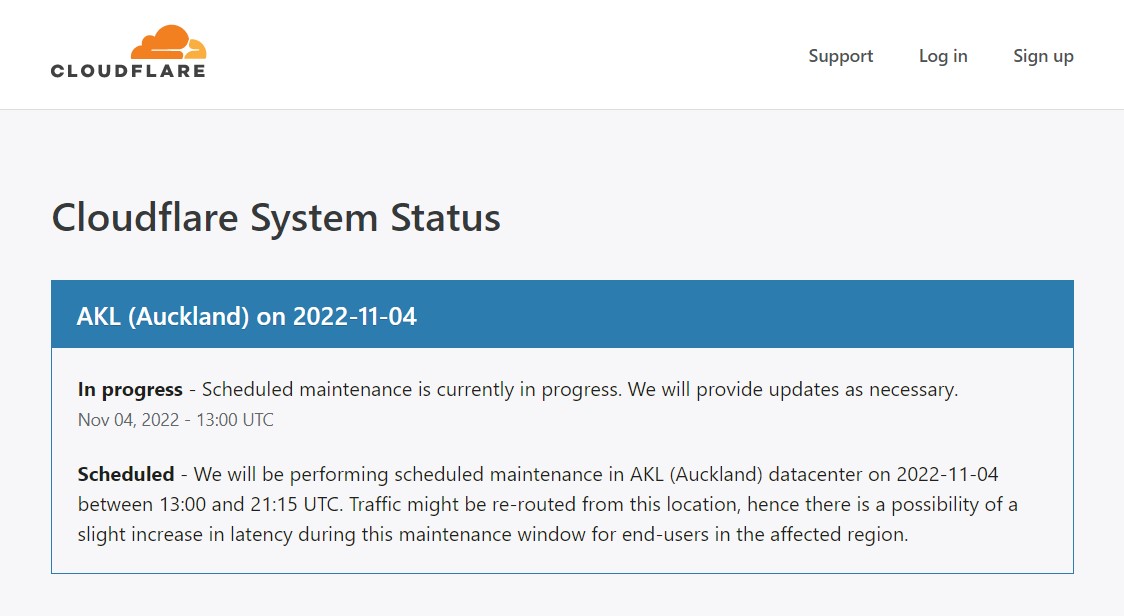
The 502 gateway error could also be caused by your Content Delivery Network (CDN) or firewall. If you’re using Cloudflare, you can simply check to see if there are any reported issues.

For example, the server might be undergoing scheduled maintenance:

The Cloudflare System Status page

Alternatively, try disabling the CDN to see if it resolves the issue. If you’re using a firewall, you might also want to deactivate it.

You should be able to manage your CDN and firewall from your hosting account dashboard. If you’re unsure where to find these settings, we recommend contacting your web host for assistance.

7. Restart PHP and Increase Your PHP Limits

The 502 gateway error could also be caused by a PHP timeout issue. This happens when the PHP process takes longer than the maximum load time and the request times out.

First, you might want to try restarting PHP. This could help resolve any connectivity issues. If this option is unavailable in your hosting dashboard, you might want to ask your web host to do it for you.

Alternatively, you might need to change your server’s max_execution_time or max_input_time values. By default, these are set to 300 seconds. However, you can ask your web host to increase these values.

8. Contact Your Hosting Provider

If none of the above steps help solve your problem, you should consider contacting your hosting provider. They might be experiencing a server issue that’s affecting your site. If that’s the cause, there’s nothing you can do but wait.

Additionally, they might be able to identify the source of the 502 gateway error and walk you through a solution. Most web hosts offer 24/7 support, so they should be able to resolve the issue quickly!

Solve the 502 Bad Gateway Error

The 502 gateway error is usually caused by an issue with the server. For instance, it might have experienced a spike in traffic that affected its performance and availability. However, this error could also be triggered by plugin conflicts and updates.

To troubleshoot the problem, start by clearing your browser cache and local DNS cache to rule out any issues on your end. Then, you can try disabling your plugins, themes, CDN, and firewall. If you’re still experiencing problems, consider contacting your hosting provider for assistance.

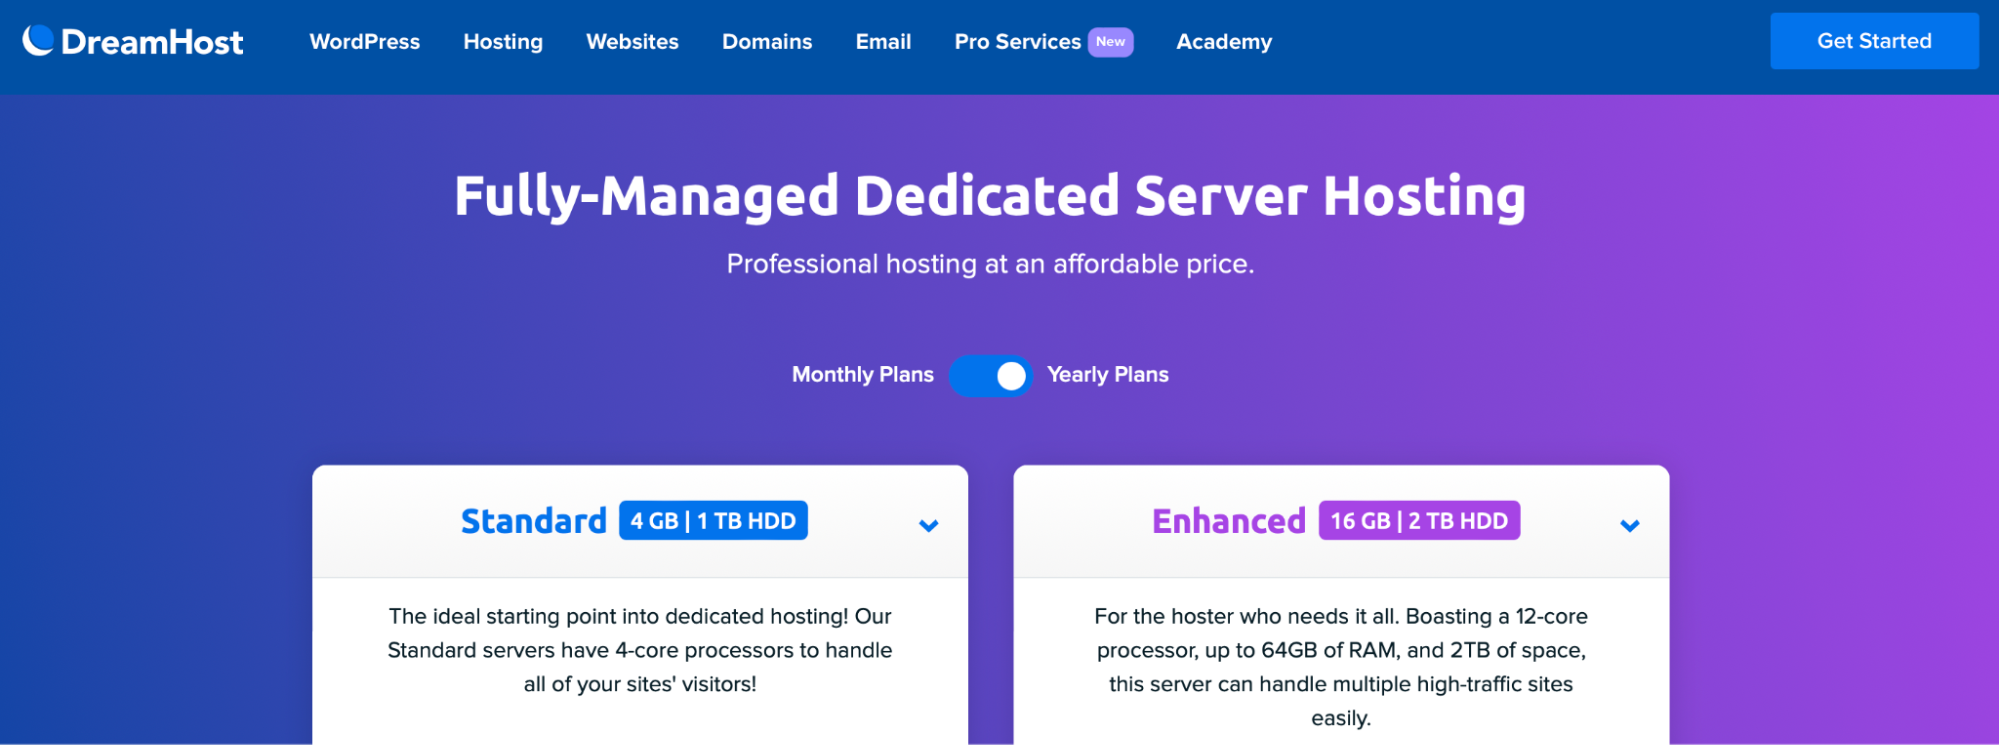
At DreamHost, our WordPress hosting plans come with 24/7 ticket support and live chat support. Our team of experts can help you resolve technical problems and get your site up and running again. Learn more about our plans!

Do More with DreamPress

DreamPress Plus and Pro users get access to Jetpack Professional (and 200+ premium themes) at no added cost!

Managed WordPress Hosting - DreamPress

The post 502 Bad Gateway Error: What It Is and How to Fix It appeared first on Website Guides, Tips & Knowledge.


source https://www.dreamhost.com/blog/502-bad-gateway-error/

Monday 21 November 2022

The Complete Dedicated Hosting Buyer’s Guide

Choosing the right type of web hosting is one of the most important considerations for your website. While shared hosting and VPS are great options, they provide limited control over your server, and the shared server environment isn’t always the best option for websites that expect consistently high levels of traffic.

Fortunately, dedicated hosting boasts several important advantages over shared hosting since your site has room to roam on its own physical (dedicated) server. This means that you can expect speedy, reliable performance. Plus, you get more control over your server configuration, enabling you to create a highly customized, highly secure environment.

In this post, we’ll look closely at dedicated hosting — we’ll discuss its pros and cons as a hosting solution before showing you how to get started. Let’s jump right in!

An Introduction to Dedicated Hosting

With dedicated hosting, you get a physical server that’s exclusively available to you. This setup contrasts with other hosting solutions like VPS and shared hosting that require you to share resources with other websites on the server:

Dedicated hosting vs. shared hosting

Image Credit: Seobility

Since the server hosts only your website, it can deliver your web pages much faster than one that has to process requests for multiple websites. Plus, you will be free to configure your server exactly how you want it.

Better yet, you can create a more stable, secure environment for your website since you have your own server. There’s less risk of downtime and cross-site infection since your site is the only one hosted on that hardware.

Also, because you have plenty of resources at your disposal, your server is in a better position to handle even the sharpest traffic spikes. This means that dedicated hosting is an excellent option for large websites or businesses that want to scale up.

When to Consider Dedicated Hosting

Now that you know more about dedicated hosting, let’s consider whether it could be a good match for your website.

You Have a Large, High Traffic Website

Dedicated hosting is an excellent choice for large websites. The server is fully equipped to handle many simultaneous requests, such as those from high-traffic websites or large e-commerce stores. This way, you get consistently speedy site performance.

With alternatives such as shared hosting, other websites on the server can compete with your site for bandwidth, causing pages to load slowly during periods of particularly heavy traffic. With dedicated hosting, your bandwidth is your own, and you can expect reliable, fast response times for your applications operating in real-time.

Your Focus Is on Security

When you’re the only one with access to your server, you have full control to deal with online threats and attacks. This factor is crucial if your website handles sensitive user data like payment details or personal information that can be the target of hacking attempts.

Conversely, on a shared server, if one website is the victim of a targeted attack, your site can also suffer the consequences. When sites are on the same server without proper barriers, it’s easy for one website’s vulnerabilities to spread across to yours. Since dedicated hosting provides an isolated server, you are effectively quarantined from anyone else.

You Can Stretch Your Budget

While there are many benefits of dedicated hosting, the perks come at an additional cost. It’s nearly always more expensive than other options like shared hosting or VPS. Therefore, if you’re on a tight budget, you may not be able to afford a dedicated server.

However, at least with dedicated hosting, you know that you’re getting enormous value for your money. No other hosting option can come close to dedicated hosting in terms of performance, control, and versatility. These factors can make it worth the cost if you have room in your budget.

You Want Experienced Management Options

Dedicated hosting is a great choice if you’d rather focus on growing your business and don’t want to spend time monitoring how well your server is performing. You can rest assured that your hardware is functioning at full capacity. Plus, hosts manage your server 24/7, so you don’t need to worry about whether your site is up or down.

You’re Anticipating Major Growth

If you’re expecting a period of growth, it can be a good idea to start out with the hosting you will need rather than a plan that’s just sufficient for the time being. This way, you can avoid the hassle of having to migrate servers at a later date.

Then, everything is already in place when growth occurs. While other hosting options enable you to scale up, there can be upper limits to the amount of resources you can access. Plus, this transition can involve a sharp price increase.

Get Content Delivered Straight to Your Inbox

Subscribe to our blog and receive great content just like this delivered straight to your inbox.

The Advantages of Using Dedicated Hosting

Before you decide whether dedicated hosting is right for you, let’s take a look at some key benefits of using it:

Security

You can manage your own security and software updates. Plus, there’s no risk of sharing a server with malicious or infected websites.

Traffic

Since you have plenty of resources at your disposal, the server can handle traffic spikes while maintaining smooth performance.

Performance

Resources are abundant, so performance is speedy. This is important since visitor abandon rate has been shown to increase by 32% when page load time goes from one to three seconds.

Customization

You’ll have complete control over your server and hosting environment. Therefore, you can configure it exactly how you like.

Root Access

This feature gives you control over all ports. Plus, it enables you to access any file on the server, modify any file, and install/delete server-wide applications.

To sum up, dedicated hosting can be an excellent option if you want more control over your server. This hosting solution can boost speeds, tighten security, and provide full access to ports and files.

The Drawbacks of Dedicated Hosting

While there are many benefits to using dedicated hosting, it’s also important to be aware of its limitations:

Cost

Dedicated hosting is one of the most expensive options, especially when compared to shared hosting. If you don’t think you’ll use all the resources, you’ll probably be able to find a more cost-effective solution.

Responsibility

While hosts can provide guidance, you’re typically the one responsible for the security and maintenance of your site. Therefore, an unmanaged dedicated server isn’t the greatest option if you don’t have the time or expertise to set up and maintain a server.

Resource types

Dedicated hosting may not always be suitable (or may just be overkill) depending on the type of resources that your site needs. For instance, dedicated hosting is beneficial for serving large media files, running many scripts, and accommodating high levels of web traffic.

If you decide that dedicated hosting isn’t suitable for your website, you might consider other solutions. VPS hosting offers a moderate degree of server customization, along with adequate security and resource isolation at a fraction of the cost.

What to Consider Before Choosing a Dedicated Web Host

Every host will offer different options to customize your server. However, when dealing with dedicated hosting, here are some of the most critical factors.

Server Type

You can use dedicated servers for emails, websites, and gaming. Additionally, you can find standard servers for small to medium-sized businesses or choose an enterprise solution.

Storage Solutions

Since additional storage is a perk of dedicated hosting, you’ll want to verify that the server suits your requirements. At DreamHost, you’ll get access to 2 TB of file storage and RAID storage. Plus, with multiple hard drives and RAID 1 redundancy, if one fails, there’s another available to pick up the slack with no unexpected downtime.

The Number of Cores

A Central Processing Unit (CPU) that offers multiple cores enables you to run multiple processes simultaneously. Therefore, the server delivers excellent performance even with the demands of powerful applications.

Random Access Memory (RAM)

RAM determines how your site functions. The amount you’ll need depends on various factors, such as how many transactions you process, how much traffic you have, and how many applications you run.

However, you’ll also need to decide whether you want to opt for managed or unmanaged hosting. For example, with managed hosting, your host will take care of the technical aspects of maintaining your server. Sometimes, these processes may even include backing up your site and monitoring for security risks.

At DreamHost, we provide managed dedicated server hosting. This plan is the ideal gateway to dedicated hosting. You can still benefit from having your own server with root access, greater memory, faster speeds, and 100% uptime:

managed dedicated hosting

Furthermore, with a managed solution, you can rest easy with DDoS protection, constant monitoring, and 24/7 support.

By contrast, unmanaged hosting providers require that you handle monitoring and maintenance tasks yourself. This often includes administrative work, backups, and security. As a result, unmanaged hosting is best suited for users with advanced knowledge and time to spend on website maintenance.

Your Dedicated Hosting Solution

There are many hosting options available for your website. Shared and VPS hosting are both popular choices. However, they’re not always the best for a growing site. With dedicated hosting, you will enjoy smooth, stable website performance. Plus, you can configure your server exactly how you want it.

While dedicated hosting costs can be a little higher, having access to your own server can reduce security vulnerabilities and better handle sharp traffic spikes. Unlike other hosting plans, dedicated servers provide root access, which gives you full control over your server files.

If you lack the technical expertise or simply aren’t ready for the work involved in running your own server, managed dedicated hosting is a great option. You can enjoy plenty of storage space, DDoS protection, and full administrative access at DreamHost. What’s more, you can count on our team of experts to handle maintenance tasks like security and backups. Check out our plans today!

Get DreamHost’s Most Powerful Hosting

Our dedicated hosting plans are the ideal solution for high-traffic sites that require fast speeds and consistent uptime.

dedicated hosting provider

The post The Complete Dedicated Hosting Buyer’s Guide appeared first on Website Guides, Tips & Knowledge.


source https://www.dreamhost.com/blog/dedicated-hosting-buyers-guide/

Friday 18 November 2022

What Are the Benefits of Cloud Hosting?

You’ve undoubtedly heard of “the cloud”. Cloud computing uses distributed resources, like remote servers and data centers, to accomplish a range of tasks, from performing intensive calculations to serving up web page content on demand. But what makes cloud services superior to alternatives such as running your website locally?

Cloud hosting provides swift performance, accessibility, and safety for your website and its files. Furthermore, it’s often an affordable hosting option with benefits that far outweigh any disadvantages.

In this post, we’ll explain the key benefits of cloud hosting. Let’s take a look!

The Cloud Promotes Business Continuity

Can you guarantee your in-house servers won’t ever go down unexpectedly? Plus, do you have a plan for getting them back online quickly when they do?

There’s no such thing as an entirely disaster-proof system. However, cloud servers minimize the adverse impacts associated with losses of service.

For instance, cloud computing data centers employ features such as backup power generation to ensure they continue sending information after utility failures. Many centers also incorporate advanced mechanisms designed to restart automatically, collect diagnostic information, and notify technicians of any ongoing problems.

These cloud hosting benefits heighten the ease of recovery. They also minimize time spent waiting to access information.

Your Data Delivery Speeds Increase

Content Delivery Networks (CDNs) host resource-intensive data, like images, streaming video, sound, and other media content. For instance, many eCommerce platforms use cloud-based CDNs for their product photos, reviews, and demonstration videos.

One of the biggest cloud hosting benefits that CDNs leverage is their ability to provide faster data access. Modern cloud hosting services can instantly detect which server is closest to a given user so that they receive content from the nearest source. In turn, this minimizes delays and page loading times. Using powerful cloud servers to distribute load also takes some of the burden off your local hosts and speeds up page requests.

Get Content Delivered Straight to Your Inbox

Subscribe to our blog and receive great content just like this delivered straight to your inbox.

Your Critical Services Are Accessible Anywhere

Cloud hosting benefits don’t just apply to public-facing websites. They also play a huge role in provisioning data services for internal business use.

For instance, companies that operate multiple retail centers often host their sales software in the cloud. Then, their employees at individual facilities can instantly submit performance data to corporate headquarters.

You’re Not the Only One Responsible for Security

Do you think keeping data safe will be harder when you’re dealing with distributed cloud computing? On the contrary, modern hosting services have it down to a precise science.

The same robust cloud hosting principles that overcome natural disasters and service outages improve your security stance.

For instance, if you know that your server software and hardware already meets security standards like PCI, DSS, and HIPAA, you don’t have to wonder whether the platform is suitable for secure payment processing or healthcare records storage. Although it’s still important to operate your systems safely, choosing cloud hosting that fulfills the necessary requirements can put you on a better footing to deal with threats.

Improve Your Website’s Performance With Cloud Hosting

Cloud hosting offers various benefits to your website and business. For instance, it can minimize downtime and improve your site’s performance.

Furthermore, cloud hosting ensures your critical services and software will be available to employees in different locations. On top of that, the data itself will be generally more secure than with other hosting packages.

Are you ready to get started with cloud hosting? At DreamHost, our cloud server hosting plans offer customizable and scalable architecture, full root access, and open-source code. Sign up for Dreamhost today!

DreamObjects is an inexpensive object storage service great for hosting files, storing backups, and web app development.

cloud hosting

The post What Are the Benefits of Cloud Hosting? appeared first on Website Guides, Tips & Knowledge.


source https://www.dreamhost.com/blog/what-are-the-benefits-of-cloud-hosting/

Wednesday 16 November 2022

17 Clever Domain Name Generators Guaranteed to Inspire You

Typically, the best websites have the catchiest domain names. They’re short, memorable, and fresh. However, it can be challenging to generate a unique domain name that matches your goals (and hasn’t already been taken).

The good news is, you’re able to use domain generators to come up with clever domain names for your site. These tools are simple to use and make it easy to pick a domain name that checks off all the boxes for your site.

In this post, we’ll take a closer look at domain names and some best practices to follow when choosing one. Then, we’ll explore some innovative domain generators to help you get inspired. Let’s get started!

How to Choose a Unique Domain Name

A domain name refers to the URL where visitors can find your website. Typically, you have to pay for a unique domain name. The cost of a domain name will usually fall between $10 and $20, but .com website addresses can be more expensive since they tend to be the most popular. Still, you can also opt for less common Top-Level Domains (TLDs) such as .org, .shop, .info, .net, and more.

Either way, there are some important factors to consider when choosing your domain name. Here’s a bit of advice:

  • Stick with domain extensions like .org, .com, and .net to establish credibility
  • Make your domain as short as possible so it’s easy to remember
  • Keep it simple, avoiding numbers and special characters
  • Use relevant keywords to attract organic traffic
  • Make it easy to pronounce and spell
  • Check that it isn’t the same/similar to trademarked names

You can usually get a free domain name (for some limited time) by choosing a quality web host that provides it as part of their hosting services. For example, at DreamHost, all of our WordPress hosting plans come with a free domain name for the first year.

17 Clever Domain Name Generators Guaranteed to Inspire You

Now that you know how to choose your website URL, let’s take a look at some popular domain name generators to help inspire you.

1. NameStudio

NameStudio

NameStudio offers two simple and innovative ways to help you find the perfect domain name. First, you’re presented with a simple domain search field. From here, you can see which domains are or are not available based on your entry.

But what sets NameStudio apart is its neat “Brainstorming” function, which allows you to further explore your options by offering additional lists of prefixes, suffixes, and extensions.

2. Lean Domain Search

Lean Domain Search

Lean Domain Search streamlines the process of domain name generation. It’s an efficient and powerful tool that shows only .com domain options, trimming away less popular alternatives. A unique feature of this tool is that it also analyzes the domain name to see if you would also be able to use it as a Twitter handle.

3. Panabee

Panabee’s domain generator tool

Panabee stands out thanks to its fun and engaging user experience (UX). To get started with this domain generator, simply enter a few keywords into the search box to view a list of available and taken domain names.

These are clearly marked, so that you know which names have potential. However, keep in mind that even viewing taken domains may spark inspiration.

4. Business Name Generator

Business Name Generator

Business Name Generator produces a list of potential business names that haven’t yet been taken. This helps you avoid infringing on trademarks or unknowingly copying other business names.

One of the best parts about this domain name generator is that it also comes up with business names (not just domain names). This is a great bonus if you haven’t settled on a company name yet.

5. Nameboy

The Nameboy domain name generator

Nameboy is a domain generator that also offers other services. For example, you can utilize a business name generator, a podcast name generator, and a store name generator. That means you can cover all your bases with one convenient tool.

Better yet, you won’t get bombarded with domain suggestions. Instead, there’s a heavy emphasis on .com URLs since these are most recognized by users. When you choose this type of URL, it may be easier to build trust with a digital audience.

6. Bust a Name

Bust a Name domain search tool

Bust a Name is a useful platform that includes multiple ways of finding a domain name. The Domain Maker enables you to set parameters for your URL. For instance, you can choose a certain word to start/end your domain and set a specific character length.

However, its Domain Search tool is also plenty sufficient, laying out options for .com, .net, .info, and .biz addresses. What’s more, you can save your domain search to return to later. Or, simply save the names you’d like to compare against one another when you’ve made your way through the list.

7. DomainWheel

DomainWheel homepage

DomainWheel is an AI-powered tool that places an emphasis on producing usable domain names. It combines the search results with random ideas that sound similar to your search or rhyme with your search.

This can be useful for finding outside-the-box domain ideas that you wouldn’t have thought of yourself. It also provides a handy list of domain registrars so that you can register your domain once you’ve chosen the perfect URL.

Get Content Delivered Straight to Your Inbox

Subscribe to our blog and receive great content just like this delivered straight to your inbox.

8. NameMesh

NameMesh domain search tool

NameMesh is a unique, flexible tool that offers lots of ways to generate domain name ideas. You can use it to check the availability of popular extensions, determining whether you’d prefer a .com, .net, or .org address. Meanwhile, you can also tweak the arrangement of words and add words/suffixes.

A great feature of NameMesh is that it presents domain ideas in neat categories. For example, you can view common names, fun domains, SEO-friendly ideas, and more. Plus, with a huge list of options, your chances of finding the right domain name are much higher.

9. Name Ideas Generator

Name Ideas Generator website

Name Ideas Generator outputs a huge list of options including multiple extensions. This gives you plenty of choice. For some, this may be ideal. However, it could be a bit overwhelming for others. Regardless, this tool is very flexible, allowing you to switch vowels, remove letters, and change the order of words.

Additionally, you can use search engine generated keywords in coming up with domain names. For example, you can choose to use YouTube, Google, Bing, and Amazon keyword suggestions. This can help you drive more organic traffic to your site from your preferred platform.

10. IsItWP

IsItWP free domain name generator

With IsItWP, you can get instant results simply by entering a few keywords or your business name. This is a speedy tool with a clean and straightforward interface. It’s also powered by Nameboy.

Using this domain name generator, you get a seemingly endless stream of options including slight variations and synonyms. You can also refine your search to find more specific ideas.

11. Blog Tyrant

Blog Tyrant free domain name generator

Blog Tyrant is a free domain generator focused specifically on coming up with domain names for blogs. The output is large so you’re sure to find a suitable option.

Additionally, Blog Tyrant offers other helpful tools if you’re considering starting a blog. For instance, you can find an uptime checker, a password generator, and a security scanner. However, it does not offer web hosting services.

12. Nameming

Nameming homepage

Nameming is one of the easiest domain generators to use. Simply type two or three keywords into the search bar to find many options. Perhaps the most unique thing about this domain name generator is that it creates convenient sublists for your domain name results.

These sublists include domain options that are categorized as short, fun, common, tech, SEO, and more. Additionally, you can access specific name generators to come up with ideas for brand names, app names, and social names.

13. NameStation

NameStation website

For a domain generator that also offers a lot more, NameStation is an excellent choice. With this tool, you can access a whole community where you can host a contest and crowdsource name suggestions to help make your decision.

This can help you pick a catchy domain name. However, the downside is that it’s less user-friendly than others on the list since you have to create an account to view domain ideas.

14. Domainr

Domainr homepage

Domainr is designed for you to access and use within seconds, providing a clean, slick UX. It offers a super quick, streamlined experience to find your perfect domain name.

It’s a great choice if you don’t want to be overwhelmed with suggestions since it provides only a handful of available domain names. Better yet, it ranks the best options according to name, features, and price.

15. Instant Domain Search

Instant Domain Search tool

Instant Domain Search starts showing results as you start typing. It provides different variations and combinations, including all extensions and domains for sale. It’s one of the quickest tools on the market, so if you’re in a hurry to secure your domain name, Instant Domain Search is a great choice.

16. Namestall

Namestall domain generator

Namestall is an ideal tool for finding domain names, business names, and blog names. You can refine your search, focusing only on popular keywords, or certain word types such as nouns or adjectives.

Beyond that, you can search for domains according to your particular industry, whether that be real estate, finance, or fashion. You can also view brandable domain names.

17. iwantmyname

iwantmyname domain search tool

iwantmyname is a great tool if you already have a few domain ideas of your own. Simply enter the address you’re considering, and this handy tool will let you know if it’s available. If it isn’t, iwantmyname will deliver a large list of similar alternatives and their prices. You can also choose to hide unavailable domains, so that you only view ideas with potential.

Frequently Asked Questions 

Even with tons of domain name generator options at your fingertips, you might still have some doubts about domains. Let’s go over some frequently asked questions!

How Do I Get a Domain Name for Free?

The best way to secure a free domain name is to purchase a hosting plan for your website. As long as you choose a quality web hosting provider like DreamHost, you can often take advantage of many other useful features such as free SSL certificates and free subdomains.

How Can I Create a Catchy Domain Name?

Using the suggestions made by the domain generators in this post, you’re more likely to find a catchy domain name. Plus, you can usually find out whether it’s already taken. Then, you can follow our best practices such as keeping your domain short, avoiding numbers and special characters, and including keywords.

How Can I Find Rare, Valuable Domain Names?

A domain name generator will produce a list of domain ideas, showing available options. In particular, a tool like Nameming organizes suggestions according to specific categories. Therefore, if you look under the “new” category, you’re more likely to find fresh, rare domain names.

Use a Domain Name Generator to Optimize Your Search

When choosing a domain name, you should aim for something unique and highly relevant to your business. You’ll want to secure a fresh, catchy URL that suits your brand. However, you also need to pick a name that is available (or isn’t trademarked). This can be challenging to do.

Luckily, with a domain name generator, you can get some creative inspiration when choosing your website name.

Once you’ve landed on an available domain name, you’ll need to purchase it ASAP! At DreamHost, you can opt for a variety of extensions and benefit from free subdomains, simple domain management, and easy domain transfers. Find your perfect domain name today!

Your Great Idea Starts with a Domain Name

Don’t let someone else register your URL. Search DreamHost’s 400+ TLDs to find the perfect fit for your website.

buy a domain name

The post 17 Clever Domain Name Generators Guaranteed to Inspire You appeared first on Website Guides, Tips & Knowledge.


source https://www.dreamhost.com/blog/domain-name-generators/

Monday 14 November 2022

How to Use GitHub for WordPress Development

If you’ve spent much time reading up on WordPress, chances are you’ve heard about GitHub. It’s one of the most popular platforms for developers to host their projects and collaborate with others. Maybe you’ve even considered trying it out yourself but don’t know where to start.

The time has come to familiarize yourself with this invaluable WordPress resource. GitHub is an excellent platform for tracking, managing, and collaborating on development projects, so it’s well worth learning how to use. It enables you to host projects online and use the powerful version control of Git to keep track of every change.

An Introduction to GitHub

GitHub may look overwhelming if you’re a newcomer, but at its core, it’s actually pretty simple. In essence, GitHub is a free hosting service specifically designed for developers. Its primary use is to host projects for sharing and collaboration, making them available so that other users can contribute to and download them:

The Github WordPress repository

As the name implies, GitHub is built around the functionality of Git. This is a version control system that tracks all changes made to a project. What makes this system so powerful is how comprehensive it is. Since Git keeps track of every file and change in your project, it enables you to revert quickly to any previous version.

Git also lets developers create ‘branches’, which are copies of a project that you can work on independently. Creating branches gives you the opportunity to make and test changes without affecting the whole project. You can then ‘merge’ your changes into the main branch if you want or simply discard them.

These features are key to understanding why Git and GitHub are so invaluable to developers. You don’t have to worry about causing irreparable damage to a project, for example, since you can always create branches and roll back all revisions.

Plus, it’s easy to collaborate on a project with a potentially unlimited number of users. In fact, this is exactly how WordPress itself is developed these days.

Getting Started with GitHub

Before you can start using GitHub, you’ll need a system for using Git and GitHub together. First of all, you’ll need to download and install Git on your local machine. You’ll be using it to perform crucial GitHub related-tasks, such as transferring files between your computer and your GitHub repository.

GitHub is only the host for the project, so all the actual development happens on your local machine. Git then uses ‘repositories’ to store each project.

This might sound confusing, in theory, so let’s look at a typical workflow:

    1. You have a project hosted in a repository on GitHub.
    2. You create a local repository and use Git to ‘pull’ in the latest version of the project from GitHub.
    3. You can now work on the project on your local computer. When you have made changes, you can ‘push’ them back into the GitHub repository.

How you decide to structure your specific workflow depends on your preferences and the project’s requirements. The important thing is that your process works smoothly for you, your project, and your collaborators.

Finally, to get the most out of Git, you’ll want to use the command line. Git is most commonly used through Secure Shell (SSH), which features a command line interface. If you don’t already know how to use the command line, we recommend that you familiarize yourself with the process before getting started.

How to Use GitHub for WordPress Development (In 7 Steps)

Now, it’s time for you to try out GitHub development for yourself! In this example, you’ll be creating a GitHub project for developing a WordPress theme. We’ll show you how to create a GitHub account and two repositories before showing you how to transfer your theme back and forth between them.

Step 1: Create a Local WordPress Environment

When you’re developing WordPress, it’s important to always use a staging environment. This gives you the freedom to try new things without worrying about how they will affect your live site.

In this case, you’re going to create a local staging environment by installing WordPress on your computer. You can do this in a few different ways, but we recommend using Local, which enables you to quickly create a local version of WordPress for free:

The Local homepage

Simply select your platform and download the free version of Local. Then you’ll just need to run the installer.

The installer will take a moment to work. After it’s completed, you can create and configure a new local WordPress site, following the instructions in this guide.

Step 2: Install Git on Your Local Machine

It’s now time to install Git. If you are running a recent version of Mac OS, you might find that Git is already on your machine. You can check this by opening your command line interface, such as Terminal, and entering the following command:

git --version

If Git is installed, this function will return its version number. If not, you will instead be asked if you want to install it right away. You can also download the installer and run it manually for Mac, Linux, and Windows computers.

If you’re not comfortable with the command line interface, you might want to consider downloading a Git GUI application instead. However, for this example, we’re going to use the standard command line method. Either way, once Git is installed, you’re ready to create a local repository.

Get Content Delivered Straight to Your Inbox

Subscribe to our blog and receive great content just like this delivered straight to your inbox.

Step 3: Create a Local Repository for Your Project

You can now create a local Git repository for your project. In this example, we’ll use the Twenty Twenty-One theme, which should already be included in your local WordPress installation.

First, you’ll need to access the theme’s folder using the following command:

cd /Users/you/Documents/Websites/website/wp-content/themes/twentytwentyone

Make sure to change this file path so that it leads to the right directory by replacing you and website with the correct folder names. You can now initialize this directory as a repository with the following command:

git init

Next, you’ll need to add your files to the index. This process tells Git which files you have added or edited since the last time you performed a commit (in other words, saved your changes).

Since this is the first commit, you can use the following command to add every file in the folder:

git add

You can now commit your changes. The following command will commit all files in the index and include a message to help you keep your versions organized:

git commit -m "The first commit"

You have now finished configuring your local repository! That means it’s time to turn your attention towards GitHub.

Step 4: Register a GitHub Account

At this point, you’ll want to create a GitHub account. Start by accessing the GitHub homepage and filling in the registration form:

The signup form for Github

The interactive signup form will prompt you to enter a password and username and confirm your email address. Then, you’ll be asked to choose how many team members will be working with you and whether you’re a student or a teacher:

Signing up for GitHub

After that, you’ll be asked which features you’re interested in using. We recommend selecting Collaborative coding at a minimum:

The GitHub signup process

Now you can choose the free plan by clicking on Continue for free:

Selecting the GitHub free plan

You’ll then be taken directly to your GitHub dashboard. If you want to know more about the basics of using GitHub, we recommend taking some time to read the aforementioned guide. For now, however, we’re going to create a repository.

Step 5: Create a Repository on GitHub

You’re finally ready to create the GitHub repository for your project. This is a fairly simple process and only requires you to configure a few settings. Let’s start from the top.

To get started, click on Create repository in your dashboard:

Create a new repository with GitHub

First, you can select the repository’s owner, which is effectively the admin for the repository. This should already be set to yourself, so you can leave it as-is:

Next, you’ll need to give your repository a descriptive and concise name. You may want to name it after the plugin, theme, or other project you’ll be working on.

After that, you can enter a description of the project. Again, this should be specific and descriptive so that other developers and users can understand what it is you’re creating.

Since you signed up for a free account, you will only be able to create a public repository (although that’s all you’ll need right now). You’ll also be given the option to immediately clone the repository to your computer using a README file. Since you already have a local repository in place, you shouldn’t select this option now. However, it can be a handy tool for future projects.

Finally, you’ll see two drop-down menus at the bottom of this screen. The first enables you to select a gitignore option if you want Git to ignore certain files from being tracked.

The second option lets you choose a license for your repository. When you’re creating a real project, it’s important that you carefully consider what license to use. WordPress has very specific rules about licenses, which you’ll need to be aware of when developing for the platform.

For now, you can simply choose None from that menu and then click on Create repository to finish setting things up:

This will take you to your new project, which means it’s time to add your theme.

Step 6: Commit Your Project to GitHub

You can now push your theme to GitHub. Enter the following command into Git, making sure to replace the URL with a link to the repository you just set up:

git remote add origin https://github.com/yourusername/my-git-theme.git

git push -u origin master

You will then be prompted to enter your GitHub username, followed by your password. When you have done that, all the files you have committed to your local repository will be pushed to your GitHub project:

If you return to your GitHub repository, you will see that all files have been added to it.

Step 7: Fetch Updates from GitHub to Your Local Repository

You now have two repositories set up, and you know how to push changes from your local machine to the GitHub project. The final step is to flip this process and learn how to pull data from GitHub to your local installation.

If you’re working alone on a project, you’ll rarely need to worry about doing this. However, it becomes necessary if other developers are pushing their changes into the external repository as well.

You can do this easily by using the fetch command. Simply enter this command into Git, replacing the URL with the correct one for your GitHub project:

git fetch https://github.com/yourusername/my-git-theme.git

This command will pull all changes from GitHub and copy them over. Your local repository will now be synced up with your GitHub repository.

With that done, you have successfully created a new GitHub project for a WordPress theme! At this point, feel free to continue experimenting with these tools to see what you can accomplish.

Get Started With WordPress Development Using GitHub

Using GitHub for WordPress development grants you absolute power over every aspect of your projects. By using Git’s powerful version control features, you’ll get access to each change, enabling you to easily revert to earlier versions of your files. Git and GitHub also make it easy for multiple developers to collaborate on the same project.

To start using GitHub for WordPress development, you’ll simply need to create a local WordPress environment, install Git, and sign up for GitHub. Then, you can create a local repository for your project and make a GitHub repository. Finally, you’ll need to commit your project to GitHub and fetch updates to your local repository.

Are you looking for a WordPress hosting provider with developer-friendly features? At Dreamhost, we offer advanced features like SFTP, SSH access, easy access to the command line, and more. Check out our DreamPress plans for more information!

Do More with DreamPress

DreamPress Plus and Pro users get access to Jetpack Professional (and 200+ premium themes) at no added cost!

Managed WordPress Hosting - DreamPress

The post How to Use GitHub for WordPress Development appeared first on Website Guides, Tips & Knowledge.


source https://www.dreamhost.com/blog/how-to-use-wp-with-github/

Creating and Mastering GA4 Explorations

In the switch from Universal Analytics (UA) to Google Analytics 4 (GA4) — which will go fully into effect July 2023 — a lot of things have...