Friday 30 September 2022

The Beginner’s Guide to WordPress 404 Error Pages

The content you post on your website — whether part of a page or post — is usually permanent. However, if an issue arises (either technical or otherwise), an item of content may not display. Instead, it triggers a 404 error, which isn’t good news for your website or its users.

In a nutshell, a 404 error signifies that a web page is not found. However, unlike other errors, they’re usually displayed on dedicated pages. With a customized and optimized 404 error page, you can get visitors back on the right track.

What is a 404 Error?

Airbnb 404 error page example

As we discussed, a 404 error is a response code indicating that although a user was able to connect to a website’s server, the page can’t be found. This occurs for a number of reasons, such as:

  • A page or post has been moved or deleted.
  • The server is having trouble loading the page.
  • The URL that leads to the page is incorrect.
  • The post or page never existed in the first place.

Naturally, a 404 error can significantly reduce your website’s traffic. As such, it’s crucial that you find and fix these errors on your website fast. First, however, let’s look at what 404 error pages are used for.

An Introduction to 404 Error Pages

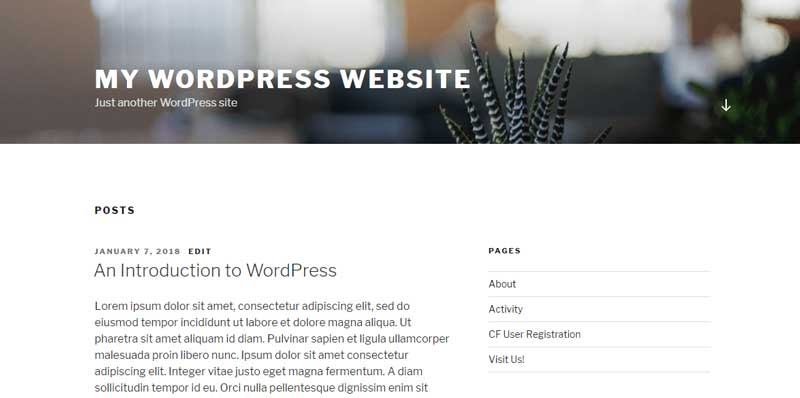
A 404 error page alerts visitors to a missing page or incorrect URL. Many websites use the default page provided by their theme, but 404 error pages can also be customized to improve User Experience (UX).

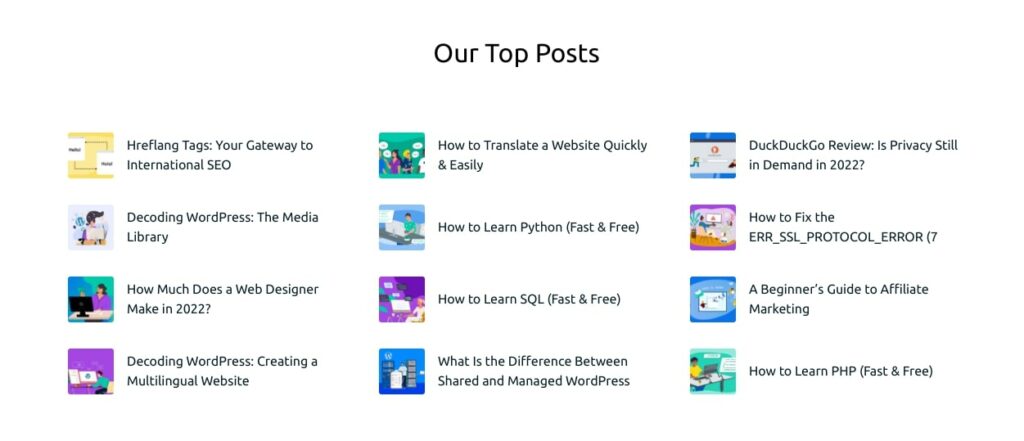
Most commonly, an error page will note the issue and provide alternative options for the user to choose from: for example, a Return to the Home Page link, related content, or a Search box.

A good 404 error page should contain a few essential elements. These include a link or navigation menu, an on-brand apology or explanation, and a Search box.

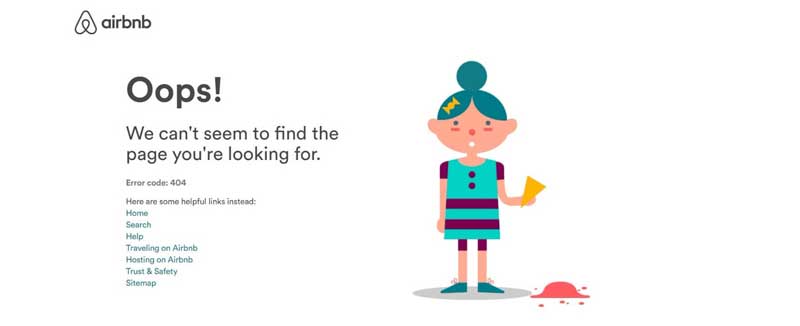
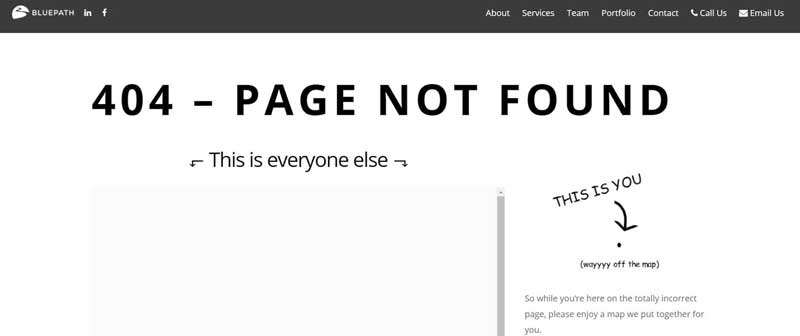
For example, Cloud Sigma opted for a quirky explanation and an easy-to-find Back to Homepage button. This helps to lessen the frustration while also enabling the user to return to the main site with minimal interruption:

404 error page example

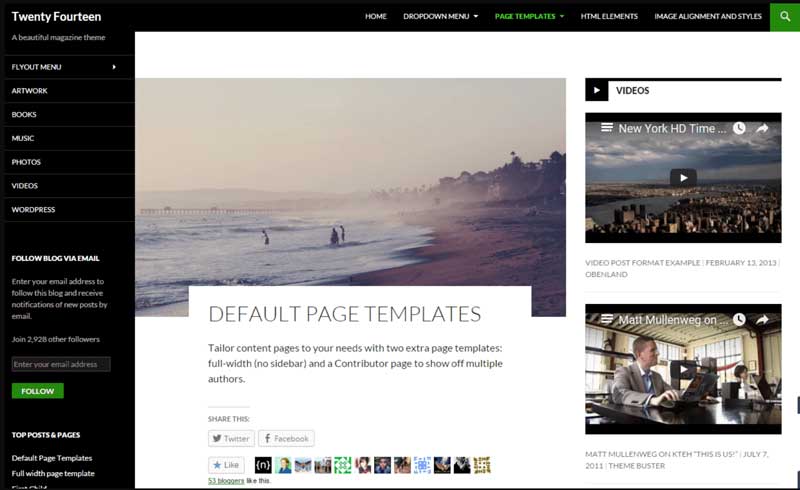
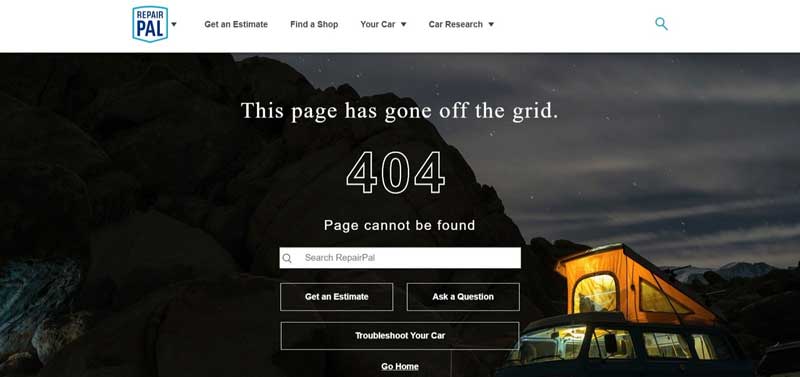
Repair Pal presents another good example of a well-implemented 404 error page. They opted to stick with their default theme — keeping the navigation menu intact — while also providing users with a way to interact immediately with the page.

For example, visitors can choose to Get an Estimate or Troubleshoot Your Car:

404 error page example

As you can see, creating a functional page is a useful way of mitigating the effects of a 404 error. It can also ensure that your website has an air of professionalism, despite an error being present.

Get Content Delivered Straight to Your Inbox

Subscribe to our blog and receive great content just like this delivered straight to your inbox.

How to Find and Fix 404 Errors on Your WordPress Website

While 404 errors are bound to happen on occasion, frequent occurrences can mean more serious problems are present. For example, there could be issues with your website’s server or with incorrectly set permalinks.

Fortunately, it’s possible to find these errors within WordPress. What’s more, once the issues are resolved, you can apply what you’ve learned to avoid the problem occurring in the future.

How to Create a 404 Errors Report in GA4

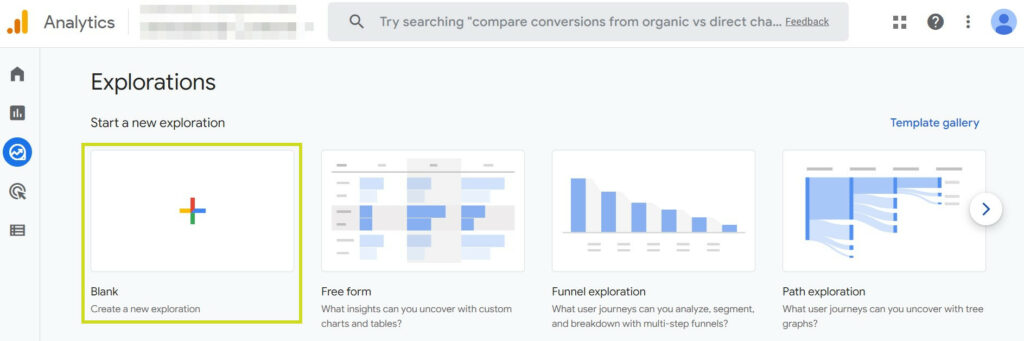
Google Analytics is great for rooting out 404 errors. Within the dashboard, go to Explore and choose Blank:

Google Analytics 4 404 error report

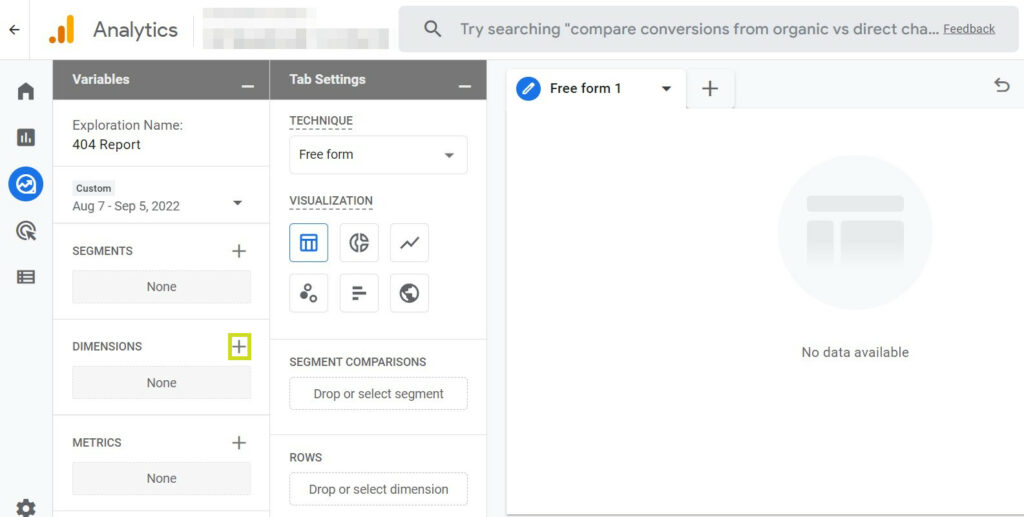
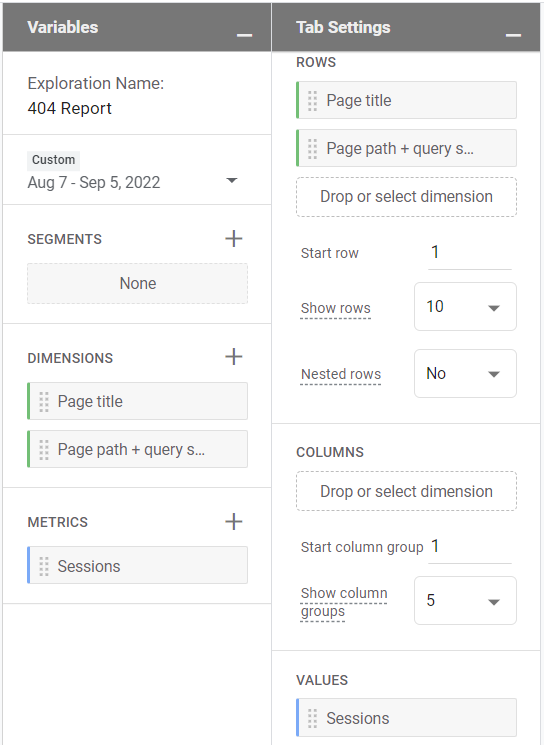
Name your report “404 Report” and click on the + sign next to Dimensions:

Google Analytics 4 404 error report

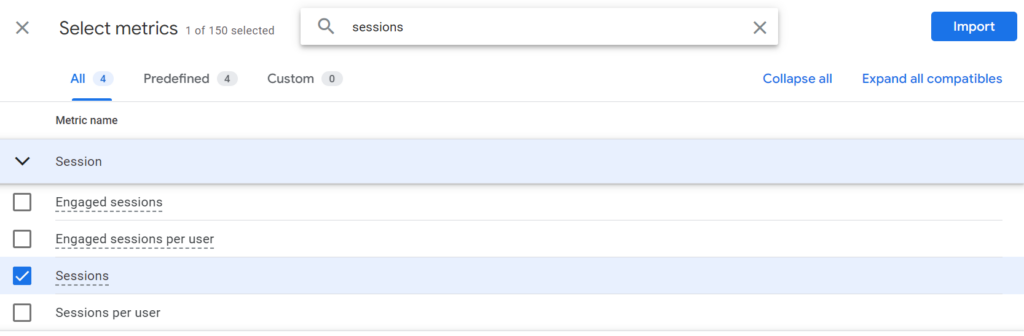
Select Page title and Page path + query string from the available dimensions and click on Import. Next, click on the + sign next to Metrics to find and import Sessions:

Google Analytics 4 404 error report

You’ll now need to drag your Dimensions under Rows and Metrics under Values:

Google Analytics 4 404 error report

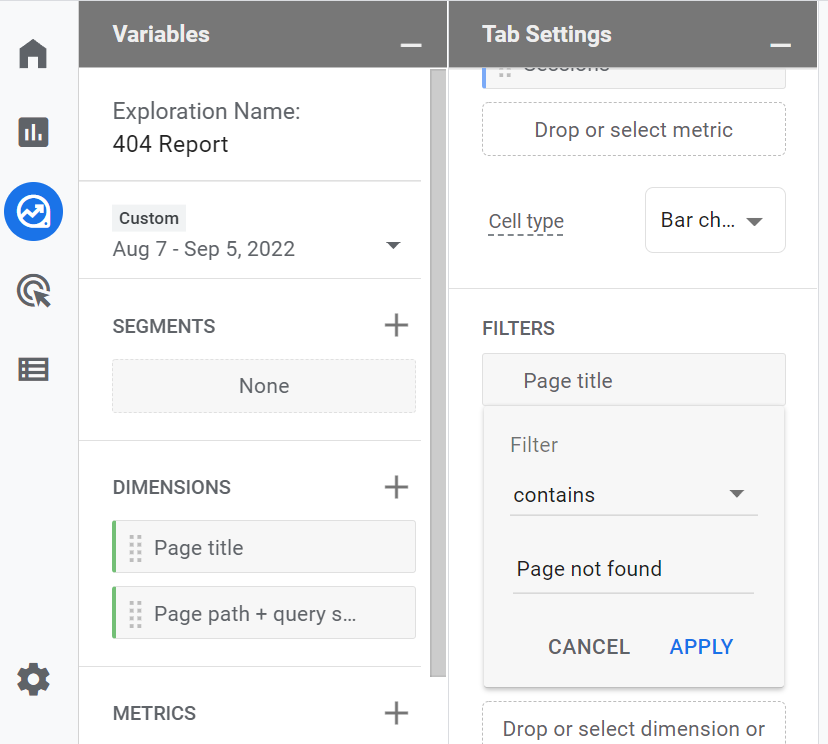
Next, drag Page title under Filter. Then, choose contains from the dropdown menu and type “Page not found” into the Enter expression box:

Google Analytics 4 404 error report

Hit Apply, and you’ll see a report of all the 404 errors on your website. Regardless of whether there’s a wider problem on your site, WordPress makes this easy to fix.

How to Deal With 404 Errors On Your Website

Even if you do your best to avoid them, 404 errors are bound to happen from time to time. However, there are ways to minimize their disruption. Let’s take a look at two now.

1. Create a Dedicated 404 Error Page

404 error page example

WordPress is flexible enough to let you edit practically all of your 404 error page’s elements. To create a custom 404 error page for your site, you have two options — manually or using plugins.

Many themes include a 404.php template file by default. If this is the case for your theme, you can locate the file yourself and edit the message that’s currently in place.

Before you do that, however, it’s a good idea to create a child theme to work with. That way, you won’t be making permanent changes to the parent theme.

After creating a child theme, go to Appearance > Editor within WordPress and open 404.php in the file list to the right of the editor:

WordPress 404 error page template file

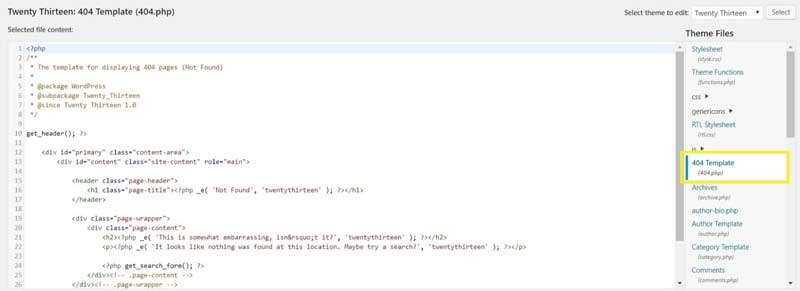
From here, look for the <div class=”page content”> line, and simply edit the message to your own requirements (saving your changes once you’re done).

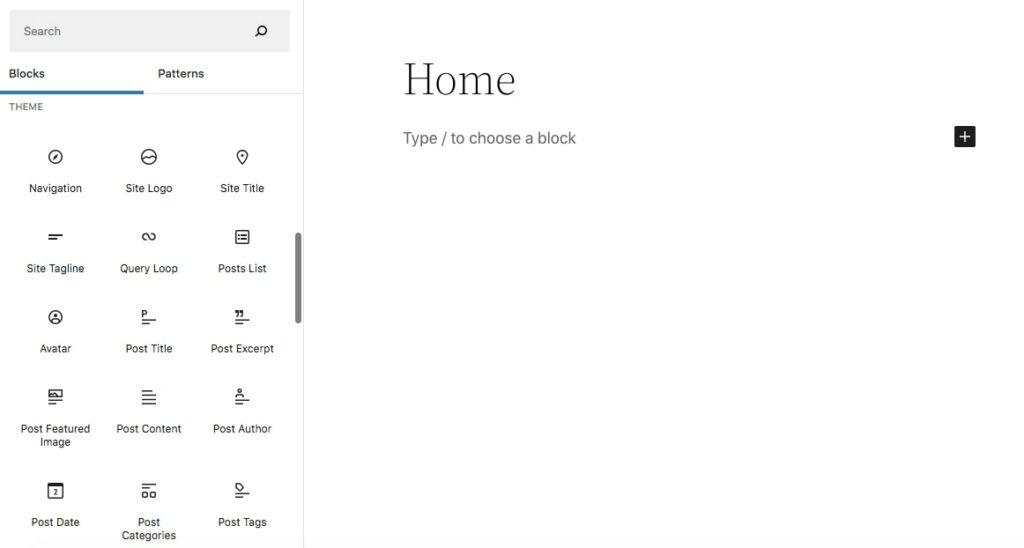
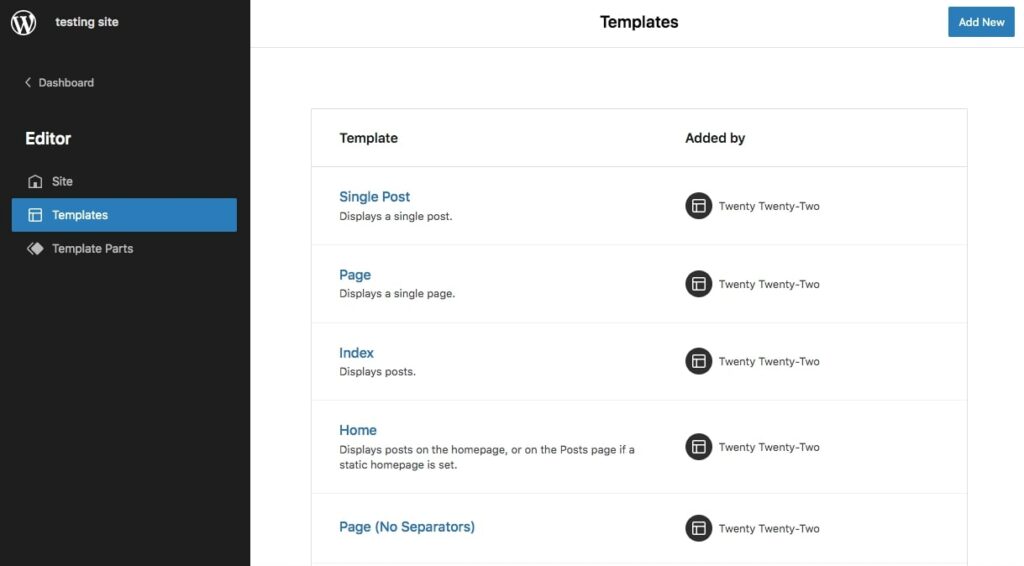
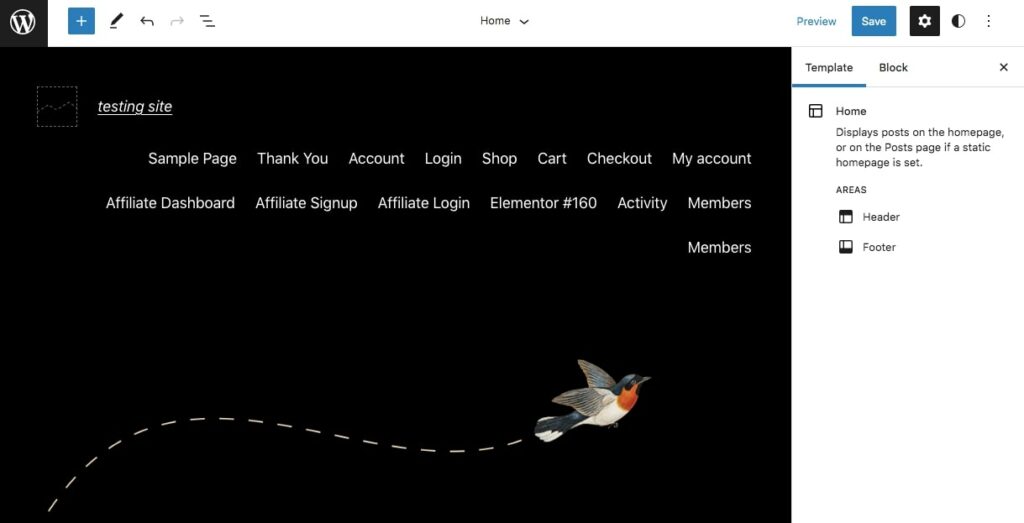
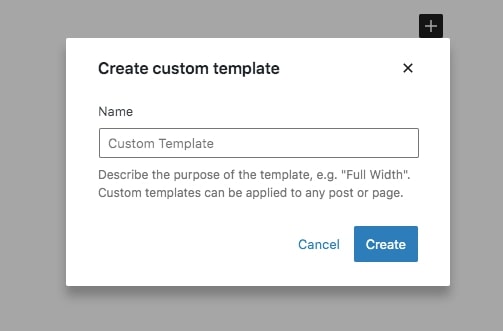
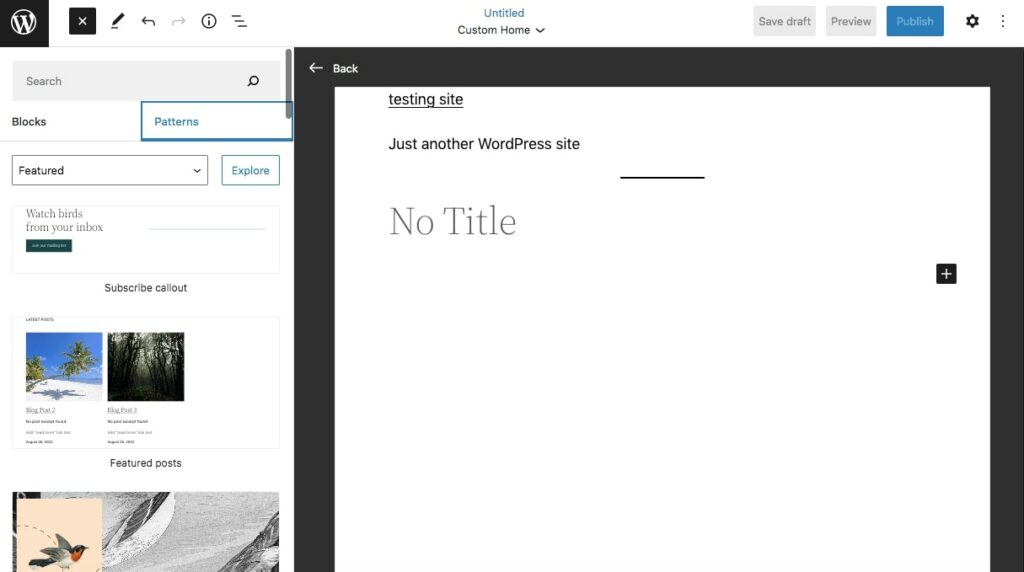
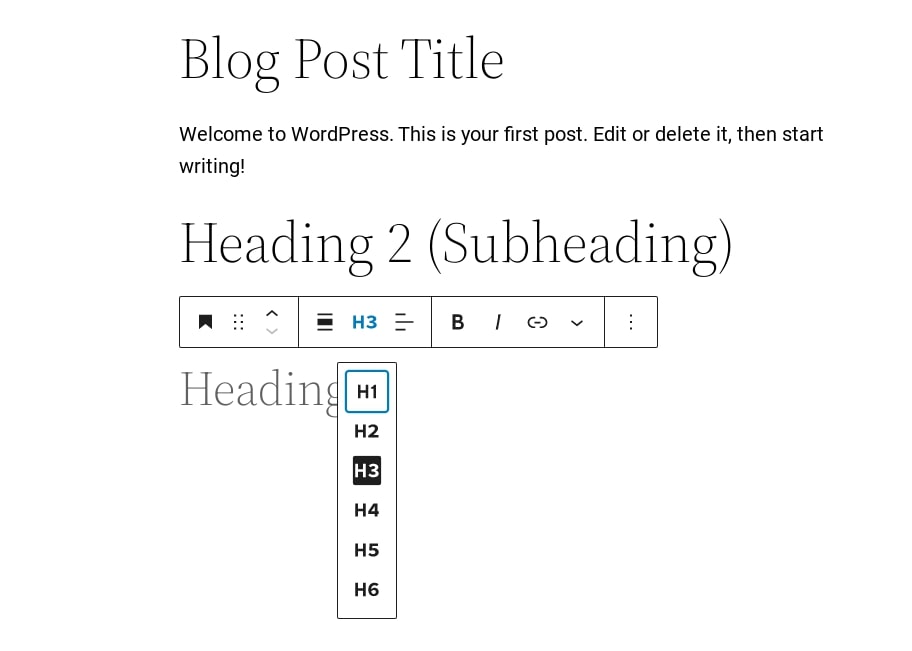
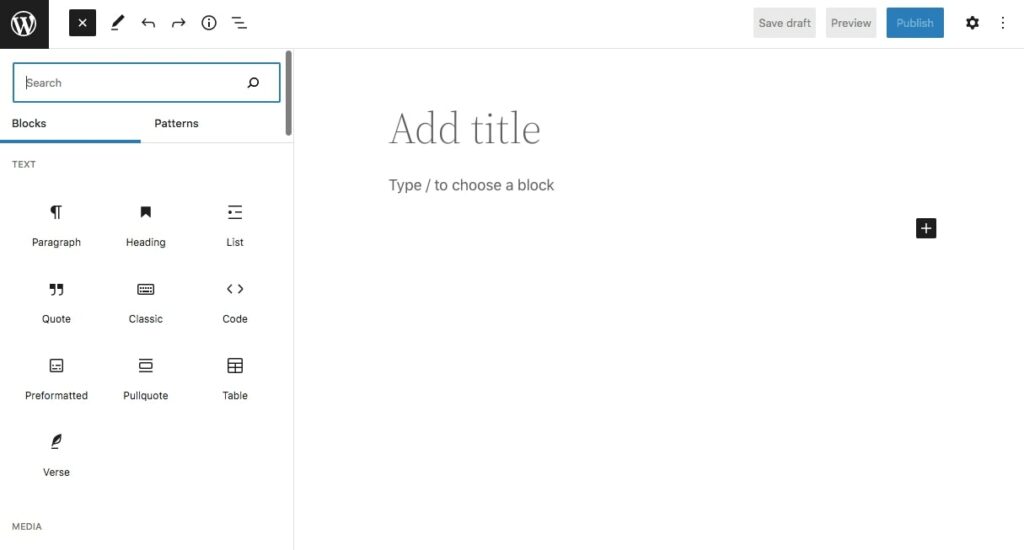
Note that if you’re using a WordPress block theme, you can edit its 404 page by navigating to Appearance > Editor > Templates:

WordPress template editor

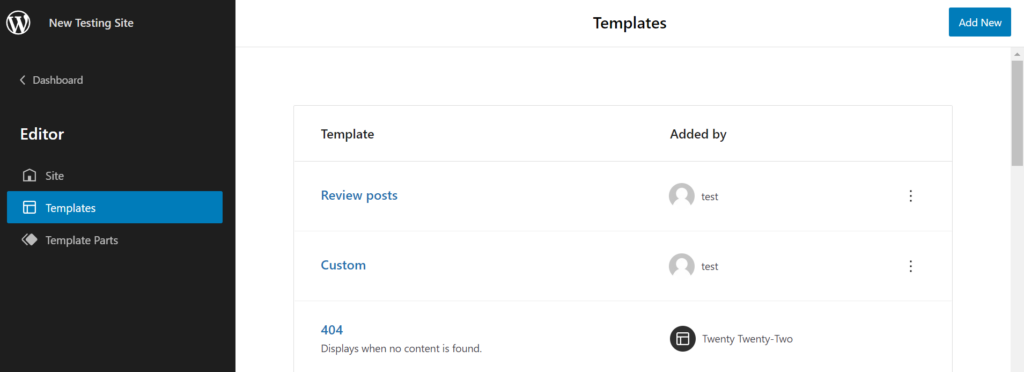
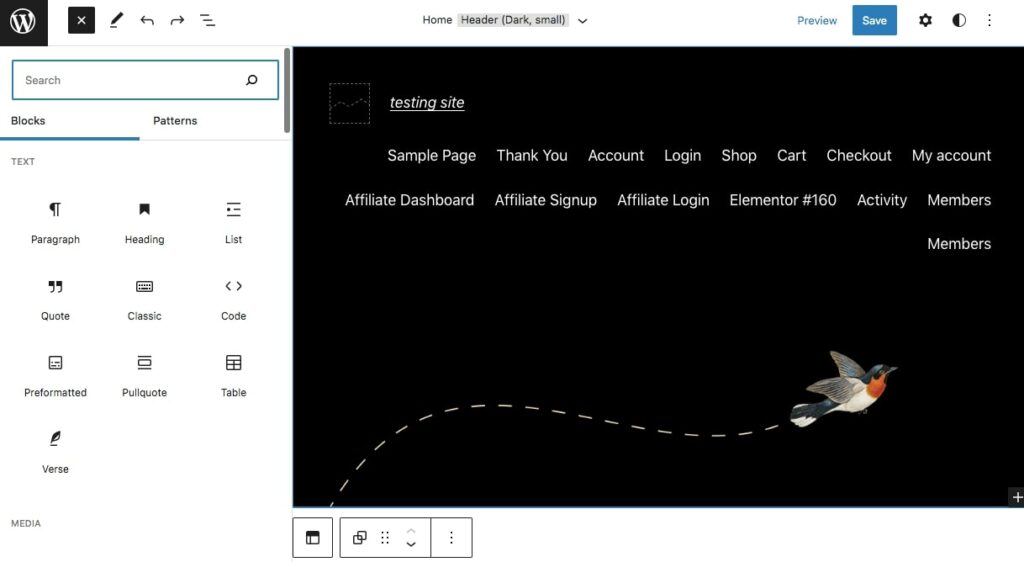
Simply click on 404, and you’ll be taken to an editing screen where you can build a custom 404 page using WordPress blocks and template parts:

404 error page example

If you don’t have a 404.php file in your current theme, you can create your own using the guidelines found in the WordPress Codex. However, you’ll need access to an FTP client such as FileZilla.

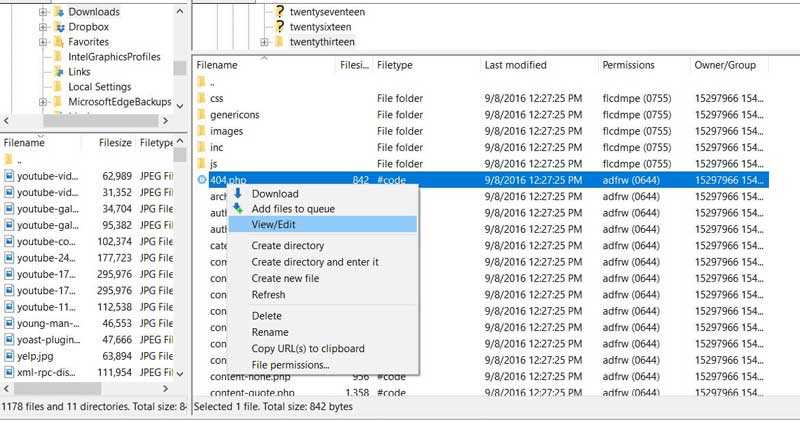
Open FileZilla, and enter your website credentials to gain access to your file directory. Double-click your website’s root folder (sometimes called public_html), and navigate to wp-content > themes > [themename] > 404.php. We’re using Twenty Thirteen’s 404 template, but you’re welcome to browse to another theme with a similar template.

Next, right-click the 404.php file and select View/Edit:

edit 404.php file via FTP client

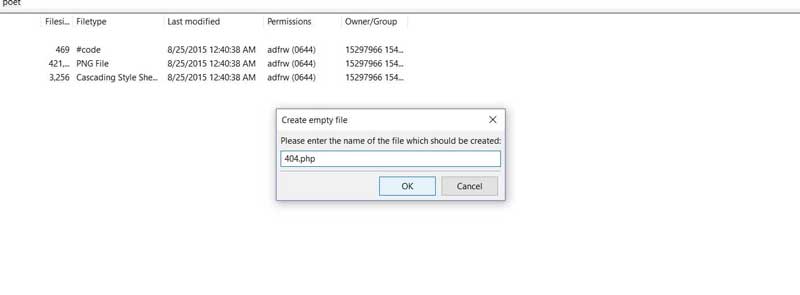
The file will open in your text editor. Highlight the entire code within, and copy it. Now return to FileZilla and navigate back to the themes directory. Select your current website theme and right-click. Select Create new file from the drop-down, and name it “404.php”.

Click OK, then right-click the new 404.php file. Select View/Edit from the drop-down and paste the code that you previously copied. Of course, you can edit the content to your own requirements. Once you save the file, you’re all set!

create a 404 error php file

Alternatively, you can use WordPress plugins such as 404page and Custom 404 Pro to achieve the same goal. Once installed, they enable you to replace your theme’s default 404 page or create one if your theme doesn’t have one included. These plugins will be ideal if you’re wary about tinkering with your WordPress core file structure.

2. Set Up an Automatic Redirect to a More Useful Page

No More 404 Errors WordPress plugin

An alternative to a 404 error page is to just redirect the visitor. Simply put, a page redirect is a way to send traffic from one web page (such as a 404 error page) to another. This is a good choice for a number of reasons.

For example, if you’ve changed the URL of an old page or post or deleted any old content, you can redirect visitors to the new page. The good news is that there are a plethora of redirect plugins available, including Redirection and Safe Redirect Manager.

Set Up a 404 Error Page on Your WordPress Site Today

404 errors require a quick and professional response in order to prevent your website’s traffic from being negatively affected. Fortunately, WordPress makes it easy to manage 404 errors and redirect visitors.

Do More with DreamPress

DreamPress Plus and Pro users get access to Jetpack Professional (and 200+ premium themes) at no added cost!

Managed WordPress Hosting - DreamPress

The post The Beginner’s Guide to WordPress 404 Error Pages appeared first on Website Guides, Tips & Knowledge.


source https://www.dreamhost.com/blog/guide-to-wp-404-pages/

Tuesday 27 September 2022

A Beginner’s Guide to the WordPress Front Page (Homepage)

Your WordPress front page (also called the homepage) is the first thing most visitors will see when they land on your site. As such, it is vital for making a good first impression.

While your front page will normally display your latest posts, you may want something more customized to help your most important content stand out. Fortunately, there are lots of options available on the WordPress platform.

What is the WordPress Homepage (Front Page)?

Your front page is the homepage of your WordPress site. By default, it displays your blog posts, starting with the most recent entries. WordPress enables you to set the number of posts displayed and even include teasers for other posts (depending on your theme’s options).

Fortunately, WordPress enables you to select any page to use as your front page. This means that you can use either a static page or a customized page. The latter option is particularly interesting since it enables you to stand out from other sites that use the same theme.

The benefits of a customized front page include the ability to:

  • Optimize your static content.
  • Better showcase what your site is about — its mission, distinguishing features, core values, etc.
  • Add multiple strong Calls to Action (CTA) that are highly visible.

Customizing your WordPress front page enables you to fine-tune its look so that it meets your requirements. It can also give you an important edge over other websites with similar subject matter. Let’s take a look at a couple of ways to customize your front page in WordPress.

3 Ways to Customize Your WordPress Homepage (Front Page)

the WordPress posts page

Before implementing any of these methods, it’s important to first back up your site. This will ensure that you can easily roll back changes you don’t like.

1. Choose Whether to Display Posts or a Static Page

To get started, go to your dashboard and select Settings > Reading. Here, you can choose whether your homepage displays your latest posts or static content:

WordPress reading settings and homepage post settings

If you run a blog, you may want to prioritize your recent posts. For this option, you can change the value in the Blog pages show at most field. This will set a maximum number of displayed posts.

If you select a static page instead, you can decide which page to use:

editing the homepage settings in WordPress reading settings

You can also choose which alternative page will display your blog posts. Keep in mind that you’ll need to have these pages already created before you can select them.

Get Content Delivered Straight to Your Inbox

Subscribe to our blog and receive great content just like this delivered straight to your inbox.

2. Customize Your Static Front Page 

After you set a specific page set as your static homepage, open that page in the Block Editor:

Adding a new block in the WordPress editor

To customize the page from scratch, you can insert new content blocks. Simply select the + icon and search for the feature you need.

WordPress has a variety of blocks to choose from. You can insert standard options such as paragraphs, images, lists, tables, and buttons. Additionally, you’ll be able to use theme blocks:

adding a new block to a custom homepage template in WordPress

To save time, you can also use pre-designed Block Patterns. You can find layouts for your headers, footers, featured posts, photo galleries, and much more:

the WordPress block editor

After adding all the elements you need on your static front page, you can publish it! Alternatively, you can save it as a draft to continue editing later.

3. Create a Custom WordPress Page Template

Twenty Fourteen, a WordPress classic theme

You can also customize your front page in WordPress by creating a custom page template. First, you’ll need to make sure you have a block theme activated on your website. This will support Full Site Editing.

To find a block theme, open your dashboard and go to Appearance > Themes > Add New. Then, click on Feature Filter and select the Full Site Editing option:

enabling full site editing in WordPress

After you apply the filter, install and activate a block theme that best suits your needs. For this tutorial, we’ll be using the default Twenty Twenty-Two theme:

WordPress themes

Most block themes will automatically generate some default page templates for your website. To view these, go to Appearance > Editor. In this Site Editor, click on the WordPress icon and select Templates:

editing templates in the WordPress site editor

Here, you’ll see a list of pre-designed page templates that come with your theme. In many cases, you’ll have a Home template. You can select this to open a preview in the Site Editor:

editing a WordPress page template

By clicking on the + button, you can insert new blocks into the template. You can add standard text and media blocks, widgets, design elements, and theme blocks. However, keep in mind that this will affect all pages that use this template:

browsing available text blocks in the WordPress block editor

If you don’t already have a Home page template, you can easily create one. First, open a new post or page. In the page settings on the right, find the Template section:

selecting a page template in WordPress

Next, select New. In the pop-up window, name the template and click on Create:

create a custom page template in WordPress

This will automatically open the Template Editor. You can now build your custom template using blocks, patterns, and even template parts:

WordPress block patterns

After you’ve made your changes, hit Publish. If you want to assign your homepage to this template, open the Block Editor for the page:

selecting a custom homepage template in WordPress

You should see your new template in the Template drop-down menu. Select it, and when you publish (or update) the page, your custom template will be applied.

There’s No Place Like Your Homepage

Adding a custom homepage to your WordPress website has numerous benefits, including greater visual appeal and the ability to convey relevant information to visitors right away. Fortunately, WordPress is flexible enough to enable you to customize your front page in almost any way you need.

Do More with DreamPress

DreamPress Plus and Pro users get access to Jetpack Professional (and 200+ premium themes) at no added cost!

Managed WordPress Hosting - DreamPress

The post A Beginner’s Guide to the WordPress Front Page (Homepage) appeared first on Website Guides, Tips & Knowledge.


source https://www.dreamhost.com/blog/guide-to-wp-front-page/

Monday 26 September 2022

WordPress Posts: Here’s Everything You Need to Know

Posts are one of the two main content types in WordPress, so it’s crucial to understand how they work. Along with pages, posts are your primary vehicle for creating content and sharing it with your visitors. This holds true even if you aren’t building a blog.

In this beginner’s guide, we’ll explain what WordPress posts are and how they can be used. Then we’ll show you how to create, organize, and manage them. Finally, we’ll wrap up with a list of formatting tips to help you improve your posts. There’s a lot to cover, so let’s jump in!

An Introduction to WordPress Posts

top posts widget in WordPress

Posts are an inherent part of any WordPress website’s blog.

In WordPress, there are two main formats for creating content. The first is your pages, which are primarily static and will likely form the structure of your website. Typical examples include a site’s Home page, About page, Contact page, and so on.

WordPress posts are similar in a lot of ways. You use the same editor to create them, and they can include text, media, and much more. However, they’re designed for more timely content. This is why they are so useful for blogs. They also work well for updates, news articles, and other types of new content published on a regular basis.

Typically, posts are dated and listed in chronological order, and they’re organized using a system of categories and tags (which we’ll discuss soon). By default, the front page of your WordPress site will be a list of your latest posts, although you can change that static page if you’d like.

You’ll find that posts are a versatile content type, capable of doing a lot on your site. What’s more, they’re easy to create and manage. Let’s go over the basics now.

How to Manage Posts in WordPress (In 3 Simple Steps)

Throughout the next few sections, we’ll discuss how to create posts, organize them, and manage them on your WordPress site. You’ll first need to log in to your dashboard before proceeding to the first step.

Step 1: Create Your First Post

To create a post in WordPress, navigate to Posts > Add New in your dashboard. You’ll find the WordPress editor, where you can design your post:

WordPress create a new post

Note that as of WordPress 5.0, the default editor is the Block Editor. Your screen may look a bit different if you’re using an outdated version of the Content Management System (CMS) or the Classic Editor plugin.

You can add text by clicking in the text field (set the Paragraph block by default). When you add your text, a toolbar menu will appear along the top of the block with your standard formatting options:

adding blocks of text in the WordPress post editor

You can also select the Add Block button (the + icon) to insert other blocks, such as Heading, Image, and so on:

Choose a block for your WordPress post

If you want to rearrange the order of your content, you can simply drag and drop the blocks to place them in your preferred order.

To the right, you’ll find a panel of settings and options, including Featured Image. Here, you can upload an image that will be used as the header for this particular post.

At the top-right of the screen, you’ll notice settings for saving and publishing your post. You can save your post as a draft to work on later, schedule it to go live at a later time, or hit the Publish button:

Publish your WordPress post

In addition, you can use the Preview button to see what your post will look like on the front end of your site. It is always recommended to preview your post before you publish, so you can rapidly identify elements that need changing before it goes live.

That’s the basics of creating and editing your WordPress posts. However, you’ll also want to make sure they’re neatly organized.

Step 2: Organize Your Posts With Categories and Tags

If you intend on publishing a lot of posts — for example, if you’re creating a blog or news site — you’ll want to keep them organized. If you don’t, both you and your readers may have a hard time sorting through the backlogs to find specific entries or topics of interest.

WordPress provides two main features for organizing posts: categories and tags. Both can be added to a post on the editing screen:

edit categories and tags in the WordPress post editor

Assigning categories and tags to your posts is a way to sort them. Categories are generally high-level descriptors of a post’s topic. For example, if you run a health blog, you might have categories called “nutrition” and “fitness.”

Tags, on the other hand, are words or short phrases that describe a particular post’s subject in more detail. If you write a post about how to start a running habit for your health blog, you might assign it tags such as “cardio exercise” and “running tips.”

The biggest difference? Categories can be hierarchical, and tags cannot.

It’s worth noting that you can see all of the categories and tags you’ve been creating by navigating to either Posts > Categories or Posts > Tags, respectively. In those screens, you can set up and optimize these elements before you ever use them in a post:

edit categories for WordPress posts

You should use categories and tags in a way that makes sense to you and your readers, although there are a few best practices to keep in mind. In general, it’s smart to stick with a handful of categories for your site and assign only one to each post. Then, each post can receive a handful of tags (we suggest two to five) to explain the topic.

Above all, the number one rule for using these features is consistency. Having a few distinct categories and some descriptive tags is a perfect way to ensure that people can easily find posts that interest them.

Get Content Delivered Straight to Your Inbox

Subscribe to our blog and receive great content just like this delivered straight to your inbox.

Step 3: Manage Your WordPress Posts

Once you have some posts under your belt, you may need to manage them from time to time. If you head to the Posts tab in your dashboard, you’ll see a list of all your current entries:

view all posts in WordPress

You can use the links and drop-down menus at the top of the screen to sort through your posts by type, category, date, and so on. This is helpful if you’re looking for specific kinds of posts. Of course, you can also use the Search Posts box to find one in particular.

If you hover over a specific post’s title, you’ll see a few additional options:

edit your post in WordPress

You can edit the post, view it, or send it to the trash to delete it. You can also choose Quick Edit, which will enable you to make a few basic changes without taking you to the full post editor.

Finally, you may notice the checkboxes to the right of each post. If you select several posts, you can edit or delete them all at once by choosing the corresponding action from the Bulk Actions drop-down menu:

use bulk actions for editing multiple WordPress posts

Overall, you’ll find that this screen is handy when it comes to keeping track of your posts. You can see each one’s author, tags, categories, and published date, all without having to visit the posts individually. We recommend becoming familiar with the entire Posts tab since it can be a huge time saver.

Tips for Formatting Your WordPress Posts Effectively

We’ve now covered how to create posts in WordPress, keep them organized, and manage them over time. However, none of that tells you how to actually write and design your posts for maximum effect. The following tips should help you make them as accessible and reader-friendly as possible!

Use Headings and Subheadings

First, let’s return to the post editor within WordPress. The blog post title you enter will always be your Heading 1. When you insert the Heading block, you can choose subsequent headings (ranging from H2 to H6):

style heading structure in WordPress block editor

Headers are a smart idea for a variety of reasons. At the most basic level, they help to break up content, making it easier for readers to scan and understand.

The Heading block comes with established formatting and a hierarchy. You can use the higher-level headers (with large, bolded text) for significant sections while reserving the lower-level options for subheadings.

For instance, Heading 1 would be used for the title of a post, Heading 2 for main subheadings, Heading 3 for sub-subheadings, and so on. Just keep in mind that the exact formatting of these headers will depend on your theme.

Additionally, using these header options is good practice for Search Engine Optimization (SEO). The way they’re coded communicates clearly to search engine bots how your posts are organized, helping the bots learn what they’re about and promote them to the right searchers.

Finally, WordPress headers help you keep your post formatting consistent. For best results, determine a heading structure for your first post, then use a similar structure in future content.

Apply Formatting Options Sparingly

If you’ve ever used a text editing program on a computer, WordPress’ standard formatting options should feel pretty familiar. You’ll see basic choices such as bolding, italics, and lists:

modify text styles in the WordPress block editor

You can also use this toolbar to link and highlight text, as well as apply other formatting styles, such as subscript. It’s best to establish a consistent way to format your WordPress posts.

For example, you may choose to use bold for emphasis and italics for website names and other titles. If you want to add more customization to the formatting, you can try experimenting with HTML.

Keep Your Paragraphs Short

In today’s digital world, people have a lot of content to choose from and sift through. To make yours stand out, you should start by ensuring that it’s easy to read. One excellent way to do that is through headers, which we’ve already discussed. Another is to keep your paragraphs short:

WordPress platform

Short paragraphs are a major aspect of writing for the web.

Readers are drawn to content with lots of short, digestible paragraphs (especially when browsing websites). This makes content easier to skim and leaves plenty of white space.

Avoid Walls of Text

Have you ever heard of the dreaded ‘wall of text’? It is precisely what it sounds like — content that is line after line of unbroken text:

the dreaded wall of text

Walls of text can be difficult to read and off-putting to visitors. It will be a lot easier for them to lose their place or become overwhelmed and simply leave the site. To avoid this, you can break up text with other elements, both to give readers a break and provide extra value.

Some of the ways you can break up walls of text within your posts are to use:

  • Bulleted and numbered lists
  • Images, videos, and other media
  • Block quotes
  • Social media callouts

The best posts are usually a multimedia experience, so don’t be afraid to get creative! Even the most text-heavy content can be made reader-friendly with the strategic inclusion of some images and lists. Fortunately, WordPress formatting makes this process quick and easy.

Start Creating WordPress Posts

If you’re running a WordPress blog or news site, understanding how posts work is a necessity. However, even if your site has a different focus, posts can still come in handy. This flexible content type is easy to create, manage, and organize, so learning how to do those things should be one of your first goals.

Do More with DreamPress

DreamPress Plus and Pro users get access to Jetpack Professional (and 200+ premium themes) at no added cost!

Managed WordPress Hosting - DreamPress

The post WordPress Posts: Here’s Everything You Need to Know appeared first on Website Guides, Tips & Knowledge.


source https://www.dreamhost.com/blog/guide-to-wp-posts/

Friday 23 September 2022

A Beginner’s Guide to WordPress Pages

As one of the building blocks of any website, pages are an integral part of WordPress. The platform enables you to quickly add static pages that can act as part of the site’s overall architecture. If you’re new to WordPress, however, you may be unsure how pages work.

A WordPress page differs from a post in many ways. For instance, it can display any content you want, not just articles. Additionally, pages are designed for more permanent content, while posts are typically organized by dates and categories.

An Introduction to WordPress Pages

Every website requires at least one page to be visible to the public, but WordPress enables you to create as many pages as you need. Pages are distinct from posts in three main ways:

  • Pages are designed for static content. This means they’re for content that rarely changes over time, like About Us and Contact Us sections.
  • By default, pages do not allow comments. Pages are a place to share information rather than encourage social engagement.
  • You can use a page to hold and display posts. While you can display posts on a page, you can’t do the opposite.

Understanding the difference between pages and posts in WordPress is just the beginning, of course. Let’s dive a little deeper and discuss how to manage pages.

Get Content Delivered Straight to Your Inbox

Subscribe to our blog and receive great content just like this delivered straight to your inbox.

How to Manage WordPress Pages

WordPress makes it easy to manage your web pages. Out of the box, the platform comes with all the tools you need to create, edit, organize, and remove any pages on your site. Let’s address these tasks one by one.

Adding and Editing Pages in WordPress

Your first step is learning how to create pages and edit them. To get started, go to your WordPress admin dashboard. From the left menu, select Pages and then click on Add New:

add a new WordPress page

From here, you can start creating your page. Just add whatever content you’d like by inserting blocks. For instance, you can type text into a paragraph block or add photos with an image block:

create a new WordPress page

You can even use the pre-designed Block Patterns to automatically create a new layout. Once you’ve made your changes, you can publish the page or save it as a draft to continue working on it later.

Organizing Your WordPress Pages

When you add a new page to WordPress, it becomes a part of your navigation. Depending on your default installation settings, WordPress will either arrange your pages by date published or in alphabetical order. If you want to change this, you will need to use a hierarchy to organize them.

First, click on Pages within WordPress:

view all WordPress pages

Here, you will see a list of all of the pages you’ve created so far. Hover over any page you want and click on Quick Edit:

quick edit a WordPress page

Then, find the drop-down menu for Parent. If you want to make this page a subpage or child of one of your other pages, you can do that here.

Otherwise, you can simply use the Order box to determine how your pages will appear in your website menu. If you leave the number at 0, for example, the selected page will be the first one in the hierarchy. If all pages are set at 0, they will be organized alphabetically.

Once you click on Update, all your settings will be saved. You’ll want to do this for each page on your site. If you add new pages later, you can follow the same steps to organize them within your existing hierarchy.

Removing a WordPress Page

Deleting a page is a very straightforward process. To do this, go to the Pages screen of your dashboard. Hover over the page you want to delete, and you’ll see the word Trash in red lettering:

edit existing WordPress pages

Once you click on that button, the page will be moved to your trash bin. If you need to delete multiple pages, you can select the checkbox to the left of each one. Then, go to the Bulk Actions menu just above the list of pages, and select Move to Trash.

Deleted pages can be restored by clicking on the Trash link above the page listing. Hover over the page you want and select Restore. If you’d like to remove the page for good, click on the red Delete Permanently link.

Create Your First WordPress Page

WordPress enables you to quickly add, edit, and organize pages on your website. These pages are primarily used for static content and can be organized hierarchically as part of your site’s overall architecture.

To get started, you’ll need to add a new page and customize it with blocks. For example, you might add text, images, buttons, and more. When you’re ready, you can publish the page or save it as a draft.

Do More with DreamPress

DreamPress Plus and Pro users get access to Jetpack Professional (and 200+ premium themes) at no added cost!

Managed WordPress Hosting - DreamPress

The post A Beginner’s Guide to WordPress Pages appeared first on Website Guides, Tips & Knowledge.


source https://www.dreamhost.com/blog/guide-to-wp-pages/

Thursday 22 September 2022

How to Find and Install WordPress Plugins (Tutorial)

Anyone can create a simple. successful website using WordPress’ default functionality. However, what if the vision you have for your site goes beyond a simple blog or a small portfolio? You’ll probably need a few tools to add the features required and bring your dream website to life.

This is where WordPress plugins come into the picture. These add-ons enable you to expand your site’s functionality and make it do just about anything you’d like. You can find plugins that help you build and optimize your site, maintain it over time, and add new features such as contact forms and storefronts.

An Introduction to WordPress Plugins

WordPress Jetpack plugin

If you’ve never heard of plugins before, fear not! They’re typically simple to understand and, most importantly, use.

In short, a plugin is an add-on for your WordPress site — a piece of software you can install that adds new features and functionality.

No matter what you’d like your website to be capable of, there’s probably a plugin out there that can help. You can find plugins to speed up your site, optimize its security, and help it rank higher in search engines. Other options enable you to add specific features to your site, such as a contact form, storefront, or forum. Some even help with basic maintenance tasks, like cleaning up broken links.

Of course, it’s worth mentioning that a quality hosting plan eliminates the need for certain plugins. For example, check out our managed WordPress hosting service — we take care of optimizing your site’s speed and performance for you so there’s no need to find plugins for those kinds of tasks.

To learn more about how DreamPress can make running your website easier, check out our documentation.

Get Content Delivered Straight to Your Inbox

Subscribe to our blog and receive great content just like this delivered straight to your inbox.

Finding Plugins for Your WordPress Site

Even with a solid hosting plan, you may still want to add some plugins to your site. So, how do you go about finding them? There are a number of places to look, and where you’ll start depends on what you’re searching for.

If you’re interested in starting with some free plugins, your first stop should be the official WordPress Plugin Directory:

browse the WordPress plugin directory

Each plugin listed there has been through a vetting process and won’t cost you a cent. You can find a lot of high-quality tools, and see how other users have rated them.

However, sometimes you’ll want more options or features than a free plugin can provide. In that case, you can look for premium plugins, which will cost you a (varying) fee but are often more comprehensive.

When choosing plugins, it’s important to be careful — a poorly-coded plugin can harm or even break your site. Be sure to check out user reviews and ratings, and take a look at how recently each option has been updated. If you’re still not sure where to start, check out our list of 20 popular and high-quality plugins every WordPress user should know about.

How to Install WordPress Plugins (3 Easy Methods)

Once you have a plugin picked out, you’ll need to install and activate it on your site. There are three main ways to do this, and we’ll address each one in turn. Before you try any of them, however, we recommend that you first back up your site. That way, if something goes wrong or the new plugin causes problems, you can reverse the damage quickly.

1. Install a Plugin From the Official Directory

If you’ve chosen a plugin from the official WordPress directory, you’re in luck. Installing free plugins from this source couldn’t be easier — and you can do so without leaving your dashboard.

To get started, log into your website and navigate to the Plugins tab:

the WordPress plugins page

Here, you can see all the plugins you currently have installed (if any). Click on Add New, and you’ll be taken to a searchable version of the directory. Simply type in the name of the plugin you want. If you haven’t chosen one yet, you can use the various search options to explore everything that’s available.

When you find the right plugin, select the Install Now button:

WP Super Cache WordPress plugin

WordPress will spend a few moments performing the installation, and then you’ll see a blue Activate button appear. Click on that, and the plugin will be ready to use! Depending on the plugin you’ve chosen, you may be prompted to configure a few settings or run through a setup wizard.

2. Upload a Plugin Through the Dashboard

If you’ve purchased a premium plugin or downloaded one from an offsite location, you’ll need to use a slightly different method than the above.

All you’ll need is the zipped folder containing the plugin’s files saved to your computer. This should have been provided to you when you bought the plugin. If you aren’t sure where to find it, contact the plugin’s developer for help.

Once you have the plugin in hand, log into your site and head to the Plugins tab. As before, click on Add New. This time, however, you’ll want to select Upload Plugin on the next page:

upload a WordPress plugin

Click on the Choose File button, find the zipped plugin folder on your computer and select it (you don’t need to extract the files), then click on Install Now. Give WordPress a few moments to work its magic, and you should see a success message:

activate a recently uploaded WordPress plugin

Hit the Activate Plugin button, and you’re all set! The plugin should now appear on your list in the Plugins tab.

3. Use FTP to Install the Plugin Directly

If you have a plugin’s zipped folder saved on your computer, you can also install it using File Transfer Protocol (FTP). FTP enables you to access your site’s files and databases directly so that you can make changes to them by hand.

For those who are comfortable working with FTP, this can be a quicker way to install plugins. However, even if you’ve never used FTP before, you may want to consider this method. It’s a perfect way to start learning how to work with your website’s files. It’s also a useful alternative if you run into any errors when trying to install a plugin through the dashboard.

The first thing you’ll want to do is download an FTP tool. We recommend FileZilla, which is free and easy to use. Then you’ll need to set it up and connect to your web host. This is a good time to make a backup of your site if you haven’t already. FTP enables you to make permanent changes to your website, so it’s important to be careful and have a readily-available way to reverse any mistakes.

Once you have FileZilla open and connected, it should look something like this:

browsing WordPress plugins folder in an FTP client

In the top right quadrant, you’ll see your website’s home directory (it will typically be named after the site’s domain). Within this folder, navigate to wp-content > plugins:

WordPress plugins folder in an FTP client

This is where you’ll need to place the files for your new plugin. Unzip them first, then copy and paste them into the plugins folder. Alternatively, you can find the files on your computer using the two left-hand quadrants of FileZilla, and drag them over (again, after they’ve been unzipped).

That’s all you need to do to install your new plugin. However, you will still need to visit your site in order to activate it. Navigate to the Plugins tab from your dashboard, and find the plugin you just installed in the list. Once you click on Activate, you’re all done!

 Easily Install Any WordPress Plugin

Plugins are fantastic resources that enable you to build your site into anything you want it to be. No matter what feature or functionality you’re looking for, chances are there’s a plugin that can make it happen. Even better, installing plugins on your WordPress site couldn’t be easier.

Do More with DreamPress

DreamPress' automatic updates, caching, and strong security defenses take WordPress management off your hands so you can focus on your website.

Managed WordPress Hosting - DreamPress

The post How to Find and Install WordPress Plugins (Tutorial) appeared first on Website Guides, Tips & Knowledge.


source https://www.dreamhost.com/blog/tutorial-wp-plugin-install-setup/

Creating and Mastering GA4 Explorations

In the switch from Universal Analytics (UA) to Google Analytics 4 (GA4) — which will go fully into effect July 2023 — a lot of things have...