Monday 29 August 2022

Hreflang Tags: Your Gateway to International SEO

Continually working to optimize your website for search engine visibility will ensure that new users can find your content on the web. There are a range of techniques you can use to improve your website’s SEO rankings for a national audience, however when trying to target audiences in multiple countries or visitors who speak more than one language, you’ll need to follow a few additional rules — one of which involves adding hreflang tags to your website.

Search engines read hreflang tags to ensure that your pages are indexed correctly for a defined international audience, and that those users are directed to the correct versions of your site. Fortunately, there are a handful of relatively simple, easy methods you can use to insert and leverage these attributes on your website.

In this post, we’ll introduce you to hreflang tags and explain why they’re important. Then we’ll walk you through how you can implement them on your website. Let’s jump in!

An Introduction to Hreflang Tags

First introduced by Google in 2011, the hreflang attribute specifies the language of the content on a page.

You can use hreflang tags to target specific countries. They are handy for websites offering content in multiple languages.

Hreflang tags are added to the <head> section of your web pages’ HTML code. Each tag should specify the language and country for a particular page.

For instance, the tags might look similar to the following:

<link rel="alternate" hreflang="x-default" href="http://example.com/">
<link rel="alternate" hreflang="en" href="http://example.com/en/">
<link rel="alternate" hreflang="de" href="http://example.com/de/">

In the above example, the first line is the default page for users who don’t speak any of the languages specified. The second and third lines are for English and German speakers, respectively. The hreflang attribute specifies the language, and the href attribute specifies the URL.

It’s important to note that hreflang tags are only used by search engines — they won’t be visible to users. Furthermore, hreflang tags are just one type of tag that can improve your website’s SEO and User Experience (UX). Other common tags include title tags and meta descriptions.

Also, keep in mind that hreflang tags and canonical tags are not the same. A canonical tag is an HTML element that tells search engines which version of a page to index.

A hreflang tag, on the other hand, tells search engines which version of a page to serve to users in different countries. Canonical tags solve duplicate content issues. By contrast, hreflang tags ensure that users who speak different languages are served the correct page versions.

Why Hreflang Tags Are Important

Hreflang tags are important for a handful of reasons. They affect both the UX and SEO of your website.

Benefits of Using Hreflang Tags

  • Ensure that your pages are indexed correctly.
  • Direct users to the correct versions of your site.
  • Lead to higher traffic levels and more conversions.
  • Organize your website.
  • Localize your content for global users.
  • Prevent competition between alternate web pages.

In addition, hreflang tags can improve your Click-Through Rate (CTR) from Search Engine Result Pages (SERPs). Users who see your site is available in their languages are more likely to click on it. This can lead to higher traffic levels and, ultimately, more conversions.

How to Use Hreflang Tags (3 Technical Methods)

There are three main methods for implementing the hreflang attribute on your website. Below, we’ll walk you through each one.

However, regardless of your chosen method, it’s important to understand three basic elements of hreflang tags. First, the language attribute must be in a two-letter country code known as the ISO 639-1 format. ISO is short for International Organization for Standardization. This value consists of one language, and can be combined with an (optional) region.

You can use the ISO 3166-1 region codes to specify a region. It’s important not to get the two confused or use them interchangeably. For example, the code for the Greek language is “el”, but the code for the Greece region is “gr”.

The second rule is that each URL needs to have return links pointing to the canonical versions. For instance, if you have 40 languages, you would have hreflang links for 40 URLs.

Finally, you need self links for your hreflang tag implementation to work. This means that each language version must also list itself using a self-referential hreflang tag, which the page points back to itself.

Now, here are three methods for using hreflang tags!

1. Use HTML Tags in <head> Sections

As we mentioned earlier, one of the ways to implement hreflang tags on your website is to insert them in HTML tags. This is often the quickest and easiest method.

However, this process can be time-consuming if you have a long list of languages. You would need to link each variation to every other variation. Additionally, WordPress would have to make multiple database calls to generate these links.

Ultimately, this could slow down your site. Therefore, if you have a larger website or want to create a long list of languages, you might want to use the sitemap method instead (see Method 3).

To use this HTML tag method, you must insert your hreflang tags into the <head> section of each of your pages. For instance, if you wanted to add English and Spanish versions for the United States version of your site, you would add the following code:

<link rel="alternate" hreflang="x-default" href="http://example.com/">
<link rel="alternate" hreflang="en" href="http://example.com/en/">
<link rel="alternate" hreflang="es" href="http://example.com/de/">

In the above example, the first line refers to the default page. The second and third are for English and Spanish speakers.

2. Insert Hreflang Tags in Your HTTP Headers

If you want to add hreflang tags in non-HTML pages, such as PDFs, you won’t have HTML code to place the tags in. When this is the case, you can use your HTTP headers instead.

The code would look something like the following:

<http://example.pdf>; rel="alternate";hreflang="x-default",
<http:/example.pdf>; rel="alternate";hreflang="en",
<http://example.pdf>; rel="alternate";hreflang="es",
<http://example.pdf>; rel="alternate";hreflang="de"

In this example, you’re adding variants for English, Spanish, and German. Each of the respective versions must be placed in the headers of each PDF file.

Get Content Delivered Straight to Your Inbox

Subscribe to our blog and receive great content just like this delivered straight to your inbox.

3. Add Hreflang Tags to Your Sitemap

The third method for implementing hreflang tags is using XML sitemap markup. This approach will let you add the hreflang attributes for all your site’s pages in one place.

It can also help you avoid slowing down your page loading speed (which might happen if you place the tags in the head section of the pages). Plus, changing a sitemap can be significantly easier than modifying each page’s <head> tag.

The sitemap method is similar to the HTML <head> tag method, except the xhtml:link attribute adds the hreflang annotations to each URL. Following the xhtml:link attribute at the front of your URL, you would add the alternative page versions, so your markup would look similar to the following:

<url>
<loc>https://example.com/link</loc>
<xhtml:link rel=”alternate” hreflang=”en-us” href=”x-default”
<xhtml:link rel=”alternate” hreflang=”en” href=”https://example.com/link/” />
<xhtml:link rel=”alternate” hreflang=”es” href=”https://example.com/enlance/” />

Here, you’ll see that each URL has a hreflang attribute and return links to the other URLs. A separate <url> element should be created for every URL. Each element must include a <loc> that indicates the page URL. The URLs also need a <xhtml:link rel=”alternate” hreflang=”supported_language-code”> element that lists each alternative version of the page.

You can add all of the necessary tags to one file. While the order of the elements doesn’t matter, we recommend keeping them uniform, because this layout will make it easier to check for mistakes. You can submit your new sitemap to Google Search Console when you’re done.

Tools That Generate Hreflang Tags Automatically

The time it takes to generate and implement your hreflang tags can vary depending on how many versions you want to create and which method you use. However, a handful of tools can simplify and speed up the process. Let’s take a look at some of the most popular ones!

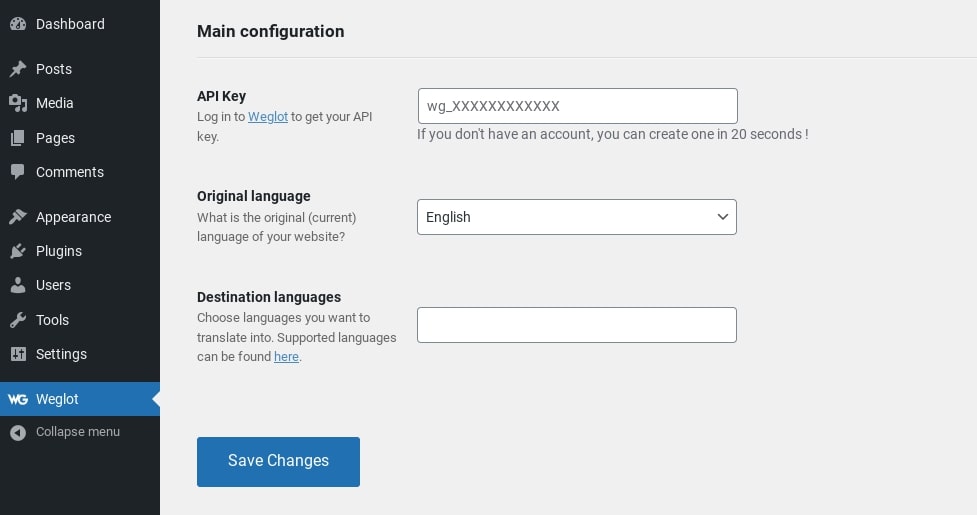
Weglot Translate Plugin

Weglot is a popular and reliable translation tool that can add hreflang Google tags and markup to your website:

The Weglot Translate WordPress plugin

Weglot can be a helpful solution if you’re a beginner and unfamiliar with working with code. It automatically identifies href tags in your code during translation, and changes the page header links.

Hreflang Checker

It’s crucial to always double-check your hreflang tags to ensure that they’re working correctly after you’ve placed them. The Hreflang Checker tool provided by Weglot can help simplify this process:

The Hreflang Checker tool

To use it, just copy and paste the URL that you want to check into the text field (make sure to include “http://” or “https://”) and select a search engine bot to emulate. Then click on the Test URL button. It will display a search results page showing your tags’ status.

XML Sitemap Generator

If you want to implement hreflang tags using the sitemap method, you can utilize the Hreflang XML Sitemap Generator Tool. It was created by Erudite, a digital marketing agency:

The Erudite Hreflang Sitemap tool

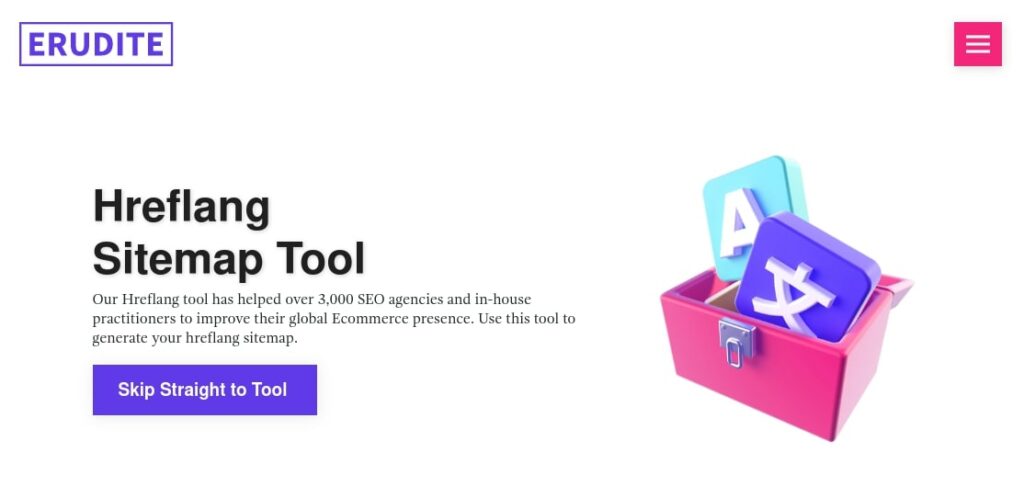
After creating an account using your email address, simply tell the tool where to send your sitemap and upload your CSV file, including a column for each language. Then Erudite’s tool will automatically generate an XML sitemap.

Hreflang Tags Generator

If you need help generating the link elements for your hreflang tags, you can use the Hreflang Tags Generator:

the Hreflang Tags Generator tool

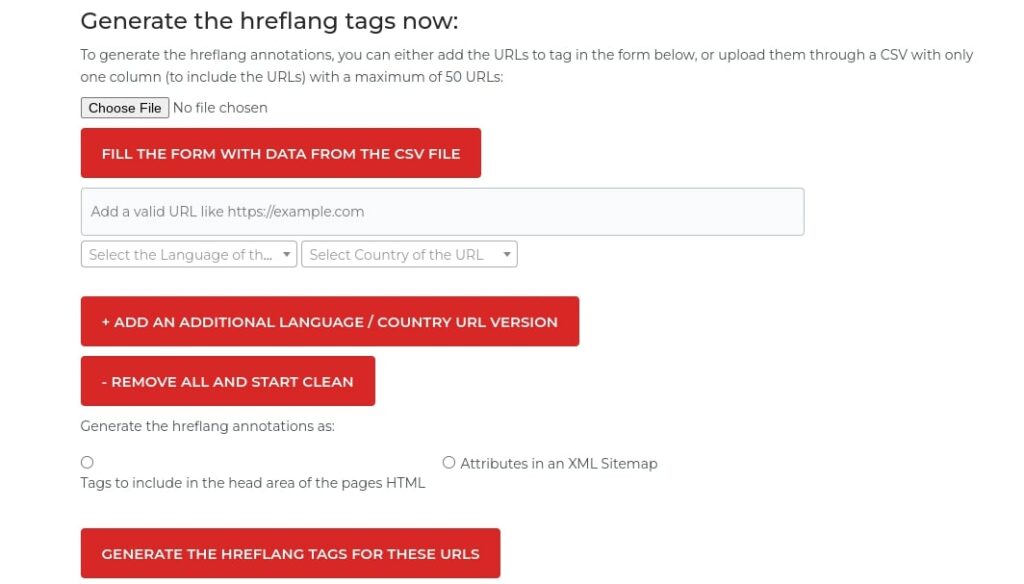
This tool, created by Aleyda Solis, can streamline creating tags for your multi-language or multi-country website. You can generate these tags by either adding the (up to 50) URLs to tag in the given form, or uploading them via a CSV file. Again, you’ll need to make sure that there is one column for the URLs.

Ahrefs Google Sheets Template

Another tool that you can use is the Google Sheets template provided by Ahrefs:

The Hreflang planner Google Sheets template

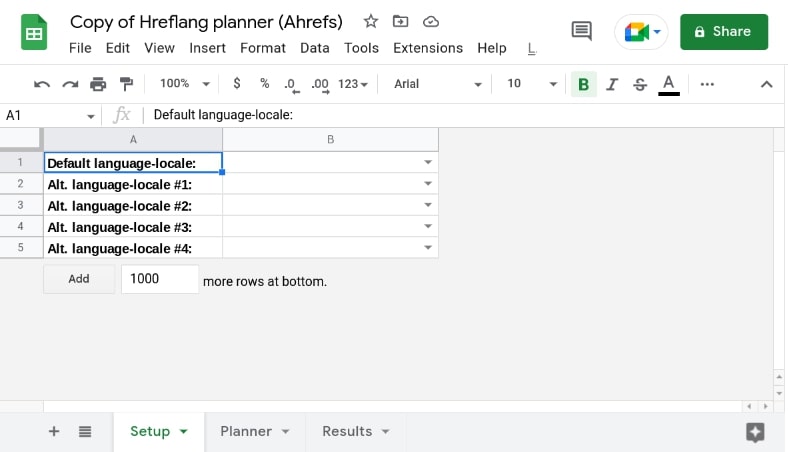
Under the Setup tab, select your site’s language-locale (default language), then choose up to four additional variations. For instance, you could pick English as the Default language-locale, followed by Spanish, German, Chinese, and Russian as the alternatives.

Next, under the URLs tab, you’ll find five columns, each with its own header cells that correspond to the language you chose in the Setup tab. There should also be an X-Default column.

Now paste the URLs into the respective cells. Then, under the Results tab, you’ll find an auto-generated code for your XML sitemap. You can copy and paste everything in the A column into an XML document and upload it via Google Search Console.

Tips and Best Practices for Using Hreflang Tags

Now that you understand the basics of hreflang tags and their implementation, let’s discuss some tips for using them. Below are some key best practices to follow!

Make Sure the Tags Are Bidirectional

Hreflang tags operate in pairs, meaning that they are bidirectional. When you add a hreflang tag to an English page pointing to a Spanish version, you also need to ensure that the Spanish variant returns with a hreflang tag pointing to the English version.

This setup tells search engines the relationship is in agreement, and that you control both pages. If two pages don’t point to each other, Google will ignore the tags.

Specify the Default Page for Users Who Don’t Speak Any of the Specified Languages

Specifying the default page for users who don’t speak any of your set languages is important. It will ensure that visitors are directed to the correct version of your site.

You can do this by adding a tag with the language code “x-default”. It would look something like:

<link rel=”alternate” hreflang=”x-default” href=”https://example.com/” />

The default page will be used in situations where Google is unable to extract the language or region for users when it’s not specified or listed. Instead, the x-default page will ask users which language they prefer, then point them to the appropriate alternate version.

Use Absolute URLs

Absolute URLs are complete URLs that include the domain name. They are also the preferred type of URL to use with hreflang tags. They are less likely to be affected by changes on your website, and make it easier for search engines to index your pages correctly.

It’s important to make sure that your hreflang tags contain absolute URLs. In other words, the code should look like “https://example.com/link” rather than “example.com/link”.

Make Sure Your Hreflang Tags Are Valid and Correctly Formatted

As we mentioned earlier, the correct ISO language and region codes must be used when creating your hreflang link attributes. Otherwise, you may encounter a message in Google Search Console informing you that your site doesn’t have any hreflang language tags.

Remember to use the ISO language codes for language attributes and the region codes for geographical locations. For instance, while “kr” is for the region of South Korea, “ko” is the code for the Korean language.

Keep Your Hreflang Tags Up To Date

As you continue adding content and pages to your website, keeping up with your hreflang tags becomes more critical.

Let’s say you add a new domain for a particular country. Then you’ll need to add the appropriate hreflang tags to your existing pages, and check to ensure that they point to the new domain.

The same applies if you delete any language versions of your website. If you remove a language, you’ll need to delete or replace the hreflang tags pointing to it. Pointing to missing or incorrect URLs can hurt both your UX and SEO.

Monitor Your Website for Errors

Just as essential as keeping your hreflang tags updated is consistently monitoring your website for errors. This process includes checking your site’s source code to make sure that all necessary tags are present.

You can use a tool such as Google Search Console to monitor your website more easily. This platform will help you verify whether your pages are being indexed correctly.

Optimize Your Website for International Audiences

Using hreflang tags can improve the SEO and UX of your website for international audiences. These attributes can help your site reach users in different countries, and ensure that the correct content is served in their native or preferred languages.

As we discussed in this article, there are three methods you can use to implement hreflang tags:

  1. Add the attributes to the <head> section of each page.
  2. Place them in the HTTP headers of non-HTML content pages.
  3. Put the tags in your XML sitemap, so that all the attributes are in one place.

Do you need help optimizing your multilingual website? Check out our DreamHost Pro Services to learn how we can take your site to the next level!

International SEO Made Easy

We take the guesswork (and actual work) out of growing your website traffic with SEO.

shared hosting

The post Hreflang Tags: Your Gateway to International SEO appeared first on Website Guides, Tips & Knowledge.


source https://www.dreamhost.com/blog/hreflang-tags/

Friday 26 August 2022

How to Translate a Website Quickly & Easily

It probably won’t surprise you to learn that English is the most common language on the web. However, it’s far from the only one. In fact, nearly half of all internet users speak another language. This means that if you’re not translating your website, you may be losing out on potential conversions and revenue.

Fortunately, translating your content is not as difficult as you might think. Plus, you don’t need to be multilingual to do it! Today, it’s easier than ever to build a website and make it available in other languages.

In this post, we’ll discuss why you might want to create a multilingual site. Then, we’ll provide you with a list of solutions for translating your website quickly and easily, including using web browsers, online translator tools, plugins, and more. Let’s jump in!

An Introduction to Website Translation

When you translate a website, you essentially create a new version of the site in a different language. For instance, our DreamHost site is also available in Spanish.

This process can be done manually, by hiring a professional translator. Alternatively, you might use an automatic translation tool.

There are a few things to keep in mind when translating a website. First, you’ll want to make sure that all of the content on the site is translated accurately. This includes the text as well as any images or other multimedia elements.

Additionally, it’s important to consider the overall design of the site. The goal is to create a version of the site that is easy for users to navigate and understand, regardless of their device or native language.

You’ll also need to consider your site’s Search Engine Optimization (SEO). The translated pages should contain the right keywords so that users can easily find them when looking for information in their language.

It’s worth noting that website translation is not the same as website localization. Localization is a more comprehensive process. It involves translating the site content and adapting the site’s design and functionality to better meet the needs of users in a specific region.

Why You Might Want to Translate Your Website

There are a number of reasons why you might want to translate your website. If you have an international audience, translating your site can help you cast a wider reach and better serve your users. It can also be a good way to expand into new markets.

A multilingual site can help increase your conversions. Your website visitors will be more likely to convert if your site content is in a language that they understand.

Translating your site can also show users that you are committed to inclusivity. It provides a good User Experience (UX) for everyone, regardless of their language. Making your site more accessible can help you build trust with your visitors and make them more likely to do business with you.

Finally, translating your site can help improve your SEO. If you optimize your site for keywords in different languages, you can attract more traffic from users who are searching for articles in their native languages.

Get Content Delivered Straight to Your Inbox

Subscribe to our blog and receive great content just like this delivered straight to your inbox.

How to Translate Your Website Quickly and Easily (10+ Methods)

Translating an entire website can be time-consuming and costly, especially if it contains a lot of pages. Fortunately, there are a handful of tools that can help simplify the process. There are also multiple methods that you can use.

Let’s look at 10+ ways to translate your website quickly and easily, with step-by-step instructions.

Using Major Web Browsers

Most web browsers enable you to translate your site in just a few clicks. Plus, this feature is normally available for free.

However, the quality of the translation may not be very good. Therefore, it’s important to proofread the translated site carefully before making it live.

Let’s look at how to translate your website using different browsers.

1. Google Chrome

Translating your site in Google Chrome is quick and easy. To start, click on the three dots in the upper right-hand corner and select Settings:

Google Chrome settings

Next, navigate to Advanced and select Languages and inputs > Languages. At the bottom, you’ll see an option that says Offer to translate pages that aren’t in a language you read. Click to enable this setting:

The Offer Google Translate option in Chrome

Now you can translate your website into foreign languages. Visit the web page you want to translate, then right-click and select Translate to English:

The option to translate language in Chrome

In the popup that appears, click on the three dots and select Choose another language:

Choosing another language to translate in Chrome

Then, you can choose an option from the dropdown menu. When you’re done, click on Translate. The web page will automatically be translated.

2. Mozilla Firefox

Unlike Chrome, Firefox doesn’t have a built-in translation feature. Instead, you’ll need to use an extension.

A popular option is To Google Translate:

The Firefox To Google Translate extension

Select the Add to Firefox button to install the add-on. On the Options screen, you can choose specific languages:

The To Google Translate options

You can also leave the Translate Text field set to Auto to translate in different languages. When you’re done, select Save.

Now, when you visit a web page that you want to translate, you can right-click on it and select Translate this page. This will open Google Translate.

Another option is to change your Firefox settings. You can do this by clicking on the menu in the top right and navigating to Settings > Language:

The Firefox language settings

Choose the language you want. Then select the OK button.

3. Microsoft Edge

If you use Microsoft Edge, you can access a built-in translation tool similar to the one in Chrome. Open your site and click on the Translate icon in the address bar:

Translating a web page in Microsoft Edge

A popup will appear. Under Translate to, select the language from the drop-down menu and click on Done.

4. Safari 

Your options for translating a website in Apple Safari will depend on your device and your browser version. For example, you may be able to access the Translate button in the Smart Search field.

If you’re using Safari on your iPhone, you can select the aA button in the address bar. This will open a menu where you can find and select the option to Translate to English.

Using Online Translator Tools

There are plenty of online translator tools that you can use. Many of them are free.

These tools use Artificial Intelligence (AI) to translate a page into another language. The process is often quick.

Unlike human translation, these tools won’t account for linguistic nuances. Therefore, you may need to check the translations to make sure they’re accurate.

5. Google Translate

Google Translate is one of the most popular online translator tools. You can use it to translate individual pages or your entire site into different languages:

The Google Translate website

On the main page, click on the Websites tab and enter your URL in the text field. Select the native language from the options on the left, then choose the new language you want to translate the content into. Next, click on Translate:

Translating a website in Google Translate

You should now be able to see the translated version of your site. If you want to change it to another language, you can select your preference from the drop-down menu.

6. Translate.com

Another popular online translation tool you can use is Translate.com:

The Translate.com homepage

It offers over 30 different languages and lets you use your voice or keyboard to input text. Then, you can read the translated text or listen to the audio version.

The unedited versions of machine translation are free to use. You can also leverage the professionally edited translations for $0.07 per word.

7. Translatedict.com

Translatedict.com is a useful online translator that lets you choose from more than 50 languages:

The Translatedict.com website

Start by entering your text in the provided box. Then, select the preferred language and click on the Translate button.

When it’s finished, you can view the written text or select the sound icon to listen to it. You can also use the word and character count tools to keep track of the length of your content.

Using WordPress Translation Plugins

If you’re a WordPress user, you can also use plugins to translate your website. Let’s look at some popular options.

8. Weglot

Weglot is a robust solution that automatically translates your website into more than 100 languages:

The Weglot website

The service incorporates both human and machine translation solutions. You can use automatic translations, then manually edit your text for clarity. You’ll also have access to professional website translators.

After you sign up for a Weglo account, you will receive a confirmation email with your API key. Then, you can install the Weglot Translate plugin on your WordPress site:

The Weglot WordPress plugin

After activating the plugin, navigate to Weglot and enter your API key. Next, select your Original Language (such as English) and set the Destination Languages:

The Weglot plugin settings

You can also choose specific pages to exclude from translation. When you’re done, click on the Save button. Now, when you view your site on the front end, you should see a language widget that lets you translate the page.

The plugin is free. However, you can upgrade to a premium plan to access more features.

9. Polylang

Polylang is another WordPress plugin that enables you to translate your site:

The Polylang plugin

You can use it to set the language for each post and create translated versions in your WordPress editor. Once you install and activate the plugin, you can access its settings by navigating to Languages:

The Polylang plugin settings

The plugin is free. For more advanced features, you can upgrade to a pro plan.

10. WPML

WPML is one of the most popular translation plugins for WordPress:

The WPML website

This tool is intuitive and easy to use. However, it’s mostly focused on manual translation. Once installed and activated, you can assign the Translator role to specific users.

The plugin supports more than 40 languages. It also lets you generate language variants.

Bonus Option: Translate Your Website Using Custom Translation Services

At this point, we’ve discussed a range of translation tools that you can use, including online translators and WordPress plugins. However, if you’re looking for high-quality translations, you might consider using a professional service such as Gengo or Translated.com:

The Translated.com website

Of course, you’ll have to pay for this service. However, you can have peace of mind knowing that your translations are being handled by experts in those languages.

This option can save you a lot of time and energy in the long run. You can contact the translators to learn more about their services and prices.

Translate Your Website Today

Not all of your site visitors are fluent in English. To avoid losing out on conversions, you might want to consider translating your content into different languages.

As we discussed in this post, there are various methods you can use. For instance, you can use an online tool such as Google Translate or install a WordPress plugin like Weglot.

Are you looking for additional ways to enhance your website? Check out our DreamHost Pro Services to learn more about our professional web design services!

DreamHost Makes Web Design Easy

Our designers can create a gorgeous website from SCRATCH to perfectly match your brand and vision — all coded with WordPress so you can manage your content going forward.

custom website design

The post How to Translate a Website Quickly & Easily appeared first on Website Guides, Tips & Knowledge.


source https://www.dreamhost.com/blog/translate-website/

Wednesday 24 August 2022

DuckDuckGo Review: Is Privacy Still in Demand in 2022?

Currently, 46% of people feel unable to protect their personal data. Since Google’s search engine often extracts and stores user information for advertising purposes, many people are turning to DuckDuckGo. However, you may be wondering if it is an effective alternative for finding information online.

Using DuckDuckGo, you can search for content without worrying about data tracking. The search engine uses Content Security Policy (CSP) reports, smarter encryption, and privacy grades to help you navigate safely online. However, Google can provide more accurate and relevant search results.

This post will explain what DuckDuckGo is and how it compares to Google. Then, we’ll list the main privacy features and concerns with using DuckDuckGo so that you can decide if it’s the right search engine for you. Let’s get started!

What Is DuckDuckGo?

DuckDuckGo is a search engine that was developed specifically for private online browsing. Unlike other search engines, DuckDuckGo claims that it doesn’t store users’ personal information:

DuckDuckGo website

Many people don’t realize that popular search engines (like Google) collect personal data from them. Depending on the privacy policy, you may be unable to protect your location information, IP address, cookies, and search history.

Although this lack of privacy might feel alarming for some, data collection is primarily used to enhance your online experience. Here are some stated reasons for data collection:

  • User profiling and personalization
  • Targeted advertising
  • More relevant search results

However, search engine data collection can also be highly intrusive, especially if you search for financial information, medical conditions, or other sensitive details. With targeted advertising, companies can exploit your personal data for their financial gain.

For this reason, many users are turning to DuckDuckGo. This private search engine had a slow rise in popularity because of convenient giants such as Google. Still, it now receives about 3 billion monthly searches.

From 2018 to 2020, DuckDuckGo doubled its search volume from 20 to 50 billion. During this time, 62% of Americans were worried about companies collecting data from them. Due to DuckDuckGo’s firm stance against data collection, it was able to soothe many of these fears.

In recent years, lawmakers have moved to curb the power of large companies such as Google. Consumers have regained control over their data with new online privacy bills like the GDPR. However, if you still don’t trust prominent search engines, DuckDuckGo can be an effective alternative.

How DuckDuckGo Compares to Google

As you’re probably aware, Google is the most popular search engine. Globally, Google generates over 80% of desktop search traffic. If you want a more private search engine, you’re probably wondering how DuckDuckGo compares to Google.

When you search for content on DuckDuckGo, you’ll notice a similar layout to Google. Both search engines generate Search Engine Results Pages (SERPs) with ten organic results:

DuckDuckGo SERP

On the first page of results, you’ll also typically see a knowledge panel. It provides basic information from a Wikipedia page:

Google SERP

On both DuckDuckGo and Google, there are paid ads at the top of the page. However, DuckDuckGo won’t use your browsing or purchase history to improve ad results. Basically, if you search for a particular product, you’ll see ads for it:

DuckDuckGo ads

DuckDuckGo also provides Instant Answers, which are similar to Google’s Featured Snippets. Without clicking on a specific result, you can immediately view the answer to a question:

DuckDuckGo Instant Answer

You can also use DuckDuckGo Bangs. These shortcuts immediately pull results from a specific source, such as Wikipedia or Amazon:

DuckDuckGo Bangs

DuckDuckGo has an easy-to-use interface, but it doesn’t yet have the same search power as Google. Since the Google search index is over 100 million gigabytes, it can provide more extensive search results.

Google can also be more convenient. It offers a free collection of workspace tools like Google Analytics, Google Docs, Search Console, and more. Plus, Google is continually updating its algorithms so that you can easily find relevant information:

Google query

To choose between the two search engines, you’ll have to decide how important privacy is to you. Since Google extracts and stores user data to improve its services and advertising, you may want to consider using DuckDuckGo instead.

8 DuckDuckGo Privacy Features

DuckDuckGo stands out from other search engines due to its dedication to user privacy. To help you decide if DuckDuckGo is right for you, let’s discuss the various ways that it protects your data!

1. No Tracking

When you visit a website, your browser sends data about your user agent and IP address to the site. This search information could potentially identify you and your location. Fortunately, DuckDuckGo doesn’t collect this data or share it with websites.

DuckDuckGo Does Not Track:

This data protection can prevent what DuckDuckGo calls “search leakage”. Instead of sharing private information with the search engine and every site you click on, DuckDuckGo redirects the request. As a result, websites won’t know your specific search terms.

Additionally, cookies aren’t saved with the default version of DuckDuckGo. However, if you change any settings, a few non-identifiable cookies will store your preferences. Additionally, DuckDuckGo adds an affiliate code to certain eCommerce sites, but this only records product information.

2. Privacy Essentials Browser Extension

Along with the standard search engine, DuckDuckGo has a browser extension. The DuckDuckGo Privacy Essentials extension automatically adds tracking protection for Chrome, Firefox, and Safari users:

DuckDuckGo extension

After you install the extension, it will set your default search engine to DuckDuckGo. Plus, it will block online tracking on any website you visit.

Here are some more privacy settings in the DuckDuckGo browser extension:

This extension allows you to browse the Internet safely without unexpected tracking. Like the search engine, DuckDuckGo Privacy Essentials will protect your data against fingerprinting, social trackers, Google AMP, and third-party cookies.

3. Smarter Encryption

Whether you’re using the DuckDuckGo extension or mobile app, you’ll be able to access Smarter Encryption technology. Put simply, your device will prioritize encrypted connections.

DuckDuckGo continually updates a running list of all the websites that support encryption. Then, the search engine will automatically use the encrypted version of a site when you visit it.

This feature can ensure that you visit the HTTPS version of a website. Rather than using an unsecured HTTP connection, your internet activity will be encrypted against prying eyes. Overall, with Smarter Encryption, over 80% of the websites you visit will be encrypted and secure.

4. Protection Against Social Media Embedded Content

Social media companies often include tracking codes in their content. If you’re visiting a website with social media embedded content, your IP address, web browser details, and browsing history can be recorded.

Furthermore, YouTube can collect your data even if you’re simply watching an embedded YouTube video on a blog. This means that you can have data leaks on two fronts: the visited website and the original social media platform.

With DuckDuckGo, you can block social media embedded content. Since this is a relatively new feature, it currently only works on Facebook content. In the future, DuckDuckGo plans to stop tracking from other social media platforms.

5. Anonymous Localized Results

Although giving a search engine your location can be nerve-wracking, it can have some benefits. For instance, you may need to access localized results like weather or local businesses.

Fortunately, DuckDuckGo can be an effective tool for preventing the exposure of your personal information. After using a GEO::IP lookup to guess your current location, this search engine deletes your IP address and location from its records.

Sometimes, you’ll want more accurate results. If DuckDuckGo needs more information about your location, it will prompt you to Enable Location:

DuckDuckGo location

However, whenever DuckDuckGo gives location-based results, your IP information is never stored in its servers. Instead, it uses a random location near you and deletes the data after your search.

6. Content Security Policy (CSP) Reports

Furthermore, DuckDuckGo uses Content Security Policy (CSP) reports. This extra layer of protection detects and blocks third-party attacks.

Here are some cyberattacks that a CSP can prevent:

  • Cross-Site-Scripting (XSS) attacks: Injections of client-side scripts into your browser.
  • Code injection attacks: Injections of code into your browser or application, redirecting its actions.
  • Clickjacking: Malicious code that tricks you into clicking on something that will reveal personal information or give hackers access to your computer.

The CSP will scan for these issues using the DuckDuckGo search engine, extension, or app. Then it will tell your browser which resources are safe to fetch and execute.

7. Fire Button

Once you download the DuckDuckGo mobile app, you can start making secure searches on your mobile device. One of its unique features is the Burn Bar, which can delete your browsing history after each session.

To use this feature, click on the fire icon at the bottom of your screen. Then, select Close Tabs and Clear Data:

App clear data

By deleting this information, DuckDuckGo won’t store any of the data on your device. This extra security measure can protect your information and give you more control over it.

8. Privacy Grade

The DuckDuckGo app and browser extension can determine the security level of each website you visit. Once you click on a link, you can open the Privacy Grade, which rates the site’s security:

DuckDuckGo privacy grade

This letter grade is based on a few factors:

  • Connection: Safer websites have encrypted connections.
  • Trackers: DuckDuckGo will count the number of trackers blocked from the website.
  • Privacy practices: The website’s terms of service agreement and privacy policy will be reviewed.

If DuckDuckGo blocks specific trackers or encrypts your connection on a particular website, it will show you how your privacy has been enhanced. Along with the current Privacy Grade, you’ll see the original letter grade before using DuckDuckGo.

DuckDuckGo Privacy Concerns

DuckDuckGo can be a better alternative to Google if you want to increase your search privacy. However, there are a few concerns about its business practices.

Recently, a privacy researcher exposed some information about DuckDuckGo, revealing that it isn’t as private as it claims. After testing the DuckDuckGo mobile browser, he discovered that it did not block data flows to LinkedIn and Bing advertisements on third-party websites:

DuckDuckGo privacy concerns

Essentially, DuckDuckGo created an exception for Microsoft data requests. Although it claims to block all tracking scripts, the company has a limited search syndication agreement with Microsoft. This agreement prevents DuckDuckGo from blocking trackers on Microsoft-owned platforms like LinkedIn and Bing.

Reportedly, DuckDuckGo is working to change this agreement to increase user privacy. However, this lack of transparency is concerning for a privacy-focused company.

Alternatives to DuckDuckGo

Due to these valid concerns, you may want to find an alternative to DuckDuckGo. Although you could look for a different and more private search engine, there are a few ways to secure your browser without it.

Optimize Browser Security

Google Chrome lets you update your settings to increase search privacy. For example, you can request that websites stop tracking your browsing data. To do this, go to Settings > Privacy and security > Cookies and other site data:

Chrome cookies

Then, find the Do Not Track setting. Turn this on and hit Confirm:

Confirm Do Not Track

Now scroll back up to the General settings. To prevent sites from seeing your history or creating personalized ads, you can block third-party cookies:

Chrome block cookies

If needed, you can also clear your cookies and site data when you close a browser window. However, this setting will automatically sign you out of Chrome as well.

Use a Virtual Private Network (VPN)

Although you may believe that an incognito browser is private, it often doesn’t hide your IP address. Therefore, using a Virtual Private Network (VPN) is beneficial when you want to be anonymous online.

A VPN connects your computer (or mobile device) to the internet with a private server. VPN software can mask your IP address and encrypt your data, providing more data security.

For example, ExpressVPN is a popular option with industry-leading security features. By encrypting the traffic between its servers and your computer, ExpressVPN can protect your data from third parties:

ExpressVPN

Similar to DuckDuckGo, ExpressVPN doesn’t store activity or connection logs. As such, it can be effective when you want to keep using Google but worry about your privacy.

A Search Engine for the Privacy-Minded Searcher

If you want to enhance your online privacy, DuckDuckGo can be a great alternative to popular search engines such as Google. Whether utilizing the browser extension or mobile app, DuckDuckGo can return ad-free search results without sharing your browser data.

On the other hand, you can benefit from personalized search results on Google. Google will return unique content tailored to your browser history and personal preferences. Therefore, to choose between the two search engines, you’ll have to prioritize either up-to-date, customized search results or increased data security.

Want more in-depth reviews and tutorials? Subscribe to the DreamHost blog and stay in the know.

Get Content Delivered Straight to Your Inbox

Subscribe to our blog and receive great content just like this delivered straight to your inbox.

The post DuckDuckGo Review: Is Privacy Still in Demand in 2022? appeared first on Website Guides, Tips & Knowledge.


source https://www.dreamhost.com/blog/duckduckgo-review/

Tuesday 23 August 2022

Decoding WordPress: The Media Library

The WordPress Block Editor enables you to upload images and files directly to your site’s posts and pages. However, your media collection can become disorganized over time, and you might struggle to find media that you uploaded in the past.

Fortunately, you can use the WordPress Media Library to organize your images and files. Thanks to multiple views and filters, you can develop an effective organizational system for your uploaded files. Additionally, you can optimize your images to rank higher in search results.

In this post, we’ll give you an overview of the WordPress Media Library and its main features. Then, we’ll show you how to extend these features and fix any potential errors that occur. Let’s get started!

An Introduction to the WordPress Media Library

When you upload images, videos, and audio files to your WordPress website, these are stored in your Media Library. Essentially, this catalogs every piece of media you’ve used in your posts and pages.

To open the Media Library, click on the Media tab in your admin dashboard. Then, you’ll be able to view your files and upload new ones if needed:

WordPress Media Library

Here are some files you may see in the Media Library:

  • Images (.jpeg, .jpeg, .png, .gif, .ico)
  • Audio files (.mp3, .m4a, .ogg, .wav)
  • Videos (.mp4, .mov, .wmv, .avi, .mpg, .ogv, .3gp, .3g2)
  • Documents (.pdf. .doc, .docx, .odt, .psd)
  • Spreadsheets (.xls, .xlsx)
  • Powerpoint presentations (.pps, .ppsx, .ppt, .pptx)

If you need to narrow down your results by type, you can use the dropdown menu. Here, you’ll see the file types listed above, along with items labeled Unattached, Archives, and Mine:

Media type

You can also select a specific upload date. This can be particularly helpful if you’re unable to find an image but you know when it was uploaded:

Upload date

To organize your Media Library, you can use the Bulk select button. Then, you can select multiple images and delete them permanently:

Bulk select

In the top-right corner, you’ll see a search bar. Here, you can enter keywords to filter your results:

Search Media Library

Please note that you’ll have to have tagged the images with these keywords beforehand — but adding this little bit of extra effort to your workflow can make a huge difference when you’re trying to find things in the future.

As you can see, the Media Library can help you organize the files on your website. It provides an all-in-one solution for uploading, editing, and deleting files.

5 Useful Media Library Features

If you’re new to WordPress, you might not know how to use the Media Library. Fortunately, this tool is very user-friendly, and it enables you to upload, view, and edit media files on your website. Let’s take a look at its main features.

1. Multiple Views

The Media Library lets you change the way files are displayed. You can either view them in a grid or a list.

By default, the Media Library shows items in a grid view, with a thumbnail for each file:

Grid view

As we mentioned earlier, you can filter the results by media type and date. If you want to view the details of a certain file, you just have to click on it:

Grid view attachment details

Alternatively, you can switch to the list view. Instead of a gallery-like grid, your files will be displayed in a list:

List view

On the left-hand side, you can use the checkboxes to bulk-select files. Next to this, you’ll see a thumbnail representing each media item.

Here’s what else you can see in a list view:

  • File: The file title, as well as the full name of the file.
  • Author: The user that uploaded the file.
  • Uploaded to: The title of the post or page where the file was uploaded.
  • Comment bubble: The number of comments for that file.
  • Date: The date when the media was uploaded.

If you click on the file name, this will open the image editor:

List view image editor

You can switch between these two views at any time, depending on your preference. However, the list view can be a better option if you want to view a file’s details without having to click on it.

2. Multiple Ways to Upload Files

When you need to upload a file to your website, you can add it directly to a post or page. The Block Editor lets you add images, videos, and other files with blocks:

Image block

Once you select the relevant block, you can click on Upload and choose a file from your computer. If you’ve uploaded the file to WordPress before, you can select it from your Media Library:

Upload from Media Library

You can also drag and drop a file directly into this section. This will automatically upload it into the Media Library, and you can then add it to the post:

Upload new file

You can also upload images directly to the Media Library. Simply click on Add New, then drag and drop files into the upload area or select them from your computer:

Add new media file

With any of these methods, your media files will be automatically imported into WordPress. Even if you uploaded your files in the Block Editor, you’ll still be able to find them in the Media Library.

3. Downloadable Files

The Media Library also lets you download your files to your computer. This can be useful if you need to use the same images or videos on another site.

To download a file from your WordPress dashboard, click on the Tools tab and select Export:

WordPress export

On this page, you can download all of your site’s content. This includes posts, pages, and media files.

Select Media, then use the dropdown menus to download files that were uploaded within a certain timeframe. You’ll simply have to specify a Start date and End date:

Export media

If you want to download all of your media files, you can leave these fields blank. When you’re finished, click on Download Export File. This will download links to the relevant files to your computer in an XML file format that can then be imported into another WordPress install.

4. Image Editing

As a website owner, it’s vital that you optimize your images before publishing them. Large files can slow down your site and take up a lot of storage space.

The Media Library has many native image editing features. For example, you can crop your images, scale them, and more.

Start by clicking on an image to open the Attachment details page. Then, under the photo, select the Edit image button:

Edit image

This will automatically open the image editor. On the left, you’ll see options to crop, rotate, or flip the image:

Image editing features

If you select the Crop button, you can use the handles on the box to remove certain parts of the image. When you’re finished, click on Crop again:

Crop image

Using the rotate options, you can flip the image 90 degrees to the left or right:

Rotate image

If you need to invert the image, you can use the Flip buttons. These will reflect the photo vertically or horizontally:

Flip image

On the right side of the page, you’ll see the original dimensions of the image. To scale the image, you’ll just need to enter the new dimensions:

Scale image

Additionally, you can click on the Crop button and enter the size in the Selection fields. You can also choose an Aspect ratio, which is the relationship between the height and width of the image:

Image crop selection

The last feature you’ll see in the image editor is the Thumbnail Settings. Here, you can apply your changes to all image sizes, the thumbnail only, or all sizes except the thumbnail:

Thumbnail settings

When you’re finished, save your changes. You can now view the edited photo in the Media Library.

5. Image Metadata

In the Attachment details page of your image, you’ll see an option to add metadata. This contains basic information about the image, including the file name, author, and description:

Image metadata

After you upload an image, WordPress will use the file name as its title. However, you can edit this to provide a more accurate description:

Image title

You can also add alternative text. This describes the contents of the image when it can’t be displayed. Additionally, it can make your website more accessible to users with screen readers:

Add alt text

Along with improving user experience, alternative text can boost your search ranking. It enables search engines to understand your images and their purpose on the page.

You might also want to write a caption and description to provide more information about the image. While the alt text is only visible to search engines and screen readers, the caption is visible to all front-end users:

Image caption

Meanwhile, descriptions will appear on the image attachment page. Here, you can post copyright details, keywords, links, and more:

Image description

This information will be saved in the Media Library. When someone visits the image URL, they’ll be able to see its description.

How to Extend the Features in the Media Library

The Media Library provides the essential tools you need to upload and edit media files. However, you may need to install a plugin to extend its core functionality.

As you upload more images to your website, your Media Library can get a little disorganized. Although you can delete images in bulk and use filters to find what you need, you may become overwhelmed by the volumes of files on your website.

With the Real Media Library plugin, you can create folders in your Media Library:

Real Media Library

This tool has a drag-and-drop interface that enables you to easily move media items to different sections. Plus, the pro version supports subfolders, image galleries, and rearranging within a folder.

Alternatively, you can use the free version of Media Library Organizer to add media categories for better media management:

Media Library Organizer

The native editing features in the Media Library may not fully optimize your images. Often, you’ll need to compress image files in order to speed up your website.

With the TinyPNG plugin, you can let your WordPress install automatically compress your images as you upload them:

TinyPNG plugin

Additionally, you may want to replace old files with newer versions. With the Media Library, you’ll have to upload the new file, locate the old version, and delete it.

Enable Media Replace is a popular WordPress plugin that you can use to quickly replace files in your Media Library:

Enable Media Replace

Even though you might not need these tools, they are available to help you optimize your website and manage your files more efficiently. They can be particularly useful when activated on media-heavy sites.

How to Fix Common Media Library Errors

Although the Media Library is very user-friendly, you might run into some common image upload issues. Fortunately, most of these problems are easy to fix.

HTTP Error

One of the most common issues in the Media Library is an undefined HTTP error. This crops up when something goes wrong during the upload process.

When this happens, it’s a good idea to wait a few minutes before trying to upload the file again. Sometimes, it’s just a temporary resource allocation problem.

Alternatively, this common image error could be caused by your browser. You can try switching to another browser to see if it solves the problem.

If the error persists, you can try clearing your browser cache and deactivating your plugins. Alternatively, you might need to increase your site’s memory limit.

Get Content Delivered Straight to Your Inbox

Subscribe to our blog and receive great content just like this delivered straight to your inbox.

Upload: Failed to Write File to Disk

When you’re uploading files to your website, you may also come across the Upload: Failed to Write File to Disk error. Usually, this results from incorrect file permissions. However, you could have maxed out your hosting plan’s disk space limit or temporary folder.

To fix this error, you’ll need to check the file permissions for your website. First, you’ll need to connect to a Secure File Transfer Protocol (SFTP) client to access your site files. Alternatively, you can use the File Manager in your hosting account.

If you have a DreamHost account, open your dashboard and go to Websites > Files and FTP Users:

DreamHost manage files

Then, click on Manage Files next to your website. In your File Manager, find the wp-content file and right-click on it:

Open file permissions

For DreamHost accounts, you can select CHMOD. If you’re using another program, click on the File Permissions option. This will open a pop-up window:

File permissions

Make sure the Numeric value is set to ‘755’. Then, click on OK to save your changes. This should help resolve the issue.

Media Library Failing to Load

Occasionally, your Media Library might fail to load altogether. This can happen if you’re using a poorly-coded theme or plugin.

You might also see this error when there’s a conflict between two plugins. Third-party software can cause compatibility issues with other programs.

To resolve the issue, start by deactivating your plugins. Select them all, then choose Deactivate from the Bulk actions menu and hit Apply:

Deactivate plugins

Now, refresh the Media Library page to see if this solved the problem. If so, you’ll need to reactivate each plugin one at a time and keep refreshing the Media Library until the issue reappears. This should help you identify the culprit.

If deactivating the plugins doesn’t help, then the problem might be your theme. Consider activating a default WordPress theme, then try accessing your Media Library again.

Organize Your WordPress Images

The WordPress Media Library enables you to upload, modify, and delete files on your website. You can also use it to crop and scale images without leaving your dashboard.

To review, here are the main things you can do in the Media Library:

  1. View uploads in a grid or list view.
  2. Upload files in the Media Library or Block Editor.
  3. Download files to your computer.
  4. Edit image size, pixels, and orientation.
  5. Add image metadata.

Although optimizing images can improve your loading times, you’ll want to build a fast website from the ground up. Our managed WordPress hosting plans come with several performance tools to help you grow your site. Check out our plans today!

Do More with DreamPress

DreamPress Plus and Pro users get access to Jetpack Professional (and 200+ premium themes) at no added cost!

Managed WordPress Hosting - DreamPress

The post Decoding WordPress: The Media Library appeared first on Website Guides, Tips & Knowledge.


source https://www.dreamhost.com/blog/wordpress-media-library/

Creating and Mastering GA4 Explorations

In the switch from Universal Analytics (UA) to Google Analytics 4 (GA4) — which will go fully into effect July 2023 — a lot of things have...