Wednesday 28 April 2021

What Is a VPS? A Beginner’s Guide to Virtual Private Servers

If you are finally ready to get your website up and running, it’s probably safe to say you’re looking into purchasing web hosting. And it’s a battlefield out here for beginners. There’s a glossary of new terms — what is a kernel?! — and acronyms seemingly dropping from the sky. One that you’ll hear a lot: VPS hosting.

But fret not, beginner. This guide will answer all your burning Virtual Private Server questions:

Ready to learn everything there is to know about a VPS hosting environment? Let’s dive in!

What Is a Virtual Private Server?

First, let’s define what VPS actually stands for — virtual private server.

In layman’s terms, a server is a powerful computer that stores all of the data and files that make up your website. When someone types your domain name into their web browser, that powerful computer “serves up” your website to the searcher’s screen.

Now for the virtual aspect: VPS uses virtualization technology to split that one powerful server we just talked about into multiple virtual servers. Think of it this way: it’s one piece of physical hardware that functions like several separate servers.

The word private means just what it implies. Your virtual server is reserved for you, so you won’t have to share RAM, CPU, or any data with other users.

How Does VPS Work?

VPS Hosting simulates the experience of a dedicated server even though you’re still sharing the physical server with other users.

Your web hosting provider installs a virtual layer on top of the operating system (OS) of the server using virtualization technology. Separating the server into individual compartments with virtual walls, this layer allows each user to install their own OS and software.

Because a VPS separates your files from other users on the OS level, it truly is a private server. This means your website lives within a secure container with guaranteed server resources — think memory, disk space, CPU cores, etc. You don’t have to share any of it with others.

How VPS Compares with Shared Hosting & Dedicated Hosting

To truly understand how VPS works, it’s important to get familiar with some of the basics of web hosting, including other common plans. Here’s a brief breakdown of the differences between shared, dedicated, and VPS hosting.

1. Shared Hosting

Shared hosting is the most common form of web hosting and works well for many new website owners. When you purchase a shared hosting plan, you’re sharing key resources like CPU, RAM, and hard drive space with other website owners using that same server.

Let’s use an analogy to make understanding this concept a little easier.

Think of a shared server as a large apartment complex, and all of the individual apartments are rented by other website owners. All of you need a place to live — just like your website’s files — but going out to buy a huge family home would be too expensive for your needs. Sharing common areas and utilities in an apartment block helps keep costs down. And the same is true for shared hosting.

There are a few downsides to shared hosting, though, mostly because you’re sharing. For instance, if someone else on your shared server has a huge spike in traffic, that could affect your website’s performance. However, if you’re just getting your website off the ground and don’t have huge traffic volume, shared hosting is a great way to get online!

Looking for an entry-level plan? Check out our affordable shared hosting packages.

2. Dedicated Hosting

Dedicated hosting is the opposite of shared hosting. Rather than pooling resources (and sharing the costs) with other website owners, you have one dedicated server that is reserved for your website only.

Sounds great, right? The catch is that it’s more expensive, but you get 100% control over your resources and can customize the software to meet your individual needs. This type of hosting package is best for websites with robust technical demands. For example, dedicated hosting could be right for you if:

  • you are getting large amounts of traffic each day.
  • you need to install your own operating system.
  • you are handling thousands of financial transactions.
  • your website requires custom software.

Need a powerful solution? Check out our dedicated hosting plans.

3. VPS Hosting

VPS hosting sits squarely between shared and dedicated. When you choose VPS, there will be other websites hosted on the same hardware as yours (remember that powerful server we talked about earlier?).

But — and it’s a big one — your website is the only domain allocated to your particular virtual compartment. And that means you get your own operating system, dedicated storage, powerful CPU, scalable RAM, and unlimited bandwidth.

With a VPS, you are getting many of the benefits of a dedicated server — for an affordable price. In short, VPS hosting can give you more bang for your buck.

We Know You've Got Lots of VPS Options

At DreamHost, we’ve never been comfortable fitting in with the crowd. Here are a few ways our VPS offering stands apart: 24/7 customer support, an intuitive panel, scalable RAM, unlimited bandwidth, and SSD storage. Plans start at $10/mo.

When Should You Switch to VPS?

The best way to evaluate whether or not you need to upgrade to VPS is to take stock of your website. Here are eight tell-tale signs it’s time to go virtual.

1. You’re Worried About Security

If you need enhanced security features, advanced monitoring capabilities, more backup space, improved website reliability, or plan on taking any form of online payment, then you may want to consider VPS. With VPS, you get reliable resources and can count on top-notch security features.

2. You Start to Experience High Traffic Volumes

If you are just starting your website and don’t receive very much traffic, then shared hosting is the ideal solution. However, if your website’s audience is consistently growing, you’ll want to consider upgrading. You don’t want to run the risk of your website running slowly or, even worse, your server crashing because it can’t handle the traffic. If you anticipate an increase in visitors, do yourself a favor and switch to VPS.

3. Your Website is Consistently Running Slowly

Shared hosting is not meant for websites that use large amounts of RAM. As your website grows and you add more and more content, you will start to see a decrease in your website’s load times. As soon as this happens, it’s an indication that you are maxing out your limits. Upgrading to a VPS will enable you to scale your website without having to worry about slow load times.

4. You Have An Online Store

The moment you plan on running an online store is the moment you should upgrade your hosting plan. Why? Because with VPS, you have a secure and dedicated virtual server where you are more likely to pass a PCI compliance test. The Payment Card Industry Data Security Standard was established by major credit card brands to protect against cardholder data theft.

If you are accepting credit cards on your website via a payment gateway, you want to do everything you can to ensure the safety of your consumers’ financial information. Since VPS is more secure than shared hosting, it’s the better option for ecommerce websites.

5. You Need To Install Custom Software

Shared hosting is great for website owners who build their site with WordPress or other common Content Management Systems. However, if you reach the point where you need to install custom software, use a custom server configuration, or engage in any other advanced programming, then you’ll want a hosting option that affords you more control.

Similarly, several standard tax, billing, bookkeeping, and other integrative programs require around-the-clock server availability as well as high-speed internet. To run these applications successfully, you’ll need either a VPS or dedicated hosting account.

If you operate on a shared server, you’ll only run into frustration when you learn advanced actions are forbidden or that apps don’t have the support needed to function properly. Instead of dealing with this potential problem, upgrade to VPS hosting and immediately gain more control over your programming actions.

6. You Run Into Server Errors

Do you encounter “Service Unavailable” errors, any 50X errors, or the “Internal Server Error” often? When you see errors, it’s likely that your potential customers are too. While you can troubleshoot downtime issues, there is simply no room for server errors if you’re running an online business. Pre-empt this problem by upgrading to VPS.

7. You’re on a Budget

While it’s true that a dedicated hosting package can address many of the problems on this list, it’s important to remember that a dedicated plan is a much pricier option. If you need to improve your bandwidth, increase your security, and get more RAM, then the most affordable option is to opt for VPS hosting.

8. You Build Websites For Your Clients

Is it part of your job to build websites for your clients? With a VPS, you can host an unlimited number of domains all while making sure you have enough RAM for each site to function properly.

What Is VPS?

Good question! We regularly report on all things web hosting and tech. Subscribe to our monthly newsletter so you never miss an article.

How to Choose the Best VPS Hosting Plan for Your Website?

Now that you know what a VPS is and when you should upgrade, let’s talk about what makes a great VPS plan and how to find the best web hosting provider. After all, you wouldn’t trust your website with just anybody, right?

Self-Managed Versus Managed VPS Services

When selecting VPS hosting, you usually have two plan options:

  1. Self-managed VPS service (sometimes called unmanaged VPS)
  2. Managed VPS service

You need to be familiar with server administration, troubleshooting, and managing the applications, software, and services installed on your VPS if you choose a self-managed service.

If you are either unfamiliar with these admin skills or you just want your hosting company to take care of it for you, then opting for a managed VPS plan is the way to go.

All of DreamHost’s VPS plans are fully managed, meaning you can skip worrying about the nitty-gritty technical details and focus on what really matters: creating great content for your website. If you’re looking for root access, though, consider opting for DeamHost’s cloud hosting.

Linux/Windows

You might think this tip might fall into the obvious category, but it’s worth sharing: Make sure the hosting package you select is compatible with your operating system. DreamHost, for instance, doesn’t offer Windows hosting since most of our users prefer to run a Linux VPS.

Reliability

The VPS hosting service you select should have uptime ratings of 99.5% and above. Anything lower from your web host is simply unacceptable. For the record, DreamHost boasts one of the industry’s highest uptime scores at 99.98%. Stop it, we’re blushing.

Hardware

When purchasing a VPS hosting package, make sure your service provider offers the latest and greatest in hardware, including solid state drives (SSD) — the fastest storage technology. SSD makes running high-speed applications easier thanks, in part, to the lack of moving parts.

24/7 Customer Support

When it comes down to it, you simply don’t know when you’ll experience a site meltdown. So make sure you purchase a VPS hosting package from a company that offers 24/7 customer support.

Backup Service

Imagine you are revamping your site when something goes wrong and you lose everything because you forgot to backup your site. Shivers. This is an all-too-common occurrence, and it can cost you money, time, and more than a few gray hairs. Make sure when you purchase VPS service, you choose a provider that makes backups easy.

Ready for Your Own Private Server?

Made it all the way to the end of this guide? Well, pat yourself on the back because you are a VPS beginner no more!

What it all boils down to is this: If your website is growing and beginning to attract some well-deserved attention, you’ll want its performance to keep pace. And that means it’s time to increase your site’s resources by upgrading to a VPS server.

While VPS hosting is more expensive than a shared plan, the benefits of this kind of hosting solution give you a lot of bang for your buck – without having to spring for a much-pricier dedicated hosting plan. Wondering which VPS host to choose? Consider DreamHost! Our VPS plans start at just $10/mo.

The post What Is a VPS? A Beginner’s Guide to Virtual Private Servers appeared first on Website Guides, Tips & Knowledge.


source https://www.dreamhost.com/blog/beginners-guide-vps/
Tuesday 27 April 2021

How to Transfer Your Domain Registration to DreamHost (4 Steps)

So you’ve got a website. Or maybe you juggle multiple websites and domain names. Perhaps you’re unsatisfied with your current registrar, or you’ve found you’re managing too many different things in too many different places.

If so, it might be time to consider transferring your domain registration. And you might want to consider transferring it to DreamHost.

Wondering How to Move a Domain Name to a New Host?

We can help! Subscribe to our monthly newsletter and get domain insights directly in your inbox.

Why You Should Consider Transferring Your Domain to DreamHost

1. You Want to Manage Everything in One Place 

A while back, we surveyed some of our customers, and they told us the No. 1 benefit of using DreamHost was that it gave them the ability to manage as much as possible in one place. 

More specifically, 60% of customers we asked said the main benefit of using DreamHost was the ability to manage several websites and domains from a single location

So if you are running several websites under several different registrars, moving them all to one place would make life a whole lot easier.

2. You’re Being Charged Too Much for Renewals 

Like any service, prices vary, and those costs can increase when it’s time to renew. If you feel you’re being charged too much for domain registration renewals, the obvious solution is to change registrars.

3. Support is Lacking 

As with price, the support offered by different service providers varies a lot. If you’re not getting the help you need from your current registrar, it may be worth moving to one that can fill the gap (like DreamHost). 

4. You’d Like to Move a Domain from One DreamHost Account to Another

If you run many websites, there’s always a chance you’re going to be taking over a domain owned by someone using DreamHost. Should this happen, we allow you to transfer domain ownership from one person to another quickly and with minimal effort. 

In this situation, the easiest solution is just to continue using DreamHost (and potentially move your other domains over too).

Need-to-Knows When Transferring a Domain

Understanding what is and isn’t possible when transferring domains can save you tons of time further down the line and help ensure a smooth and pain-free domain transfer. 

With that in mind, here are a few things you need to know before you start the process of transferring a domain registration.

1. Only Certain TLDs Are Allowed

At DreamHost, we support certain TLDs for transfer. However, it’s actually only a handful of TLDs that cannot be transferred. These are: .AM, .AT, .BZ, .FM, .JP, .NET.NZ, .ORG.NZ, .NGO, .ONG, .OOO, and .WS. 

For more information, you can check out DreamHost’s TLD page for a current list of domain extensions with pricing.

Additionally, there are also some New TLDs and ccTLDs which are considered premium domains — for example, .LIVE, .ME, and others. DreamHost cannot accept transferring premium domains due to the pricing structures that vary from one registrar to another. 

If you’d like to use a premium domain for your website, you’ll need to register it directly with Enom or another registrar that sells premium domains. Then you can host the site on your DreamHost account like any other domain. 

2. Beware of the ICANN 60-day Transfer Lock

Did you know you can’t transfer your domain during the first 60 days of registration? You need to wait until day 61.

It’s also worth remembering that you cannot transfer a domain if your last transfer took place within the previous 60 days.

And remember, transferring a registration only moves your domain. If you’d like to transfer your web hosting service to DreamHost, we can help with that too.

3. Downtime Can Happen If You Don’t Get Your Nameservers Sorted First

It’s important to know that if you decide to change your nameservers to DreamHost after completing a transfer, you may experience some downtime. Changes to the nameservers cannot be made while the domain is pending transfer. 

We recommend that you start the transfer at least a month in advance — this will make sure your domain registration does not expire during the transfer. 

What Should You Do Before You Request a Domain Transfer?

We recommend completing three super simple steps before you make your transfer request. This is because of ICANN’s Transfer Policy, which means that following a transfer, changes made to the registrant’s name, organization, or email address will be put on a 60-day lock

  1. Unlock the domain registration. This is done with your current registrar.
  2. Obtain the auth code, also known as the EPP. You can get this from your current registrar.
  3. Remove WHOIS privacy. This is done through your current registrar. This allows your new registrar to recognize the new owner.

Now you’ve completed all the preparation, it’s time to transfer your domain to DreamHost. The whole process is pretty simple, but just to be sure, here’s what you need to do. 

How to Transfer Your Domain to DreamHost in 4 Steps

Four steps — it’s that easy! Let’s walk you through the process of transferring your domain to DreamHost.

1. Request the Transfer-In With Dreamhost

Start by logging in to your DreamHost account. You can do that here. If you don’t have an account yet, you can create one here

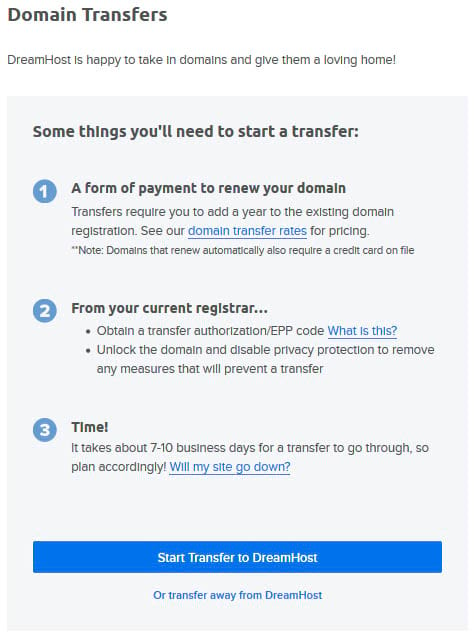
From there, you are going to need to navigate to the Reg Transfer page. There you will find a button labeled Start Transfer to DreamHost — click that. 

DreamHost’s list of info for what you need to know before starting a domain transfer.

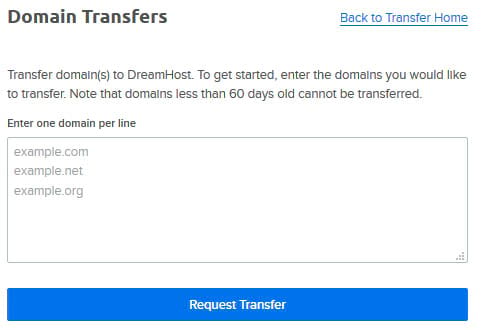
Have you done that? Cool. You should now see this:

Requesting a domain transfer in the DreamHost panel. 

In this section, all you need to do is add the domain(s) you would like to transfer to DreamHost and click Request Transfer

2. Enter your Auth Code, WHOIS Info, and Nameservers

Now you need to fill in details to show you are the owner of that domain(s). If you want your contact details to stay hidden, just tick the I want all my contact information private button.

This is free, by the way. We don’t like unnecessary charges!

Checkbox for making WHOIS contact info private

You should now see a section asking you to enter all your WHOIS information. As you might suspect, you need to make sure all your details are valid and correct and that you have followed the ICANN policy we mentioned earlier.

The WHOIS section looks like this:

Empty WHOIS information fields to be filled out.

See that little checkbox at the top? If you click that, it will use these details to automatically fill in the four contact fields on the domain registration’s internal ownership details. These are:

  • Admin
  • Billing
  • Registrant
  • Technical details

The following section is the Auth Code field.

Your current registrar should have provided you with either an Auth Code or EPP code. Make sure you fill in the fields with the code exactly as provided to you.

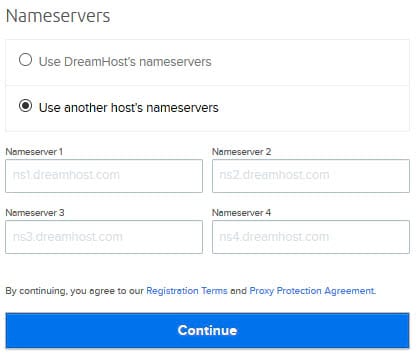
Once that’s done, you should see the following:

Filling out nameserver information with the “Use another host’s nameservers” option clicked.

Choose either Use DreamHost’s nameservers (this automatically sets DreamHost’s nameservers for you) or Use another host’s nameservers (you should choose this if you’d like to enter outside name servers manually). 

Make sure you have read the Registration’s Terms, and click Continue

You now need to pay for the transfer. 

3. Pay for Your Domain Transfer

If you have a free domain registration with your current registrar, you won’t be charged by DreamHost. If you don’t have a free domain registration, you will need to pay for it here. 

To complete this step, you first need to review your order. 

Reviewing order total for example.com ‘Transfer + 1 year registration’

If you need to pay for the transfer, you will know because the fee will appear in the Order Summary. 

Click the Proceed to Payment Entry button. You then need to confirm the payment, so press the Submit Transfer Request button. 

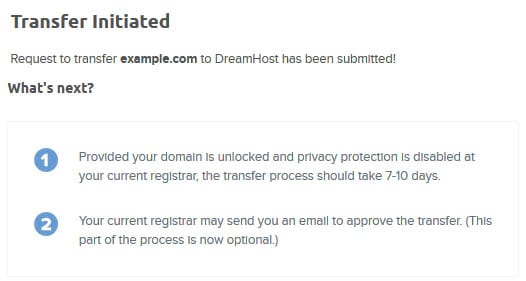
Notification showing ‘Transfer Initiated’ submitted and next steps. 

On the next screen, you simply need to enter your payment details and click the confirmation button. You should now see that the transfer has been initiated.

Notification showing ‘Transfer Initiated’ submitted and next steps.

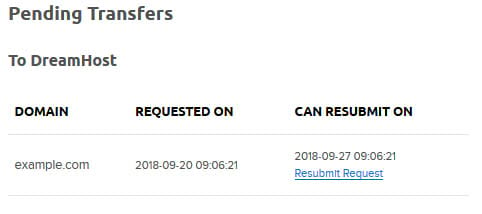
Navigate to the Reg Transfer page, and if all is well, you will be able to see confirmation that the transfer is pending. 

Example of a pending transfer in the DreamHost panel. 

When the transfer has completed, payment will be taken from your bank account. 

Let’s move on to the last step. 

4. Check That the Domain Status and EPP Code Are Verified, and Transfer Request Is Submitted to the Current Registrar

Once the transfer is completed, the authorization code and EPP are verified with your current registrar. 

The registrar then has five days to release the domain to DreamHost, and the transfer will complete within the seven days after. 

You can confirm the status by running a quick WHOIS check. If the transfer fails, you can get more help by contacting our support team

There you go — four simple steps as promised!

That said, there are little things that can go wrong. Let’s discuss some of the most common domain transfer problems our team here at DreamHost comes across and how they can be fixed without needing to contact support. 

Ready to Switch Your Domain Registrar?

Search DreamHost’s 400+ TLDs to find the perfect URL for your website.

3 Common Domain Transfer Issues

While the steps involved in transferring a domain are simple, that doesn’t guarantee everything will run without a hitch. There are several factors involved, and if you have issues, it could be for one of the following reasons. 

  1. Some domains update their auth code internally. For example, the .org registry has many security measures and can often change EPP codes automatically. If you see this happening, you need to contact your current registrar. You’ll then need to reset the auth code and resubmit the domain transfer request. 
  2. Some domains are transfer locked. You can establish whether this is an issue by looking at the WHOIS information and checking for the following: Domain Status: clientTransferProhibited. If you see this, you’ll have to contact your current registrar to have it unlocked. Once that’s done, you then need to resubmit the domain transfer in DreamHost.
  3. Intermittent issues with the DNS. After a transfer, you may see this issue. This is usually down to domains having previously used DNSSEC. Find out how to fix it in this article. 

Still running into issues? Check our Knowledge Base or contact support.

Master Your Domain at DreamHost

It’s not uncommon for website owners to start with one domain registrar and later move to another. Over time many of us realize we rushed the initial registration process, didn’t do due research, and wound up being charged too much for too little.

If this includes you, moving your domain registration — to DreamHost or any other registrar — is much simpler than you might at first think.

In short, you simply need to:

  1. Request the Transfer-In with DreamHost (or your chosen registrar)
  2. Enter the auth code, WHOIS, and nameservers 
  3. Pay for your transfer 
  4. Wait for your domain status and EPP code to be verified and for your transfer request to be submitted to your current 

If you’d like to register a new domain, we can help with that too! DreamHost .COM domains cost $7.99 a year and come with free, private registration, while other domains start from less than $1/year. Find out more here.

The post How to Transfer Your Domain Registration to DreamHost (4 Steps) appeared first on Website Guides, Tips & Knowledge.


source https://www.dreamhost.com/blog/how-to-transfer-domain-registration-to-dreamhost/

Wednesday 21 April 2021

How To Fix the WordPress Memory Exhausted Error by Increasing Your Site’s PHP Memory Limit

As you may know, WordPress is built using PHP. This programming language is incredibly flexible, but it also has a few drawbacks. For example, if you don’t allocate enough memory for your WordPress installation, you might start running into the occasional “PHP Memory Exhausted” error.

In a nutshell, this error means your server isn’t allocating enough resources for WordPress to execute the PHP scripts it needs to function properly. This issue can negatively affect your site’s functionality, but there are several ways you can fix and even prevent it.

In this article, we’ll show you how to fix the memory exhausted problem by increasing your PHP memory limit. However, first, let’s talk about how to recognize this error and what it means!

Why You’re Seeing a WordPress Memory Limit Error on Your Site

As we mentioned earlier, the PHP memory limit error means you’re not allocating enough resources for your WordPress installation to function correctly. The problem usually presents itself with a message such as:

The memory exhausted PHP fatal error.

Don’t be scared by the word “fatal,” though. Your website isn’t broken, but you will need to make some changes to your WordPress installation if you want it to work properly. Specifically, you’ll want to increase your PHP memory limit.

By “PHP memory limit,” we mean the amount of server memory that’s allocated to run PHP scripts. By default, that number should be around 64 MB or higher. In most cases, 64 MB is more than enough, however.

Most hosting servers provide you with far more memory than that, so increasing the PHP allowed memory size shouldn’t negatively impact your website’s performance whatsoever. In fact, unless you’re using a cheap web host or you set up WordPress manually, your PHP memory limit shouldn’t be an issue at all.

You can easily check to see what your PHP memory limit is by accessing your WordPress dashboard and navigating to Tools > Site Health > Info. Next, you can click on the Server tab and look for the PHP memory limit entry.

A website with a high PHP memory size.

Within the Server tab, you can also check other information such as your PHP version and the PHP time limit. The latter variable, which is in seconds, defines how long PHP scripts have to execute before they time out.

For now, let’s focus on the PHP memory limit. As you can see, the above example has quite a high limit, which means that the website is unlikely to run into a WordPress Memory Exhausted error.

If your site has a low memory limit (<64 MB), it’s in your best interests to increase it. There are a couple of ways you can do so.

Take Your WordPress Website to the Next Level

Whether you need help navigating your web hosting control panel, fixing an error, or finding the right plugin, we can help! Subscribe to our monthly digest so you never miss an article.

How to Resolve the WordPress Memory Limit Error (2 Methods)

As far as WordPress errors go, this one has a clear-cut cause and solution. You’re not allocating enough memory for your PHP installation, so you need to increase that number. In this section, we’ll go over two methods you can use: one manual technique and one that requires your wallet.

1. Increase the PHP Memory Allocated to Your Website Manually

WordPress enables you to declare your allowed memory size manually by modifying one of two files: .htaccess and wp-config.php. However, changing your WordPress installation’s .htaccess file can lead to site-wide errors since that file governs how it interacts with your server.

Increasing your PHP memory limit through wp-config.php is, in most cases, the safest option, and it’s remarkably easy to do. All you need is a Secure File Transfer Protocol (SFTP) client such as FileZilla that you can use to connect to your website.

Once you access your website via SFTP, open the WordPress root folder and look for the wp-config.php file within it.

A WordPress wp-config.php file.

Open that file using a text editor, and you should see something like this:

Editing a wp-config.php file.

To increase your PHP memory limit, you can simply add a single line of code anywhere after the <?php tag and before the part of the file that reads “/* That’s all, stop editing! Happy blogging. */”.

This is the line of code to add:

define( 'WP_MEMORY_LIMIT', 'XXXM' );

You’ll need to replace the “XXX” variable within that line with the amount of memory you want to allocate to PHP. As we mentioned before, the absolute minimum you should settle for is 64 MB.

However, you can also double the number to play it safe or increase it even further. For example, if you set a PHP memory limit of 256 MB, it would look like this:

define( 'WP_MEMORY_LIMIT', ‘256M’);

Once you’re set on a number, save the changes to wp-config.php and close the editor. Now return to your WordPress dashboard and navigate to Tools > Site Health > Info > Server to see if the changes went through.

In some cases, declaring your PHP memory limit manually won’t work because you don’t have the necessary permissions to change that value. If you can’t adjust your WordPress memory size manually, that leaves you with one other option.

2. Upgrade Your Website’s Hosting Plan

Typically, if you use a decent WordPress hosting provider, you won’t need to worry about increasing your PHP memory limit. One caveat is that if you’re using shared hosting, you’ll likely face limited resources. So if you’re encountering this error, it might be time to upgrade to a better hosting plan.

Upgrading your hosting package will usually result in an increase in available PHP memory. That means you’re much less likely to run into a WordPress memory limit error. The only limiting factor is your budget.

If you can’t upgrade hosting plans right now, it might be worth contacting your provider’s support team and seeing if they can increase your PHP memory limit on their end. If they can’t, it might be time to switch to a better WordPress host that offers high PHP memory limits on affordable plans.

Skip the Stress

Avoid troubleshooting when you sign up for DreamPress. Our friendly WordPress experts are available 24/7 to help solve website problems — big or small.

Want More WordPress Error Tips?

Once you increase PHP memory on your WordPress website, we can help tackle other issues. We’ve put together several tutorials to help you troubleshoot every error message:

Want more information on WordPress site management? Check out our WordPress Tutorials, a collection of guides designed to help you navigate the WordPress dashboard like an expert.

Increasing PHP Memory Limit

Running into a PHP fatal error can be worrying, but it’s not necessarily a cause for concern. Learning how to increase your PHP memory limit is relatively simple if you don’t mind using an SFTP client and adding a single line of code to one of WordPress’ core files.

The alternative is to upgrade your hosting plan or opt for a better provider. Most WordPress-friendly hosting options offer high limits by default, so you’ll never run into a PHP memory exhausted error ever again.

If you’re ready to use a web host optimized for WordPress websites, check out our DreamPress hosting packages! We offer optimized WordPress setups, so you spend less time troubleshooting errors and more time working on your website.

The post How To Fix the WordPress Memory Exhausted Error by Increasing Your Site’s PHP Memory Limit appeared first on Website Guides, Tips & Knowledge.


source https://www.dreamhost.com/blog/how-to-fix-wordpress-memory-limit-error/

Thursday 15 April 2021

17 SEO Tools to Optimize Your Website for Success in 2021

Search Engine Optimization (SEO) is one of the hardest parts of running a website. The way Google and other search engines rank your website changes constantly. This means you need to keep up with the latest SEO developments if you want to outpace the competition.

The good news is that there are plenty of excellent tools you can use to tackle on-site SEO and get the data you need to improve your ranking. If you know what they are and what they can do for you, you’ll be well equipped for success.

In this article, we’ll introduce you to 17 of our favorite SEO tools. Each can help improve your rankings on all the popular search engines, including Google and Bing. Let’s jump right in!

Optimize Your Site with DreamPress

DreamPress' automatic updates and strong security defenses take server management off your hands so you can focus on SEO.

1. Google Search Console

Google Search Console. 

Google Search Console is a collection of services you can use to figure out how the search engine views your website. This service provides you with a wide array of free SEO tools, covering many different aspects of optimization.

For example, Google Search Console enables you to check out any crawling errors that have occurred on your website so you can correct them right away. It can also point out when your site is affected by malware, what keyword phrases people are using to find your site, the backlinks you’ve received, and more.

The many features this service offers makes it a near necessity if you’re concerned about your Search Engine Results Page (SERP) rankings. There’s a clear focus on Google results here, but don’t worry. If you can rank well on Google, the chances are high that you’ll also do OK in other search engines.

As far as actually using the service goes, Google Search Console is very simple to understand. It’s also easy to add your website and get started, so there are no reasons to avoid it.

Key Features:

  • Monitor how Google perceives your website.
  • Keep track of what keywords visitors are using to reach you.
  • Stay on top of any crawl, meta tag, or sitemap errors.
  • Update your robots.txt file.
  • Monitor your site’s backlinks.
  • Get alerts if your site is infected with malware.

Price: Free!

2. Semrush

SEMrush

Semrush is a keyword research tool that enables you to get data about how many people are looking for specific terms. On top of that, it also provides you with information on similar keywords, related ads, product listings, and a lot more.

Along with being an excellent keyword tool, Semrush can also offer information about your competitors’ strategies. For example, it can tell you how much traffic they’re getting, how much of that comes from paid ads, and what their backlinks are.

If you’re the kind of person who loves doing keyword research, you need a tool like Semrush in your arsenal. With it, you’ll be able to figure out exactly what keywords will give you the best results for your efforts and check which terms your competitors are ranking for.

This service even enables you to peek into your competitors’ text and media ads, which can save you big money when it comes to testing. However, keep in mind that all this data means the learning curve with this service can be a bit steep.

Key Features:

  • Research the value of specific queries.
  • Check out what keywords your competitors are ranking for and how much traffic they’re getting.
  • Find information about other websites’ backlinks.
  • Look into your competitors’ text and media ads.

Price: You can get up to 10 results for free per day or sign up for a premium account. The good news? We’ve worked out a special two-week trial with Semrush so you can see if they’re a good fit for your site! 

3. BuzzStream

BuzzStream website. 

BuzzStream offers you a collection of tools to help with domain research, email marketing, and project management. It’s a very all-in-one type of platform, and the sheer number of options it provides can be intimidating. With that in mind, let’s focus on how it can help you tackle your SEO needs.

When it comes to research, BuzzStream can help you collate lists of results for the keywords you look into. Then it provides you with information about each of those websites, including overall rankings, related social media accounts, domain age and authority, and more.

In practice, you can use these features to help you do a thorough SEO audit, researching who your competitors are and the content they’re publishing. Moreover, it can even help you create lists of their authors and what each one is up to, so you can keep an even closer eye on their strategies.

Key Features:

  • Research your competitors based on any keywords you want to target.
  • Collect data about domain age and authority for specific websites.
  • Find out what your competitors’ rankings are in the SERPs.
  • Locate the social media accounts for your competition’s sites.
  • Create lists of authors who write for competing websites and follow what they’re doing.

Price: BuzzStream plans start at $24 per month.

4. DreamHost SEO Toolkit

Want to grow traffic without blowing your budget on enterprise-level tools or a private contractor? If you’re a DreamHost customer, you can take advantage of SEO Toolkit and become your own SEO pro. 

With more than 100 automated checks and verifications, SEO Toolkit starts by auditing your site to find potential issues. Then, it creates a personalized SEO plan with a checklist of simple tasks you can tackle to start seeing ranking improvements. For example, SEO Toolkit analyzes your site’s pages and provides targeted recommendations on where to position keywords to optimize your content.

SEO Toolkit also makes it much easier to track competitors — we’ve talked before about the benefits to monitoring your online competition — so you can tweak your keyword strategy and land at the top of the SERPs. 

Key Features:

  • Get a comprehensive website audit to identify potential SEO issues.
  • Generate a personalized SEO plan with tasks to improve your site’s search engine performance.
  • Stay up to date with weekly progress reports.
  • Take advantage of SEO toolkits on-page optimization tools to improve keyword placement.
  • Track up to 20 keywords and four competitors.

Price: SEO Toolkit costs just $4.99 per month. New DreamHost customers can add SEO Toolkit when signing up for a hosting plan. Existing customers can enable SEO Toolkit directly in their panel.

5. Moz Pro

Moz Pro homepage.


Moz Pro is a suite of SEO tools created to help you tackle optimization using a data-driven approach. To give you a quick overview, Moz Pro is somewhat similar to SEMrush, in that it enables you to research both specific long-tail keywords and other domains. You can use this information to avoid keywords with little potential and to improve on what your competitors are doing.

When you look into a keyword using Moz Pro, it will show you a difficulty score that illustrates how challenging it will likely be to rank for that term. You also get an overview of how many people are searching for that phrase, and you can even create lists of keywords for easy comparison. These are all features you’d expect from a reliable keyword research tool, but Moz Pro stands out thanks to a very intuitive interface.

As for what’s so unique about Moz Pro, the platform offers a Chrome extension you can use to get information on any domain you visit. Moreover, it can provide suggestions about on-page optimization and alert you about crawling errors, much like Google Search Console.

Key Features:

  • Research how competitive a keyword is, as well as its search volume.
  • Get suggestions on related keywords.
  • Investigate your competitors, including which keywords they’re targeting.
  • Use a Chrome extension to look into other domains without going to the Moz website.
  • Compare multiple keywords using custom lists.
  • Get on-page optimization suggestions and error alerts.

Price: A 30-day free trial is available for the Pro plan, while regular pricing starts at $99 per month.

6. Linkody

Linkody website. 

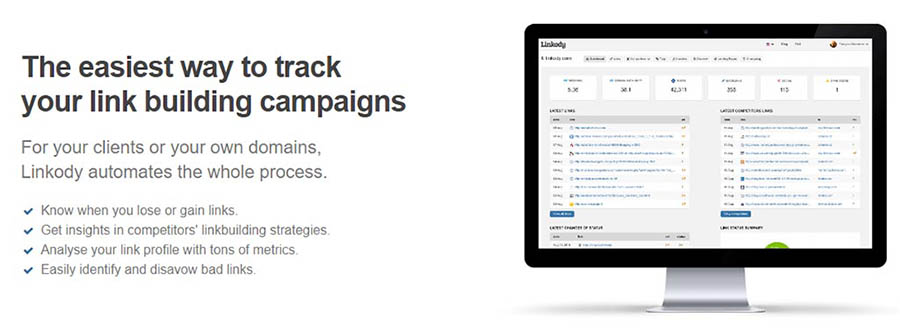
Linkody is all about backlinks. This tool allows you to find out who’s linking to your website, learn what keywords they’re using, and even “disavow” links you don’t like. That last feature can be handy if you think someone is linking to your website as spam since you don’t want search engines thinking you’re trying to game the system.

While the main attraction here is the backlink reports, Linkody also offers a few notable extras. For example, it provides you with the option to generate reports that you can send to clients, monitor your site’s social shares, and connect to Google Analytics.

Overall, it’s a pretty niche tool, but quite useful if you need some help with link building. More importantly, it’s a lot cheaper than the massive do-it-all services we’ve talked about so far.

Key Features:

  • Analyze your website’s backlinks.
  • Disavow bad links that might affect your SEO.
  • Generate backlink reports for your clients.
  • Connect to Google Analytics to gain access to more data.
  • Monitor your site’s social shares.

Price: Linkody plans start at $14.90 per month for up to two domains, but you can also try it free for 30 days without a credit card.

7. Ontolo

Ontolo home page. 

Ontolo is a research tool you can use to find marketing and SEO opportunities. It can also help you find backlinking and guest posting opportunities, which is not something you’d expect an automated tool to do so well.

The idea behind Ontolo is that it helps you find ways to grow your traffic beyond keyword research. If you want your website to become more authoritative, backlinks are essential, but finding the right opportunities can be daunting.

Ontolo helps you locate those opportunities, so all you have to do is pitch them (which sadly can’t be automated). It can pull prospects from over 80 sources, so chances are you’ll find excellent options regardless of what keywords you’re trying to rank for.

Key Features:

  • Look for guest posting and backlink opportunities.
  • Collect data from over 80 sources to find the best prospects.
  • Carry out research using simple-to-understand reports.
  • Export your prospects to share them with others.

Price: Ontolo plans start at $97 per month and come with a 30-day money-back guarantee.

8. HubSpot’s Website Grader

HubSpot’s Website Grader tool.

HubSpot’s Website Grader is a lot more straightforward than the other SEO tools we’ve featured so far. To use it, all you have to do is enter a domain and wait for HubSpot to generate a report. When you get that report back, you’ll find separate scores for your site’s performance, mobile-friendliness, SEO, and security.

It’s crucial to keep in mind that performance, mobile-friendliness, and solid security practices directly impact your SEO. In a way, your entire report is one giant analysis of how your site is faring from an SEO perspective. Better yet, this tool breaks down each part of the report and provides you with tips on how to improve every element.

HubSpot’s Website Grader is incredibly simple to use, and it can help you improve your website quickly. Plus, it won’t cost you a thing, so this one definitely deserves your attention.

Key Features:

  • Analyze your website’s performance, mobile-friendliness, security, and SEO.
  • Receive separate scores for each aspect of your site.
  • Get recommendations for how to improve each score.

Price: Free!

9. Google AdWords Keyword Planner

Google AdWords Keyword Planner. 


Google AdWords Keyword Planner is one of the most comprehensive keyword research tools you can use. With it, you can look up keywords and get traffic estimates about them. More importantly, it can help you figure out how competitive keywords are based on their AdWords price.

To avoid overwhelming you with information, this tool lets you filter keywords out based on Cost-per-Click (CPC) or search volume. This way, you can get reports based only on the estimates you want to aim for.

Overall, the Keyword Planner offers much of the same functionality we’ve seen from other SEO tools on this list. The difference is that this one is part of the Google ecosystem, and you can get amazingly detailed reports for free.

Key Features:

  • Find out the search volume for any keyword you want.
  • Determine a keyword’s competitiveness from its CPC.
  • Get detailed reports for specific keywords.

Price: Free!

10. WooRank

WooRank website scoring tool. 

WooRank is similar to HubSpot’s Website Grader in that you give it a link, and it provides you with a full report card. In this case, it gives you a single score for your entire website. After that, it launches into a list of everything you can do to improve its SEO and mobile-friendliness.

The main selling point, in this case, is that WooRank also provides you with tips to improve your site’s usability and performance. From our experience, its recommendations are solid. To top it all off, you also get an analysis of how well you’re doing from a backlink perspective.

Overall, this is an excellent tool if you want a quick rundown of what you’re doing right and wrong on your website, including when it comes to SEO.

Key Features:

  • Analyze your website’s overall status, including SEO, usability, performance, and backlinks.
  • Receive tips on how to improve your website and tackle SEO tasks.
  • Analyze your domain’s authority.

Price: Free, with premium options starting at $59.99 per month.

11. Varvy SEO Tool

Varvy SEO tool. 

Our next pick is another tool of the “Enter a URL and get a report” variety. However, this one is different from those we’ve introduced so far. What the Varvy SEO tool does is check to see if your website is following all of Google’s SEO guidelines. It can produce a full report in seconds.

What’s more, that report is very extensive. It checks for several things, including page speed issues, mobile-friendliness, on-page SEO, and more. However, the best part is that Varvy SEO Tool really takes the time to explain why each setting is vital.

If you’re new to SEO (or website optimization in general), you’ll probably welcome all the information this tool has to offer. It even provides links to further reading for each setting it covers, in case you want to learn more about them.

Key Features:

  • Check to see if your website follows Google’s SEO guidelines.
  • Receive a quick report, including precise information on how to fix each issue.

Price: Free!

12. Screaming Frog

Screaming Frog SEO Spider Tool. 

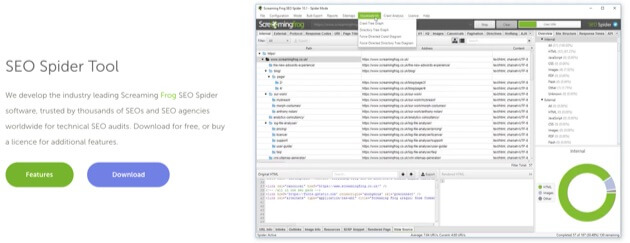
Screaming Frog offers an SEO Spider Tool, a sophisticated crawler that can accomplish a host of optimization tasks. This includes finding and fixing broken links and redirects. 

If you operate an online store, Screaming Frog has some especially helpful options. For example, you can use the crawler to extract data from HTML pages on your site using CSS Path. This means you can use XPath or regex to gather data about prices, SKUs, and more. 

You can even use this tool to generate XML sitemaps and connect them up to Google Analytics. What’s more, Screaming Frog has a pretty robust free version, so you can try out the main functionality before you decide to leap in.

Key Features: 

  • Analyze titles and metadata. 
  • Crawl your site to find and fix broken links.
  • Discover and resolve duplicate content and pages. 

Price: You can access the free version with limited features and URLs, or get the full version for £149 per year (about $191).

Be Awesome on the Internet

Join our monthly newsletter for tips and tricks to build your dream website!

13. Yoast SEO

Yoast SEO tool. 

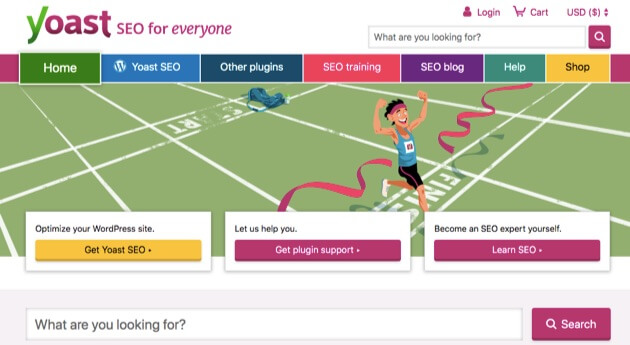
Yoast SEO is often touted as the number-one WordPress SEO plugin. Its features cover the full spectrum when it comes to SEO. You can conduct readability checks, for example, and set canonical URLs to avoid confusing Google with duplicate content. 

Other functionality on offer includes keyword optimization and the ability to preview pages in Google, Facebook, and Twitter. With the upgraded version of the plugin, you will also get some content assistance, since Yoast will offer you internal linking suggestions as you write pages and posts. 

Yoast SEO has a robust knowledge database to help you get started. Plus, with the premium version, you’ll have access to one year of 24/7 help from an expert support team. 

Key Features: 

  • Optimize your content for specific keywords.
  • Provide search engines with the metadata they need to understand your content.
  • Avoid duplicate content.
  • Handle critical SEO tasks automatically, such as creating a sitemap and optimizing permalinks.

Price: You can download a limited free version or get the premium version for $89 per year.

14. Link-able

 Link-able SEO linking tool.

Link-able offers a fairly unique approach to optimizing your website, boosting SEO, and expanding your traffic. You can think of this service as a highly-specialized job board. It’s designed to provide marketers with a reliable way to create backlinks for their content. 

The process starts with a marketer posting a specific request on the Link-able website. This request will include details about the kind of backlinks the marketer wants to build. They’ll also provide any other information that might be helpful, much like a job posting. 

Authors who have been thoroughly vetted by Link-able will be able to access the project database. They can submit proposals for specific projects and wait for the marketers to respond. If a marketer likes a proposal, Link-able connects the two parties, and the work is guaranteed. 

Key Features:

  • Find highly-qualified authors who have passed a rigorous testing process.
  • Receive highly-relevant author matches and proposals for your projects.
  • Focus on your content while employing others to handle link building.

Price: While this is a free service for both marketers and authors to join, Link-able does charge a percentage of the paid transactions. 

15. Serpstat

Alt text: Serpstat all-in-one SEO tool.

Serpstat is a relative newcomer to the SEO application market. It offers a suite of data-driven analysis tools for marketers. Among the different options, you’ll find an SEO audit tool, backlink checker, and competitor tracking features. 

This is a project-oriented system, which means you can organize your websites into groups or individual projects. All of these can then be accessed through a well-organized dashboard. You’ll be able to access any of Serpstat’s features from your project list. 

Serpstat is a little like a Swiss Army knife when it comes to functionality. You can use it to find broken links on your website, track down the cause of sluggish page loading times, and a lot more.

Key Features:

  • Handle a high volume of website monitoring for clients.
  • Use an on-site auditing tool for locating and fixing issues.
  • Access to a Market Intelligence tool for sizing up your competition regionally and globally.
  • Get easy compatibility with both the Mac and PC operating systems.

Price: This is technically a tool you can use for free, although there are limits to the number of searches you can conduct. To increase your query capacity, you can start with the ‘Lite’ plan at $69 per month

16. Ahrefs

Ahrefs SEO tool.

Ahrefs offers several data analysis and optimization tools. In fact, all of its tools are included in the same pricing plans. This means you don’t have to worry about missing out on critical features. Additionally, you’ll have access to the Ahrefs Academy,  an online knowledge base offering a wide variety of learning opportunities. 

One of the features you’ll have access to is a content research tool. With this, you can use keywords to find out what related content has performed the best on social media or in organic searches. The Ahrefs platform also includes a comprehensive dashboard, so you can keep track of all your projects. 

You’ll also be able to find content related to your specific target keywords and filter the results to highlight websites that have not linked to you before. Since Ahrefs crawls over 5 billion web pages per day, you’re sure to gain valuable insights from its data. 

Key Features: 

  • Analyze your competitors’ organic search rankings.
  • Access a vast database of information.
  • Gather valuable insights from a competitive analysis tool.
  • Benefit from a Search Traffic index that boasts 489 million keywords originating from 155 countries.

Price: Ahrefs offers four pricing tiers starting at $99 per month and a seven-day trial for $7.

17. DreamHost’s SEO Marketing Service

SEO Marketing at DreamHost. "Get More Visitors, Grow Your Business"

Over the years, DreamHost has helped thousands of customers build websites — it’s kind of our thing! But recently, we’ve had a number of users reach out to ask if we could do more to help them reach their online goals, especially when it comes to getting more traffic.

And we get it: SEO is a complicated, multi-disciplinary marketing activity. It’s a hard thing to DIY when you’re busy running a blog or small business. 

That’s why we created our SEO Marketing service. Instead of mapping out an SEO strategy or doing keyword research yourself, our team of experts handles all the nitty-gritty tasks to get your site ranking higher on search engines. 

In addition to creating and publishing new content for your site each month, our team will develop a keyword strategy and continuously optimize your existing website to improve your ranking on relevant search results over time. 

And you’ll never have to wonder if your efforts are paying off. We’ll compile a monthly report for you to track ranking improvements and traffic growth. Additionally, you’ll receive regular calls from your dedicated SEO manager to make sure the work we perform each month is aligned with your goals. 

Key Features:

  • Offload your entire SEO strategy and execution to a team of SEO experts.
  • Boost on-page keywords with new custom content created every month by a professional copywriter.
  • Receive an in-depth monthly report on your site’s search engine rankings and traffic.
  • Sync monthly with your dedicated SEO manager to ensure the team’s efforts are aligned with your goals.

Price: We offer three plans — Startup, Business, and Enterprise — starting at just $399 per month.

Search Engine Optimization Made Easy

We take the guesswork (and actual work) out of growing your website traffic with SEO.

The Search for Website Optimization Tools

SEO is just one part of the puzzle when it comes to running a website. However, it’s a piece you have to pay special attention to if you want your website to get the traffic it deserves. After all, search engines don’t care how much effort you put into your blog posts and content if they aren’t optimized.

So are you ready to optimize your website? 

You can use dozens of services to improve your search engine rankings, but some of our favorites include Google Search Console, Moz Pro, and SEMrush. The first packs a lot of free SEO tools you can use to discover how search engines view your website, whereas the latter two enable you to conduct professional-level keyword research. For beginners, we recommend starting with SEO Toolkit — it’s one of the easiest and most affordable ways to improve your site’s rankings. However, if tackling SEO on your own seems overwhelming, check out DreamHost’s SEO Marketing service; our team of experts can do all the work for you.

The post 17 SEO Tools to Optimize Your Website for Success in 2021 appeared first on Website Guides, Tips & Knowledge.


source https://www.dreamhost.com/blog/seo-tools-to-optimize-website-success/

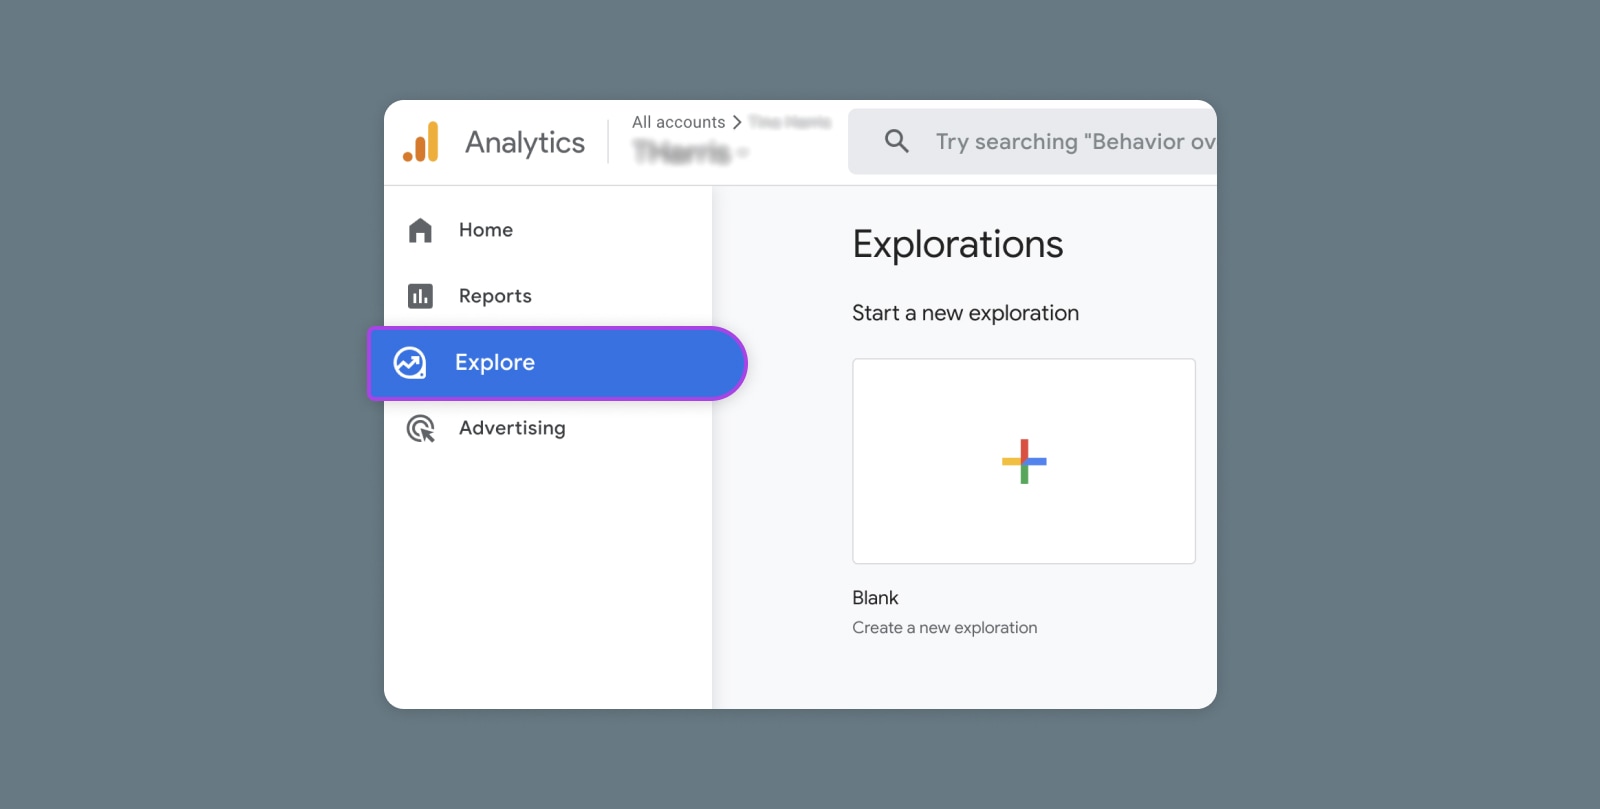
Creating and Mastering GA4 Explorations

In the switch from Universal Analytics (UA) to Google Analytics 4 (GA4) — which will go fully into effect July 2023 — a lot of things have...