Wednesday, 22 February 2023

25+ Best Free and Paid SEO Tools Around (Bookmark These!)

When done right, Search Engine Optimization (SEO) is incredibly powerful. Effective SEO can help you boost your website’s search engine visibility, making your web pages more popular and enabling you to earn much more website traffic.

However, the algorithms for Google and other search engines change frequently. So if you’re not keeping up with the changes, you could be putting your organic visibility at risk.

DreamHost Glossary

Algorithm Update

An algorithm update refers to any changes or upgrades to a pre-existing search engine algorithm. These updates are made to improve the accuracy and relevance of search results and can often result in large ranking fluctuations.

Read More

The good news is that plenty of free and paid SEO tools are available to help you keep pace with ever-evolving search engine algorithms and ranking factors. With the right stack, you’ll be able to consistently improve (and maintain) your organic rankings, earning more traffic for your site.

In this post, we’ll highlight some of the best free and paid SEO tools around. To make things easier, we’ll separate these into categories for keyword research, analytics, link building, and more.

Ready to rank? Let’s go!

Best Keyword Research Tools

Keyword research tools enable you to choose your keywords and phrases based on the terms that users are actually searching. Here are some of the best tools to improve your keyword strategy.

Semrush

Semrush

Semrush is a great choice for more technically-proficient users since you’ll get an advanced dashboard with tons of resources. One of the most useful assets is the SEO toolkit which enables you to track your visibility progress and identify which keywords you’re ranking for.

Additionally, the Semrush toolkit helps you find your current page ranking for each keyword and identify your monthly keyword search volume. You can even get a sneak peek at your competitor’s keyword strategies for Pay-Per-Click (PPC) campaigns. Meanwhile, you can monitor your backlinks and receive optimization recommendations.

Key Features

  • Find out which keywords your site is currently ranking for
  • Identify your monthly keyword search volume
  • Analyze any domain’s backlink profile and marketing campaigns

Price

Plans for Semrush start at $119.95 per month.

Moz Pro

Moz Pro

While great for keyword research, Moz Pro is an all-in-one solution enabling you to identify optimization opportunities, track growth, and build reports. Plus, it provides an in-depth analysis of your crawl performance.

Moz Pro is equipped to handle even very large websites with its ability to analyze up to 3,000 links on any URL. Then, you can access information about duplicate content and redirects that impact your SEO performance.

Key Features

  • Target keywords strategically with accurate volume and difficulty metrics
  • Save keyword lists that you can track and update
  • Track your local and national searches

Price

Moz Pro is a paid solution with plans starting at $99 per month.

Google Ads Keyword Planner

Google Keyword Planner

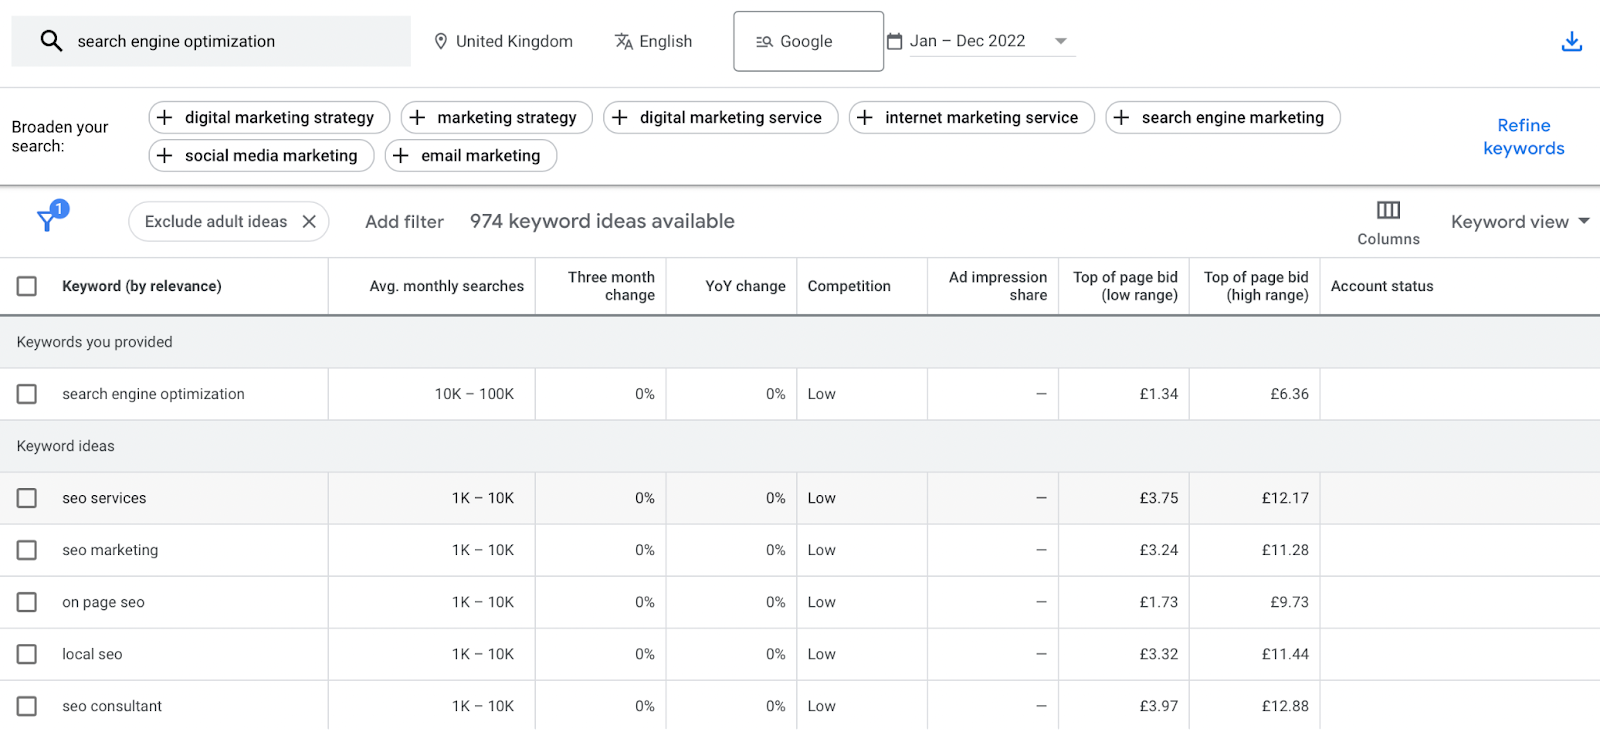
Google’s Keyword Planner is a comprehensive keyword research tool that’s free and easy to use. It’s a great tool for all types of users, including those with zero SEO knowledge. You can get started by simply typing in one (or more) terms associated with your business, product, or niche.

You can also use it to access tons of metrics. For instance, you can look up keywords, get traffic estimates, and figure out how competitive keywords are. Moreover, the keyword planner displays a ‘three month change’ column to help you identify and hop on trending topics.

Key Features

  • Browse entire pages of keywords or filter keywords based on volume
  • View historical results for specific keywords
  • Judge the quality and authority of websites that are currently ranking

Price

Keyword Planner is completely free.

KWFinder

KWFinder

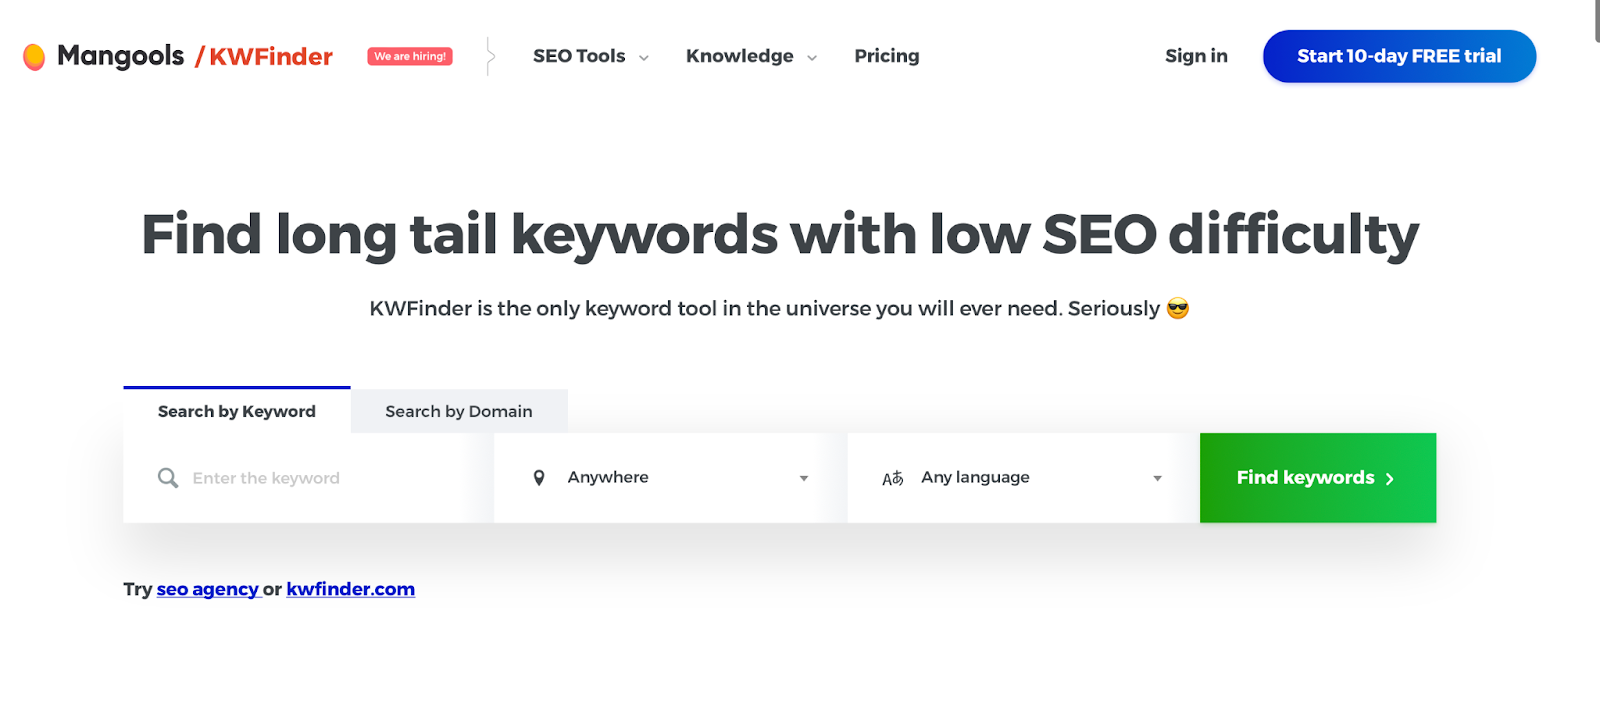
KWFinder is a much simpler, streamlined keyword tool that’s superb for SEO beginners. The software helps you generate ‘targetable’ keywords, making it an excellent option for new or small businesses since you’ll find terms that aren’t too difficult to rank.

Typically, KWFinder connects you with long-tail keywords. These are more specific yet still attract large amounts of traffic. Better yet, it’s excellent for websites with an international audience since the tool shifts seamlessly between languages and regions.

What’s more, KWFinder provides insight into your competitors’ keyword strategies and helps you analyze Search Engine Results Pages (SERPs) to understand search intent better.

Key Features

  • Find out what local users are searching for
  • Target long-tail keywords to improve your chances of ranking
  • Uncover the keywords that your competitors are ranking for

Price

KWFinder is a premium keyword research tool with plans starting at $29.90 per month.

AnswerThePublic

Answer the Public

AnswerThePublic is a unique keyword tool based on autocomplete data from Google and other search engines. With this platform, you’ll receive a list of questions and terms that people search for (based on your keyword).

This allows you to create content around the actual questions and phrases that your audience is searching for, so you’re more likely to boost your click-through rate (CTR). Better yet, you’ll receive instant updates when people are talking about your primary keywords, so you can monitor trends.

Key Features

  • Generate new ideas for your content based on relevant keywords
  • Receive instant updates when people use your keywords
  • Monitor trends and compare user behavior over time

Price

AnswerThePublic plans start at $9 per month.

Get Content Delivered Straight to Your Inbox

Subscribe to our blog and receive great content just like this delivered straight to your inbox.

Best Link Building Tools

Link building is a vital part of any good SEO strategy. It helps search engines better understand your content and keeps people on your site for longer. Here are five of the top link-building tools.

Linkody

Linkody

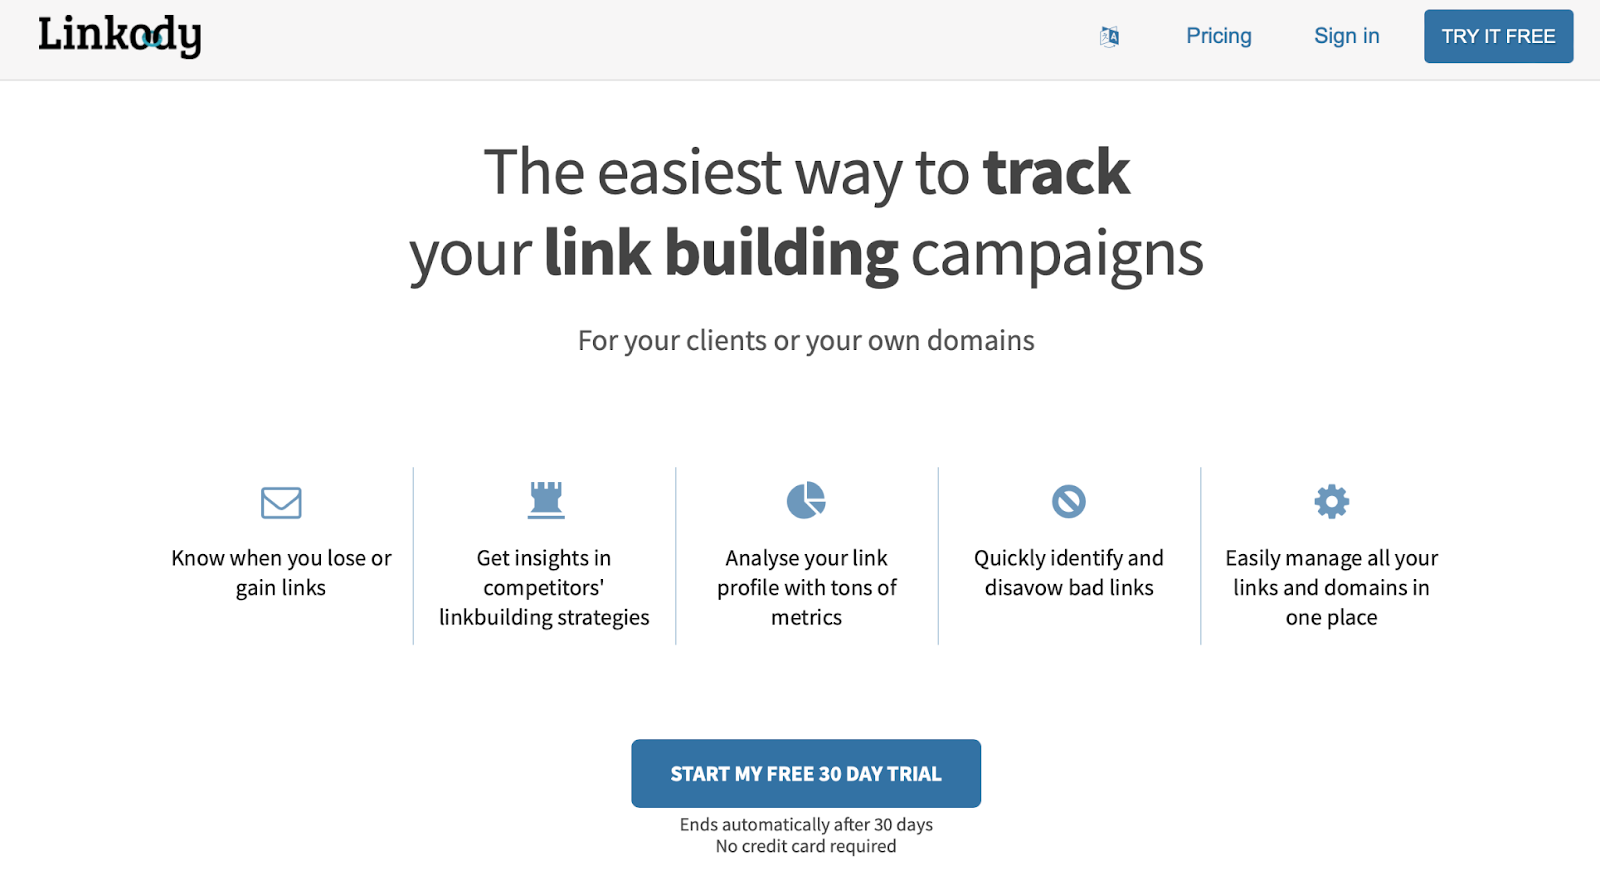
Linkody is an excellent tool that enables you to discover, track, analyze, and fix backlinks on your site. It’s excellent for beginners since you’ll complete all actions from an intuitive dashboard.

Moreover, the checker runs 24/7 and notifies you of any changes. Therefore, you can immediately fix issues that might damage your SEO performance. Additionally, Linkody prioritizes the most essential backlink metrics like your Google indexation status, domain authority, and spam score.

Key Features

  • Conduct a competitor analysis by simply entering a URL
  • Download white label client reports for sharing with your team
  • Get notified of SEO issues 24/7

Price

You can get started with Linkody for just $14.90 per month.

Link-able

Link-able

Link-able was designed to provide marketers with a reliable way to create backlinks for their content. It works similarly to a job board, connecting two parties.

Basically, you post a request on the Link-able website, including details about the kinds of backlinks you want to build. Once Link-able has vetted you, you can access the project database and submit proposals.

Then, you’ll wait to get a response from a qualified partner. Link-able matches you up with highly-relevant marketers.

Key Features

  • Get matched with highly-relevant partners based on your industry and goals
  • Only hire authors that you want to work with
  • Build high-quality backlinks to drive organic traffic to your site

Price

Link-able is free to use, but you’ll need to pay authors to complete the work. Then, Link-able takes a cut of the author’s earnings.

Broken Link Checker

Broken Link Checker

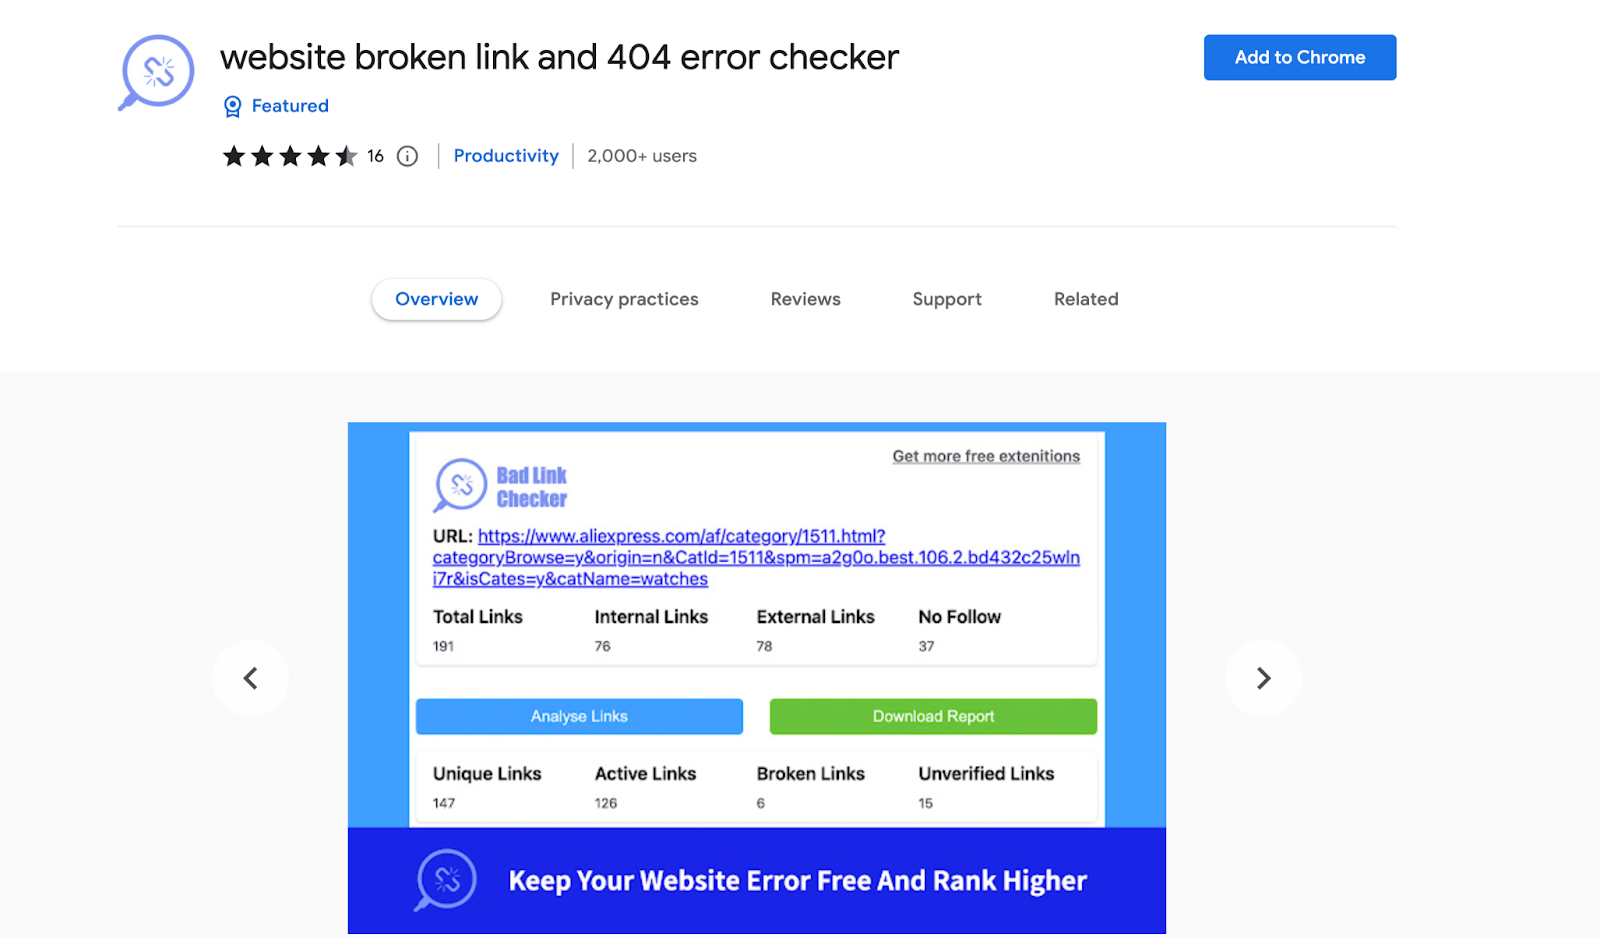
Broken Link Checker is a Google Chrome extension that ensures your internal and external links are working. It was initially created for developers, content editors, and web designers.

What’s great about the tool is that it lets you make corrections to these links before your pages go live. Plus, it’s easy to use, and the platform makes it super quick to identify good and bad links, clearly flagging problematic links in red.

Key Features

  • Export all your bad links in one click for further analysis
  • Get a broken links report in just minutes
  • Analyze external links and 404 errors

Price

As a Google Chrome Extension, Broken Link Checker is available for free.

BuzzStream

Buzzstream

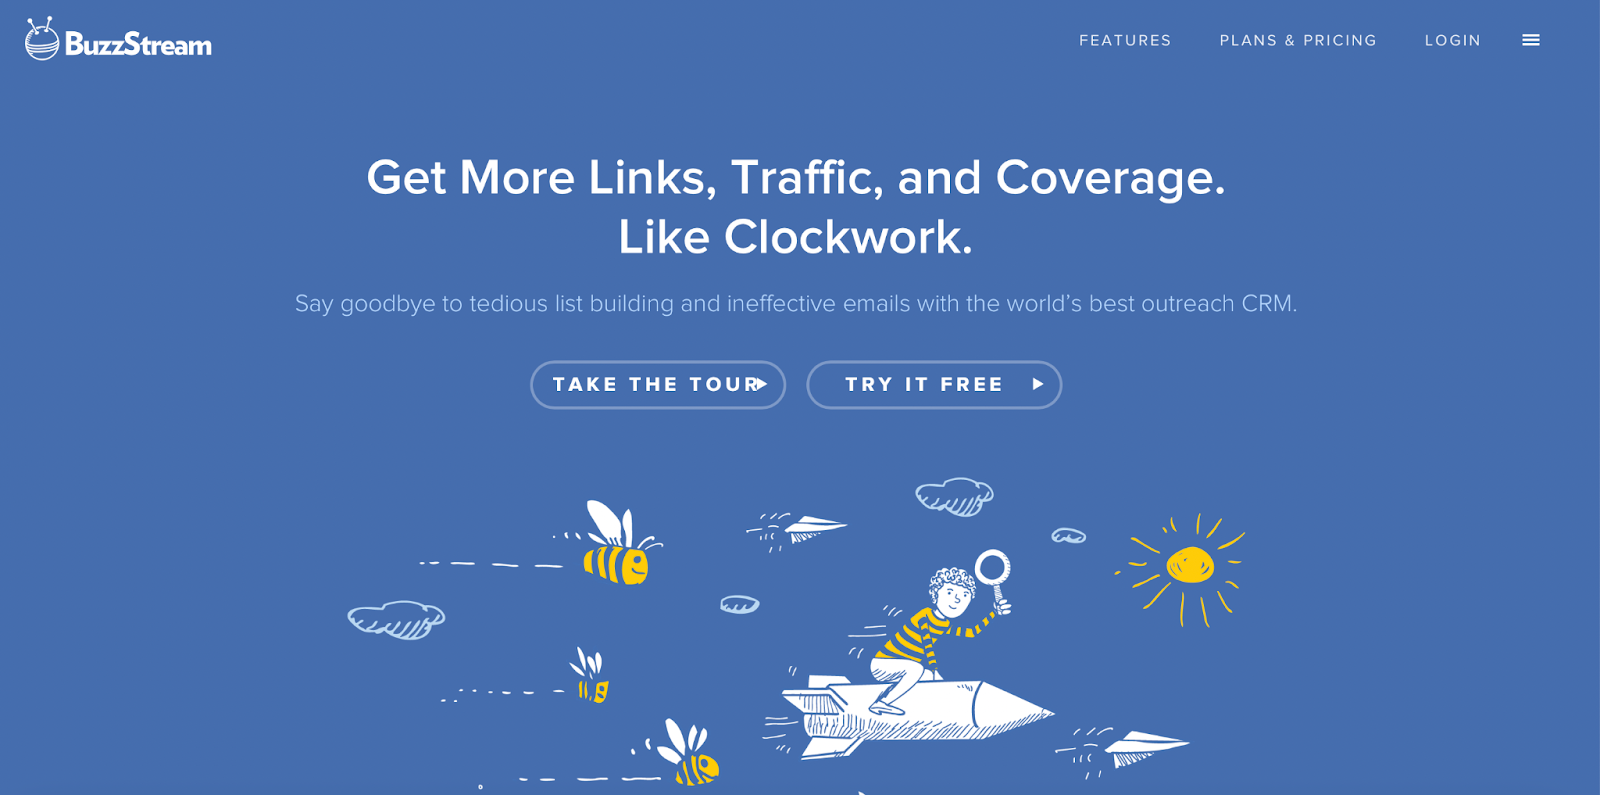
BuzzStream helps you acquire backlinks more easily by connecting you with the right people. For example, you can use it to research relevant people and websites based on factors like industry and social engagement.

Then, BuzzStream assists you in coming up with the most effective email messages to capture the reader’s attention. Better yet, you can track these messages, so you’ll know which have been opened and read. By targeting users that might be more receptive to backlink requests, you boost your chances of success.

Key Features

  • Target users that are receptive to backlink requests
  • Get help generating effective email messages
  • Track messages, so you know when they’ve been delivered, opened, and read

Price

BuzzStream plans start at $24 per month.

Screaming Frog SEO Spider

Screaming Frog

Screaming Frog SEO Spider is a powerful tool that crawls your website to discover common SEO issues. The scanning speed is awe-inspiring, especially since it’s a task that could take hours to do manually.

You’ll gain information about 404 errors, word counts, title tags, and analytics data. For instance, you could find out if your title tags are duplicated or if meta descriptions are missing from your posts.

Key Features

  • Export your SEO data to Excel for further analysis
  • Works for any URL, so you can enter competitor URLs to see how their sites perform
  • Create XML sitemaps and image XML sitemaps for your site

Price

The free version of Screaming Frog SEO Spider has a crawl limit of 500 URLs. To get unlimited, you can upgrade to a paid plan. Licenses start at $259 per year.

Best Content Marketing Tools

Content marketing is one of the easiest ways to get your website in front of more people. The tools listed below will help you realize SEO opportunities and gain more visibility in search engines.

The DreamHost SEO Toolkit

DreamHost SEO Toolkit

If you’re a DreamHost customer, you can take advantage of our SEO Toolkit. First, you’ll get a full site audit that detects potential SEO issues. Then, you’ll receive a personalized SEO plan with actionable steps to improve your ranking.

For example, you might discover new keyword placements that will help optimize your content. Plus, you can track up to 20 keywords and keep an eye on your competitors’ sites. You can also stay updated every step of the way with weekly progress reports.

Key Features

  • Receive a personalized SEO plan with actionable tasks
  • Keep track of 20 keywords and four competitors
  • Access 24/7 site audits that monitor your web pages for technical SEO issues

Price

SEO Toolkit costs just $4.99 per month. New DreamHost customers can add SEO Toolkit when signing up for a hosting plan. Existing customers can enable SEO Toolkit directly in their panel.

Ontolo

Ontolo

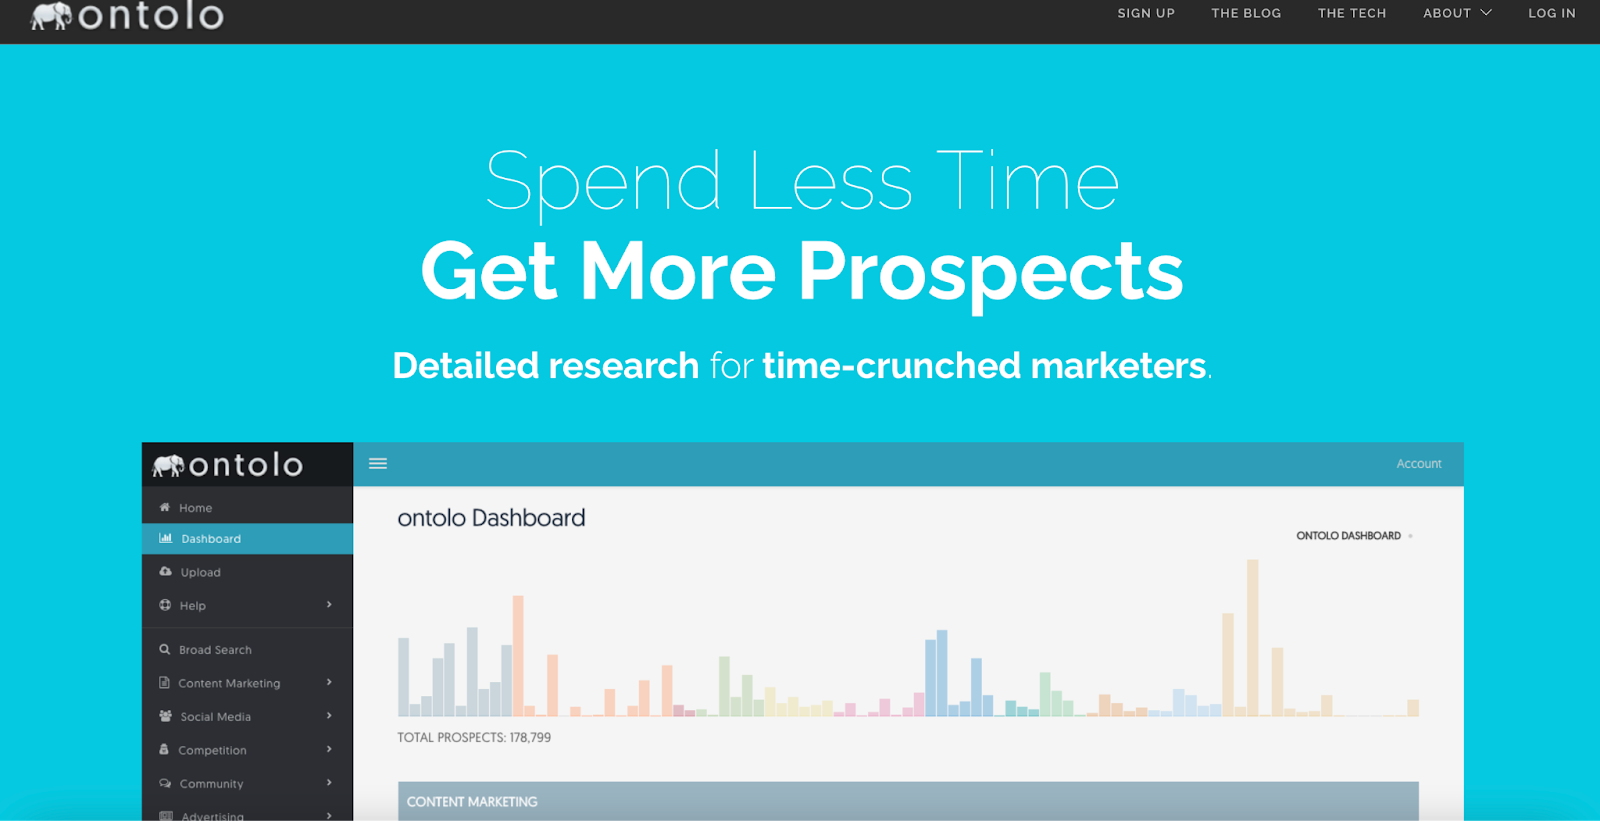
Ontolo is primarily a content research tool that you can use to find marketing and SEO opportunities. For instance, you’re able to identify guest posting and backlinking opportunities to expand your reach.

Ontolo scouts these opportunities, so all you have to do is pitch your ideas. What’s more, you’ll get access to a vast database of prospects from over 80 sources — Therefore, you’ll be sure to find a suitable match.

Key Features

  • Export your prospects to share them with colleagues or clients
  • Access prospects from 80+ sources
  • Upload prospect lists from any source, including Moz and Ahrefs

Price

Ontolo plans start at $97 per month.

Ahrefs Webmaster Tools

Ahrefs

Ahrefs Webmaster Tools is a key SEO resource that’s especially well-known in its field. It’s an all-in-one solution that helps you create quality content optimized for search engines.

For instance, you can get information related to keywords, links, and rankings to make better decisions about your content. Meanwhile, you can access the Content Explorer, where you can search high-performing web pages under specific keywords and topics.

Key Features

  • Generate a monthly search volume and CTR for specific keywords
  • Discover how individual web pages are performing, including 100+ technical SEO issues
  • Keep track of your ranking progress with a dedicated Rank Tracker

Price

Ahrefs has many different pricing options, but its most affordable plan is $99 per month.

ContentKing

ContentKing

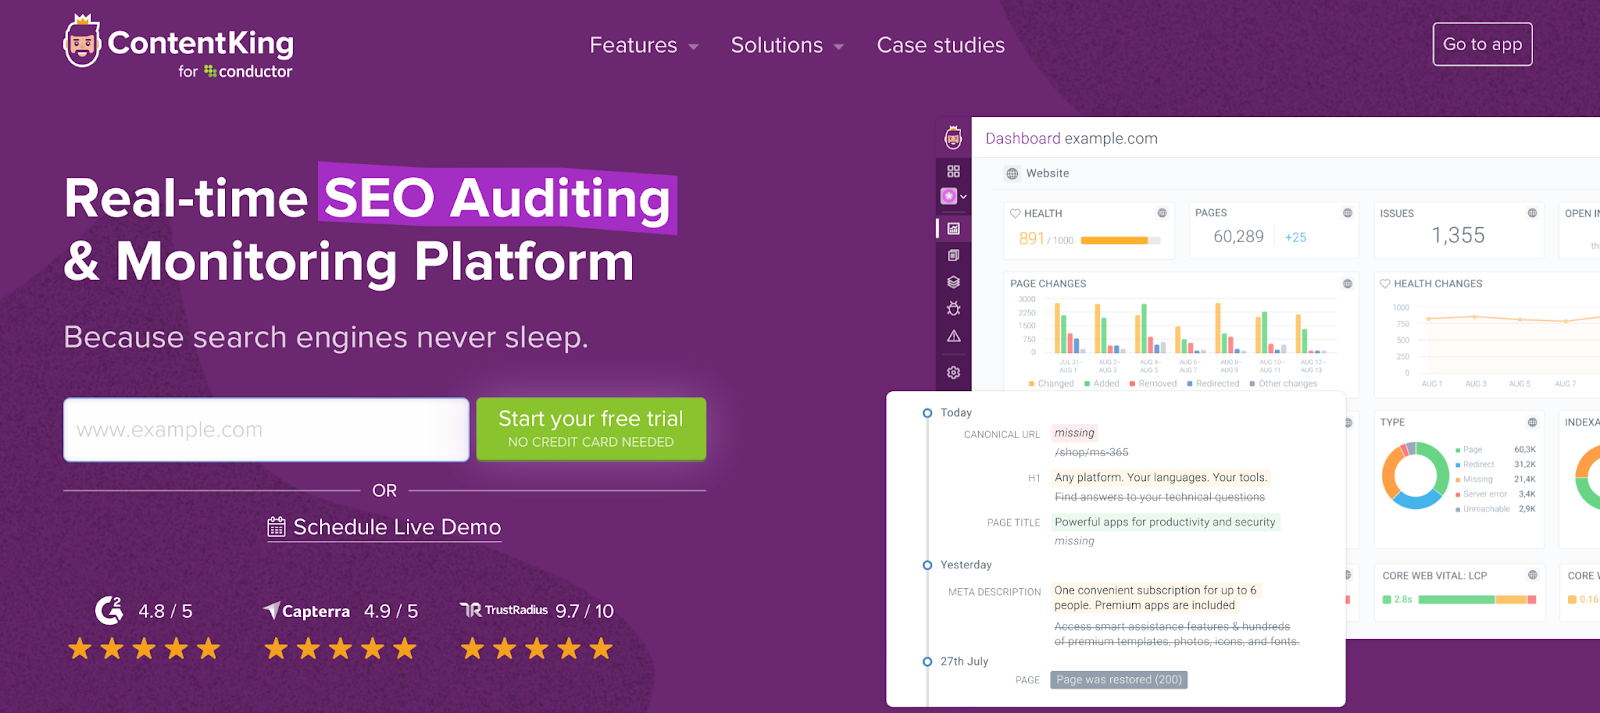
ContentKing is an SEO auditing and content tracking tool. It’s cloud-based, so there’s no installation required. Plus, data and reports are readily available from any location.

ContentKing audits your site 24/7 and provides optimization tips as well as notifications when SEO issues occur. One unique feature of this tool is that you’re able to access your SEO history. This way, you can keep track of content changes over time, like insidious pages and changes in your robots.txt file.

Key Features

  • Access reports from any location (even remote)
  • Get notified about SEO issues 24/7
  • Track website changes, page changes, and changes in robots.txt

Price

ContentKing is a paid SEO platform with plans that start at $139 per month.

Best Rank Checking and Tracking Tools

Rank checking tools can help you identify the best ranking opportunities for your site. Meanwhile, rank tracking tools will update you with crucial information about your current SEO ranking. Let’s take a look at five of the best SEO rank tools.

WooRank

WooRank

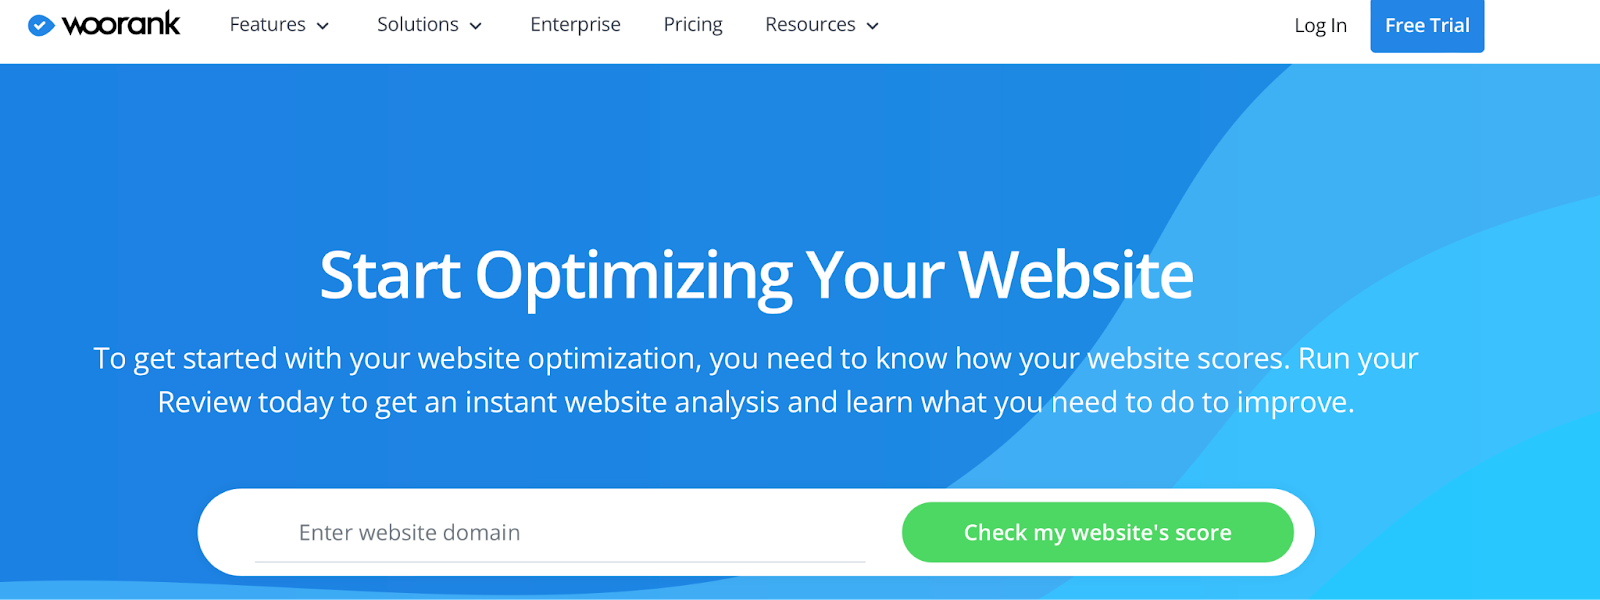
WooRank is a popular SEO tool that generates an in-depth SEO analysis to help you improve the optimization of your site. The report also considers the performance of your existing SEO strategies, social media, usability, and more.

Each report is divided into sections, so it’s easy to navigate, and you can quickly identify areas for improvement. Plus, WooRank helps you target and achieve your SEO goals. For example, you’ll receive a marketing checklist, mobile optimization tactics, and an analysis of your SEO metrics against predetermined goals.

Key Features

  • Generate quick, scannable reports
  • Access a marketing checklist to keep track of your progress
  • Customize your reports with brand-focused templates

Price

WooRank’s cheapest plan is $79.99 per month, but you can contact the team to discuss custom pricing.

GrowthBar

Growthbar

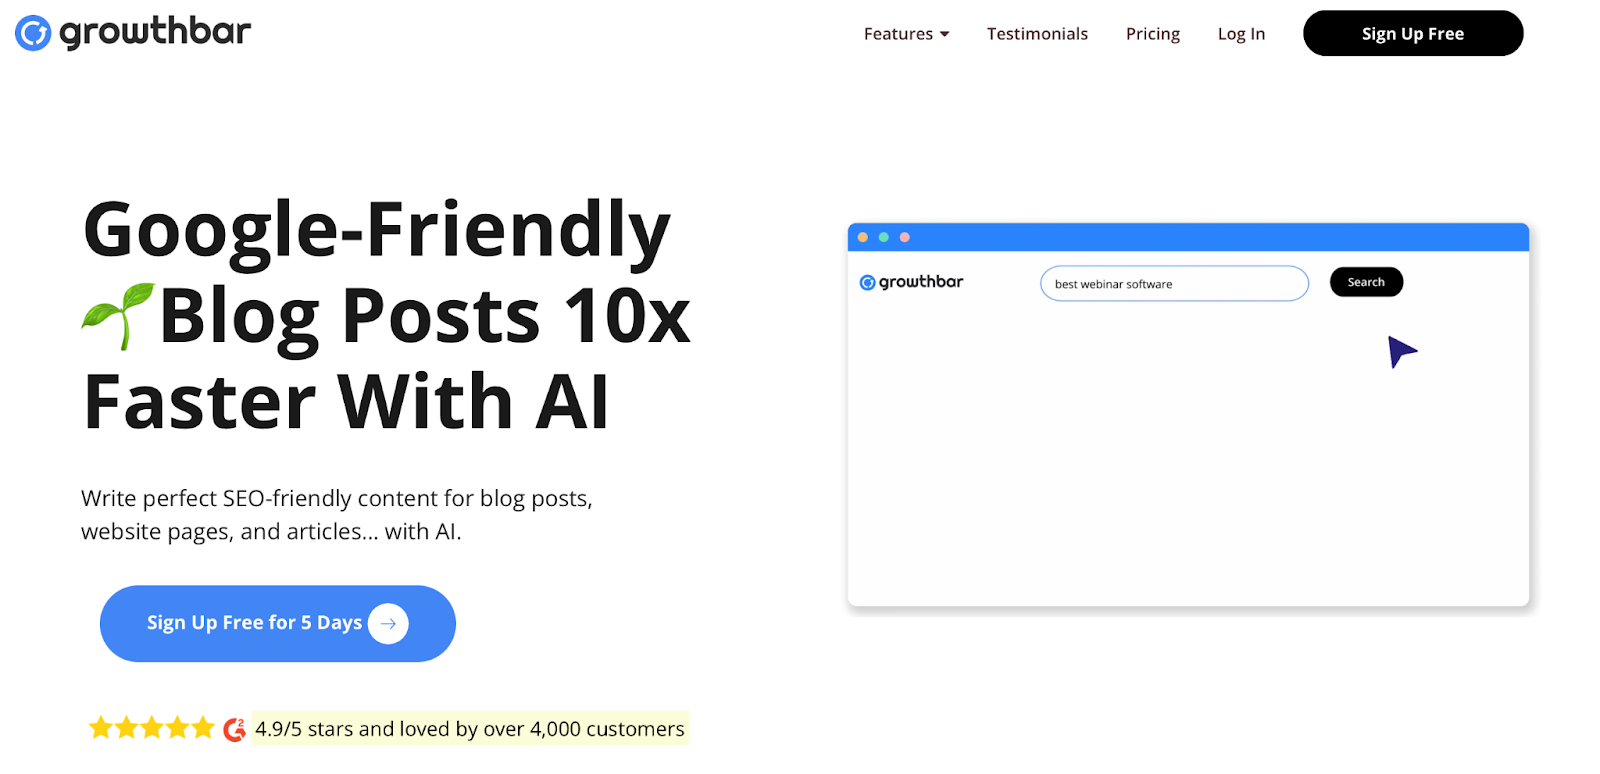
GrowthBar is the second Google Chrome extension on this list. It’s an excellent tool that’s ideal for keeping track of your SEO rankings. Plus, the platform enables you to assess the difficulty in ranking for new keywords.

Besides ranking information, GrowthBar also offers keyword and competitor analysis. For example, you can discover keywords, backlinks, and ads that are effective for other sites. Meanwhile, you can find out which organic and paid keywords attract users.

Key Features

  • Get a list of the most authoritative backlinks to your site
  • Find out which organic and paid keywords are most effective for your site
  • Use the 2-minute Blog Builder to let GrowthBar’s AI write your blog posts

Price

To get started with GrowthBar, it will cost you $29 per month.

CanIRank

Can I Rank?

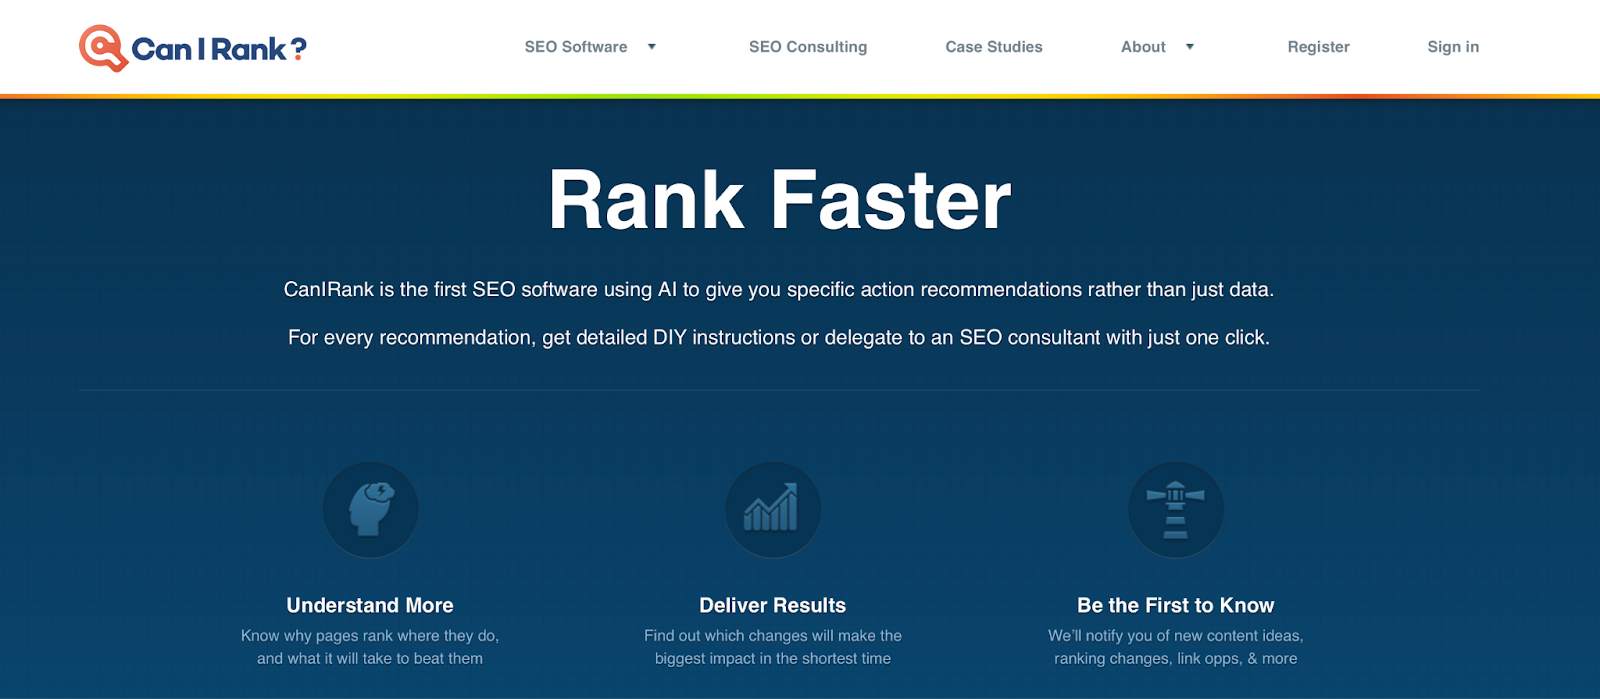
CanIRank is a superb tool that lets you find out if you can rank on the first page of the SERPs for a specific keyword. There isn’t any other tool that offers this dedicated service, balancing keyword value with ranking difficulty.

Additionally, CanIRank doesn’t just provide data — It also gives you actionable recommendations generated with AI. Then, you’re free to act on these recommendations using thorough DIY tips, or you can offload the tasks to an SEO consultant with just one click.

CanIRank is a great tool for beginners since it gives you an opportunity to learn more about SEO. You’ll get notified about new content ideas and linking opportunities. Plus, the data can help you understand why certain pages rank highly and what you can do to outrank them.

Key Features

  • Find out if it’s possible to rank on the first page of the SERPs
  • Get notified about new content ideas and linking opportunities
  • Learn more about why pages rank and how you can outrank them

Price

You can access a limited version of CanIRank for free. However, you’re able to unlock powerful features with paid plans from $49 per month.

SerpRobot

SerpRobot

SerpRobot is another dedicated ranking tool that keeps an eye on your keyword positions in real time. You can enable automatic alerts and specify a frequency for how often the SERP is checked. Then, you’re able to view visual representations of the changes, making it easy to analyze.

SerpRobot is a very thorough tool with results generated across desktop, tablet, and mobile. Plus, it doesn’t just stick to Google. You can keep tabs on many search engines, including YouTube, Bing, Yahoo, and Google Business Profile.

Key Features

  • Track competitor sites
  • Get visual reports that are easy to analyze
  • Enable automatic alerts

Price

You can use SerpRobot for free or upgrade for $4.99 per month per bot.

SE Ranking

SERanking

One of the best parts about SE Ranking is that you can get a hold of real-time ranking positions of your site’s keywords across major search engines. What’s more, you can track rankings on a country, region, or city level.

Additionally, you’ll get access to a website audit tool that picks up on on-page and off-page SEO issues. Plus, you’ll be alerted when changes occur with your website (or when they take place on your competitors’ sites).

Key Features

  • Control and monitor all your backlinks
  • Access social tools like auto-posting and analytics
  • Track rankings on a country, region, or city level

Price

The pricing for SE Ranking is determined by the frequency of the ranking checks. Therefore, daily plans are the most expensive, starting at $39.20 per month.

Best Reporting and Analytics Tools

Reporting and analytics tools offer the easiest way to know whether your SEO strategy is working. Typically, you’ll be able to view and analyze key performance metrics, helping you identify areas to improve. Here are five of the best SEO reporting and analytics tools.

Google Analytics

Google Analytics

Google Analytics is another one of the tech giant’s powerful tools for implementing an exceptional SEO strategy. When you pair it with Google Search Console, you get an incredibly thorough method for tracking keywords and important metrics.

This tool can provide you with lots of different performance indicators. For example, you’ll be able to view your page exit metrics and conversion behavior.

Key Features

  • Differentiate between organic and paid traffic
  • Discover which channels lead to the most conversions
  • Determine custom engagement metrics for each web page

Price

For small and medium-sized businesses, the free version of Google Analytics will likely be sufficient. Larger enterprises can opt for Analytics 360.

Serpstat

Serpstat

Serpstat offers a suite of data-driven analysis tools, such as an SEO audit tool, a backlink checker, and a competitor tracking feature. The platform is project-oriented, enabling you to organize your websites into groups. Then, you can access your projects through a stylish dashboard.

Serpstat provides top-notch features that generate in-depth results. For instance, the backlink checker collects data from the previous two years and keeps track of competitors’ backlink strategies.

Key Features

  • View historical data
  • Get insights into traffic distribution among domains
  • Identify market share fluctuation

Price

The Serpstat plans start at $55 per month.

Google Search Console

Google Search Console

With Google Search Console, you can conduct an initial SEO analysis or update your existing strategy with fresh keywords. The tool monitors your performance and helps you find out what keywords you’re ranking for.

Google Search Console really excels at giving you insight into your crawling and indexing performance. For example, you can identify crawl errors and see how many of your web pages are in Google’s Index using the powerful URL Inspection Tool.

Key Features

  • Helps you understand how responsive your site is
  • Provides opportunities to make your site more mobile-friendly
  • Tracks and presents important metrics like clicks, impressions, and average position

Price

Google Search Console is totally free.

UpCity

UpCity

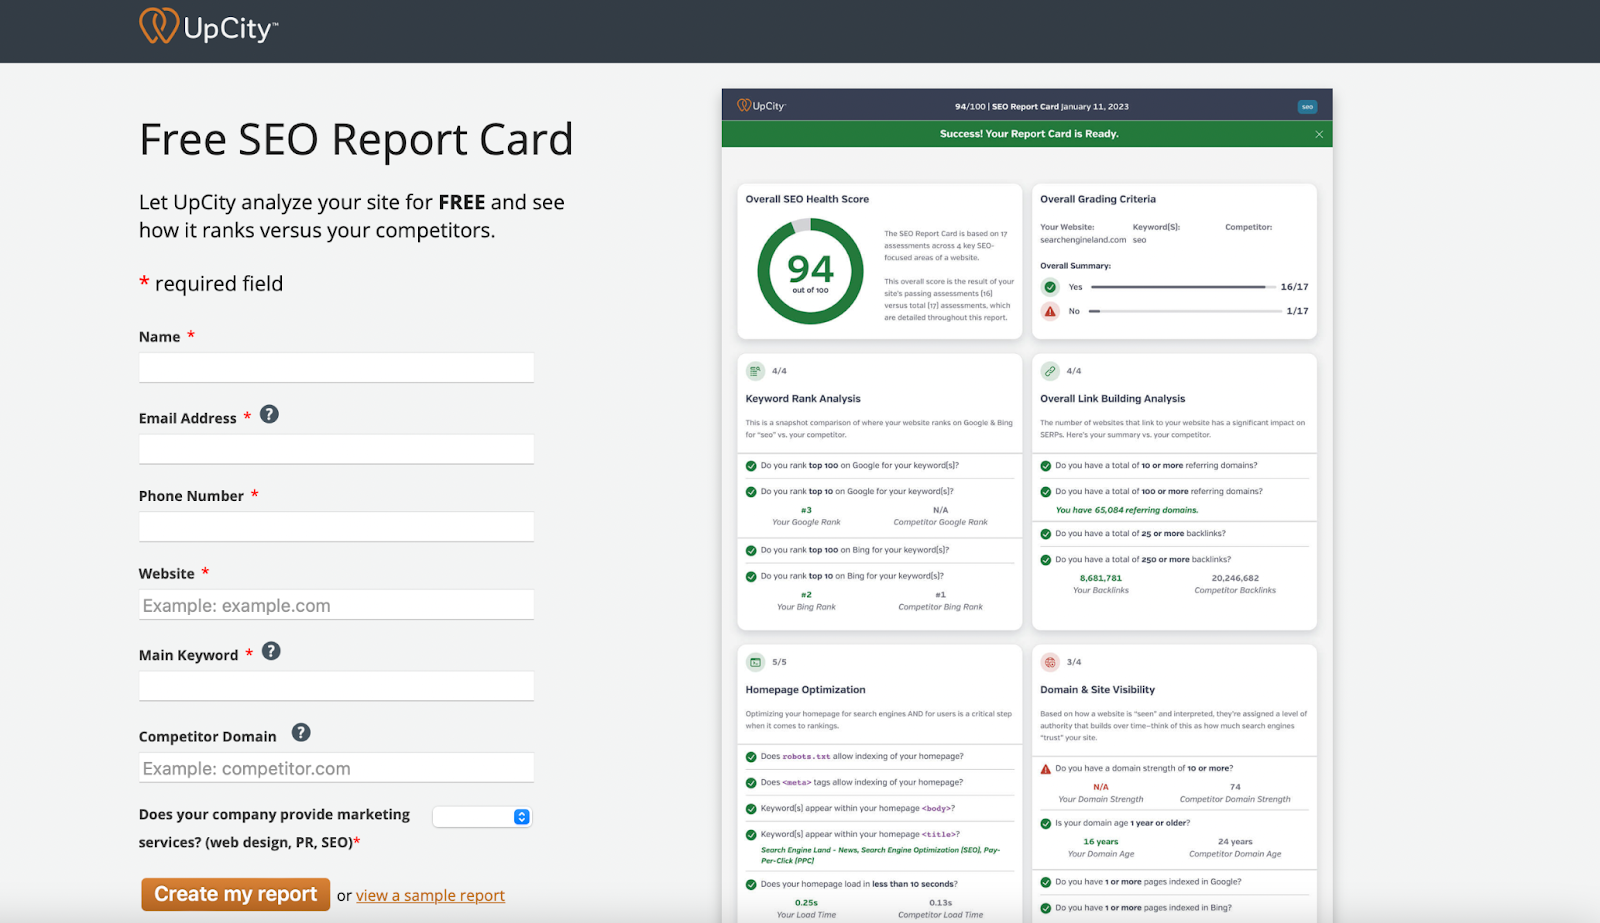
UpCity is a very easy-to-use tool. You can get started without needing to create an account or fill in lots of details. All you have to do is fill out an SEO report card with information such as your keywords, website URL, and a competitor domain.

Then, you’ll receive a one-page resource, containing important SEO data. Everything is very clear and straightforward. Right at the top, you’ll find your overall SEO health score. Then, the report is split into four sections where you can analyze more in-depth details.

Some of the metrics you can identify with UpCity include your ranking position and the number of backlinks. Plus, you’re able to discover how well your keywords are distributed.

Key Features

  • Judge metrics for accessibility and speed
  • Find out how authoritative and trustworthy your website is deemed to be
  • Generate a one-page report with all of your important SEO data

Price

UpCity is a free tool.

Best On-Page SEO Tools

On-page SEO is crucial to improving your visibility in search engines and boosting your CTR. It involves optimizing on-page elements like headings, HTML tags, and metadata to make your site more Google-friendly. Here are five of the best on-page SEO tools.

Seomater

Seomater

Seomater excels for technical SEO analysis and provides in-depth on-page optimization. You’ll get an initial report that breaks down your current SEO elements, including links, page speed, and social media. Then, you’ll receive tips to improve each component.

On top of this, you can access the SEO Monitoring Alerts feature, enabling you to find out when there are problems with your site’s SEO performance. You can also take advantage of the Domain Comparison tool, allowing you to evaluate two of your competitors’ sites in terms of broken links, HTML tags, content quality, and more.

Key Features

  • Access SEO Monitoring Alerts to find out when SEO issues occur
  • Use the Domain Comparison tool to evaluate your competitors’ sites
  • Embed the Seomater Audit widget on your site

Price

You can pay-as-you-go for as little as $5, or upgrade to monthly plans from $49.

Google PageSpeed Insights

Google PageSpeed Insights

Google PageSpeed Insights makes it easy to check the speed of your website across different devices. All you have to do is enter your site’s URL to test the loading time and performance on desktop and mobile.

The tool is very quick and simple to use. You’ll receive a graded score from 0-100. However, you can also find more in-depth information about your Core Web Vitals, such as First Contentful Paint (FCP).

Key Features

  • Target Core Web Vitals as well as SEO
  • Receive tips to improve your site speed
  • Generate a quick website speed score out of 100

Price

Google PageSpeed Insights is completely free.

Yoast SEO

Yoast SEO

Yoast SEO is one of the most straightforward and accessible tools for optimizing content like blog posts. The free plugin has some limitations, but you can overcome them with the premium tool.

Yoast will evaluate how well-optimized the page is, considering your metadata, keyword distribution, permalinks, headings, image alts, and more. The analysis is divided into problems, improvements, and good results. You’ll also see a real-time Yoast SEO score at the top of the page as you work.

Key Features

  • Access a readability analysis to make your content more appealing
  • Get previews for sharing your content on Facebook and Twitter
  • Utilize Yoast’s internal link suggestions as you write

Price

There is a free version of Yoast, but with Yoast Pro plans, starting at $99 per year, you’re able to enjoy more advanced features.

Google Mobile-Friendly Test

Mobile-Friendly Testing Tool

A simple but useful tool, Google Mobile Friendly Test allows you to see how well your site fares with mobile devices. You just need to enter your URL. Then, you’ll get information regarding your HTML response rate and how many page resources can be loaded. The software will also detect problems with your page and suggest ways to resolve them.

Key Features

  • View your JavaScript console messages
  • Assess your HTTP response
  • Sync with Google Search Console to monitor mobile-friendliness for your entire site

Price

Mobile Friendly Test is completely free to use.

Google Rich Results Test

Rich Results Test

The final Google tool on this list is the Rich Results Test. With it, you can discover whether your website can support ‘rich results,’ which is basically enhanced content in Google’s search results.

For example, a food recipe might make it into the rich results section, featuring important details such as star ratings, cook time, and ingredients. Generally, websites need to use schema markup to appeal to Google and claim these spots.

Key Features

  • Find out if your site supports rich results
  • Evaluate structured data like breadcrumbs and sitelinks
  • Sync with Google Search Console for more information on your whole site

Price

Google’s Rich Results Test is a free SEO tool.

Clearscope

Clearscope

Clearscope is an excellent content optimization tool focused on on-page SEO elements. The good news is, it’s super simple to get started. All you need to do is enter a primary keyword, and Clearscope helps you craft highly-optimized content with the potential to outrank authoritative sources.

What’s more, Clearscope gives you insight into the optimal number of appearances for each search term. Plus, you can obtain the best adaptation of your keywords for other text-based items like headings. The tool updates in real-time too, so you can easily edit your content as you work.

Key Features

  • Access an intuitive content editor with AI-powered content generation
  • View a clear SEO score for your content as you work
  • Adapt keywords and phrases to suit different on-page text-based elements

Price

Clearscope plans start at $170 per month.

Boost Your Site’s Rankings with the Best SEO Tools

SEO is key to driving organic traffic to your website — Without it, your site may fail to stand out in search results. Fortunately, by using quality SEO tools, you can improve your search rankings and get your content in front of the right users.

For example, you can target keywords with a research tool like Semrush. Or, you might prefer an analytics tool such as Google Search Console to keep track of your SEO performance. Meanwhile, on-page SEO tools like Yoast SEO are a great way to optimize elements like metadata, headings, and more.

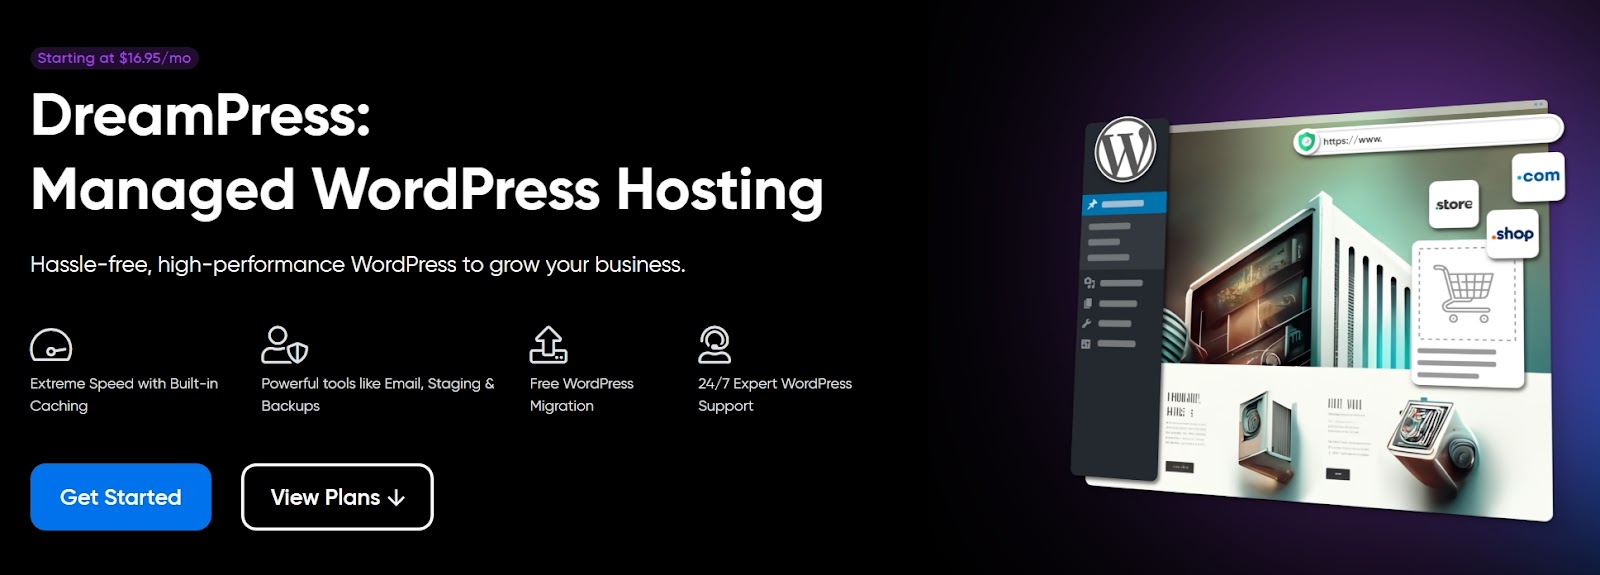
One of the easiest ways to improve your website’s SEO is to use DreamHost’s SEO Marketing Services. You’ll get access to a team of experienced professionals who will do all the heavy lifting for you!

Search Engine Optimization Made Easy

We take the guesswork (and actual work) out of growing your website traffic with SEO.

shared hosting

The post 25+ Best Free and Paid SEO Tools Around (Bookmark These!) appeared first on Website Guides, Tips & Knowledge.


source https://www.dreamhost.com/blog/best-seo-tools/

Thursday, 16 February 2023

WordPress 6.2 is Coming Soon! Here’s Your First Look

On February 6, 2023, the WordPress core development team published its Roadmap to 6.2, which includes a wealth of exciting details about the key sections of work expected to be completed for WordPress 6.2, the next iteration of WordPress that’s planned for a March 28 release. This release, like the ones that have come before it, looks to offer features that make working within the content management system more user-friendly and promises to help make you more productive than ever.

Refinements and significant improvements, as well as ease of use, are the main focus areas of WordPress 6.2. Among those improvements are a revamped approach to navigating between templates and template parts, an additional way to manage menus with the navigation block, and the ability to import widgets to block themes.

DreamHost Glossary

Full-Site Editor

The Full-Site Editor is a tool that enables you to modify theme templates using blocks. It replaces the Theme Editor in past versions of WordPress.

Read More

The base block experience will also receive improvements, including features like a new distraction-free writing mode and a scaled block settings experience.

Let’s dive right in and check out what you and other WordPress users have to look forward to!

Full Site Editing Becomes a Breeze

The Site Editor will now center the entire structure of your site starting with the homepage. Whereas in the past when you’d be dropped into a single template, various features will now come together to make it easier to navigate across your site and take the actions you want. In addition, you’ll be able to:

New Site Editor Features

  • Experience a refreshed Site Editor with the new Browse mode.
  • Easily identify template parts and reusable blocks with added colorization.
  • Write without interruption with the specially designed distraction-free editing mode.
  • Insert media directly from your Media Library using the Inserter.
  • Quickly add images from Openverse to your posts using the Inserter, with the option to disable this feature.
  • Keep an eye out for the updated Block Settings icon, an indicator of additional forthcoming changes.
  • Migrate your widgets to block themes with ease.
  • View your list view and document information all in one unified panel.

Distraction-Free Mode

via GIPHY

Reimagined Site Editor

via GIPHY

Leveling-Up Individual Blocks

Individual blocks, particularly the Navigation block, have also received some desperately needed upgrades. Like many other features and functions of WordPress, their capabilities and the user experience have continued to improve. Furthermore, overall block settings have been iterated upon with more complex blocks in mind, with a split between Styles and Settings tabs.

New Block Features

  • Enhance your editing experience with the new list view for the Navigation block, accessible within the block settings sidebar.
  • Limit editing of the Navigation block’s inner blocks (links and submenus) for a more curated experience.
  • Enjoy the convenience of various in-built fallbacks for the Navigation block.
  • Elevate your block customization with split Styles and Settings, optimized for compatibility with a growing range of design tools.
  • Keep blocks at the root level in sight with the “Sticky” block position option in the inspector.
  • Fine-tune the width of blocks within a Row block.
  • Easily choose between a row or stacked layout during Group block setup.
  • Utilize the aspect ratio tool for custom image dimensions.
  • Modify captions for Audio, Video, and Image blocks directly from the block toolbar with ease.
WordPress blocks

Design on Your Terms With Updated Block Patterns

Since they were introduced, Block Patterns have been one of the most popular features of WordPress. They’re a collection of predefined blocks that you can insert into pages and posts and customize with your own content. They make it possible to quickly and easily create standout pages on your WordPress site with very little effort.

Now, in WordPress 6.2, a redesign of the patterns Inserter makes it easier to pick and choose between patterns, including newly bundled Header and Footer options. Developers and Site Builders who create and provide patterns can expand where they can be used, including an option to register patterns specifically for templates.

New Block Patterns Features

  • Streamline your pattern selection with the improved Pattern Inserter and refined categorization.
  • Effortlessly switch between Header and Footer patterns bundled with Core.
  • Specify the templates where patterns can be used by registering them for specific template types. For instance, an Error 404 pattern should only be used with the 404 template.
  • Select from a growing collection of Query Loop patterns directly from the block, with a more streamlined setup process.

via GIPHY

Design Takes Center Stage

If you’ve struggled with site design in the past and felt overwhelmed by the learning curve of previous WordPress releases, don’t panic! WordPress 6.2 takes the strong foundation provided by theme.json and the Styles Engine to new heights.

The new features and enhancements will allow users to experiment with different styles, preview the changes in real-time, and apply them globally or locally as needed, making the entire design process more intuitive and efficient. So, even if you have never felt confident in your site design skills, WordPress 6.2 is here to help.

New Design Features

  • Create a cohesive look for your site with the Style Book, which allows you to view and style all blocks at once.
  • Preview the impact of your design changes with an inline view of blocks while working with Styles.
  • Get a more comprehensive glance at your template when choosing a style variation.
  • Quickly make sitewide changes to a single block across your site using the “Apply Globally” control in the Advanced block settings.
  • Speed up your design process by copying and pasting block styles for consistent designs.
  • Customize your entire site or individual blocks with custom CSS controls.
  • Make edits to block style variations from within Styles.
  • Set a minimum fluid font size in theme.json for more flexible typography.
  • Add shadow preset support via theme.json.

via GIPHY

More to Come in WordPress 6.2

In addition to all of the refinements and improvements coming to WordPress 6.2 that we’ve laid out above, there will also be a number of performance improvements, a faster plugin and theme upgrade process, further iteration on PHP 8.2.x support, and all of the expected general bug fixes and enhancements to look forward to.

Altogether, these will help take the WordPress experience to new heights! Stay tuned for more updates by subscribing below.

Get Content Delivered Straight to Your Inbox

Subscribe to our blog and receive great content just like this delivered straight to your inbox.

The post WordPress 6.2 is Coming Soon! Here’s Your First Look appeared first on Website Guides, Tips & Knowledge.


source https://www.dreamhost.com/blog/wordpress-6-2/

Wednesday, 15 February 2023

How to Make a Website (Comprehensive Beginner’s Guide)

So you want a website, huh?

Creating your own website can certainly be an intimidating process, especially if you’ve never done it before. Setting up even the most straightforward site requires finding a web host, buying a domain, and choosing what technology you’ll use to build it. On top of that, you’ll need to learn how to use that technology and get everything set up before you can start publishing content.

The good news is that building your own website has never been easier — There are a lot of tools designed to help streamline many of those steps! While any web project will take hard work, you don’t need to be a developer to create an amazing website. What you will need is patience and time to get through all the necessary steps.

In this article, we’ll guide you through the entire process of making a website as a beginner and answer any questions you might have. So let’s get to it!

Step 1: Define Your Website’s Purpose

via GIPHY

The first thing you need to do before committing any resources or time to a website is to decide what it’ll be about. You might be surprised how many people jump into buying domain names and purchasing hosting when they only have half an idea for a website or an online business. That’s essentially throwing money away.

If you’re thinking of launching an online business, there’s a whole other component to the planning stage. You need to analyze if there’s a market for it, consider how you’ll promote it, what your competitors are doing, and much more. However, that all falls under the ‘business planning’ category, and we’ll come back to that later.

For now, make sure you have a clearly-defined project in mind and consider what your site’s goal will be.

Some of the most straightforward examples of goals for websites are:

How you approach making a website will depend heavily on your goals. Sites can change and pivot if you decide to aim for different results. Still, if you don’t have a specific plan when launching your new website, you’re unlikely to feel motivated to put in all the work it involves.

Step 2: Lock In Your Domain Name

For many people, this is the point where making a website turns from just an idea to a real project. Buying a domain requires committing some of your hard-earned money. That means if you decide to abandon the site, that money is lost.

The good news is that most domain names aren’t that expensive. A standard .com domain will cost around $10-15 per year. That’s a fantastic value, and if you wait for the right sales, you can often register a domain for even less money.

There are a lot of Top-Level Domain (TLD) options beyond .com. However, if you’re working on your first website, we recommend sticking to the tried-and-true one. .com domains tend to be regarded as more professional and are the standard for most websites.

DreamHost Glossary

What is a gTLD?

Generic Top-Level Domain (gTLD) is the standard Top-Level Domains (TLD). “.com” is the most popular gTLD, but “.org”, “.net”, and other similar extensions fall under this same classification.

Read More

From a technical perspective, there’s no difference between a .com domain and a .coffee one. However, novelty TLDs can confuse some users and affect how your website is perceived.

The registration process is simple. Pick a domain name, see if it’s available, and if it is, buy it. You’ll need to fill out some personal information and decide if you want to pay for any add-ons, such as WHOIS protection (which is sometimes free, depending on the registrar):

Domain addons

WHOIS protection tends to be cheap, and it prevents random people from looking up your contact information through public domain records. We recommend getting it to minimize spam emails.

Step 3: Sign Up for Hosting

We could write an entire book about hosting (and we have a lot of articles on the subject). There are hundreds of web hosting providers to choose from, and here’s what you need to keep in mind when selecting one:

  • Not all hosting services offer the same level of quality.
  • Some web hosts are optimized for specific types of websites (such as e-commerce or WordPress sites).
  • Free hosting options will almost always offer a lower level of service.
  • A lot of hosting providers advertise prices that drastically increase when you need to renew your contract.
  • You should look at lots of reviews before signing up for a web host.

Ideally, you’ll be using the same web host throughout the entire lifecycle of your project. That means you must be certain they offer excellent service before signing on the dotted line.

When working on your new website, it can feel tempting to opt for the cheapest web hosting service or pay for something more expensive than you need. For your first site, we recommend either shared or managed hosting:

DreamPress managed WordPress hosting

Shared hosting is cheaper but may require more hands-on optimization to boost your site’s performance. With managed hosting, you pay more, but you don’t have to worry about site optimization, backups, and security (depending on the web host).

If you plan on using specific software or a Content Management System (CMS) such as WordPress, it might be a good idea to choose a hosting provider with plans optimized for it. Our DreamPress plans, for example, come with WordPress pre-installed and offer managed services.

DreamHost Glossary

What is WordPress?

WordPress is an open-source Content Management System (CMS). Since it is free and accessible, WordPress is used to power almost any type of website, from blogs to e-commerce businesses.

Read More

After you sign up for hosting, you’ll need to point your domain toward your new servers. This doesn’t happen automatically, and if you’re uncomfortable changing your domain’s configuration, you can ask your registrar’s support team to help you do it.

Step 4: Choose Software to Build Your Website

When you think about building a website, you might imagine someone coding each web page by hand using HTML, CSS, PHP, JavaScript, and other programming languages. That’s a valid approach, but it only works if you’re either an experienced web developer or have a lot of free time to learn how to code.

These days, most websites are built using software such as WordPress. CMSs like WordPress provide the tech “back end” for almost any website. You can create pages with a few clicks, customize them using built-in editors, change design styles by installing themes or templates, and even add new functionality with WordPress plugins:

Add plugins

A staggering 43.2% of all existing websites use WordPress, and with good reason. If you’re working on your first website, WordPress will provide a solid foundation to grow your site into a popular user destination.

If you know your way around other CMS or software options, by all means, go for it! You’re the only person that knows exactly what features you need, so trust your judgment.

If you decide to use WordPress, you’ll need to install the CMS on the server you’re renting from your web host. A lot of hosts provide access to a control panel where you can use automatic installers for popular software:

Install WordPress

Some providers will even pre-install WordPress for you when you sign up. However, that’s usually only the case if you sign up for a WordPress-specific or managed hosting plan (such as DreamPress).

After WordPress is up and running, take some time to familiarize yourself with how the CMS works. Explore every tab in the dashboard, try different themes and plugins, and build a few practice pages:

WordPress dashboard

From this point on, you will begin actual work on website design and development. Being familiar with the interface will save you a lot of time during this process.

Step 5: Plan Your Website’s Structure

You already know what kind of website you’re going to build. You also have a domain, hosting, and the tech back-end to make the site. Now, it’s time to work on planning the site’s structure.

By structure, we mean deciding which pages the site will include. You should also outline the key elements for each web page.

For example, if you want to add a Contact Us page, it should include a contact form:

Contact us

At this stage, this can be a very rough layout. In fact, we recommend against spending too much time planning exactly what your website’s design will look like. That’s a different step, and your site’s design will likely change drastically while you’re actively working on it (we know this from experience).

If you’re not sure which pages your website should include, here’s a basic list of options that most sites can benefit from:

  1. Homepage. Every website has a homepage. This is the heart of your site, so you must carefully consider which elements you will include.
  2. About Us. This page can tell visitors more about you and your team. You can include short bios and discuss what your website’s goal is.
  3. Contact Us. Users will want to get in touch with you at some point. A Contact Us page makes it easy for them to do so via email or an embedded contact form.
  4. Blog. The Blog page should include your latest blog posts and enable visitors to browse the archives.
  5. Shop. If you want to sell products online, you need a Shop page. This is where visitors can start looking for the products they want to buy and navigate the store’s catalog.
  6. Frequently Asked Questions. Depending on your site, you should include a page that answers common questions users might have about your content, services, or products.

Since this is your first website, we recommend looking at similar sites targeted toward the same audience you want to focus on. For example, if you’re going to launch a cooking blog, check out other food sites to see how they’re structured. In other words, scope out the competition.

This should give you an idea of which pages and elements you should include. Write all this information down in a list and save some of the pages you like the most as inspiration. You’ll want to refer to them during the design process.

Get Content Delivered Straight to Your Inbox

Subscribe to our blog and receive great content just like this delivered straight to your inbox.

Step 6: Begin Working on Your Website’s Design

Once you know what pages you want to include on your website and the elements they’re going to have, it’s time to get to work. By work, we mean creating, designing, and tweaking the pages you envisioned until you’re happy with the results.

This is where you’ll face the biggest challenge if you don’t have a web development or design background. It’s fairly easy to put together some simple pages with HTML and CSS. Still, modern websites include many advanced features you can’t easily cobble together just by going over a few quick tutorials.

If you don’t feel confident creating and designing each page from scratch, you have two options: hire a professional, or use a CMS.

Option #1: Hire a Professional Web Developer

While it’s true that it’s never been easier to build a website, not everyone has the time to create page after page from scratch. That is even assuming you have the necessary skills to do so and don’t need to spend time learning.

For a lot of people, hiring a professional web developer is their best bet. If you’re working on a website for your small business, an online store, or anything that needs to look as professional as possible, paying for a developer can be a significant investment.

A professional web developer can take your plans and bring them to life. They’ll know what is and isn’t possible. Plus, they’ll likely finish the project much faster than you could on your own.

To be fair, professional web developers don’t come cheap. On average, freelance web developers in the US charge between $35-150 per hour. That means a simple website that takes about ten hours to set up can cost around $2,000, at the low end of the spectrum.

If you decide to go this route, you must set up your hosting and domain before contacting a developer. You’ll also want a detailed outline of which pages you want, design guidance, examples of websites you like, and any other relevant information you can think of.

All of that prep work means the developer can start working on the pages faster, and you won’t pay exorbitant fees for things you could have done yourself. This process will likely take longer than you think, cost more, and involve revisions, so you need to go into it prepared.

Option #2: Use a CMS that Supports Themes

Most modern CMSs offer support for templates. Themes or templates are pre-built designs for specific types of pages you can use to get your website up and running faster.

DreamHost Glossary

Content Management System (CMS)

A Content Management System (CMS) is a software or application that provides a user-friendly interface for you to design, create, manage, and publish content.

Read More

To get an idea of what a theme can look like, you can check out the WordPress theme repository:

WordPress themes

All of those themes are free options. You can download and install one on your website in minutes. With WordPress, you can install multiple themes and switch between them with a few clicks to test different website designs:

Switch themes

Themes are not ready-to-go website designs. After setting up a theme, you’ll still need to customize it, set up the pages you need, add your content, and make sure you’re not missing any key elements. There’s still a lot of work involved, but you can skip the code-heavy phase of creating and styling pages from scratch.

Besides themes, CMSs such as WordPress often enable you to use visual editors or website builders. These are drag-and-drop interfaces with pre-built “blocks” or elements you can place, move around, and customize within your pages:

WordPress editor

The result is that you can build fully-functional websites without a background in web development. You’ll still need time to learn tools like the WordPress Block Editor, but the process is much easier than learning web development from scratch.

Step 7: Mind Your User Experience (UX)

By this point, you should have a nearly completed website. Pages will be functional, and the website’s initial content should be in place. That means all the pages will have their written and visual content, and a user should be able to move from one page to another and complete actions seamlessly.

We use the word “should” because many people don’t test their websites before making them public. With that in mind, this step is simple. Go ahead and ask some friends or colleagues to take your website for a test run.

To collect more valuable information from their experiences, ask the following questions:

  • Is the website easy to navigate?
  • Did you spot any elements or pages that don’t work?
  • Do you think the website is missing any key functions?
  • Is there any aspect of using the site that you didn’t enjoy?

Keep in mind that not all feedback you get will be actionable. If you can get feedback from professional designers or web developers, they’re more likely to spot glaring errors in the site’s usability. They’ll tell you if the text is hard to read, buttons aren’t noticeable, forms don’t work, Calls-to-Action (CTA) need some changes, and much more.

You can get all of this user experience feedback after launching your site and receiving visitors. However, enticing the first users to your website takes a massive amount of work. If you want those users to come back, you need to make sure your website looks like a professional project rather than something put together haphazardly.

Step 8: Plan Your Marketing Strategy

Websites don’t just get visitors out of nowhere. If you want people to find your website, you need to market it.

There are a lot of ways to market a website. However, these are the main approaches to focus on:

  1. Content marketing. This approach involves creating content that users can find via search engines or social media. If you want to focus on content marketing, you’ll need to learn about Search Engine Optimization (SEO).
  2. Email marketing. With this approach, you create an email list and drive visitors to sign up for it. Then, you can use email campaigns to draw subscribers back to your website and promote products and/or services.
  3. Social media marketing. This approach involves maintaining an active online presence on social media and driving your followers to your website.
  4. Paid advertising. This approach is the most effective way to get clicks and visits if you have the budget to pay for ads on search engines, social media, and other websites. However, it requires a sizable budget, and you still need engaging content and offers for those visitors to stick around.

Ideally, you’ll use a mix of the first three marketing methods. The fourth option, paid advertising, is optional. We only recommend it for e-commerce sites, if you’re selling services, or if your website is already monetized. That way, you’ll be able to offset the costs of paying for ads without losing money.

Most websites can benefit from an email list and a social media presence. If you start building that mailing list from the moment you launch your website, you’ll maximize the number of subscribers that you can get:

email signup

For starters, you might send email campaigns every two weeks to give subscribers updates on new content or offers. As your website grows and you start getting more email subscribers, you can increase the frequency of the campaigns.

When it comes to social media, start by focusing on the platform where you think most of your audience is. Engage with other accounts that share similar interests, post about website updates, and link back to your site whenever it makes sense.

Both email and social media marketing will take some time to get off the ground as you gather subscribers and followers. Don’t be discouraged if your content takes some time to get interactions, as the effort will be well worth it.

Step 9: Learn the Basics of SEO

SEO is perhaps the most powerful tool to grow your website’s traffic. If you can learn how to optimize for search engines and publish information that people are actually looking for, you will get traffic.

DreamHost Glossary

What is SEO?

Search Engine Optimization (SEO) is the practice of improving a site’s ranking in search results. Search results are aggregated based on a number of factors, including a site’s relevance and quality. Optimizing your site for these factors can help boost your rankings.

Read More

There is a lot to unpack when it comes to SEO. Here are some of the main things you’ll need to consider when it comes to “on-page” optimization:

  • Research which keywords to use. “Keywords” are the terms people use to look up information on search engines. A great SEO strategy involves researching what people are looking for and building content around those queries.
  • Use descriptive page titles and subheadings. Search engines don’t really “understand” what information pages include. Instead, they use contextual data to help determine when to show results, and titles play a huge role. Use descriptive titles that tell users exactly what information each section covers.
  • Add meta descriptions to each page. Meta descriptions are short blurbs of information that appear below titles in Search Engine Results Pages (SERPs). A good meta description can increase clickthrough rates for any given page.
  • Using internal links. Linking to other pages within your website helps increase on-page time and shows you have relevant information for users to peruse.
  • Getting other websites to link to you. This is one of the most important aspects of SEO. Search engines take backlinks as signs of trustworthiness, so you must get other websites to link to your pages.

That’s just the tip of the iceberg when it comes to SEO. There’s much more to learn about in this field, including structured data, local SEO, voice search optimization, etc.

For now, focus on the basic best practices of SEO and read as much about the subject as possible. SEO can take months or even years to pay off, but it’s a surefire way to get steady traffic to your website.

Step 10: Sign Up for an Analytics Service

Many web hosts provide you with data about your website’s traffic. However, if you want more in-depth information than “You got 100 visits!”, you’ll need to use an analytics service.

Analytics tools, such as Google Analytics, enable you to monitor traffic, see which sites refer users to you, determine which pages they spend time on, and access a lot more information:

Analytics dashboard

That data can help you decide how to manage your website and monitor if your marketing efforts are working. For example, if you see that you’re not getting a lot of organic traffic, it might mean you need to increase your SEO efforts.

We recommend Google Analytics because it’s a free tool and one of the most comprehensive options. It’s pretty easy to set up with most websites. Furthermore, if you collect data from the moment your site goes live, you’ll be able to monitor every aspect of its growth.

Additionally, Google Search Console is an excellent tool. It can help you monitor which keywords are bringing traffic to your site and provide suggestions for fixing performance issues.

Start Making Your Website Today

If you’ve been thinking about making a website but are hesitant, don’t be scared! It can be a long process, and some parts can be frustrating. However, it’s not an exaggeration to say making a website has never been easier. You don’t need to code to build an amazing-looking site, and most of the real work comes after the pages are published.

For a first-time project, we recommend using WordPress. It’s an incredibly versatile CMS you can use to build small and large-scale websites alike. It’s highly customizable and comes with a visual editor that makes building pages remarkably simple.

If you don’t want to do everything on your own, we have your back. At Dreamhost, we offer professional web development services where we listen to your needs and put together the perfect website for your personal project or small business. Learn more about our professional web development services!

You Dream It, We Code It

Tap into 20+ years of coding expertise when you opt for our Web Development service. Just let us know what you want for your site — we take it from there.

shared hosting

The post How to Make a Website (Comprehensive Beginner’s Guide) appeared first on Website Guides, Tips & Knowledge.


source https://www.dreamhost.com/blog/beginners-website-guide/

Monday, 13 February 2023

How to Make a Logo Online for Free

First impressions make all the difference.

If you want your brand or small business to stand out from the crowd, you’ll want an eye-catching logo. For many bootstrappers, however, this might seem easier said than done, especially if you don’t have the budget to invest in a professional graphic designer.

The good news is that it’s super easy to make a logo online for free! There are plenty of beginner-friendly and intuitive tools that will help you throw together a logo from scratch and customize it to fit your business.

In this post, we’ll take a closer look at why a good logo is so important. Then, we’ll show you how to make a logo that impresses your customers and helps your business stand out. Let’s get started!

Why You Need a Logo for Your Website

A company website provides an excellent opportunity to show off your brand identity. It can demonstrate that you’ve thought about the impression you want to make and how you can communicate that to your audience. This can legitimize your business, since it makes you look more professional to customers.

Additionally, a logo provides users with a visual representation of your business. Whether you hone in on your values, story, niche, or products, users can connect with this and instantly understand important details about your brand.

For instance, the Shake Shack logo features a burger between the text elements. Therefore, users can quickly establish an association between the brand and fast food:

Shake Shack logo

This motif can also be helpful when attracting new customers who don’t know about your business. Eventually, you can spread more awareness about your brand, making your logo instantly recognizable.

On top of that, a logo is a great way to encourage clicks and create consistency across all of your company touchpoints. You can add it to your website, include it within your marketing materials, and use it across social media. That way, customers can easily identify your accounts and the business behind them.

Get Content Delivered Straight to Your Inbox

Subscribe to our blog and receive great content just like this delivered straight to your inbox.

How to Design a Great Logo (5 Tips)

Now that you know why it’s important to add a custom logo to your website, here are five key tips to help you create the perfect design!

1. Use Strong Brand Colors

Like text and images, color is essential for influencing your audience. It can even affect their mood and behaviors.

For example, red tends to spark excitement and passion. Meanwhile, blue is great for evoking feelings of calmness and peace:

Calm blue

However, it’s also vital to consider contrasting colors to distinguish between all the design elements in your logo. This is especially relevant if you add text to your logo, since users need to clearly read your message.

You may have already established your brand colors. In this case, it’s best to stick with those shades, in order to reinforce your brand identity and avoid design conflicts.

2. Keep Your Design Simple

It can feel tempting to come up with complex custom logo designs to impress your audience. However, just think about some of the most iconic logos. Often, they lean toward minimalistic brandmarks that are easy to read and see.

For instance, the McDonald’s logo couldn’t be simpler, which makes it easy to use in different contexts:

McDonald's logo mark usage

Meanwhile, while it’s plenty recognizable, the Nike logo consists of just a single element. This also means it can be applied to all Nike products without interfering with their designs:

Nike logo

Not only are these logos easy to engage with, but they’re also very memorable. Plus, a streamlined design enables your customers to focus on what’s important. Your idea can easily get lost if there’s a busy background or too many elements.

3. Appeal to Your Audience

If you’re a less established business, appealing to your audience can be a great way to convey your message and purpose.

For instance, a new food blog might design a logo that features cooking utensils or food items. This way, new visitors instantly understand the intent and industry of the company site:

Cooking logo

Alternatively, a company that sells outdoor clothing and equipment might create a logo featuring mountains or trees. By using the same strategy, you can visually represent your brand and plant it more firmly in your customers’ minds.

Furthermore, typography is another crucial consideration when creating a design that appeals to a specific audience. For instance, you might use script fonts to convey elegance and warmth. These characteristics make them ideal options for creative businesses:

Script font

On the other hand, serif fonts are typically associated with tradition and authority. Therefore, they can be great choices for businesses such as law firms or finance companies.

4. Choose the Right Logo Type

There are various types of logo designs to choose from. For instance, you might want to add text to your logo, use a mascot, or opt for a more abstract design.

Emblems are popular, since they have a classic look that can convey professionalism. Better yet, you can add text or let the emblem speak for itself. Furthermore, an emblem is a good option if you want to include your brand name or add a message to your logo:

Harvard logo

On the other hand, you might opt for a monogram logo. These logos tend to have clear, memorable designs and feature your brand’s initials:

Monogram logo

Logotypes are another option. These rely only on text like your business’ name or your company slogan. While very simple, logotypes can be quite striking if you choose the right typography:

Costa logo

Brand marks are entirely image-based and often feature a more abstract design. With this option, there is less opportunity to use text, but brand marks tend to look sleek, stylish, and bold:

Mac logo

Finally, you could include mascots in your logo, such as people, animals, or cartoons:

Mascot-logo

This can help you appeal to a younger audience, since mascots tend to be playful and accessible.

5. Consider the File Format

Before getting started on your logo design, it’s also helpful to think about its file format. Generally, PNGs are preferable because they produce clear, high-quality images.

Plus, with PNGs, you’re able to use transparent backgrounds. This lets you add your logo to content with different colored backgrounds (like your website and other marketing materials) without any unattractive color clashes.

JPEGs are also excellent choices for digital images. JPEGs use lossy compression to reduce the file size. This makes them great for storing and sending photos.

Additionally, there are plenty of next-gen image formats to choose from. For instance, SVG is an increasingly popular file format designed for web usage and supports transparent backgrounds.

DreamHost Glossary

What is an SVG?

An SVG file, or Scalable Vector Graphic file, is a file format that renders two-dimensional graphics on the web. SVG’s are becoming increasingly popular in web applications for their low resource usage and lack of quality loss.

Read More

The 5 Best Tools for Making a Logo Online

Now that you’ve covered some key design tips, let’s look at five of the best tools for creating your own logo design!

1. Canva

Canva

Canva is a free, beginner-friendly tool that’s ideal for users lacking design or coding experience. It’s super simple to get started using the intuitive drag-and-drop editor.

You’ll find a huge library of logo templates to speed up your design process. Better yet, these are organized by industry, such as gaming, food, sports, and more. Then, you can download your logo file or print it onto many marketing materials like business cards or letterheads.

What’s more, the customization options are pretty extensive. For instance, you can change the fonts, swap out color combinations, and add your own text and images. Plus, you’re able to easily include other graphic elements like stickers and shapes.

2. Designhill

Designhill logo maker

Another platform with an easy-to-use logo maker is Designhill. After you enter your company’s name, you can choose up to five different pre-designed templates that you like. This will inform the software about your preferred style.

Then, you can pick a color palette and specific icons. Once you add more details about your business, Designhill will generate custom logos using machine learning and Artifical Intelligence (AI).

With Designhill, you can choose from thousands of logos that contain your specific information, style, and preferences. After selecting your favorite, Designhill will allow you to tweak the layout, background, symbols, and other details.

When you’re ready to purchase the final design, you can download a full logo package. This includes a high-resolution logo in vector EPS and SVG files. You’ll also have full ownership of the logo.

3. Adobe Express Logo Maker

Adobe Express

The Adobe Express free logo maker crafts AI-generated logos that can be shared on all platforms or printed. You’ll get started with a professionally-designed logo template based on details like your business name, industry, and slogan.

Unlike other logo makers, the customization options are pretty basic with Adobe. All you can really do is swap colors and fonts. Plus, you can’t choose a specific font or color combination. Instead, the free logo generator creates new options each time you click on the icon.

Therefore, Adobe Express isn’t the best option for users who know what they want or already have existing brand materials. However, if you’re a new business and are open to suggestions, then Adobe could be an excellent choice.

4. Logo.com

Logo.com

With Logo.com, you can jump right into the logo-making process. You don’t even need to create an account until you’re ready to download your design.

There are plenty of templates on the website, or you can enter your business’ name and select Make a Logo. The free logo creator is tailored to your specific needs, so you’ll be guided through stages to choose your favorite color themes and typography styles.

At the editing stage, you can view more templates, try out different colors, and more. Better yet, you can see your logo on various branding materials, such as business cards, web pages, and letterheads.

5. Looka

Looka

Looka provides an easy-to-use editor for crafting unique assets. What’s great about this tool is that you can access color, white, or transparent backgrounds. Plus, you can choose between various file formats like PNG, JPG, SVG, and EPS.

To get started with the logo-making process, you’ll choose several logos that you like. Then, Looka will automatically generate ideas based on your preferences. Additionally, Looka’s templates are optimized for specific social sites.

Another unique feature of this platform is that you can subscribe to Looka’s Brand Kit. Then, you’ll receive a one-page resource with your brand colors and fonts for future use. Plus, you can make unlimited changes to your logo once you’ve downloaded it.

How to Make a Logo for Free Online

Before you get started with your logo maker, there are a few extra steps to take. First, we recommend having a brainstorming session to come up with rough ideas of what you want to achieve.

It’s easy to get overwhelmed or lose focus if you go into the process completely blind. Therefore, at the very least, knowing what colors you want to use and whether you want to add text to your logo can be helpful.

Besides your imagination, you can also gain inspiration from looking at your competitors. Decide what you like and dislike about their designs.

For example, does the company logo match the brand’s personality? Does it represent the products they sell?

Then, you’re ready to start experimenting with a logo maker. For this tutorial, we’ll use Logo.com since it has plenty of customization options and tailors the editing process to your specific needs. Let’s jump in!

Step 1: Specify Your Logo Criteria

On the Logo.com website, you can choose your favorite pre-made template to get started. However, we’ll show you how to make a logo from scratch.

Enter your company name and click on Make a Logo:

Make a Logo

Alt text: Make a logo with Logo.com

Next, add the company slogan or text you’d like to include in your logo. You can also leave this section blank and hit Skip:

Enter slogan

Now, select your industry. If you start typing, Logo.com generates plenty of options for you, including real estate, fashion, and management:

Add industry

Make your selections and then hit Continue. Or if you’d prefer, select Skip.

Then choose your brand colors. These aren’t set in stone, and can be modified at the editing stage. What’s great about this process is that Logo.com provides some brief emotions and moods that the colors represent.

For instance, purple can be mysterious or spiritual, whereas green is associated with growth and health:

Choose logo colors

Make your selection and hit Continue.

At this point, you can choose your favorite typography style(s). Again, you’ll find tips to help you make a choice.

For example, a modern font adds an urban flair to text. Alternatively, you might prefer a bold font that leaves an impact:

Typography logo

On the next screen, you can determine whether you want to focus on icon-based logos or text-based logos. If you want to include symbols and icons, click on With Icons. Or select Without Icons to focus on the text:

Logo type

If you choose Without Icons, you’ll be taken straight to the editing interface. However, if you opt for With Icons, there is an extra step where you’ll choose up to three keywords to help your brand stand out.

A few keywords will be suggested for you based on your business’ name. You can also click on View More to expand the list of suggestions:

Select logo keywords

Make your choice and click on Continue to finish up the process.

Step 2: Choose Your Favorite Template

After completing all of the previous stages, you’ll be presented with a selection of templates based on your specific criteria:

Logo templates

It’s also easy to change your settings by using the menu at the top of the page. For instance, you can enter a slogan, use the slider to disable/enable icons, and add extra keywords. You’re also able to adjust your color themes and typography styles.

If you decide to change your criteria, click on Generate to find new templates. As you scroll through the designs, more will load beneath them.

When you find a design you like, save it by clicking on the heart icon:

Save logo

You can compare your favorite templates later by selecting Favorites at the top of the screen:

Favorite logos

If you find a template that you’re ready to work with, select Customize:

Customize logo

This will take you to the editing interface, where you can make changes to your logo template.

Step 3: Customize the Design

Now that you’ve chosen a template to begin the logo editing process, you should see a screen like this:

Logo editor

Here, you can take advantage of all the customization options. Alternatively, you can retrieve a different logo template by clicking on Ideas:

Change template

Not only can you swap templates here, but you’re also able to update information such as your business’ name, slogan, and icons.

If you navigate to the Design tab, you can change the alignment of your design elements. You can also select a new template (based on your current logo) and filter the results according to text styles, colors, and more:

Logo design

Switch to the Colors tab, where you can modify your logo colors (without adjusting the design). For instance, under Color Options, you might enable a multi-color business name and slogan.

Meanwhile, you’re able to apply a custom color palette to your business name, background, and elements under Custom Color Palette:

Logo color settings

What’s more, you have another opportunity to swap to a different logo template with a fresh color scheme.

Next, head to Containers to add a container to your design or modify the one you have. You’ll find a list of templates on the left-hand side of the screen. All you need to do is select a new one, and the preview adjusts instantly on the right:

Logo container

At the top of the screen, you can remove the container or change the container color.

Further down, under Business Name, you can edit your company’s name, change the color of the text, and adjust the title case. You might also change the style and weight of the text, and alter the alignment:

Business name logo

Additionally, you’re able to search for specific fonts in the search bar, or apply a new typography style from the templates below.

Step 4: Preview and Download Your Logo

Once you’re happy with your design, you can see how it will look on different branded materials including markups, business cards, and letterheads:

Preview logo

If you scroll further down, you’ll also find a summary of your logo elements, such as the typography you’ve chosen and the HEX codes for your brand colors:

Logo summary

If everything looks as it should, click on Get your logo! You’ll need to register with Logo.com at this stage. This is completely free and only takes a couple of seconds.

Then, you’ll be taken to a new dashboard where you can view, edit, and download your designs:

Logo dashboard

Here, you can sign up for the Brand Plan and make use of plenty of extra features. Alternatively, simply select Logo Files > Your logo files:

Logo files

If you just want to download a single file, select Download your logo:

Download your logo

However, you can also download the logo .zip file for your design. With this option, you’ll receive your logo in various file formats and on different types of backgrounds.

Alternatively, you might download a Brand Board. This resource includes all the visual elements you’ve selected, including your fonts, icons, and colors.

You’re also able to use the tabs on the left-hand side of the screen to view and download your logo for different use cases.

For instance, under Social Media, you can use the Social Editor to create a new post or add your logo to your profile and cover images:

Logo social

With the Brand Plan, you can also easily add your logo to letterheads, invoices, and more.

Make a Logo Online for Free

A logo is a key part of establishing a strong brand identity and web design. However, it may seem difficult to create one on your own, or expensive to hire a professional. Fortunately, you can make a beautiful, memorable logo online for free.

To recap, here’s how to make a logo online for free:

  1. Specify your logo criteria with an online tool like Logo.com.
  2. Choose your favorite template.
  3. Customize the design.
  4. Preview and download your logo

A logo is a great addition to your business website. However, if you want your site to perform as professionally as possible, you’ll also need a quality web host.

At DreamHost, we offer a free domain, free SSL certificate, and 24/7 support. We also provide plenty of hosting solutions, so you’re sure to find an option that best suits your needs and budget. Check out our plans today!

Power Your Brand with DreamHost

We make sure your website is fast, secure and always up so your visitors trust you.

shared hosting

The post How to Make a Logo Online for Free appeared first on Website Guides, Tips & Knowledge.


source https://www.dreamhost.com/blog/make-logo-online-free/

Creating and Mastering GA4 Explorations

In the switch from Universal Analytics (UA) to Google Analytics 4 (GA4) — which will go fully into effect July 2023 — a lot of things have...