Monday, 9 May 2022

ELI5: What Is a Headless CMS & Why Use One?

A Content Management System (CMS) is a software application or set of related programs used to create and manage digital content. For years, the focus has been on traditional CMSs like WordPress or Drupal. However, many back and front-end developers are turning toward a more modern solution, headless CMS.

This so-called “headless CMS” decouples the back end (content creation and management) and database from the front end and presentation layer. This means that the CMS can be used to power any type of front-end application, ultimately providing more flexibility and scalability.

In this post, we’ll provide a comprehensive overview of a headless CMS. We’ll discuss its origin, benefits, what it solves, and common implementations. We’ll then wrap up with some speculation about its future. Let’s jump in!

What is a Headless CMS?

A headless CMS is a back-end CMS that enables you to easily manage and store your content without the need for a front-end website. This means that you can use any platform or device to access and edit your content without worrying about its presentation.

To fully understand what a headless CMS is, it helps first to understand its origin. So let’s take a look at the traditional CMS architecture and how it evolved.

How Headless CMS Is Different From Traditional CMS

Traditional CMSs, also known as “coupled” CMSs, first started in the early days of development. They’re represented by popular platforms such as WordPress and Drupal as a way to store and display various types of content, such as text and images.

With a traditional CMS, all of the elements are in one place, including HTML, CSS, text, images, etc. It uses web frameworks to organize website content and connect the front end with the back end.

Key Features of a Traditional CMS:

  • In-house hosting and delivery
  • Support for limited simultaneous devices
  • Monolithic back-end system
  • Scheduled updates

There are a handful of benefits of a traditional CMS. For example, it serves an entire site from a single system, making it easy to manage content. It also lets developers control the design of a site through templates and themes.

However, as web development advances and becomes more sophisticated, so does our need for scalable and flexible solutions. For instance, many developers want to create content that can be served on devices other than websites. That’s where headless CMS comes in.

A headless content management system is a type of decoupled CMS. Decoupled CMSs are back-end systems that store and manage content but don’t render it on the front-end site. This means that they can be used with any supported front-end system, whether it’s a traditional website, a mobile app, or even a voice assistant.

Key Features of a Headless CMS:

  • Cloud hosting and delivery
  • Limitless supported devices
  • Microservice back-end system
  • Continuous updates

The main difference between a headless CMS and a traditional CMS is that a headless one doesn’t have a built-in templating system for rendering content on the front end. This means that you need to use a separate front-end system to render the content from your headless CMS. Additionally, a headless architecture is often more scalable than a traditional one, as it can be used with multiple servers and devices.

How a Headless CMS Works

A headless CMS stores your content in a cloud-based database. This content can then be accessed through an Application Programming Interface (API), which can be used to render the content on any type of device or platform.

The content repository, known as the “body”, is decoupled from the “head”, also known as the presentation layer. This is why it’s referred to as headless CMS. The presentation layer is separated from the body (content).

A headless infrastructure creates a custom framework for organizing your content types and how they relate to each other. This includes breaking down individual elements. In other words, you won’t be using a preprogrammed model as you would be with a traditional CMS.

To use a headless CMS, you first need to create your content in the back-end system. This can be done using a variety of methods, such as a What You See Is What You Get (WYSIWYG) editor, markdown, or even directly via the API. Once your content is created, it is then stored in the cloud-based database.

It’s important to note that a headless CMS does not directly connect to the front end of the site. It only deals with the content. The content is then published through the API.

When you want to display this content on your website or app, you simply send a request to the API, which will return the content from the database. The front-end system will then render this content using a variety of methods such as HTML, CSS, and JavaScript.

Skip the line and get tips right in your inbox

Click below to sign up for more how-to's and tutorials just like this one, delivered to your inbox.

marketing tips

The Benefits of Using a Headless CMS

Huge companies are using a headless CMS to manage their content. However, small businesses are also finding benefits in using a headless approach.

A headless CMS is perfect for businesses that want to create dynamic and responsive websites or for those who want to be able to easily update their content without having to rely on a web developer. It also gives you the freedom to choose any platform or device to access your content, making it very versatile.

There are many other benefits of using headless CMS solutions. Let’s take a look at some of them.

You Can Use Any Supported Front-End System

With a headless CMS, you’re not tied to a specific platform. Instead, your content is easily accessible through an API, making it easy to use with many types of devices or platforms.

Being served over APIs means that you can choose your front-end system. Developers can also work with PHP over JavaScript or Ruby (or vice versa). Switching frameworks on the front end won’t affect the CMS on the back end.

You Can Make Website or App Changes With Ease

Headless CMSs make it easy to make changes to your website or app. You can edit your content without paying attention to the code.

The content infrastructure eliminates the need for redundant copying and pasting since it unifies all of your  content in a single place. You can change images or text from this centralized hub, and the changes will automatically apply wherever it’s located.

Headless CMS can also help with team collaboration as it replaces the traditional waterfall development process with an agile framework. In addition, it can help you reuse your content and make it accessible on different platforms.

You Can Seamlessly Scale Your Website or App

A headless CMS is often more scalable than a traditional CMS, as it can be deployed to multiple servers and used across a number of devices. Therefore, it’s perfect for businesses that want to create dynamic and responsive websites.

Basically, a headless CMS offers you more flexibility. It allows you to change developer tools and work with your preferred ones.

When to Use a Headless CMS

While a headless CMS offers many benefits, it may not always be necessary to use them. Traditional CMSs can still be a very solid solution.

For example, if you’re creating a single website for yourself or your small business, a traditional CMS will likely suffice. You’ll be able to manage everything from one place and get your site up and running in no time.

On the other hand, if you have more complex needs, a headless CMS may be the better option. More specifically, it can be ideal if your website or application is using JavaScript frameworks such as Angular, VueJS, or React.

It’s also preferable if you plan on making a native mobile app and any project that requires you to publish content across multiple platforms simultaneously. A headless CMS is also useful for e-commerce sites.

If you’re thinking of using a headless CMS for your business, consider the following questions:

  • Do you need a front-end website?
  • Do you want to be able to update your content easily?
  • Do you want the freedom to choose any platform or device to access your content?
  • Are you comfortable working with code?
  • Do you have the budget to hire a web developer?

If you answered “yes” to any of these questions, a headless CMS could be a solid solution.

How to Choose a Headless CMS

If you decide to use a headless CMS, there are some important factors to keep in mind. In most cases, you may have to spend some time testing the interface and API to find the platform that you’re most comfortable with.

When deciding on a headless CMS, you might want to consider the following questions:

  • What type of content do you need to manage?
  • How will this content be used?
  • Who will be responsible for creating and managing the content?
  • What budget do you have for a headless CMS?
  • What level of technical expertise do you have?

You’ll also need to research the different headless CMS options available and read reviews from other users to see which one would be the best fit for your needs. Again, there are many options available, so taking the time to understand each platform’s use cases and features fully is important.

Many headless CMSs are available as a Software-as-a-Service (SaaS) solution. Others let you handle the hosting, database, and servers on your end. For instance, you could use a DreamHost Virtual Private Server (VPS) environment.

Let’s look at some of the most popular headless CMS solutions.

Contentful

Contentful is an API-driven headless CMS:
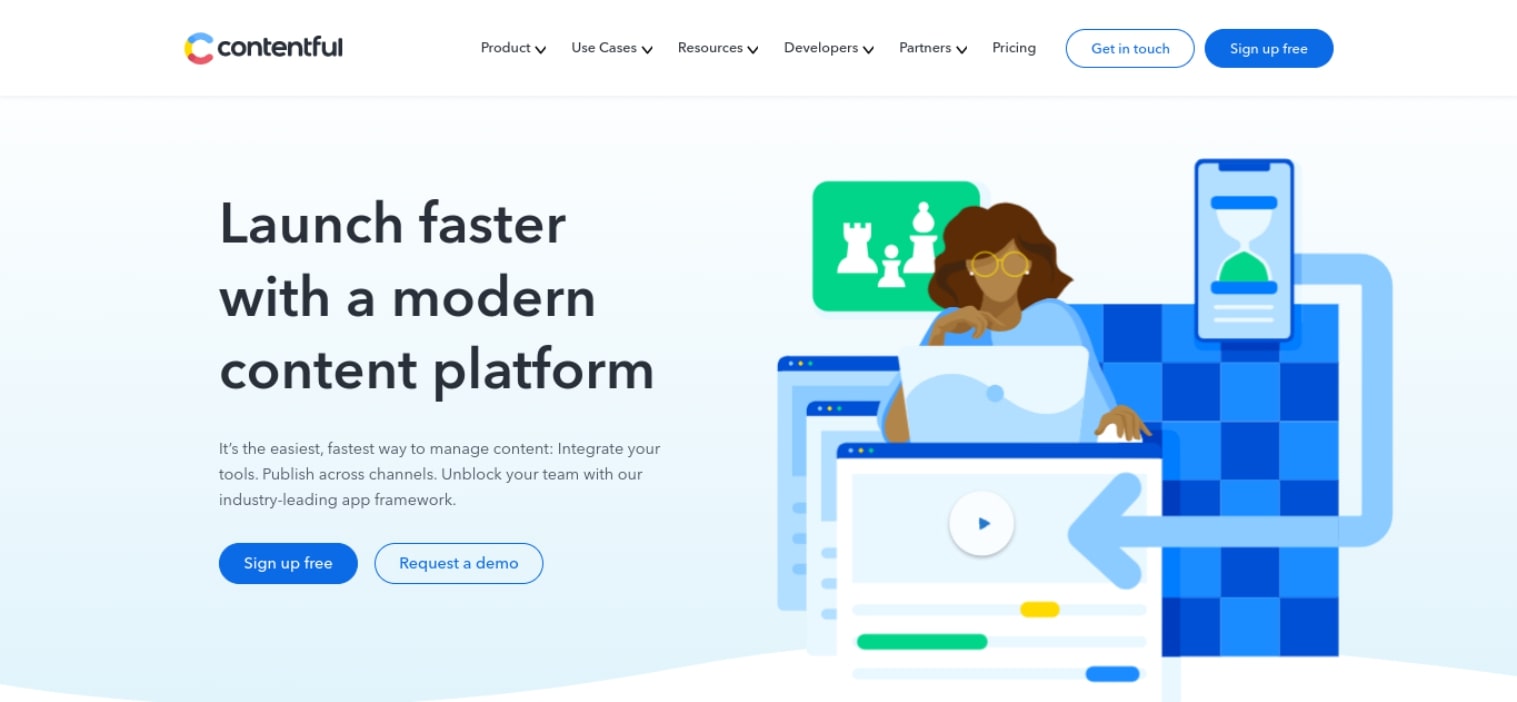
Contentful headless CMS

It provides a centralized hub that lets users edit content from anywhere. It also features a user-friendly User Interface (UI) that is easy for beginners to navigate. As a result, this platform is best for small to medium-sized businesses.

Strapi

Strapi is popular open-source headless CMS that is self-hosted:
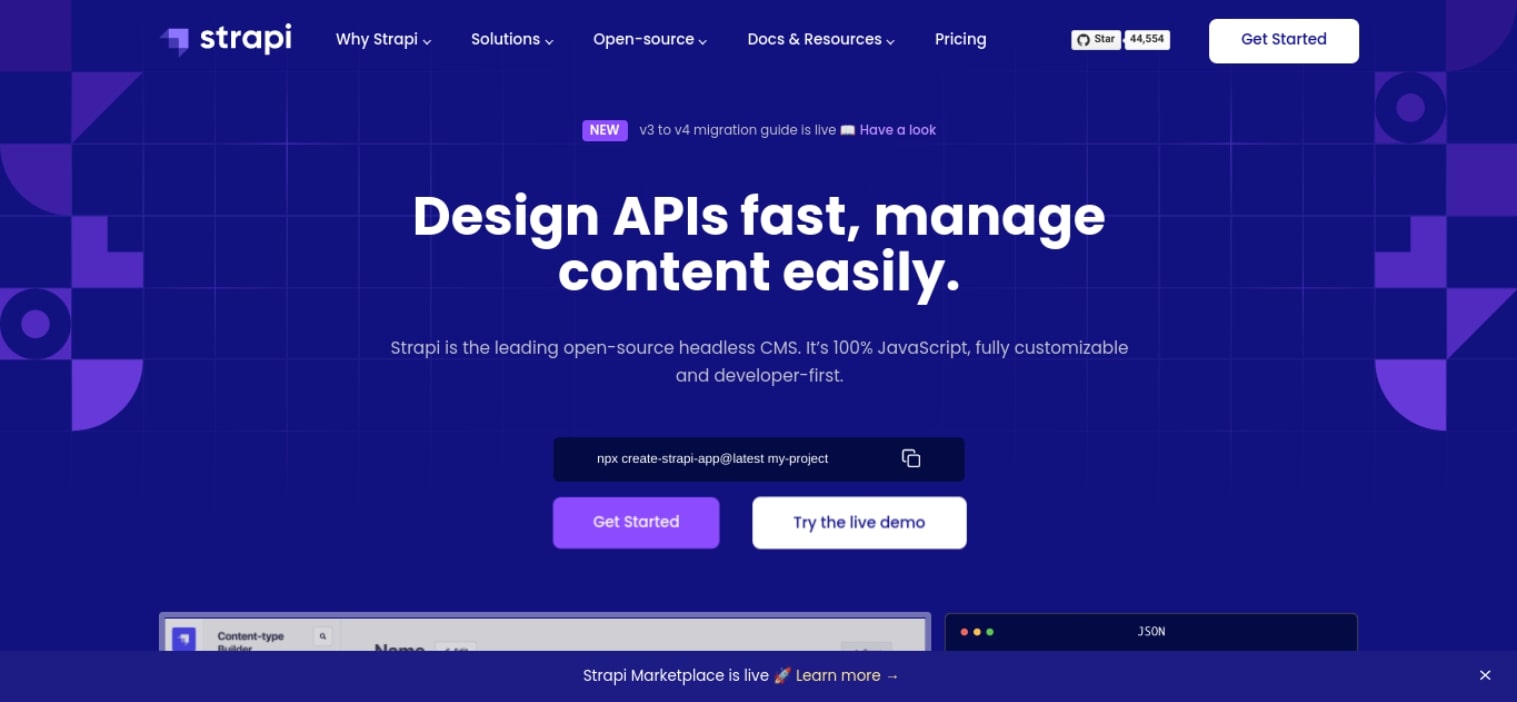
Strapi headless CMS

It works entirely with JavaScript and is highly customizable. This makes it a solid option for developers looking to enhance their workflow productivity. It also works with a RESTful API or GraphQL.

WordPress

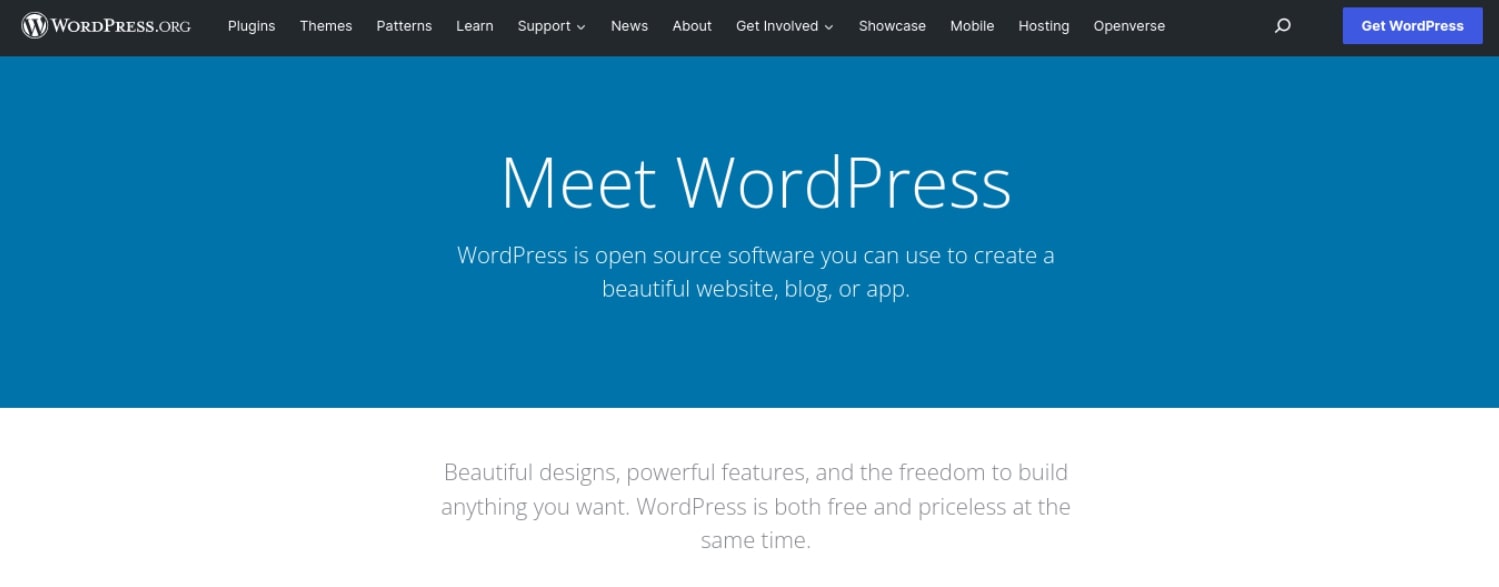
WordPress is one of the most popular, powerful, and flexible CMSs in the world:
WordPress open source headless CMS

While it started as a traditional CMS, you can use WordPress as a headless system because it’s open-source and offers a RESTful API. WordPress can also help heighten your site security since hackers won’t be able to access your back end.

The Future of the Headless CMS

The future of the headless CMS is looking very bright indeed. As more and more businesses discover the benefits of using a headless CMS, we can expect to see more headless CMS options becoming available over the next few years. We also anticipate seeing more features added to headless CMSs, such as support for multilingual websites and apps.

More businesses and marketers will likely recognize the benefits of using a headless CMS and want to take advantage of the opportunity to save money, improve productivity, and increase time to market. In an increasingly omnichannel world, it will be unsurprising to see using a headless CMS as an essential development strategy in an increasingly omnichannel world.

Get Started With Headless CMS Development

The right CMS can help you create and manage your digital content more effectively. However, more developers are moving away from the traditional CMSs in favor of headless CMS solutions.

As we discussed in this post, a headless CMS is a decoupled architecture that separates the content repository from the presentation layer of a website or application. It can be a powerful option if you’re looking for a highly flexible, scalable, and versatile environment for developing dynamic projects.

Do you want to switch to a scalable hosting solution for headless CMS? Check out our VPS hosting plans to learn more!

Take Charge with Flexible VPS Hosting

Here’s how DreamHost’s VPS offering stands apart: 24/7 customer support, an intuitive panel, scalable RAM, unlimited bandwidth, unlimited hosting domains, and SSD storage.

VPS hosting provider

The post ELI5: What Is a Headless CMS & Why Use One? appeared first on Website Guides, Tips & Knowledge.


source https://www.dreamhost.com/blog/headless-cms/

Friday, 6 May 2022

Why You Should Update Your PHP Version (& How to Do It)

Regularly updating your site’s copy of WordPress ensures that your website will have a high level of performance and security. If you forget to update your site’s PHP version though, you’re leaving your site vulnerable to both hackers and potential performance bottlenecks. Yikes!

Fortunately, it’s fairly easy to check your site’s current PHP version and proceed with upgrades if it happens to be outdated. This process can contribute to faster load times, improved security, and support for new functionality.

This article will discuss what PHP is, and why you should consider updating it. Then, we’ll show you how to check your current PHP version and upgrade it if needed. Let’s get started!

An Introduction to PHP

update your PHP version

PHP is a programming and scripting language that plays an important role in WordPress development. PHP takes data from the database and converts it into an HTML web page whenever someone visits your website.

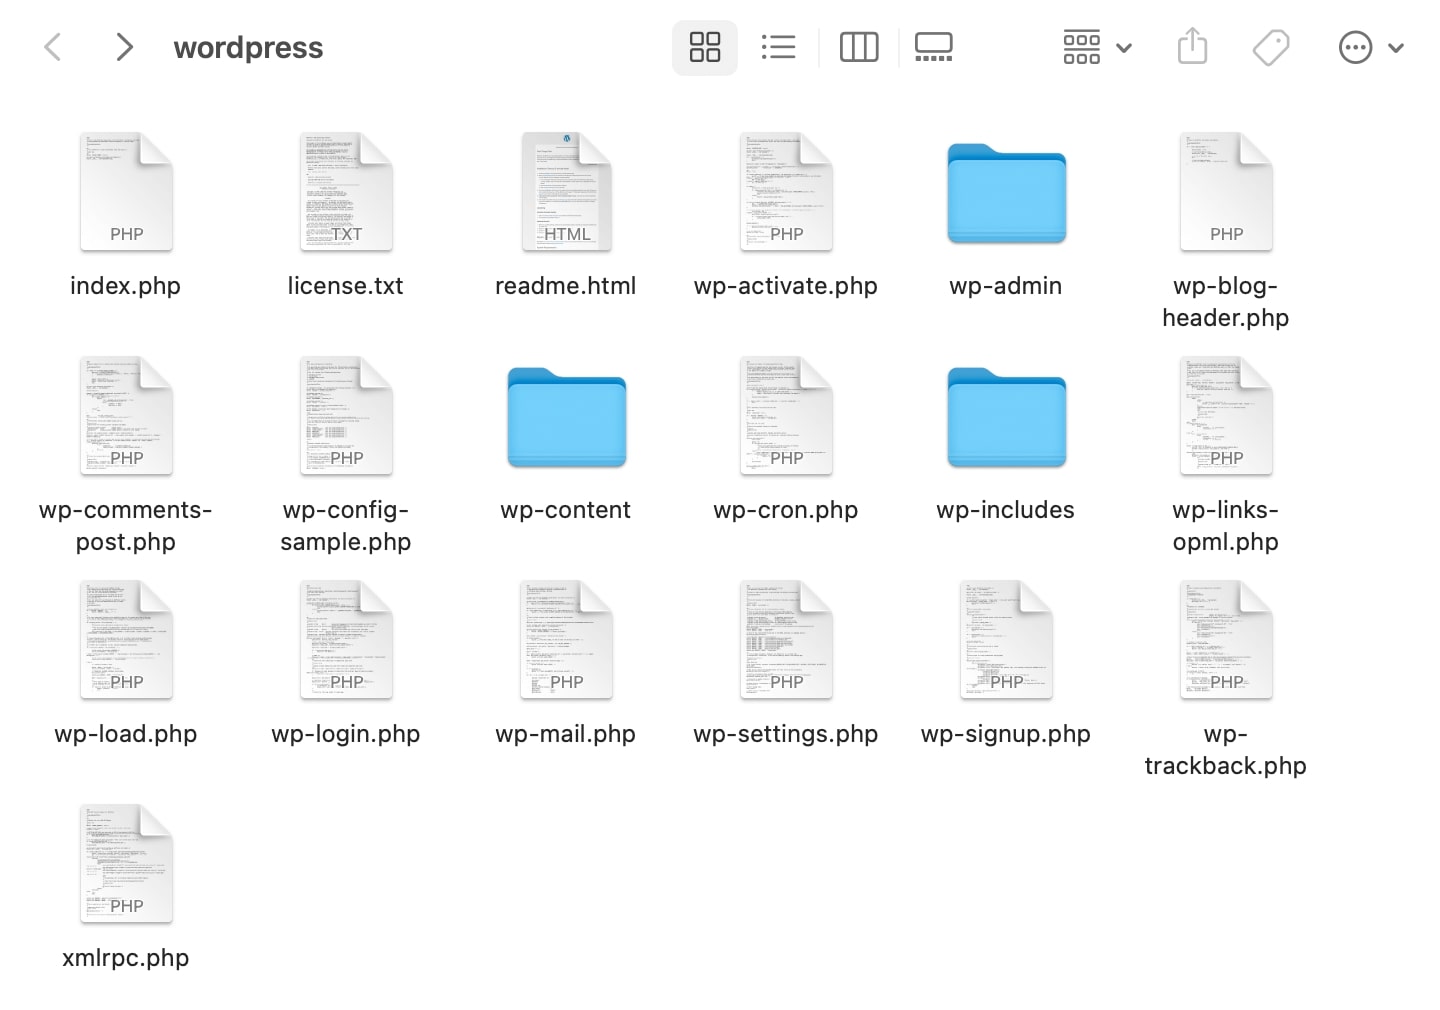
As a website owner, you might never need to learn PHP coding. However, after downloading WordPress, you’ll automatically receive all of the PHP files that make up WordPress core:

WordPress folder in FTP client

Although these files have been written for you — and are just waiting for your content, themes, and plugins — there are some scenarios where you can benefit from editing PHP files:

Since PHP is one of the key languages behind WordPress, learning a little bit about how to work with it will open up the scope of projects that you are able to do.

It’s likely that you won’t have to edit your PHP files. Still, learning the language can be handy for developers who wish to create new software or customizations.

Why You Should Update Your PHP Version

You might already be familiar with the importance of updating your WordPress, themes, and plugins. It’s also crucial to regularly update your PHP version:

PHP 8.1 released

Currently, WordPress recommends upgrading your PHP version to at least 7.4. This isn’t required, but older versions may have reached their end of life, meaning they no longer have active support for bug fixes or security updates.

Here are the main benefits of upgrading your sites to the latest PHP version:

  • Better security: Older PHP versions can be more vulnerable to cyberattacks.
  • Improved performance: Upgraded PHP can improve load times through internal code improvements and reduced memory usage.
  • More support: Currently supported versions have active support, with regular bug fixes and security patches.

Take it from our Director of IT Operations, Luke Odom:

“Running a modern, supported, version of PHP is one of the best things you can do for the health, security, and speed of your website. Let’s compare an outdated PHP version to an old car. Sure, it will run and get you from point A to B, but without modern safety sensors, technology, fuel efficiency, and GPS navigation you may find yourself in some trouble a bit more easily.”

Ultimately, your website will be faster and more secure when it’s running on the latest version of PHP. Many web hosts provide automatic updates for their customers, but if you’re not with one of these hosts, you can follow this manual process.

How to Check Your Current PHP Version

Before you get started, you should check which PHP version is currently supporting your website. If you’ve installed WordPress 5.0 or higher, you can view your PHP version in your dashboard.

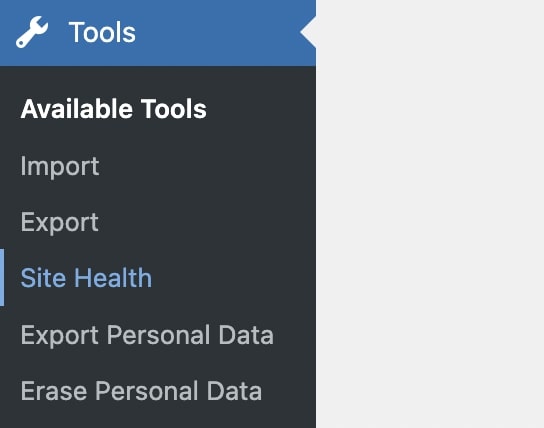
First, go to Tools > Site Health:

WordPress Tools Site Health

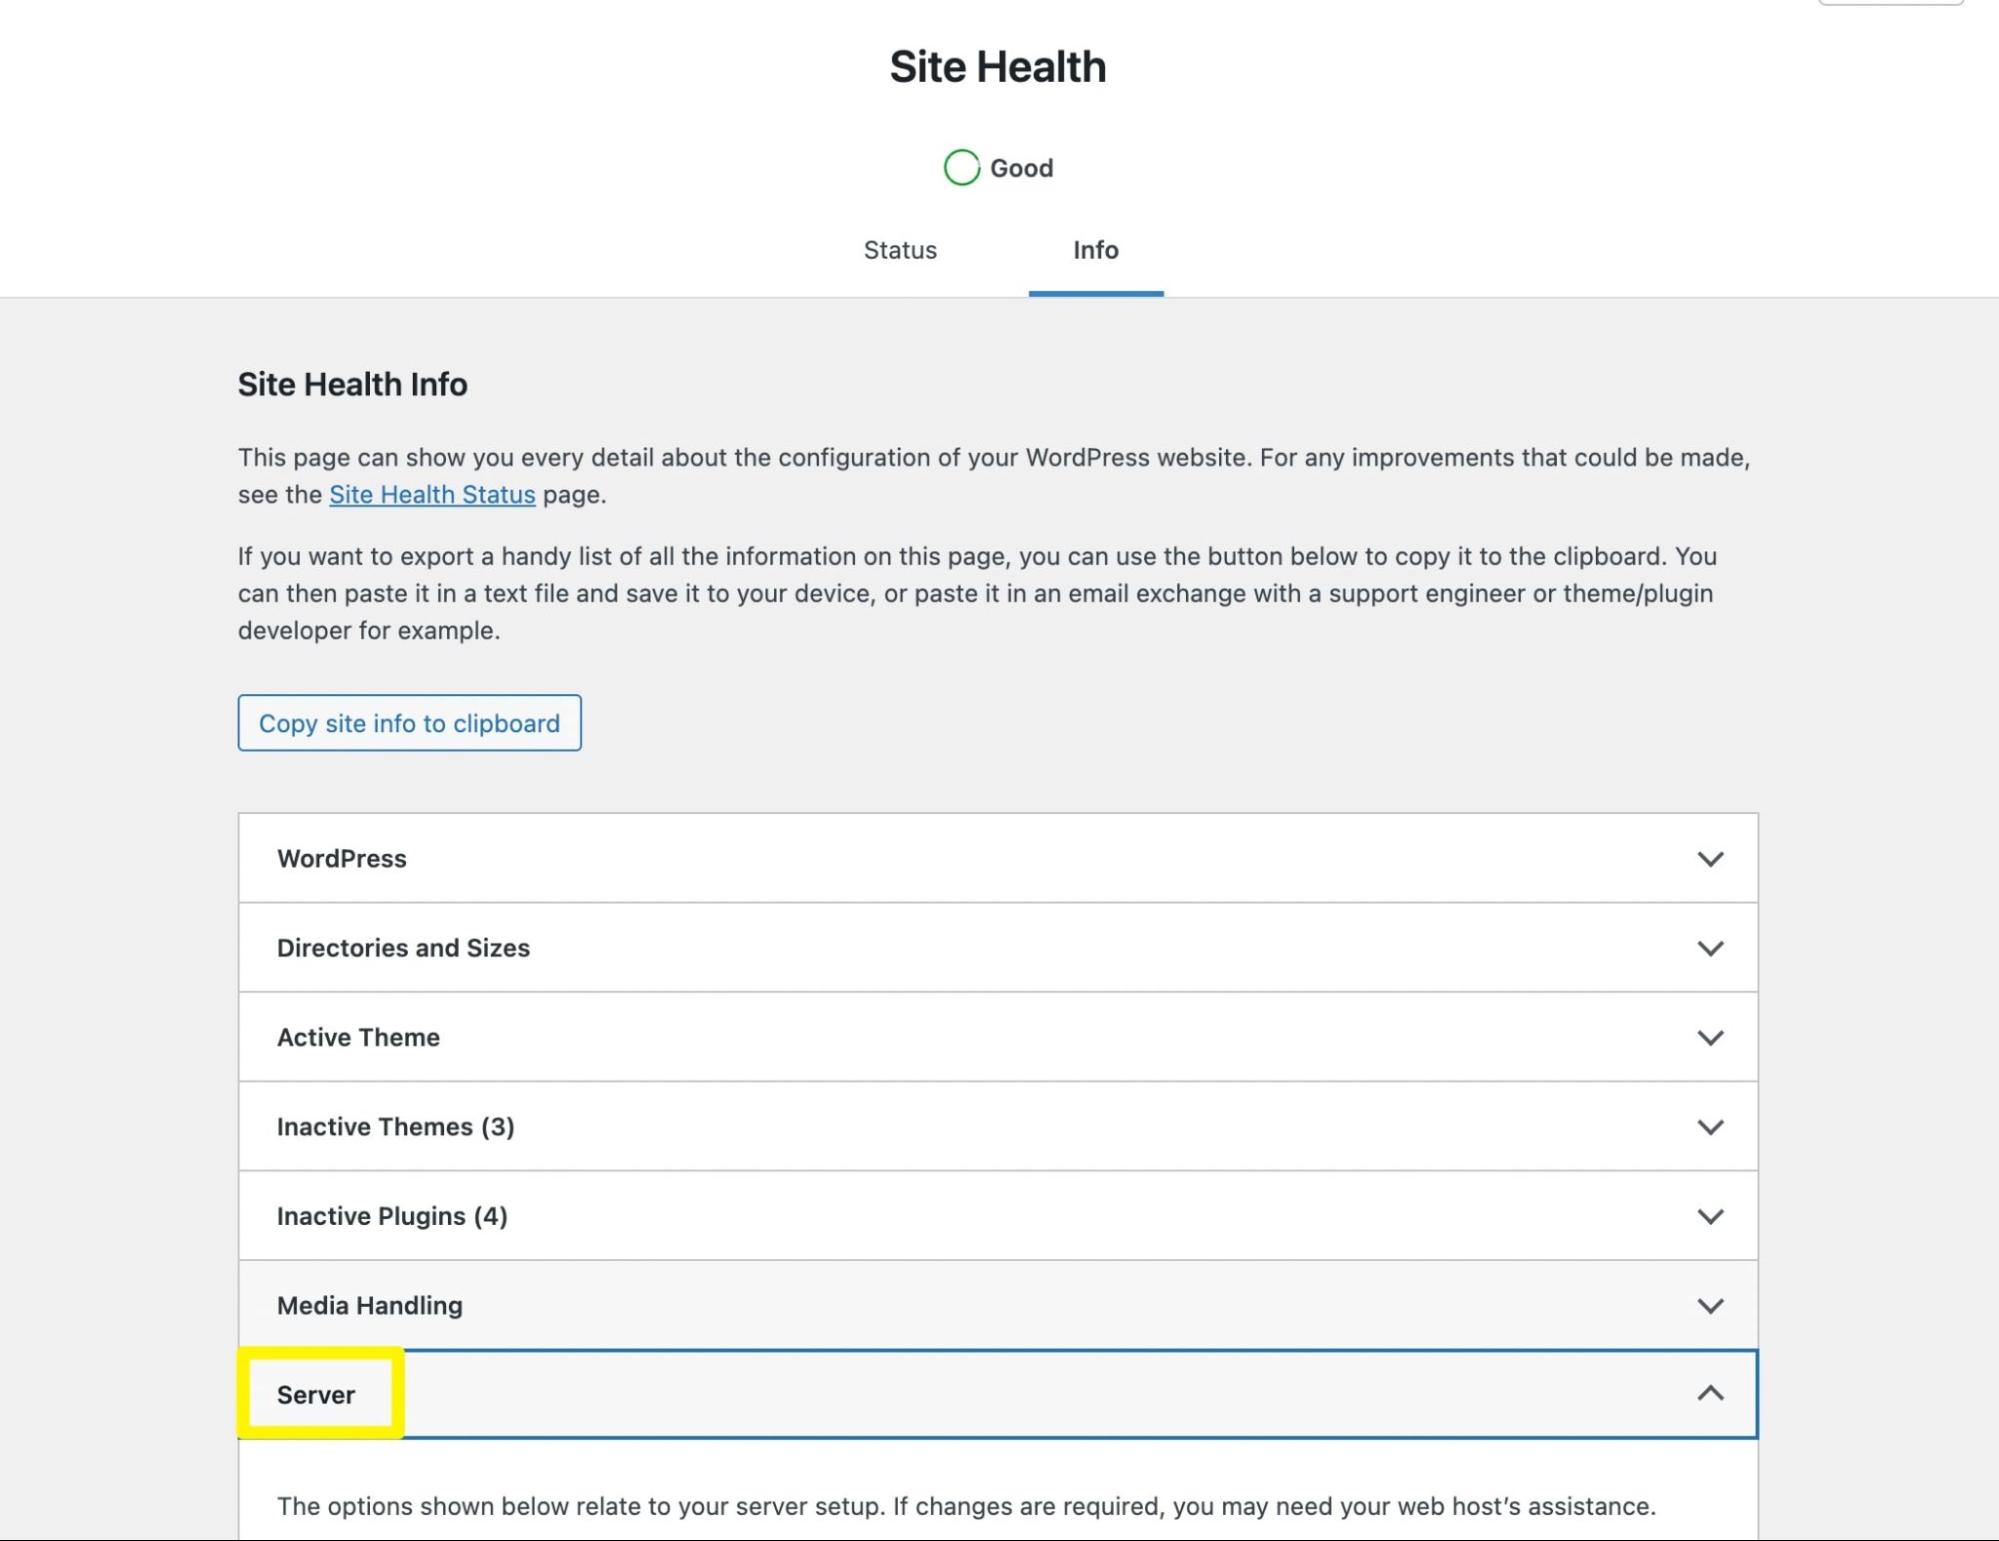
On the Site Health page, click on Info. Then find the Server section:

view server Site Health in WordPress

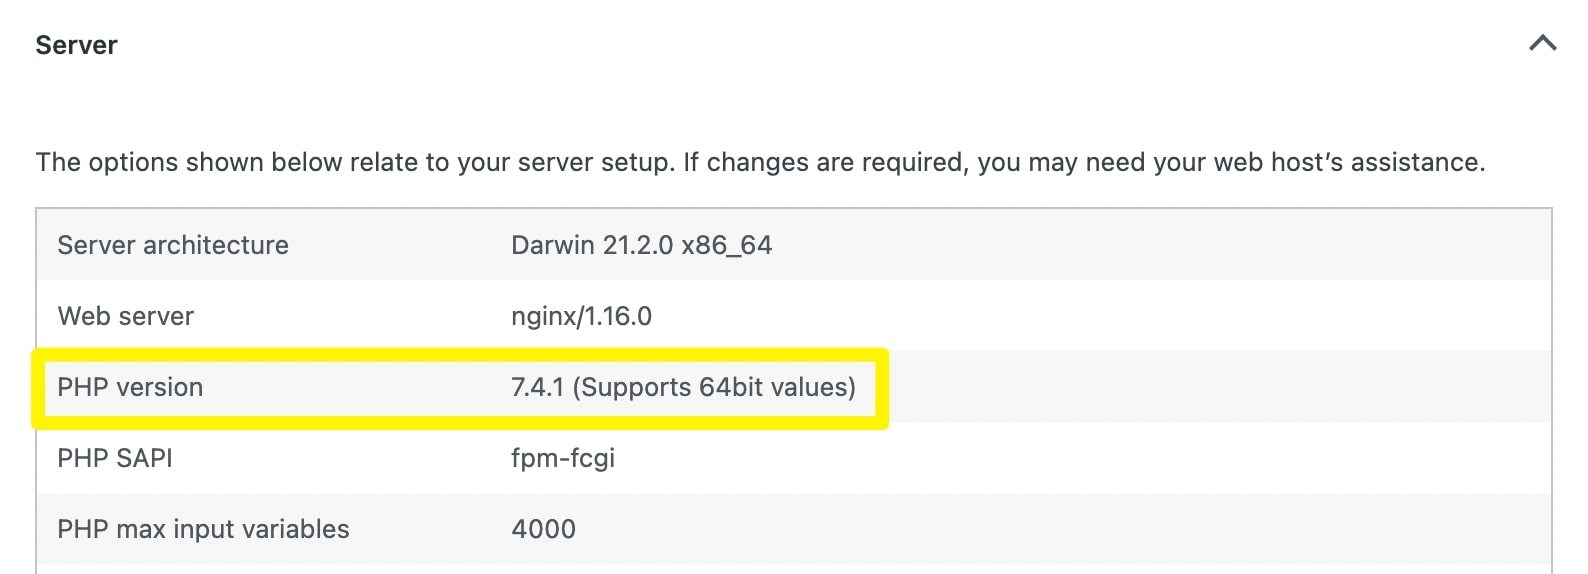
Here, you should be able to see your current PHP version:

view your server's PHP version

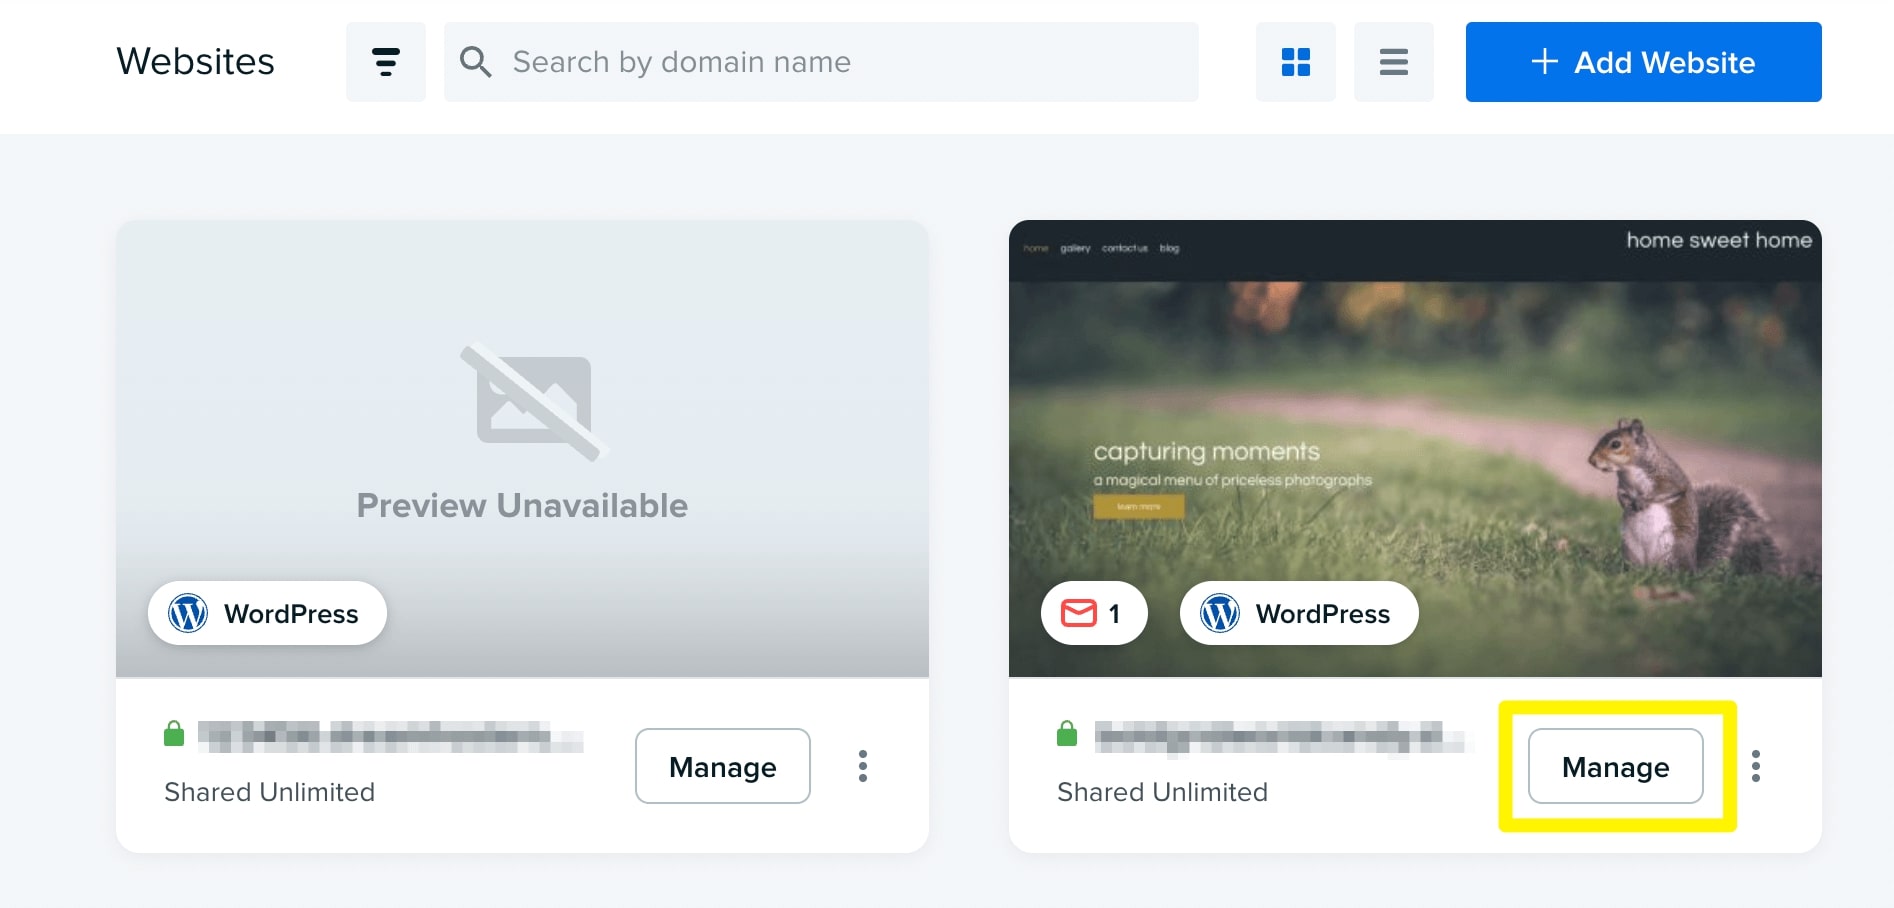
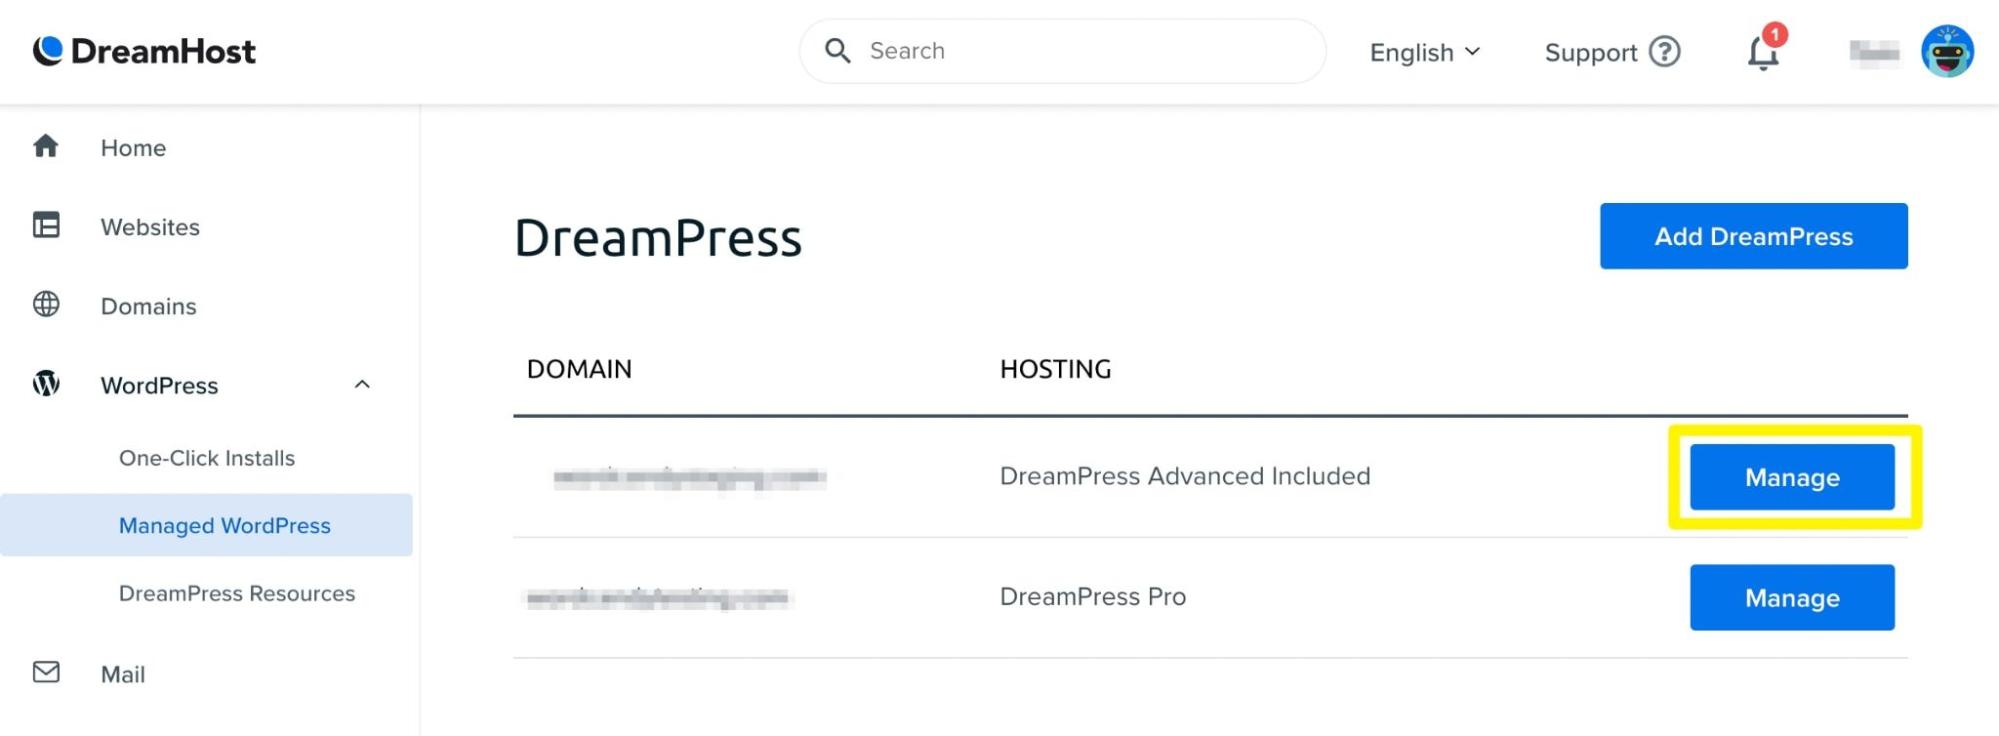
Another simple method for checking your PHP version is using your web host’s control panel. For DreamHost websites, click on the Manage button next to your domain:

manage websites in DreamPress Panel

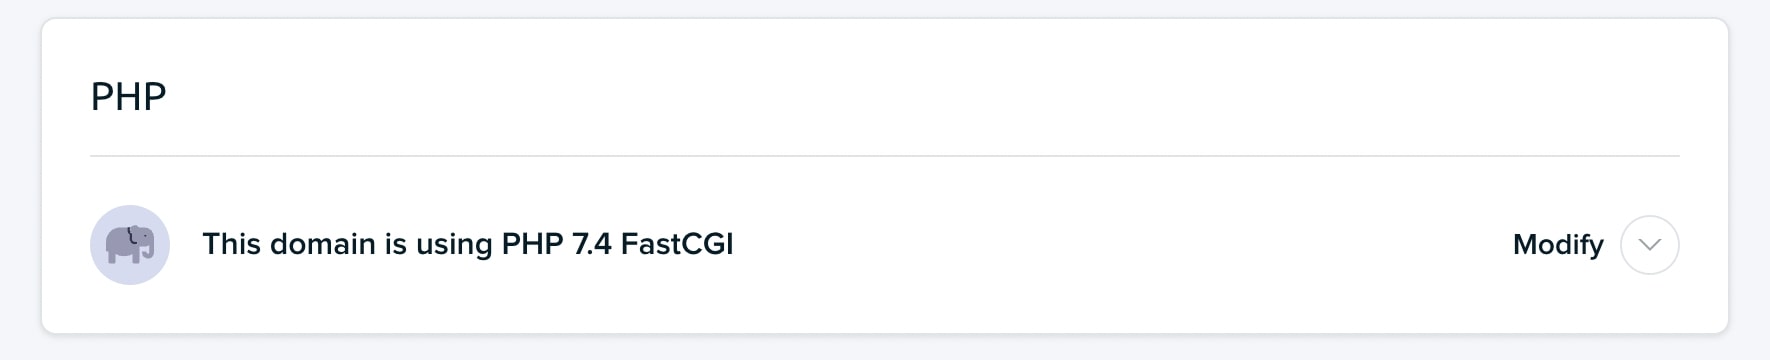
Then, find the section labeled PHP. This will list your site’s PHP version:

modify your PHP version

The latest PHP release is 8.1. If you have a version older than 7.4 — the version that the WordPress project suggests — you can proceed with the following steps.

Skip the line and get tips right in your inbox

Click below to sign up for more how-to's and tutorials just like this one, delivered to your inbox.

marketing tips

How to Update Your PHP Version (In 4 Easy Steps)

Once you decide to update your version of PHP, we recommend taking a few precautions. Firstly, consider backing up your website. If anything goes wrong, you can roll back your version of PHP and then revert your site to the backed-up version.

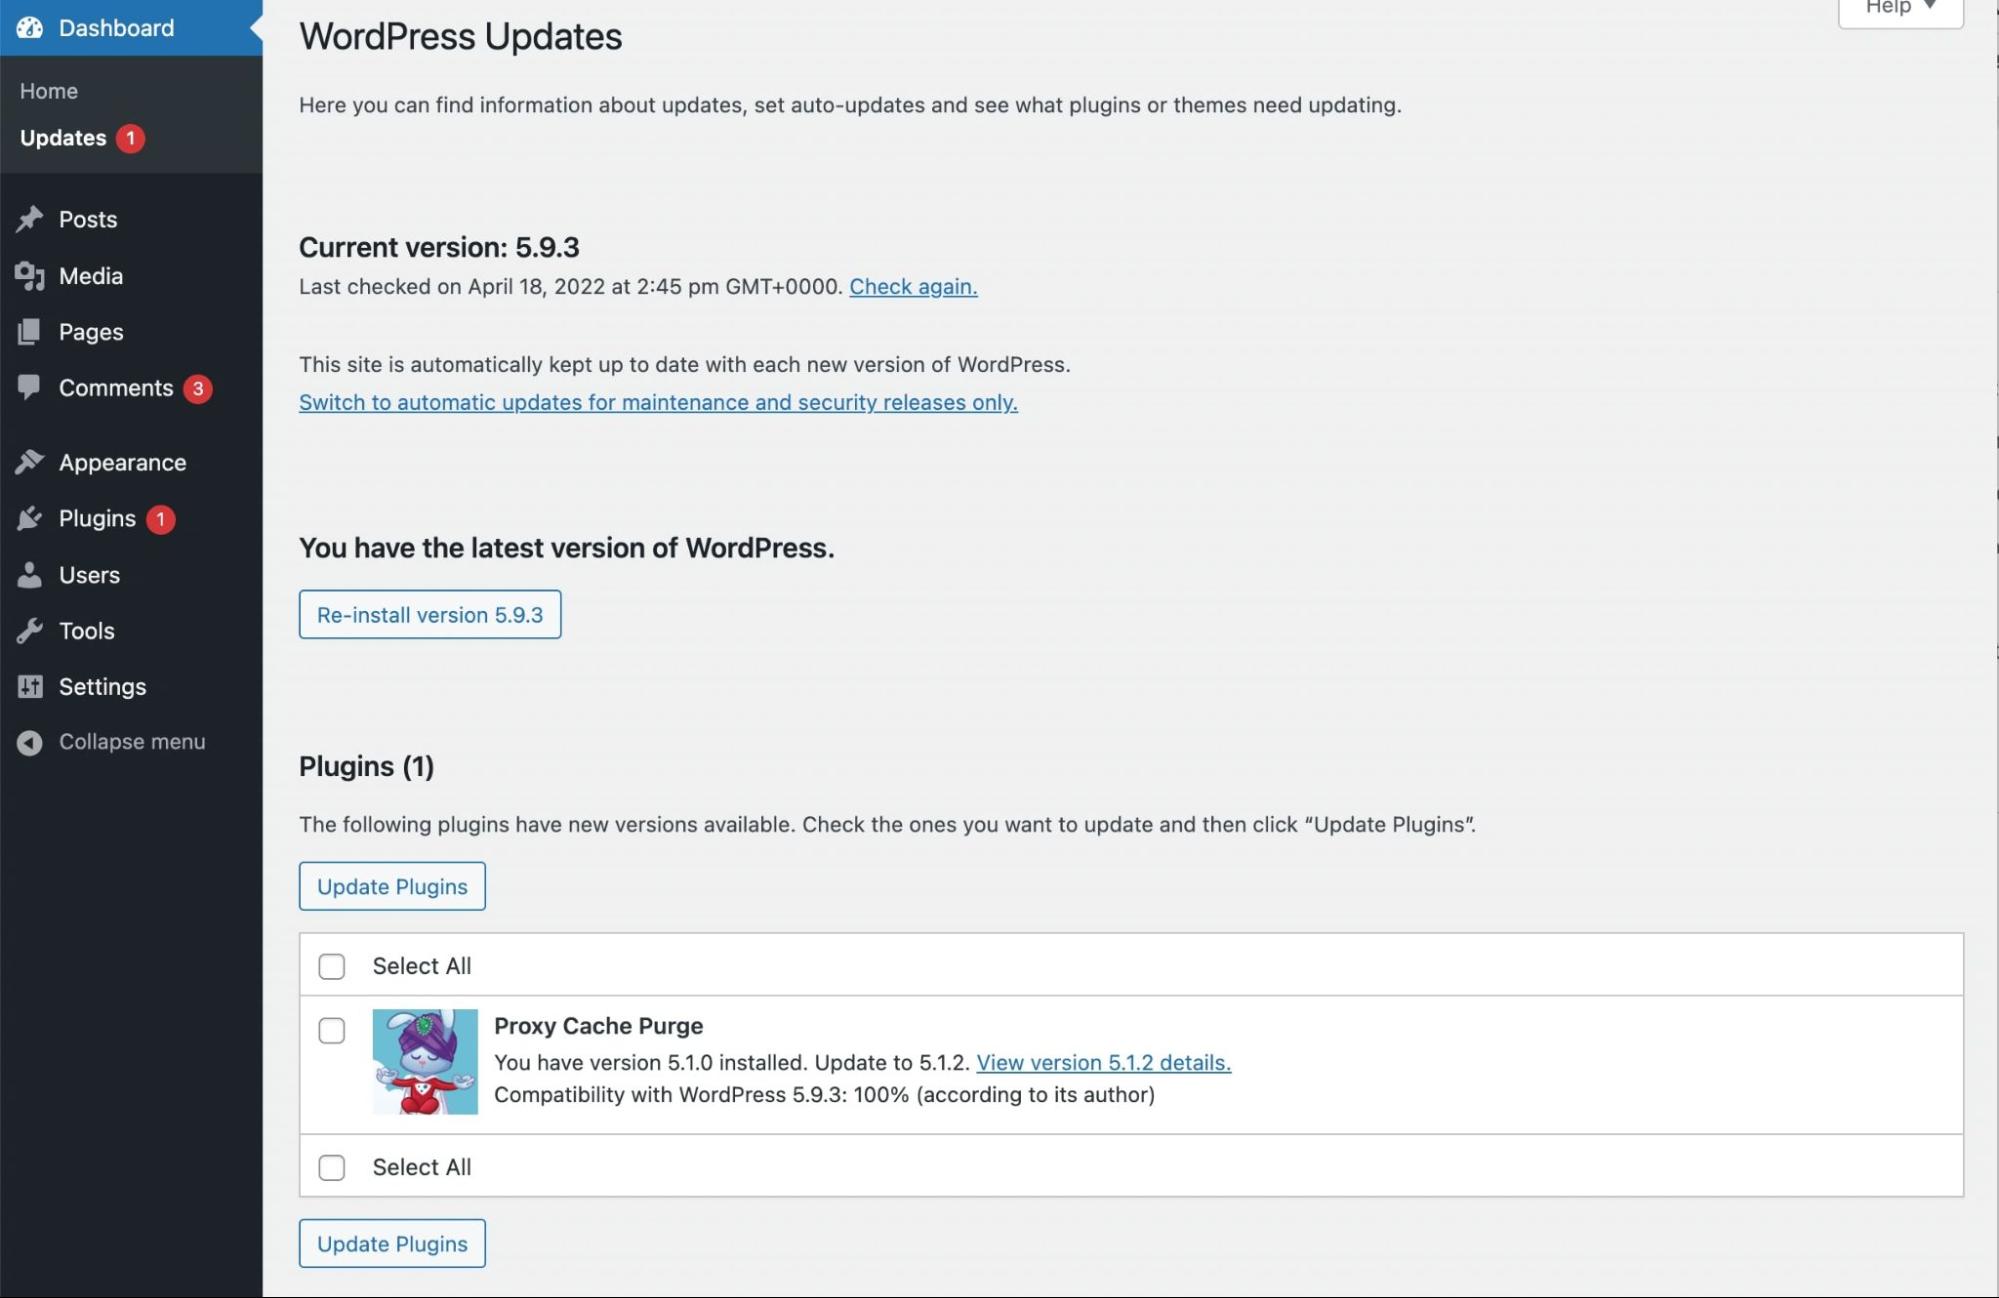
Next, make sure your website is fully up to date. In your dashboard, go to the Updates page and install the latest versions of WordPress, themes, and plugins:

WordPress Proxy Cache plugin

After taking these preventative steps, you can start manually updating your PHP version. As a simpler alternative, you can also contact your hosting provider. The host can typically handle this process for you.

Step 1: Create a Staging Site

Updating your PHP version can cause software conflicts on your website. Therefore, it’s wise to test the update in a staging area initially. This creates a separate, safe environment to implement changes rather than breaking your live site.

With many hosting providers, you can create a staging site through your control panel. For this tutorial, we’ll be using the DreamHost panel.

If you have a managed DreamHost plan, you can set up your staging site in minutes. Simply open your control panel and navigate to WordPress > Managed WordPress > Manage:

DreamPress managed WordPress settings in PanelOn the next page, go to Staging. Then, click on Create Staging Site:
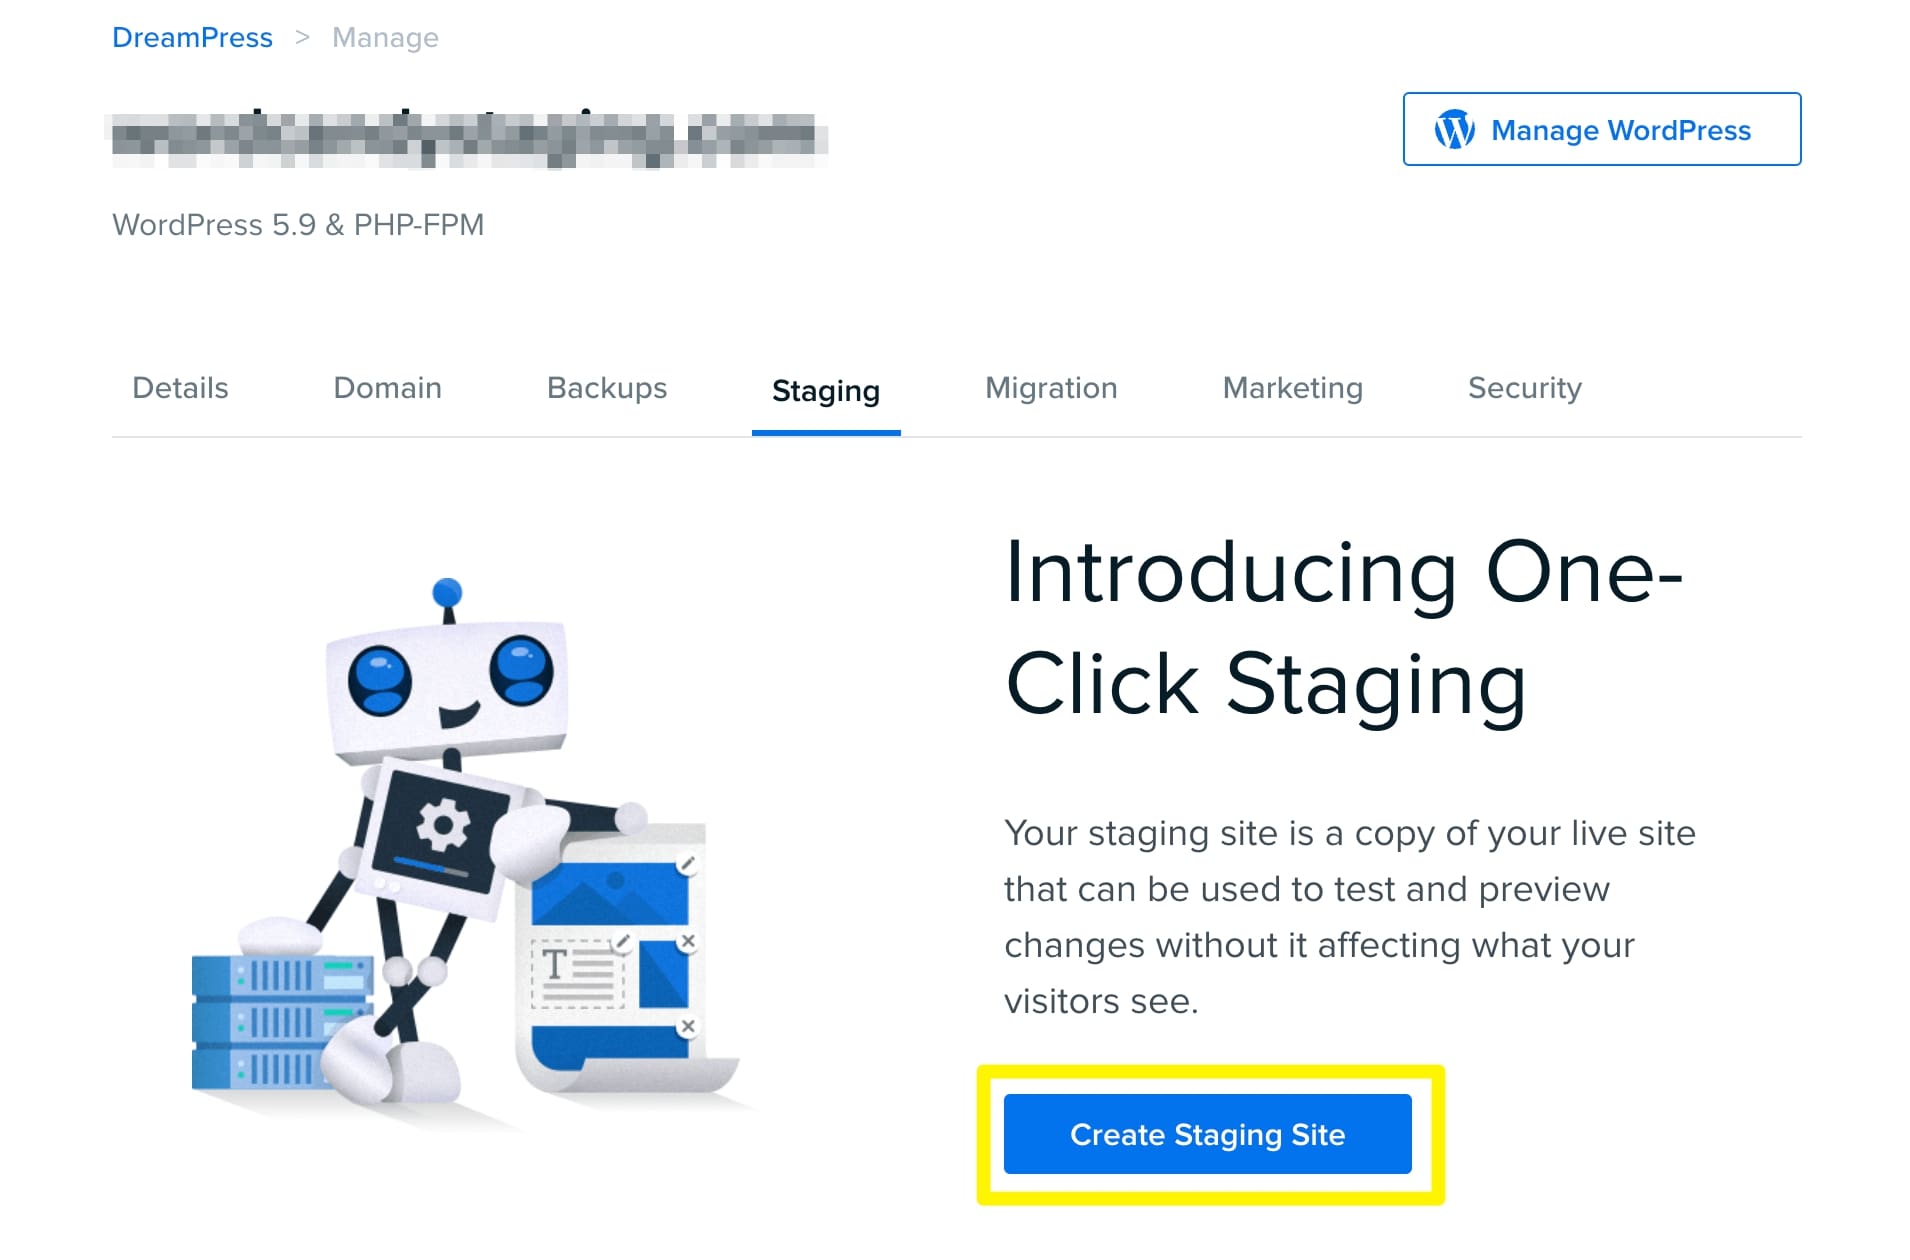
create a one click staging site with DreamPress managed WordPress hosting

This will set up your staging site on an automatically generated subdomain. After this, you can update your PHP version without editing your live site.

Step 2: Change Your PHP Version

No matter your hosting provider, you can usually change your website’s PHP version through your control panel. This process will look different based on your host, but you’ll want to look for a MultiPHP Manager or PHP Selector.

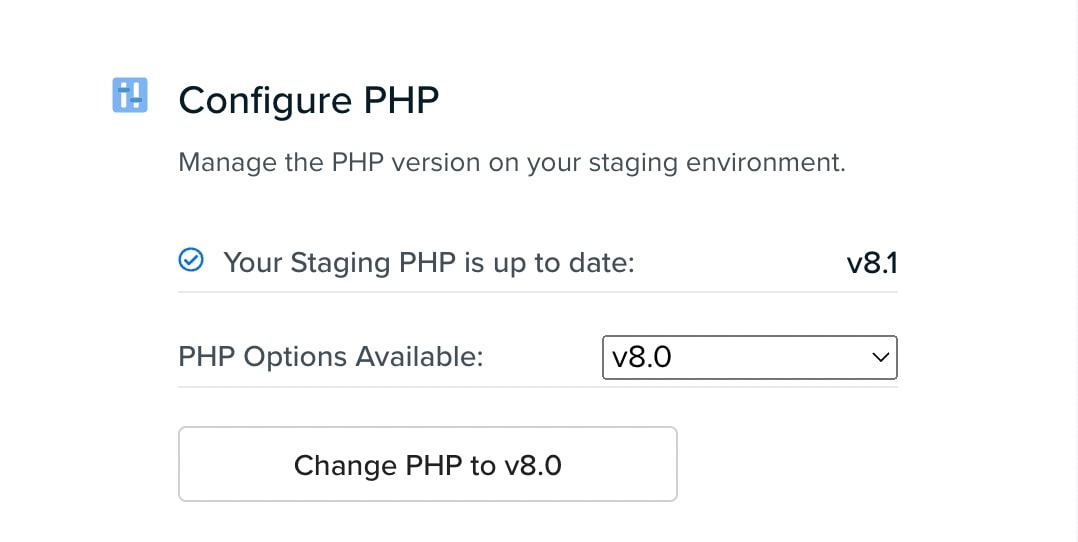
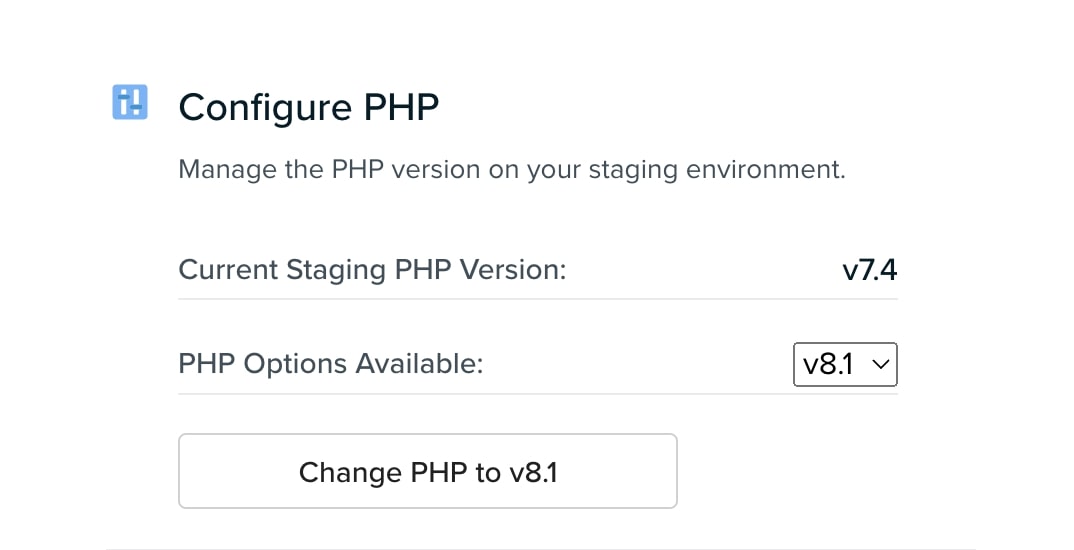
To edit your DreamHost staging site, you can simply scroll down to the Configure PHP section. This section will list your current PHP version and the most recent update option:

change PHP version

To update PHP, click on Change PHP to v8.1. If successful, this section will indicate that your site is up to date:

configure your PHP version

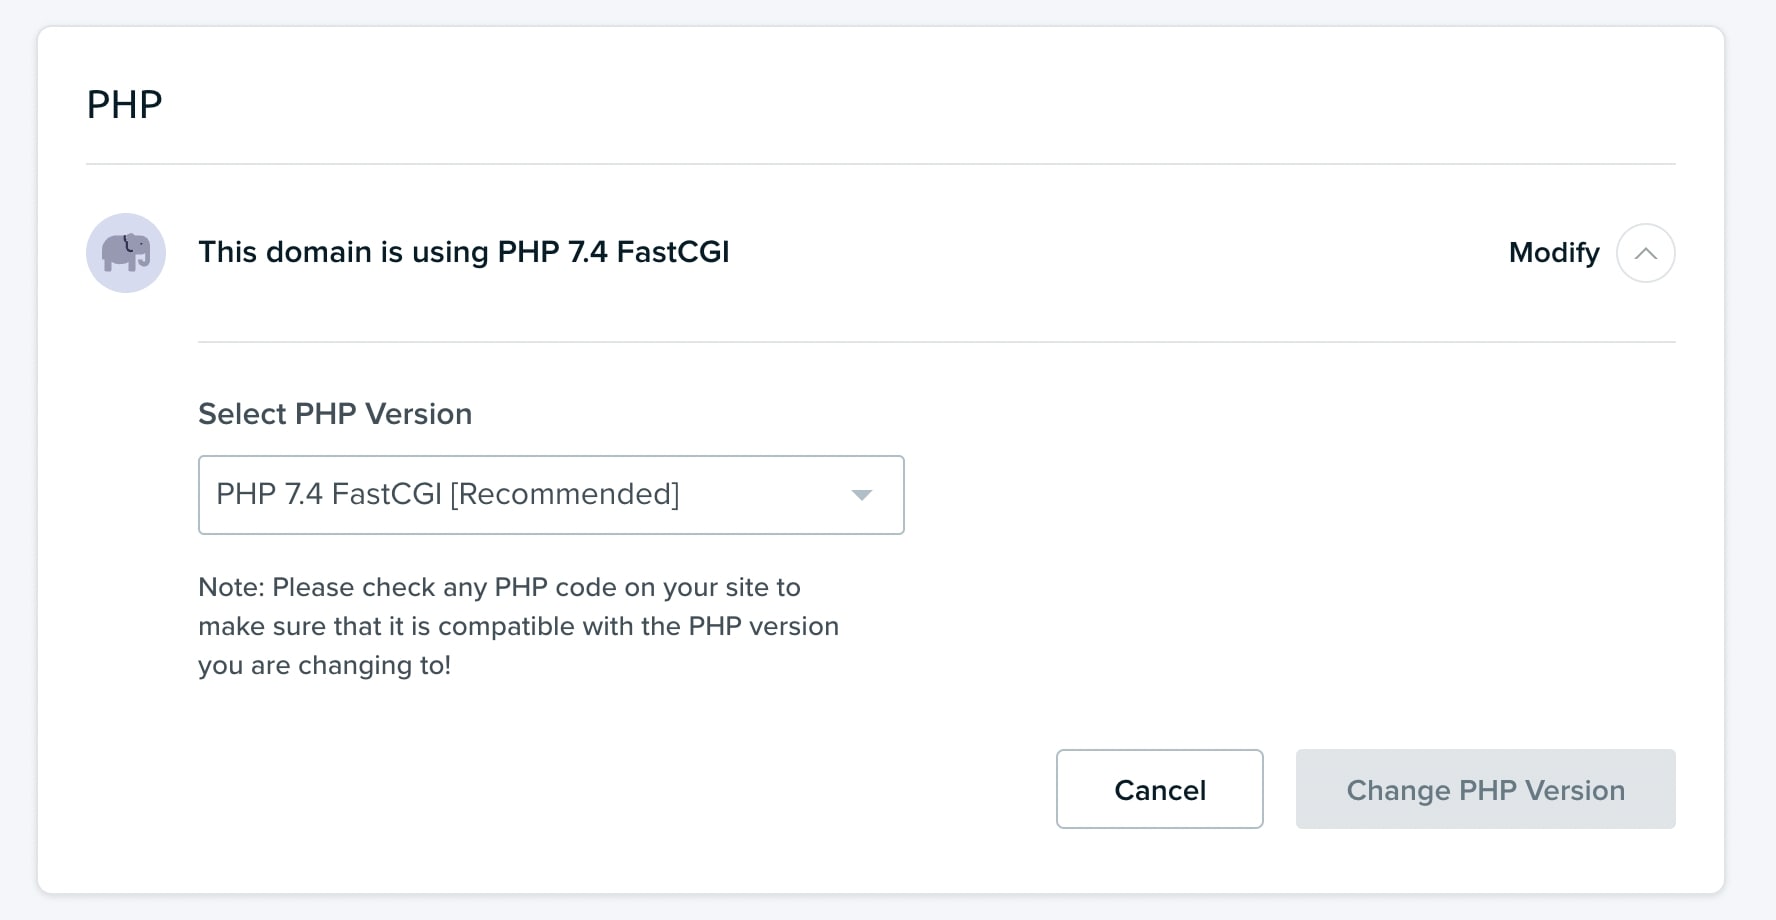
Although it isn’t recommended, you can also directly modify your live website. In your DreamHost panel, go to Manage Websites. Then, scroll down to PHP and click on the arrow next to Modify:

select PHP version in the DreamHost panel

Lastly, select the new version you want to run on your website. Click on Change PHP Version to finish the process.

Step 3: Look for Conflicts

After updating your PHP version, we recommend reviewing your plugins and themes for conflicts. Upgrading PHP may cause common problems such as the White Screen of Death or 500 internal server errors.

Whether you updated a staging environment or your live site, visit the front end to see if everything is functioning correctly. If you notice any errors after browsing the website, you’ll need to troubleshoot the issue.

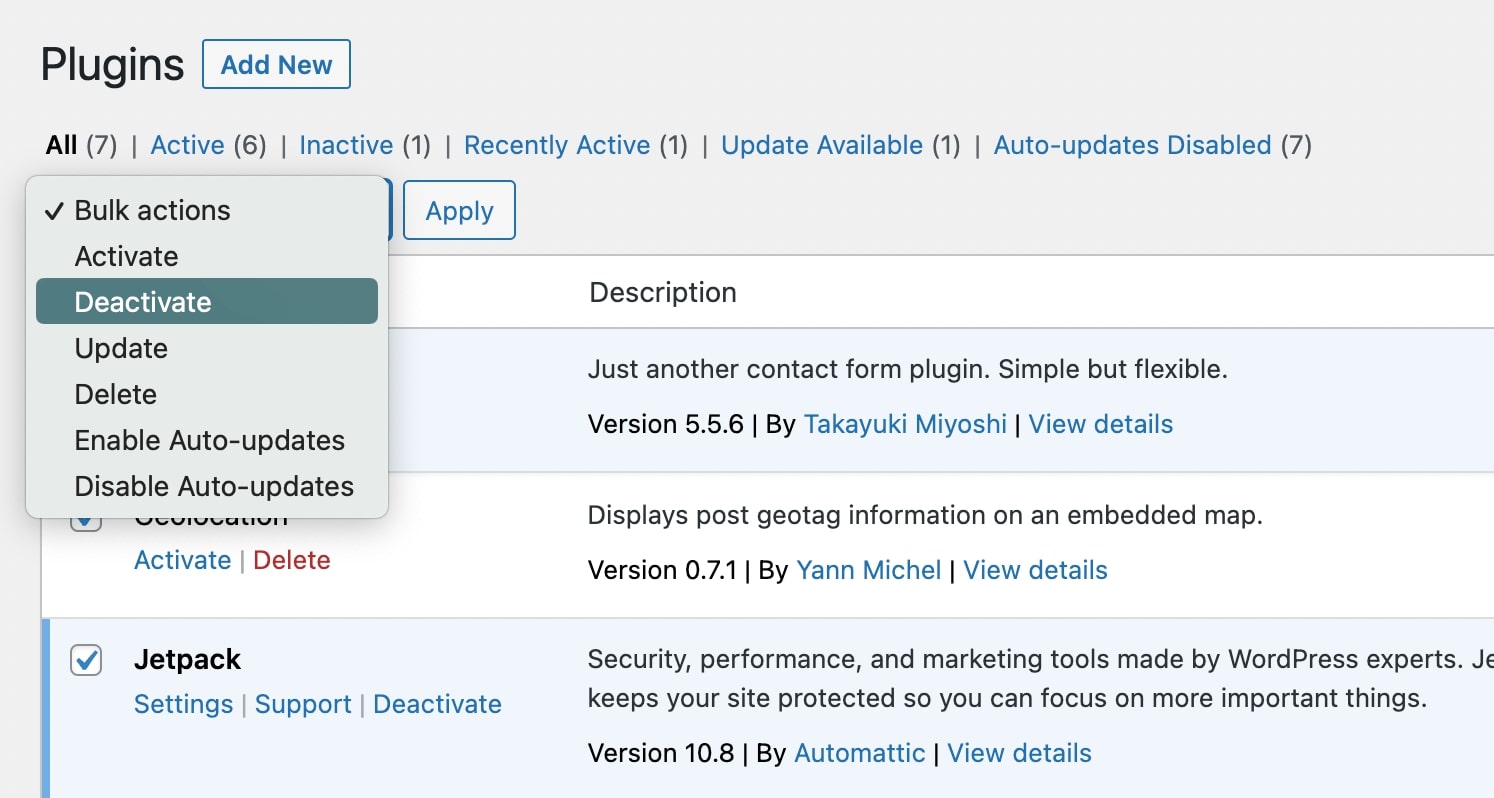
One common reason for WordPress errors is a plugin conflict. When issues arise, try deactivating all of your plugins using the Bulk Actions on your Plugins page:

deactivate WordPress plugins

To target the conflicting plugin, reactivate each plugin one by one. Then, you can download a similar plugin or delete it if it’s unnecessary.

If you face additional problems like exceeded maximum execution time or maintenance mode errors, you might need to edit your wp-config.php file. This process could require more extensive troubleshooting, such as increasing your PHP memory limit.

Step 4: Publish Changes to Your Live Site

If you implemented a new PHP version on a staging site, it’s time to publish this change on your live website. Usually, you can do this in your host’s control panel.

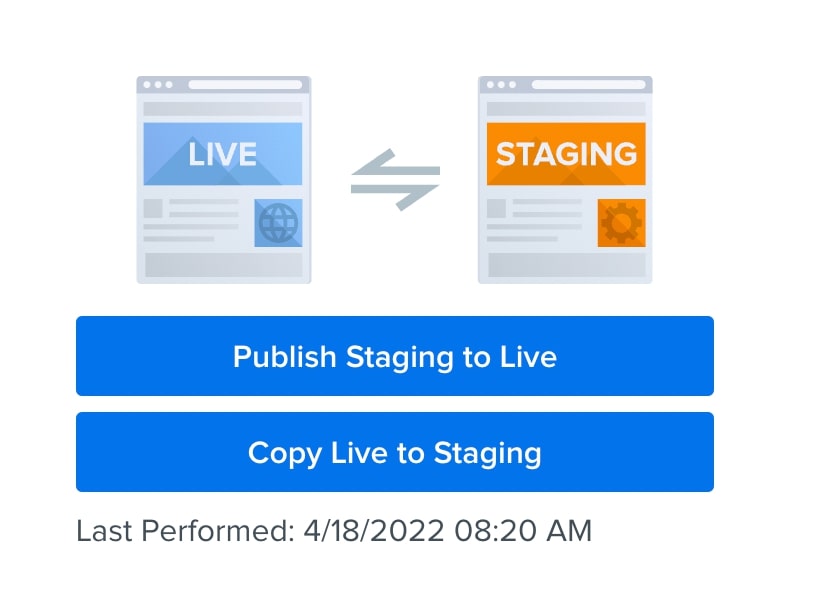
For example, DreamHost provides a simple one-click transfer of your staging data to your website. Once you’re sure you’ve targeted any potential conflicts, you can click on Publish Staging to Live:

push staging environment to live

This will successfully update your website’s PHP version. Since you used a staging site, you won’t have to worry about unexpected errors!

Ready for an Upgrade?

You might be hesitant to update your PHP version because you’re worried about breaking your site. However, PHP updates ultimately improve the security and performance of your website. You can easily avoid any conflicts by testing changes before making them live.

To review, here are the four steps you can take to update the PHP version of your website:
  1. Create a staging site.
  2. Change your PHP version.
  3. Look for conflicts.
  4. Publish changes to your live site.

Although you can manually update your PHP version, you might want to avoid doing this for every new development. Here at DreamHost, our Website Maintenance plans now include automatic PHP updates! This way, you can sit back, relax, and leave this process to us.

Website and PHP Version Management Made Easy

Let us handle the backend — we’ll manage and monitor your website so it’s safe, secure, and always up.

website tech support

The post Why You Should Update Your PHP Version (& How to Do It) appeared first on Website Guides, Tips & Knowledge.


source https://www.dreamhost.com/blog/update-php/

Wednesday, 4 May 2022

Decoding WordPress: New Site Blocks in 5.9

WordPress has always been a user-friendly platform that is flexible and easy to learn. However, those without coding skills may struggle to perform certain customization tasks.

Fortunately, Version 5.9 introduced Full-Site Editing, which brings together both new and existing features to provide centralized control of your entire site. One of the most significant changes is the addition of new site level blocks.

In this post, we’ll discuss everything you need to know about site blocks in WordPress. We’ll also look at some examples and show you how to use them. Let’s get started!

An Introduction to WordPress Blocks

Blocks have been a fundamental aspect of WordPress since late 2018. Version 5.0 of WordPress replaced the classic editor with a new WordPress block editor called Gutenberg.

A block is a specific element that you can add to your site. For instance, there are blocks for images, headings, lists, paragraphs, and more. This system provides users with a simple and intuitive way to create a unique website.

Each block comes with a set of customization options, such as alignment, color, and size. Additionally, blocks can be moved around on via a drag-and-drop editor, facilitating a simpler page-building process.

Common WordPress Blocks

Gutenberg introduced blocks for various purposes. There may be some blocks that you will never touch. However, there are others you’ll probably use every time you create a post. Let’s take a look at some of the most common options in the new block editor.

The Heading Block

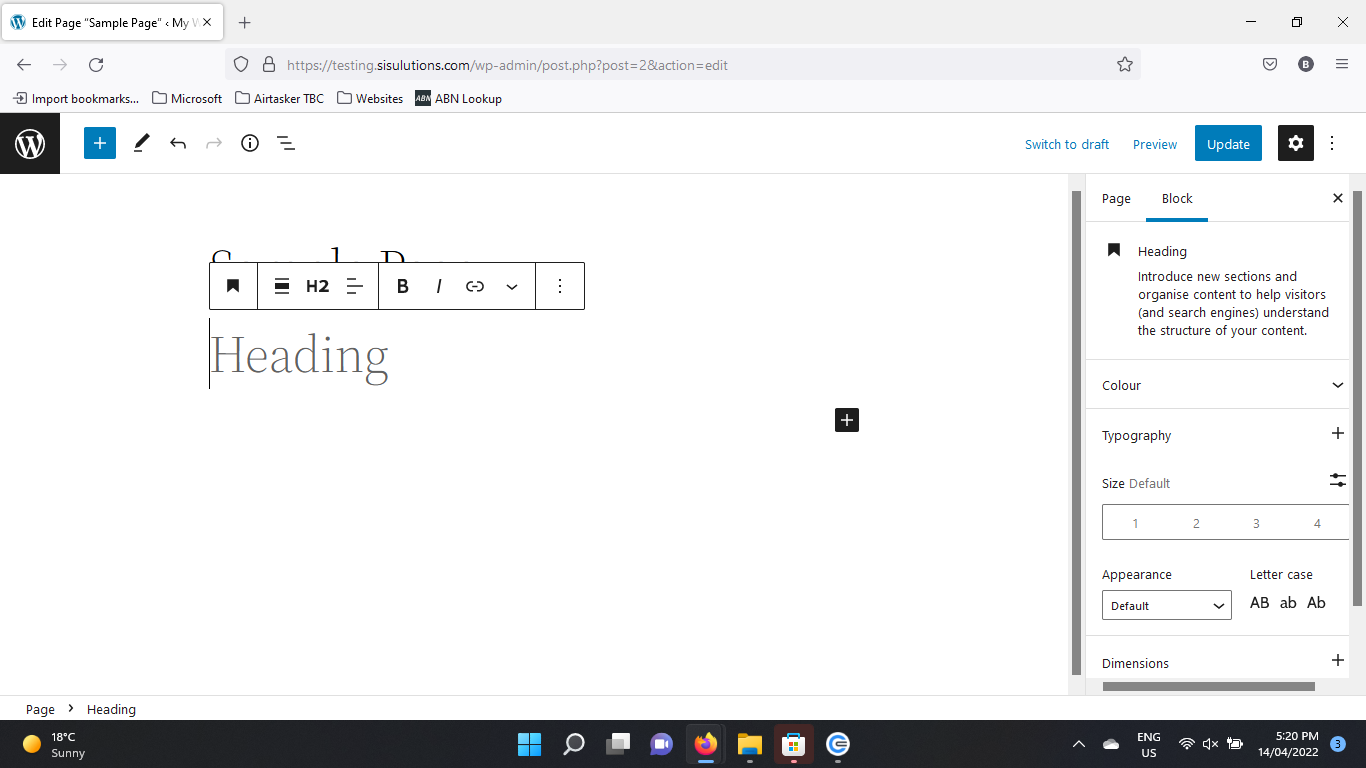
The Heading block provides several choices for configuring and styling headings:

WordPress Heading Block

This block can help you organize your content more efficiently. For instance, you can select the heading level H2 for main sections, and H3-H6 for subsections. Additionally, you can add a hyperlink to the heading.

The Paragraph Block

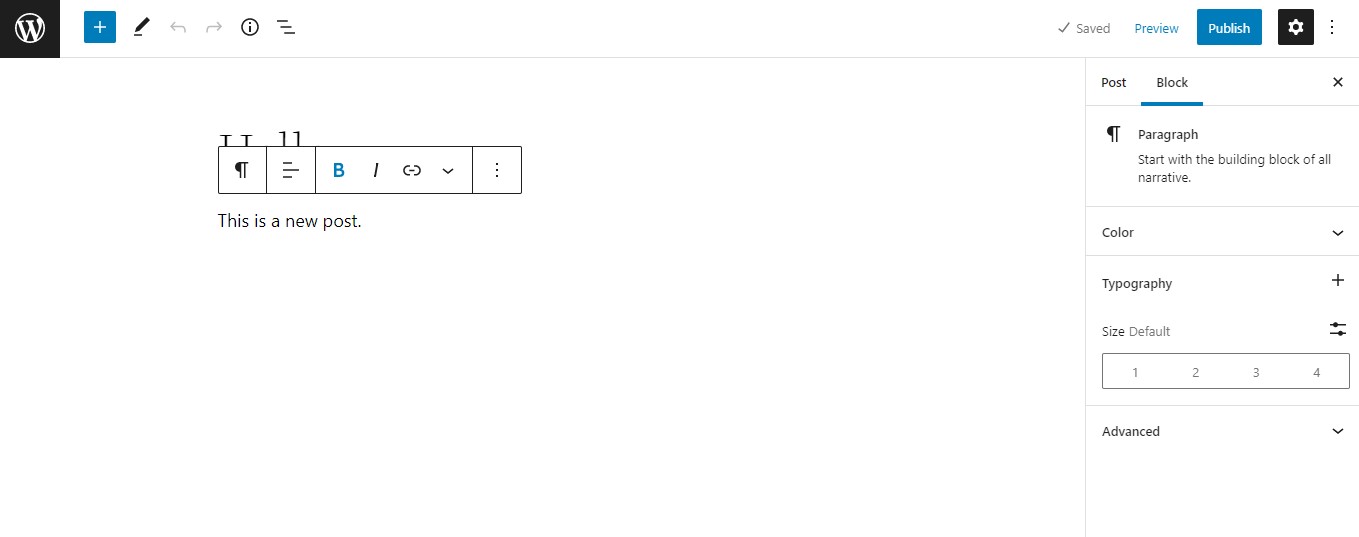
Paragraphs are the most frequently-used block in the Gutenberg editor:

WordPress Paragraph Block

This element enables users to write text and customize the typography. Usually, headings are used to group relevant paragraphs together and split up the page’s content.

The Image Block

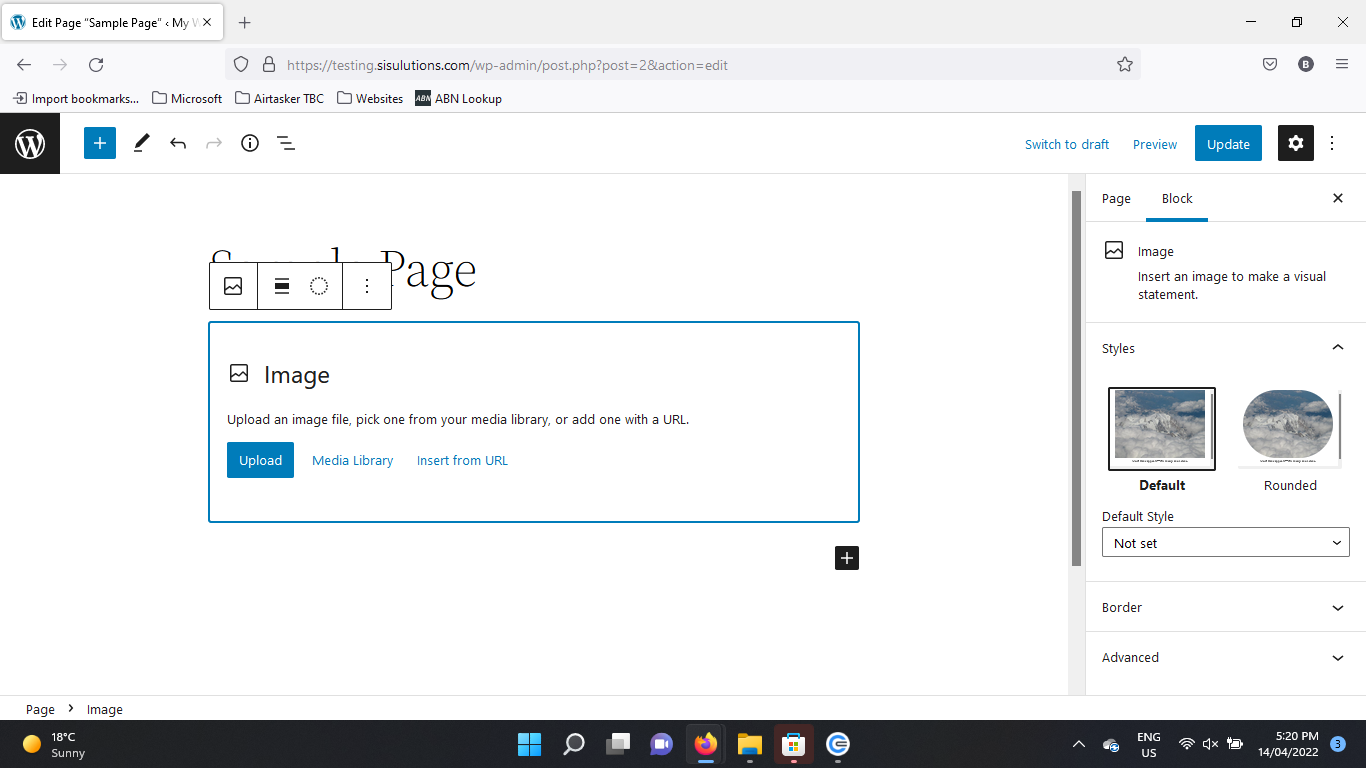
Image blocks enable you to upload photos or artwork to your site:

WordPress Image Block

You can then use the settings to resize and crop your images. You can also add captions and alt text.

The Video Block

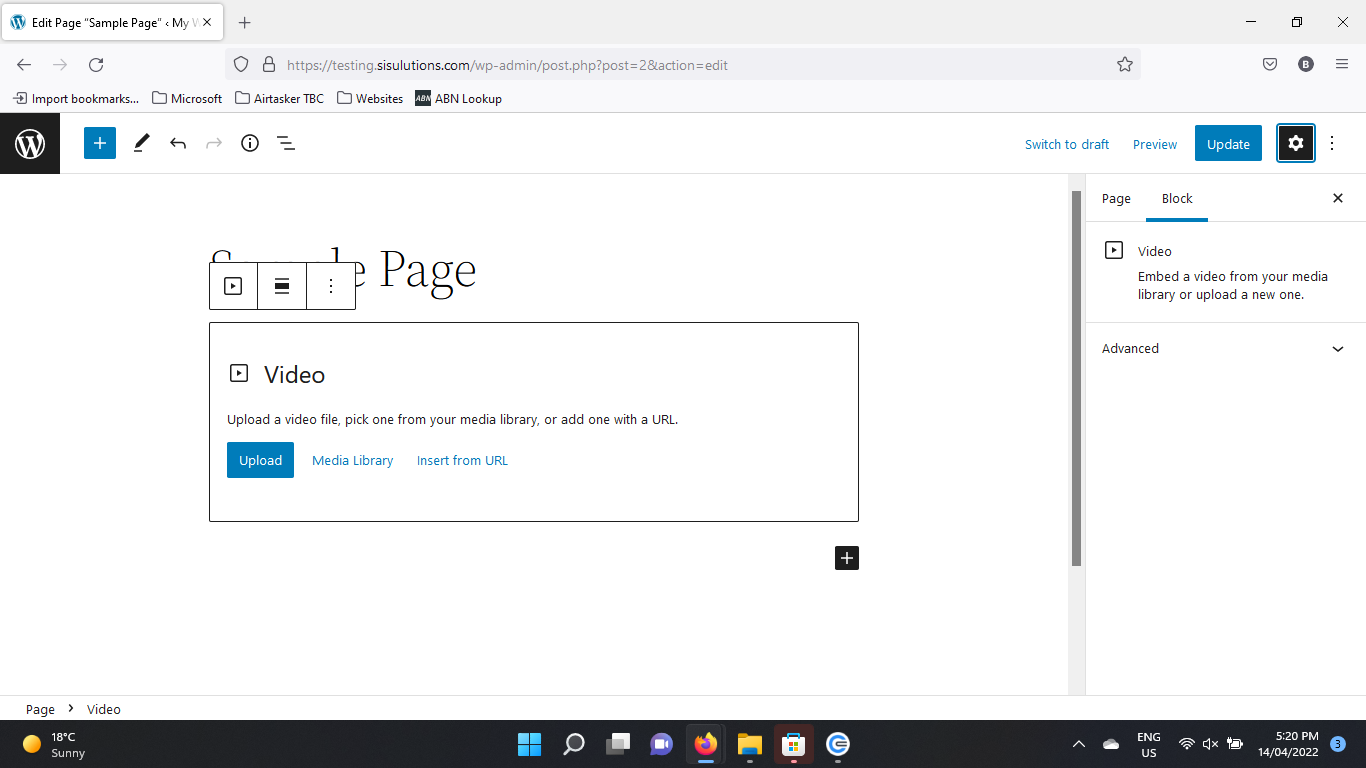
You can also add videos to your post. There are different options for displaying videos:

WordPress Video Block

For instance, you can upload them to your site’s Media Library, or embed them from YouTube and other video-sharing platforms. You can also add text tracks such as subtitles, captions, chapters, and descriptions to the block.

The List Block

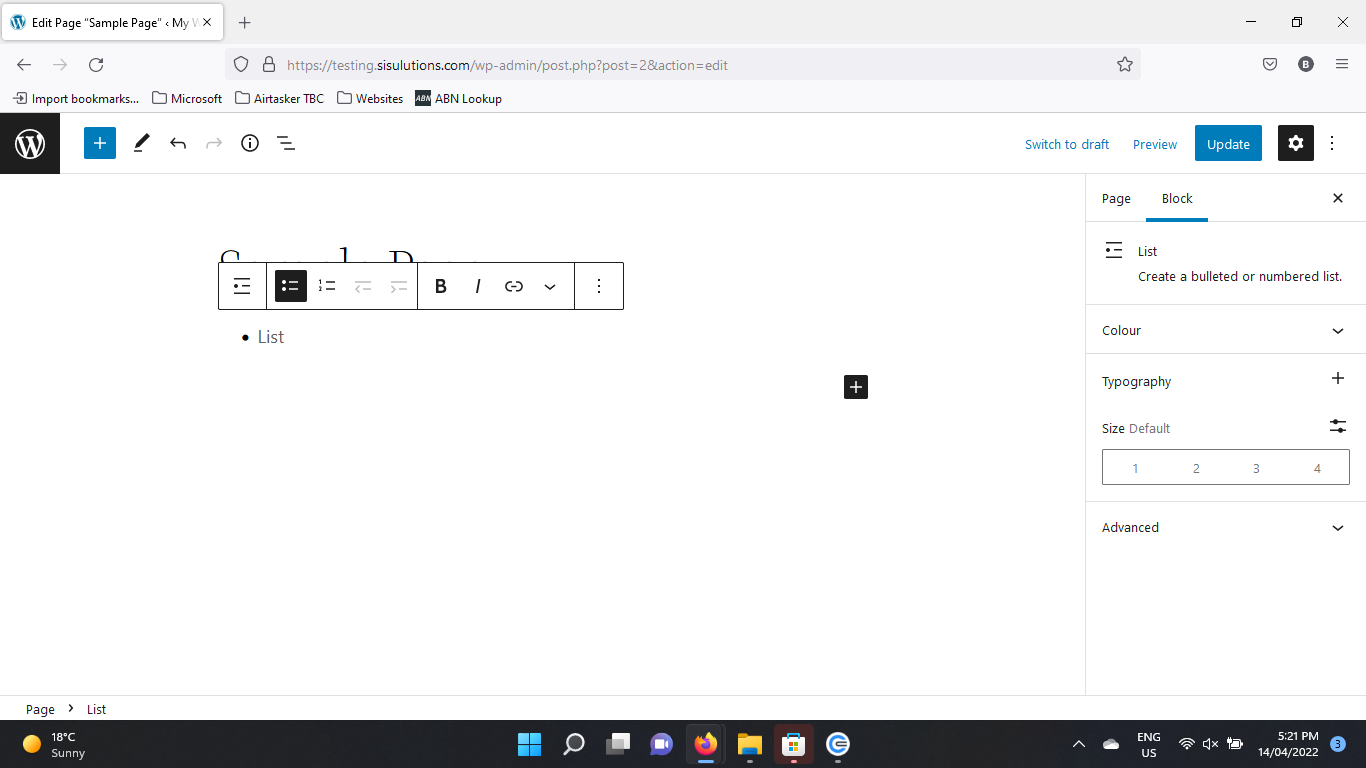
The List block enables you to insert bulleted or numbered lists into your page:
WordPress List Block

This block comes with styling options such as bold and italics, as well as more intricate rich-text controls. Additionally, you can add hyperlinks to list items.

Skip the line and get tips right in your inbox

Click below to sign up for more how-to's and tutorials just like this one, delivered to your inbox.

marketing tips

New Site Blocks in WordPress 5.9

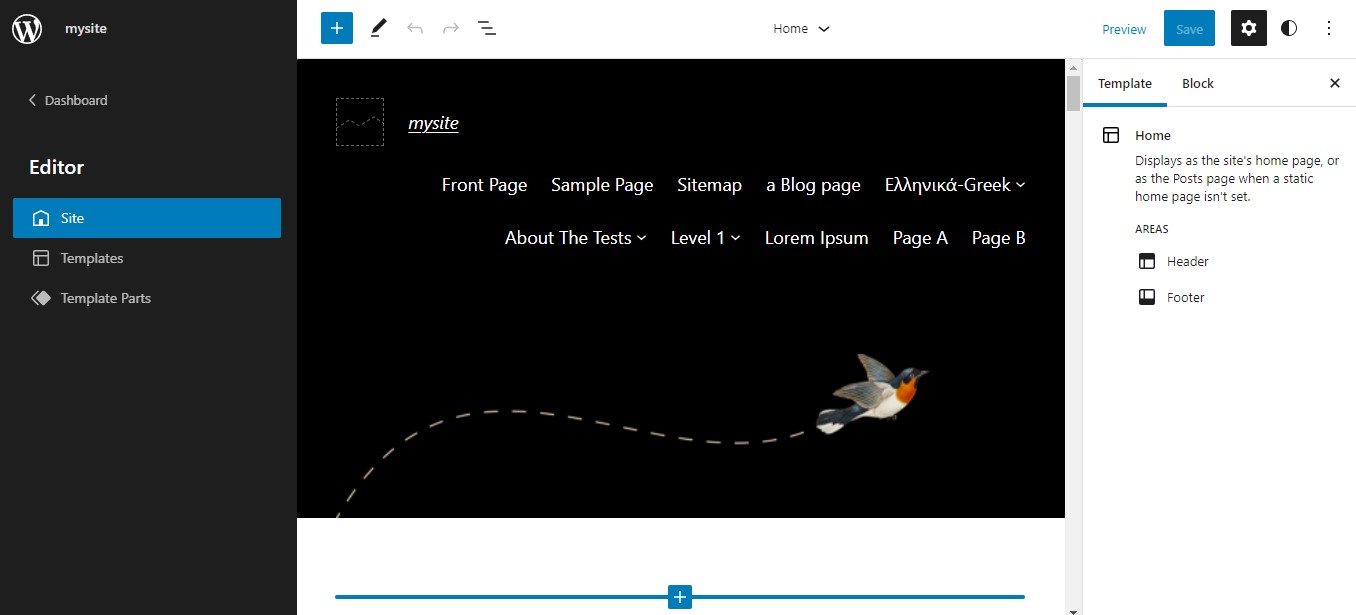
Now that Full-Site Editing is here, individual blocks can also be used for editing your site’s theme. You can use the new editor to customize all aspects of your site:
WordPress Full Site Editing - edit template

This feature has replaced the Customizer. However, it only supports block-based themes, such as Twenty Twenty-Two. If you’re using a ‘standard’ theme, you’ll still have access to the Customizer (and the Gutenberg block editor), but you won’t be able to use the Full-Site Editor.

The Full-Site Editor comes with templates for different pages, such as your archive or home page. Additionally, you can customize more areas of your site, such as your header and footer. There is also a new Global Styles feature, which enables you to define site-wide settings for your blocks.

In addition, the Full-Site Editor has introduced a range of ‘theme blocks’. Often nicknamed ‘site blocks’, these new additions enable you to use and edit global elements such as the site logo and tagline, navigation, and post lists.

The Benefits of Using Theme Blocks

The new theme blocks were introduced to make the web design process in WordPress simpler and more streamlined. Previously, the WordPress theme editor had limited customization options, and users who wanted unique designs often needed to use custom code.

Theme blocks remove the need for coding (and third-party page builder plugins) in most cases. Each block has a variety of styling and display options, offering users the flexibility to create almost any layout and design. Whether you’re a WordPress beginner or an experienced web developer, the process of creating custom sites is now faster and easier.

Let’s take a look at some notable site blocks that have been added with WordPress 5.9. This is just a brief introduction – we’ll delve more deeply into each of these Gutenberg blocks shortly.

Navigation

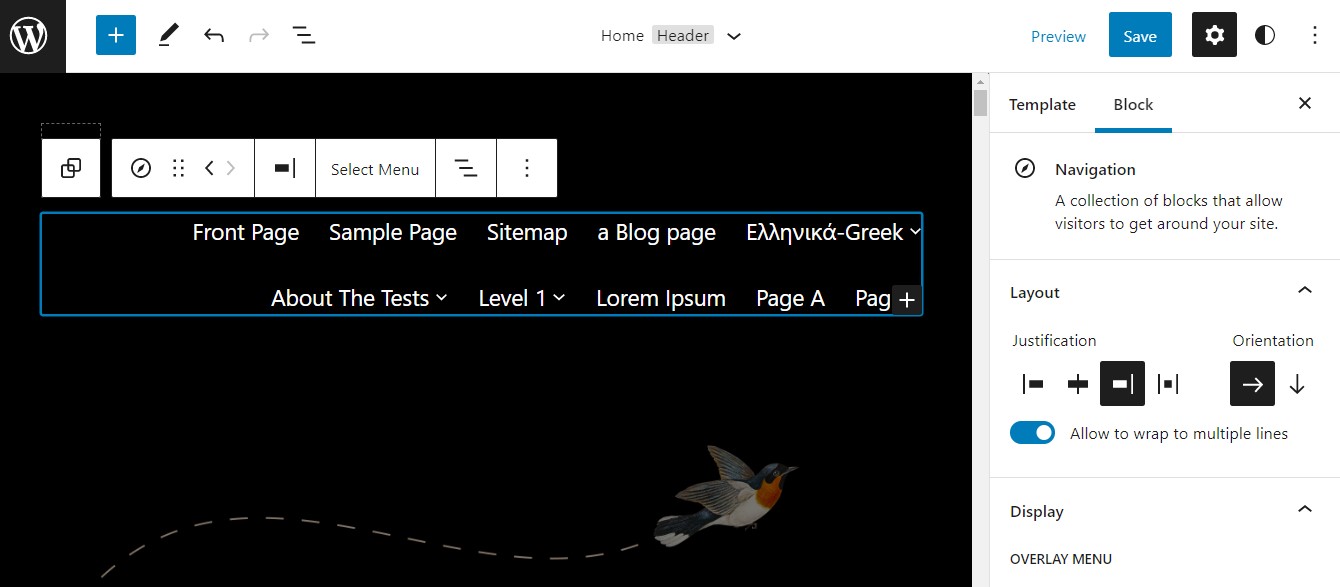
This feature enables you to add your site’s navigation menu to a page:

WordPress Navigation Block

You can customize both the design and structure of your menu. For instance, you can add submenu items, change the color and alignment, and more.

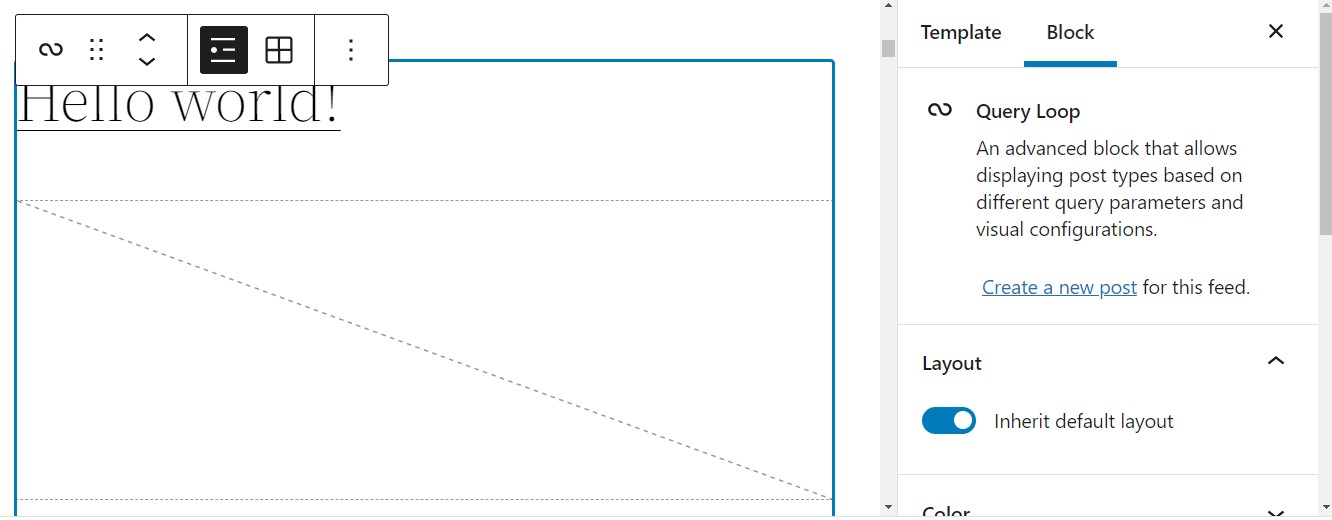
Query Loop

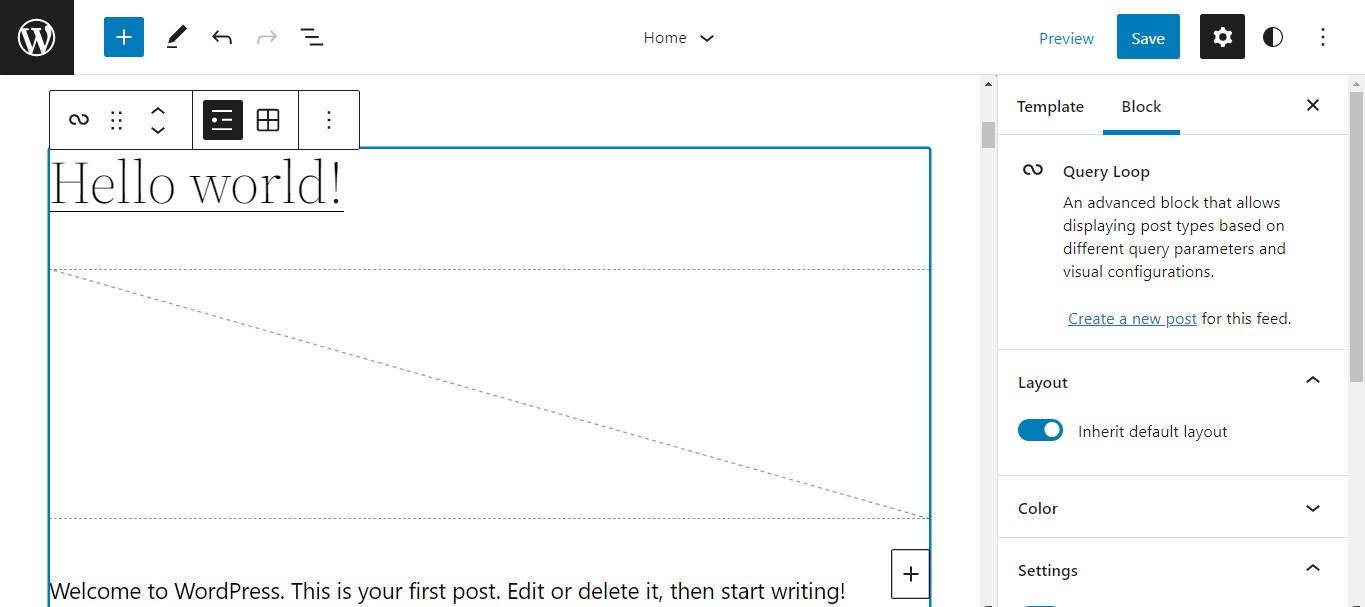
A query loop is a block that displays a set of posts based on specific conditions and parameters:

WordPress Query Loop Block

This is a great way to showcase posts on a particular topic. You can filter content by post categories, tags, authors, and keywords. The block also comes with different styling options for the post feed.

Template Part

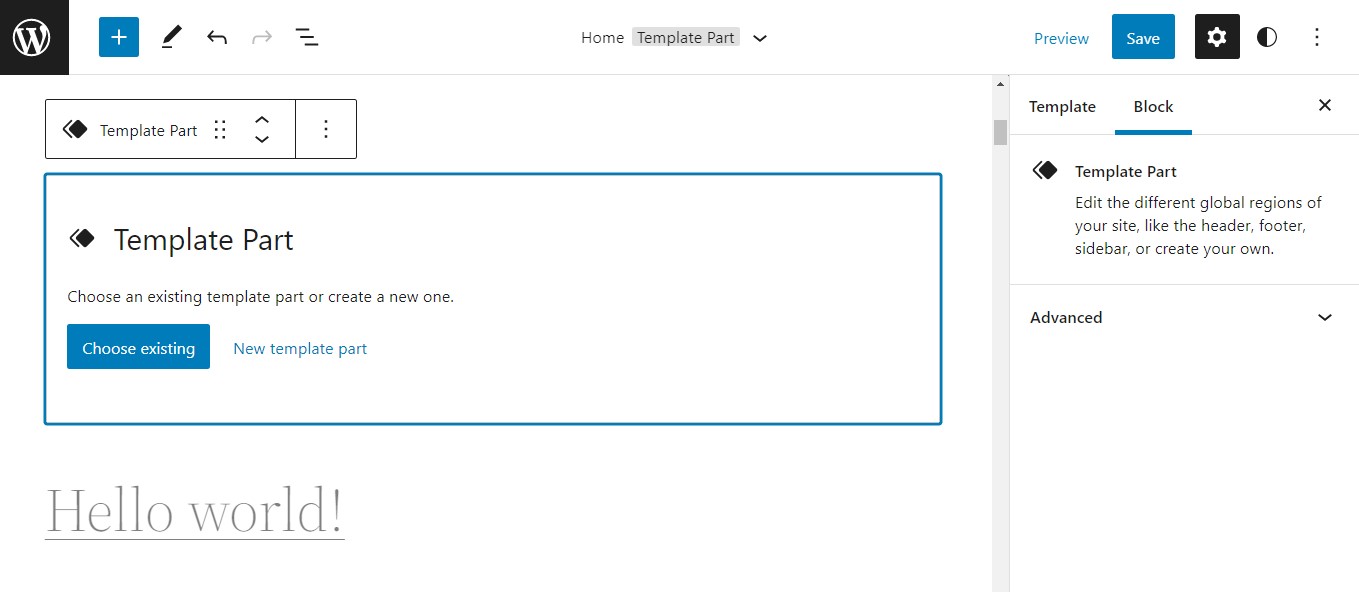
Template parts are used to organize the structure of a site. They’re essentially collections or containers of other content blocks:

WordPress Template Part Block

They can only be used when editing templates, so you’ll find this block in the Full-Site Editor. Each template part has a user-generated name. When adding a block, you can choose an existing template or create a new one.

How to Use Common WordPress Site Blocks (6 New Theme Blocks)

Now, let’s take a detailed look at a few common theme blocks. For each of the new blocks, we’ll discuss its purpose and the steps for using it.

1. Navigation

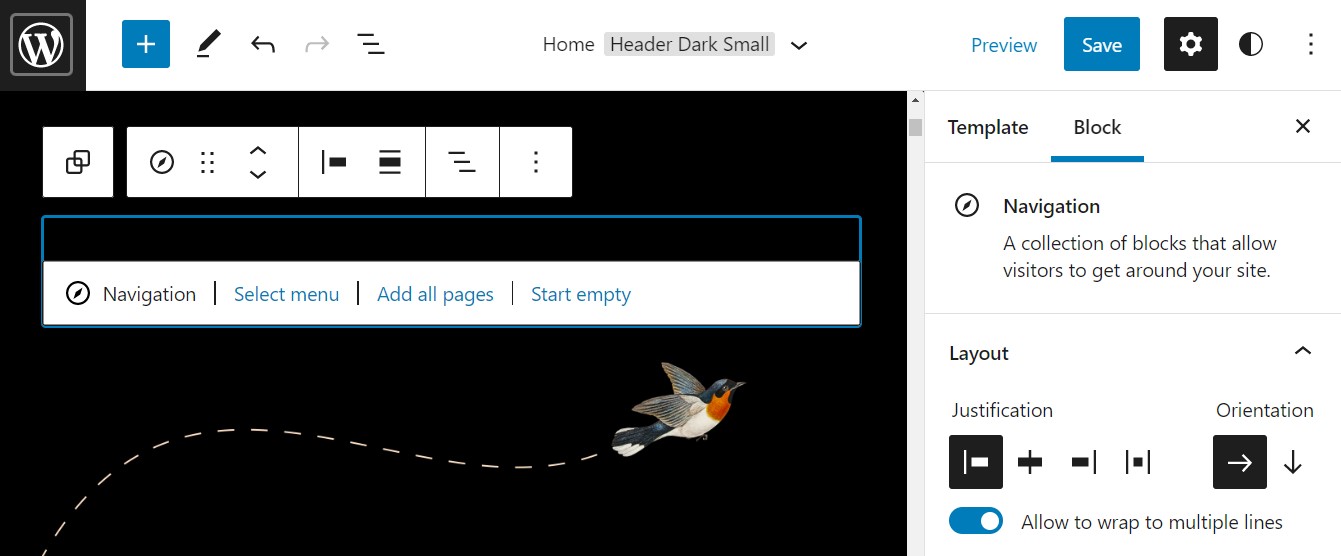
Navigation blocks are used for editing your site’s menus. When you add this block to your page, you are given three options: select an existing menu, add all of the site’s pages, or start with an empty menu:

WordPress Navigation Block

You can include additional menu items as well as indented items, which appear as subpages. Moreover, you can change the links and names of each item using the “anchor” icon in the toolbar. The toolbar also enables you to change the alignment and other layout settings.

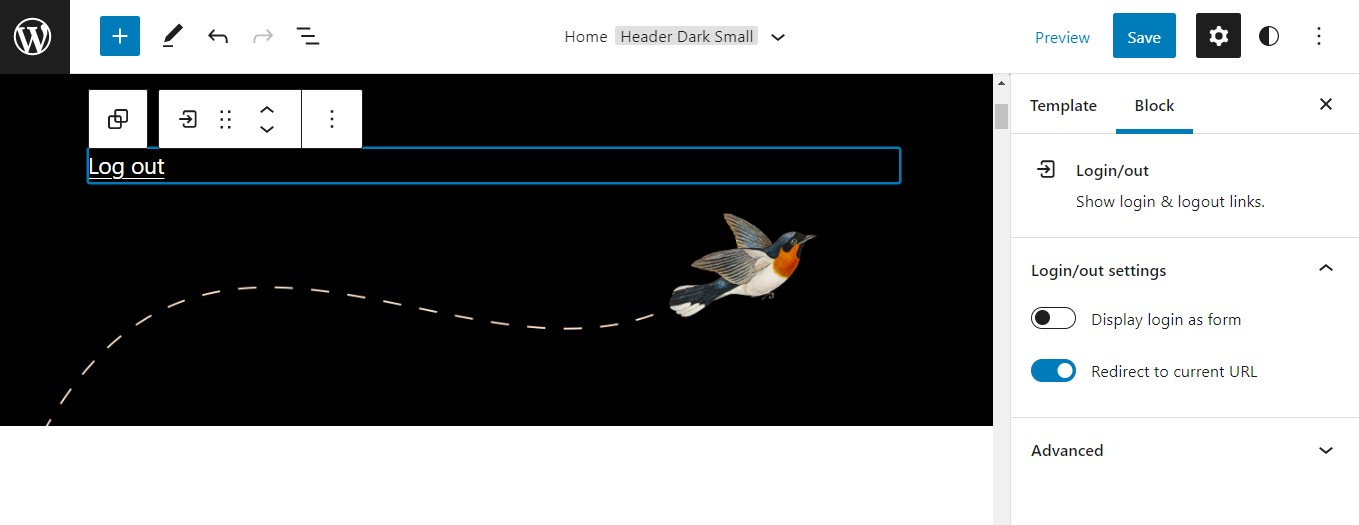
2. Login/out

The login/out block provides a simple way to add a login and logout button to your website:

WordPress Login/Out Block

It automatically displays the correct link depending on the status of the user. You also have the option to display the login/out button as a switch.

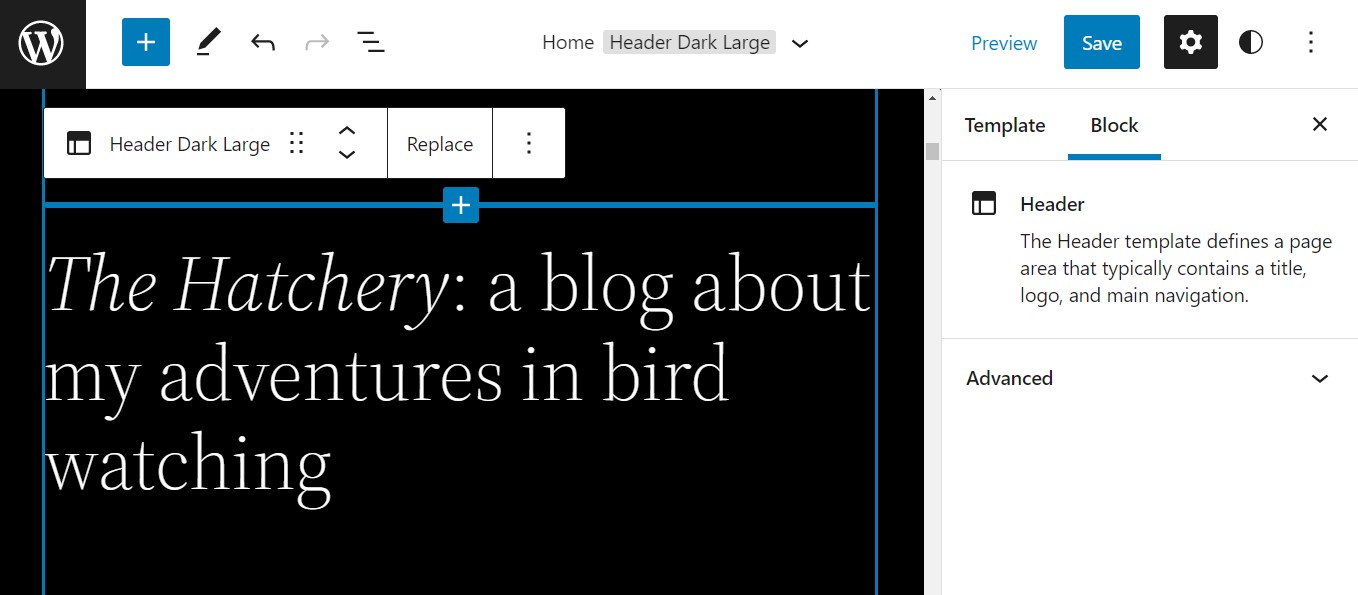
3. Template Part 

This element can be thought of as a group of blocks. The template part helps you organize the structure of your page. These blocks can only be used when editing templates, and they’re an excellent way to manage global areas such as headers and footers:

WordPress Header Block

Template parts can be added in the site editor. Upon selecting the block, you’ll be asked if you want to add an existing template or create a new one.

If you opt for the latter, you’ll be prompted to enter a name for the template. Then, you can go ahead and add in blocks to create the desired layout.

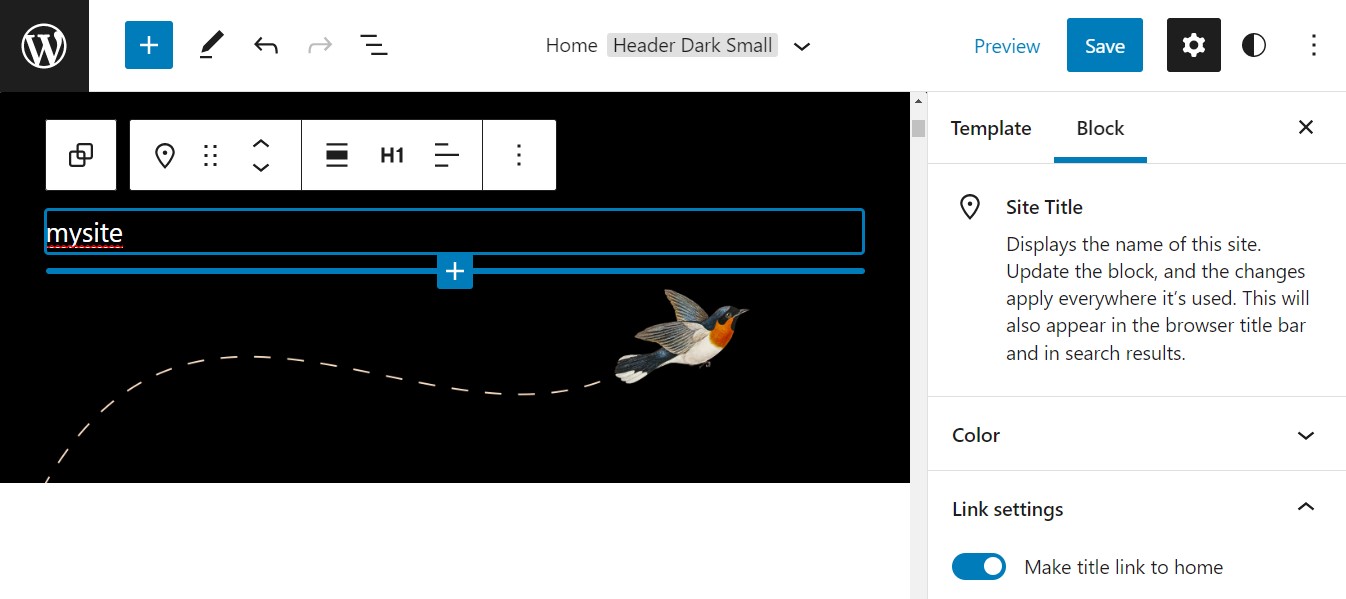
4. Site Title

As the name suggests, this block is used to display the title of your site:

WordPress Site Title Block

By default, the title links to the home page, but this can be turned off with a toggle switch in the settings. There’s also a range of styling options, including text and background colors, font size, line height, letter spacing, and other typography settings.

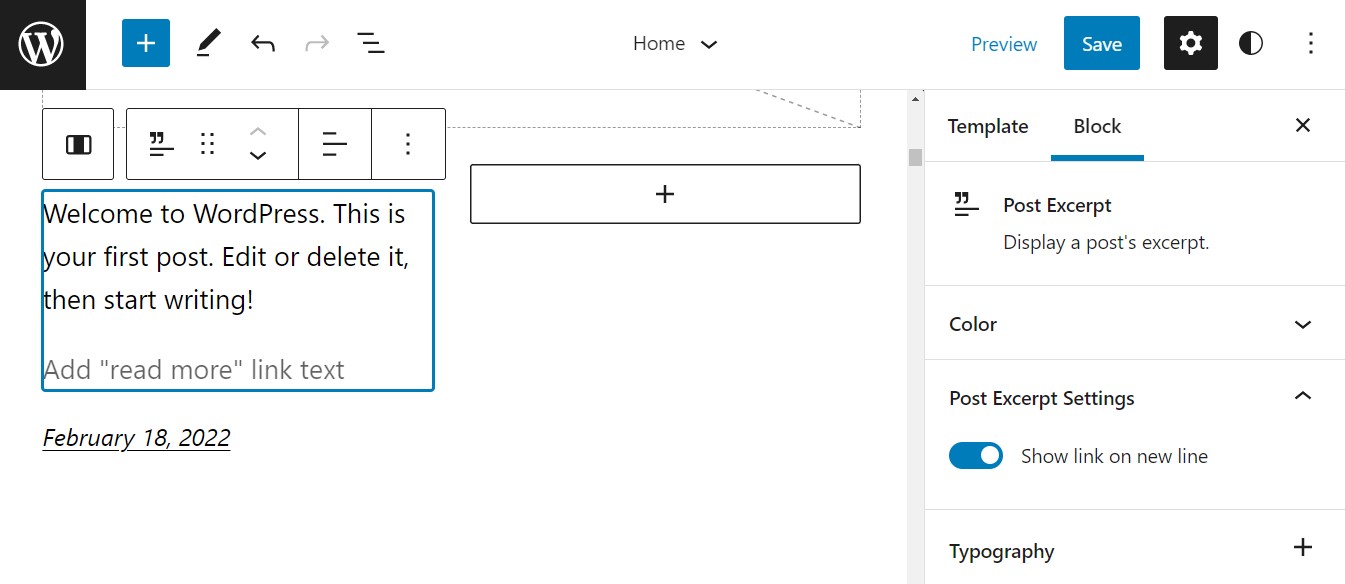
5. Post Excerpt

Post excerpts give readers a sneak peek into a post, and can help them decide whether or not they wish to read the entire article:

WordPress Post Excerpt Block

Most of the time, this block will be a child element of a query loop. It displays either the first 55 words of a post, or the set excerpt for that post. You can also add a “read more” link. This will take the user directly to the full post.

6. Query Loop

Query loops can be used to display a set of posts based on specific conditions and parameters. For example, you may use this block to show all posts in a particular category or by a specific author:

WordPress Query Loop Block

Query loops are made up of multiple blocks, including post titles, dates, excerpts, and featured images. You have the option to start blank and add nested blocks manually, or start with a premade layout and edit from there.

You can then alter the width, alignment, arrangement, and colors. You can also change the number of posts that the query loop displays.

Conclusion

In the past, customizing WordPress sites may have been challenging for some users. However, with the release of new site blocks in version 5.9, the process has become a lot easier.

Thanks to the Full-Site Editing feature, you can now make changes to your entire site from a unified interface. You can also customize individual elements such as the site title and tagline, navigation menu, and template parts like headers and footers.

If you’re looking for a fast, reliable, and affordable place to host your WordPress site, we’ve got you covered. Check out our DreamHost WordPress Hosting plans!

Power Your Website with DreamHost

We make sure your website is fast, secure and always up so your visitors trust you. Plans start at $1.99/mo.

shared hosting

The post Decoding WordPress: New Site Blocks in 5.9 appeared first on Website Guides, Tips & Knowledge.


source https://www.dreamhost.com/blog/wordpress-site-blocks/

Monday, 2 May 2022

Decoding WordPress: Custom Templates and Template Parts

With the introduction of WordPress 5.9, you can now use Full-Site Editing to customize the appearance of your theme. Furthermore, you can access more design features to build your website without coding with a block-based theme. However, these basic settings might not meet your needs.

Fortunately, you can add custom templates and template parts to your WordPress block theme. Whether by using Full-Site Editing or editing your theme file, you can create a custom layout to reuse when designing new content.

In this article, we’ll discuss what templates and template parts are. Then, we’ll show you how to create these in WordPress. Let’s get started!

An Introduction to Templates and Template Parts (Why and How to Use Them)

Using Full-Site Editing, you can design the layout of your website with blocks. You probably already use blocks to create WordPress posts. Now, they can build your entire site, including non-content areas.

One advantage of Full-Site Editing is its page templates. If you only rely on default WordPress themes to customize your web design, you might struggle to create unique pages. Page templates can provide more flexibility as you design your site.

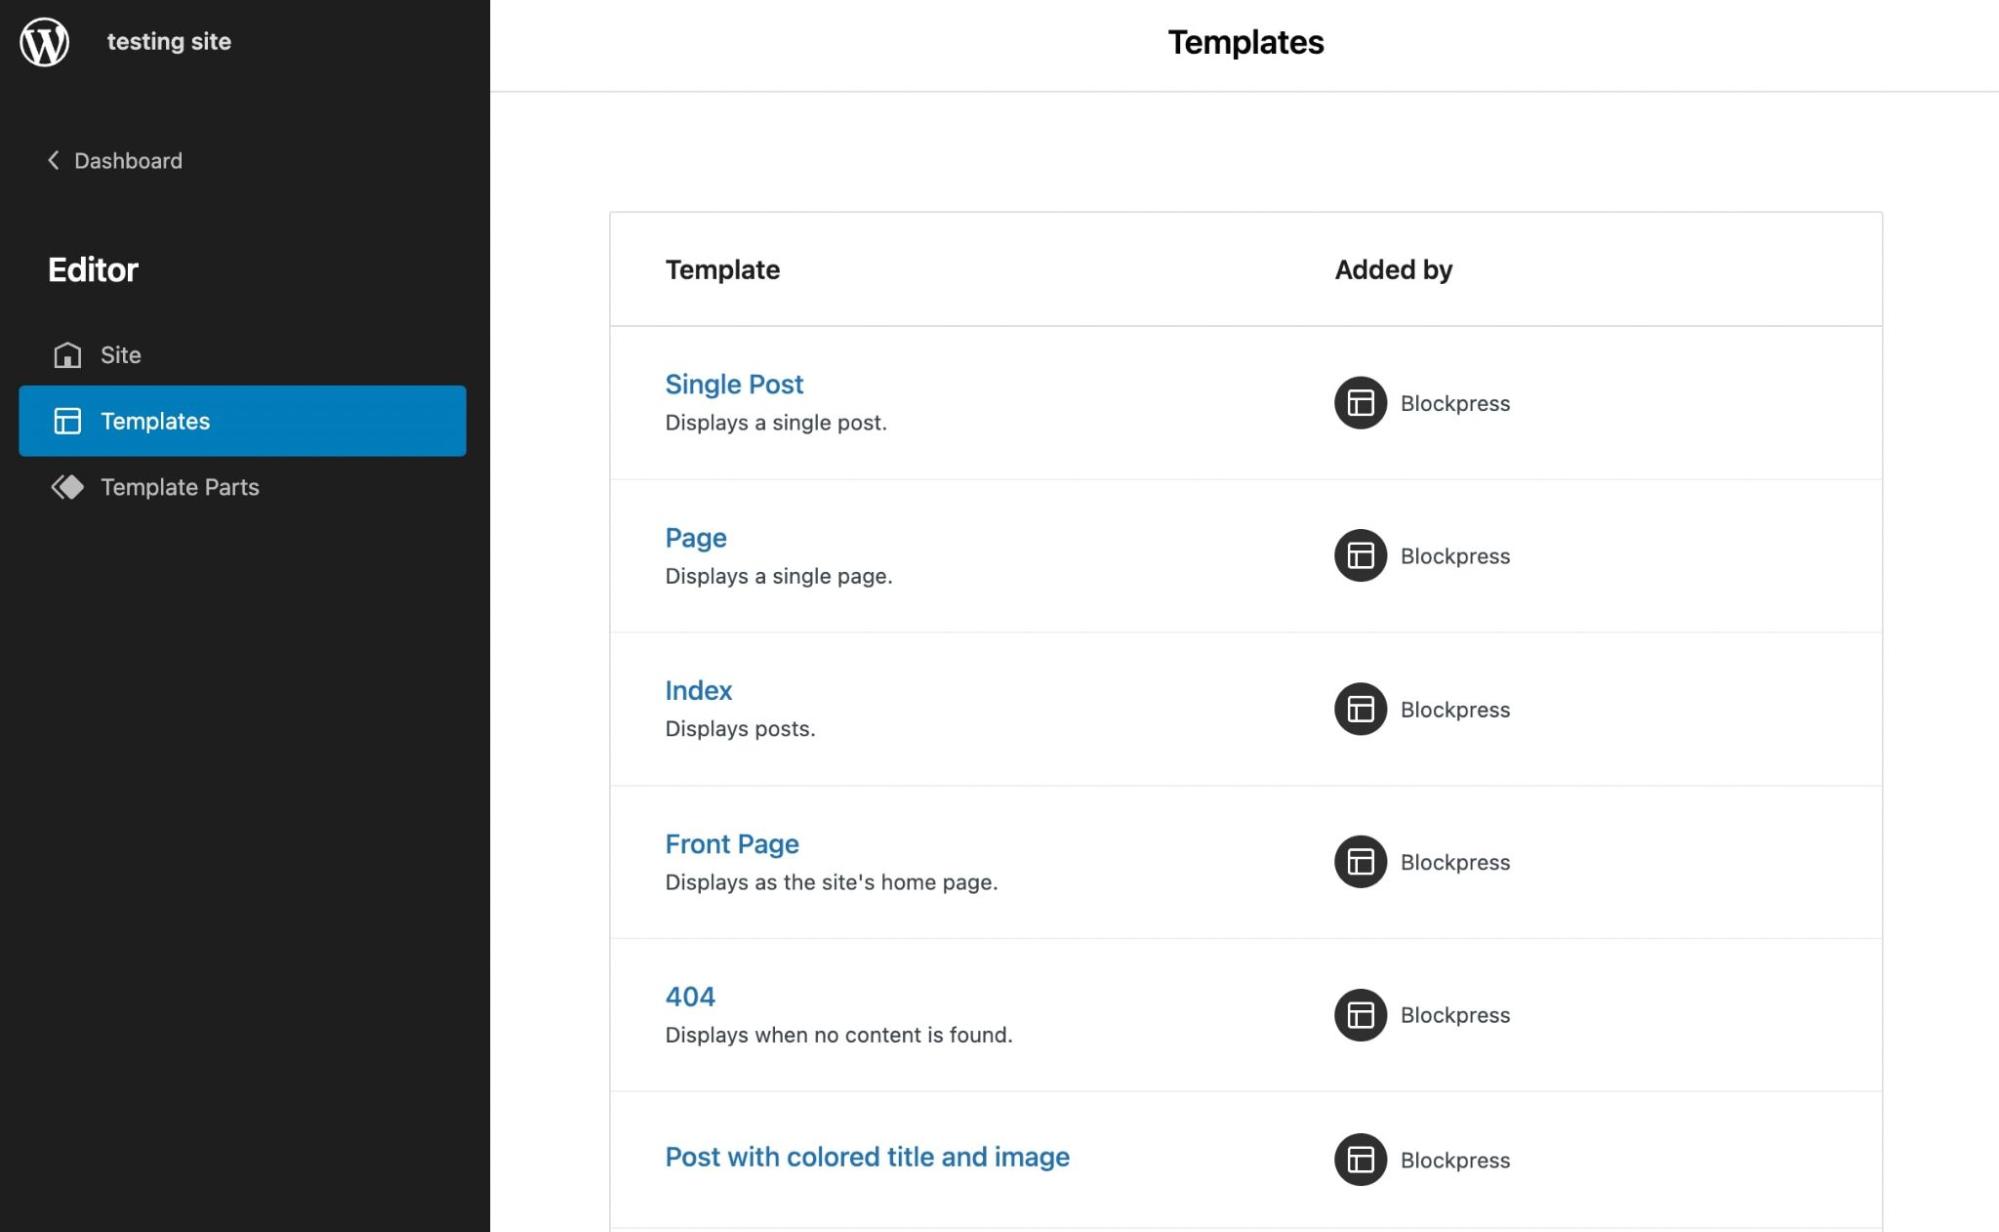
Page templates are files that control how a specific page looks. Instead of creating new pages and implementing formatting on each one, you can use templates to apply a particular layout automatically:

WordPress testing site - templates

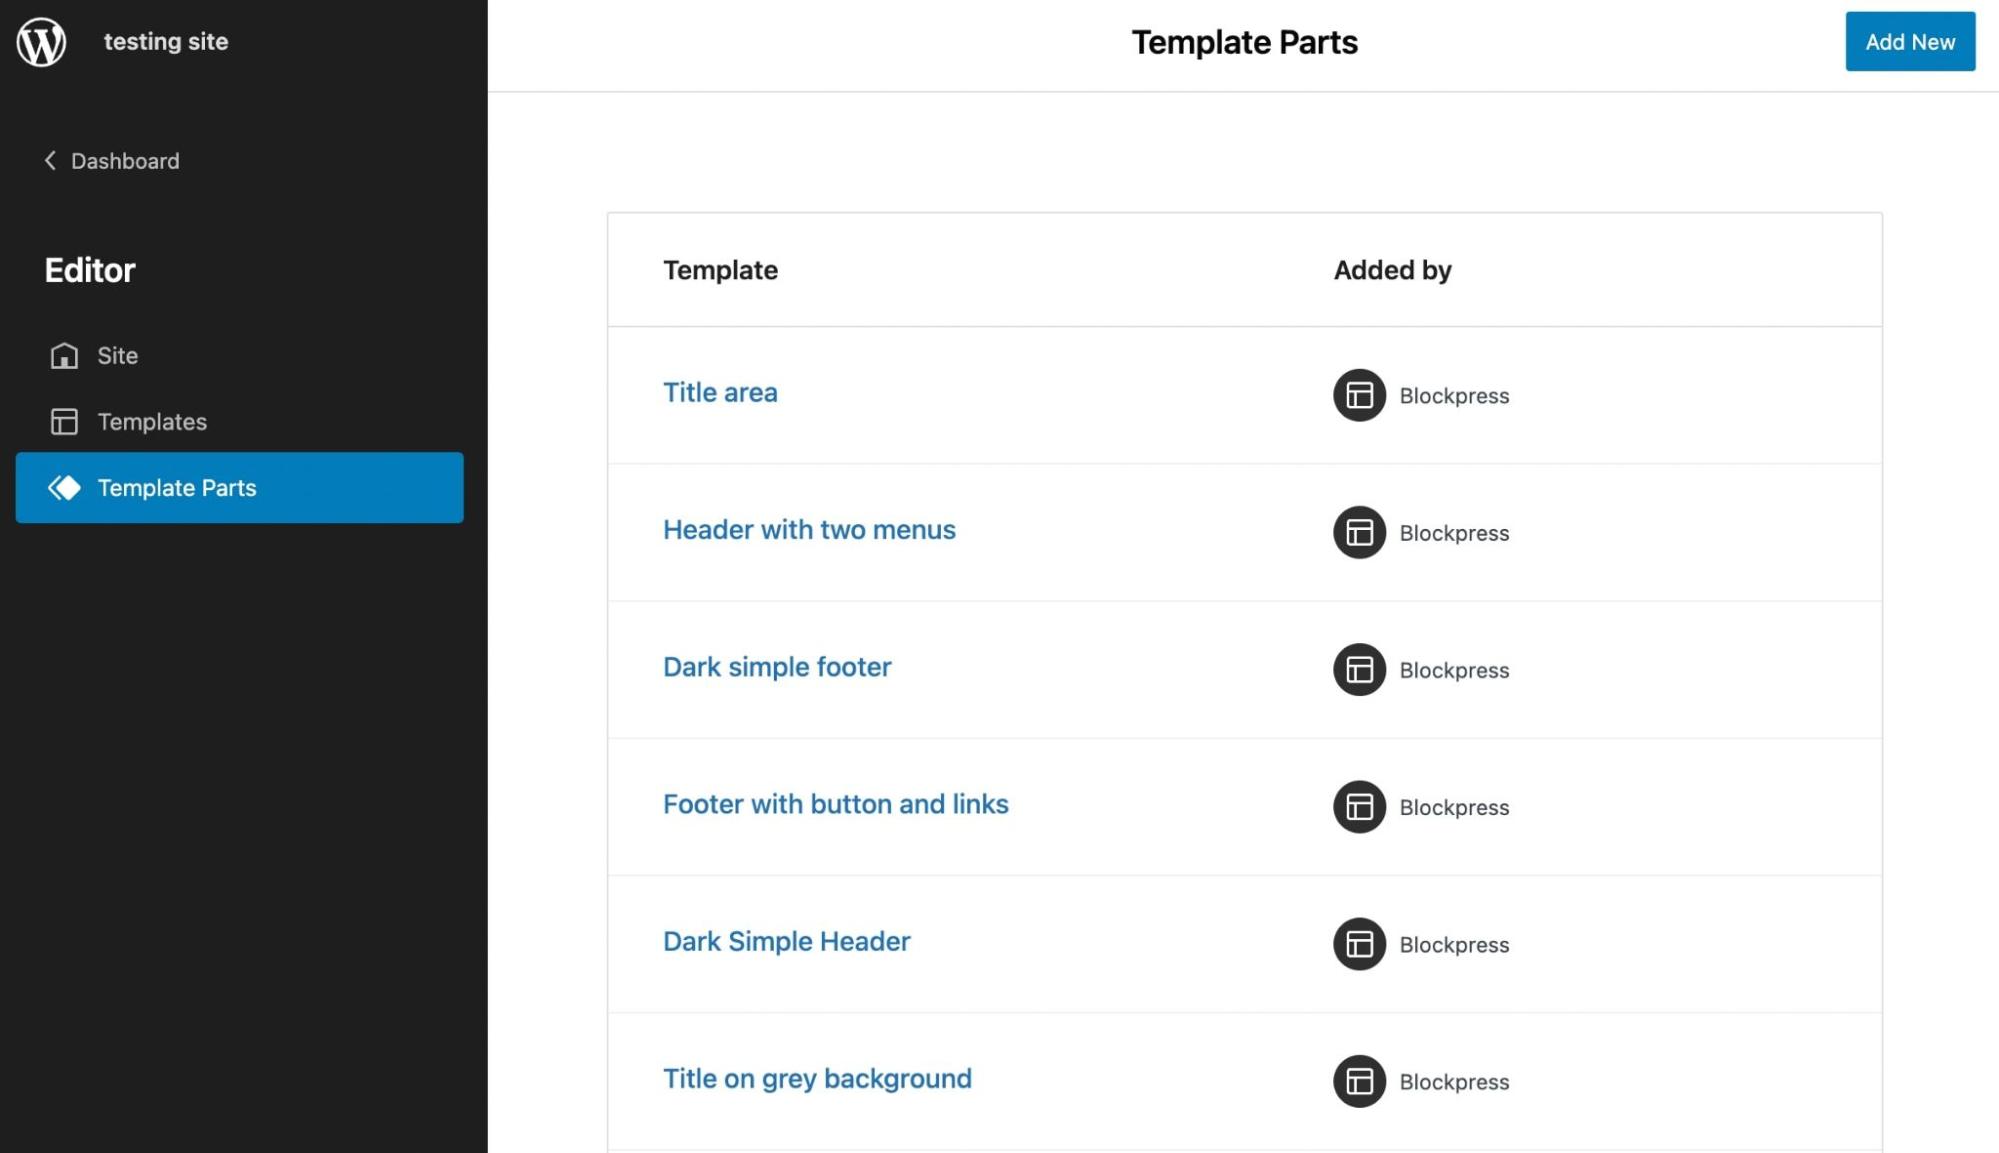
In WordPress, there are also template parts, which function as smaller structural sections of a page template. You will usually see template parts for headers or footers:

WordPress Template Parts

Using a template, you can build pages with unique features. For instance, you might not want your home page to have the same layout as the rest of your content. Therefore, you can achieve a unique design with a page template.

Furthermore, you can save time during the design process by reusing templates and template parts. By simply clicking on a template or individual element, you can implement it instantly.

How to Make Templates in WordPress with the Template Editor

If you’re using a block theme, it comes with the Template Editor. Using this feature, you can create and edit templates for any page or post on your website. It works similarly to the Block Editor, enabling you to customize your theme with blocks.

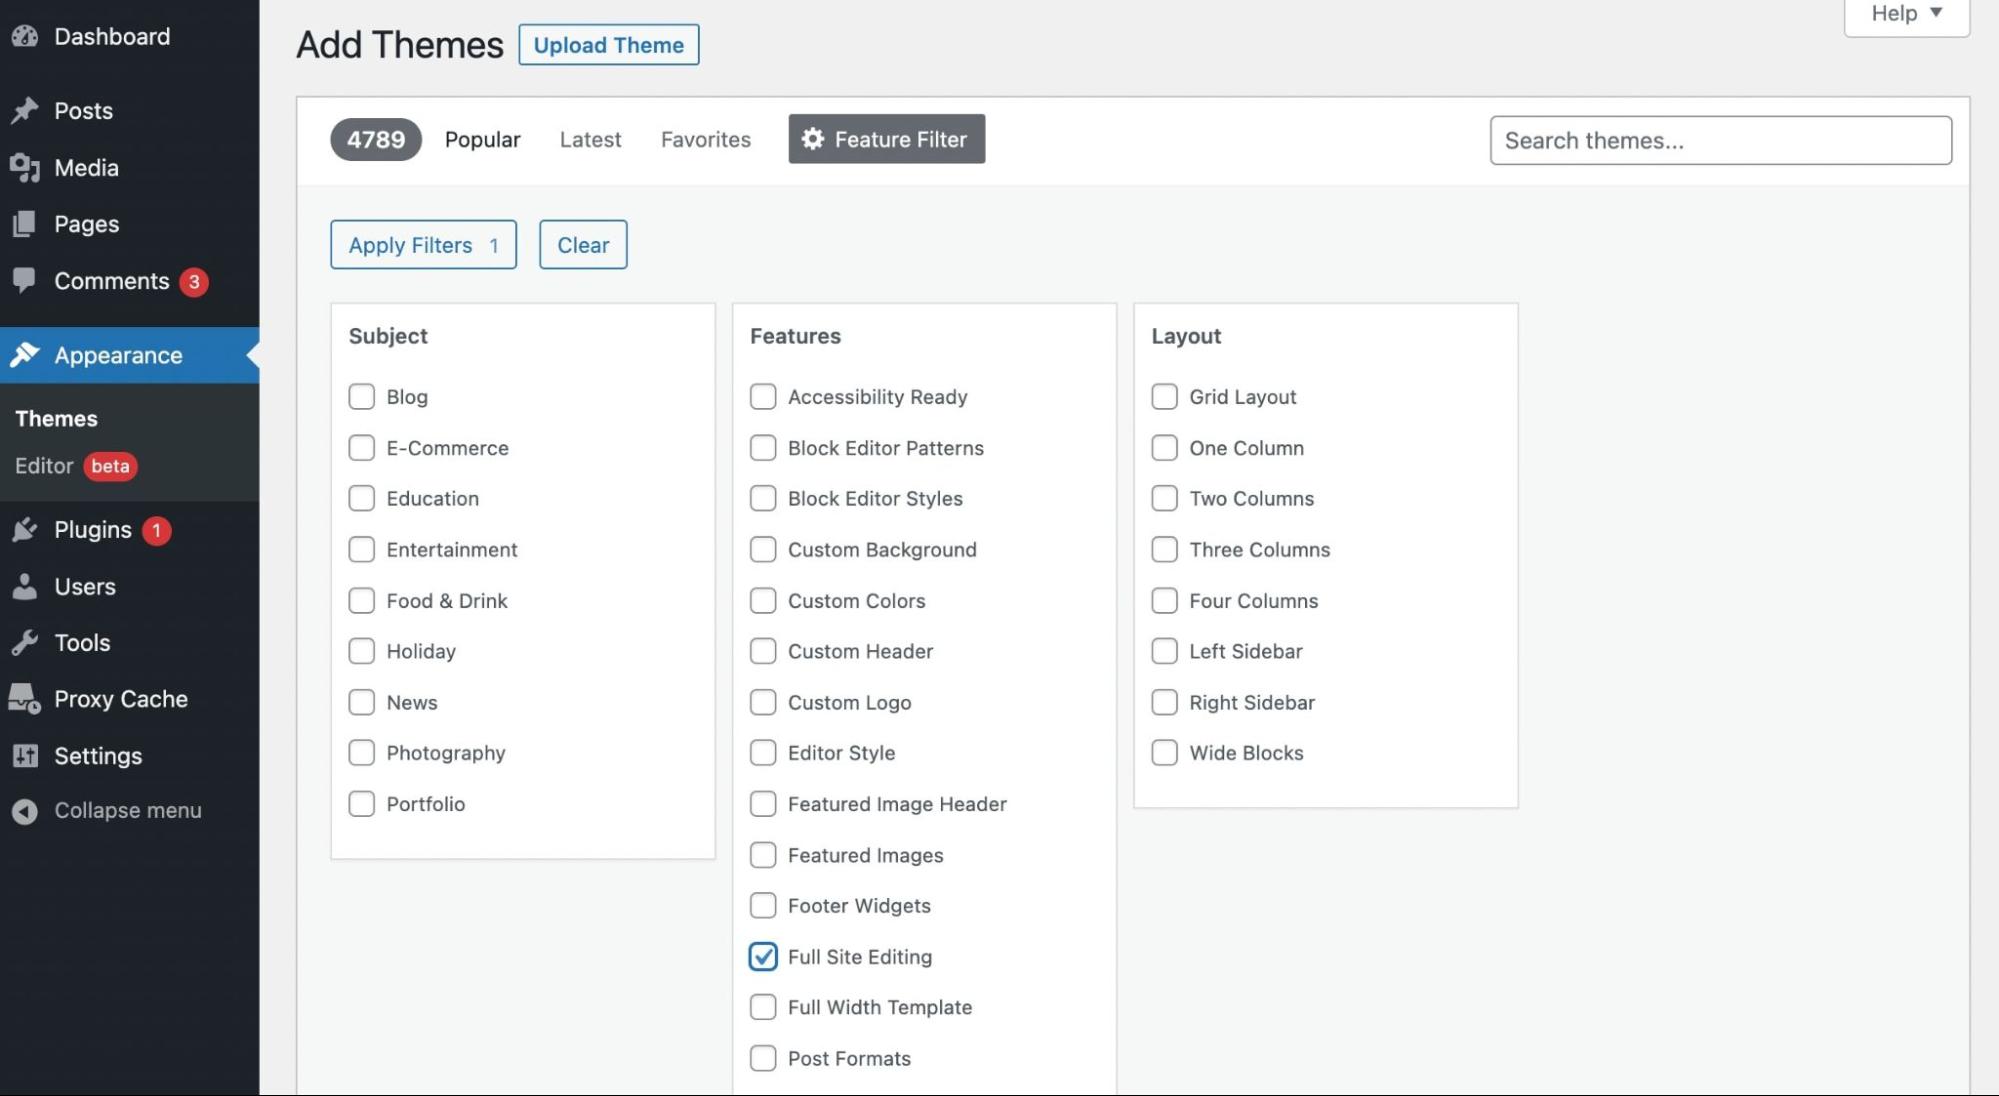
To get started, you’ll need to install a block theme. In your WordPress dashboard, navigate to Appearance > Themes > Add New. Then, filter the results with a Full Site Editing tag:

Appearance Themes Menu in WordPress

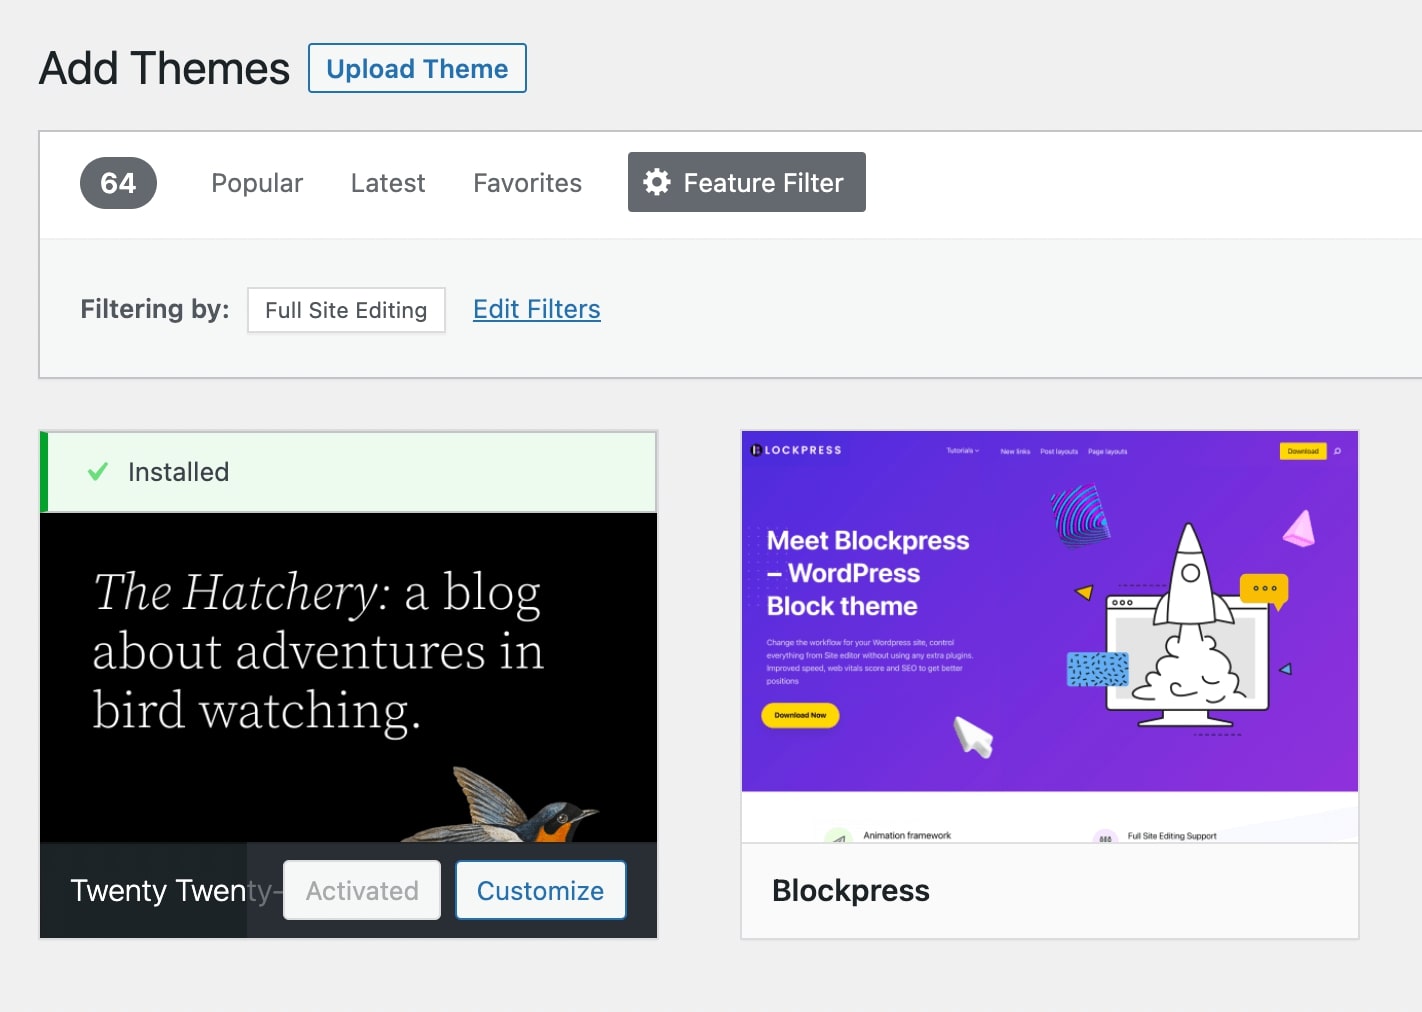
Select Apply Filters. In the search results, install and activate a theme. We’ll be using the default Twenty Twenty-Two theme for this tutorial:

WordPress Themes menu

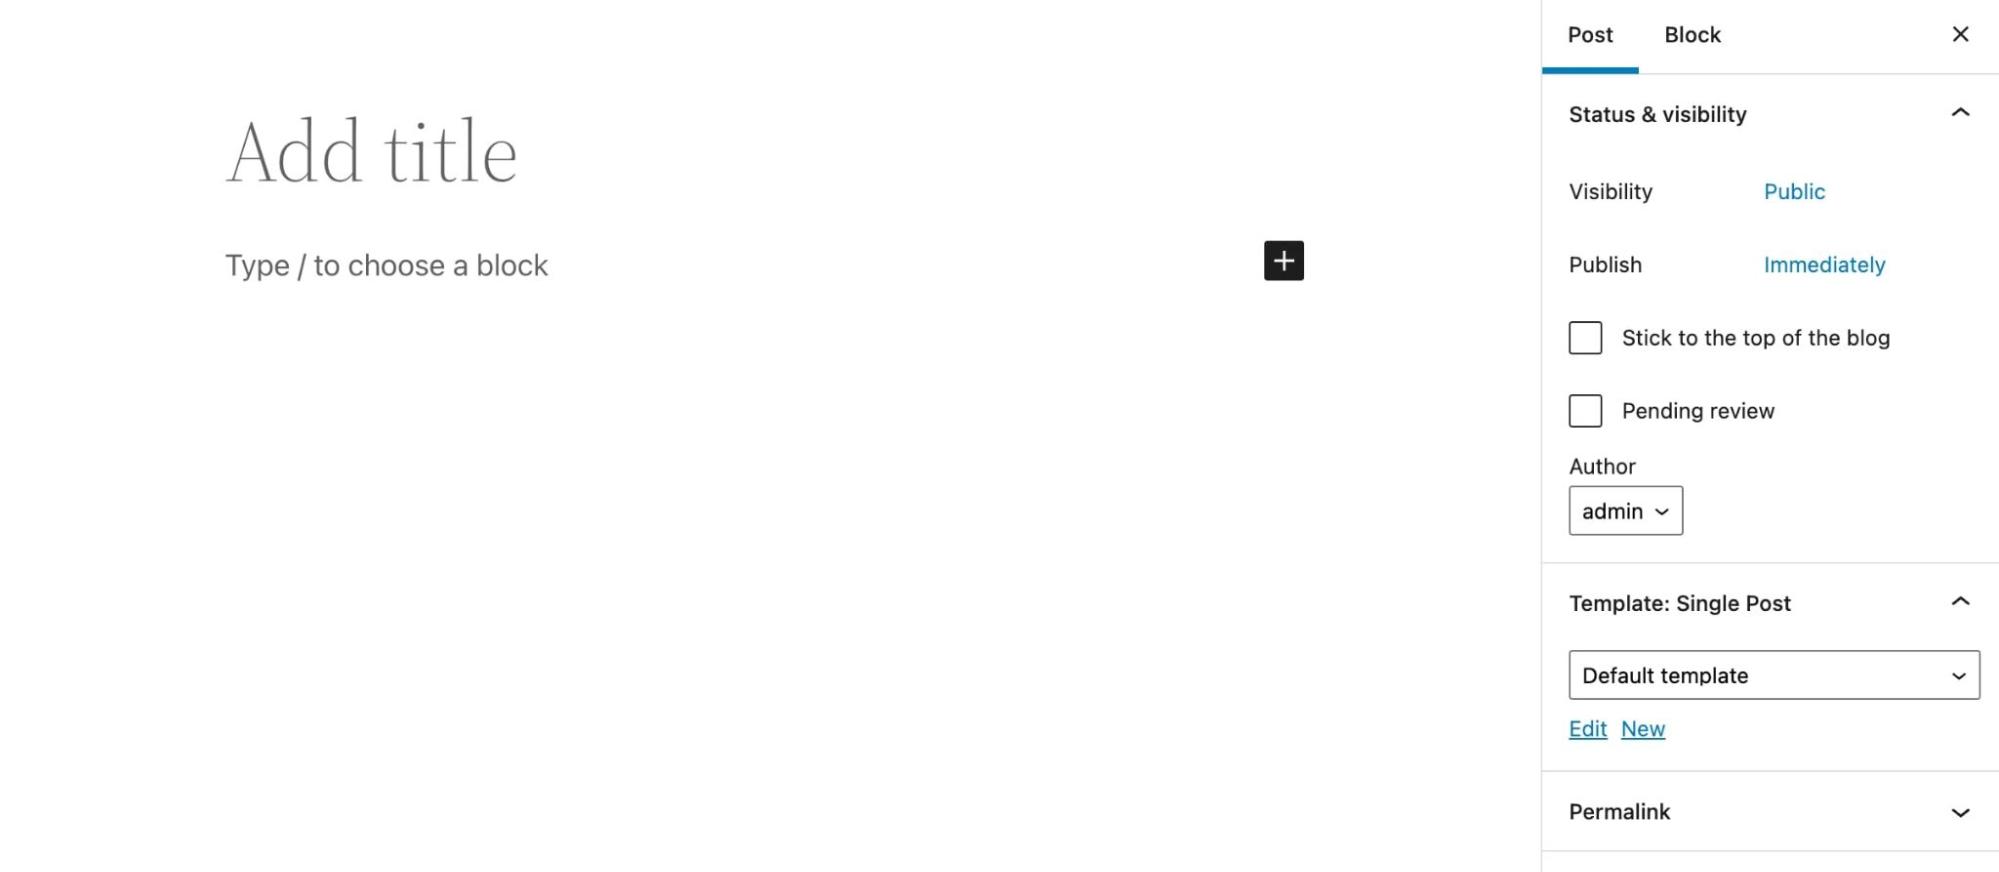
To create a new template, start by adding a new post or page. Then, in the Post settings tab, find the Template section and select the New button:

WordPress Add new post

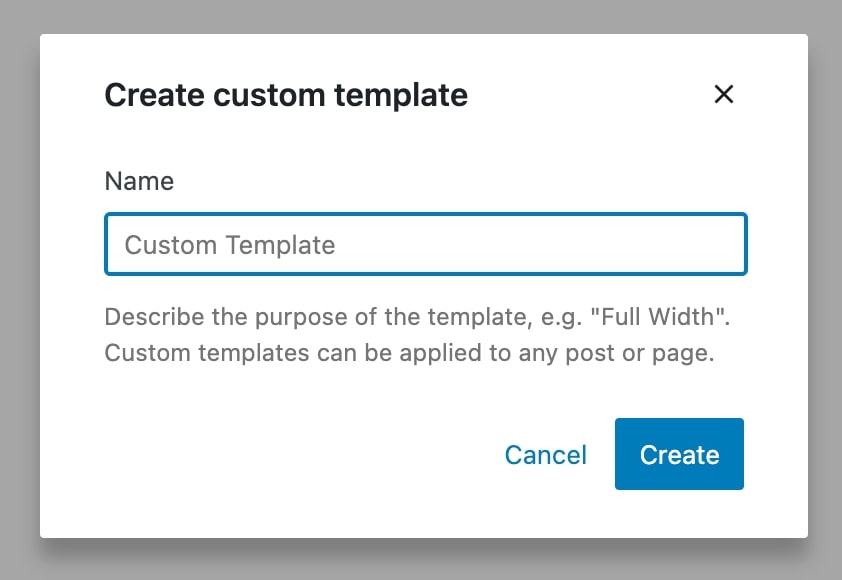
In the pop-up window, give your new template a name. Then, select Create:

Name your custom WordPress Template

This will automatically open the Template Editor. You can design your template using the same blocks you’d use in a post. However, it’s important to note that these blocks will be added to every post with this template:

add Block to WordPress Template

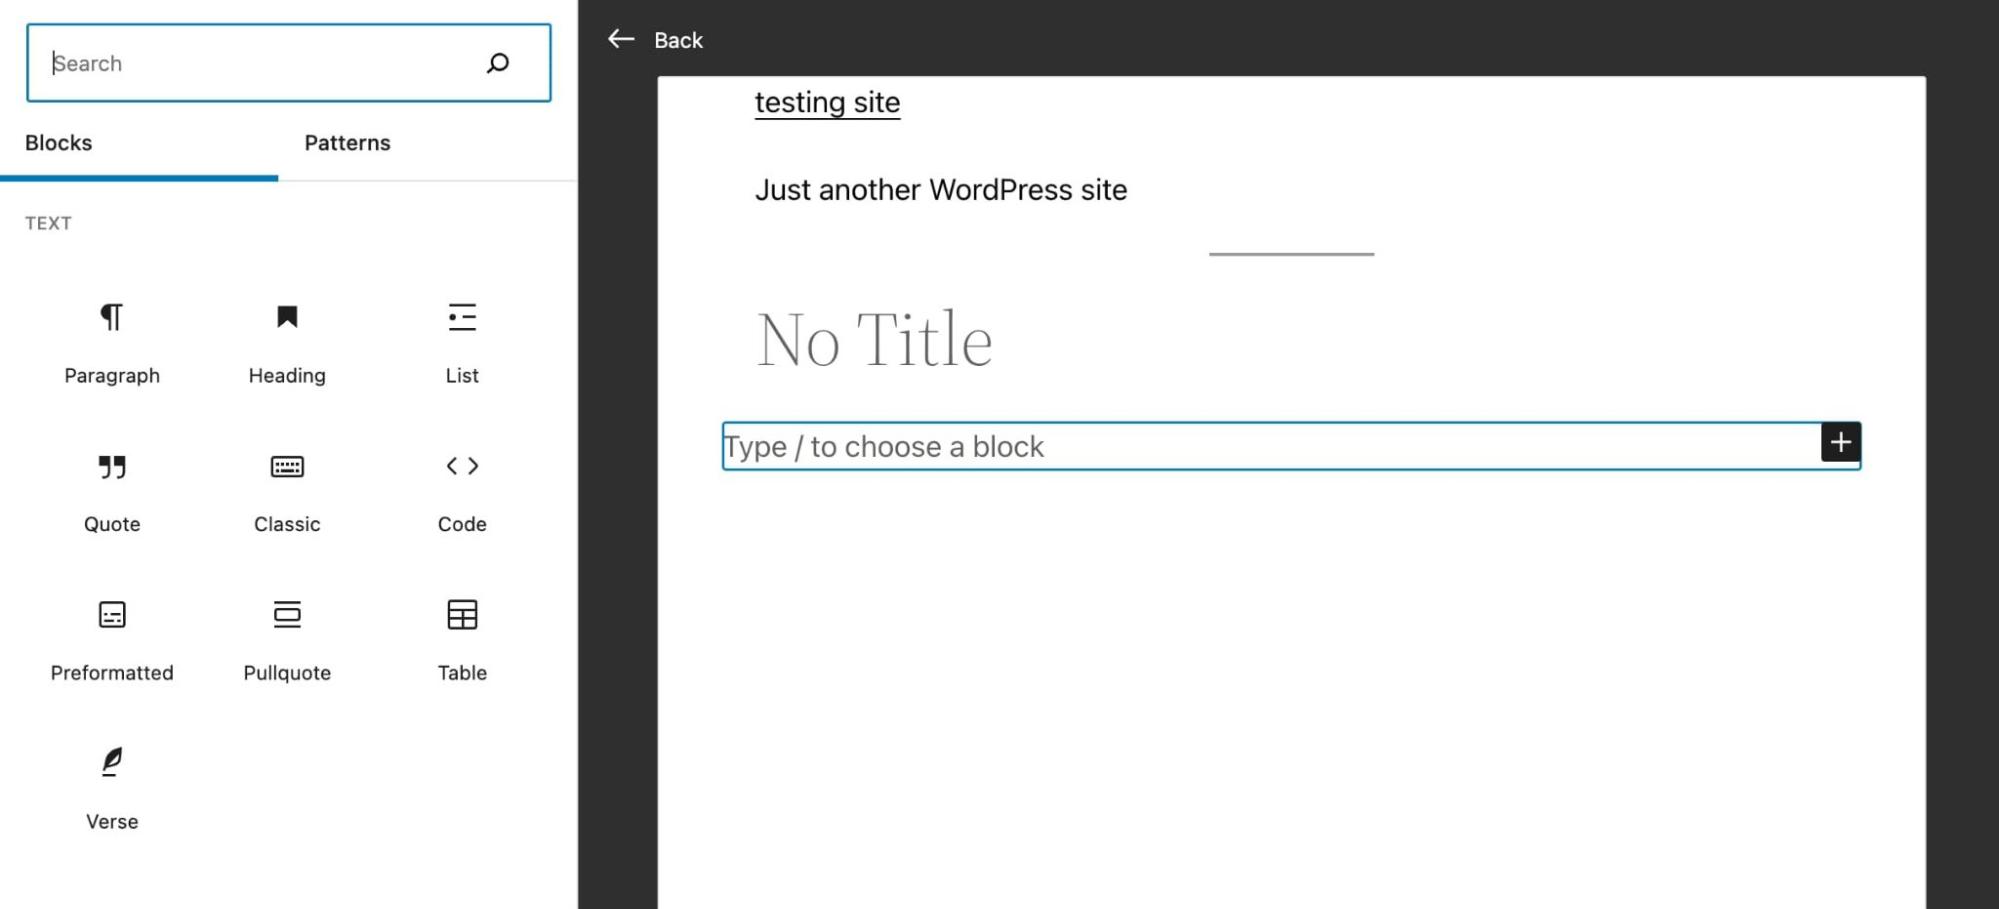
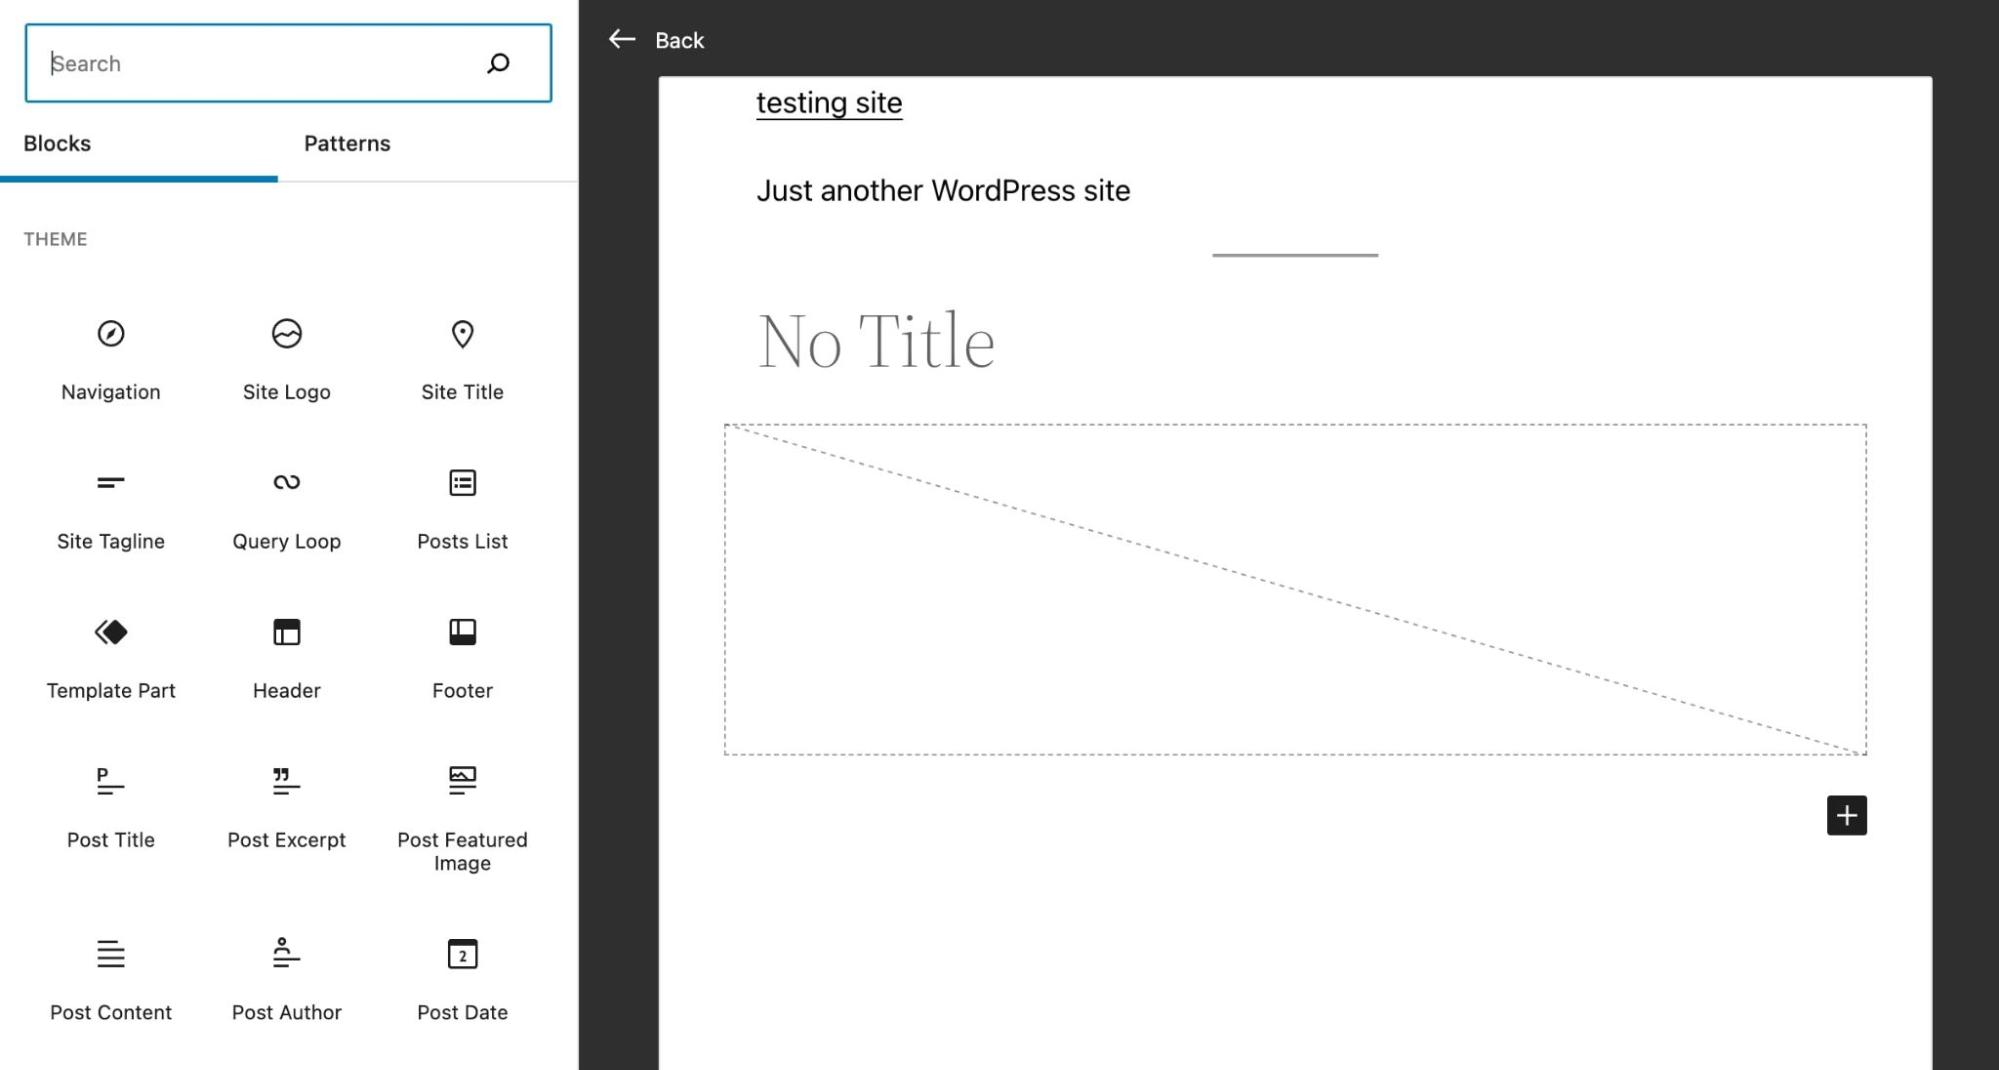
You can also insert blocks related to your theme. By scrolling down to the Theme section of the block options, you can display a logo, tagline, post comments, and more:

WordPress Site Blocks

When you finish customizing your template, click on Publish. Then, whenever you want to assign a post or page to that template, simply select it in the settings tab.

Skip the line and get tips right in your inbox

Click below to sign up for more how-to's and tutorials just like this one, delivered to your inbox.

marketing tips

How to Create Template Parts in WordPress with the Site Editor

With a block theme, you can edit templates with the Site Editor. You can edit your theme directly rather than making a new post or page.

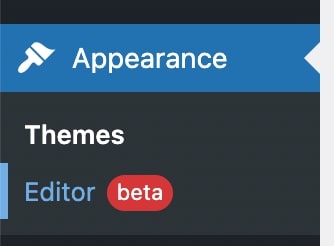
First, go to your dashboard. Then, select Appearance > Editor (beta):

WP Theme Editor

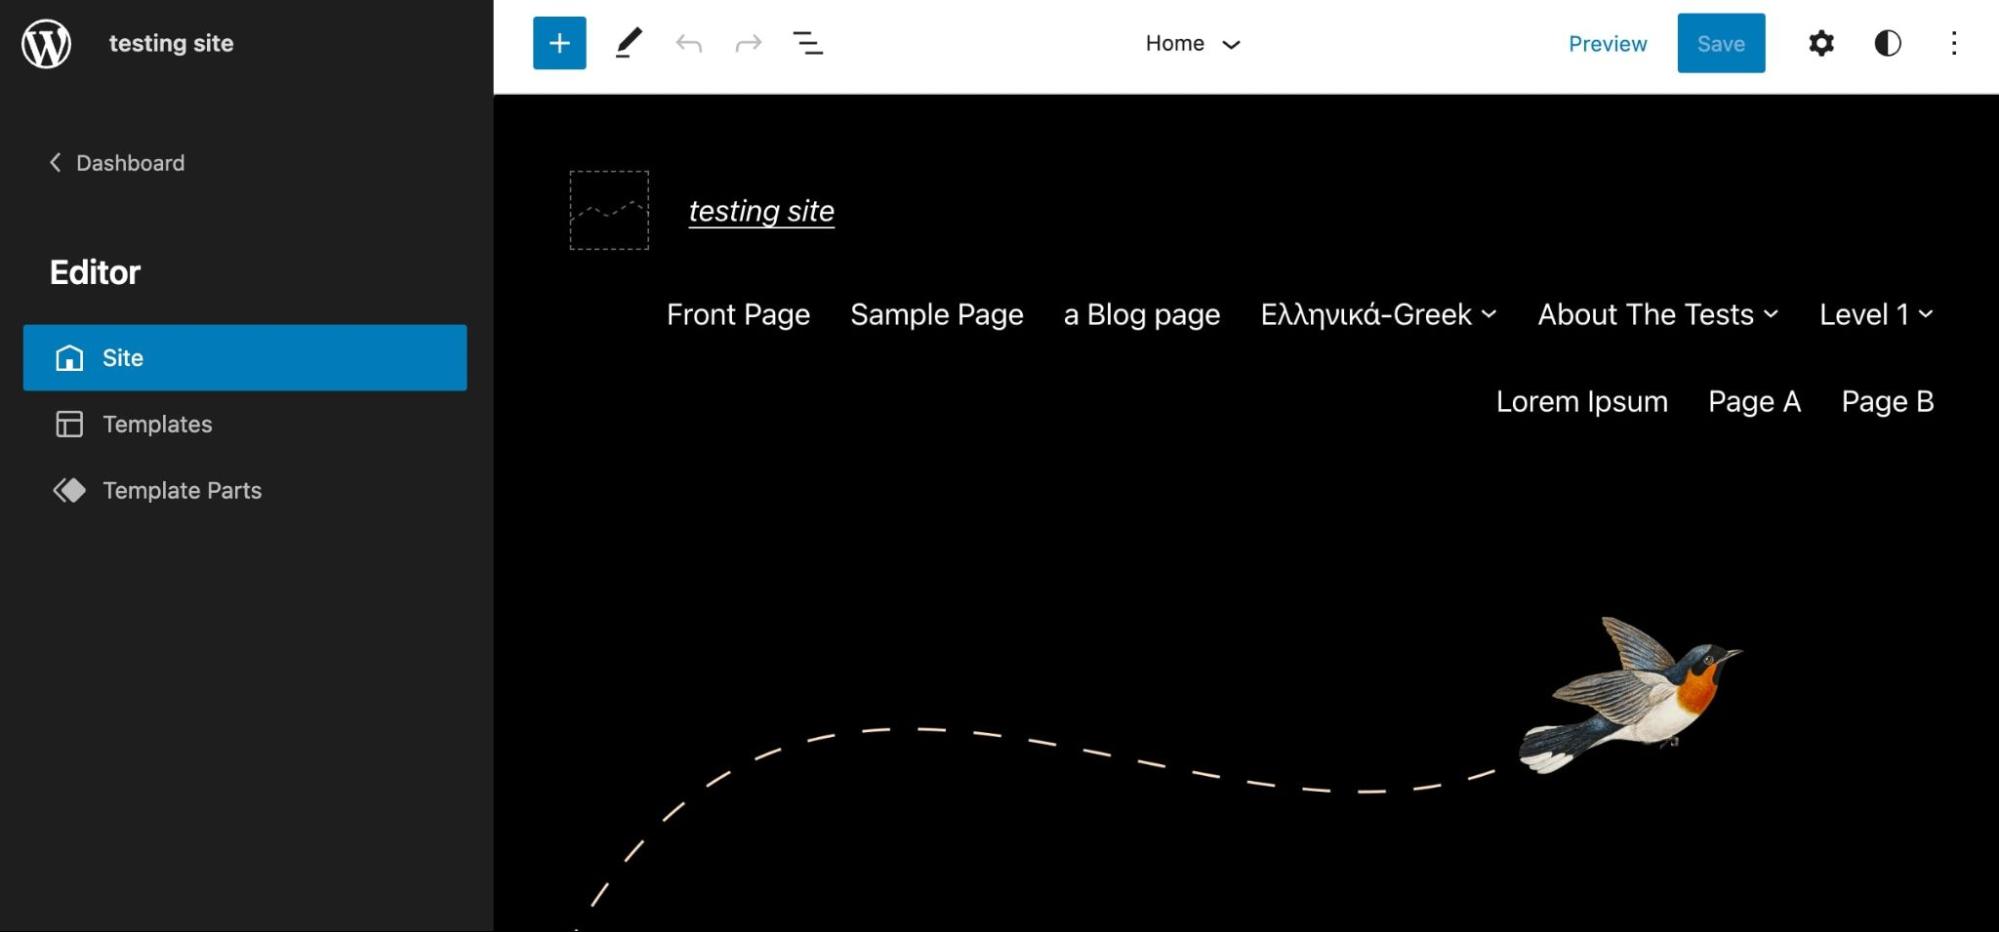
This will open the Site Editor. To find your theme’s templates and template parts, click on the WordPress icon in the upper left corner:

WordPress Custom Theme testing site

After selecting Template Parts, you’ll see a list of default options. To add a new template part, click on the Add New button:

WordPress Template Parts

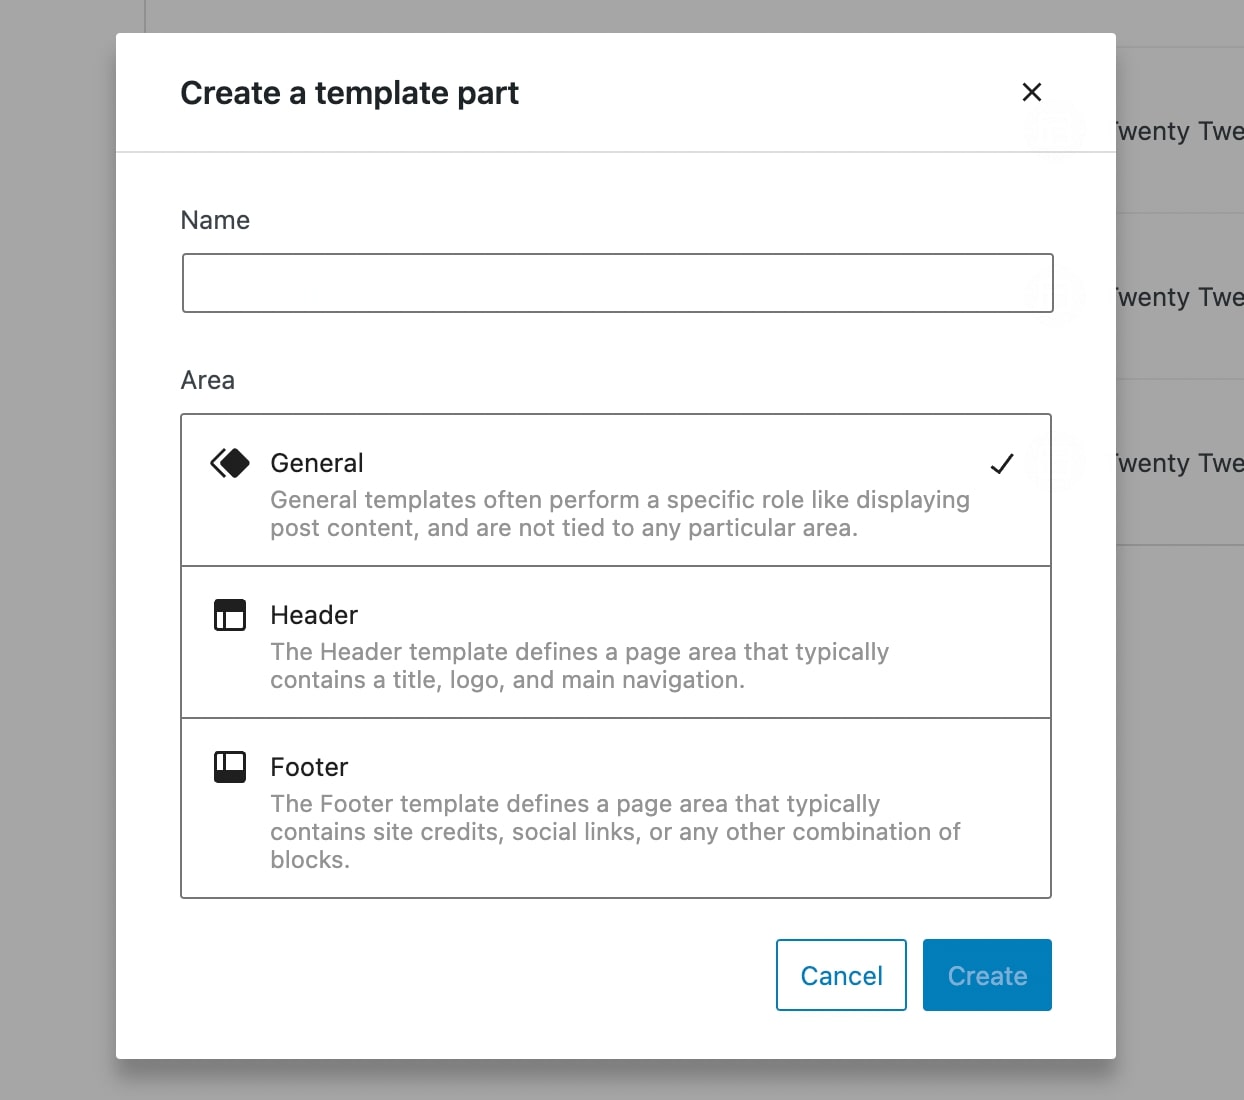
Then, create a name for your template part and choose where to place it. The three placement areas are General, Header, and Footer:

WordPress Template Part

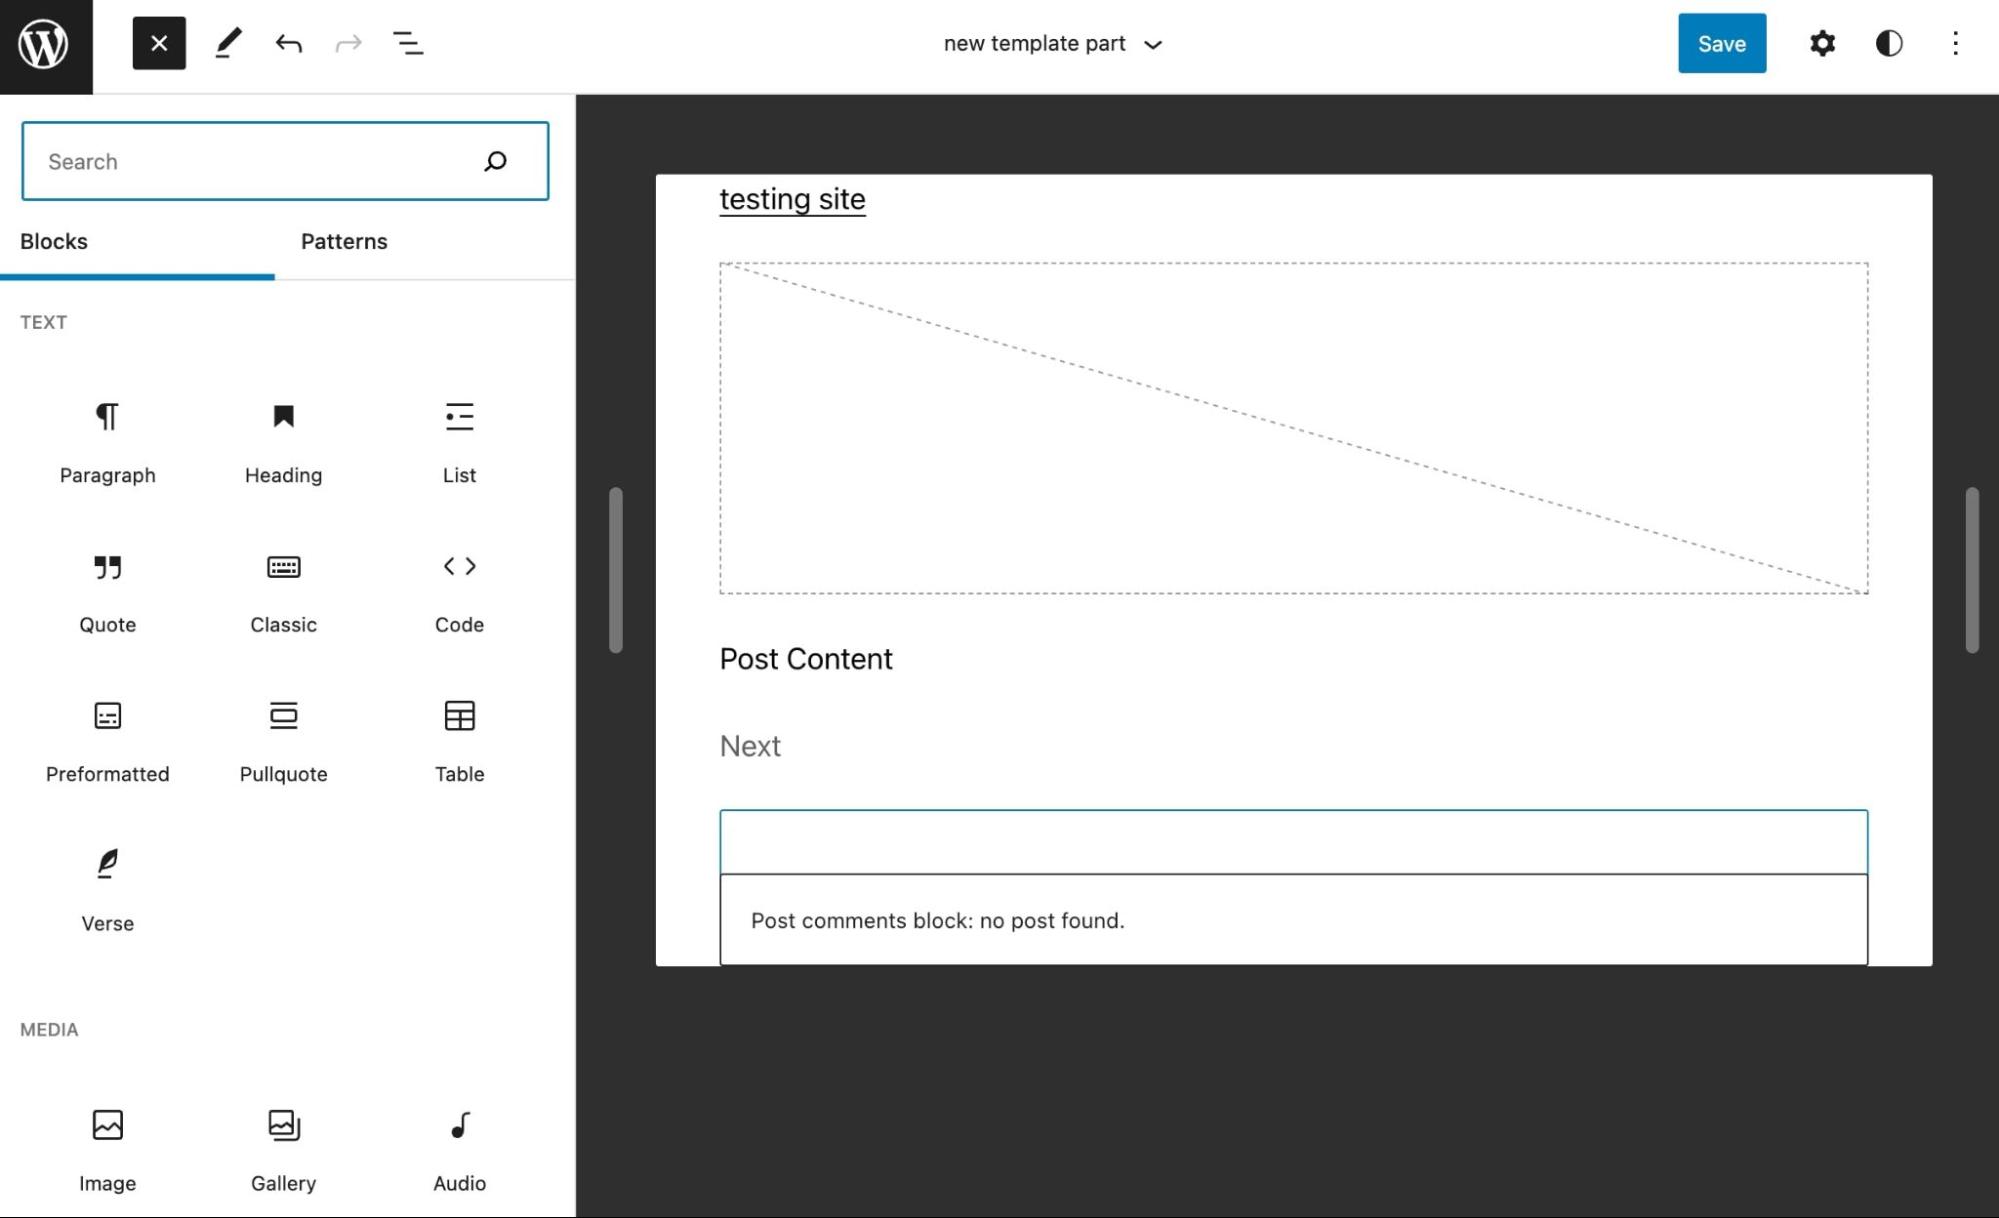
When you’re done, select Create. This will take you to the isolated template part, which you can customize by adding blocks:

WordPress add new Template Part

You could display a simple call to action, website logo, or anything you might want to reuse as a template part. Once it’s saved, you can add it to any template by simply inserting the Template Part block.

How to Create Custom Templates and Template Parts in WordPress (Manual Coding)

Although Full-Site Editing enables you to create templates and template parts for an existing theme, you might want to develop your theme. In addition, this option can give you more control over the appearance of your website.

If you’re building your new theme from an existing one, we recommend creating a child theme. This step ensures that new updates on the parent theme won’t override your customizations.

Step 1: Add a Configuration File

With previous PHP-based themes, you could edit the header of your template file. However, to create custom content in a block-based theme, you’ll need to create a new theme.json file.

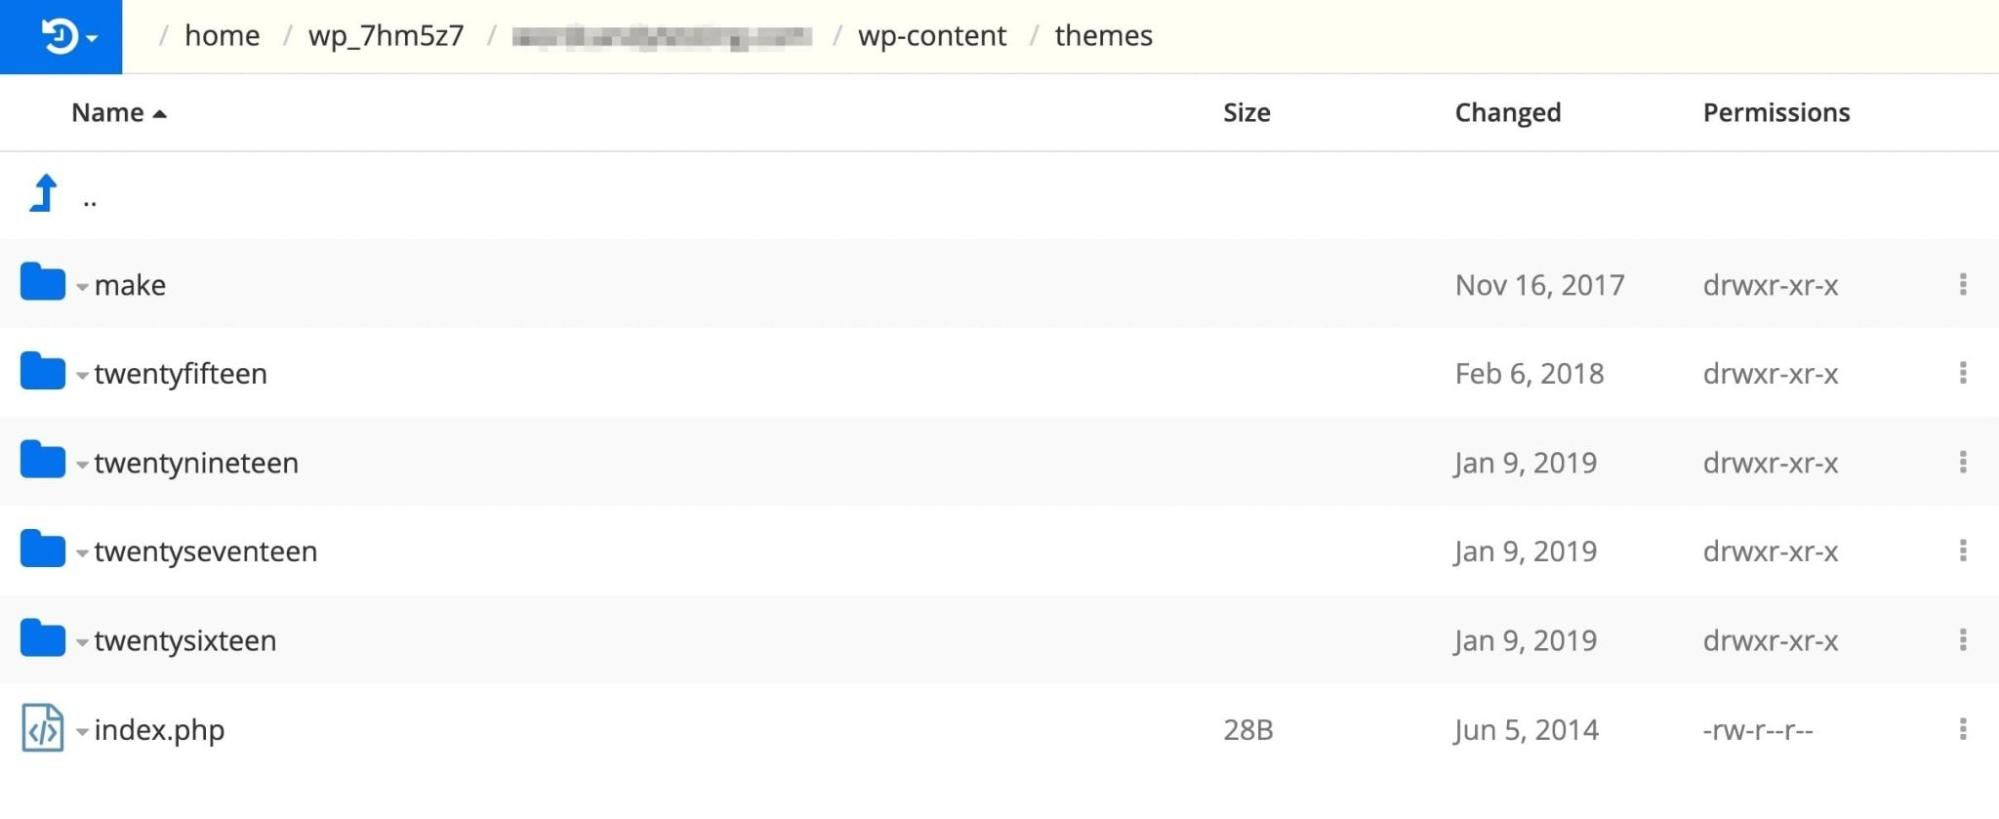
You’ll first need to access your site via Secure File Transfer Protocol (SFTP) or your hosting provider’s site manager dashboard. Then, look for the themes folder, which should be under wp-content:

WP-Content Themes Folder

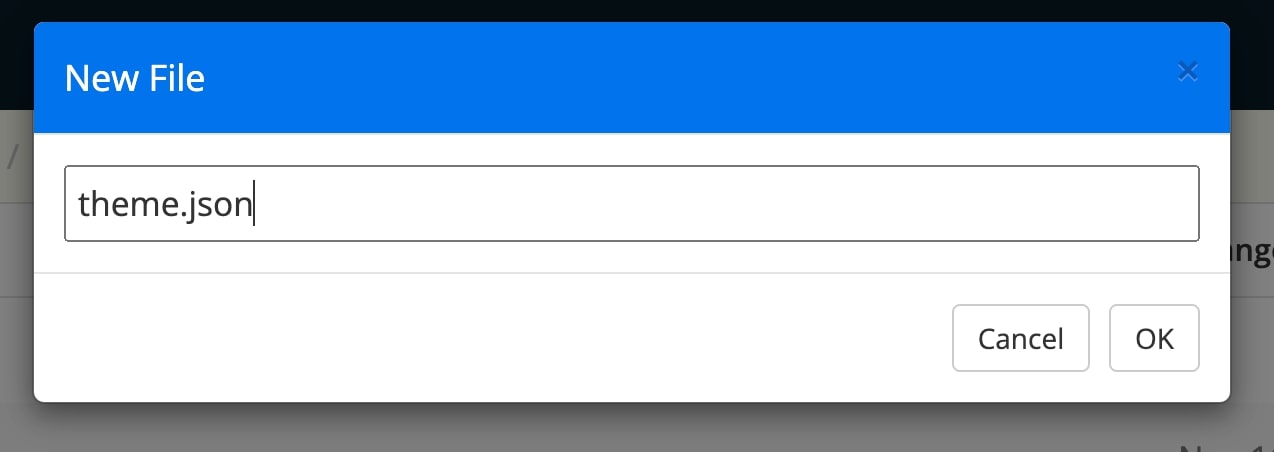
In your child theme folder, create a new file. Label it “theme.json”:

theme.json file

In this file, include the version number within curly brackets. If you don’t add this, it will be read as “version 0”:

{
    "version": 2
}

You’ll have to configure this theme.json file to support the width of your content. After your version number, copy and paste this extra code:

{
        "version": 2,
"settings": {
"layout": {
"contentSize": "840px",
"wideSize": "1100px"
}
}
}

This will set your content width to 840px. The wide width will also be updated to 1100px. These values match the default widths in the Site Editor, but you can edit them as needed.

Since the content width is now 840px, it will provide a lot of space for each line of characters. Depending on your chosen font and size, you might need to adjust it so that viewers can comfortably read your content.

Step 2: Create New Template Parts

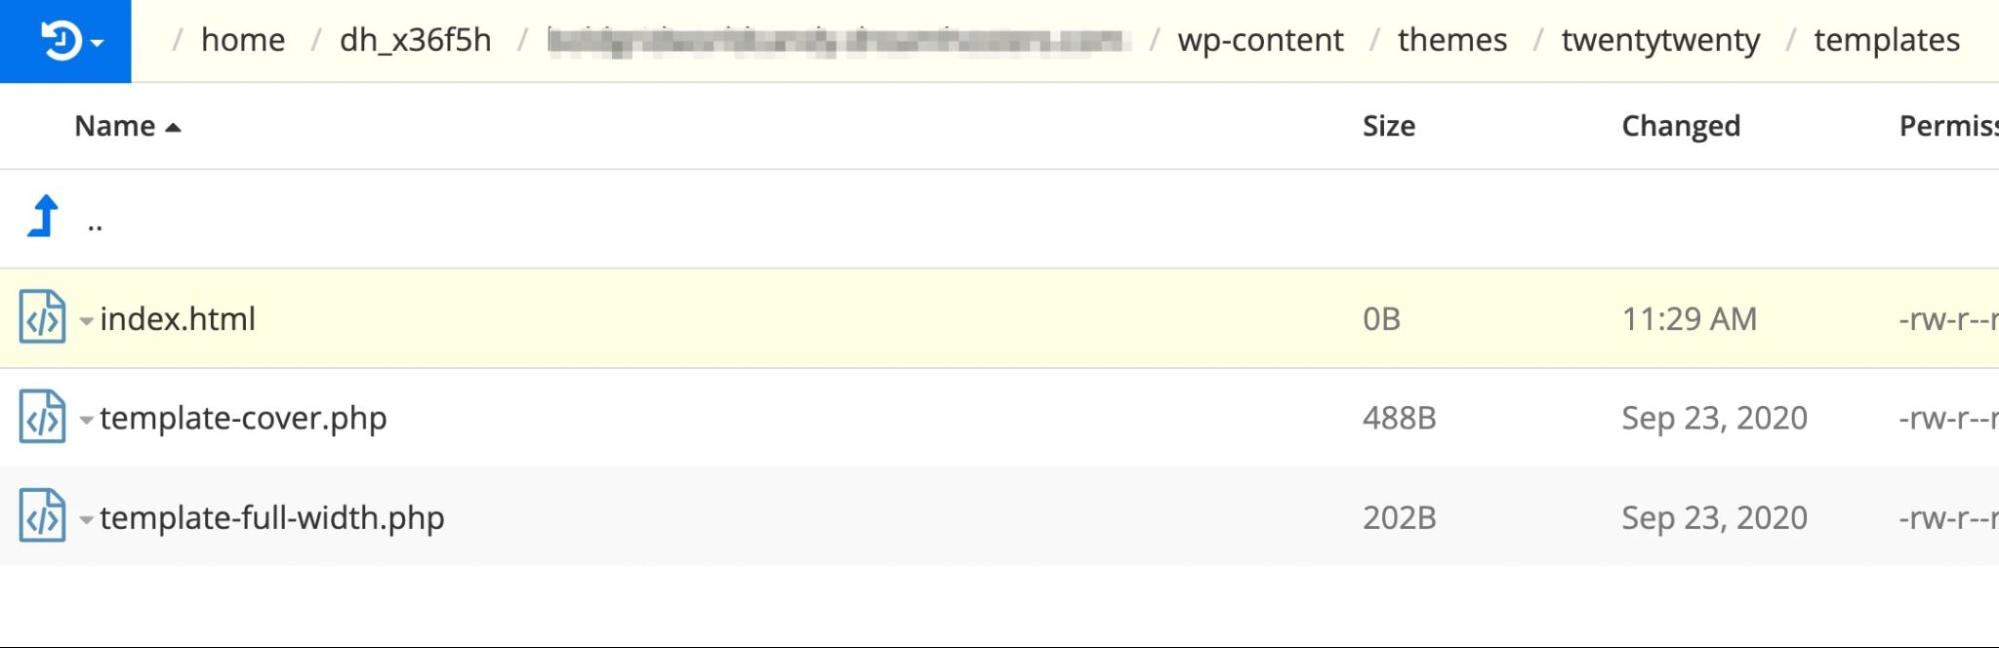
Then, go back to your themes folder and open the templates folder:

WP-Content Templates folder

Here, create an index.html file:

WordPress template index.html file

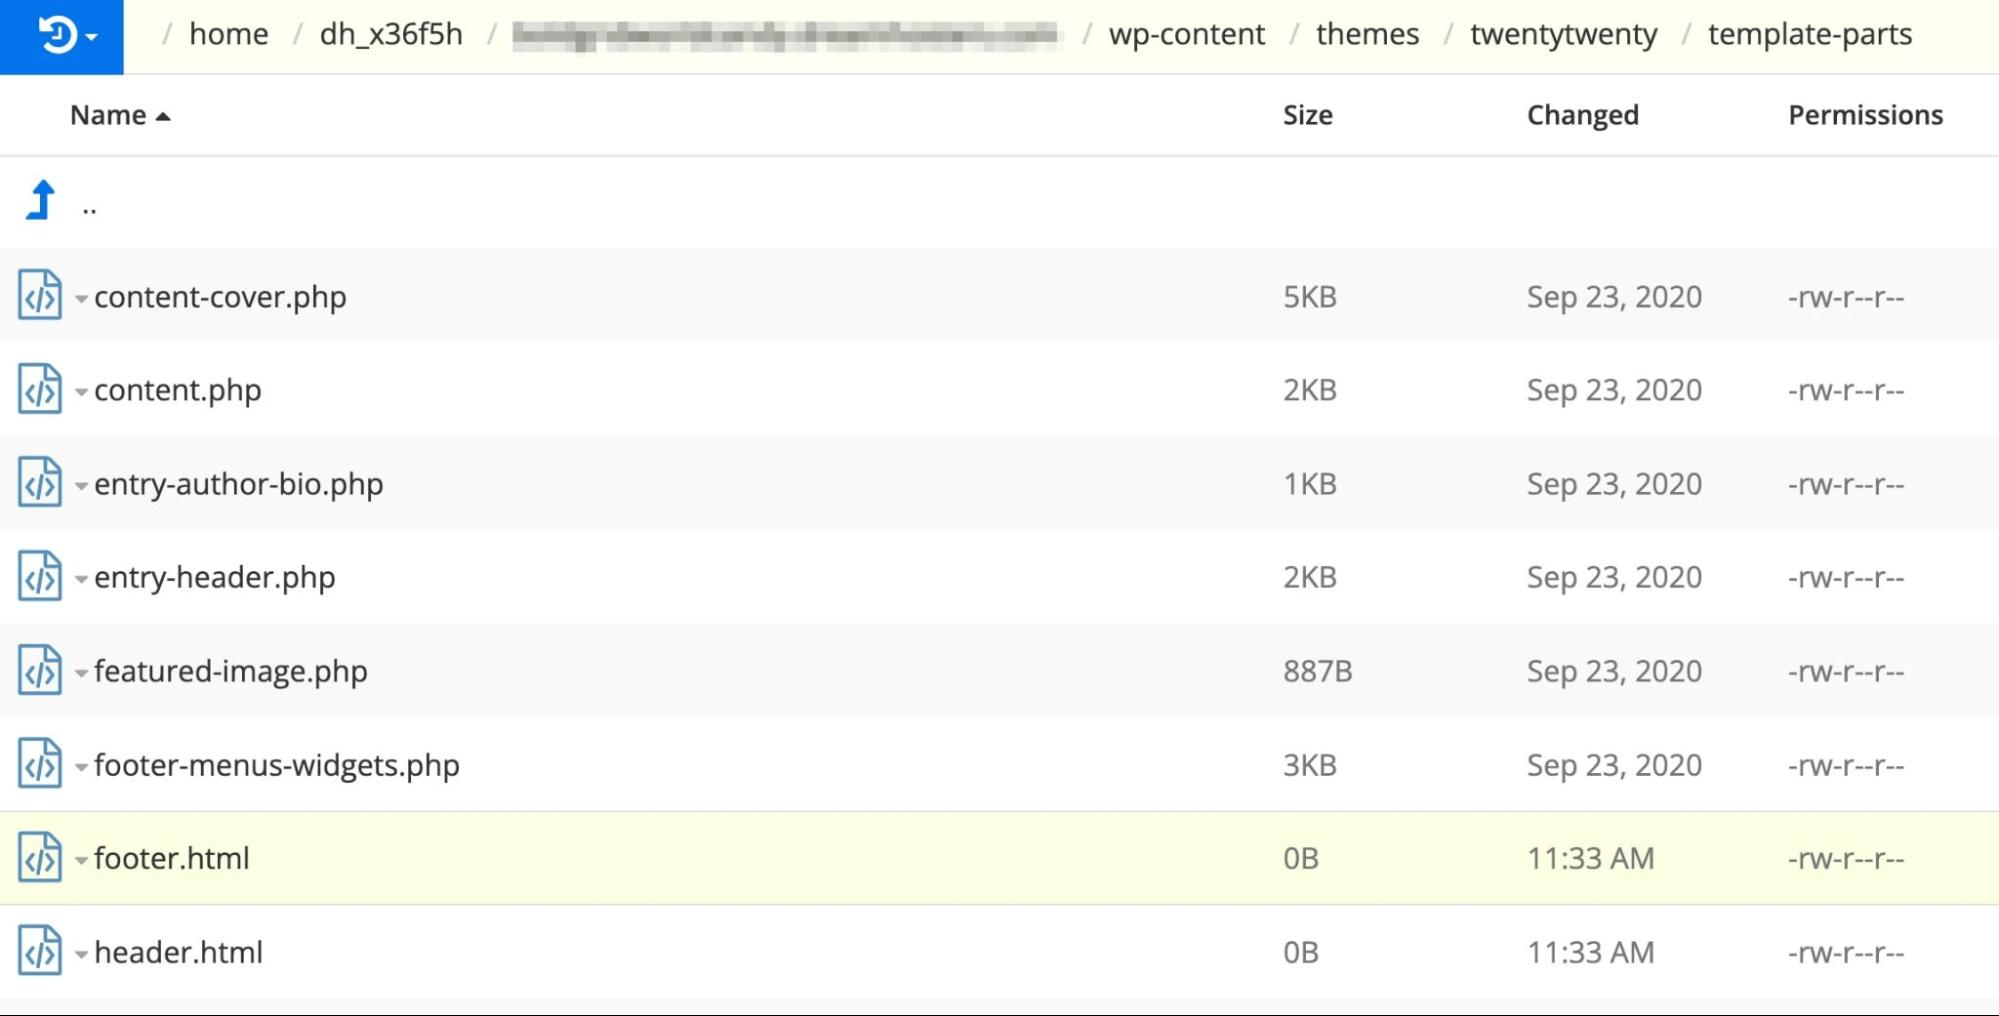
Return to your theme folder and click on template-parts. Inside this folder, create files for footer.html and header.html:

WP-Content template parts folder

Inside the header.html file, add code for your site title and tagline blocks. You can do this by including this block markup:

<!-- wp:site-title /-->
<!-- wp:site-tagline /-->

Next, go to the footer.html file and paste the following code:

<!-- wp:paragraph {"align":"center"} -->
<p class="has-text-align-center">Proudly powered by 
<a href="https://wordpress.org/">WordPress</a>.</p>
<!-- /wp:paragraph /—->

Once you add these template parts, they can easily be identified when you’re ready to test your theme.

Step 3: Combine the Template Parts

The next step is to place block markup for your template parts into your template HTML file. Open the templates folder and find the index.html file you created in the last step.

Then, you’ll need to add code for your two template parts:

<!-- wp:template-part {"slug":"header"} /-->
<!-- wp:template-part {"slug":"footer"} /—->

Based on the name of the template part file, this name will become the slug. For example, the header.html template part will have “header” as its slug.

Next, add the correct HTML element for each template part. They will identify the location of the template part:

"tagName":"header"
"tagName":"footer"

If you plan on using CSS to identify this header and footer, you’ll need to add a custom CSS class name. You can place this code at the end of each line:

"className":"site-header"
"className":"site-footer"

Lastly, the layout setting you inserted into the theme.json file needs to be supported. To do this, add this code to each template part:

"layout":{"inherit":true}

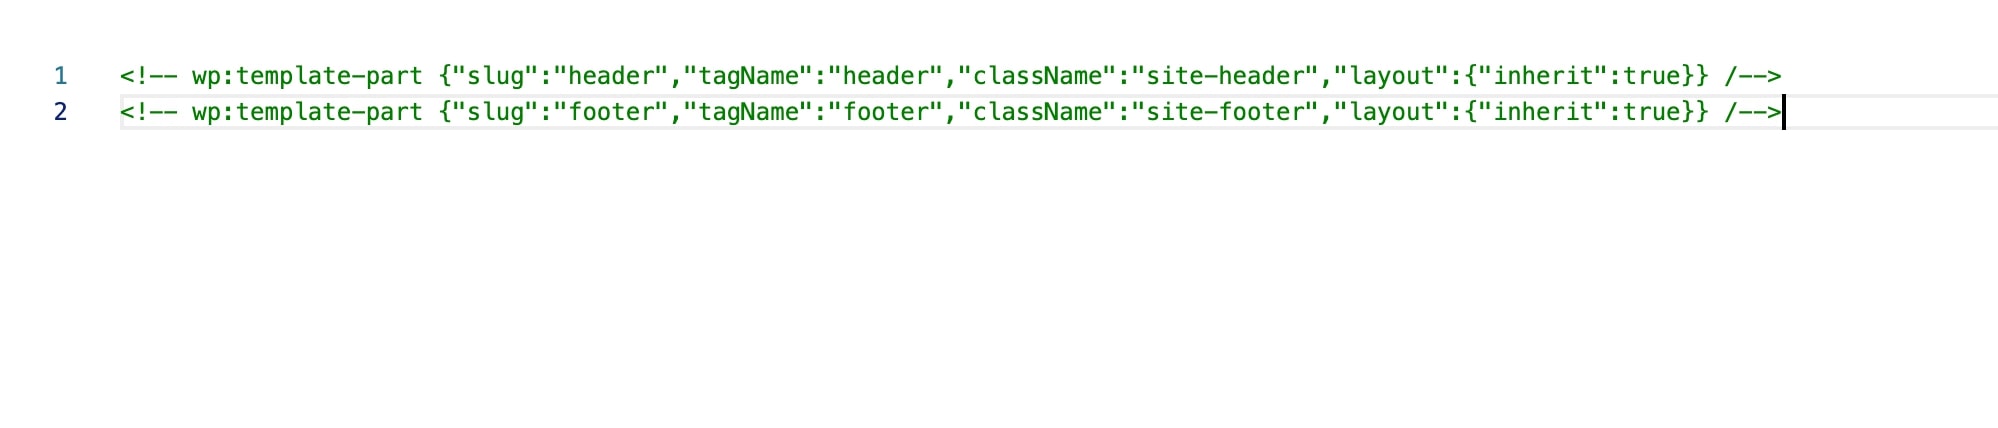
Here’s what the resulting code should look like:

custom WordPress Template header and footer code

Once you’ve finished coding, you can preview your site to view these changes to your layout.

Create Original Templates

If you want to streamline your website design process, it’s a good idea to use Full-Site Editing. You can easily customize your site’s appearance with templates and template parts with this feature. This approach can be a simpler alternative than completely redesigning every page from scratch.

To review, here are the different ways you can create templates and template parts in WordPress:

  1. Make a new template with the Template Editor.
  2. Create template parts with the Site Editor.
  3. Manually code templates and template parts.

Coding your own theme can be tricky, especially if you don’t have experience with web development. If you need to customize your layout from scratch, you might want to hire a professional designer. With our Custom Web Design Pro Service, you can avoid this complicated coding process and get a high-quality website designed for your brand!

Get a Beautiful Website You’re Proud Of

Our designers will create a gorgeous website from scratch to perfectly match your brand.

custom website design

The post Decoding WordPress: Custom Templates and Template Parts appeared first on Website Guides, Tips & Knowledge.


source https://www.dreamhost.com/blog/wordpress-templates-template-parts/

Creating and Mastering GA4 Explorations

In the switch from Universal Analytics (UA) to Google Analytics 4 (GA4) — which will go fully into effect July 2023 — a lot of things have...