Thursday, 10 June 2021

3 Things You Should Never Outsource for Your Small Business (And 6 You Should)

As a small business owner, there might come a point when you feel it’s time to call for backup. Perhaps you’re struggling to stay on top of your responsibilities, or you realize that you lack the required expertise to carry out certain tasks.

In these situations, outsourcing might be the right solution for you. It involves hiring a third party to perform essential services, such as managing your company website and social media accounts. However, before getting outside assistance, it’s essential to identify the business areas that could benefit most from this strategy.

In this article, we’ll look at the main advantages of outsourcing jobs for your small company. We’ll also highlight the three things to never outsource for your small business and the six you can definitely hand off to someone else. Let’s get started!

The Advantages of Outsourcing for Small Businesses

Outsourcing can be very beneficial for small business owners. For starters, hiring third parties tends to be more cost-effective than employing new staff members, mainly because you don’t have to spend money on renting office space or expanding your existing location.

You’ll also avoid other costs that generally come with hiring employees, such as software licensing. When you outsource, you’re only paying for the services delivered by the third party.

“An example of a small business website.”

Outsourcing can also reduce your stress as a small business owner and help you prioritize your tasks more efficiently. As your company grows, you may find that your workload becomes unmanageable. Handing over certain jobs to third parties will free you of those unnecessary burdens, so you can focus more time and energy on developing your products or services.

Finally, outsourcing can help you achieve your business goals more efficiently. For example, if you wish to grow your Instagram audience and drive more sales, you can achieve this quicker if you hire a social media expert (rather than doing it yourself or training an existing staff member).

Likewise, if you want a new website, you can have one up and running within a few days if you hire a professional. Ultimately, you can use outsourcing to fill gaps in your workforce and have experts take over the weaker areas of your organization.

How to Determine What Type of Help You Need

Perhaps you’ve decided that outsourcing is the right option for your small business and are wondering how to determine the type of help you require. Let’s look at a few factors to consider.

It’s best to start by identifying the tasks that are hard both for you and your team. These typically tend to be secondary or additional duties on top of primary responsibilities.

For example, your customer service assistant might also do a bit of social media marketing when time permits, even if it’s not their area of expertise. In this case, it makes sense to outsource your social media marketing, so you’ll have someone who can dedicate more time to it and achieve better results.

You might also want to track your time when working on particular tasks or projects. Even if you and your staff are qualified enough to handle every area of your business, some jobs can be more time-consuming than others, and in turn, require outsourcing.

For instance, while you may have the technical expertise to manage your website, doing so could be taking up a large part of your working day. Therefore, it might be a good idea to entrust a professional with the maintenance of your company site.

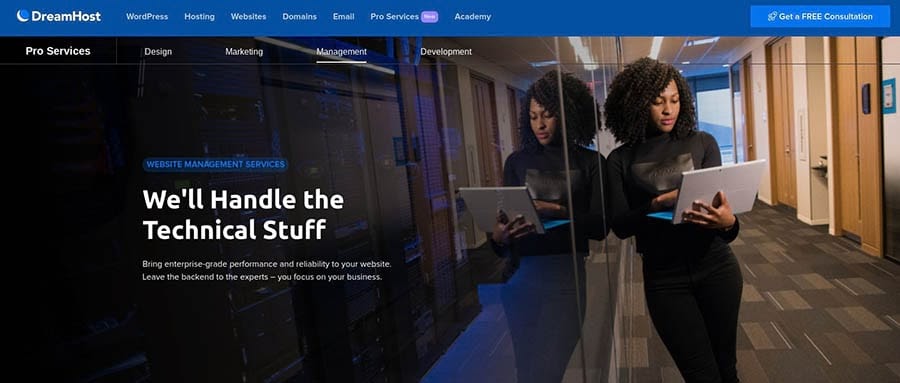
Delegate More, Stress Less

Running a website takes work. Now you can offload backend jobs — things like performance optimization, malware removal, and updating old software — to DreamHost’s technical professionals and free yourself up to focus on your business.

3 Things You Should Never Outsource for Your Small Business

Outsourcing can make things easier for you and your team. However, we believe there are three areas of your business that you should avoid handing over to third parties. Let’s take a look at them.

1. Core Competencies

Your core competencies are the capabilities or traits that make your company stand out from the competition. For instance, your main competency could be your innovative marketing strategy, or perhaps it’s the quality and reliability of your products. In other words, it’s what makes your business special.

Since this core competency gives you a competitive advantage, you might want to avoid assigning it to outside parties. Think of it as your ‘secret recipe’ that you want to protect and constantly improve.

2. Customer Service

Another area of your business that you should avoid outsourcing is customer service. When you interact directly with your clients, you can ensure that their issues and requests are addressed quickly and efficiently. This will help you earn a reputation for really caring about your user base.

Meanwhile, when you entrust a third party with your customer support operations, it’s hard to be sure whether they are dealing with your clients professionally. Poor service can cause irreparable damage to your brand image. You can also miss out on vital information about weak areas, which can help you improve your offerings.

3. Human Resources

If you have a small team, handling your own human resources could be more cost-effective than outsourcing it. You may have one member of staff who has the authority to approve or reject holiday leave, deal with payroll processing, and handle other employee-related issues.

Having an in-house human resource manager also means that any problems or conflicts within your small team can get addressed and resolved instantly. This creates a safe and supportive working environment for your employees, which can positively impact their productivity.

6 Things You Should Consider Outsourcing for Your Small Business

As your workload begins to increase, you may feel the need to hire more freelancers or firms to handle a specific task or business function for you. Here are six main services you should consider outsourcing if you want to save money on training and employing staff.

1. Content Marketing

Content marketing is about publishing material aimed at engaging people with your brand and products. This normally includes articles, videos, and social media posts.

“A DreamHost blog post.”

Crafting interesting content for your audience requires time and creativity. When you outsource your content marketing to a freelancer (also known as an independent contractor) or a content agency, you can have professional writers regularly creating high-quality posts for your company website or social media channels.

Outsourcing helps ensure that you will have fresh, engaging content published regularly. In addition to continuously providing value to your clients, this can also help boost your rankings in search engines.

2. Search Engine Optimization (SEO) Marketing

SEO is a marketing strategy that helps your website get found by users looking for products in your niche. It can help you drive more traffic to your website, and therefore increase sales.

However, SEO can take a while to master. There’s a lot of technical work involved and many different areas to cover, from performing keyword research to optimizing your website’s metadata. For this reason, you might want to consider hiring SEO strategists to help your website rank higher on search engines.

3. Social Media Marketing

Managing multiple social media accounts can be taxing. The quickest way to grow your following and engagement is to publish unique posts daily – something you and your team may not have the time for.

“The Cluse Instagram account.”

Outsourcing your social media marketing means you won’t have to spend hours taking beautiful photos for your Instagram account or trying to come up with interesting content to post on your Facebook page. Social media experts can do all the posting for you while helping you reach a wider audience.

4. Website Design

These days, almost everyone can create a website. Thanks to the variety of drag-and-drop website builders available, developing your own site has never been easier. However, not everyone is design-savvy, and a poorly-built site can drive people away.

If you want people to trust your authority or buy your online products, your company should have a professional website. We recommend hiring web design experts who can create a stunning WordPress website that reflects your brand image and values and offers an engaging User Experience (UX).

5. Website Management

As a business owner, building a well-designed and functional website is just the beginning. Once you’ve set up your site, it’s essential to make sure that it’s actively managed and maintained.

Considering that this is a time-consuming and sometimes tedious undertaking, we recommend finding someone who can manage the technical work.

“The DreamHost Pro Services site.”

Occasionally, your website will require some updates or backups. Moreover, some features might stop working, or your site may become unresponsive.

If you outsource your website management, you don’t have to worry about fixing glitches on your site or resolving serious issues such as hacking attacks. Instead, you can have experts troubleshoot any technical issues and carry out regular maintenance on your site.

6. Website Development

As your business grows, so will your website. Perhaps you’ll need to add new products to your online shop or install new features such as live chat or a membership area.

“A membership area of a rental property website.”

By hiring an expert web developer, you can keep your site updated and relevant without having to do any work. Simply let your developer know what changes you want to make on your site, and they can take care of it.

Outsource with Software and Tools

Are you thinking of outsourcing some business operations? Consider a virtual assistant! Check out our round-up posts of software and tools that can help you manage your outsourcing:

When hiring third parties to perform jobs for your business, it might be a good idea to use a few task management tools so you can keep track of all your outsourced projects.

Entrepreneur Tips in Your Inbox

Whether you need help creating the perfect web design, crafting a digital marketing strategy, or managing a remote team, we can help! Subscribe to our monthly digest so you never miss an article.

Perfecting Your Business Process

As your small business starts to grow, you might want to consider outsourcing some essential tasks. Hiring freelancers or other firms to take over certain areas of your business can be more cost-effective than training your team or employing new staff members.

As discussed in this post, some areas make sense to handle in-house, such as your core competencies, customer service, and human resources. However, when it comes to marketing initiatives — such as SEO and social media and web design and development — we recommend outsourcing to minimize costs without sacrificing quality.

If you’re looking to hand over your marketing and website management to the experts, we offer several professional services to help you grow your business in a cost-effective way. Check out our plans to learn more!

The post 3 Things You Should Never Outsource for Your Small Business (And 6 You Should) appeared first on Website Guides, Tips & Knowledge.


source https://www.dreamhost.com/blog/small-business-outsourcing/

Tuesday, 8 June 2021

How to Fix 16 Common Image Issues in WordPress

High-quality imagery can do wonders for your website. When used right, images can make your content highly engaging and easier to digest. More importantly, blog posts with images tend to rank better in search engines than those lacking visuals. Therefore, it’s essential to know how to use images on your site adequately.

WordPress enables excellent flexibility when it comes to adding photos to pages and posts. You can format your images and arrange them within your content any way you wish. You can also make your site more visually appealing with features such as photo galleries, headers, and background images.

If you want to learn more about using images on your WordPress site, you’ve come to the right place. In this post, we’ll show you how to fix 16 common image issues in WordPress with clear, step-by-step instructions. Let’s get started!

We Make WordPress Easier for You

Leave migrating your site, installing WordPress, managing security and updates, and optimizing server performance to us. Now you can focus on what matters most — growing your website!

1. How to Upload Images in WordPress

To upload an image in a WordPress post or page, simply click on the black button with the plus symbol (in this post, we’ll refer to it as the Add Block button). This will ask you to choose a block to insert into your content.

Select the Image button, and a block will appear.

Uploading an image in WordPress.

Next, click on the Upload button and select the image you want to add. Select Open, and then you’re done!

2. How to Align an Image to the Left or Right

When you select an image, a toolbar will appear above it. Click on the alignment button and choose Align left or Align right.

Aligning an image in WordPress.

As you can see, this toolbar also gives you other options as well. This includes replacing the image and adding a link to it.

3. How to Add Captions Below Images

To add a caption, simply click on your image, and you’ll see the option to write something below.

Writing an image caption in WordPress.

Note that you’ll also get a few styling options for your caption. You can link to another page by clicking on the third button in the caption toolbar.

4. How to Display Images in Columns and Rows

If you want to display images in columns and rows, you can click on the Add Block button and select Gallery from the options. Next, click on Upload in the gallery block, and then select the images you want to add and choose Open.

Adding an image gallery in WordPress.

Once your images have been uploaded, you’ll be able to move them around. To do this, you can click on an image and use the arrow buttons. You’ll also see an option to write a caption for your images and the gallery.

5. How to Create Responsive Image Galleries

The default WordPress gallery is very basic. If you use your site to showcase your photography, you might want to consider adding a plugin that lets you build and customize your own image galleries.

For beautiful responsive galleries, we recommend using the Envira Gallery plugin. After installing and activating the plugin, navigate to Envira Gallery > Add New. There you can create your first gallery, which you can then insert into your posts by selecting the Envira Gallery block.

The Envira Gallery settings page.

You can start by uploading some photos to your gallery and then clicking on Config to select the number of columns, set the lazy loading delay, and use the other available features.

Adding an Envira Gallery in WordPress.

Remember to name your galleries. This way, you’ll be able to find them more easily when adding them to your posts.

6. How to Set Featured Images for Posts

WordPress lets you select a featured image for your posts. This image will be attributed to your post when it appears in your blog feed. Without a featured image, your post will have a missing thumbnail image. A post thumbnail is a reduced-size picture that appears on your blog’s homepage to help users sort through and identify relevant content.

To set a featured image, head to the sidebar on the right, select the Post tab, and navigate to the Featured image section.

Setting a featured image in WordPress.

Next, click on Set featured image and upload your image file. Alternatively, you can choose an image that is already uploaded to your site by clicking on the Media Library tab.

7. How to Add Cover Images in Posts and Pages

If you’re writing a long post, you might want to add a wide cover image between different sections so that your content is more digestible. To add a cover image, start by clicking on the Add Block button and typing “cover” into the search bar.

Once you select the Cover button, the block will appear. Click on Upload to add an image from your computer, or select Media Library to choose an image you’ve already uploaded to your site.

Adding a cover image in a WordPress post.

If you want to make some changes to the cover image, you can use the options in the tool section in the post.

8. How to Fix the Featured Image Appearing Twice

Some WordPress themes display the featured images at the top of published posts. This image will not be visible in your post when using the content editor.

Therefore, you might think you have to insert it into your content in addition to setting it as the featured image (as shown in step six). If you do this, you’ll get the same image twice in your live post.

Fixing a featured image appearing twice issue.

To fix the multiple images problem, simply delete the image from the post editor. Then you can just use the one you selected in the Set featured image box.

9. How to Crop Images

WordPress offers some basic photo editing features. To edit a photo, you can go to your WordPress dashboard and navigate to Media > Library. After you select the image, a window will pop up.

Cropping images manually in WordPress.

Click on the Edit Image button below the image, and you’ll be taken to a page with editing tools. Select the Crop button at the top, and drag the corners of the box to crop the image to your liking.

Alternatively, you can change the image size by entering the dimensions and aspect ratio in the right sidebar.

Cropping images in WordPress.

At the top, you can find options to rotate and flip the image. Once you’ve finished editing your photo, click on Save. Note that the changes will be applied to the original photo.

10. How to Add Header Images

Some WordPress themes feature header images. To change the default header image, go to your dashboard and navigate to Appearance > Customize.

On the customization page, click on Header Image. If you can’t see this option in the menu, it means that your current theme does not support header images.

Changing the header of a WordPress theme.

On the Header Image page, select Add new image to replace the default image in your header.

Changing the header of your WordPress site.

When you’re done, you can click on the Publish button at the top of the screen. This will save your changes.

11. How to Add Background Images

Your WordPress theme might also come with support for background images. To set a one, access the theme’s customization page by navigating to Appearance > Customize from your WordPress dashboard.

Next, click on Colors. Locate Body Background and click on Select image.

Changing the background of your WordPress site.

When you set your background image, you’ll get some options for adjusting the preset and image position. Remember to save your changes before exiting.

12. How to Find Free Images for Your WordPress Site

When sourcing images for your posts and pages, we recommend accessing free stock photo sites to avoid copyright infringement. Several sites offer royalty-free images, including Pixabay, UnsplashFlickr Creative Commons, and Pexels.

A site offering free stock photos.

The images available on these sites are free to use. However, it’s always a good idea to credit the photographer or artist with a link in the image caption.

13. How to Tag Images

Tags make it easier to organize and filter photos on your site. However, WordPress currently does not offer an image tagging feature. Therefore, you might want to download a plugin that lets you sort your images with categories and tags.

For categorizing and tagging images, we recommend using the Media Library Assistant plugin. Start by installing and activating the plugin, and then head to Media > Library.

You can see all the photos you’ve uploaded to your WordPress site on the Media Library page. Click on the list view button at the top, then find the photo you want to tag and click on Edit.

The WordPress Media Library.

On the Edit Media page, find the Att. Categories and Att. Tags sections on the right-hand side, and start adding categories and tags to your image.

Tagging images in WordPress.

You can also rename your image on this page, write a caption, and add alternative text. When you’re done, click on the Update button on the right to save your changes.

14. How to Import External Images to WordPress

To import external images to WordPress, you’ll need to access your old website’s files directly using a Secure File Transfer Protocol (SFTP) tool such as FileZilla. Locate your site’s root directory, and then go to wp-content/uploads.

Accessing the WordPress uploads folder.

There, you’ll find the media files that you’ve uploaded to your site. Download them to a secure location, and then log into your new WordPress site. Navigate to wp-content/uploads again, and copy over your media files.

You may still encounter image-related errors after doing this since your image URLs may be pointing back to your old site. If that’s the case, you’ll need to go through and update your image URLs so they point to your new site instead, which can be a time-consuming process.

To avoid that problem, we recommend using a plugin such as Duplicator to move your website between domains or web hosts. You may also benefit from reaching out to your new host for assistance to make sure everything on your site gets transferred over properly.

15. How to Require a Featured Image in Your Posts

If your site has multiple authors, you might want to set a reminder for everyone to select a featured image before publishing a post. To do this, you’ll need to add some custom code to your site.

Before getting started, we recommend backing up your site and creating a child theme. Then you can add the following code at the end of your theme’s functions.php file:

<?php

/**

* Require a featured image to be set before a post can be published.

*/

add_filter( 'wp_insert_post_data', function ( $data, $postarr ) {

$post_id              = $postarr['ID'];

$post_status          = $data['post_status'];

$original_post_status = $postarr['original_post_status'];

if ( $post_id && 'publish' === $post_status && 'publish' !== $original_post_status ) {

$post_type = get_post_type( $post_id );

if ( post_type_supports( $post_type, 'thumbnail' ) && ! has_post_thumbnail( $post_id ) ) {

$data['post_status'] = 'draft';

}

}

return $data;

}, 10, 2 );

add_action( 'admin_notices', function () {

$post = get_post();

if ( 'publish' !== get_post_status( $post->ID ) && ! has_post_thumbnail( $post->ID ) ) { ?>

<div id="message" class="error">

<p>

<strong><?php _e( 'Please set a Featured Image. This post cannot be published without one.' ); ?></strong>

</p>

</div>

<?php

}

} );

Save your changes, and users will be required to add featured images to all post types that support them.

16. How to Set a Default Featured Image

If you want to set a default featured image for those occasions when you can’t find the right photo, the Default Featured Image plugin is a handy tool to have. It lets you choose a photo that will automatically appear as the featured image for posts published without one.

After installing and activating the plugin, navigate to Settings > Media in your dashboard.

Using the Default Featured Image plugin.

Click on the Select default feature image button and choose your photo. Finally, hit Save Changes at the bottom of the page.

Take Your WordPress Website to the Next Level

Whether you need help navigating the WordPress dashboard, choosing the perfect product image, or writing alt text, we can help! Subscribe to our monthly newsletter so you never miss an article.

Additional WordPress Resources

If you’re new to WordPress, you may run into some common issues while working with images and other content. To help you navigate any WordPress problem you encounter, we’ve put together several how-to guides:

If you’re looking for more WordPress tips and hacks, check out our WordPress Tutorials. This collection of guides will help you set up and design your first WordPress site.

Now You Can Fix That Common Image Issue

Images can improve your site’s User Experience (UX) and increase the visibility of your content in search engine results. Therefore, it’s important to know how to use photos to engage readers with your content.

Fortunately, WordPress makes it easy to upload and manage photos on your site. It lets you crop and customize images, as well as create beautiful photo galleries and headers to make your pages more interesting.

If your business relies on high-quality imagery, you might want to consider using a web hosting service that offers full WordPress support. Our DreamPress plans are perfect for site owners who want to focus on growing their businesses and spend less time troubleshooting errors in WordPress.

The post How to Fix 16 Common Image Issues in WordPress appeared first on Website Guides, Tips & Knowledge.


source https://www.dreamhost.com/blog/how-to-fix-common-image-issues-wordpress/

Thursday, 3 June 2021

How to Design an LGBTQ-Inclusive Website

At DreamHost, we care a lot about accessibility and inclusive web design. The idea is simple: Make your website as easy to use (and as welcoming as possible) for each and every visitor.

Of course, you’re going to think about the abilities of your users and the demographics of your target market. But there is a huge population that many small business owners forget to consider when designing a website: individuals who identify as LGBTQ (an initialism for lesbian, gay, bisexual, transgender, queer, and questioning).

“Wait,” you say. “People are people, and love is love.” And you’re not wrong!

However, there are so many things you can do to make a website that is more inclusive and welcoming for all your visitors, regardless of orientation or identity. We’ll walk you through some of the key reasons you should consider the needs of your LGBTQ customers when designing a website (Spoiler: It’s good for business!) and then we’ll give you 12 key pointers to get started.

Create a Website for All

With automatic updates and strong security defenses, DreamHost takes server management off your hands so you can focus on creating a site that represents your visitors.

Why Having an LGBTQ-Inclusive Website Matters

“Making your site more inclusive for LGBTQ people can improve the user experience for everyone,” explains Jaymie Strecker, a non-binary Drupal developer at Kosada in Athens, Ohio. “Your site’s audience almost certainly includes people who are LGBTQ themselves or have LGBTQ friends and family. To provide the best user experience, you have to understand how that facet of their lives intersects with your site. Why would you want to alienate a significant percentage of your users?”

Strecker points out that some people hesitate when they hear the word “inclusive” because they equate it with “politically correct” and are afraid it will take away their creative freedom in crafting content for the site.

“They think it’s about following a bunch of rules about what you’re not allowed to say,” Streker says. “In reality, being inclusive is about understanding your audience and making your site resonate with them. It’s about breaking away from marketing clichés and reaching out to your users in a more authentic way. A more LGBTQ-inclusive site will come across as more vibrant, fresh, up-to-date, and friendly.”

Another factor in having an LGBTQ-friendly site, the one we teased above, is that it’s simply good for business. “We live in a capitalistic society, and online shopping is a must nowadays,” says Laura Egocheaga, Lead Digital Marketing Strategist at DivibeTech in Tampa, Florida. “Money does not discriminate, and analysts at LGBT Capital estimated the LGBTQ buying power at $3.7 trillion globally.”

According to Statista, 9.1% of U.S. millennials identified as LGBT in 2020. In its 2017 Accelerating Acceptance report, media watchdog GLAAD put that figure much higher: 20%. On top of that, Egocheaga notes, younger people — especially Gen Z — are more embracing of queer culture overall.

“No matter if you’re a startup or big brand, your objective is to capture the attention of a younger generation to increase the lifetime value of your consumer,” Egocheaga says. “An LGBTQ-inclusive website matters because you don’t want to be turning away that buying power, let alone be considered a horrible brand in Generation Z’s eyes.”

For Queen of Surfing, a Hawaii-based expert on online publicity and marketing, the proof is in the numbers. “If you go online and research the top 100 followed entities on Twitter, 8% of them are gay or lesbian or transgender,” she says. “Even more awesomely shocking: 30% of the top 10 most-followed people on Twitter are gay or lesbian or transgender. To make the error of excluding us from any version of online presence and not considering us as a demographic when creating your website is akin to losing out on 8–34% of your possible profits.”

There are perks to having an LGBTQ-inclusive site within your company as well. It can help your employees feel safe and valued, regardless of how they identify. It will also help LGBTQ customers — and prospective LGBTQ employees — find you. For example, at DreamHost, we are champions of diversity — that’s why two of our core values are to “Empower People” and “Give Everyone a Voice.”

12 Ways to Create an LGBTQ-Inclusive Website

So how can you tweak your site to be welcoming to all? Simply follow these 12 tips to create an LGBTQ-friendly website.

1. Use gender-neutral terms.

Being inclusive when it comes to pronouns is crucial, especially in drop-down forms. “Gender forms should contain more than just binary options,” says Andrew Becks, co-founder and COO of 301 Digital Media, based in Nashville. “More to the point, why collect gender at all? Sign-up form completion rates will likely be higher with one less question, so maybe just avoid asking altogether unless absolutely necessary.”

In addition to male and female, be sure to include ‘non-binary’ or ‘other’ as an option. “If ‘other’ is chosen, give them the option to write in what they want their gender to be,” Egocheaga says. “This will give you an in-depth look into that consumer’s mind so you can retarget them with specific marketing content.”

If it’s an option on your site, a text field is the best bet since that will provide options that cover all of your users, explains Streker, who prefers to use the gender-nonspecific pronoun ‘they.’ “This allows people to write in options that you may not have considered, such as the Native American term two-spirit or the Native Hawaiian / Tahitian Māhū,” they say. “It irks me, as a gender non-binary person, to be forced to choose between radio buttons ‘male’ or ‘female.’”

2. Include LGBTQ images.

“Avoid clichés like featuring only opposite-sex couples in photography,” Becks says. Use pictures and graphics that represent individuals and couples from the LGBT community.

“Facebook does a great job at this when they have two males or two females get married and share it as a milestone post, showing an icon of two males or an icon of two females dressed up,” Egocheaga says. “It’s the little things that make a huge difference.”

Though there aren’t many LGBTQ-inclusive options on popular stock photo sites that you can buy, there are sites that offer inclusive content that reflect the diversity of your audience, such as TetraImages.com, the LGBT section at Twenty20, Blend Images, PhotoAbilitythe Getty Images Lean In Collection, and Canva’s Natural Woman Collection.

“Drawings can include LGBTQ people, too,” Strecker says. “For one of my company’s websites, to explain our product in a fun way, we commissioned a comic from artist Kelci Crawford that features a genderqueer character.”

3. Show targeted products.

“Where appropriate, have a section of the website dedicated to an organization’s LGBTQ-community outreach efforts or LGBTQ-targeted product offerings,” Becks says.

“And definitely include that page on the menu so it catches everyone’s attention right away,” Queen of Surfing says. “A ‘straight’ person coming across your site might now forward it to their LGBTQ friend, having noticed that mention on your menu.”

Want a real-world example?

On its LGBTQ community page, Kimpton Hotels and Restaurants spells out the organization’s commitment to diversity. In 2014, the hospitality giant became the first national hotel sponsor for The Trevor Project (the country’s largest organization that works toward crisis and suicide prevention for LGBTQ youth), donating hotel rooms, meeting spaces, and catering, in addition to hosting fundraisers for the organization across the country. Additionally, Kimpton often caters to LGBTQ guests through their blog, Life Is Suite, with posts like 5 Unique Trips LGBT Travelers Will Love and Our Favorite 10 Gay Bars from San Francisco to Philly.

4. Use SEO to Promote Your Site

When you have an LGBTQ-inclusive site, you want to ensure the community finds it — and there are tricks for making that happen. “Build external links and partnerships from LGBTQ-community websites and blogs to diversify and improve a site’s SEO backlink profile,” Becks advises.

Queen of Surfing emphasizes the value of a meta-tag to drive an audience. Essentially, a meta-tag is how people find your website. When you go online and input search terms in a search engine, those very words are meta-tags. To make your site pop up in first in searches, use these words repeatedly in your website.

“In a nutshell, to attract the lesbian, gay, and transgender community to your website, meta-tag it by repeatedly mentioning the words ‘lesbian,’ ‘gay,’ and ‘transgender’ along with your matching product or service organically and wherever appropriate within your website,” Queen of Surfing advises. The keyword opportunities are limitless, she says:

  • If your site promotes cruises, include content that specifically mentions ‘lesbian cruises.’
  • If you focus on charity events, create content targeted around the phrase ‘gay charity.’
  • If your site covers healthcare topics, include an article about ‘transgender healthcare.’

“You better believe when we go online, we don’t just search for a product or service,” Queen of Surfing adds. “We definitely input the words ‘transgender,’ ‘gay,’ or ‘lesbian’ with any product or service when we perform online searches.”

If you’d like to learn more about search engine optimization and how it can help people find your site, check out the DreamHost Academy. We’ve put together an in-depth SEO course that walks you through SEO best practices and keyword research techniques.

5. Educate yourself about LGBTQ issues and terminology.

“You can’t improve the user experience for your LGBTQ users until you understand where they’re coming from,” Strecker says. “This is an ongoing process. There are many ways to do it.” Here are a few examples:

  • Hire speakers to talk to your team about LGBTQ awareness.
  • Attend or sponsor events for LGBT people and allies in tech (for example, DreamHost sponsored an LGBT+Allies meetup during WordCamp US).
  • Follow blogs of LGBTQ advocacy organizations.
  • Get involved with local LGBTQ advocacy groups.
  • Support policies that promote diversity in the workplace.
  • Make LGBTQ resources available for employees.
  • If you have an LGBTQ person on your team, get their feedback. “They may have some valuable suggestions,” Strecker says. “But don’t put all the burden on them. Every member of your team should take responsibility for making the site more inclusive.”

Strecker points out that the LGBTQ community is an incredibly diverse group with many communities and different points of view, consisting of people of all races, ethnicities, and nationalities. “LGBTQ people are wealthy and poor, urban and rural, and across the political spectrum,” they say. “Different LGBTQ people talk about their identities in very different ways.”

Be sure to consult with the LGBTQ community for different aspects of your website. “Include LGBTQ representation in the website design, development, testing process, hiring, and vendor selection,” Becks adds.

6. Collect only the data you need.

“If your site is intended to be GDPR-compliant, you should already be doing this,” Strecker says. “Do you really need to ask your users what their gender is? If you don’t have a specific plan for how you’re going to use that data, don’t ask for it. If your users are participating in an online community, they may not need to know another user’s gender, but it can be helpful to know the pronouns to refer to that user (she/her, he/him, they/them, etc.). So, your user registration form can ask for the user’s preferred pronouns. To protect users’ privacy, this should be optional.”

Remember to think about why you are collecting this data in the first place. Consider your present and future needs, and what you plan to do with the details you amass. If there isn’t a valid purpose for it, reconsider your approach.

7. Tell users how you’re going to use their data.

If you do ask users for their gender, sexual orientation, or other personal information, Strecker advises telling them how you’ll use that information:

  • With whom will it be shared?
  • Will it be shown publicly?

“Because trans people may go by different names in different situations, when asking for a user’s name you should provide help text or other context to explain how that name will be used,” Strecker says.

For example, if you’re asking for a phone number, inquire what name they want to be addressed by if you’re going to call them. When you ask for an address, have a name field that goes with that address. If you’re collecting donations, what’s the name that should appear on the tax receipt? What’s your billing name if you’re asking for credit card information? If you’re hosting an event, ask what name should be on the badge.

8. Watch your language.

“When writing the content for your site be mindful of non-binary terms,” Egocheaga says. “Gender fluid people are not confused, and you must be mindful of that. All LGBTQ people want is to be respected and acknowledged for who they are.”

When asking for a user’s sexual orientation, there are so many possibilities — it’s not just lesbian, gay, or bisexual — so your best bet is to provide a text field, Strecker advises. When asking for a user’s title, in addition to the usual “Ms.”, “Mr.”, and so on, include the gender-neutral title “Mx.” and make the field optional.

Questions about relationship status should consider more than just married or single. “With more and more kids growing up in households with same-sex parents, it’s time to retire the perennial security question: ‘What is your mother’s maiden name?’” Strecker says. “These may seem like small things, but they can make a big difference in making LGBTQ users feel welcome on your site.”

9. Protect users from harassment on your site.

“More and more online communities are instituting community agreements that protect users from harassment and hate speech,” Strecker says. “A web search will turn up many templates and examples to help you get started.”

To make sure users understand your expectations, your community agreement should list some of the kinds of harassment that are banned, for example, “on the basis of race, ethnicity, disability.” This list should also include sexual orientation, gender identity, and gender expression.

“Have a plan for how to respond to homophobic and transphobic comments,” Strecker says. “This may include deleting the comment, speaking to the user, and/or suspending the user’s account. Empower users to protect themselves. Many sites let users flag inappropriate comments to bring them to the attention of a moderator (who should be knowledgeable about LGBTQ issues). If your site has private messaging, enable users to block other users.”

10. Use security best practices to protect users’ data.

“Leaked data is bad for any user, but the consequences can be especially dire for LGBTQ users,” Strecker says. “For LGBTQ individuals who are not out at work, being publicly outed could get them fired. LGBTQ youth who are not out at home are incredibly vulnerable. If their family finds out, they could be abused, subjected to conversion therapy, or kicked out of the house.”

In fact, a national survey by the University of Chicago found that lesbian, gay, bisexual, and transgender youth had a 120% increased risk of experiencing homelessness compared their peers who identified as heterosexual and cisgender.

11. Support a cause.

“If you’re a social enterprise make sure to showcase it on your site by showing exactly how you’re giving back to the LGBTQ community,” Egocheaga says.

Whatever you decide to support, show how you’re helping on your website.

“The LGBTQ community is known for having an open heart, and we tend to align ourselves with entities whose products or services are either sustainable in themselves, or entities who donate to worthwhile charitable causes and activism,” says Queen of Surfing. “Is your product or service eco-conscious in some way? I highly recommend overstating everywhere on your website wherever energetically appropriate each and every way your product or service is eco-friendly. This is guaranteed to attract the lesbian*gay*transgender*bisexual*queer pocketbook.”

12. Avoid making homophobic and transphobic remarks.

“I can’t tell you how many times I’ve seen someone do this, then dig themselves in deeper by saying, ‘It was only a joke,’” Strecker says. “If you mess up, own up to it, apologize, and be more mindful in the future.” This goes for all of your platforms. In addition to being careful about your website, keep the same policy in place for social media and any additional marketing materials.

“The more you educate yourself about LGBTQ terminology and issues, the more you develop a sense of what is and is not appropriate to say,” Strecker says. “You can relax and be spontaneous in your online interactions without accidentally saying something hurtful.”

DreamHost Takes Inclusivity Seriously

We regularly report on diversity, accessibility, and representation in the tech industry. Subscribe to our monthly newsletter so you never miss an article.

LGBTQ Inclusion Matters

We all want to be treated with dignity and respect, regardless of who we are or where we come from. Your LGBTQ visitors deserve the same consideration you give your other users. And setting aside the very important issue of human rights for a moment, it just makes good business sense to make this diverse group feel at home when they visit your corner of the web.

How have you created an LGBTQ-inclusive website? Any other tips you’d add to this list? Share with us on social media or join our Facebook group to start a discussion.

The post How to Design an LGBTQ-Inclusive Website appeared first on Website Guides, Tips & Knowledge.


source https://www.dreamhost.com/blog/how-to-design-lgbtq-inclusive-website/

Friday, 28 May 2021

How to Fix the WordPress Login Page Refreshing and Redirecting Issue (3 Ways)

Are you trying to log into your WordPress website but can’t get past the login page? If so, you might be stuck in a redirect loop.

When your WordPress login page keeps refreshing after entering your username and password, you’re likely dealing with a caching problem or a plugin error. Fortunately, this is an issue that can be solved quickly.

In this post, we’ll look at the common causes of this redirect loop and then walk you through three simple fixes to help you log back into your website. Let’s get started!

Common Causes of the Login Page Refresh and Redirect Issue in WordPress

The WordPress login redirect issue occurs when the login screen keeps refreshing and redirects you back to the same page. As a result, you’ll be locked out of your site’s admin area.

The WordPress login page.

There are three possible reasons for this error:

  • Your browser might be storing outdated WordPress files and data.
  • A recently-installed WordPress theme or plugin might be faulty or incompatible with other plugins.
  • Your WordPress site might have a corrupted .htaccess file.

You’ll be pleased to know that there’s an easy fix for each scenario. Next, we’ll show you how to troubleshoot the WordPress login redirect error so you can get back into your site.

Skip the Stress

Avoid troubleshooting when you sign up for DreamPress. Our friendly WordPress experts are available 24/7 to help solve website problems — big or small.

How to Fix the WordPress Login Page Refreshing and Redirecting Issue (3 Methods)

Now, let’s go through the three main steps to fixing the WordPress login redirect error. Before proceeding, you might want to perform a backup of your site just in case something goes wrong and you need to restore an earlier version.

1. Clear Your Browser Cookies and Cache

The quickest way to solve the WordPress login redirect issue is by clearing your browser cookies and cache. WordPress uses cookies to store authentication data. Sometimes your browser might retain old files, resulting in a redirect loop when you try to log into your site.

To clear the cookies and cache in Google Chrome, click on the three-dot icon in the top-right corner of your browser. Go to More Tools in the drop-down menu, and then choose Clear browsing data.

“Clearing your browsing data in Chrome.”

In the popup window that appears, set the time range to All time and check the following options: Cookies and other site data and Cached images and files. Finally, click on Clear data.

If you’re not a Chrome user, don’t worry. You can easily find instructions for clearing your cache and cookies in different browsers.

Once you’ve completed this process, restart your browser and try logging into your WordPress site. If you’re still facing the same login error, head to the next step.

2. Check New Installs and Updates (Plugins and Themes)

As we mentioned earlier, the WordPress login redirect issue may be caused by a theme or plugin you’ve recently installed. Perhaps this new theme or plugin is faulty, or it is incompatible with other plugins on your site.

To determine whether the problem is caused by a theme or plugin, you can do two things:

  • Deactivate the plugins on your site
  • Revert to your site’s default theme

First, you’ll need to access your WordPress site via a Secure File Transfer Protocol (SFTP) client or the file manager in your website’s hosting account. If you have a DreamHost account, you can log in and navigate to WordPress > Managed WordPress in the sidebar.

Then find your domain and select Manage. On the next page, click on the Manage Files button in the Details section. This will take you to the file manager. Next, locate and open the folder labeled with your domain name.

“Accessing your WordPress site’s files.”

To deactivate your plugins, open the wp-content folder in your site’s root directory, and then find the plugins folder and rename it plugins_test.

 “Renaming the plugins folder.”

If this solves the login problem, you’ll need to determine which specific plugin is at fault. To do that, restore the folder’s original name, open it, and rename one of the plugin folders instead. You can repeat this process to deactivate one plugin at a time, testing your login page after each one to identify the culprit.

If you’re still unable to log into your WordPress site after deactivating the plugins, return to the wp-content folder and find the themes folder. Rename the folder themes_test. Your WordPress site will automatically revert to a default theme.

“Renaming the themes folder.”

If deactivating these elements solves your login problem, you can head to your WordPress dashboard and perform any necessary updates. You might also want to replace the plugin or theme causing trouble or contact the developer for assistance.

3. Restore Your Default .htaccess File

If you’ve tried the above two methods and are still stuck in the loop, don’t worry. There’s still one last method you can try.

Another possible cause of the WordPress login redirect loop is a corrupted .htaccess file. Located in your site’s root directory, the .htaccess file enables WordPress to interact with your server and generate permalinks for your site.

To access this file, connect to your website through an SFTP client or the file manager in your hosting account. From there, go to your site’s root directory, locate the .htaccess file, and delete it.

“Deleting the .htaccess file.”

Next, try logging into your site. If you’re successful this time, you’ll know that the problem was the .htaccess file.

Finally, you’ll need to create a new .htaccess file. Go to Settings in your WordPress admin dashboard, select Permalinks, and click on the Save Changes button at the bottom of the page.

“Creating a new .htaccess file.”

Note that you don’t need to make any changes on the Permalinks Settings page. Simply hit the blue button, and a new .htaccess file will appear in your site’s root directory.

Additional WordPress Error Resources

Do you want to learn how to troubleshoot other WordPress errors? We’ve put together several guides to help you solve several common WordPress issues:

If you’re looking for more WordPress tips, check out our WordPress Tutorials. This is a collection of guides designed to help you navigate the WordPress dashboard like a pro.

Take Your WordPress Website to the Next Level

Whether you need help navigating the WordPress dashboard, fixing incorrect database credentials, or finding the plugins folder, we can help! Subscribe to our monthly digest so you never miss an article.

Login Issue Be Gone

The WordPress login redirect loop may seem intimidating, but it is a common error. It’s generally caused by a caching issue, a faulty plugin or theme, or a corrupted .htaccess file.

There are three things you can do to get out of this redirect loop:

  1. Clear your browser cookies and cache.
  2. Check to see if the problem is caused by a newly installed theme or plugin.
  3. Delete and restore the .htaccess file in your website’s root folder.

If you want to avoid dealing with WordPress errors in the future, consider switching to DreamPress. Our managed WordPress hosting service takes care of all technical problems for website owners, which means you get to spend less time troubleshooting and more time growing your business!

The post How to Fix the WordPress Login Page Refreshing and Redirecting Issue (3 Ways) appeared first on Website Guides, Tips & Knowledge.


source https://www.dreamhost.com/blog/how-to-fix-wordpress-login-page-redirect-issue/

Monday, 24 May 2021

The History of WordPress: An In-Depth Look at the Most Popular CMS

WordPress has a long, rich history. From releasing new technologies to expanding a tight-knit community, this platform has established itself as an industry giant. However, given its robust timeline, understanding every important development that’s happened over the past few decades can feel overwhelming.

Fortunately, it is possible to grasp the highlights of WordPress’ history. By dividing the platform’s past developments into relevant feature-based groups, you can obtain a big-picture view while still learning about critical details.

In this article, we’ll introduce you to WordPress and cover its developmental timeline. We’ll analyze the history of plugins, themes, community groups, and more before looking at the platform’s future. Let’s get started!

An Introduction to WordPress

Before we discuss its history, let’s spend some time considering WordPress in its current state. This free, open-source Content Management System (CMS) helps people create websites. You can hear a little bit more about it in this video:

There are other important features that define WordPress as well. Of course, since nearly half of all sites run on WordPress, you may already be familiar with the software.

The platform is undeniably an industry giant. As such, even people who have never heard of WordPress have likely visited a site supported by its infrastructure. Additionally, its growth shows no signs of slowing down any time soon.

You might be wondering how we got here, as growth like this doesn’t happen overnight. If you’re trying to predict where WordPress may be headed in the next few years, understanding its past is a solid starting point.

The Best Web Host for WordPress

Leave migrating your site, installing WordPress, managing security and updates, and optimizing server performance to us. Now you can focus on what matters most: growing your website.

The WordPress Timeline

Let’s kick things off by focusing on the software itself. We’ll take a look at how WordPress has developed since the early days of 2002, dividing the time until now into four distinct phases of development.

2002-2005: Getting Off the Ground

WordPress development began in 2002. It was initiated as an improvement on a competing CMS with waning popularity, b2/cafelog. Nevertheless, the new interface was distinct. Users who decided to give the new blogging platform a shot were greeted by this interface in 2003:

A simple, bare-bones blogging interface from WordPress in 2003.

Its structure was based on the b2/cafelog model but with some upgrades. The interface was easier to interact with, and you could also choose from different templates to shape your content. Perhaps most important, however, was the reliance on the General Public License (GPL).

By licensing this CMS under the GPL, WordPress founders ensured that the software would remain free to use. Additionally, this license also enabled users to legally modify the code as much as they’d like. As such, the options for customization and evolution were nearly limitless.

Bloggers everywhere were immediately drawn to this flexible, easy-to-use haven. The number of users started to grow. In 2004, WordPress developers released version 1.2 of the software. This update provided more accessible features, which in turn attracted more users.

By 2005, it was becoming clear that WordPress was a platform with serious potential. Perhaps trying to capitalize on this, developers added the critical page creation function. This change provided users with more tools to create their own websites tailored to their exact needs. The same year also saw the founding of Automattic.

Other features present by this time included posting by email, common registration, and adding multiple authors. The simplicity of use without a price tag remained a priority. Usage continued to grow as more creators discovered this multi-tool for the web. Soon enough, WordPress had a loyal fanbase.

2006-2010: Expanding the Community

The decisions over the next four years would reflect the value of the WordPress audience. Dedicated users were critical to the platform’s development, as they determined the direction of new features and often contributed time and resources to create them.

In 2006, Automattic was still relatively new. Nevertheless, the company moved forward to trademark WordPress and its logo. This branding remains today.

A black and white image of the WordPress logo.

This legal action wasn’t the only development of the period. Developers continued to improve functionality in 2007. Some changes included refining the User Interface (UI), adding the ability to import features, and fixing various security issues.

Unfortunately, 2007 was also the year that WordPress experienced its first security breach. This shows that WordPress has been a target for malicious actors since the early days. It’s another reason to be vigilant about your site’s defense.

After the software was secured, more developments continued into 2008. One notable occurrence that year was the introduction of shortcodes. Shortcodes enable users to bracket text in posts and replace that text with dynamic features. This addition helped simplify the creation of complex posts.

Another essential feature added in 2008 was one-click updates. You might take it for granted now, but keeping your site current wasn’t always as easy as receiving an alert and clicking on a button. With this feature, more users were likely to complete updates with critical security patches.

Community-focused functionality continued to grow at the end of this period. 2009 saw improvements that included a built-in image editor, simplified video embedding, enhancements to elements that search engines ranked for, and post thumbnails.

Finally, with 2010 came the introduction of the custom post type. This boosted the flexible potential of WordPress even further and ushered in the age of meeting user needs.

2011-2015: Growing to Meet Users’ Needs

The addition of different post formats and an admin bar came in 2011. Both of these features made the WordPress User Experience (UX) easier to navigate. It also improved on the possibilities available to content creators.

The user-forward focus was paying off: In 2011, 50 million blogs ran on WordPress. Consumers seem to have appreciated their main role in the software’s development.

The progression didn’t stop there. In 2012, a new media manager was launched, making it even easier to add photos or videos to posts.

The WordPress media manager launched in 2012.

This made WordPress a more welcoming place for media-heavy blogs and text-based creators who enjoyed the simplicity of the interface.

Security and maintenance were evolving too. In 2013, automatic updates were released. This functionality only applied to small updates, but it still saved people time.

The same year, developers took note of the trend toward mobile devices. As such, a new, more responsive interface was added to increase accessibility across multiple devices.

In 2014, streamlined access was a priority for users. Several drag-and-drop improvements were made to the Classic editor, facilitating a more intuitive creative process. The developers also included a gallery preview option, taking significant guesswork out of the image posting equation.

Another media innovation of this year was the new playlist feature. This worked for both audio and visual components, making it simpler for users to post several related media files in a truncated way.

Then 2015 saw a big change: REST Application Programming Interfaces (API) infrastructure was added to the WordPress core. REST API enables other programs to access WordPress data from outside of the software itself.

This enabled users to integrate other tools with the platform easily. Therefore, the REST API was a significant contribution to the highly-tailored WordPress experience.

2016-2021: Refining the Modern Approach

You might consider 2016 the beginning of WordPress’ modern age. This is due to its relatively recent history, and also because it marked the start of several influential new features.

For instance, custom CSS was added to the Theme Customizer. This allowed users to make more stylistic changes through the Theme Editor. WordPress.org also announced that it would actively support Secure Hypertext Transfer Protocol (HTTPS), demonstrating the continued dedication to high-security standards.

2017 brought a modest yet impactful change: new default widgets. These widgets helped users add common content such as images and rich text in an intuitive way. If you’ve made frequent use of widgets on your WordPress dashboard, you might particularly appreciate the change.

After that, 2018 was a watershed year for WordPress history. Developers had been working on a project titled Gutenberg, available as a plugin during the creation stage. Gutenberg laid the foundations for the Block Editor, now the standard editor for WordPress, to thrive.

The modern Block Editor.

The Block Editor was revolutionary because it made post creation a more flexible experience. It did so by adding “blocks” or units of content that could freely move around. Each block was specialized for its content type. As such, the Block Editor marked a huge step forward for intuitive WordPress design.

With 2019 came adjustments to the Block Editor, security updates, and better debugging tools. 2020 was largely focused on the Block Editor as well, with new blocks, user improvements, and other changes taking place.

That brings us to today, in 2021. In the past couple of months, alterations have continued to roll out. Security has seen reinforcements, post-editing has been tweaked for ease of use, and behind-the-scenes technology has doubtless continued to develop.

The History of WordPress Plugins

WordPress plugins are third-party software that you can use to enhance your site. There are a huge number of these tools available today. You can search thousands of them with a visit to the WordPress Plugin Directory.

The WordPress Plugin Directory.

This repository has an inventory of over 58,000 plugins. Some are free, while others offer “freemium” plans (where users can download free versions with the option to upgrade to paid alternatives).

Plugins made their debut in 2004, with WordPress version 1.2. They were always meant to be crowd-sourced — that is, created and distributed by WordPress users themselves. These free-moving, effective extensions were instantly popular with fans.

In 2005, Akismet became the first plugin to be pre-installed with WordPress.

The green banner for the Akismet anti-spam plugin.

Akismet is an anti-spam tool that remains widely known and used to this day. With it, users could monitor their pages for harmful links or junk content. The release of the tool was an early and significant move towards a more secure platform for all.

The year 2010 saw the introduction of WordPress APIs. This technology made it easier to use third-party software to curate a WordPress website. As such, it’s become a huge asset to plugin creators.

In 2016, WordPress streamlined third-party software updates. Four years later, in 2020, updates were made automatic for plugins, helping to keep sites secure and plugins operational.

Today, the WordPress Plugin Directory remains a repository for third-party software. However, these tools continue to sell on private directories and developers’ personal sites. Therefore, users can rest assured that they have various ways to personalize their WordPress site.

The History of WordPress Themes

WordPress plugins weren’t the only third-party software to make a splash. WordPress themes have also played a critical role in the development of the platform. Themes control the look and feel of your site, giving you the freedom to brand your site however you see fit.

From the beginning, each version of WordPress included a default theme. The first of these was the Classic Theme, followed by Default (also known as Kubrick). To give users more options, the WordPress Theme Directory was launched in 2008, coming four years after its plugin counterpart.

The WordPress Theme Directory.

The introduction of this freely available marketplace helped expand the potential for individuality while also supporting community interactions. As such, it was a big moment in WordPress history.

The next important development for themes came in 2012. Users gained access to the Theme Customizer, opening up new possibilities for users willing to make adjustments. Themes became easier than ever to curate for individual sites. Theme previews also started this year, providing a critical front-end view.

The default WordPress themes continued to evolve as well. These themes are typically the first that many users create with and are often designed to make the best use of cutting-edge WordPress technology.

In 2019, the Twenty Twenty theme was released and included a unique feature: It was designed for compatibility with the Block Editor. This decision signaled that the Block Editor was here to stay and encouraged users to optimize their sites for its use.

These days, the Theme Directory remains a robust resource for top-notch themes. However, you can also find plenty of legitimate premium and developer-run sites if you’re on the lookout for even more variety.

The History of the WordPress Community

The history of WordPress is largely defined by its dedication to those who use it most. Here are some critical areas where the WordPress community has grown over the years.

Core Contributors

Let’s begin with the WordPress founders. In 2002, Matt Mullenweg was an active blogger. His platform of choice was the popular b2/cafelog CMS. Mullenweg, along with his fellow users, used this technology heavily.

Unfortunately, the developers stopped updating the project that same year. Without updates or support, Mullenweg and his colleagues were left without a platform. Perhaps feeling that it didn’t make sense for a CMS’s success to hinge on one team of developers, he set out to create his own.

Mullenweg partnered with developer Mike Little to get the project off the ground. Together, the duo released the first version of WordPress in 2003. Later on, the founding of Automattic became critical for the business-side of WordPress.

The logo for Automattic.

Automattic proved to be invaluable for the raising of necessary capital. The company received an influx of funding for WordPress, setting the stage for important developments and new features.

By 2010, Automattic had decided to place a heavier emphasis on keeping WordPress open source. The company launched the WordPress Foundation, an organization dedicated to the accessible, community-oriented values of WordPress software.

This decision made WordPress’ reliance on the free exchange of information between users official. This trend continues with the presence of so-called “core contributors.”

Core contributors are individuals who develop WordPress on a consistent basis. WordPress does not employ them, nor are they compensated for their time. Rather, they volunteer their skills to help make WordPress a better platform for everyone.

Considering their significant work, core contributors remain critical to the software’s success. Furthermore, their role as loyal fans collaborating for a better future is largely reflective of the WordPress identity as a whole. If you’re interested in being a part of WordPress history, consider getting involved as a core contributor.

WordCamps

The open-source nature of WordPress earned it plenty of fans in the early days. However, as the WordPress platform grew, users started looking for a more official way to share their passion. In 2006, they found their answer: WordCamps.

WordCamps began as simple ways for WordPress enthusiasts to meet up and discuss the growing project. The idea was a hit, and today there are large annual events for users all around the world.

The WordPress WordCamp logo.

The scope of WordCamps is fairly broad. However, discussions tend to focus on WordPress’ technological advancements. In this sense, WordCamps center on the development of the user community as a whole. If you’re interested in getting involved with WordCamp, you have a few options.

If you have a knack for administration, for example, you might want to apply to act as an organizer. You might also choose to be a speaker and participate in WordCamp events. Alternatively, you could always apply as a volunteer, and pitch in wherever you’re needed.

WordPress Meetups

WordCamps are relatively structured, global events. However, there’s another option if you’re looking for a community a little closer to home: WordPress Meetups. Organized on the Meetup website, these events boast 822,736 members in over 1,551 groups.

The home page of the Meetup group for WordPress users.

These are localized events, as you can see from the map above. People from across the world can get together with other enthusiasts in their communities and discuss the platform. These gatherings tend to be more informal than the WordCamps.

They also happen more frequently since they require fewer resources to organize. A handful of interested users can simply agree on a meeting place ahead of time or even conduct their meetings over video calls.

Despite the smaller scale of Meetups, they remain vital to the WordPress community. They facilitate the sharing of ideas and provide a sense of community. Moreover, the consistent nature of Meetups can help to develop ideas over time.

There are several WordPress Meetups around the world. However, you may not have any Meetups in your area. It’s also possible that there are dormant groups in your community. This occurs when a Meetup has not been disbanded but has also not been recently active.

Fortunately, anyone can host. Consider visiting the Meetup page and starting your own group! If your local group is inactive, you might try reaching out to current members to re-establish the meetings.

The History of Managed WordPress Hosting

In the early days of WordPress, membership grew quickly. By 2006, there was significant demand for web hosting that could meet the platform’s needs. WordPress had become. Over time, hosting companies learned the best way to tailor their services to WordPress users.

Managed hosting takes many technical tasks off your plate. Site maintenance, security, migration, and upgrades are handled by professionals instead. You can use the extra time to keep your site running exactly the way you want it.

If you want to learn more, you can check out our own managed hosting service: DreamPress. With the addition of high-speed Solid State Drives in 2015, we set ourselves apart from the crowd. We also offer a variety of pricing plans to fit your budget and technical skills.

Take Your WordPress Website to the Next Level

Whether you need help navigating the WordPress Admin Dashboard, fixing a WordPress database error, or adding a widget, we can help! Subscribe to our monthly digest so you never miss an article.

The History of WooCommerce

WooCommerce is one of the most widely-used plugins available for WordPress today with over five million active installations. However, WooCommerce wasn’t always specifically focused on e-commerce.

In 2008, a few developers founded WooThemes. As you might expect, they largely focused on providing new themes for WordPress users. However, this was soon to change.

2011 saw the use of ecommerce plugins increase. This functionality started to become more popular among WordPress users. As such, the idea of using the platform to support online stores began to spread. WooThemes released WooCommerce to join in on the trend.

The WooCommerce logo.

WooCommerce became a preferred choice for WordPress users. By 2015, its frequent use caught Automattic’s attention, and the company acquired this popular plugin. By 2017 WooCommerce hit $10 billion in sales — a watershed moment in WordPress history.

Today, the plugin continues to be updated, developed, and improved. However, it’s not without its competitors. Options such as Shopify have sprouted up as formidable alternatives, encouraging more frequent innovations.

The Future of WordPress

Predicting the future is no small task. Nevertheless, we can take a few clues from the history of WordPress up until now to make some educated projections.

For one thing, development continues on the Block Editor. As it improves and becomes a more integrated part of WordPress, we’ll doubtless see new features.

You might also expect this technology to become more intuitive and widely used. If you’re curious about keeping up with these developments, consider installing the Gutenberg plugin to stay informed.

The Gutenberg WordPress plugin.

As for WordPress’ popularity, its web share has grown over the past few years. There’s little reason to think that this pattern will change. This seems especially true with the WordPress community actively working to enhance its features.

If you’d like to be a member of the group steering WordPress towards tomorrow, consider getting involved as a core contributor, developer, or even just starting your own site. You could also keep up with broader internet trends, such as Search Engine Optimization (SEO) developments.

However you choose to use WordPress, one thing seems sure for the platform — its future looks bright.

The Evolution of WordPress

As odd as it might seem, the internet is still relatively new. Therefore, taking a historical view of it can be difficult. This task only complicates further when you try to focus on something as widespread as WordPress. Fortunately, you can see important trends by looking at key moments of its development.

In this article, we covered the evolution of WordPress features from 2002 onward. Additionally, we looked at specific areas of growth, such as the strength of the WordPress community and the use of third-party software.

We also discussed the history of managed hosting. We’ve been providing WordPress-optimized managed hosting for many years. If you’re interested in taking your site to the next level with ease, consider contacting our team and asking about DreamPress!


The post The History of WordPress: An In-Depth Look at the Most Popular CMS appeared first on Website Guides, Tips & Knowledge.


source https://www.dreamhost.com/blog/history-of-wordpress/

Creating and Mastering GA4 Explorations

In the switch from Universal Analytics (UA) to Google Analytics 4 (GA4) — which will go fully into effect July 2023 — a lot of things have...